Creating an ETL Application via SI Tooling
Introduction
ETL (Extract, Transform, Load) is a form of data processing that involves performing the following functions in the given order:
-
Extract: Obtaining input data from a specific source such as a file or a database.
-
Transform: Converting the data obtained to a different form.
-
Load Writing the data extracted and transformed into another destination.
Tutorials such as Performing Real-time ETL with Files and Performing Real-time ETL with MySQL show how the WSO2 Streaming Integrator can perform ETL for streaming data by writing and deploying Siddhi applications with ETL functionality. If you need to create such a Siddhi application without writing code, you can use the ETL Flow wizard in Streaming Integrator Tooling.
In this tutorial, let's create the same Siddhi application created in Performing Real-time ETL with MySQL using the Streaming Integrator Tooling.
Before you begin
-
You need to have access to a MySQL instance.
-
Enable binary logging in the MySQL server. For detailed instructions, see Debezium documentation - Enabling the binlog.
Info
If you are using MySQL 8.0, use the following query to check the binlog status.
SELECT variable_value as "BINARY LOGGING STATUS (log-bin) ::" FROM performance_schema.global_variables WHERE variable_name='log_bin'; -
Add the MySQL JDBC driver into the
<SI_HOME>/libdirectory as follows:-
Download the MySQL JDBC driver from the MySQL site.
-
Unzip the archive.
-
Copy the
mysql-connector-java-5.1.45-bin.jarto the<SI_HOME>/libdirectory. -
Start the SI server by issuing the appropriate command based on your operating system.
- For Windows:
server.bat --run - For Linux:
sh server.sh
- For Windows:
-
-
Once you install MySQL and start the MySQL server, create the database and the database table you require as follows:
-
Let's create a new database in the MySQL server which you are to use throughout this tutorial. To do this, execute the following query.
CREATE SCHEMA production; -
Create a new user by executing the following SQL query.
GRANT SELECT, RELOAD, SHOW DATABASES, REPLICATION SLAVE, REPLICATION CLIENT ON *.* TO 'wso2si' IDENTIFIED BY 'wso2'; -
Switch to the
productiondatabase and create a new table, by executing the following queriesuse production;
CREATE TABLE SweetProductionTable (name VARCHAR(20),amount double(10,2)); -
-
Download
productions.csvfile from here and save it in a location of your choice. (e.g., in/Users/foo). -
Download and install Streaming Integrator Tooling
-
Download and install the siddhi-io-cdc extension. For instructions, see Downloading and Installing Siddhi Connectors.
Step 1: Design the Siddhi application with ETL functionality
To design the Siddhi application with ETL functionality via the Streaming Integrator Tooling, follow the steps below:
-
Start the Streaming Integrator Tooling by navigating to the
<SI_TOOLING_HOME>/bindirectory and issuing one of the following commands as appropriate, based on your operating system:-
For Windows:
tooling.bat -
For Linux:
./tooling.sh
Then Access the Streaming Integrator Tooling via the URL that appears in the start up log with the text
Editor Started on:. -
-
In the Welcome screen, click New ETL Flow.
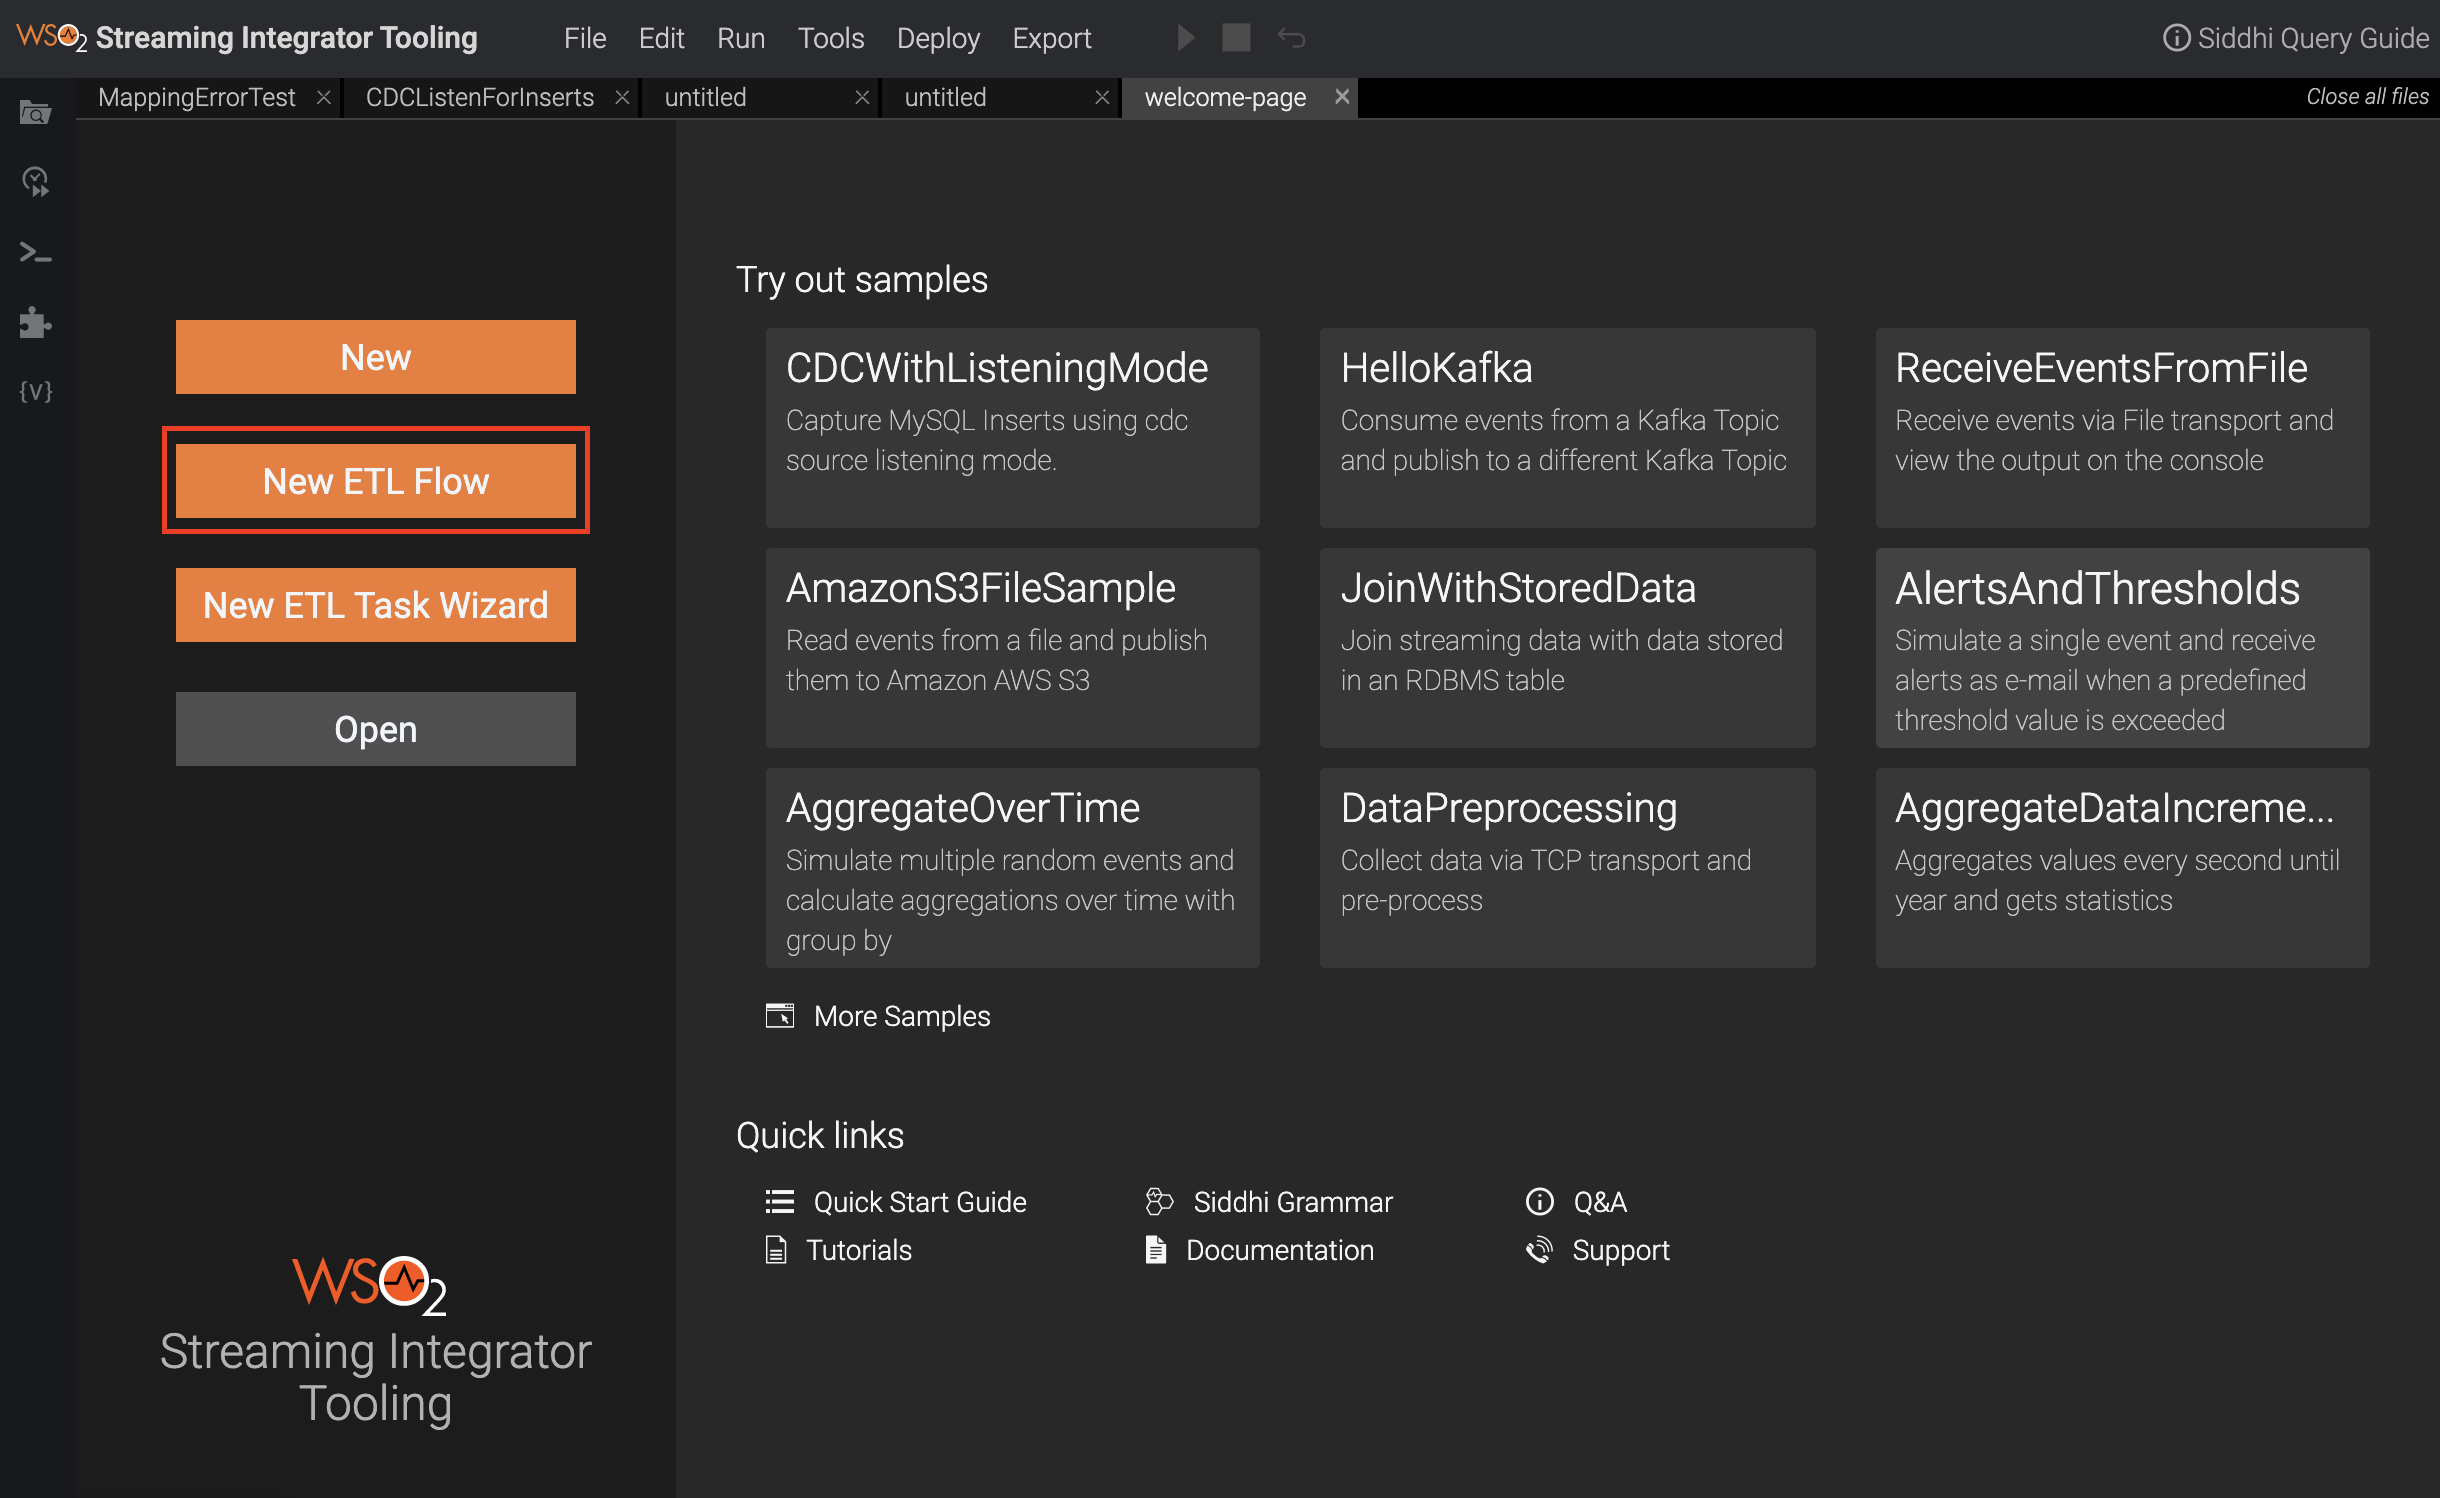
This opens the wizard to create ETL task flows as follows.
-
Change the title of the ETL task flow from
UntitledETLTaskFlowtoSweetFactoryETLTaskFlow. -
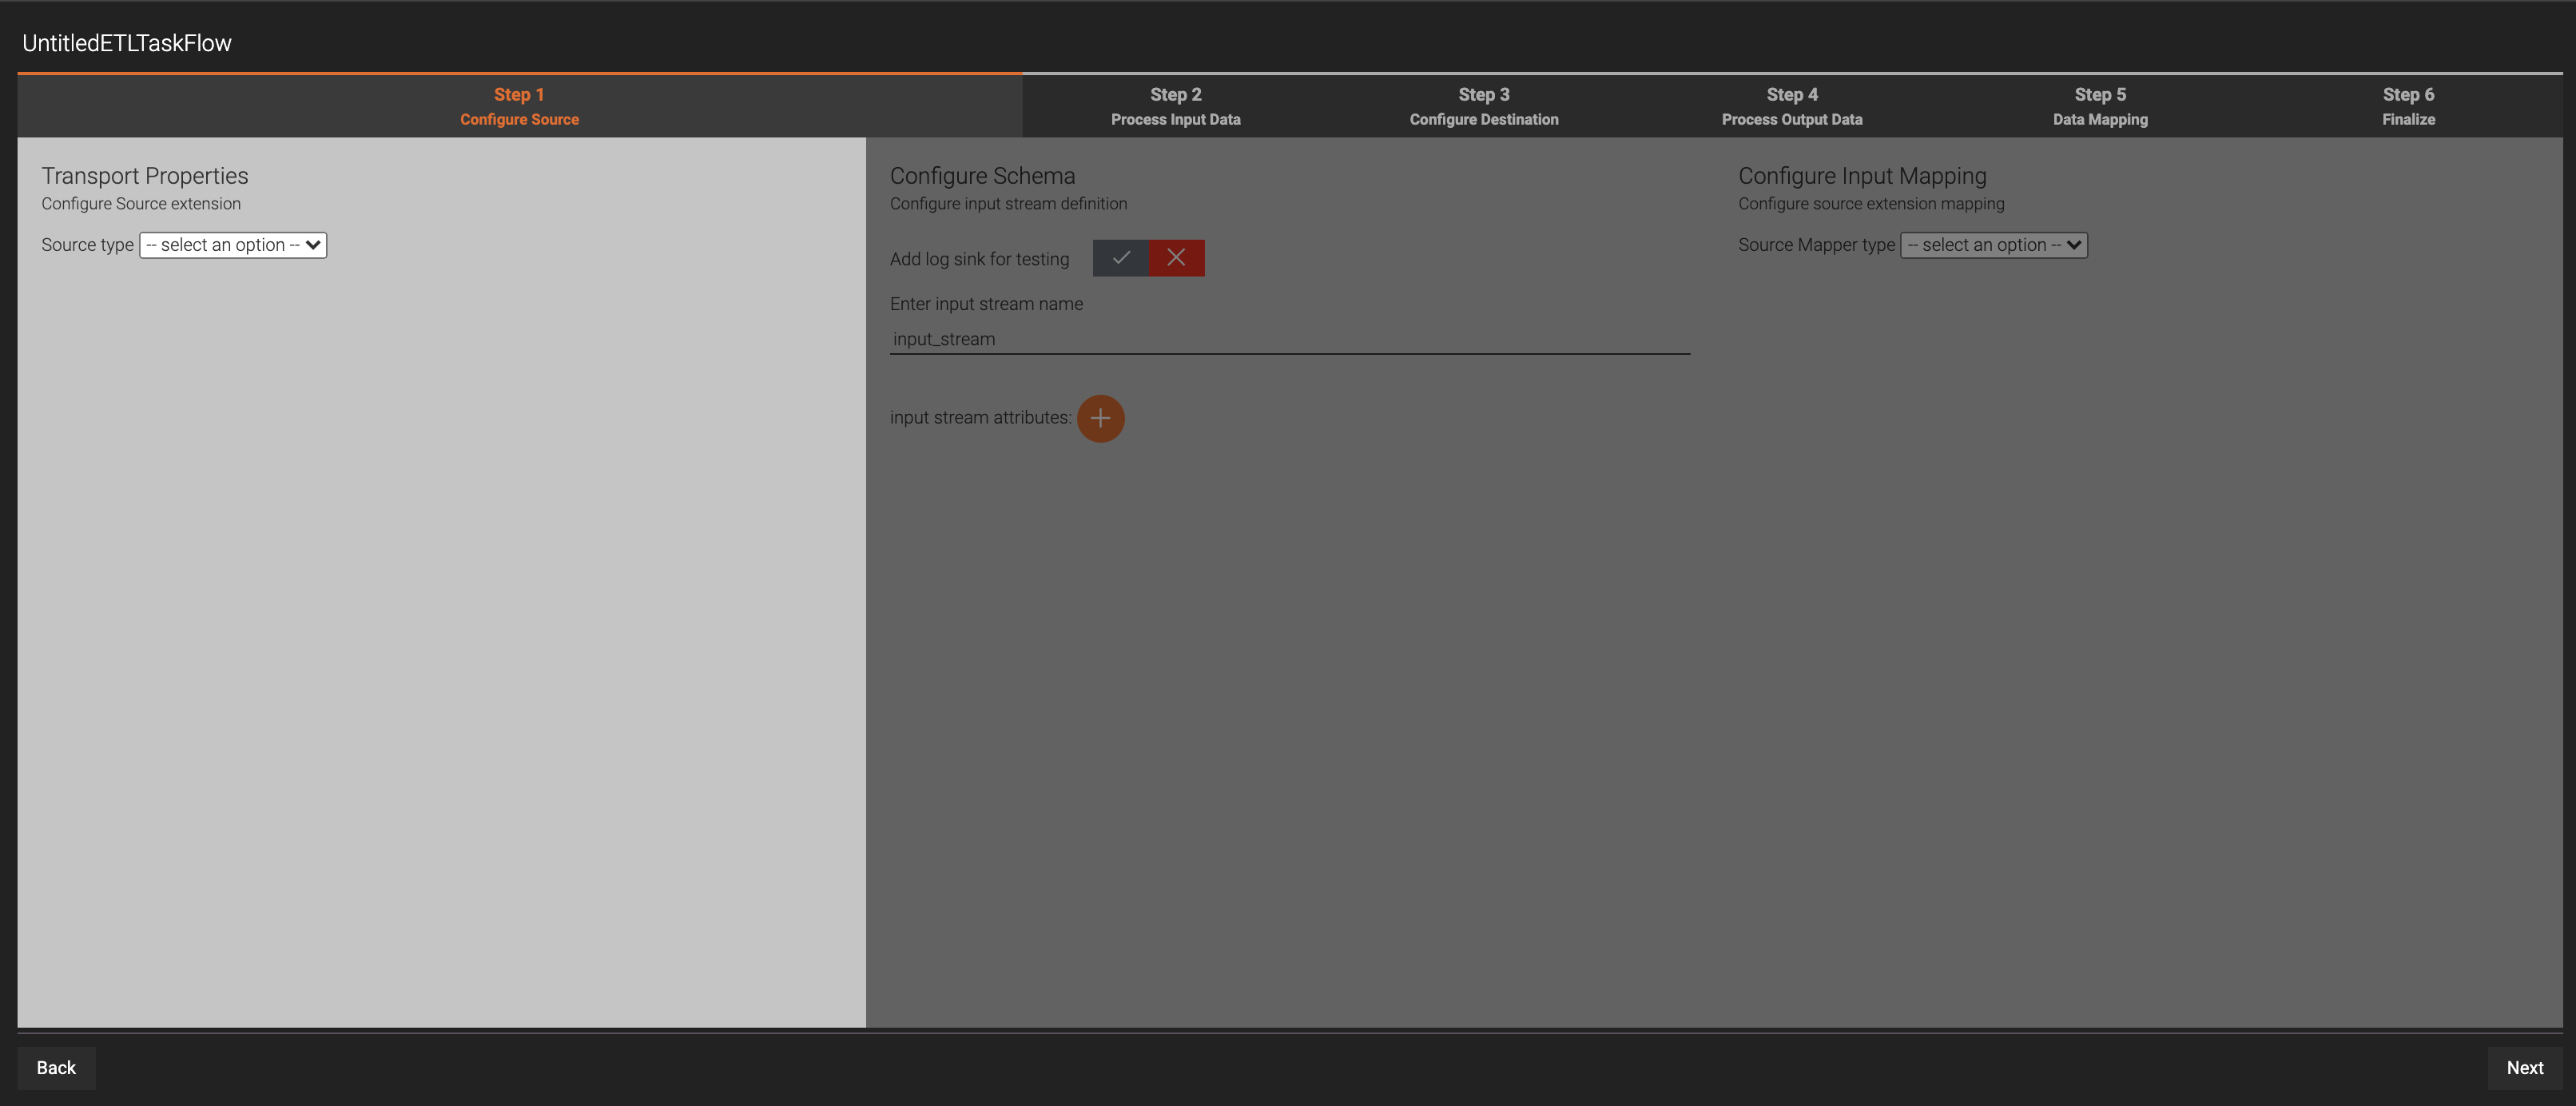
In Step 1 Configure Source, enter information relating to the data source as follows:
-
Under Transport Properties, select CDC as the source. Then enter values for the properties relating to the CDC source as follows.
Property Value url jdbc:mysql://localhost:3306/productionusername wso2sipassword wso2table.name SweetProductionTableoperation insertThen click Next.
-
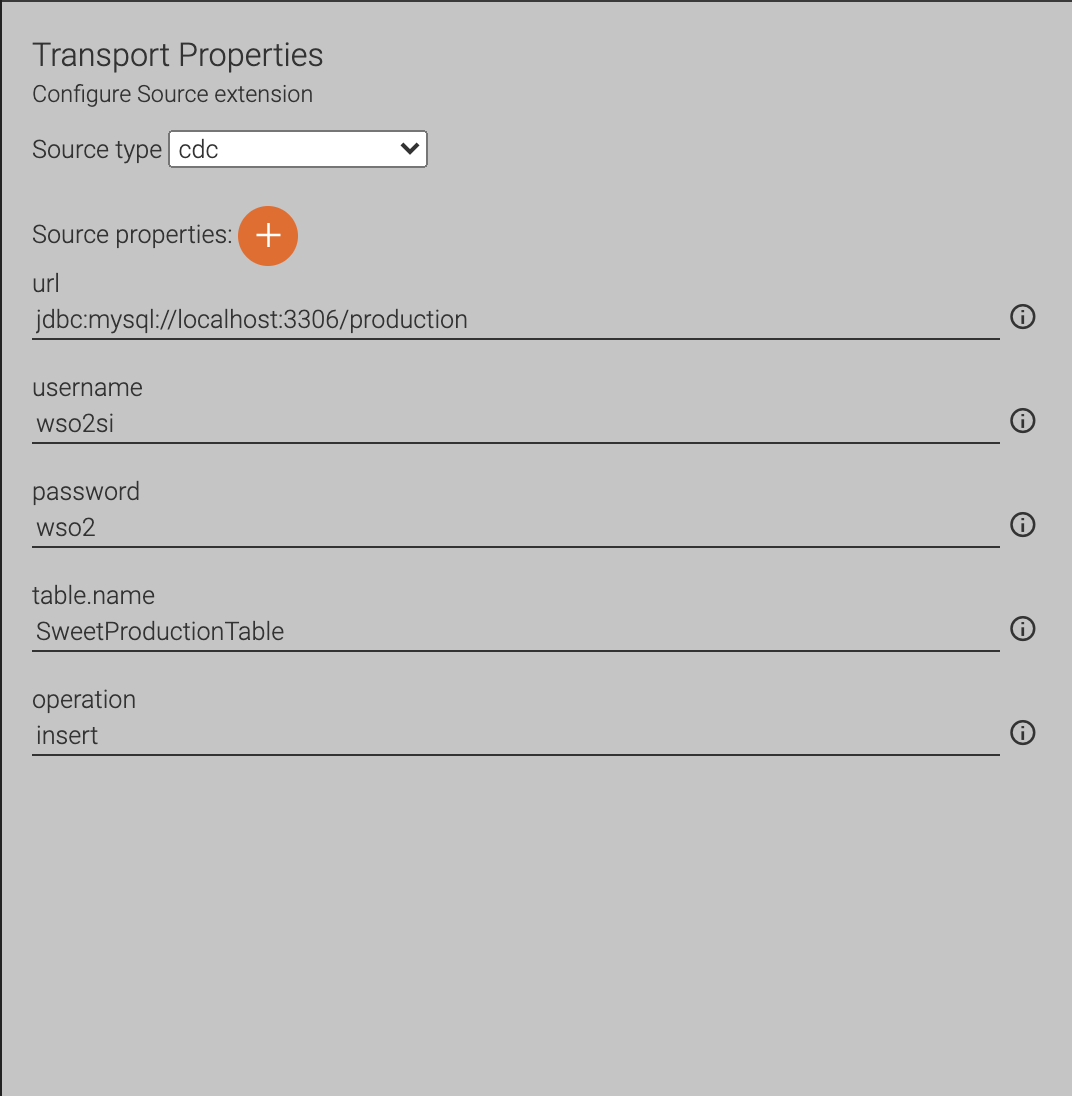
In the Configure Schema section, do the following to define the schema of the events you expect to receive as input data:
-
Click the tick (✓) for the Add log sink for testing parameter.
-
Under Enter input stream name, enter
InsertSweetProductionStream. Then add two attributes as follows:
-
Move the cursor over the + sign next to input stream attributes and select STRING. As a result, a new row is created for the attribute. Enter
nameas the attribute name. -
Move the cursor over the + sign again, and then select DOUBLE. Then enter
amountas the attribute name. -
Click Next.
-
-
-
In the Configure Input Mapping section, select keyvalue as the source mapper type.
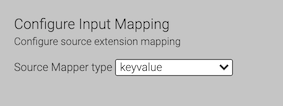
Then click Next.
-
-
In this scenario, let's do a simple conversion where the names that are received in simple case are converted to upper case when they are published in the file. This is a mapping-related conversion. Therefore, in Step 2 Process Input Data, click Next without making any change.
-
In Step 3 Configure Destination, enter information on how you want the output to be published. In this scenario, let's publish the output in a CSV file named
productioninserts.csv.-
Under Transport Properties, select file as the sink type. Then enter the path to the
productioninserts.csvfile which you saved as an empty CSV file (in this example,/Users/foo/productioninserts.csv).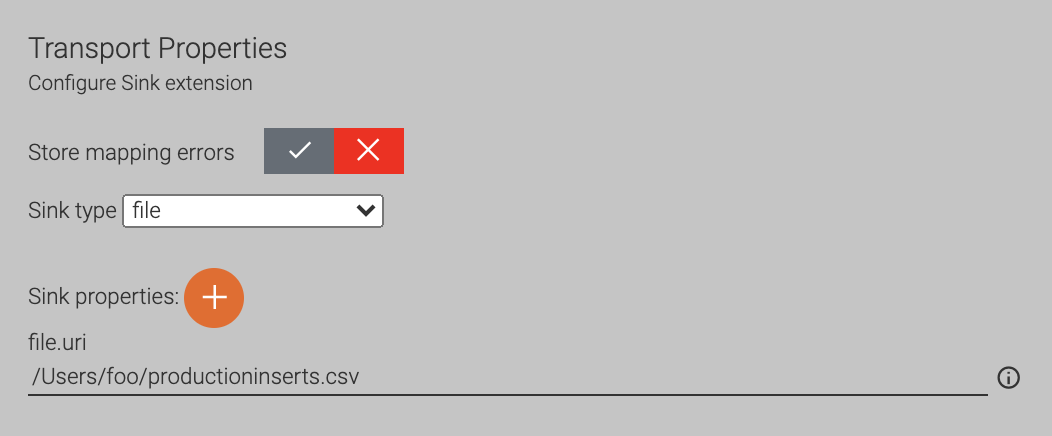
Then click Next.
-
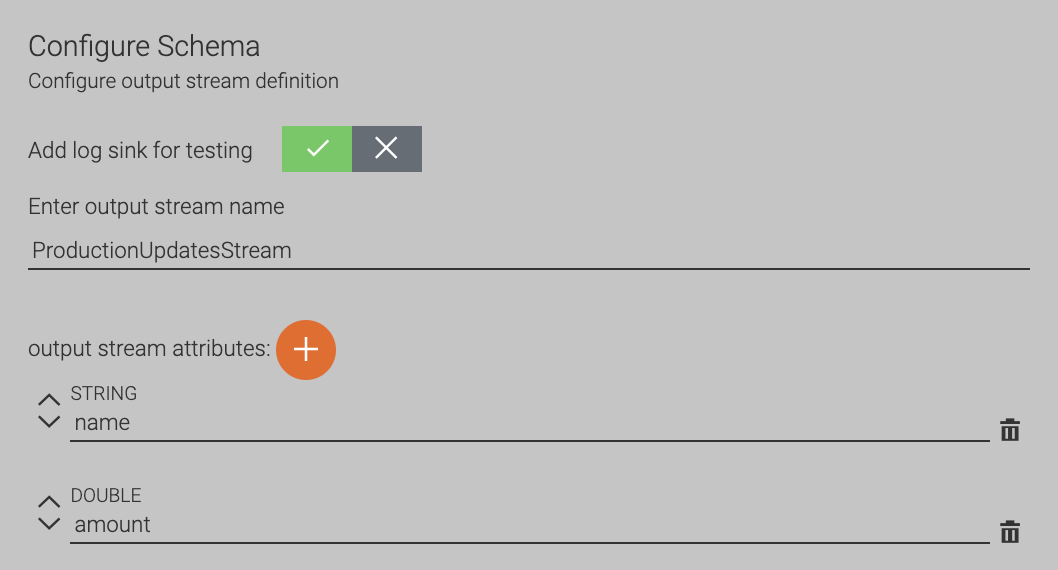
In the Configure Schema section, enter information as follows to create an output stream that defines the schema of the outgoing events.
-
Click the tick (✓) for the Add log sink for testing parameter in order to log the output events in the console.
-
Under Enter output stream name, enter
ProductionUpdatesStream. -
Move the cursor over the + sign next to output stream attributes and select STRING. As a result, a new row is created for the attribute. Enter
nameas the attribute name. -
Move the cursor over the + sign again, and then select DOUBLE. Then enter
amountas the attribute name. -
Click Next.
-
-
In the Configure Output Mapping section, select text as the sink mapper type.

Then click Next.
-
-
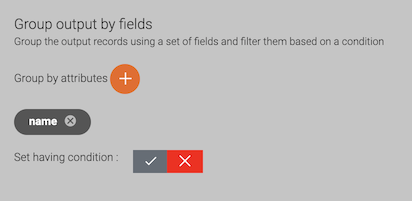
In Step 4 Process Output Data, move the cursor over the + sign under Group Output by Fields, and then click name. This groups the output events by the name of the product.
Then click Next.
-
In Step 5 Data Mapping, follow the procedure below to do the required configurations for the data transformation to be done by your ETL Siddhi application.
-
Click the following button to map all the attributes.

As a result, the attributes in the input stream and the output stream are joined together by lines as shown below.

This indicates that the value for each input attribute is directed to the output stream without any further processing to be published. However, since you need to do a simple conversion for the
nameattribute. Therefore, remove the matching for that attribute by clicking the following icon for it under Output Attributes. Move the cursor to the right of the attribute to make this icon appear.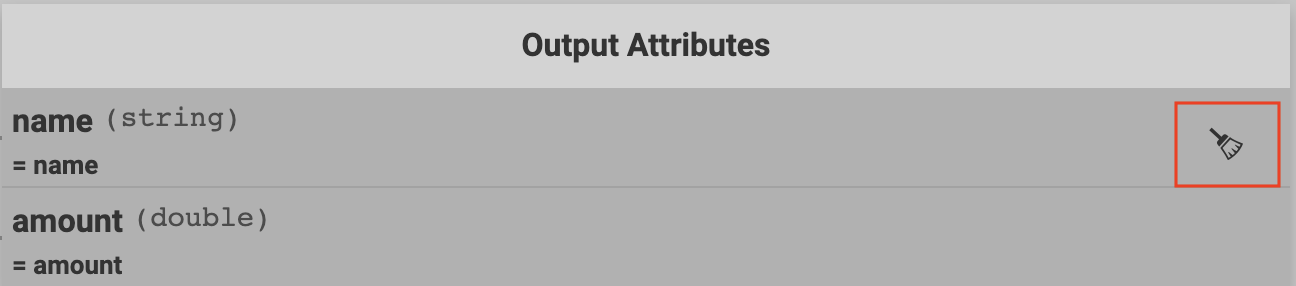
-
Click on name under Output Attributes.

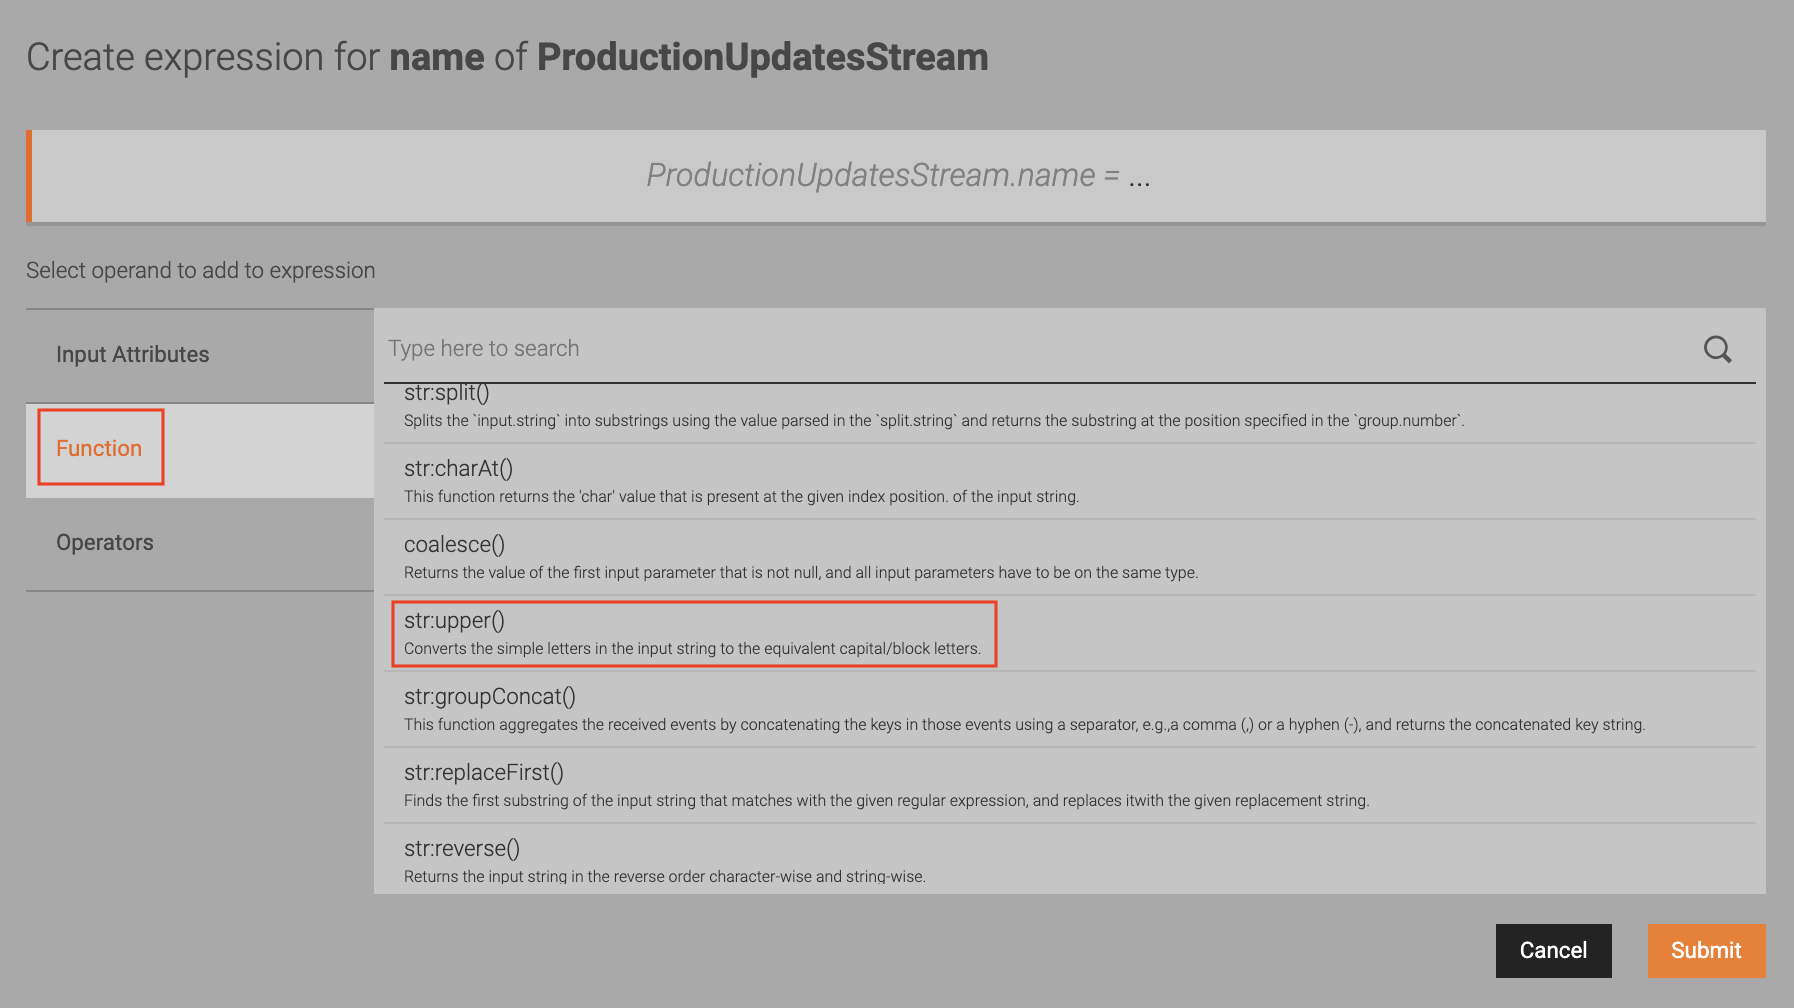
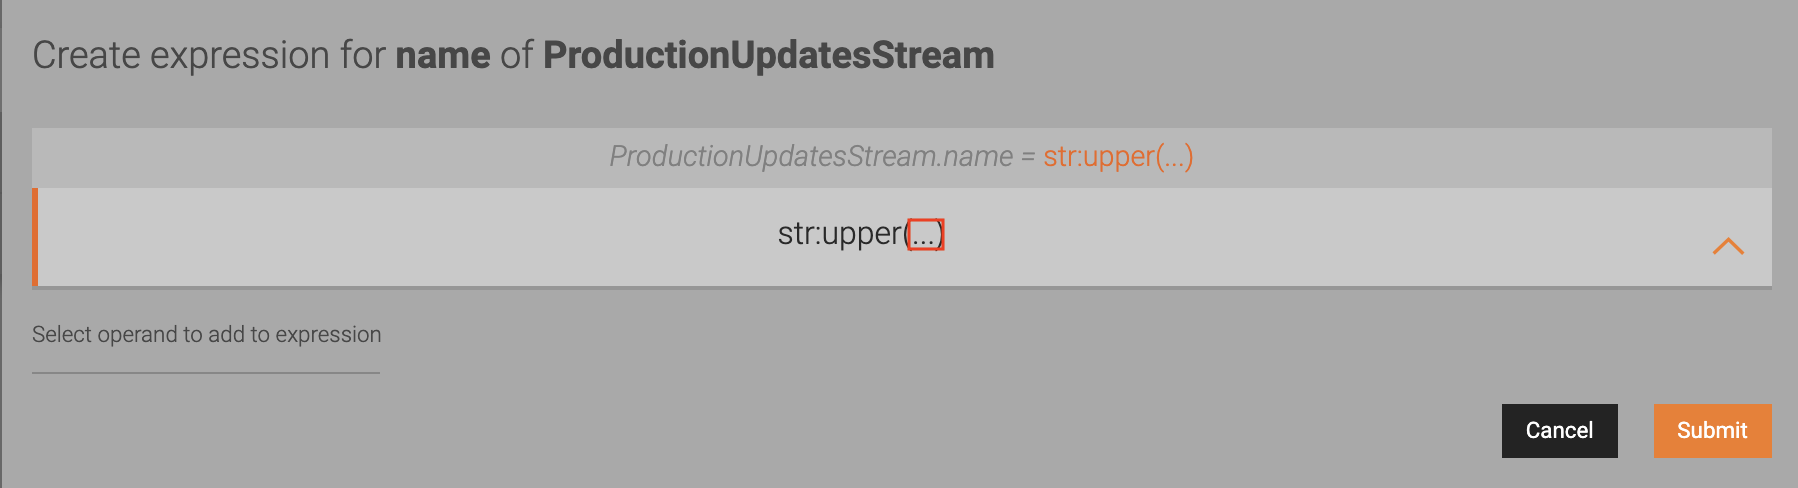
This opens a dialog box named Create expression for name of ProductionUpdatesStream.
-
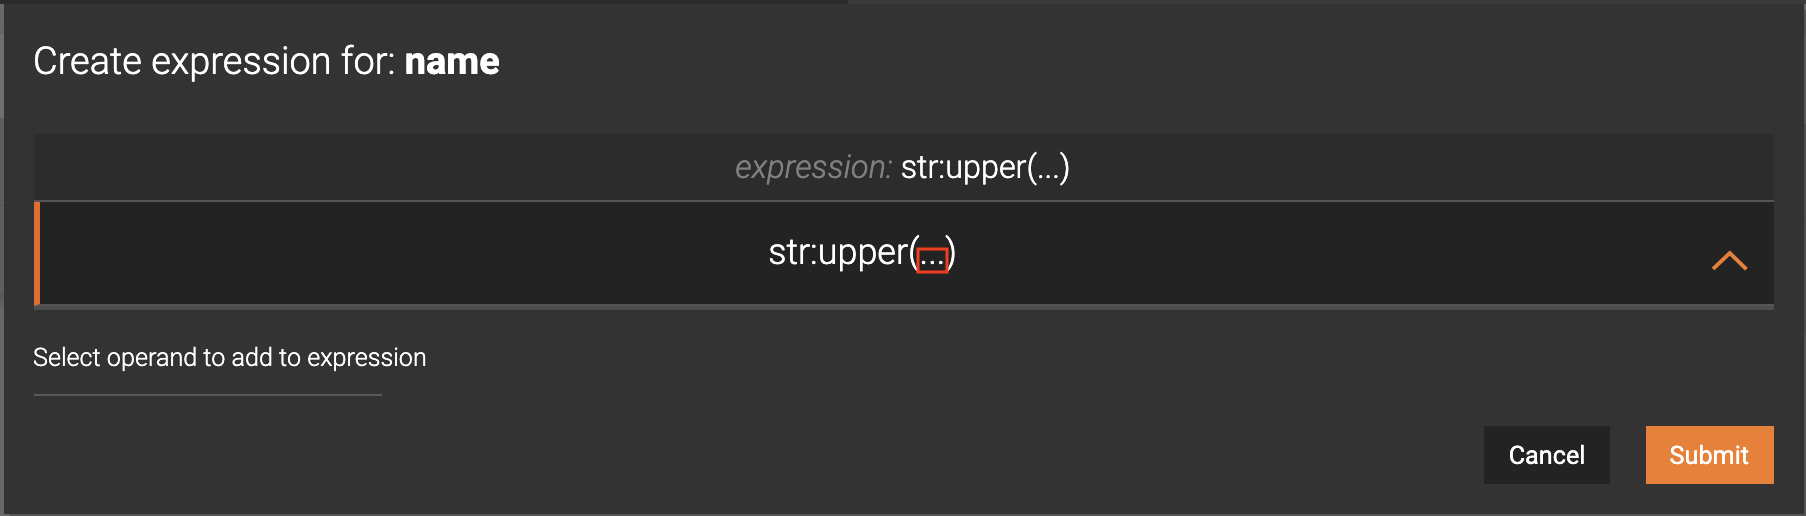
In the Create expression for name of ProductionUpdatesStream dialog box, click Function. Scroll to find the str.upper() function, and then click on it to select it.
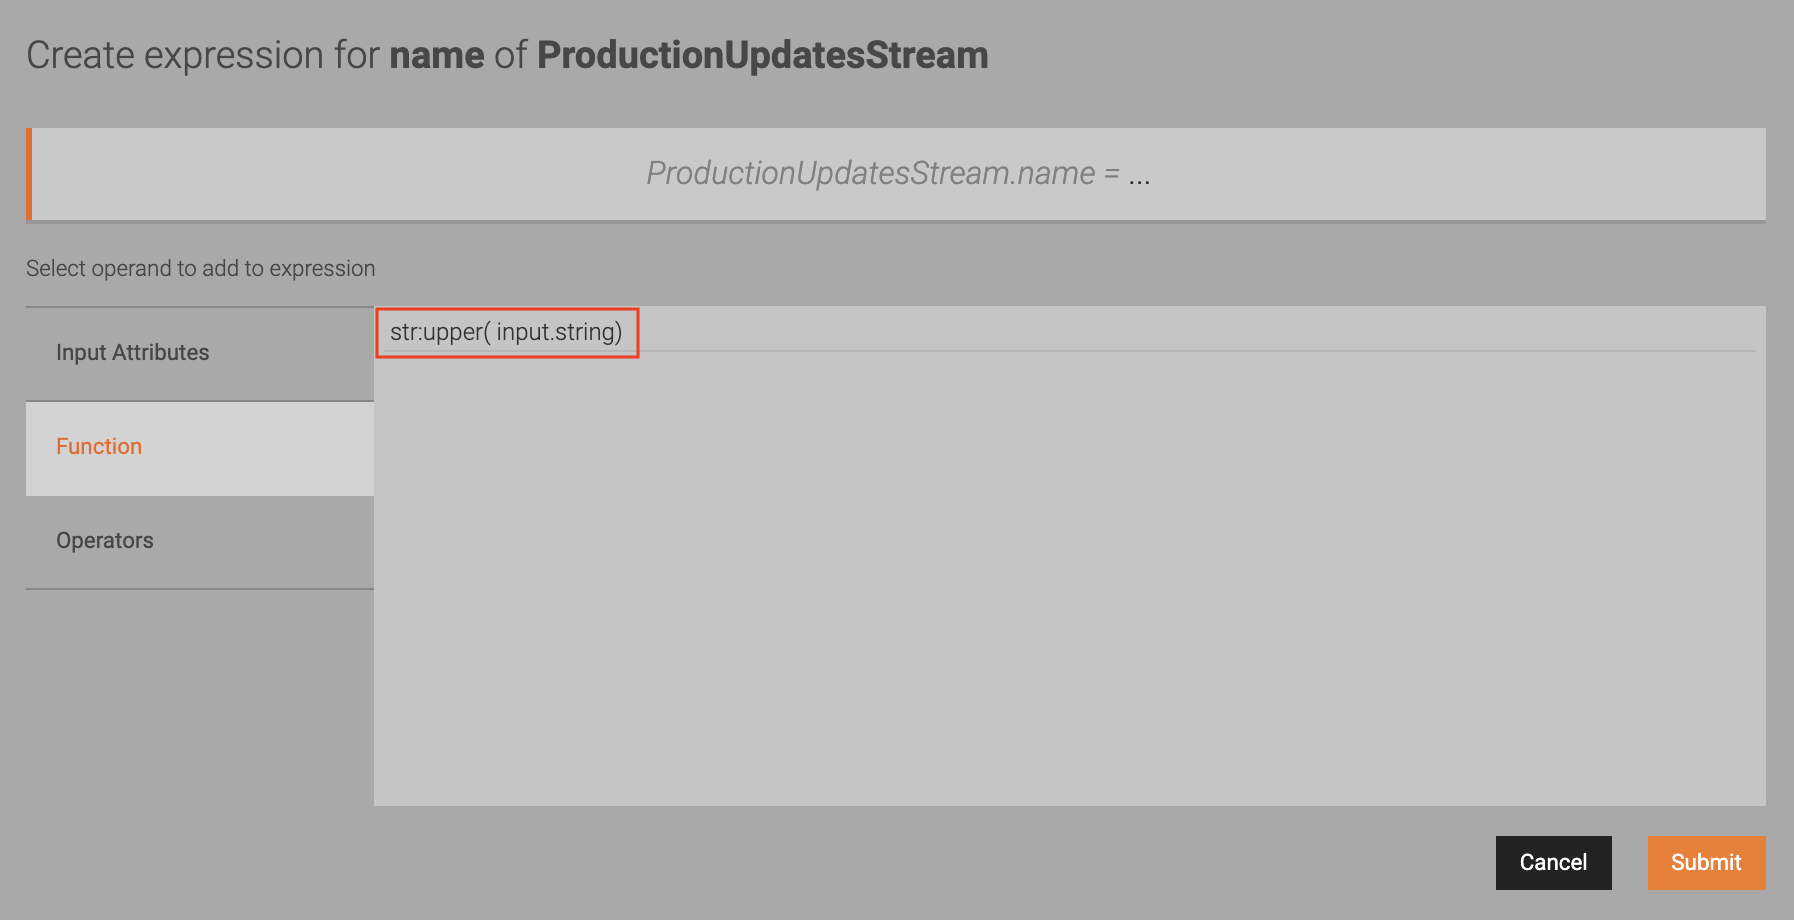
Once select the function, it is displayed as follows. Click on the selected function again.
-
When the function is added as shown below, click on it again.
Another bar appears below the selected function with the function expression in the clickable mode between the brackets.
-
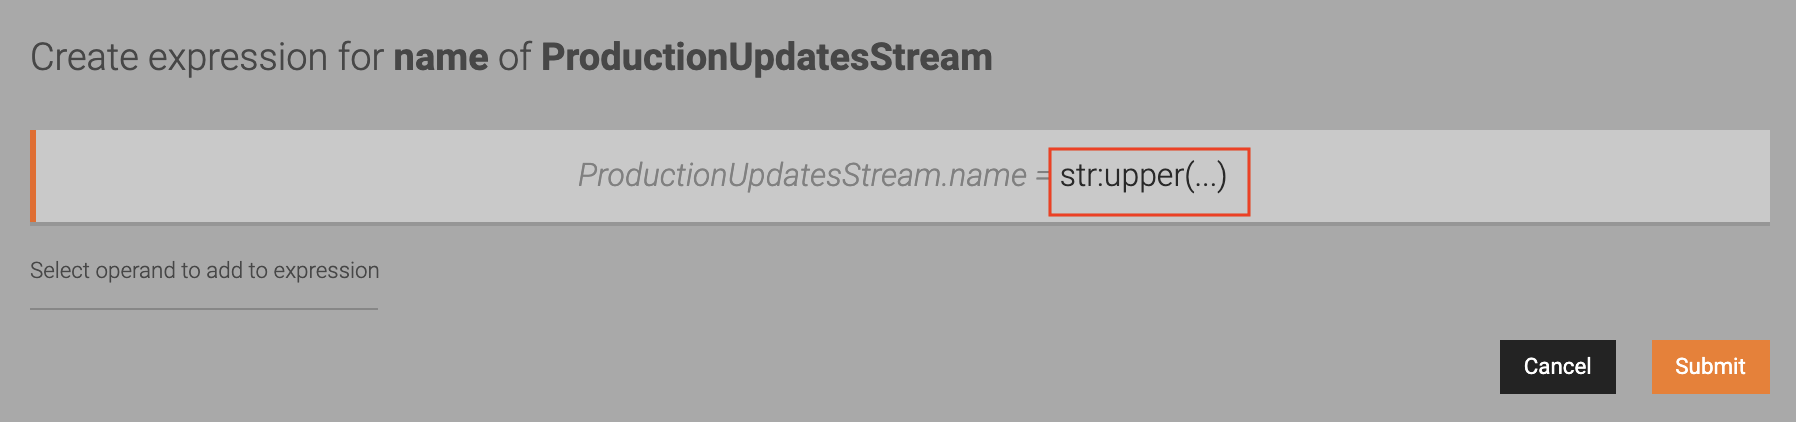
To specify the attribute to which the function should be applied, click on the dots between the brackets.
-
Click on name attribute to select it as the attribute to which the function applies.
-
Once the
nameattribute is selected and displayed, click the arrow pointing upwards to the right of the attribute. This adds thenameattribute to the function expression.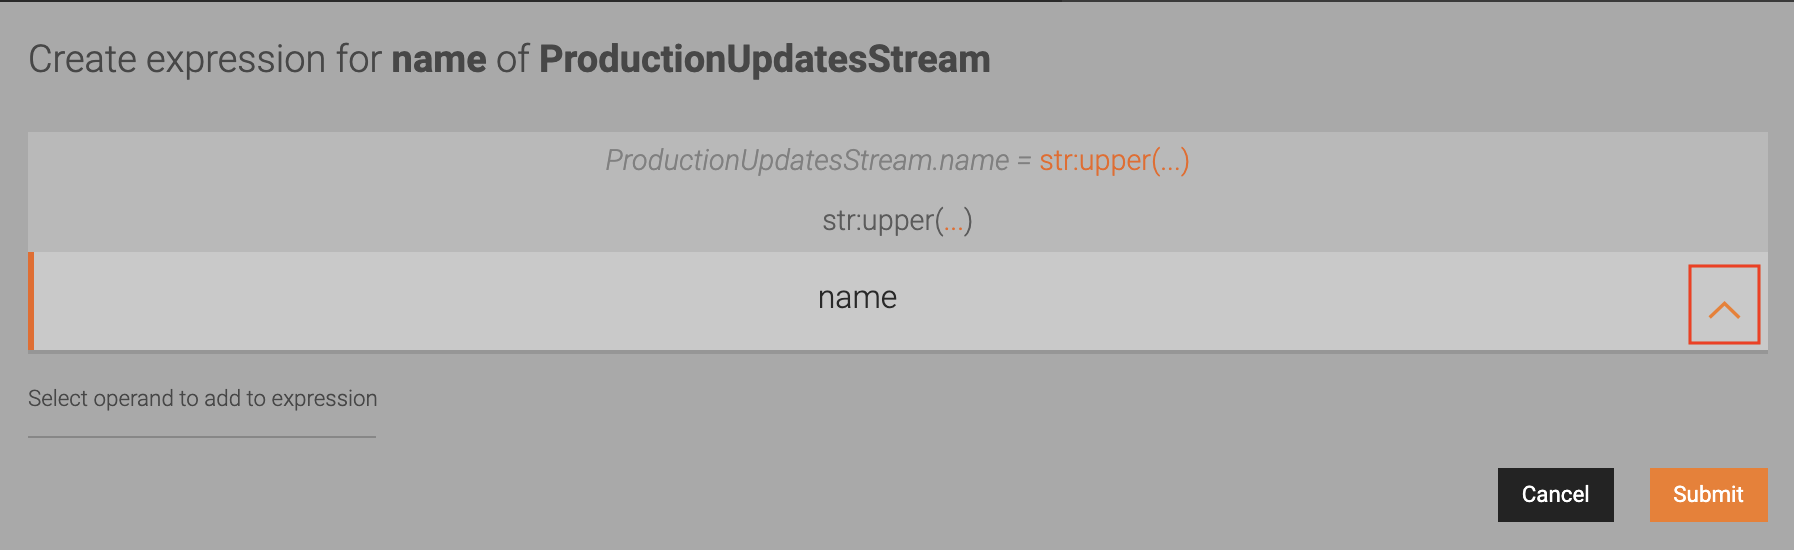
-
Once the function is displayed with both the expression and the attribute, click the arrow pointing upwards to the right of it. This completes the function configuration.

-
Click Submit.
Now both the attributes appear matched again, and the function expression is displayed for the name attribute.

-
Click Save.
-
-
In Step 6 Finalize, deploy the Siddhi application you just completed by clicking Deploy to Worker.

This opens the Deploy Siddhi Apps to Server dialog box.
-
In the Add New Server section, enter the host, port, user name and the password of your Streaming Integrator server as shown below.
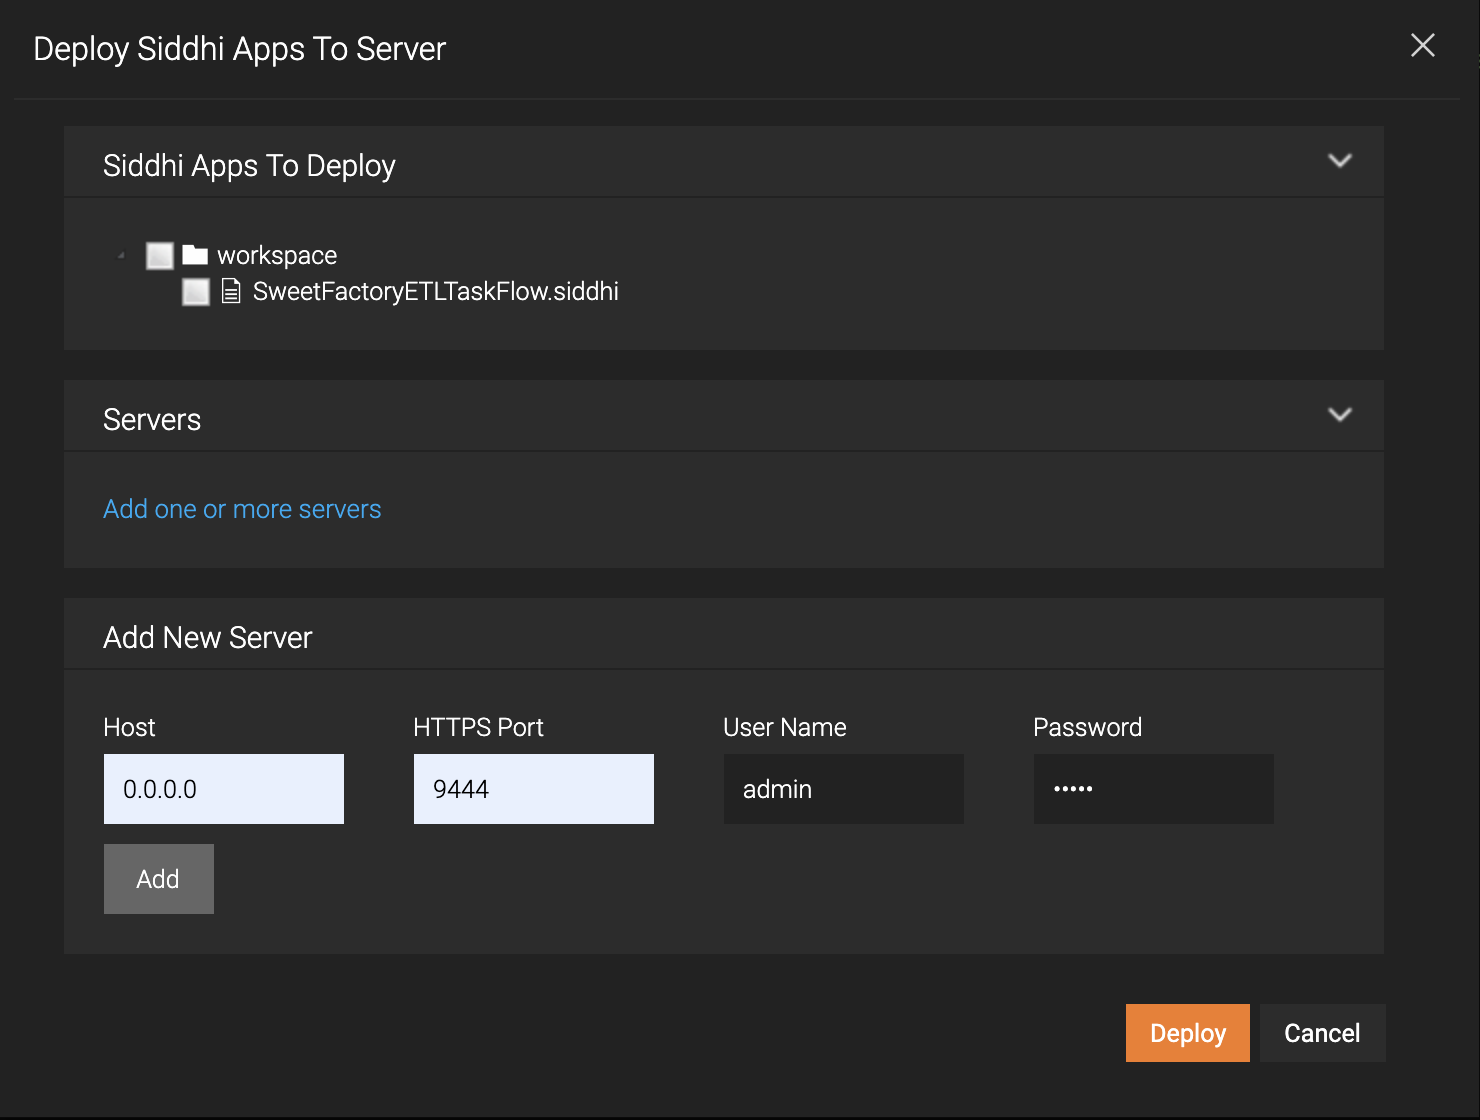
Then click Add.
-
In the Siddhi Apps to Deploy section, select the checkbox for the SweetFactoryETLTaskFlow.siddhi application. In the Servers section, select the check box for the server you added. Then click Deploy.

The following message appears in the Deploy Siddhi Apps to Server dialog box.
SweetFactoryETLTaskFlow.siddhi was successfully deployed to 0.0.0.0:9444
-
Step 2: Test the Siddhi application
To test the Siddhi application, insert a record to the SweetProductionTable MySQL table by issuing the following command in your MySQL console.
insert into SweetProductionTable values('chocolate',100.0);
The following log appears in the Streaming Integrator console.
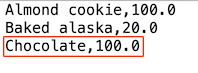
INFO {org.wso2.siddhi.core.stream.output.sink.LogSink} - CDCWithListeningMode : logStream : Event{timestamp=1563200225948, data=[chocolate, 100.0], isExpired=false}If you open the /Users/foo/productions.csv file, the Chocalate, 100.0 record is displayed as shown below.
What's Next?
Once you develop an ETL application, you may need to carry out following tasks:
- Error Handling: To understand how to handle errors that may occur when carrying out ETL operations, try the Managing Streaming Data with Errors tutorial.
- Monitoring ETL Statistics: For instructions to set up pre-configured dashboards provided with WSO2 Streaming Integrator and visualize statistics related to your ETL flows, see Monitoring ETL Statistics with Grafana.