Using Okta as an External IDP with SAML
Follow the instructions below to connect Okta as a third party Identity Provider to WSO2 API Manager.
Prerequisites
Before you begin, make sure you do the following.
- Create an account in https://developer.okta.com/
- Download WSO2 API Manager 4.1.0 distribution from https://wso2.com/api-management/
- Unzip the distribution and open the
deployment.tomlfile located in<APIM_HOME>/repository/conf/. Add the following configuration
You need to enable this because Okta uses the email as the username by default. To use the email as the username in WSO2 API Manager you have to enable it as it is not enabled by default. Once enabled, you can use your email or a normal username as your username.[tenant_mgt] enable_email_domain= true - Start the WSO2 API Manager server.
Step 1 - Configure Okta
-
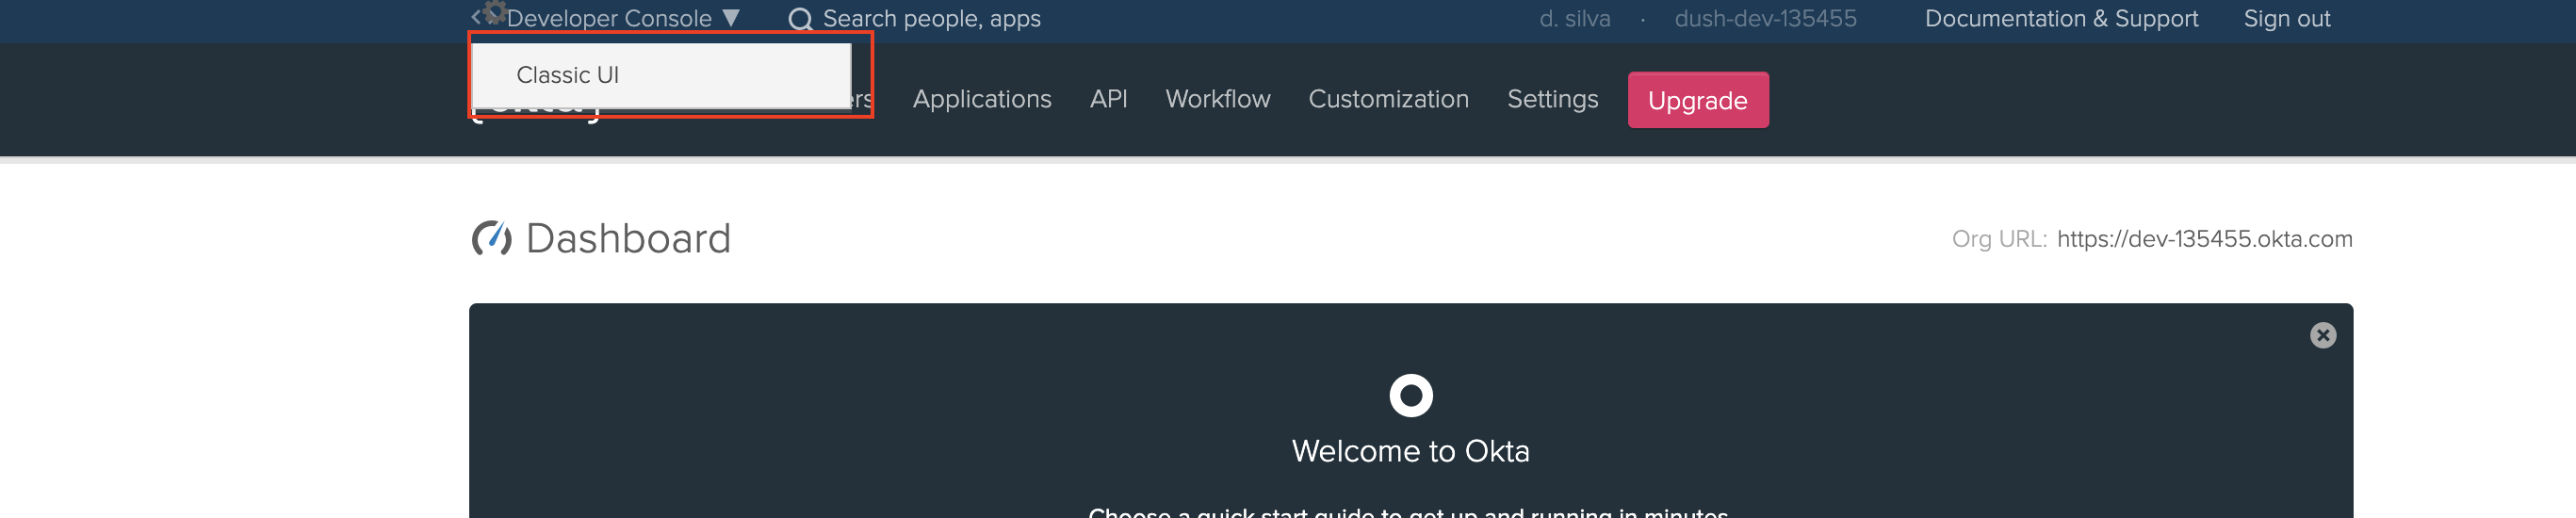
Login to the Okta developer console and switch to the classic UI.
-
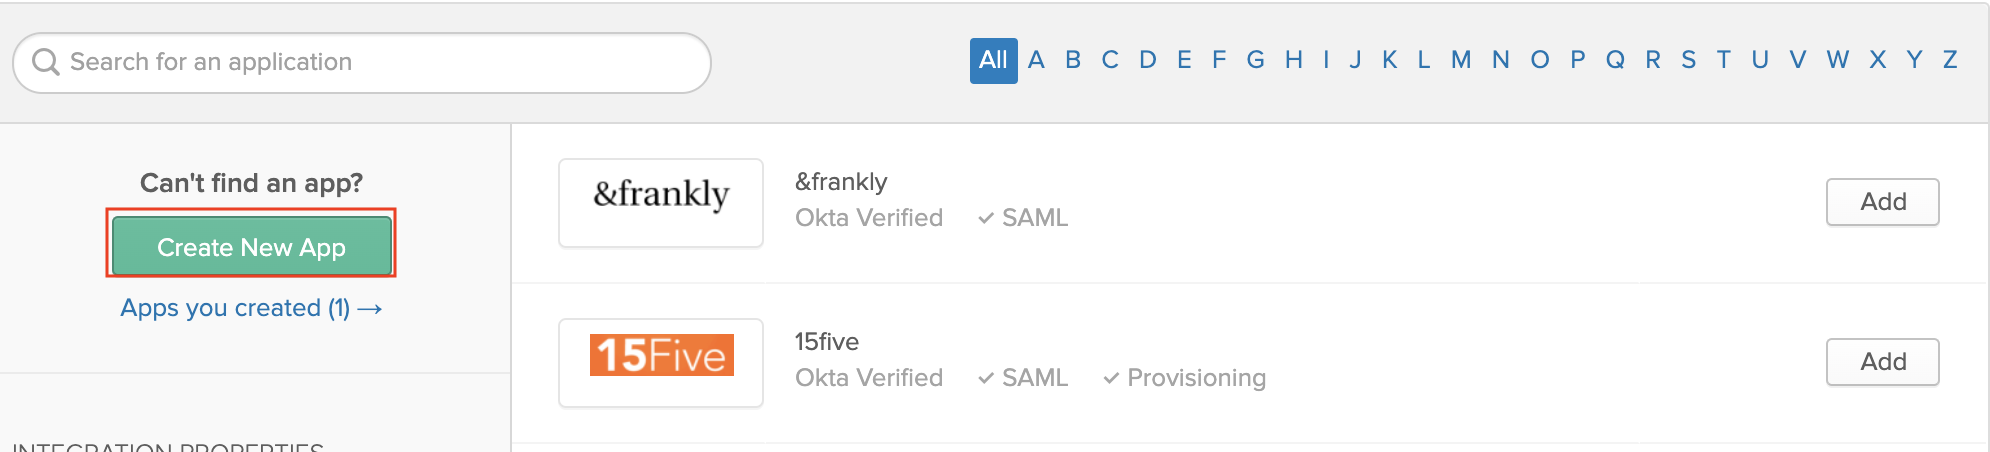
Go to Applications -> Add Application.

-
Click Create New Application.
-
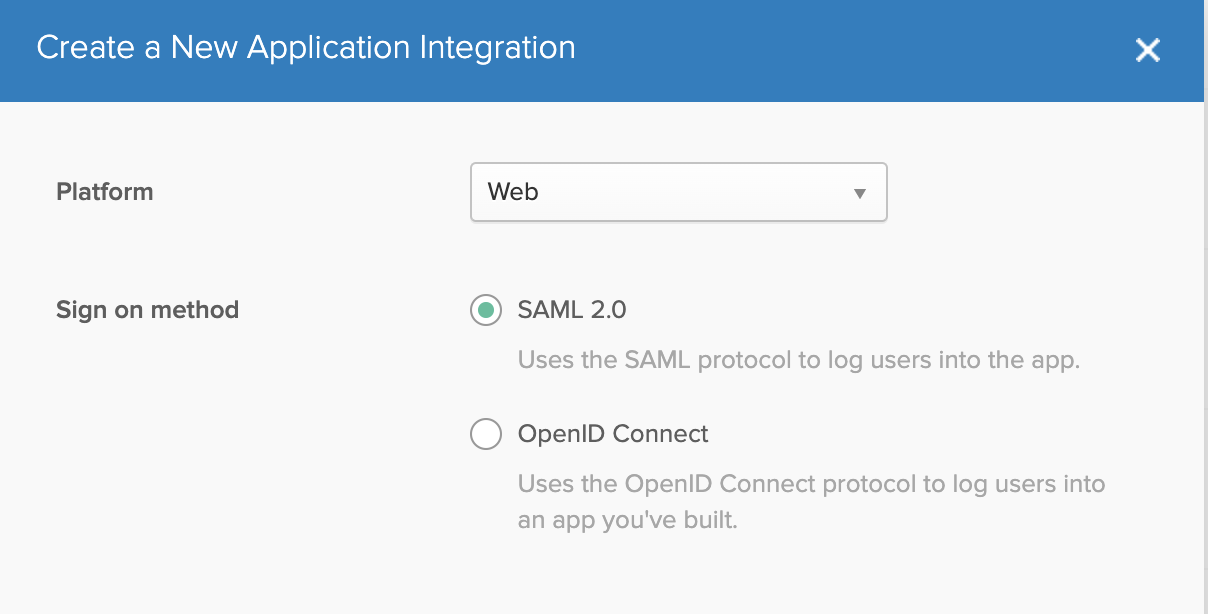
Select Web as the Platform. Select SAML 2.0 as the sign-on method.
-
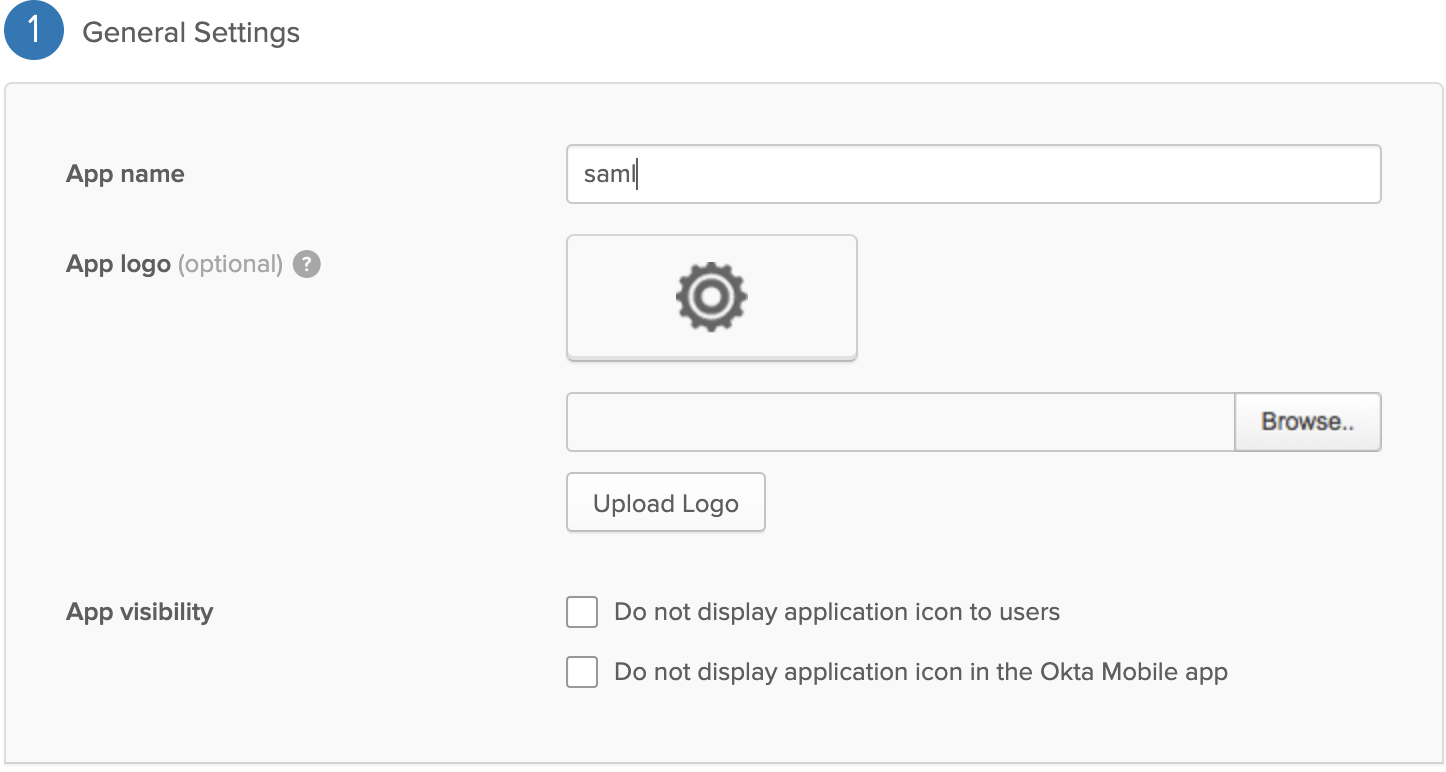
Enter the General Settings as shown in the images below.
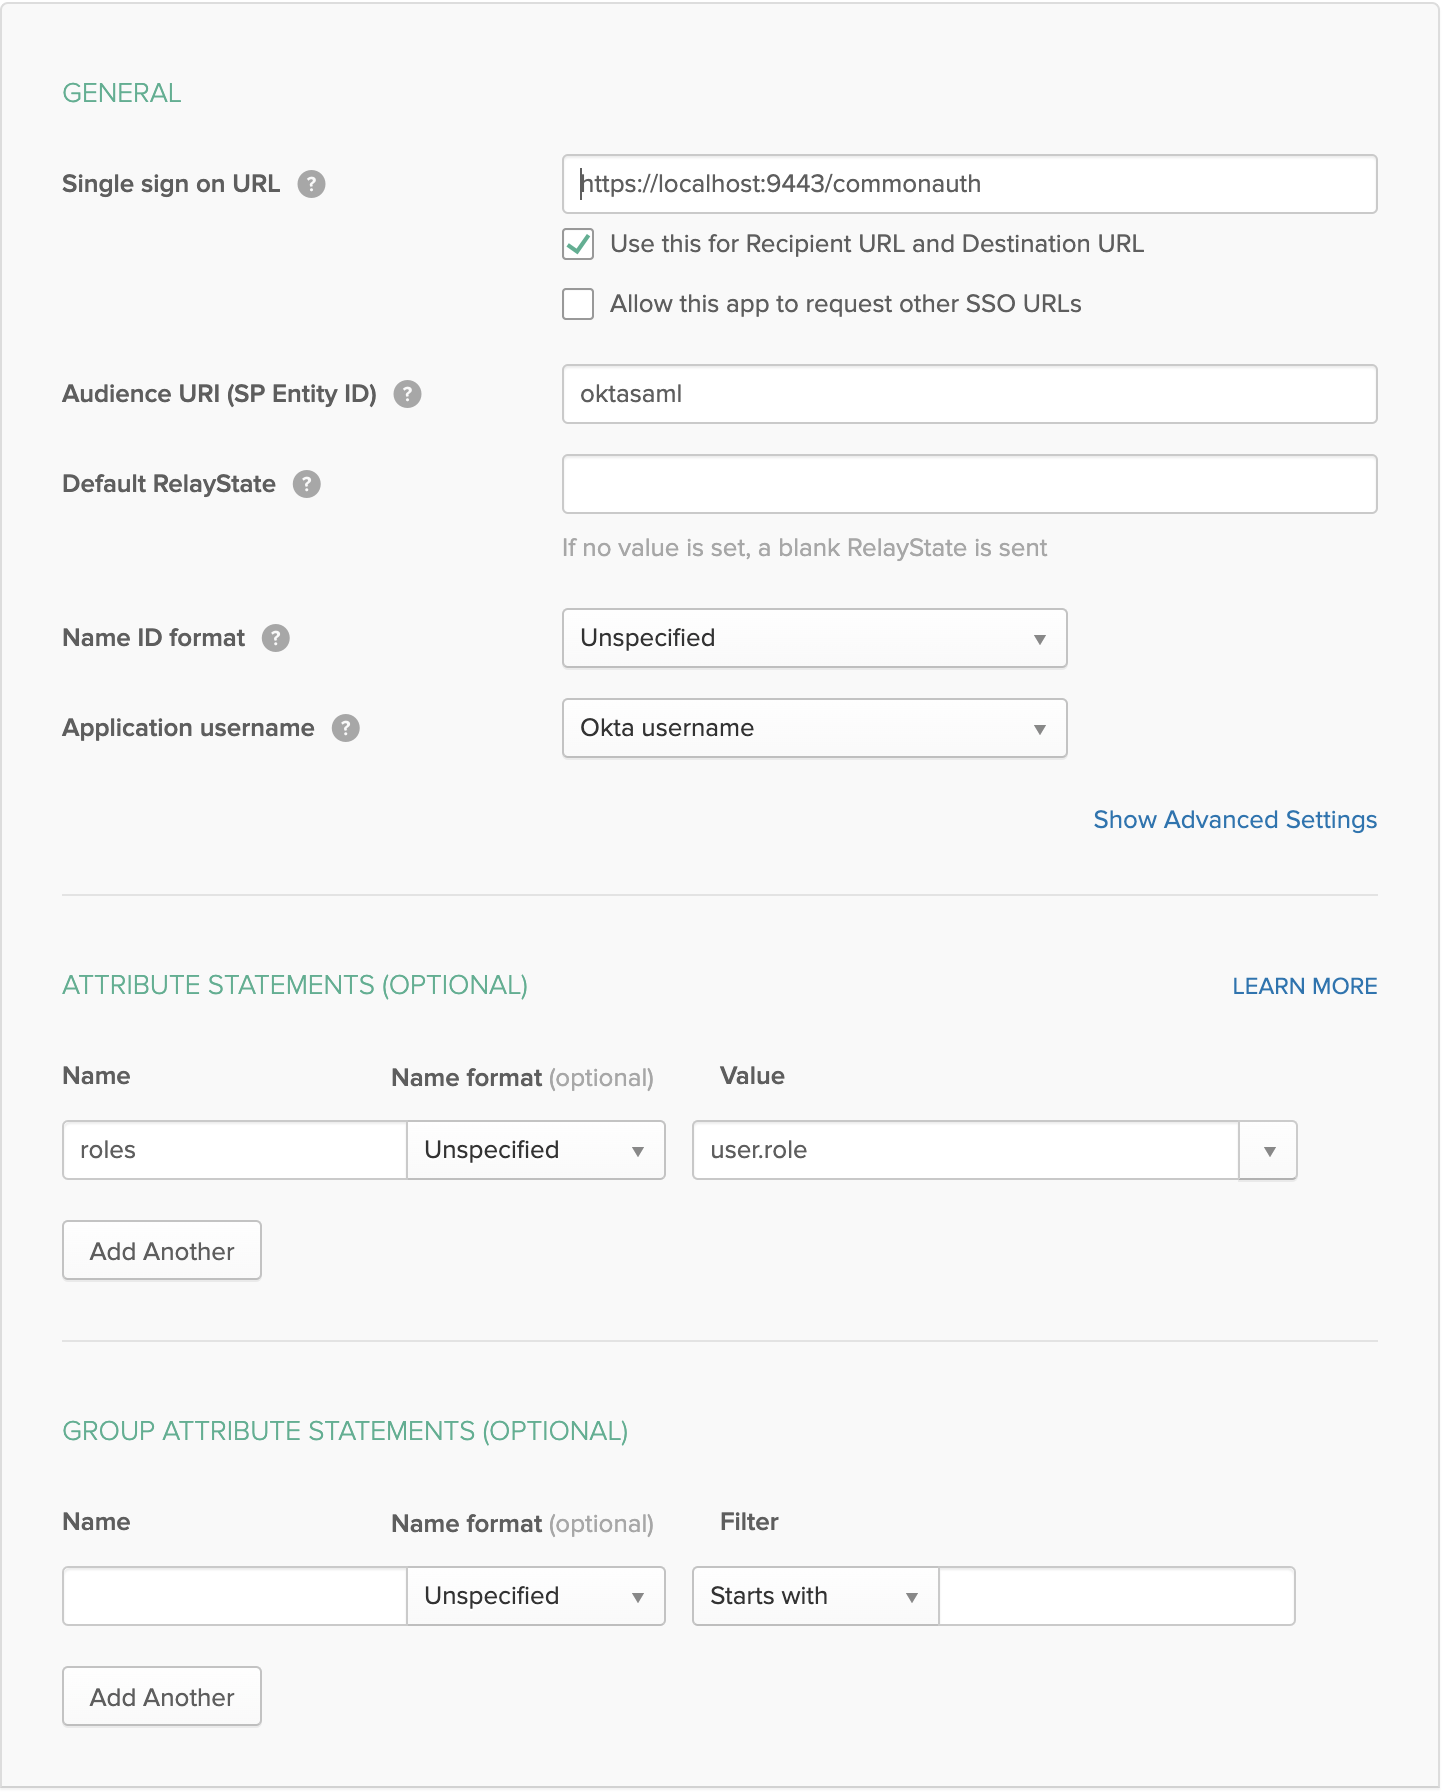
Warning
Audience URI should be same as the Identity Provider entity id name that is created in WSO2 API Manager.
-
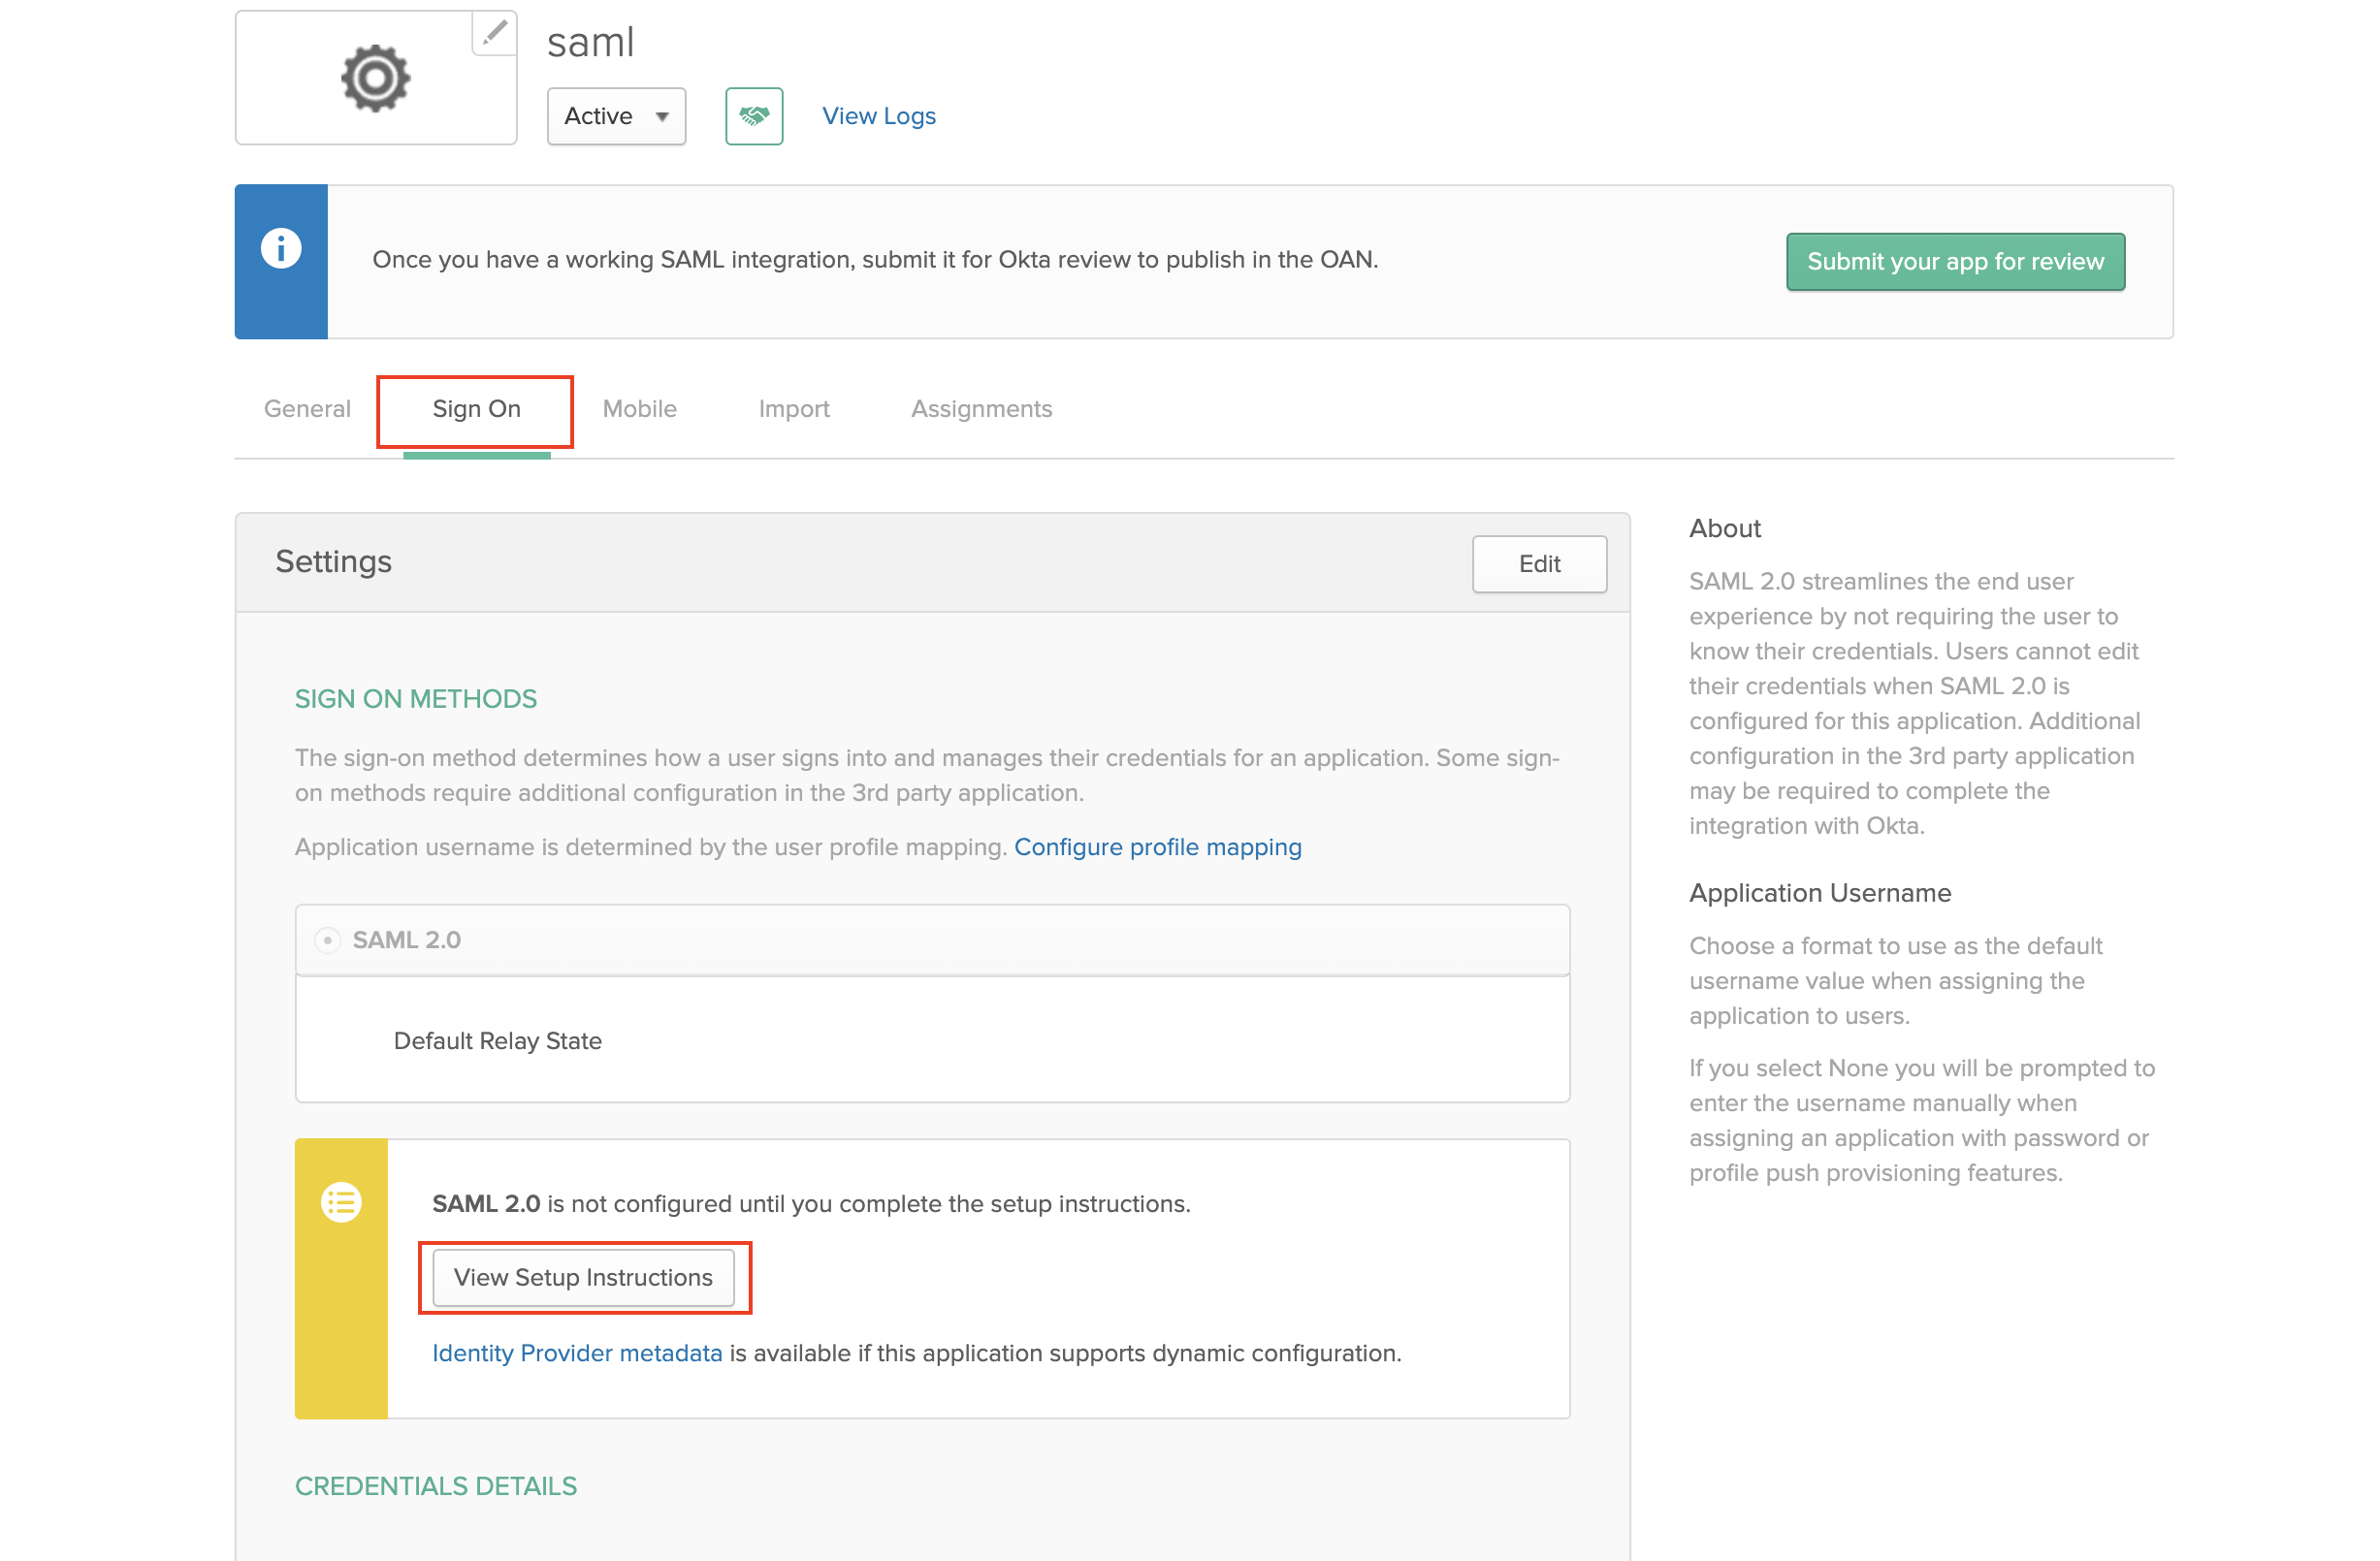
Inside the SAML app you created go to Sign On and click View Setup Instructions.
-
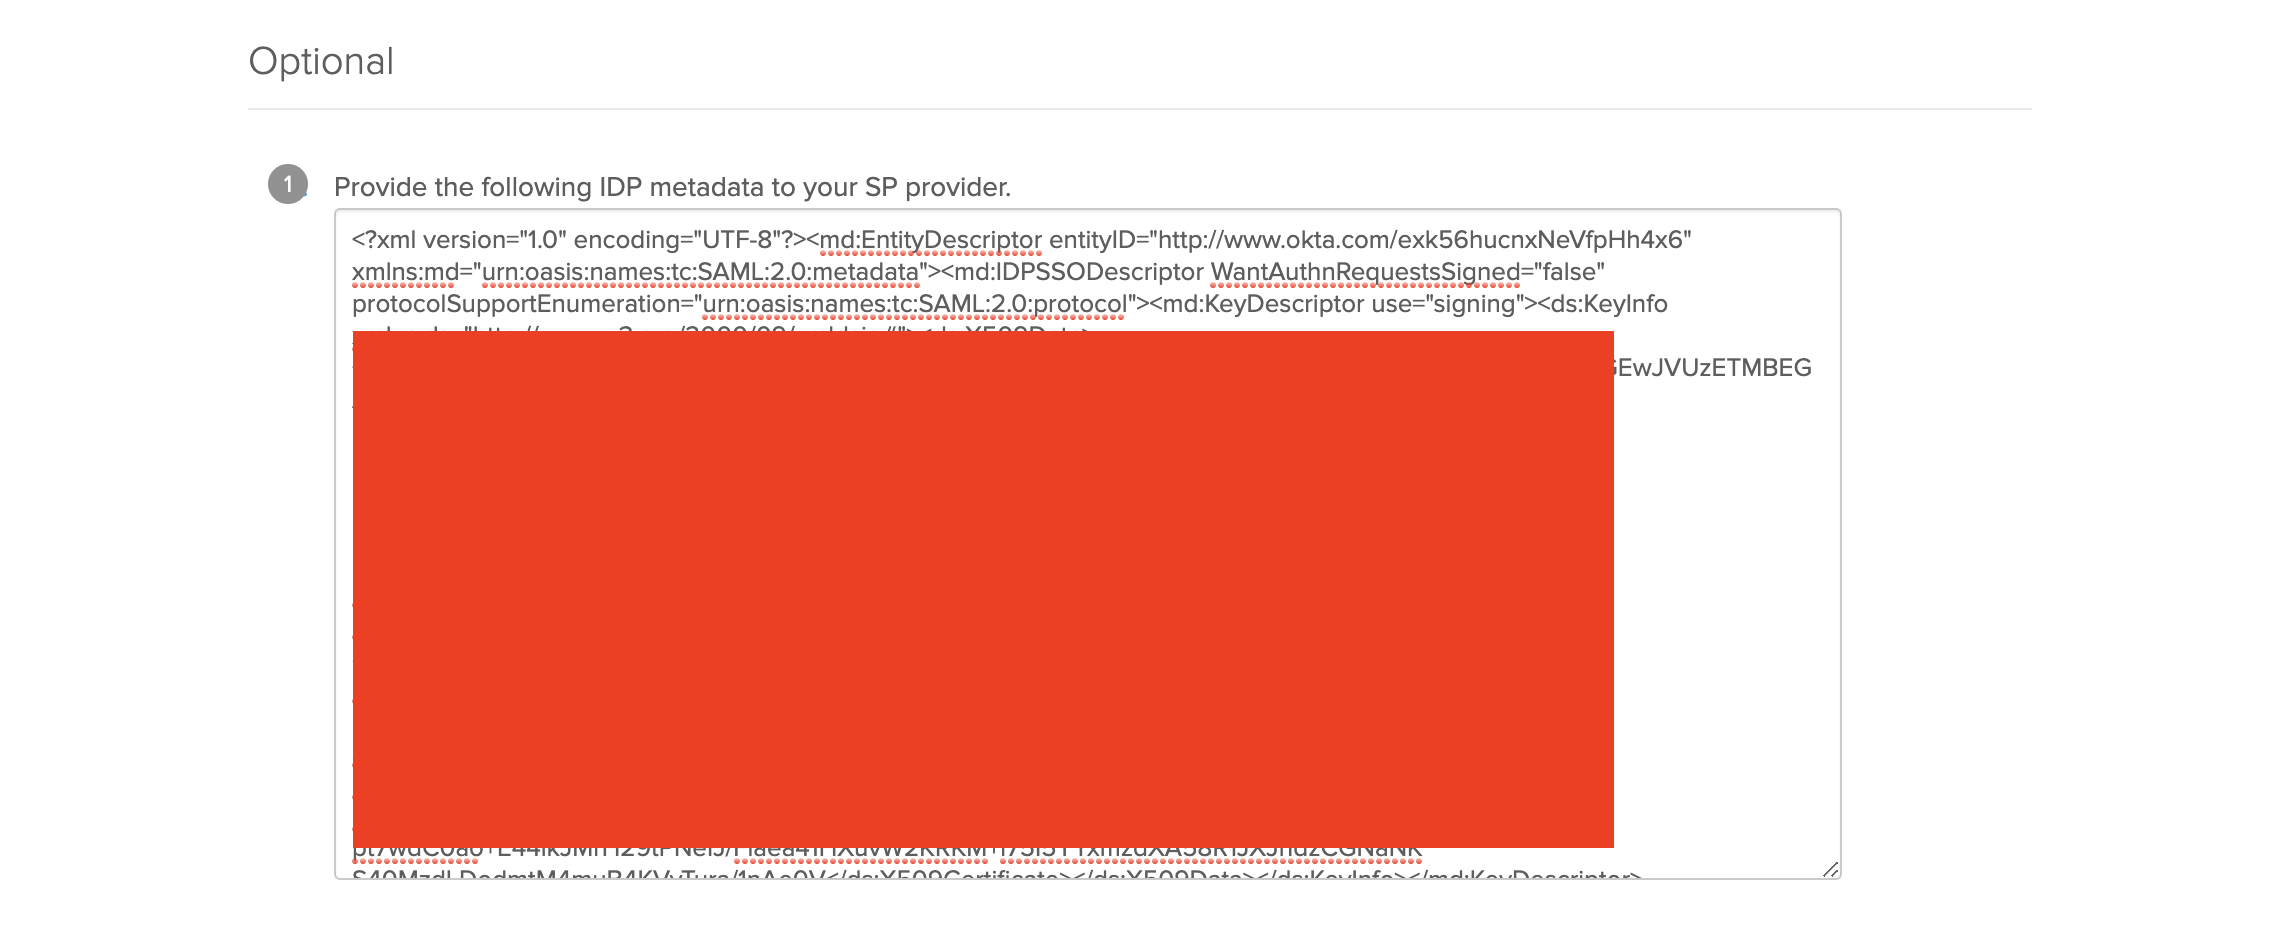
Scroll up to the Provide the following IDP metadata to your SP provider section. Copy and save the details given to a XML file.
-
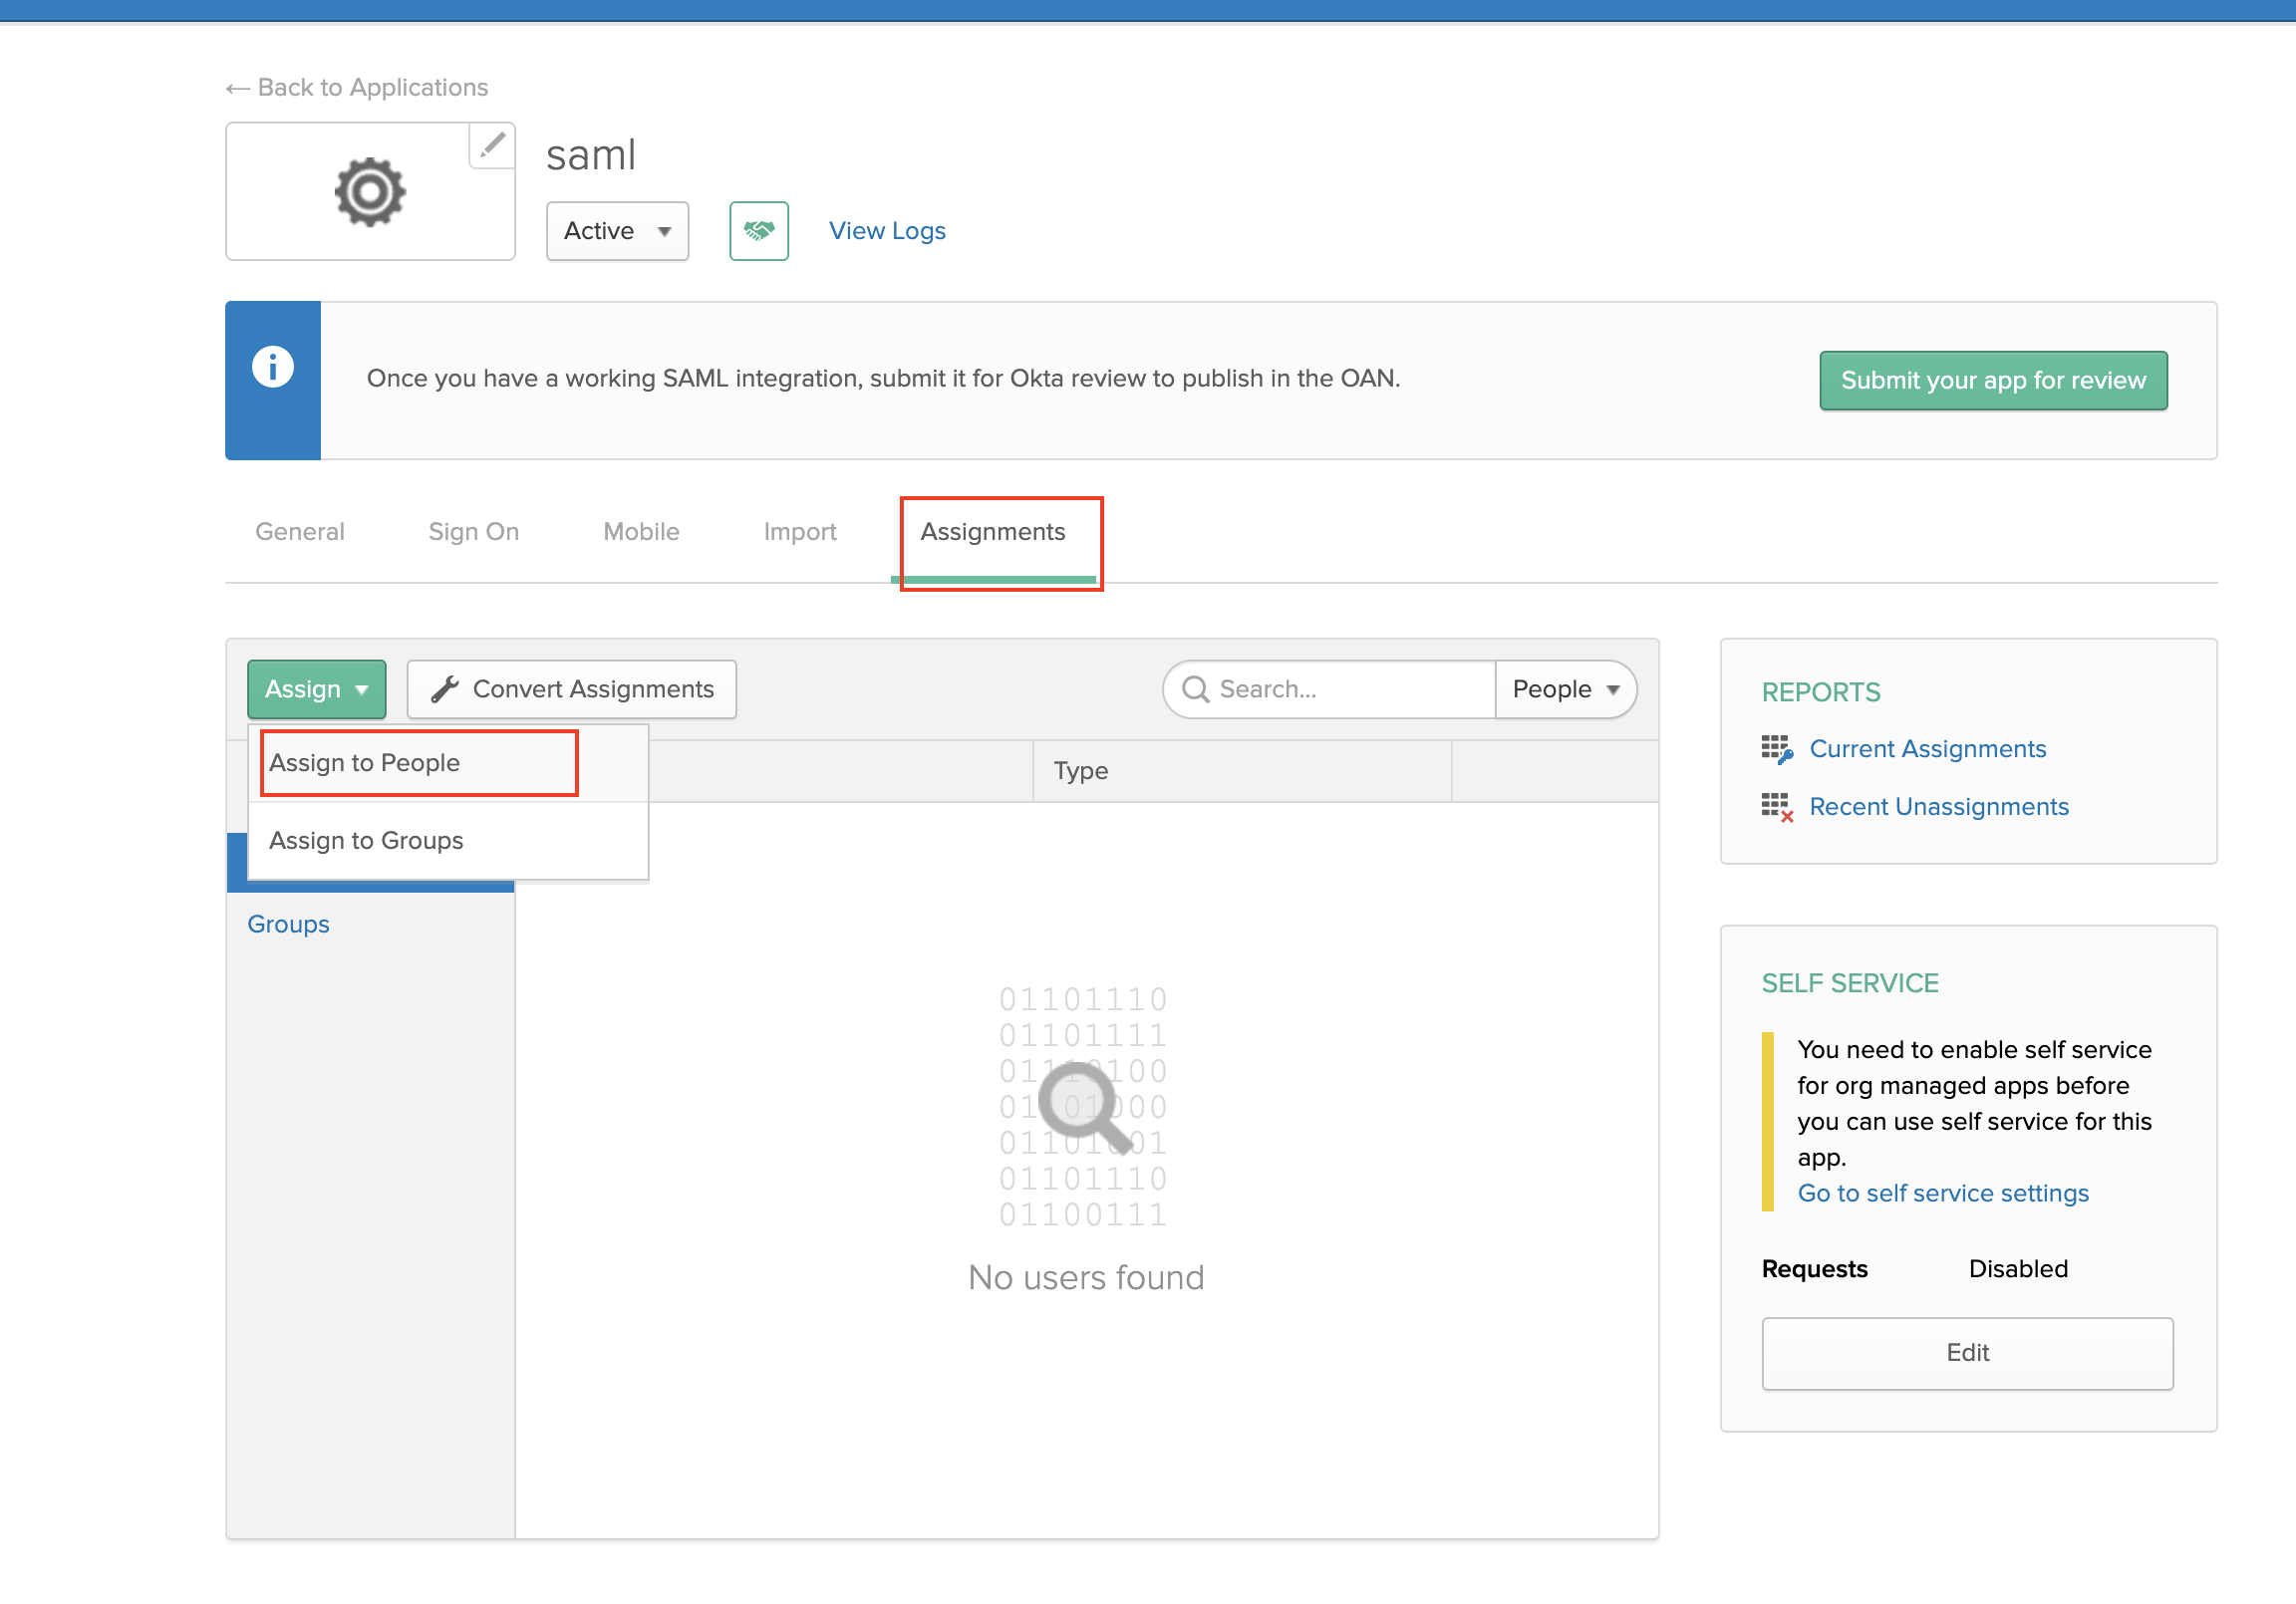
Go to Assignments -> Assign. Click Assign to People and assign your current user.
-
-
Switch back to the Developer Console shown in step 1.
-
Follow these steps to add a new attribute to the default user profile of Okta to represent the user role.
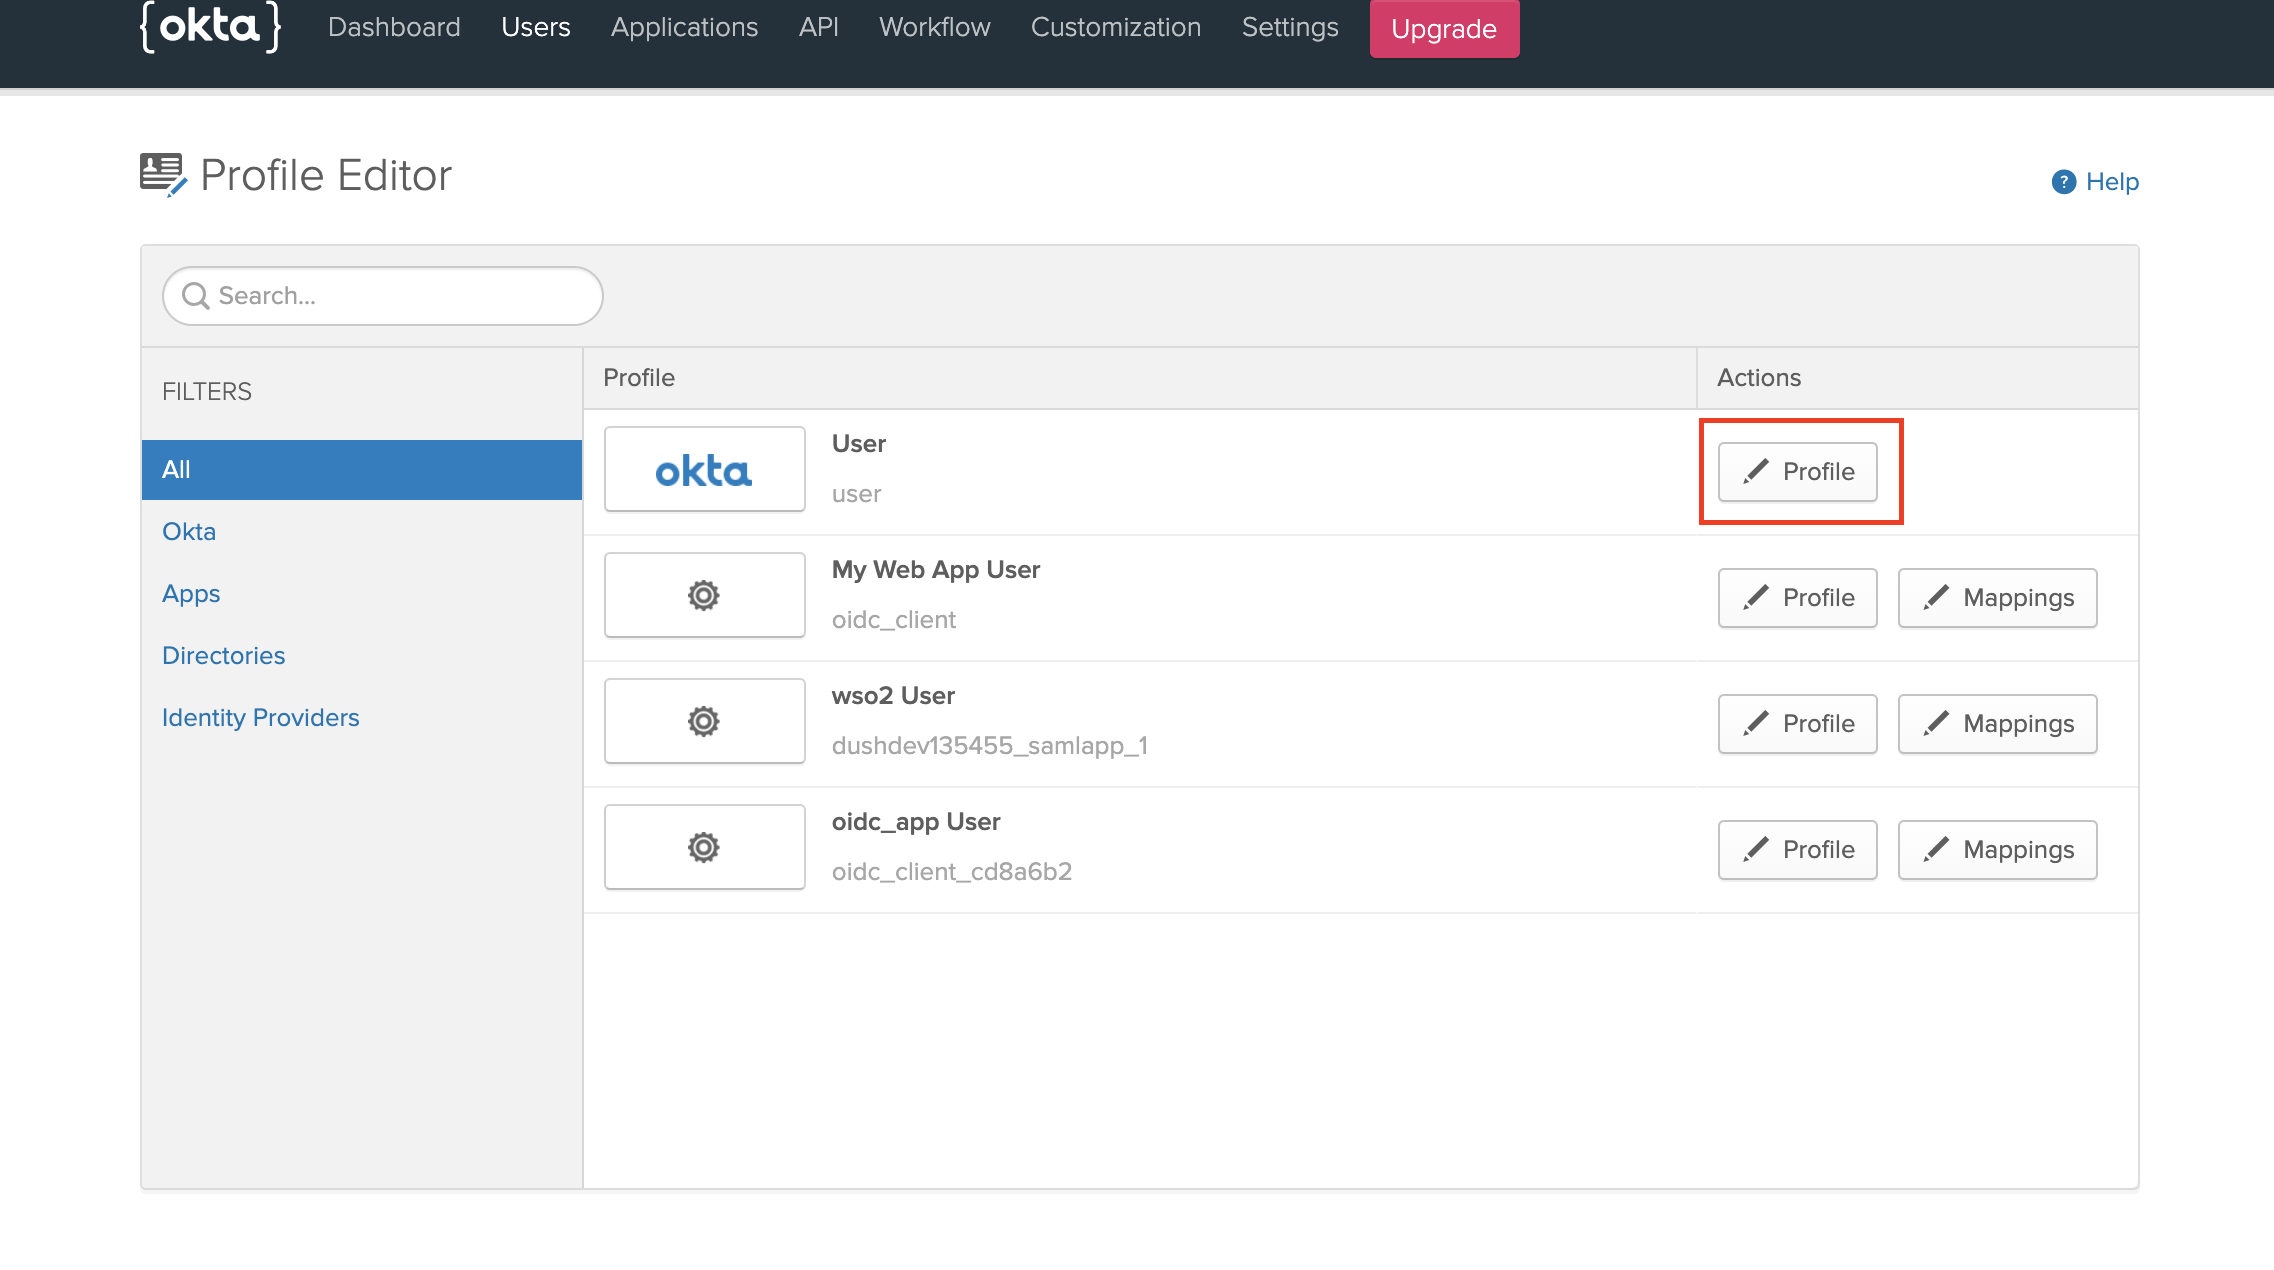
-
Navigate to Users -> Profile Editor and click the pencil icon to edit the default profile.
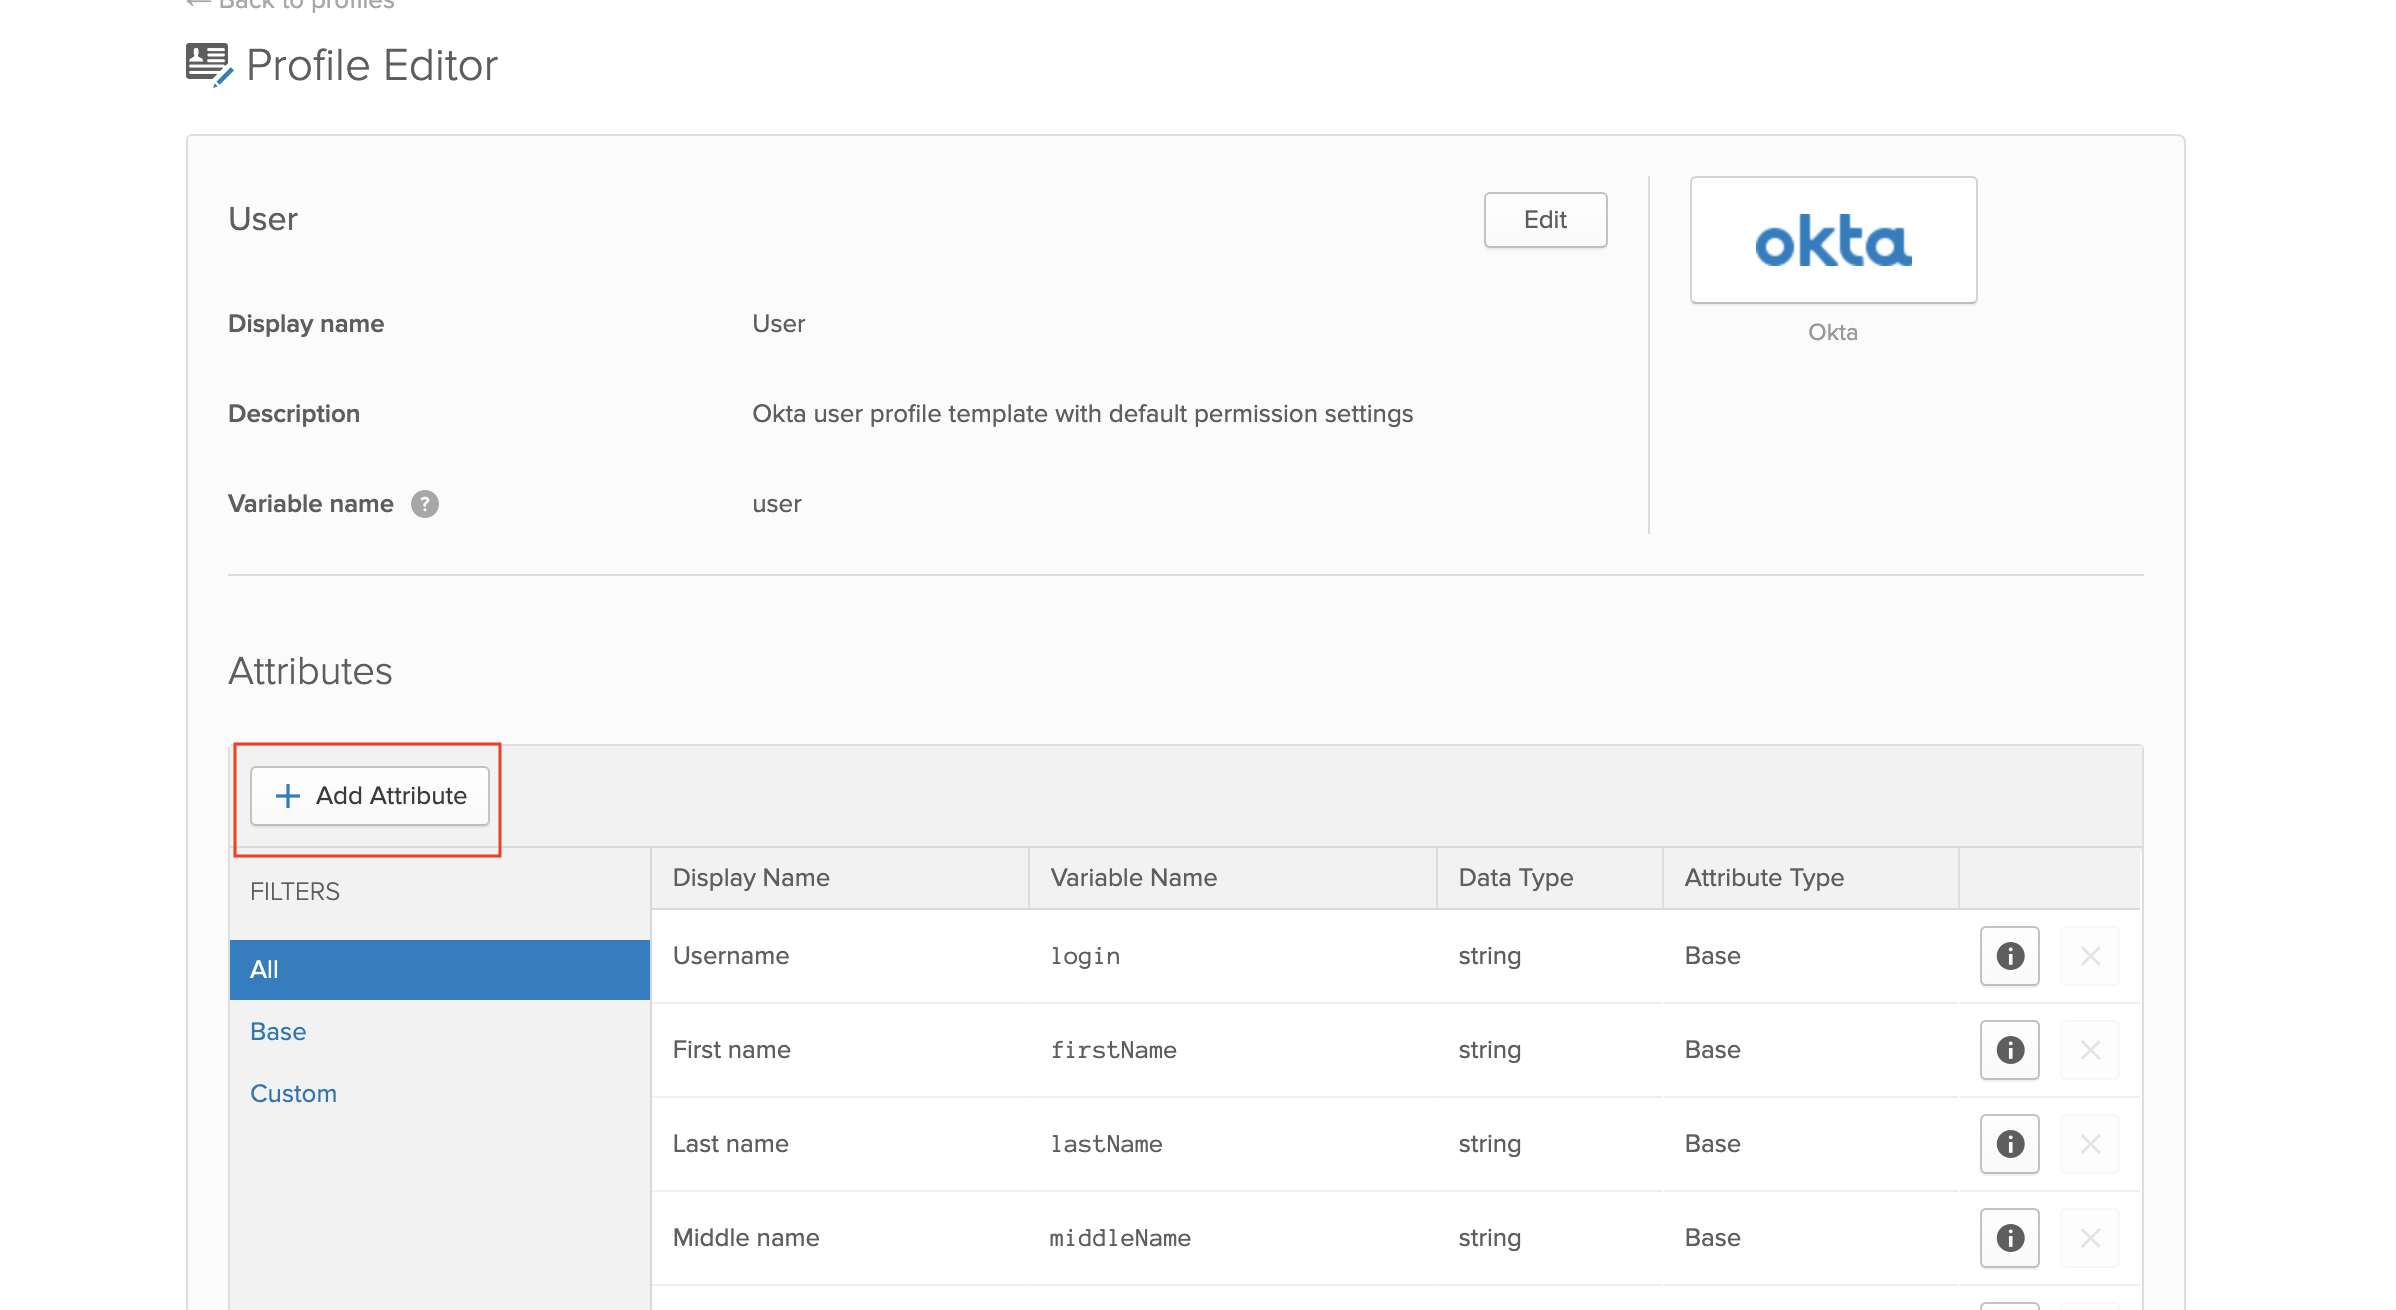
-
Click Add Attribute to add new user attributes.
-
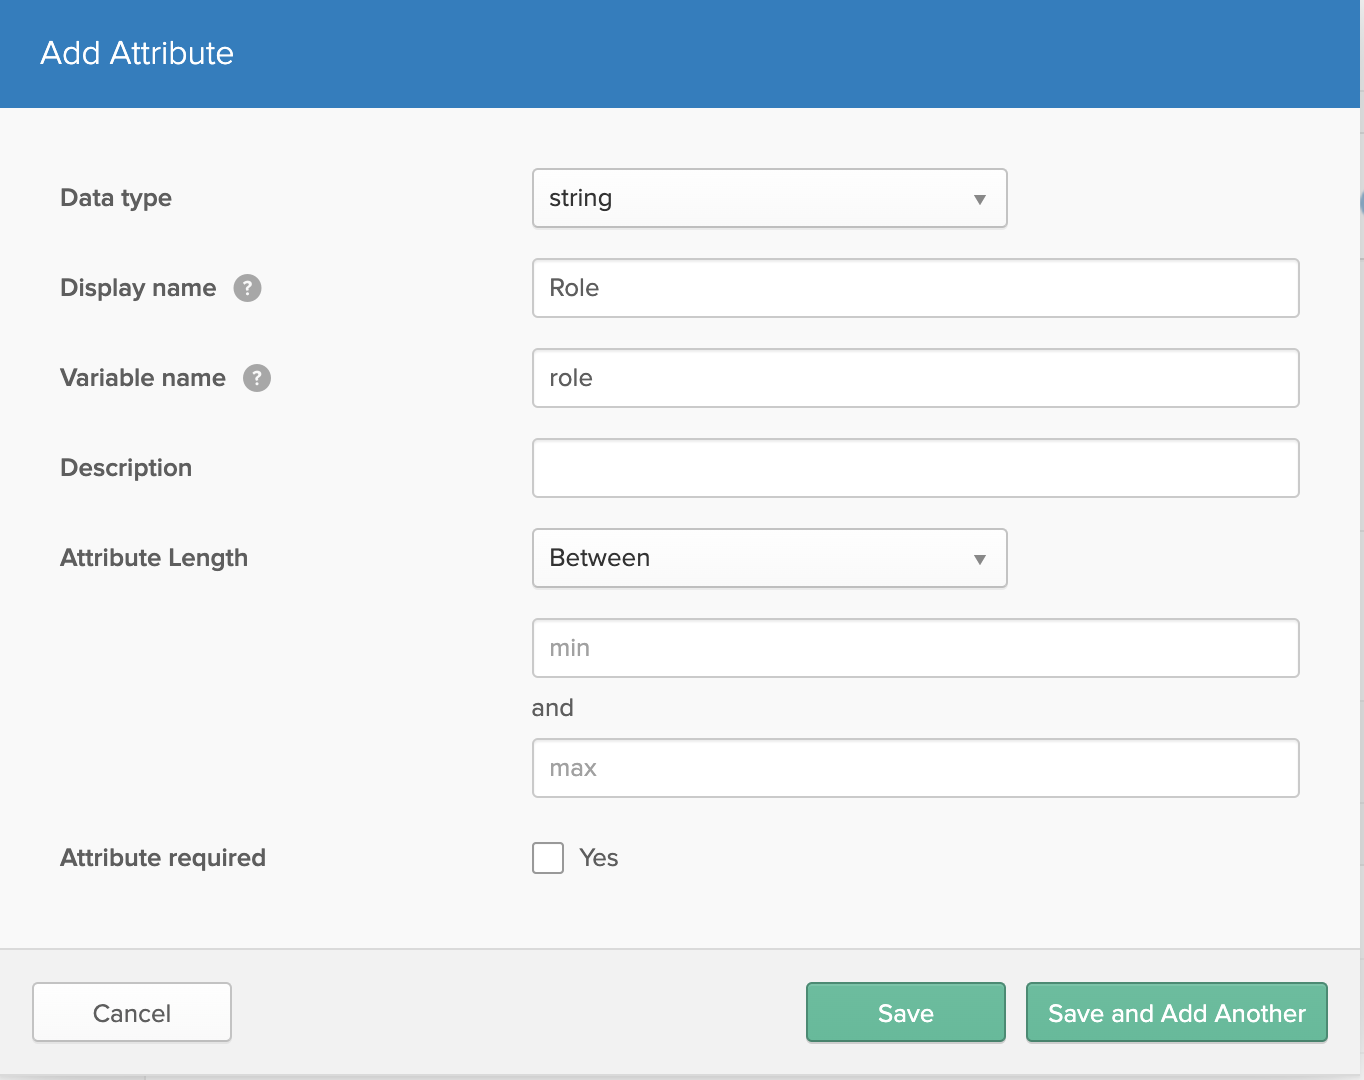
-
Enter the user attributes shown in the image below. Click Save.
-
Follow the steps below to edit the user profile.
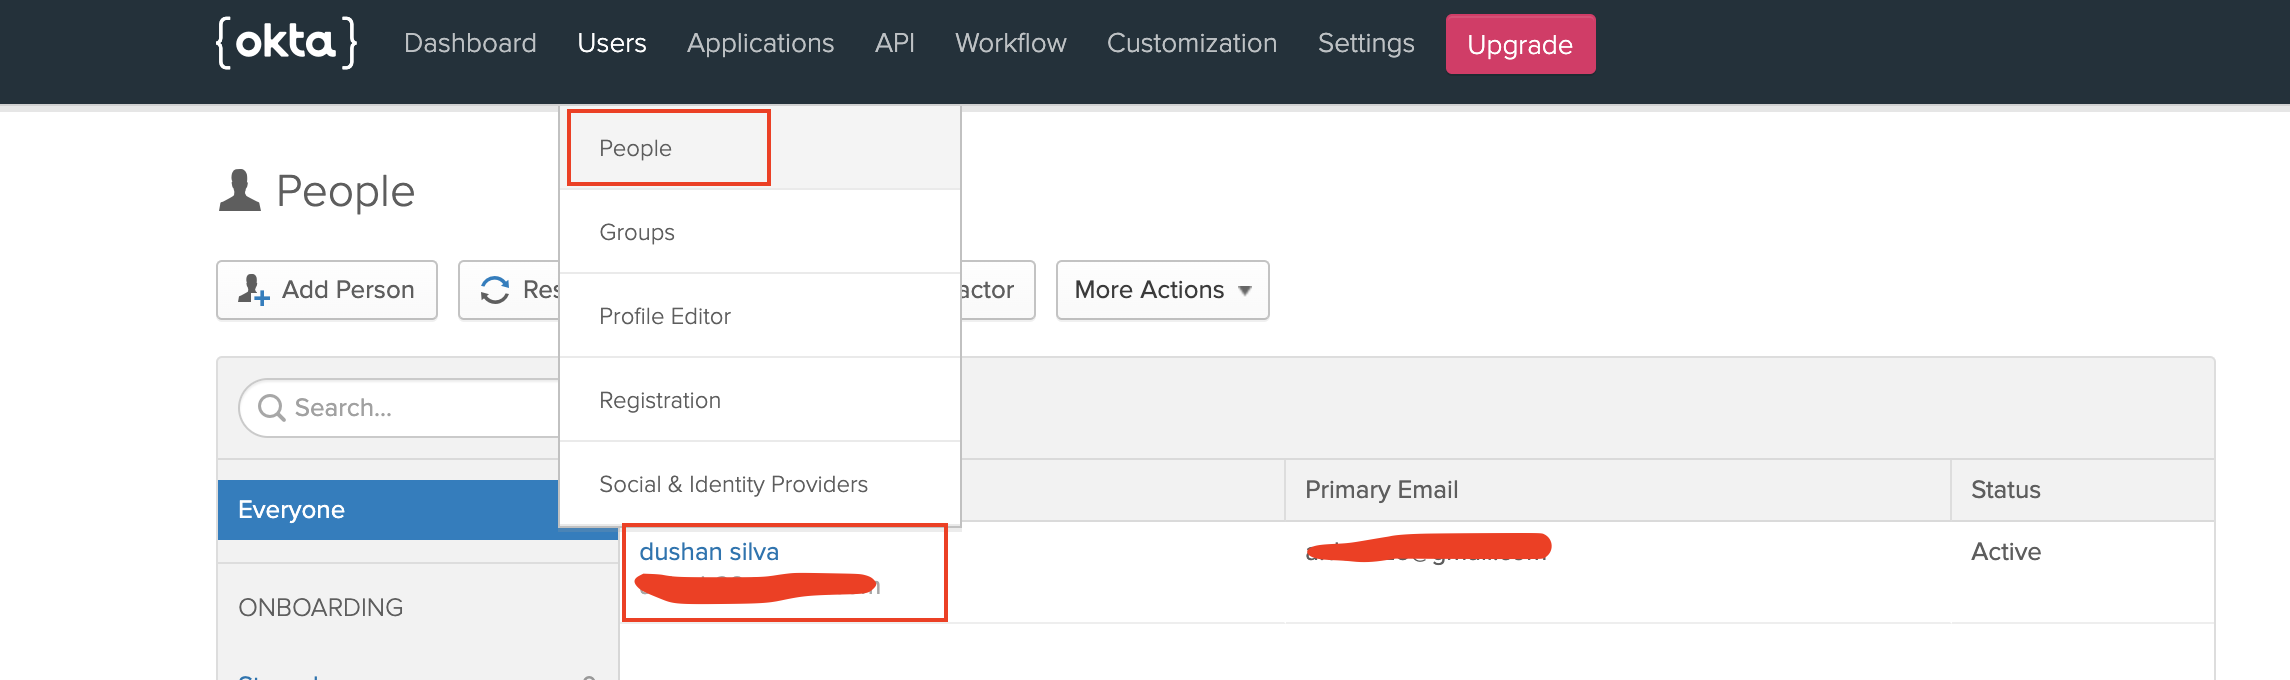
-
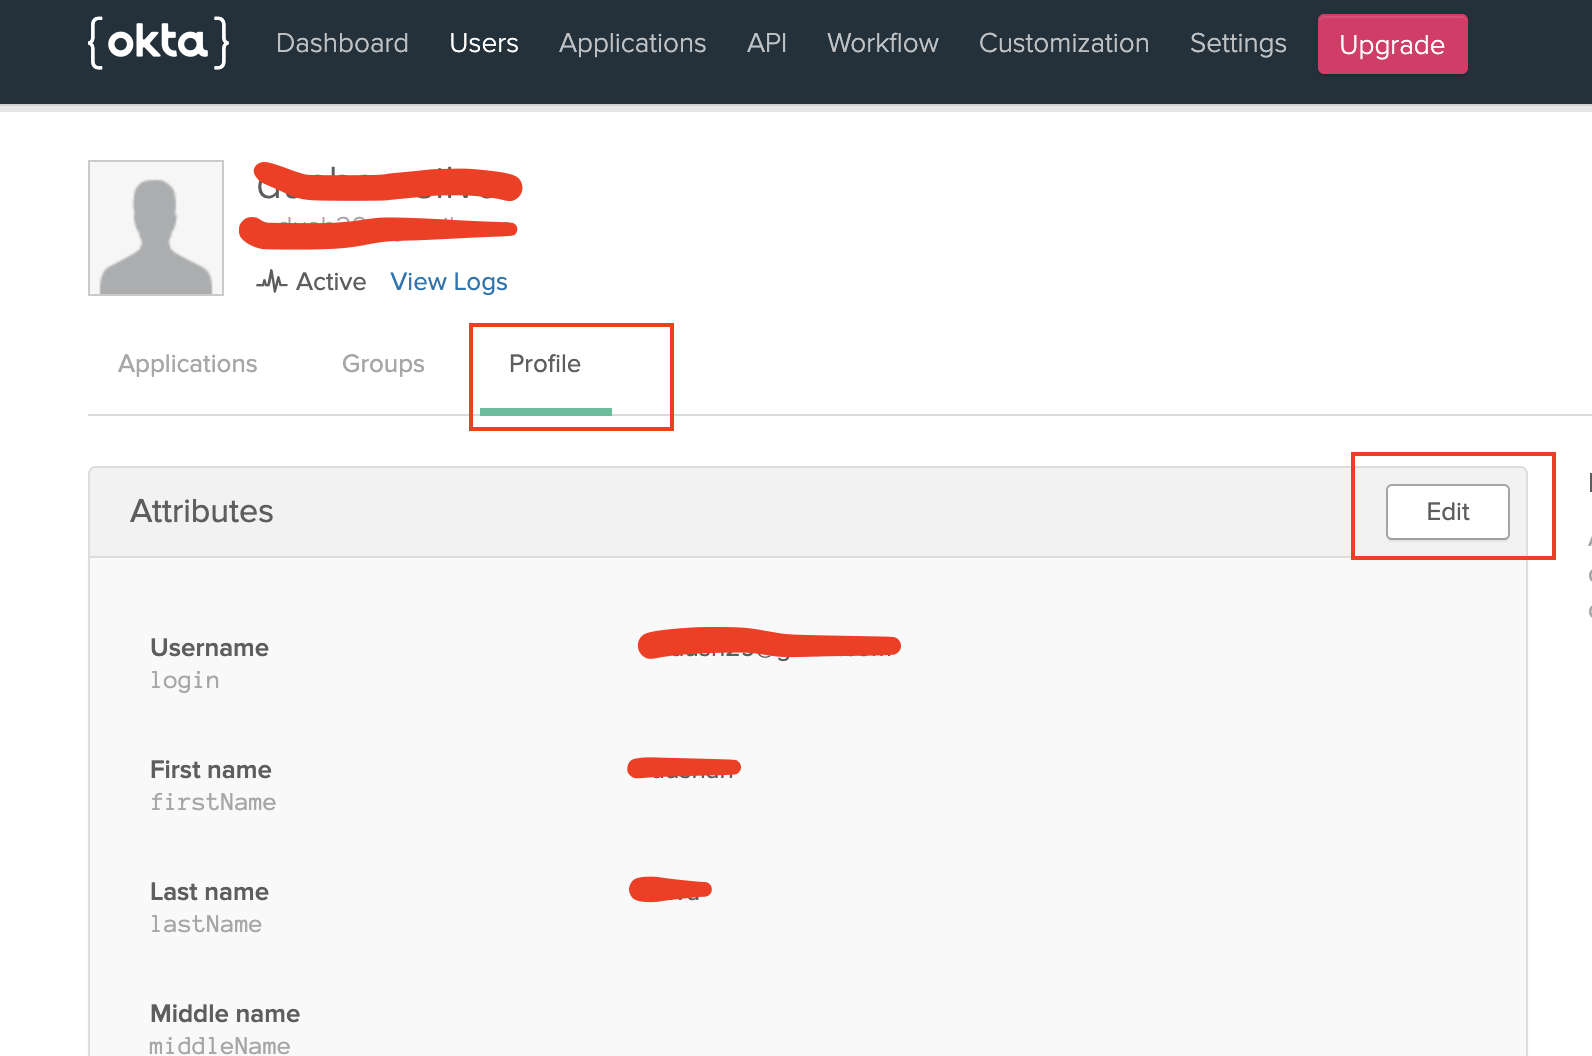
Go to Users -> People and click on your profile name.
-
Click Edit to change the profile details.
-
Add the Role. This will be used in the API Manager to map an internal role to the provisioned user.

-

Step 2 - Setup API-Manager
-
Log in to
https://localhost:9443/carbon. -
Create a role that needs to be assigned to users that will be provisioned from Okta.
-
Go to Users and Roles.

-
Add a new role.
-
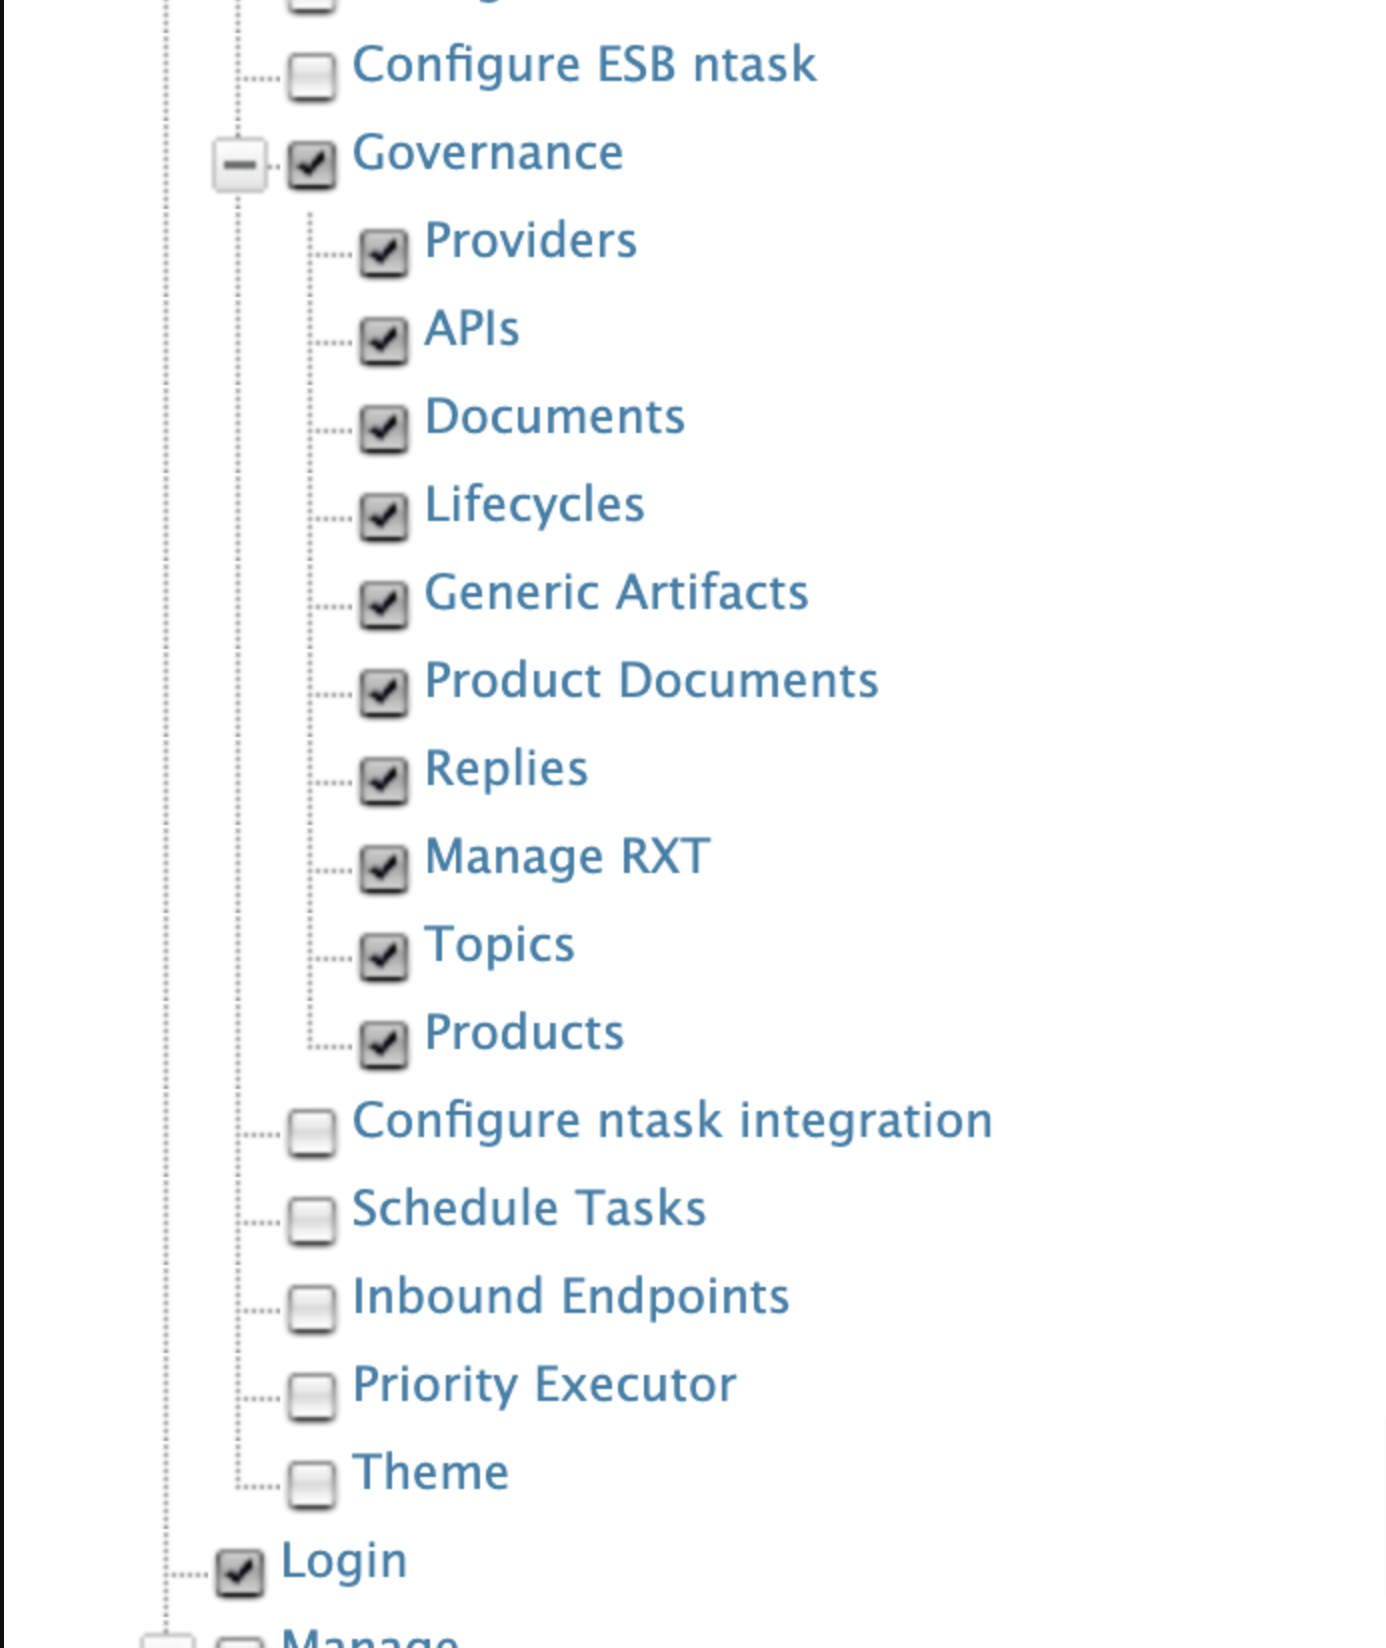
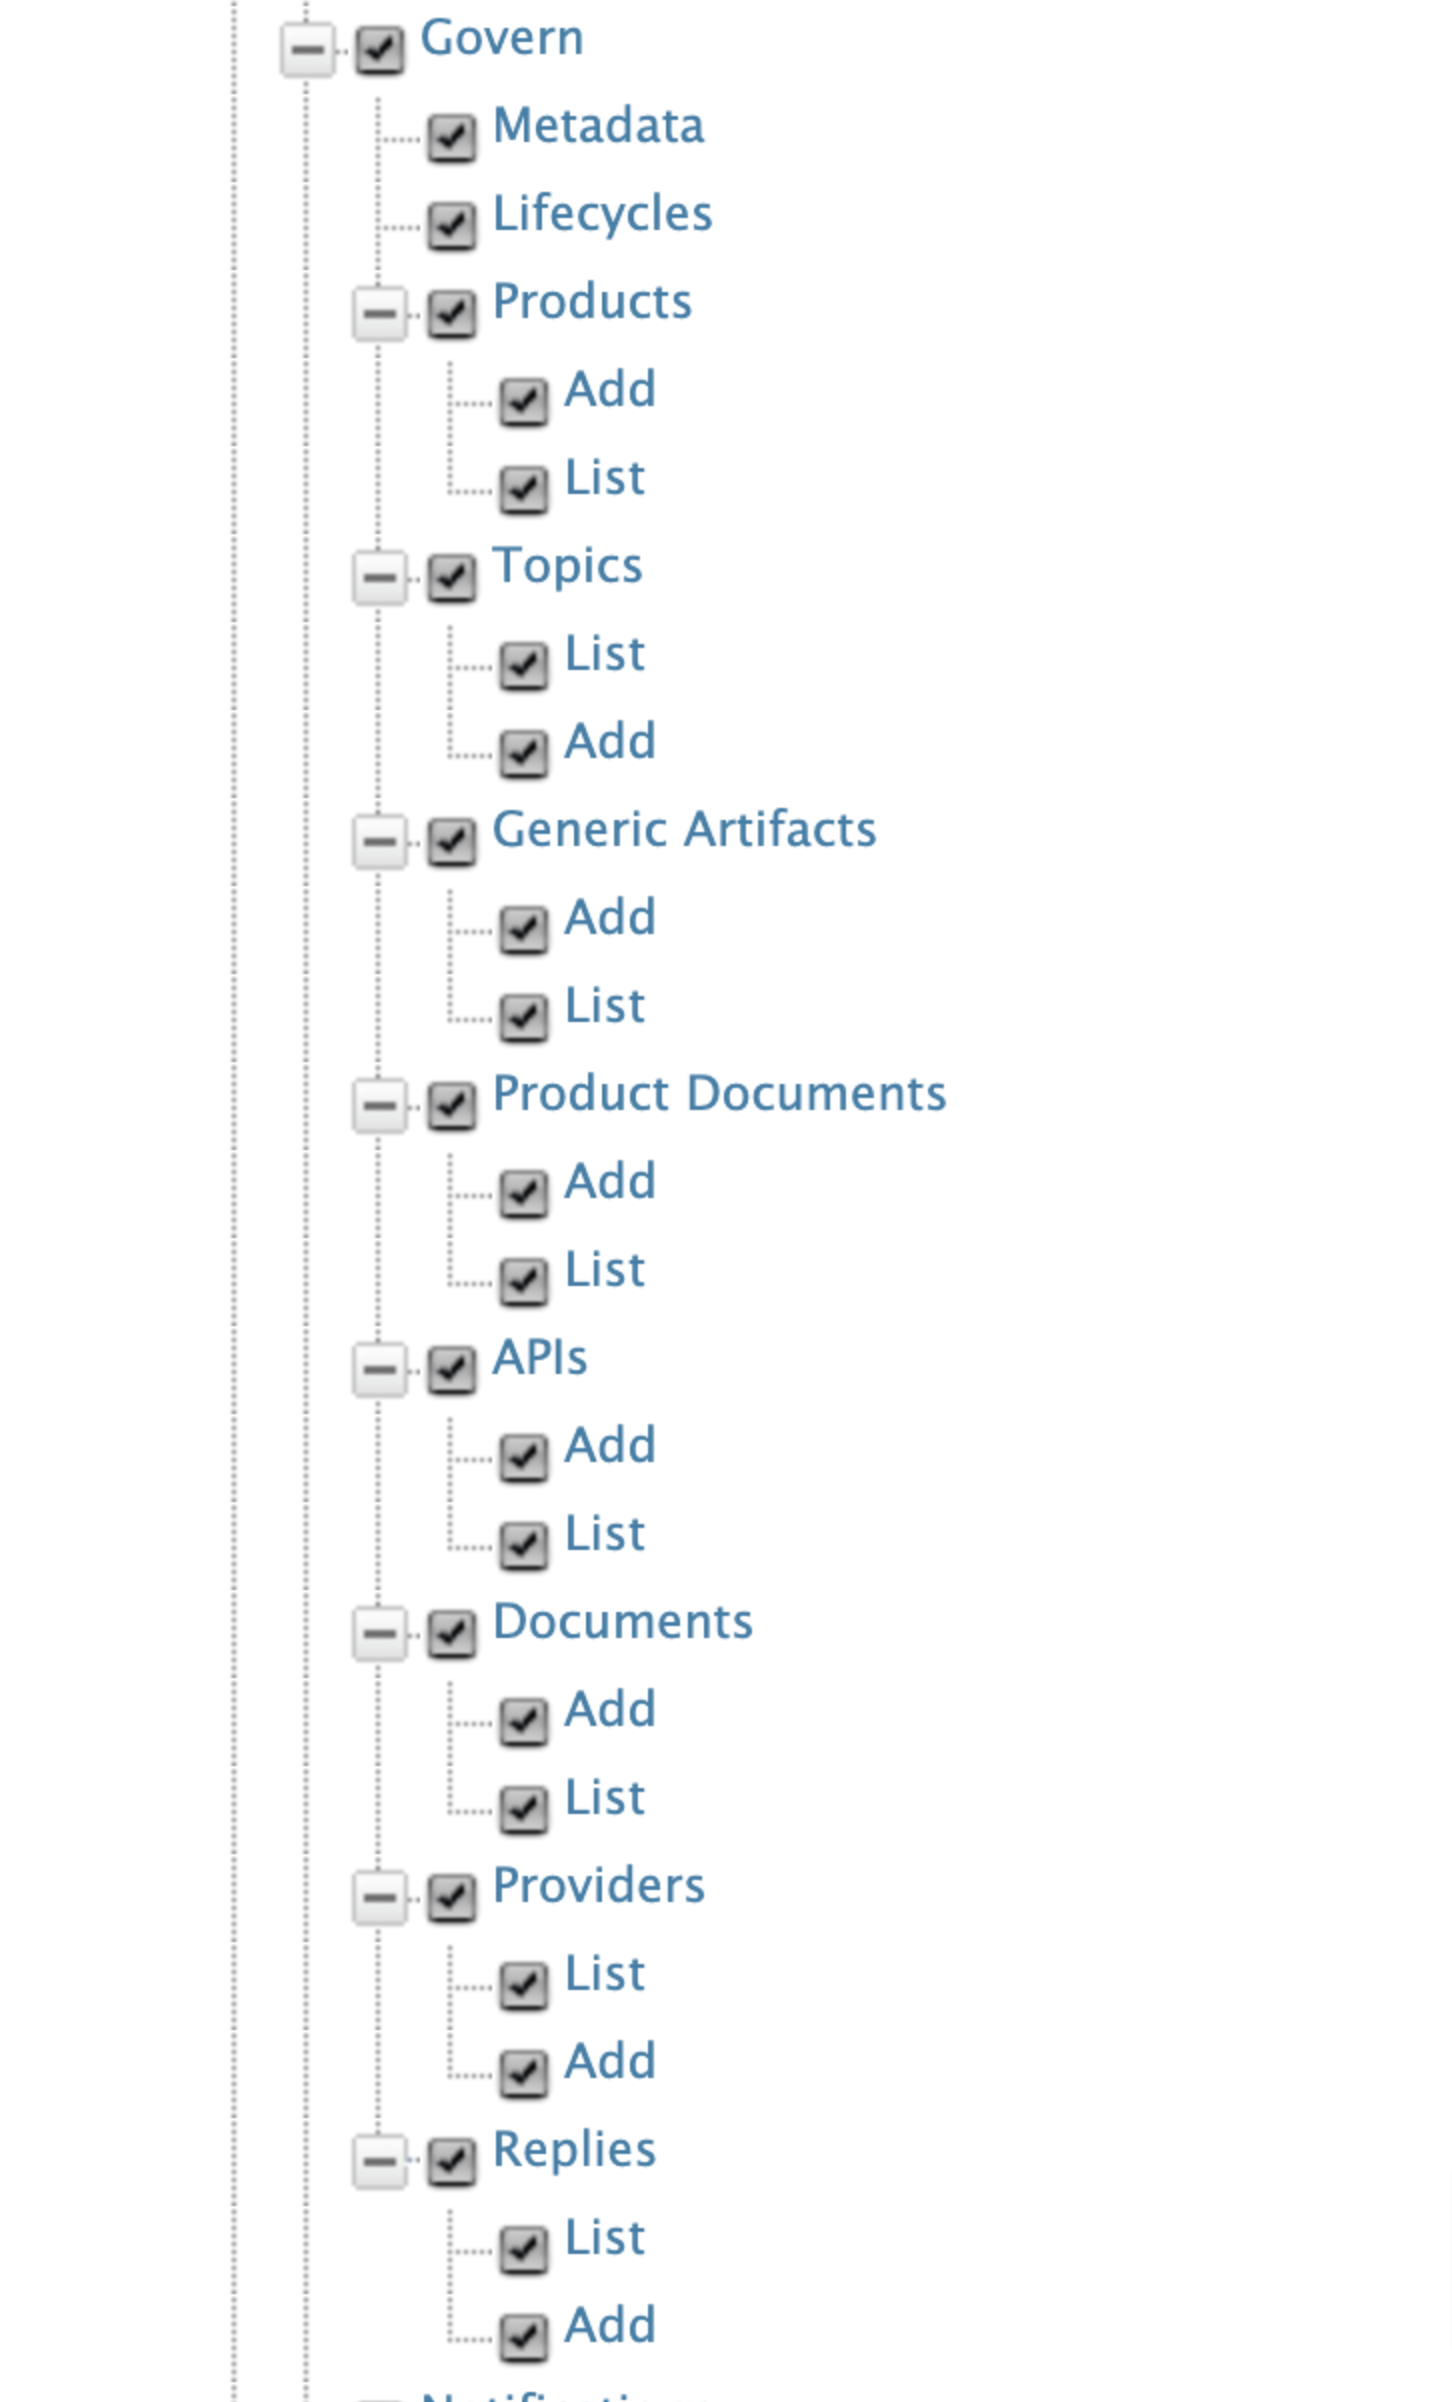
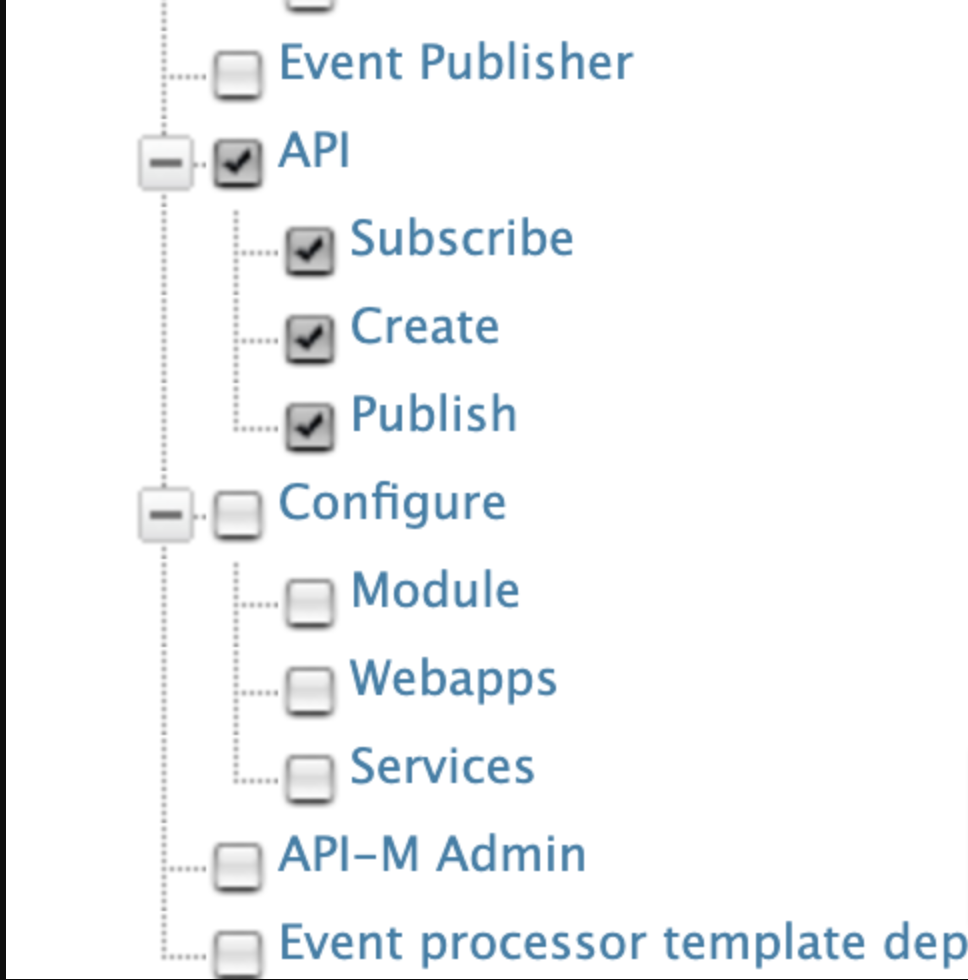
Assign the following permissions to the role and save the role.
-
-
Log in to
https://localhost:9443/admin.-
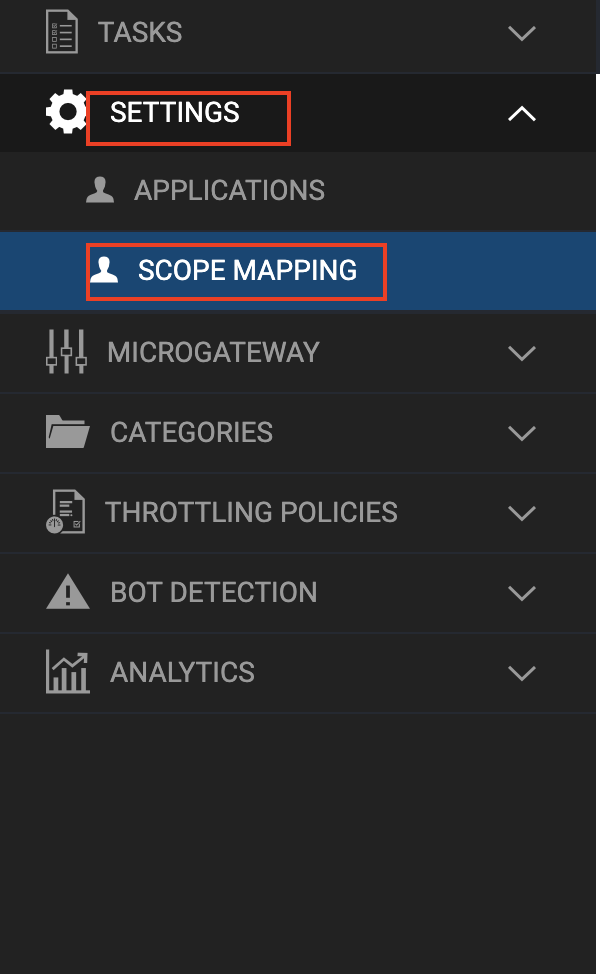
Expand Settings and click Scope Mapping.
-
Update the following scopes with the
okta_role.
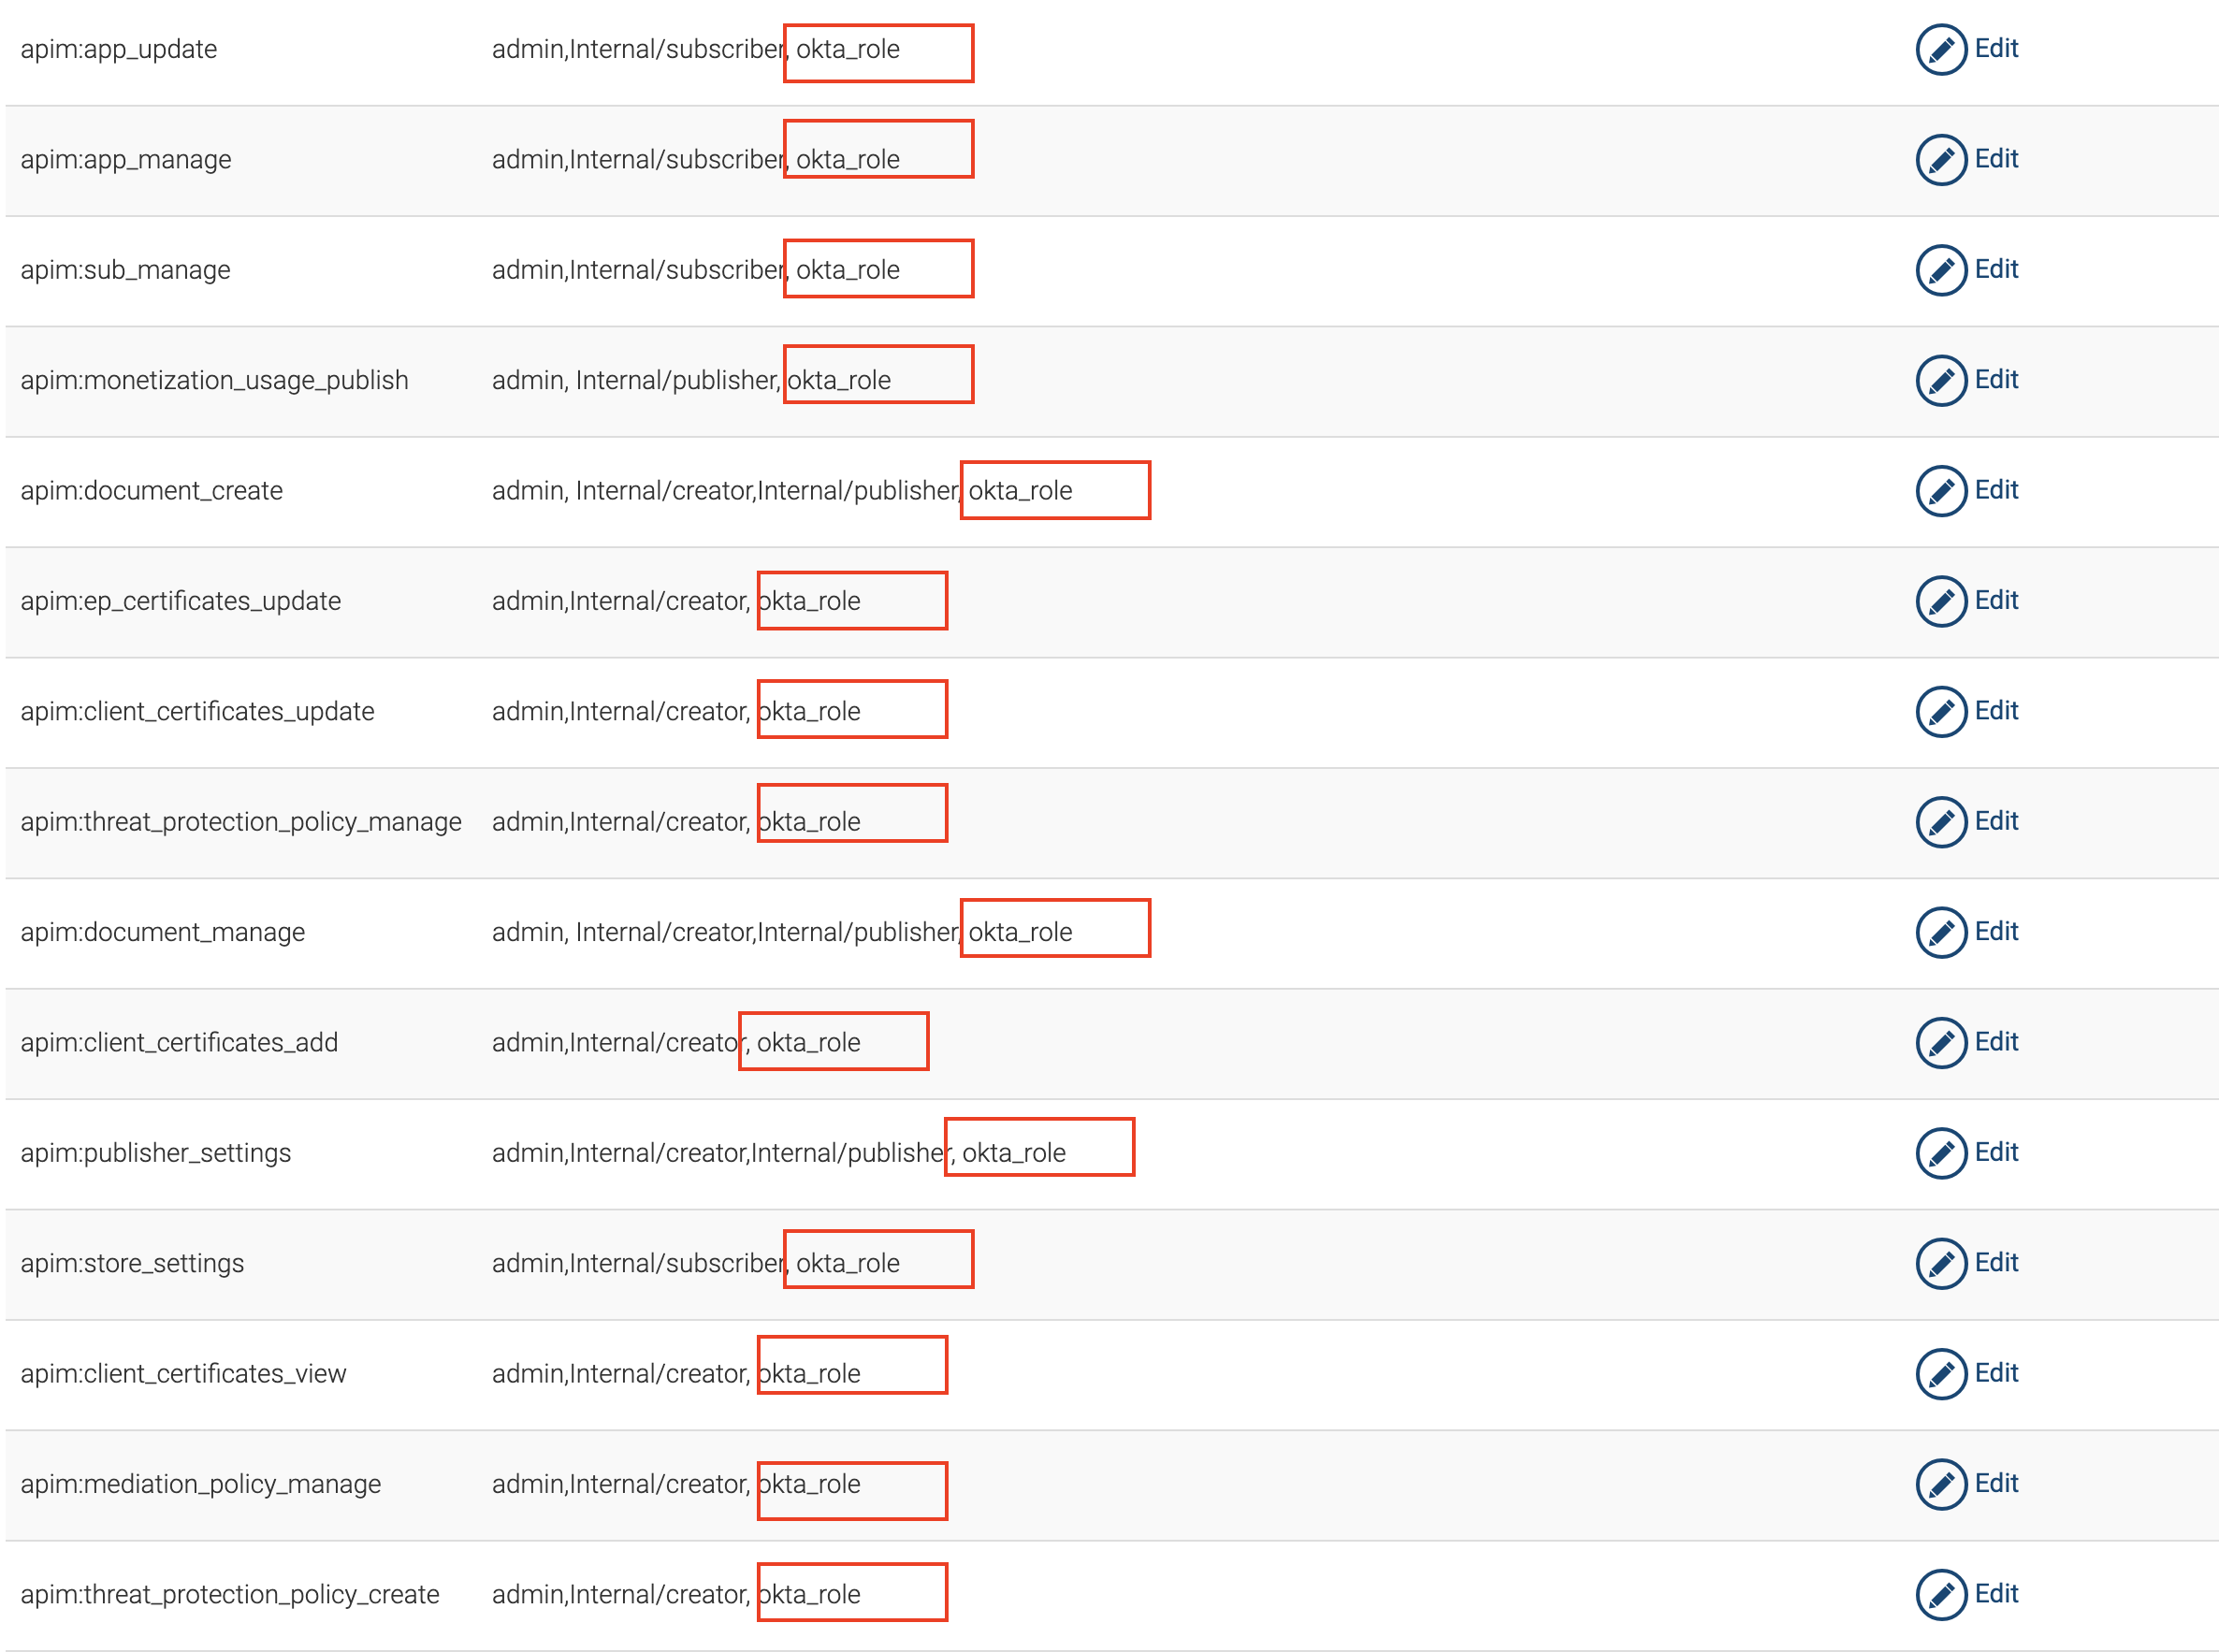
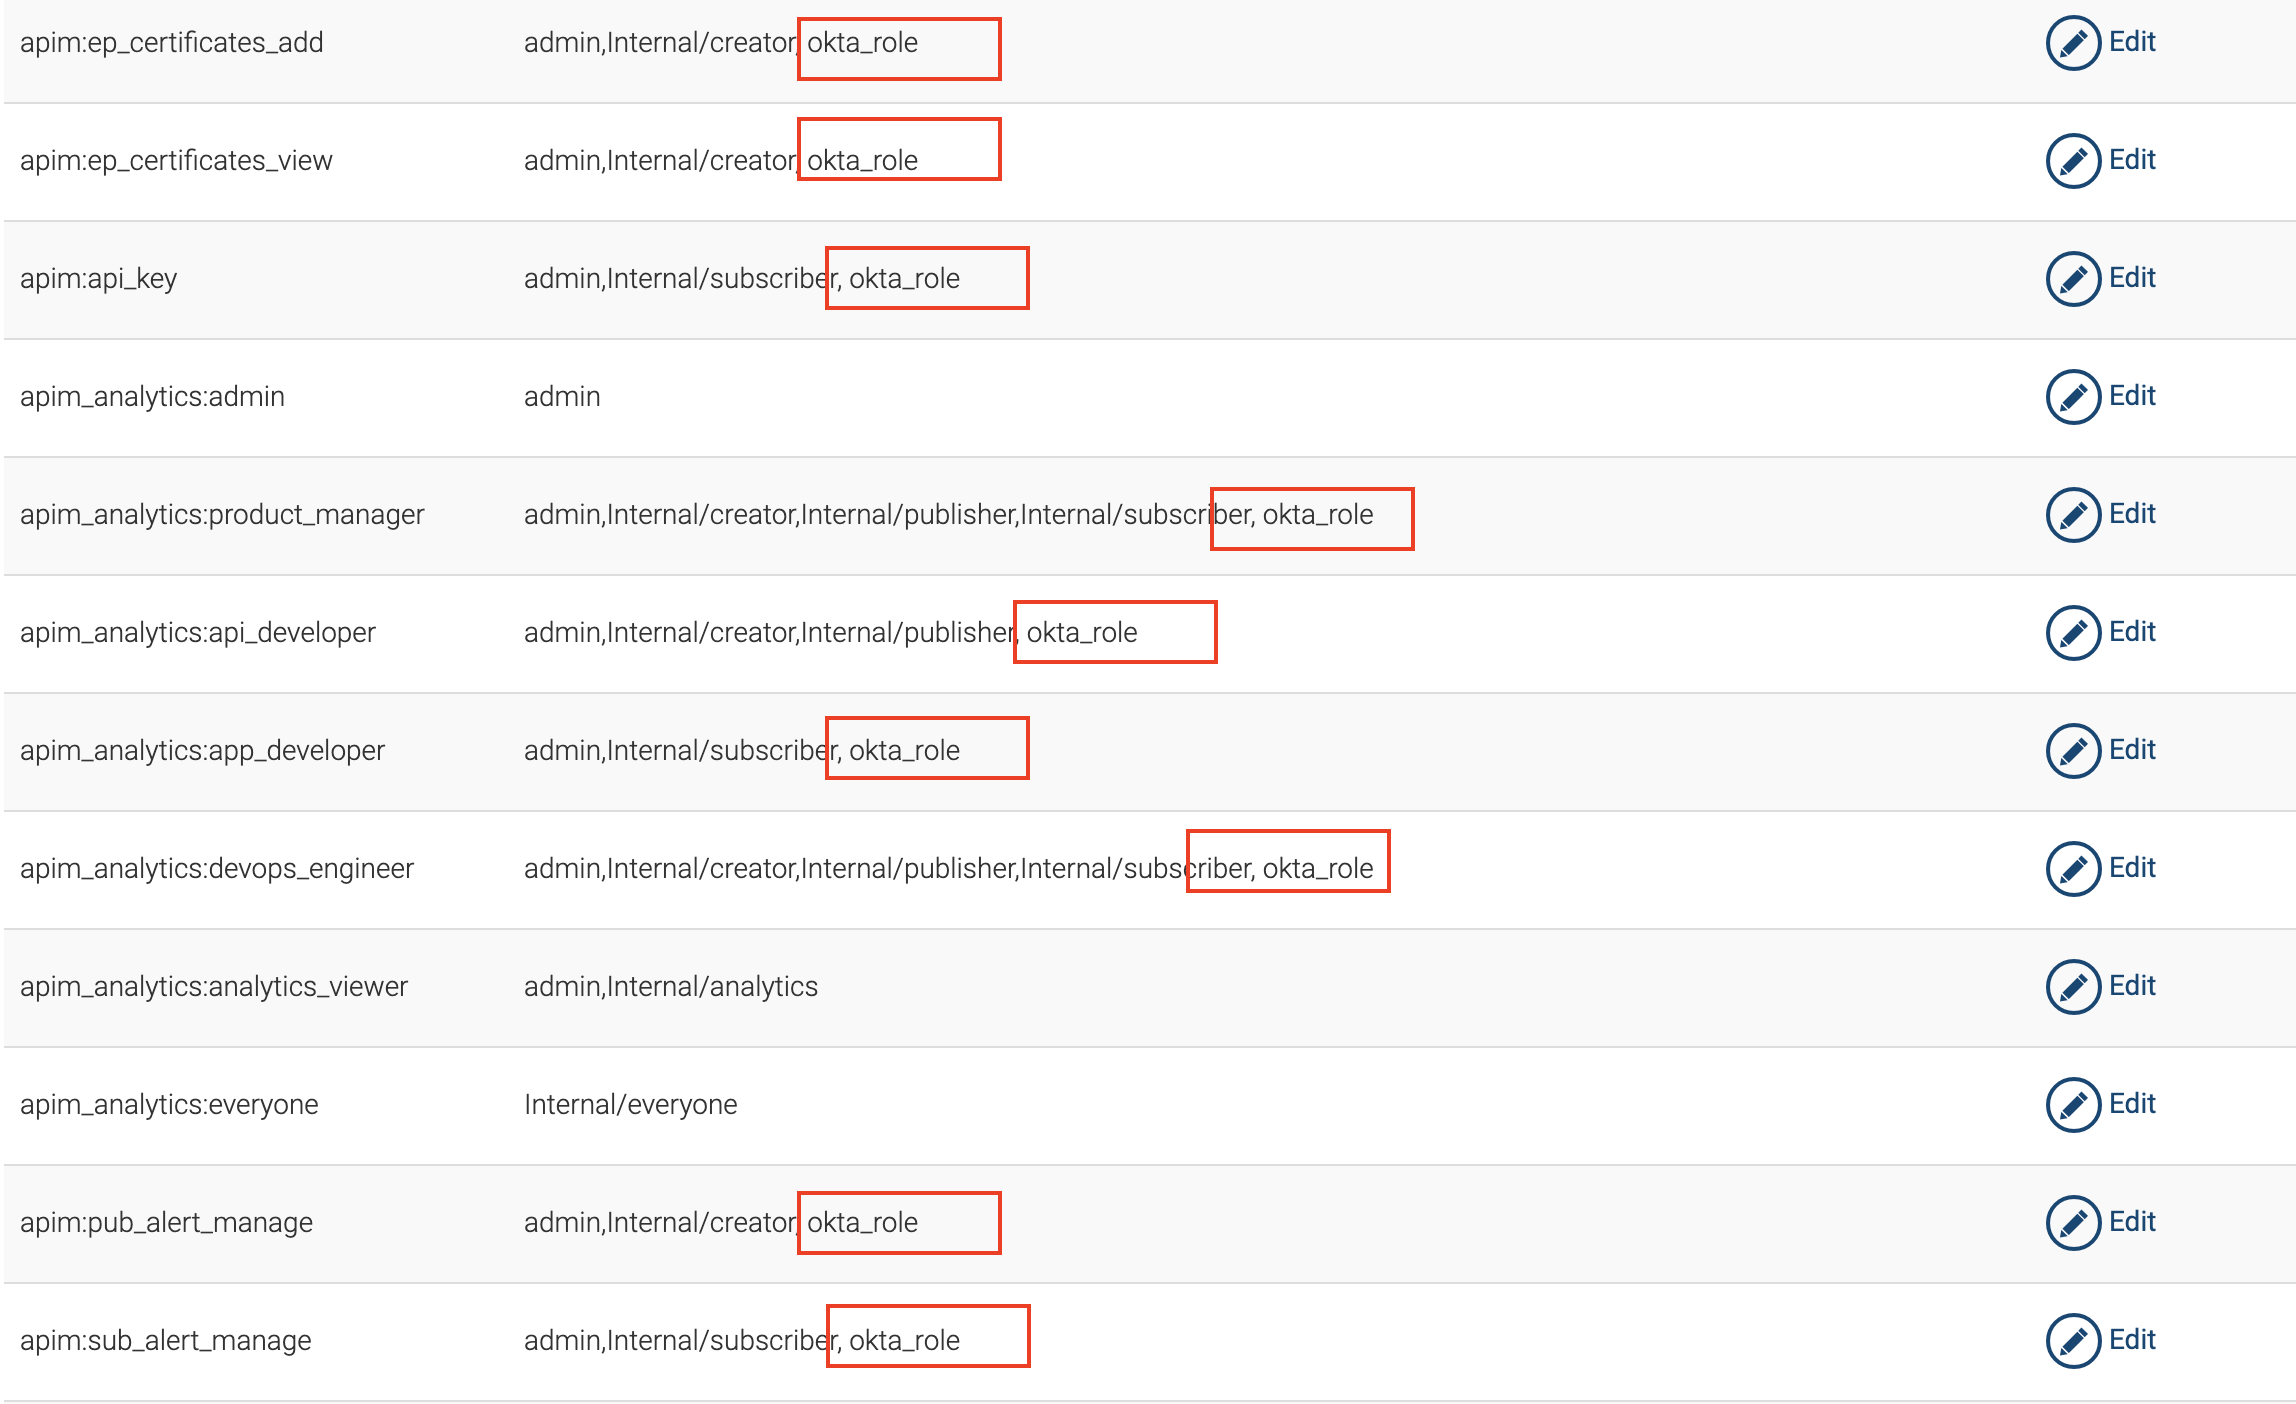
These permissions will allow a user having the
okta_roleto log in to Publisher and Developer Portals.
-
-
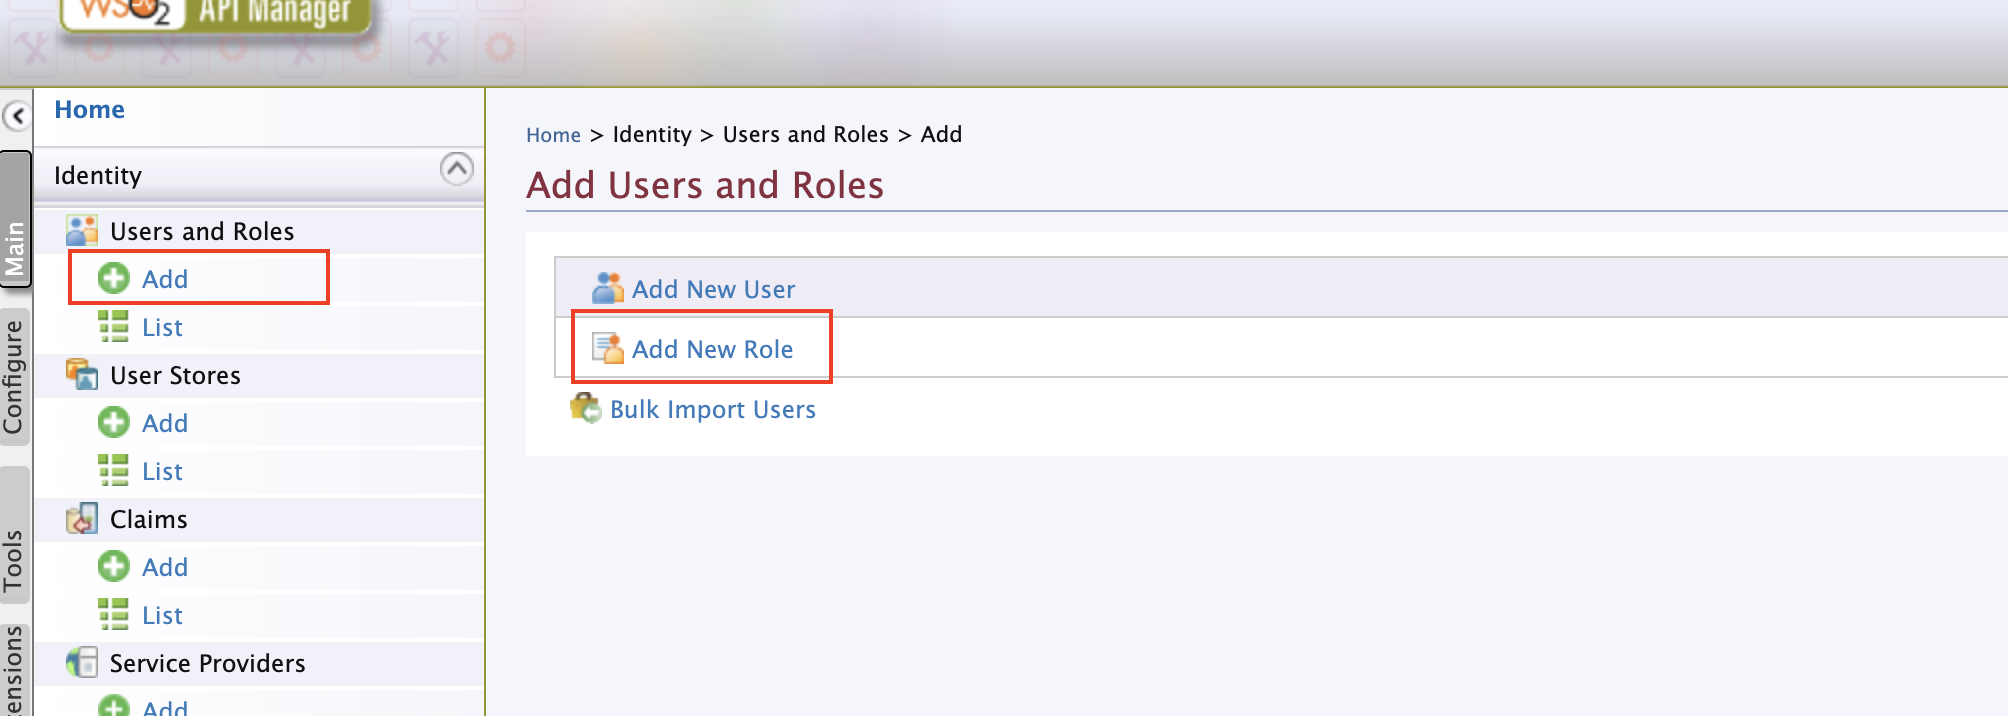
Add an Identity Provider.
-
Sign in to the WSO2 API-M Management Console.
https://localhost:9443/carbon -
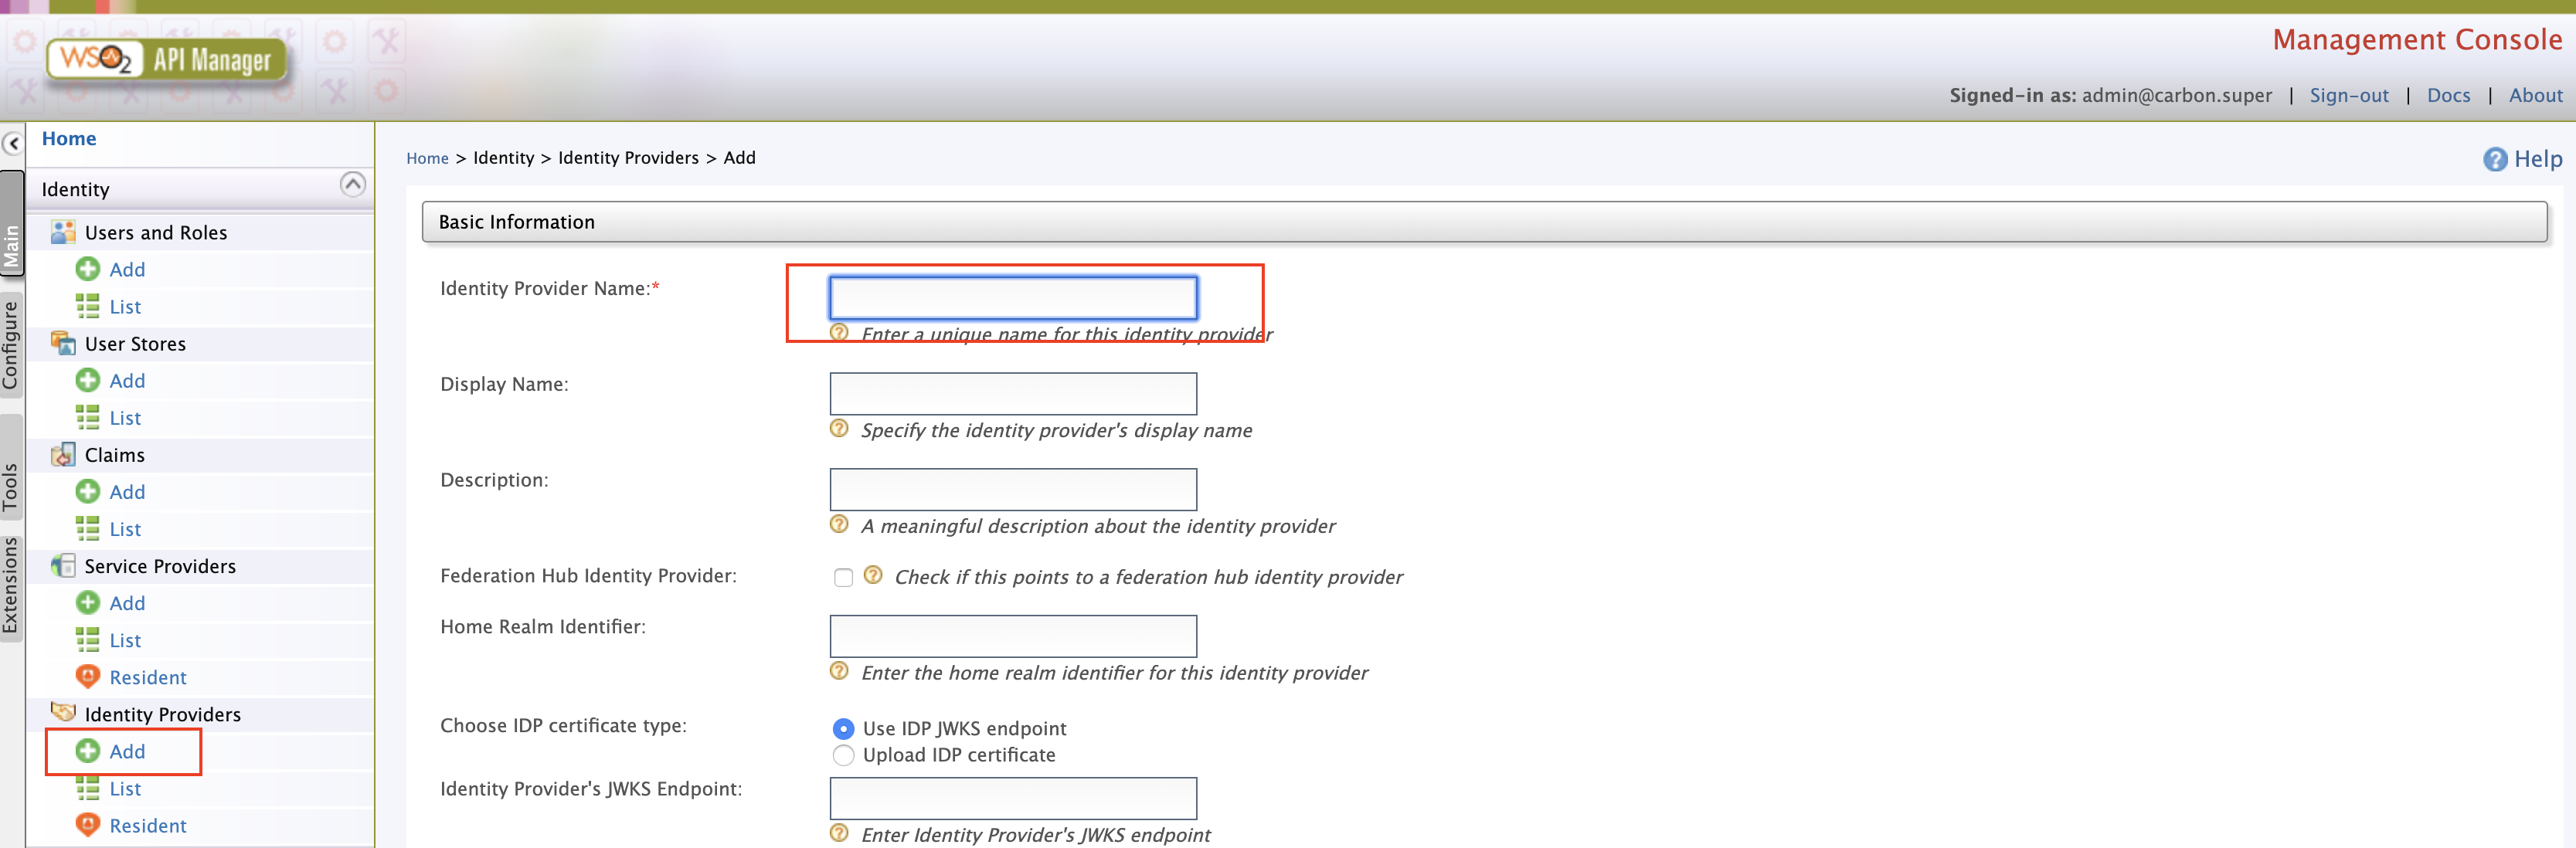
Click Main and then click Add under Identity Providers.
-
Enter the Identity Provider's Name.
-
Expand Federated authenticators -> SAML2 Web SSO Configuration section. Under Select Mode, select Metadata File Configuration. Update the XML file obtained during the Okta setup process Step 1 - 6(a).
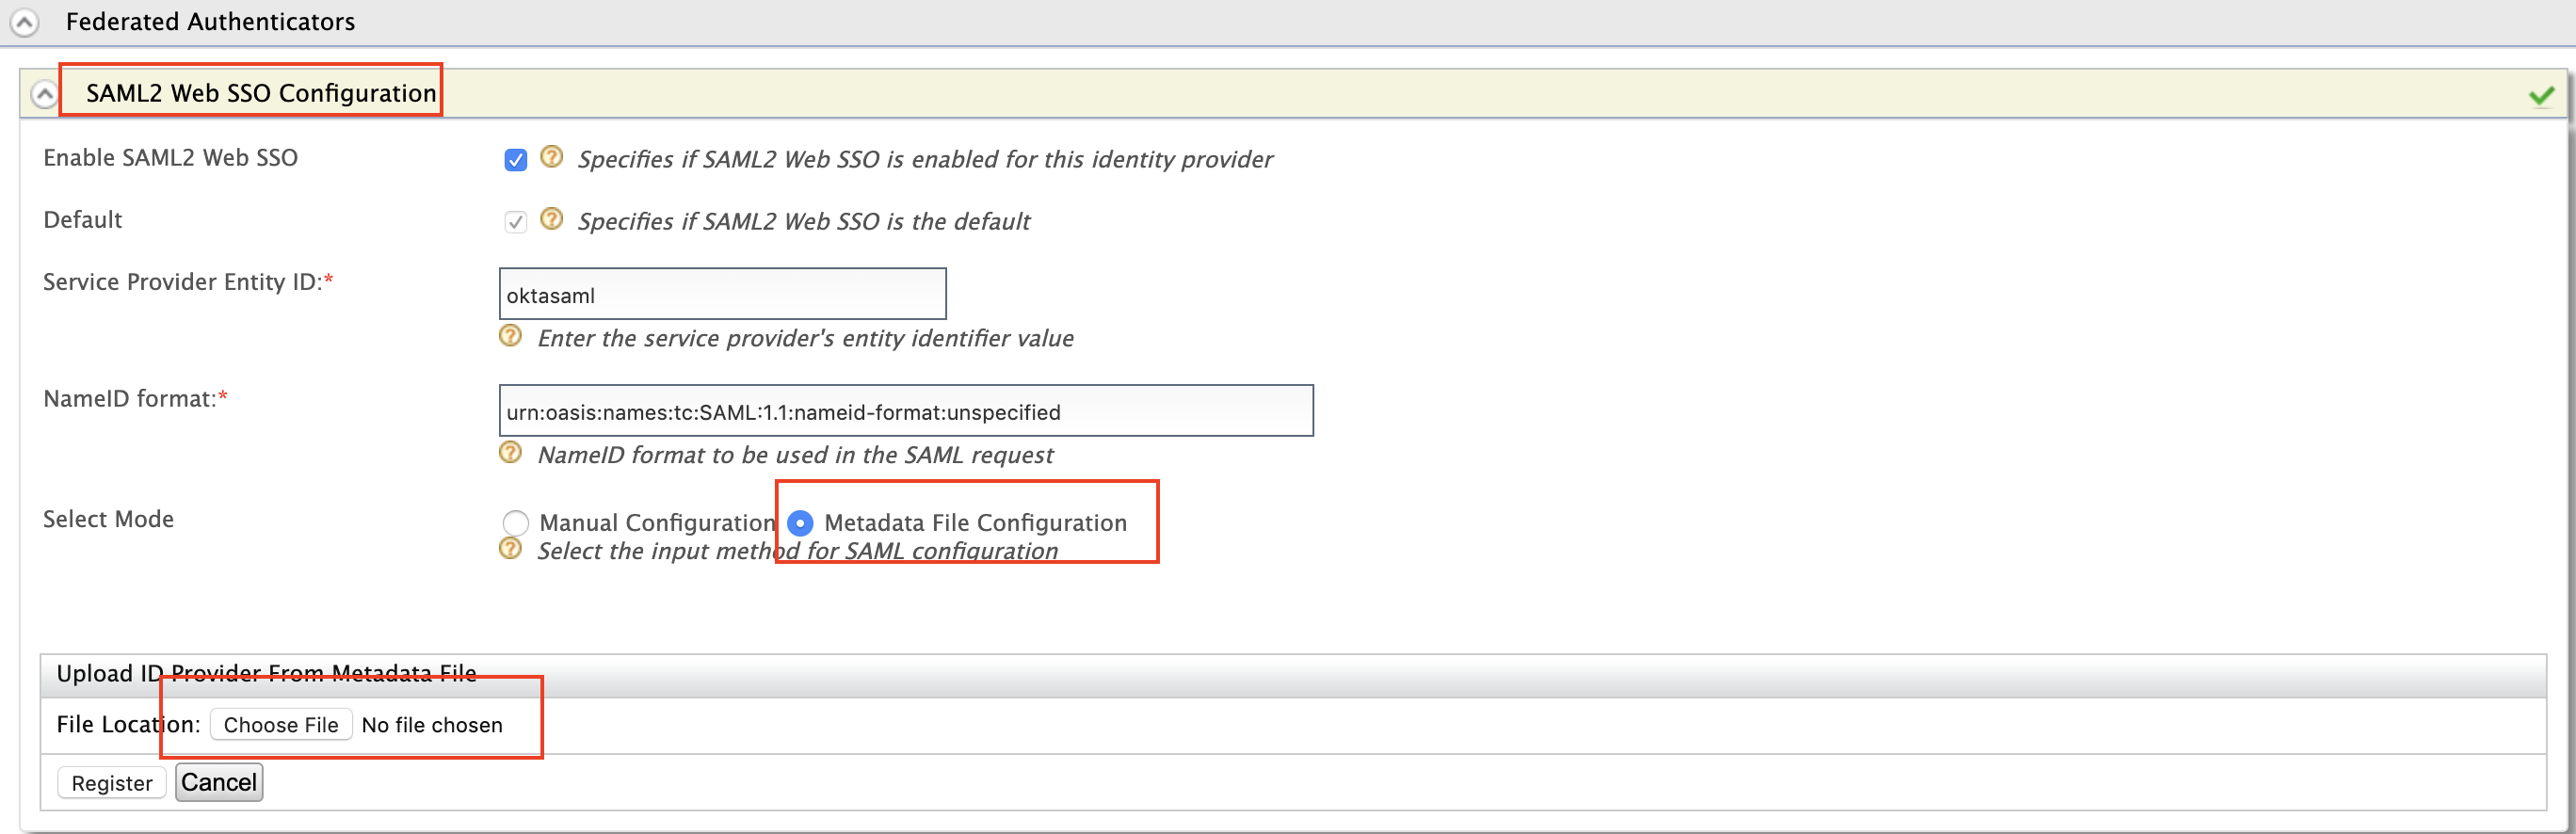
Field Sample value Specifies if SAML2 Web SSO is enabled for this Identity Provider True Service Provider Entity ID Entity ID specified when creating SAML app (e.g., oktasaml) -
-
Expand Claim Configuration -> Basic Claim Configuration. Add the claim configurations as shown in the image below. The
roledrop-down menu contains the roles you configured in Okta (Step 1). Select theIdentity Provider Claim URIsaccording to the configurations in the Okta Developer Console in Step 1.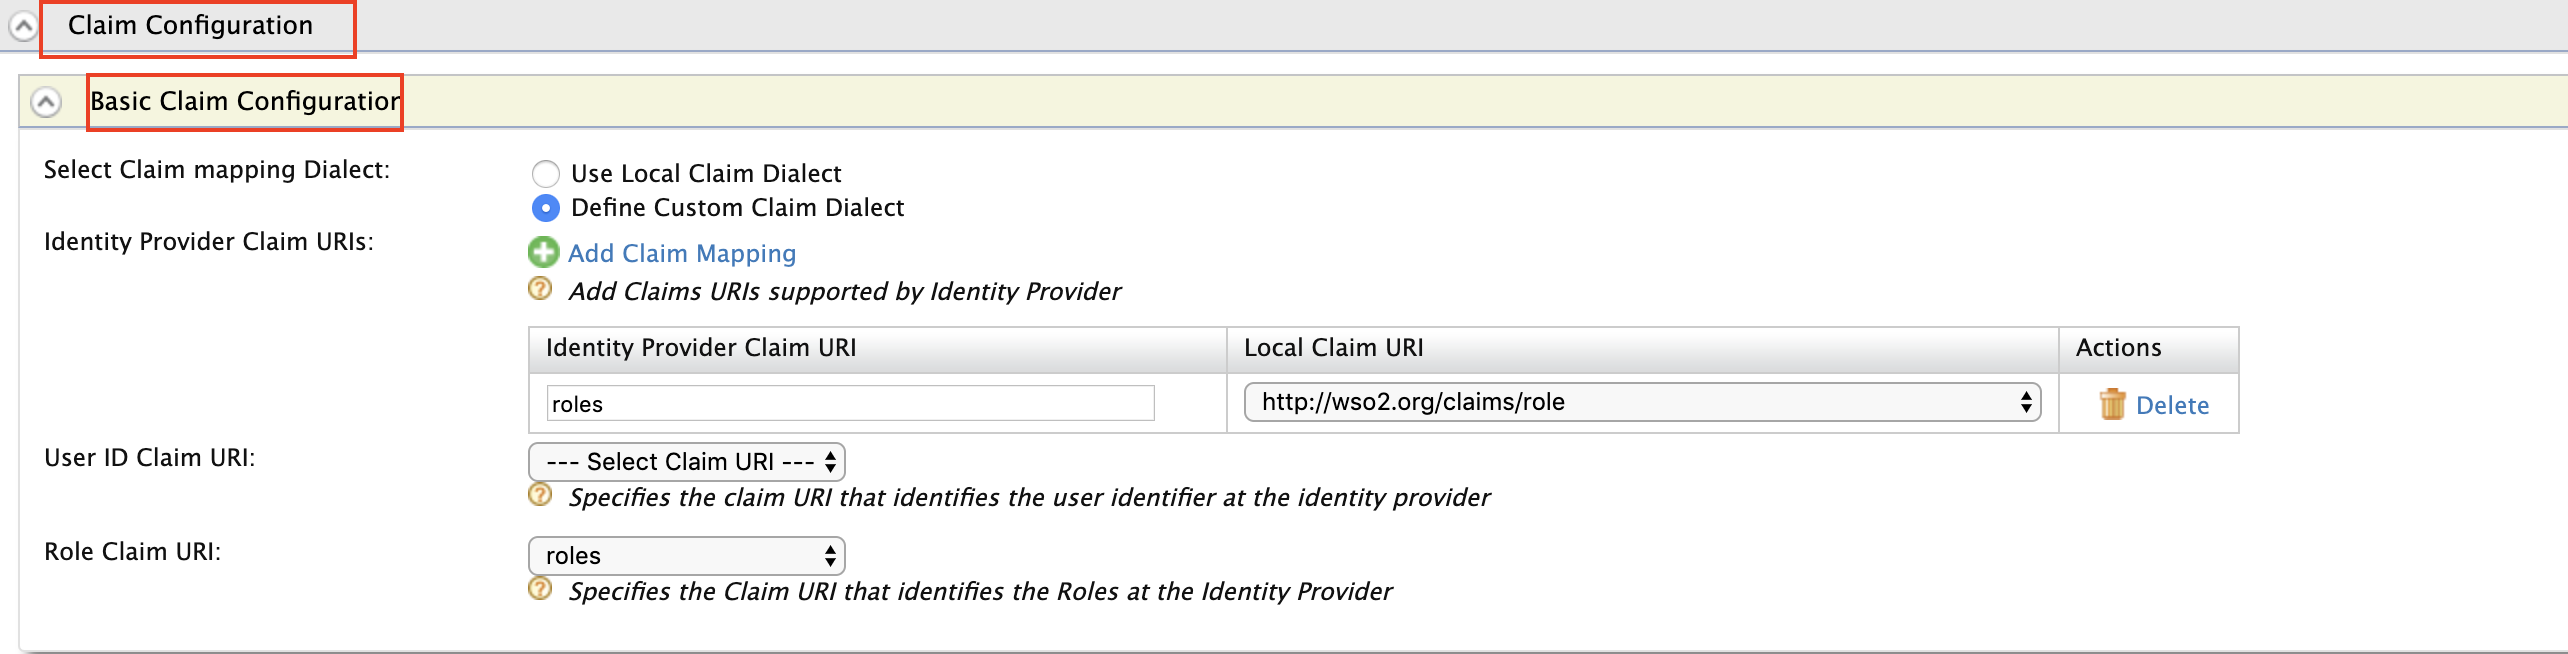
-
Expand Role configuration and add
okta_roleas shown below.You can check if the user logged in has the role
anyand assign the localokta_role.
-
Enable Just-in-Time Provisioning for the user to be saved in the API Manager user store.

-
Select a Service Provider.
-
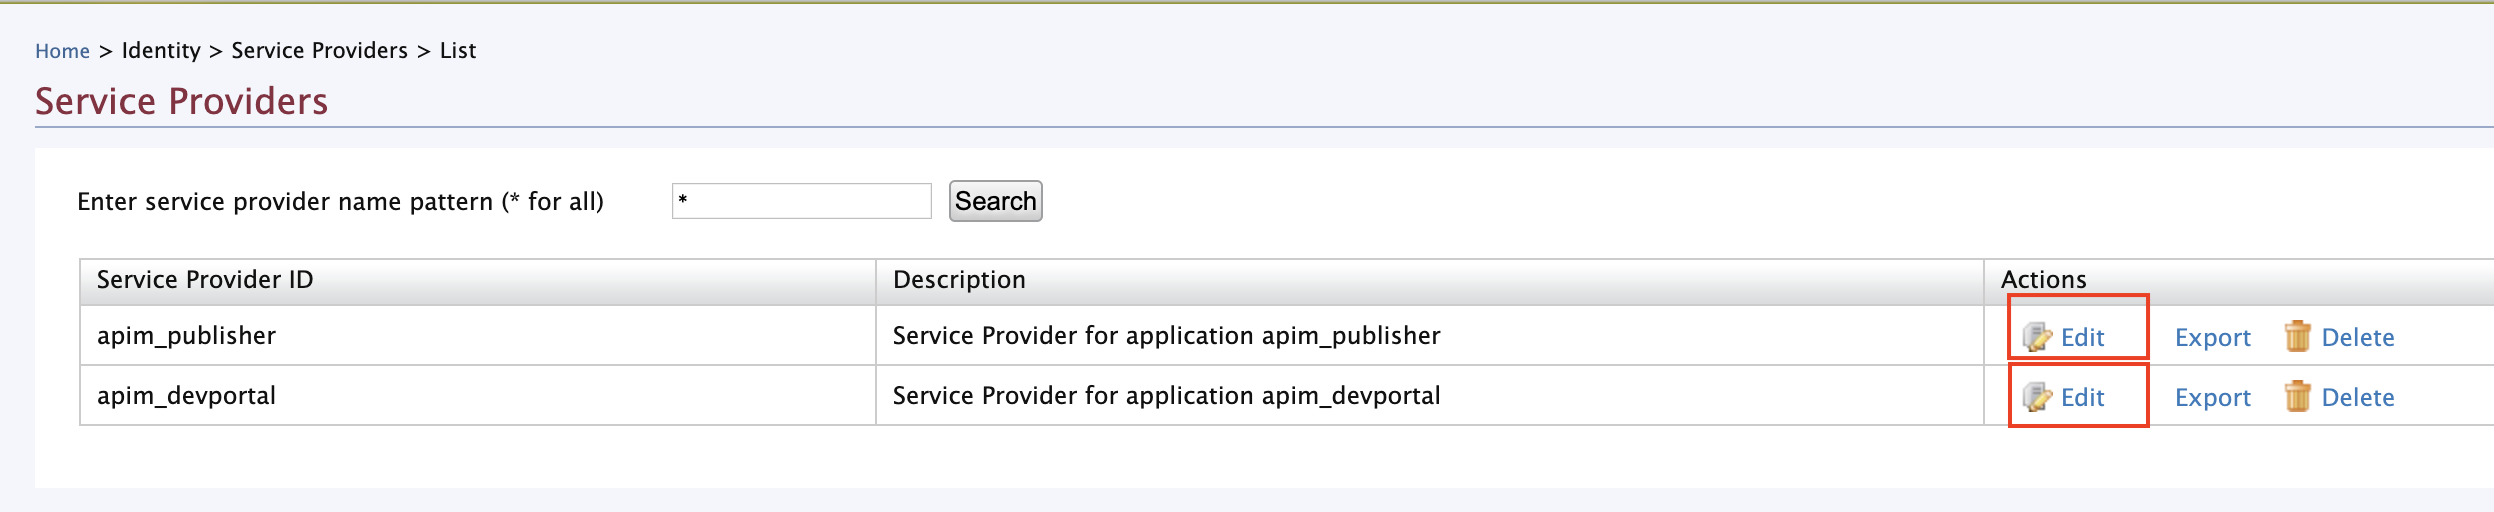
Navigate to Service Providers -> List.
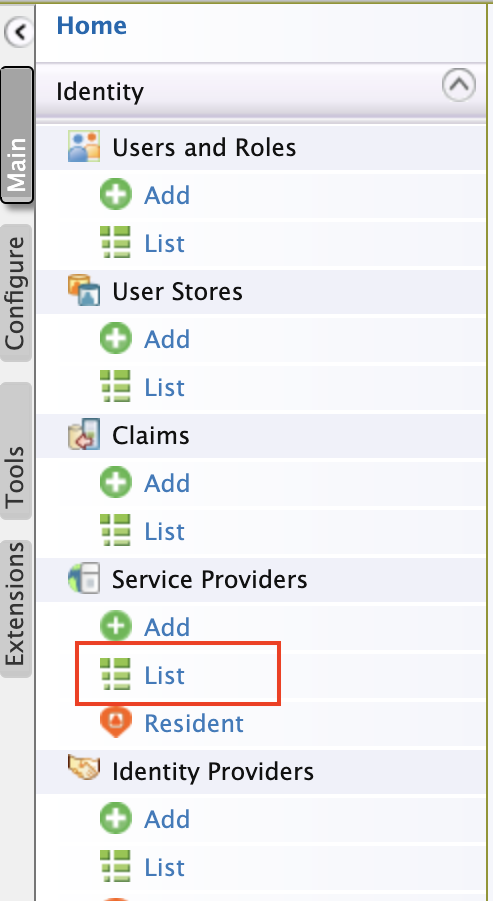
-
There are two service providers created
apim_publisherandapim_devportal. Click Edit forapim_publisher.Warning
You need to have signed in to the Developer Portal and Publisher at least once for the two service providers to appear, as it is created during the first sign in.
-
Expand Local & Outbound Authentication Configuration. Select Federated Authentication and select the name of the Identity Provider you created from the corresponding drop-down menu.

Repeat this step for
apim_devportalas a Service Provider. -
Now you will be able to Sign in to the Publisher and Developer Portal using Okta.
Top