Provisioning Out-of-Band OAuth2 Clients
When application keys are generated, an OAuth2 client is created underneath. The consumer key and consumer secret that appears under a key type belong to the OAuth2 client. There can be situations where an OAuth2 client is created elsewhere but needs to be associated with an application in the Developer Portal. These types of OAuth2 clients are referred to as Out-of-Band OAuth2 Clients.
For instance, in an organization where WSO2 Identity Server (WSO2 IS) is used as the authoritative server, OAuth2 clients may only be created through the Identity Server. Similarly, when you use a third-party OAuth2 provider, you may also want to use the previously created OAuth2 clients with WSO2 API Manager. In such a scenario, you need to provision the OAuth2 clients that you created outside the Developer Portal into WSO2 API Manager (WSO2 API-M) by associating the OAuth2 client with an application in the Developer Portal. After the mapping is completed, the third-party OAuth2 client will work in a similar manner to an OAuth2 client that was created via the Developer Portal.
Follow the instructions below to provision an OAuth2 client that was created outside the Developer Portal into the WSO2 API-M.
In this example, let's use WSO2 IS configured as a third-party Key Manager. An OAuth2 client will be created in its Management Console and will be provisioned into WSO2 API-M by associating it with an application in the Developer Portal.
Step 1 - Configure a third-party key manager
Follow the steps in Configure WSO2 IS as a Key Manager to setup WSO2 IS as a third-party key manager.
Note
You can use any Key Manager mentioned under Multiple Third-party Key Manager support and configure it as a third-party key manager.
In this example, it will be assumed that WSO2 IS and WSO2 API-M are up and running in https://<Server Host>:9444 and https://<Server Host>:9443 respectively.
Step 2 - Create an external OAuth2 client
-
Sign in to the WSO2 IS Management Console (
https://<Server Host>:9444/carbon) -
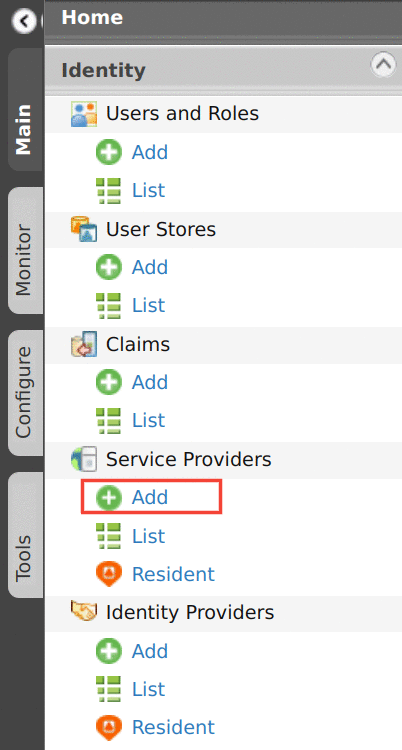
Click Main → Service Providers → Add.
-
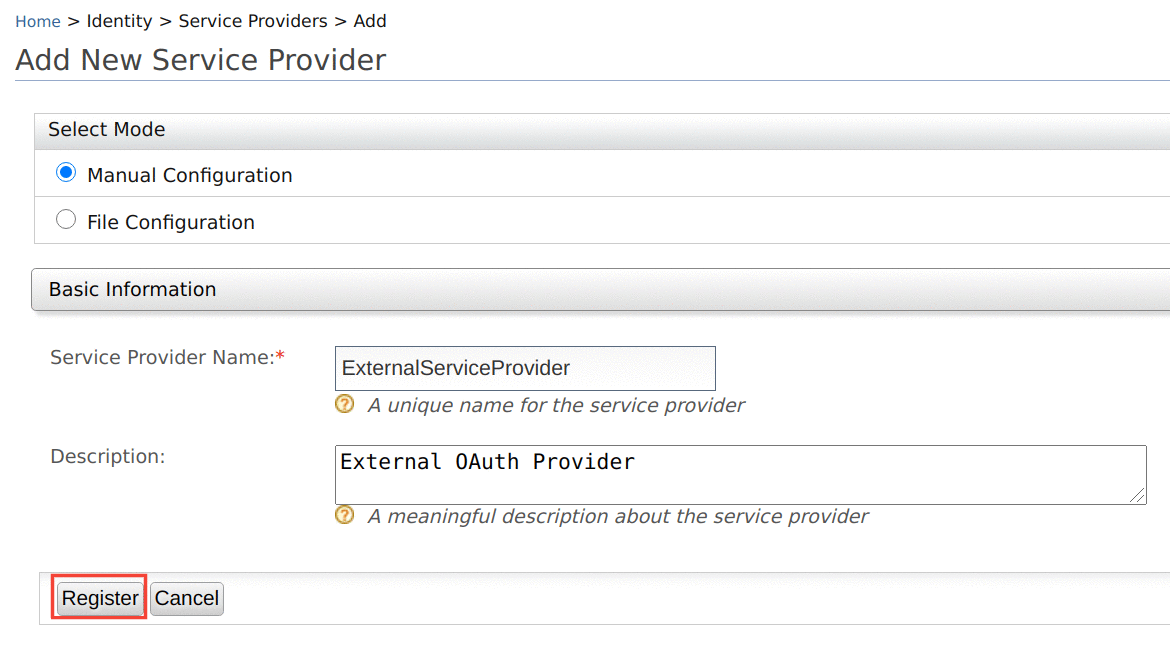
Enter the name of the service provider and click Register.
-
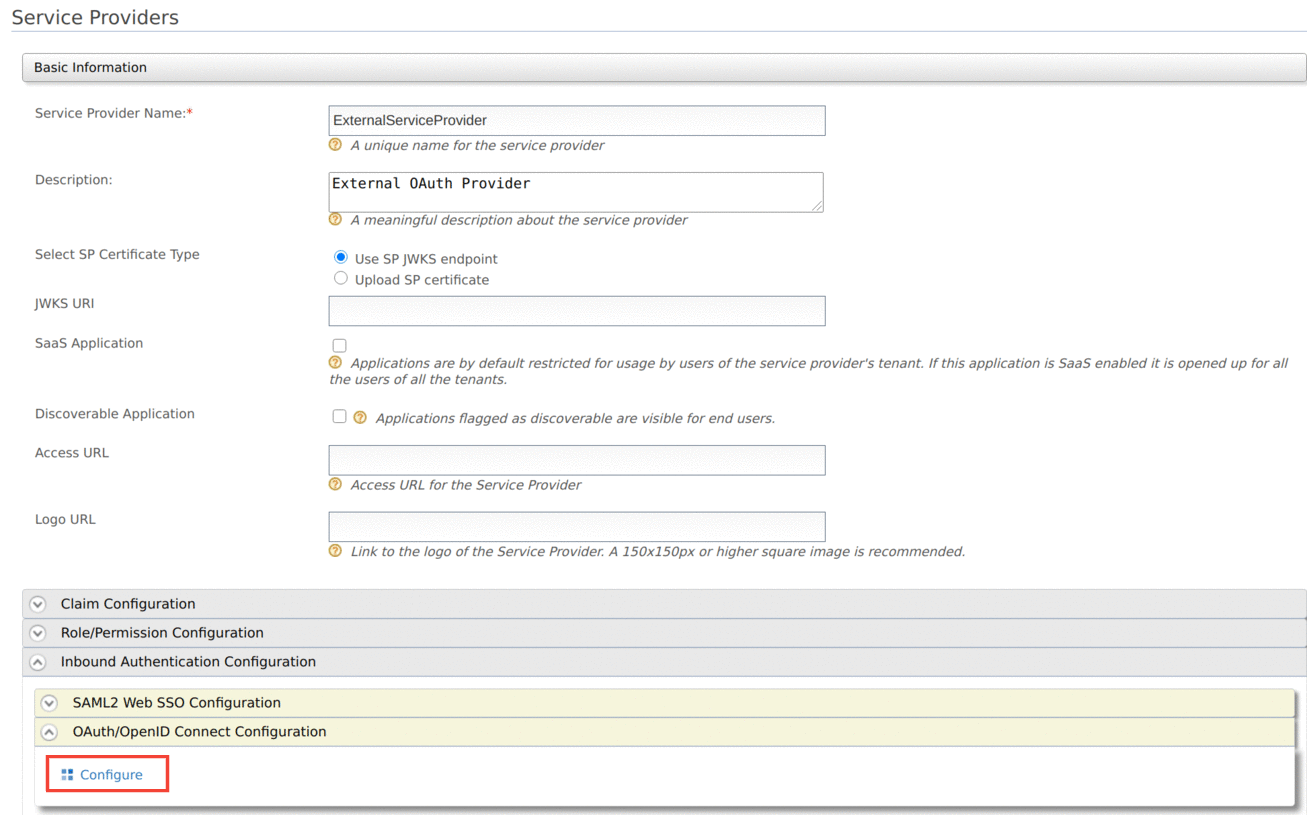
Click Inbound Authentication Configuration → OAuth/OpenID Connect Configuration → Configure to add a new OAuth2 client.
-
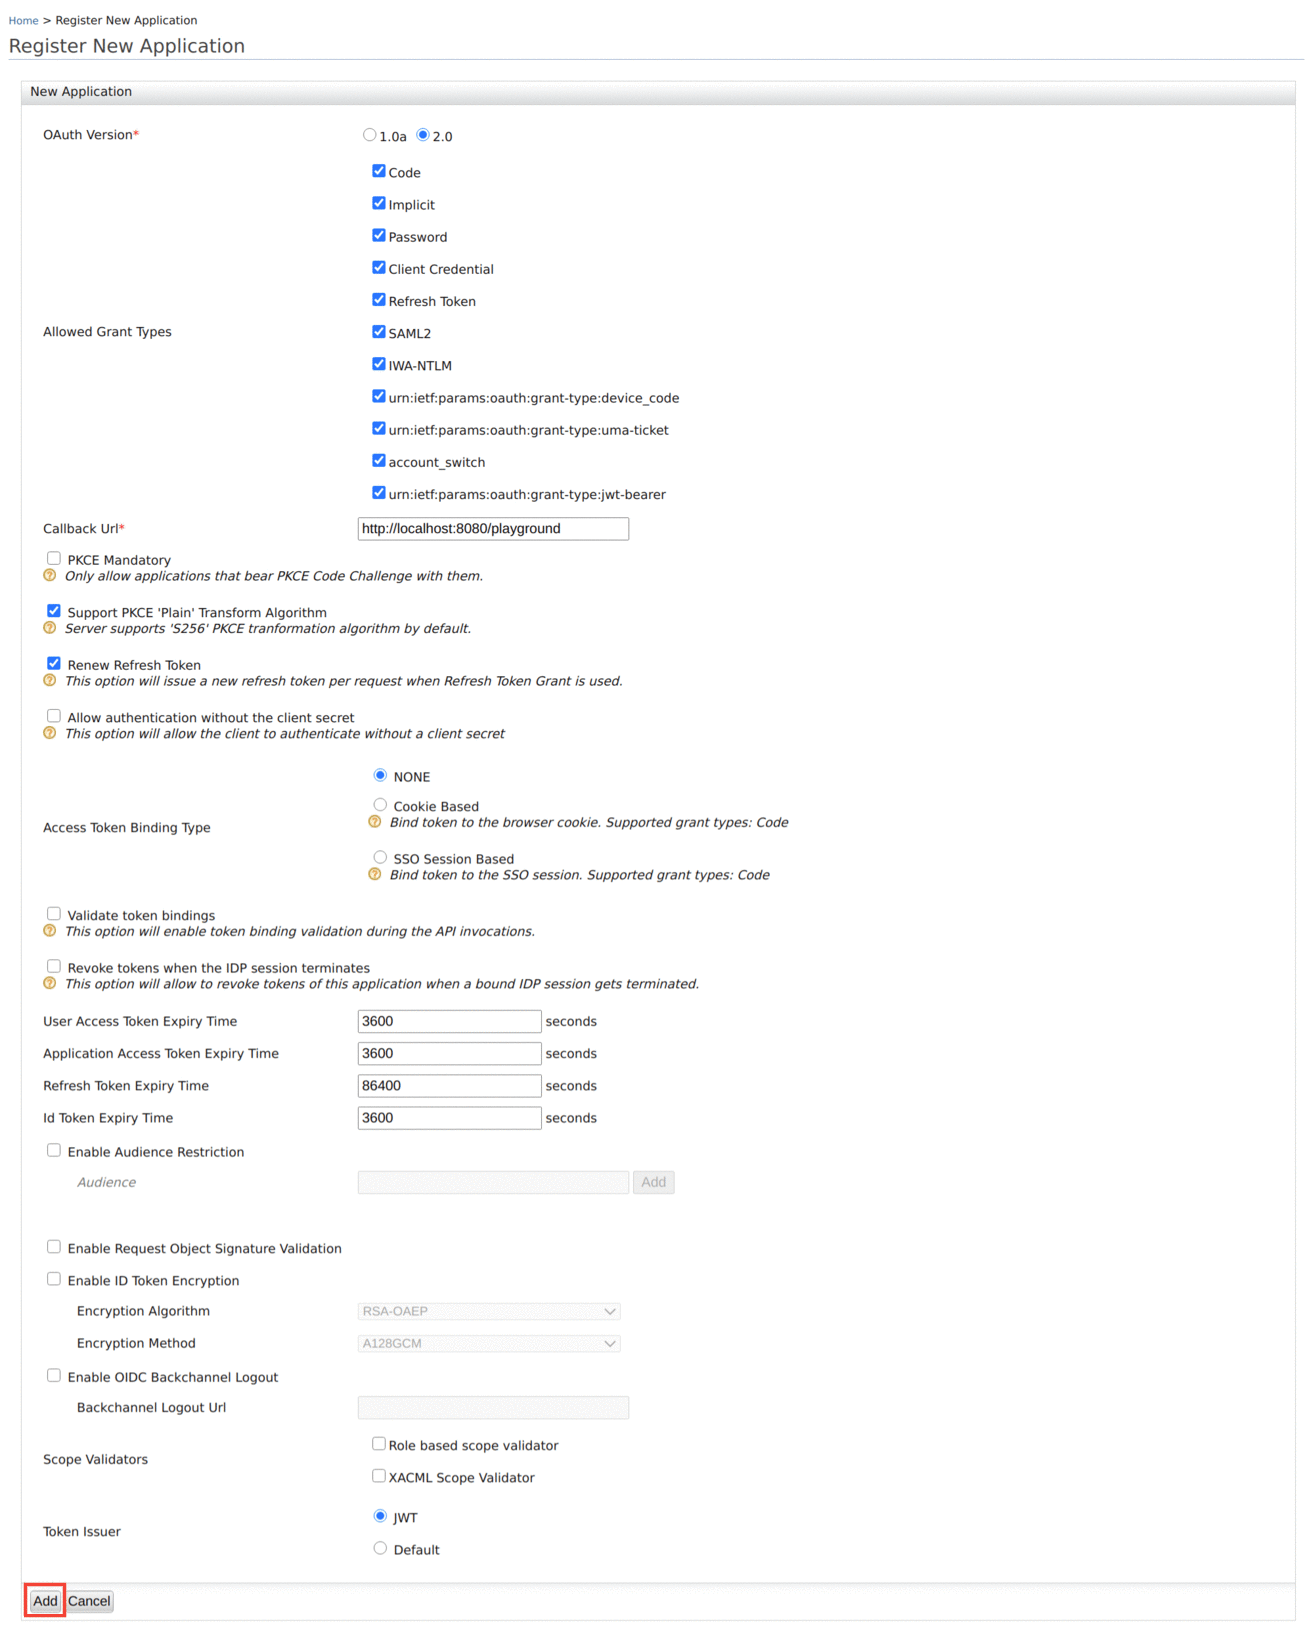
Provide a Callback Url and set the Token Issuer as
JWT, then click Add.If you do not have a Callback Url, you can clear the Code and Implicit authorization grant types and add the OAuth2 client.
Now you have successfully created an OAuth2 client and generated a consumer key and consumer secret for it.
Step 3 - Provision the out-of-band OAuth2 client
Follow the instructions below to provision the out-of-band OAuth2 client that you created in the previous step in WSO2 API Manager.
-
Stop the WSO2 API Manager server if it is already running.
-
Enable the option to provide out-of-band keys.
Open
<API-M_HOME>/repository/conf/deployment.tomlfile in a text editor and add the following configuration under theapim.devportalconfiguration.[apim.devportal] enable_key_provisioning = trueNote
- The ability to provision Out-of-Band Auth client will only be available for the applications that you created after applying this configuration.
- If you want to disable the validation of the provisioned applications, add the following config under the
apim.key_managerconfiguration to<API-M_HOME>/repository/conf/deployment.tomlfile.[apim.key_manager] enable_provisioned_app_validation = false
-
Sign in to the Developer Portal.
https://<Server Host>:9443/devportal -
Create an application.
For more information, see Create Application.
-
Click on the respective application to view the credential details.
-
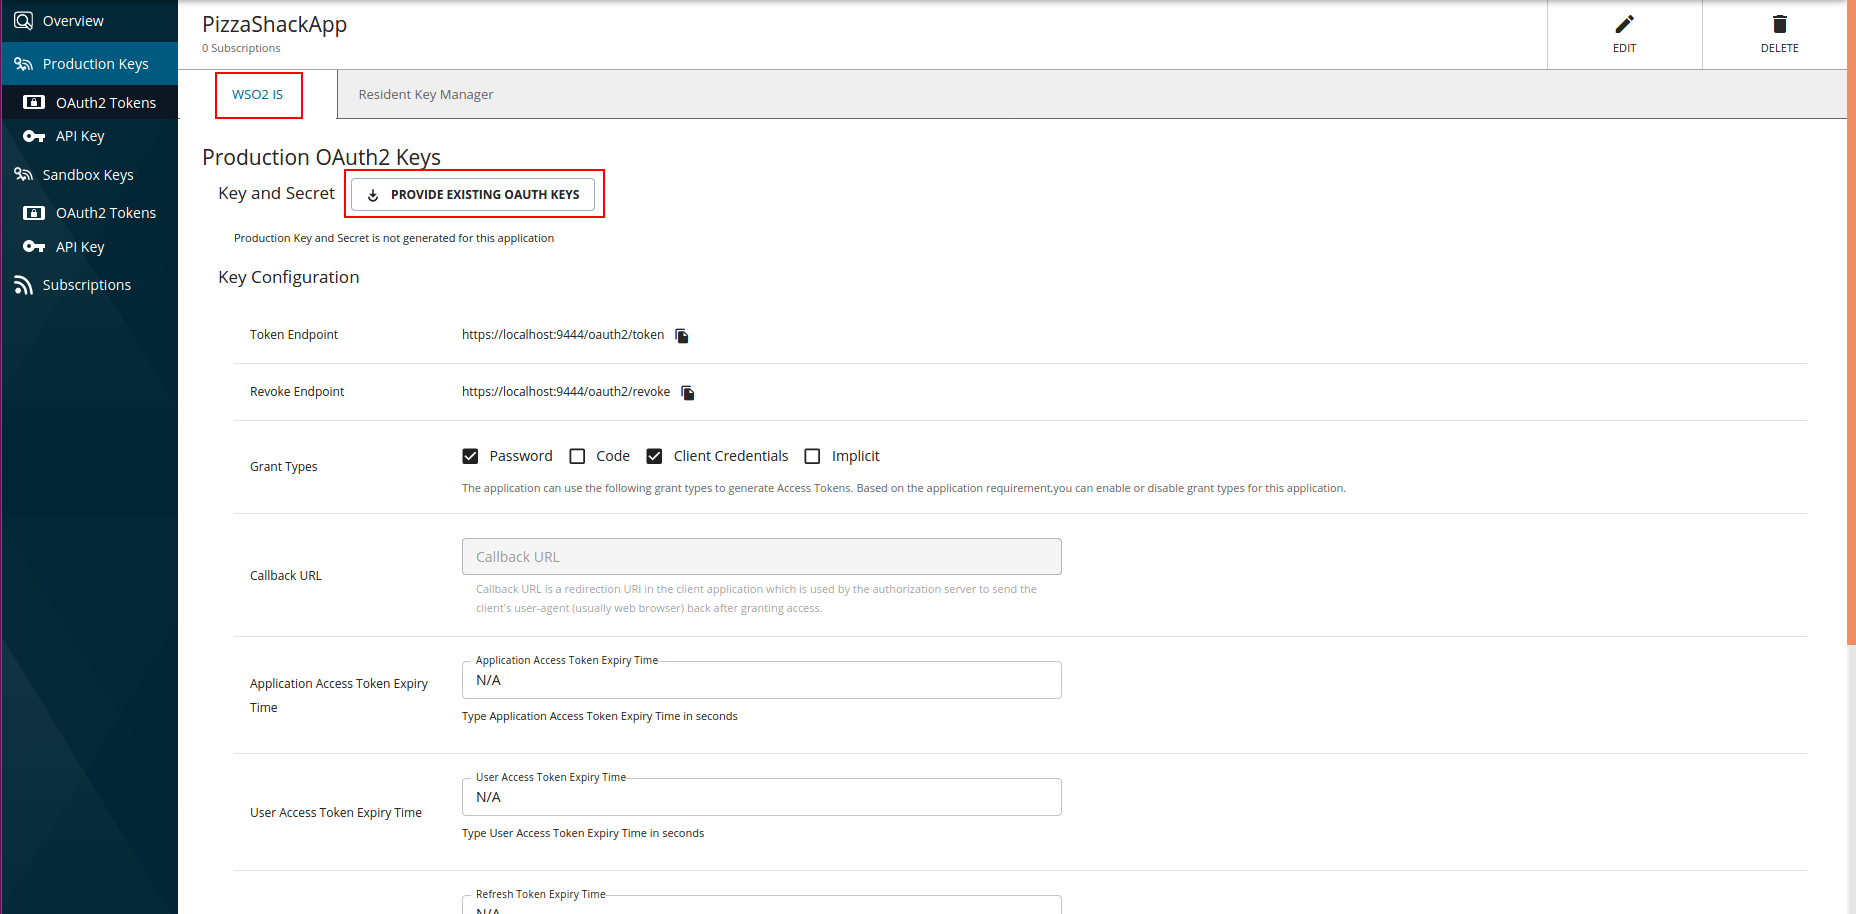
Click OAuth2 Tokens under Production Keys tab and navigate to the respective key manager tab (here it is
IS).The PROVIDE EXISTING OAUTH KEYS button appears under the Production OAuth2 Keys section.
Note
Out-of-band OAuth2 client can be provisioned either for production or sandbox environment. If you wish to generate keys for your sandbox, you can follow the same instructions in the Sandbox Keys tab.
-
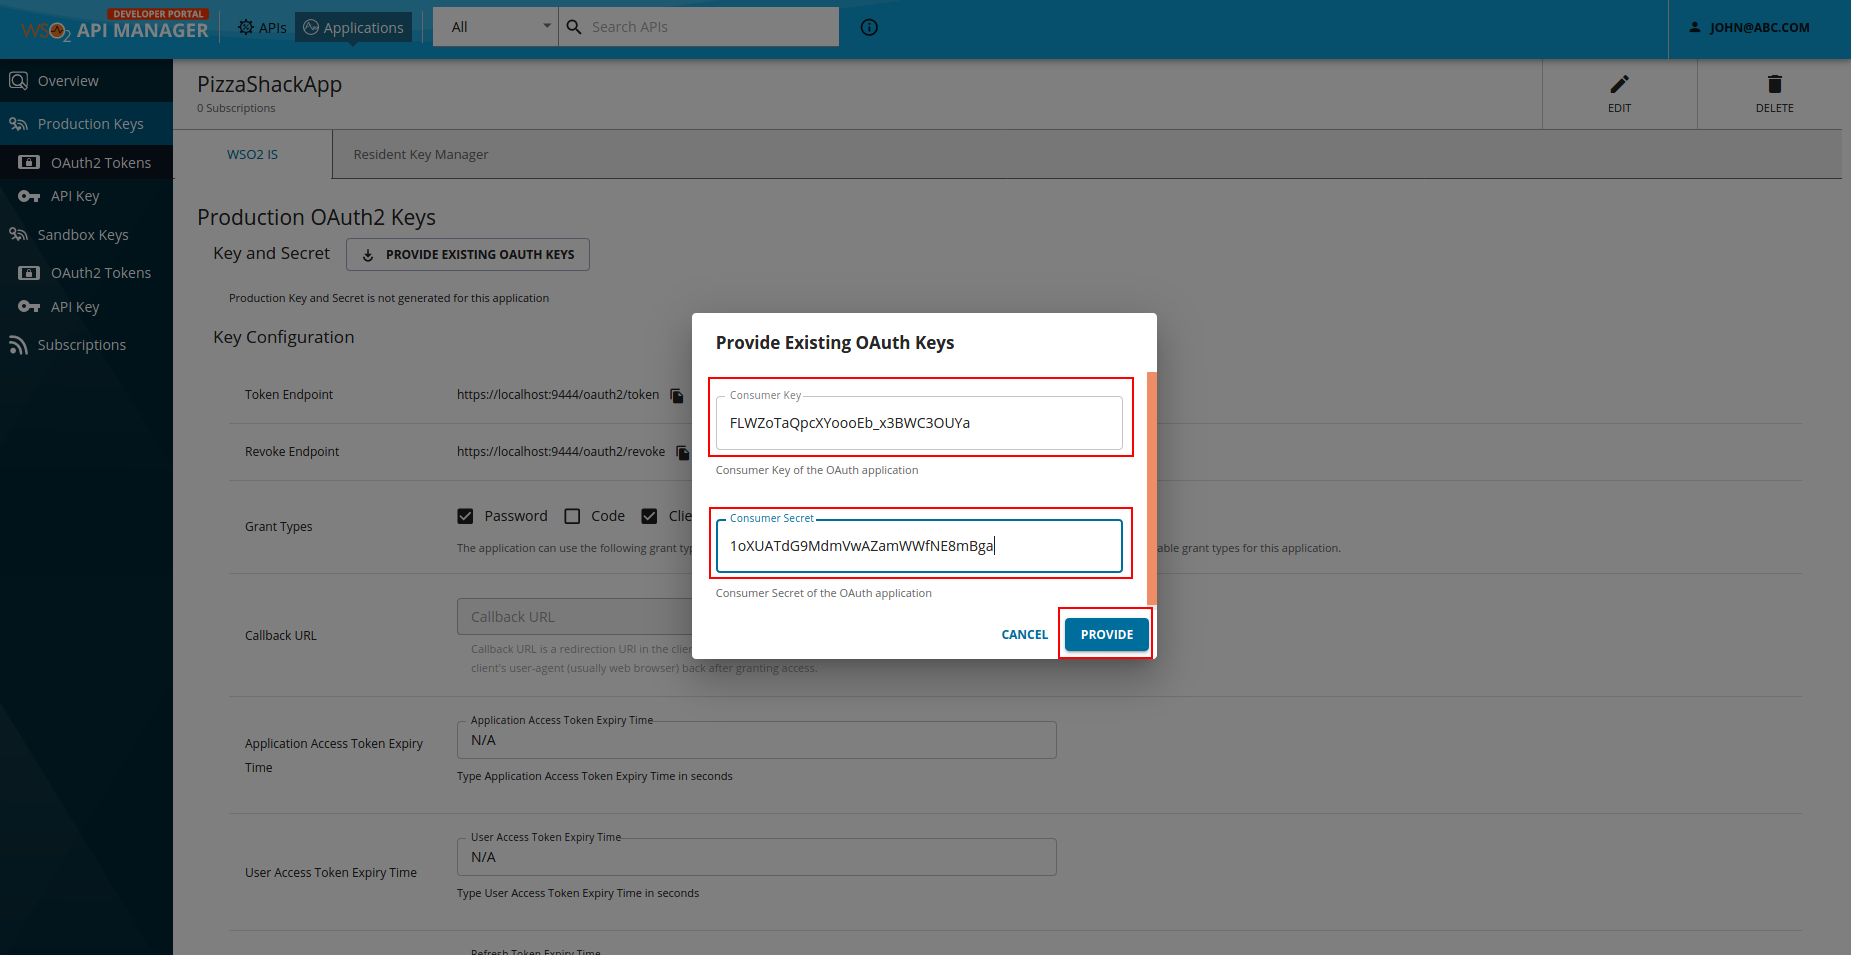
Paste the consumer key and consumer secret pair, which you derived in Step 2 - (5) Creating an external OAuth client.
-
Click Provide.
Now you have successfully mapped an out-of-band OAuth client to an application.
Step 4 - Invoke an API
-
Subscribe to an API via this application.
-
Obtain an access token for it.
You cannot obtain an access token from the Developer Portal for the provisioned applications. You need to use the command line (cURL). For more information, see Obtain Access Token.
