Building a CI/CD Pipeline for APIs Using WSO2 API Controller
In the modern digital-era, many organizations adopt digital transformation technologies to keep up with the changes. APIs are one of the basic building blocks used in a digitally-driven organization. When the number of APIs managed by the organization grows, they need to have an automated process to handle the rapid API development process. Having a proper continuous integration and continuous deployment (CI/CD) process would give an added advantage to your organization.
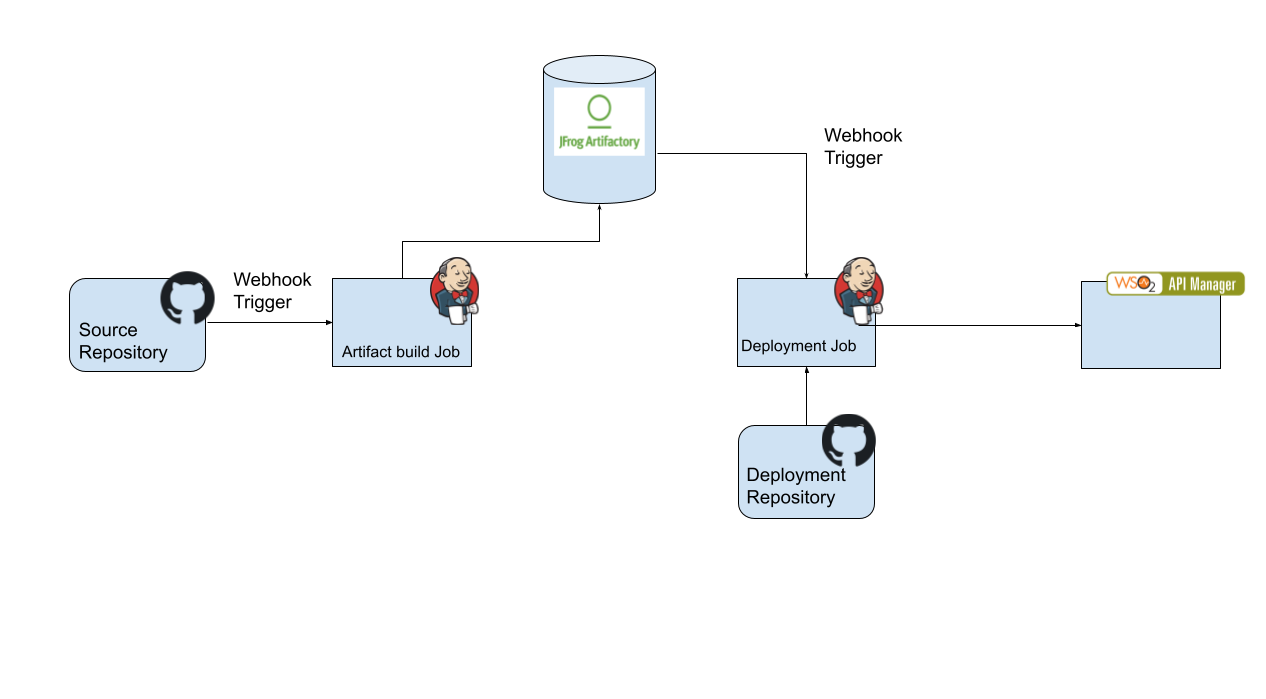
In this section, you will learn how to build an automated process using the WSO2 API Controller (apictl) with WSO2 API Manager (WSO2 API-M). You will see how a solution is built using a version control system (GitHub), artifact repository(JFrog Artifactory) and CI/CD Tool (Jenkins).
Setting up the environment
Step 1 - Setup Jenkins
Before you begin, you need to set up the Jenkins server on a remote machine that has public access. To use webhooks in GitHub and Artifactory repository to trigger Jenkins jobs, you need a publicly accessible Jenkins server URL. If you are trying this on a local machine, you may have to use a tool such as socketxp to create a tunnel.
In this section, the instructions are tested out on an Ubuntu server setup on https://cloud.google.com/compute .
Log in to the server and install the following.
-
Install jq using the command given below.
sudo apt-get install jq -
Install the apictl tool. Extract to a location that is henceforth referred to as
CTL_HOME. -
Install Java.
-
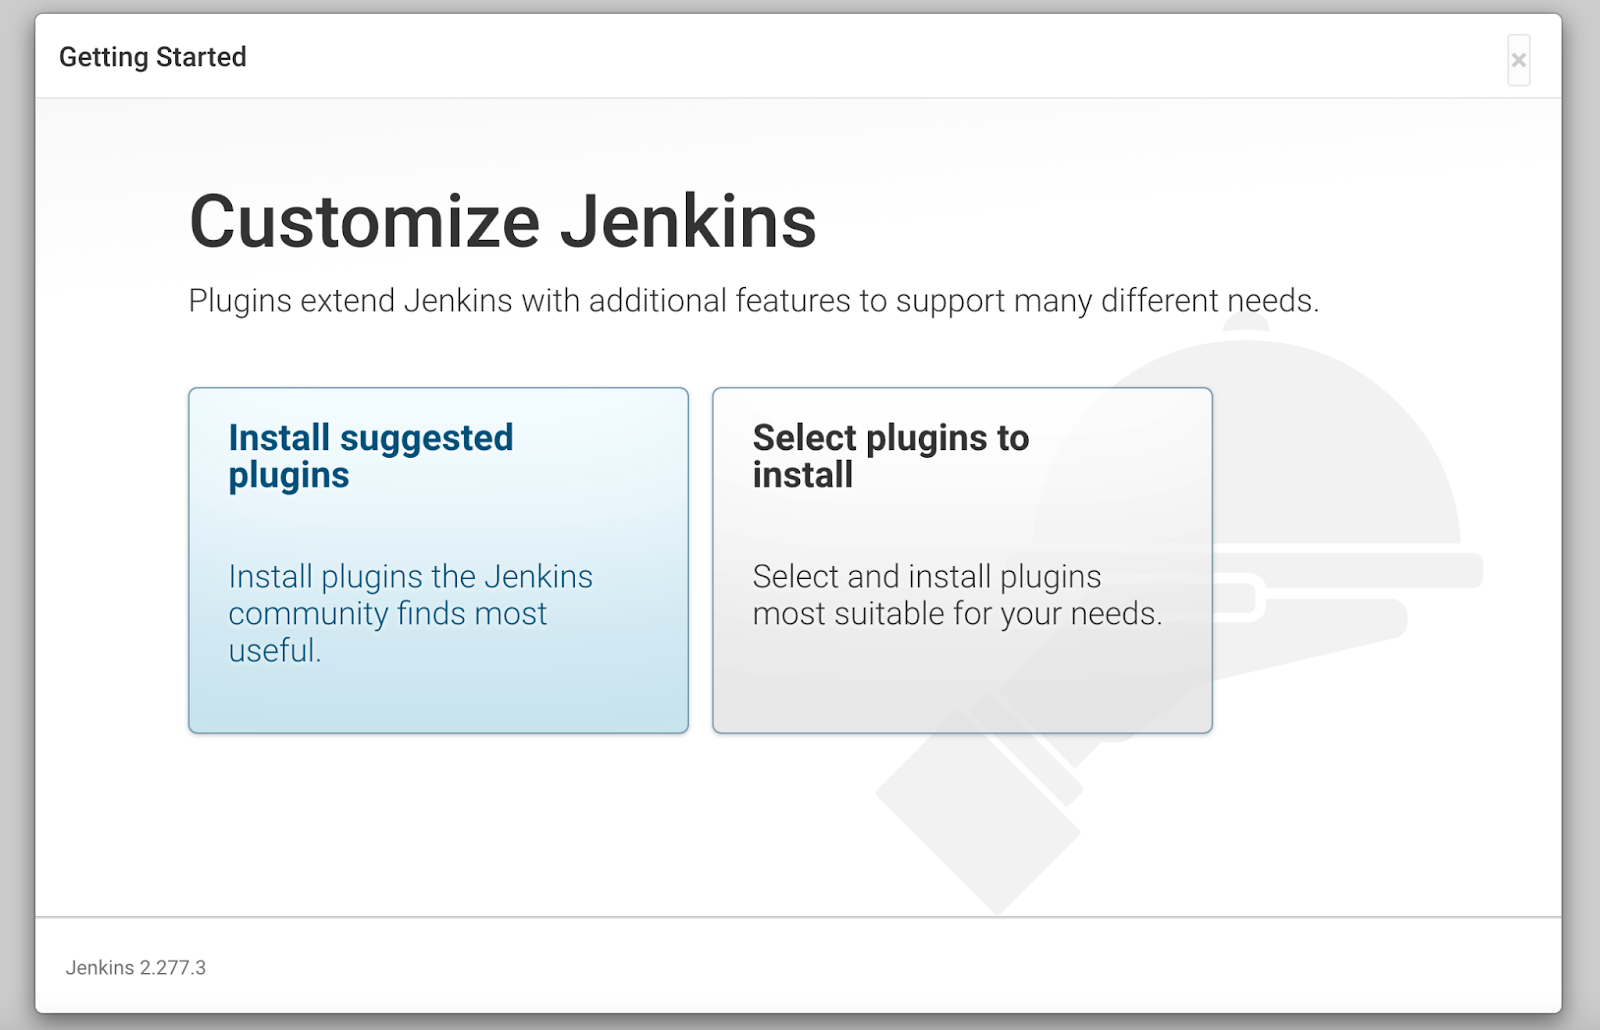
Setup the Jenkins server following the instructions given here. You can choose to install the suggested default plugins. This will install the commonly-used plugins.
-
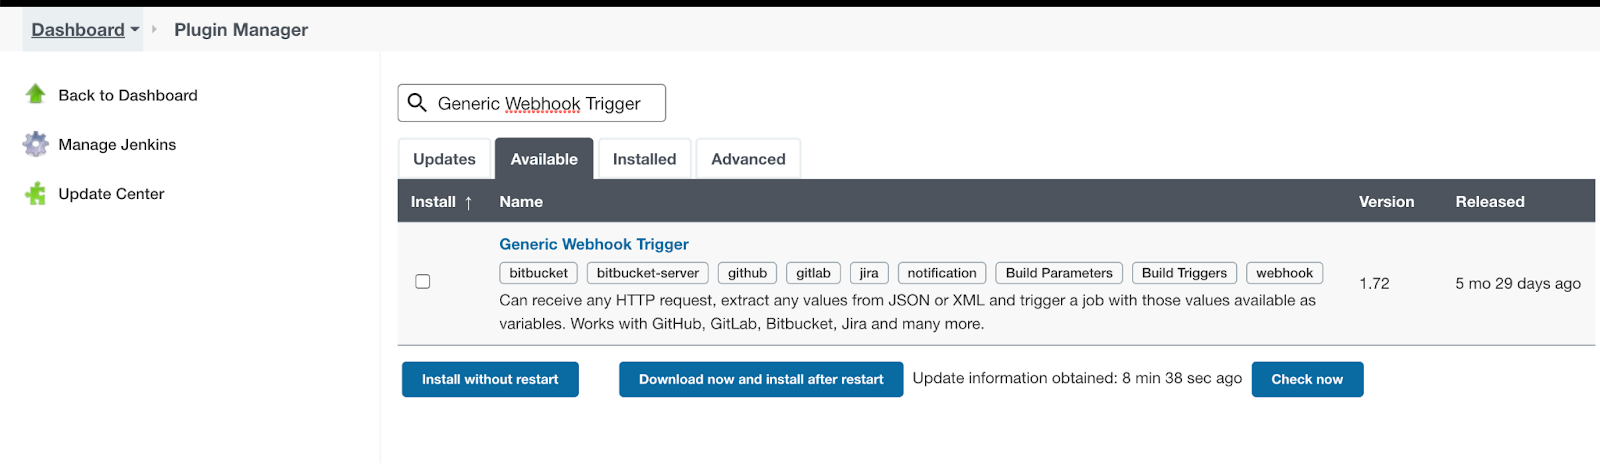
Register a webhook in the JForg Artifact repository to notify changes. To capture these events and trigger a Jenkins job, install a generic-webhook-trigger plugin.
-
Configure apictl home as an environment variable. Go to the Manage Jenkins section and select Configure System.
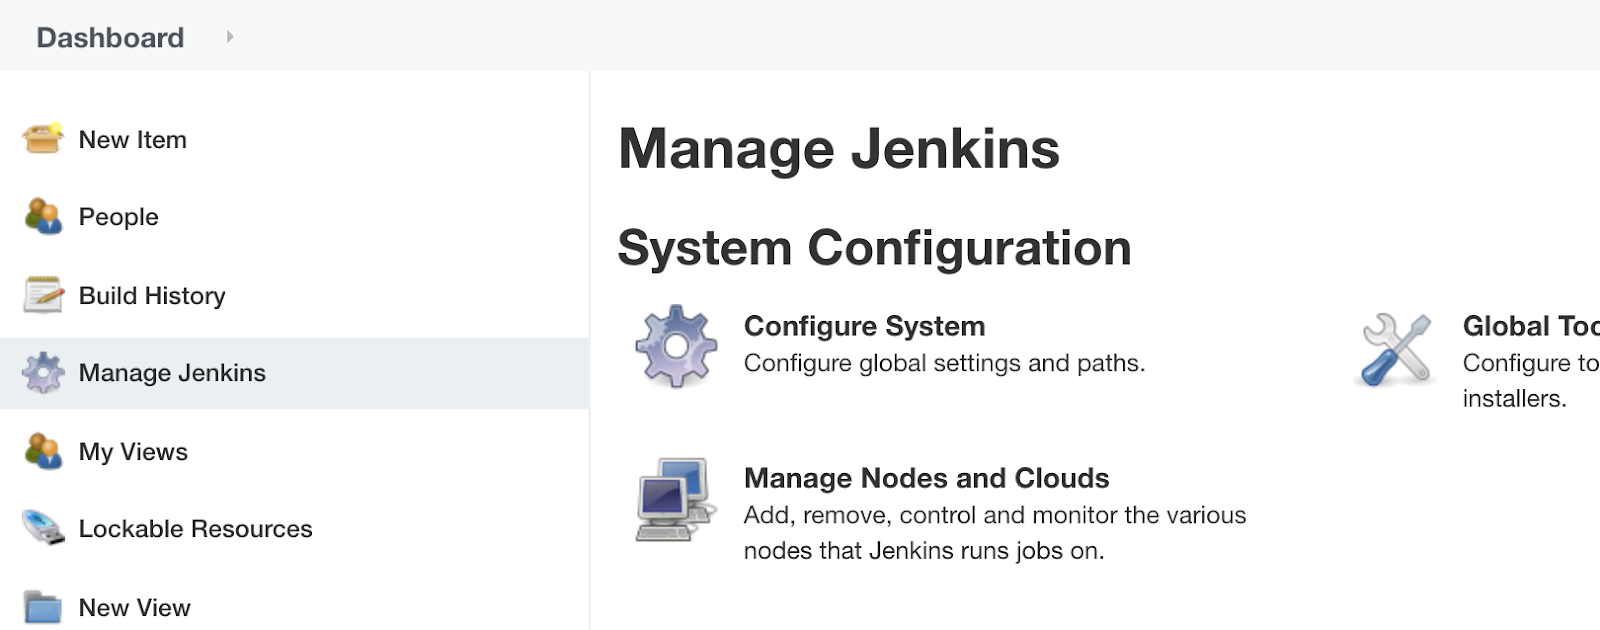
Under the Global properties select Environment variables and set the APICTL home as below and click Save.
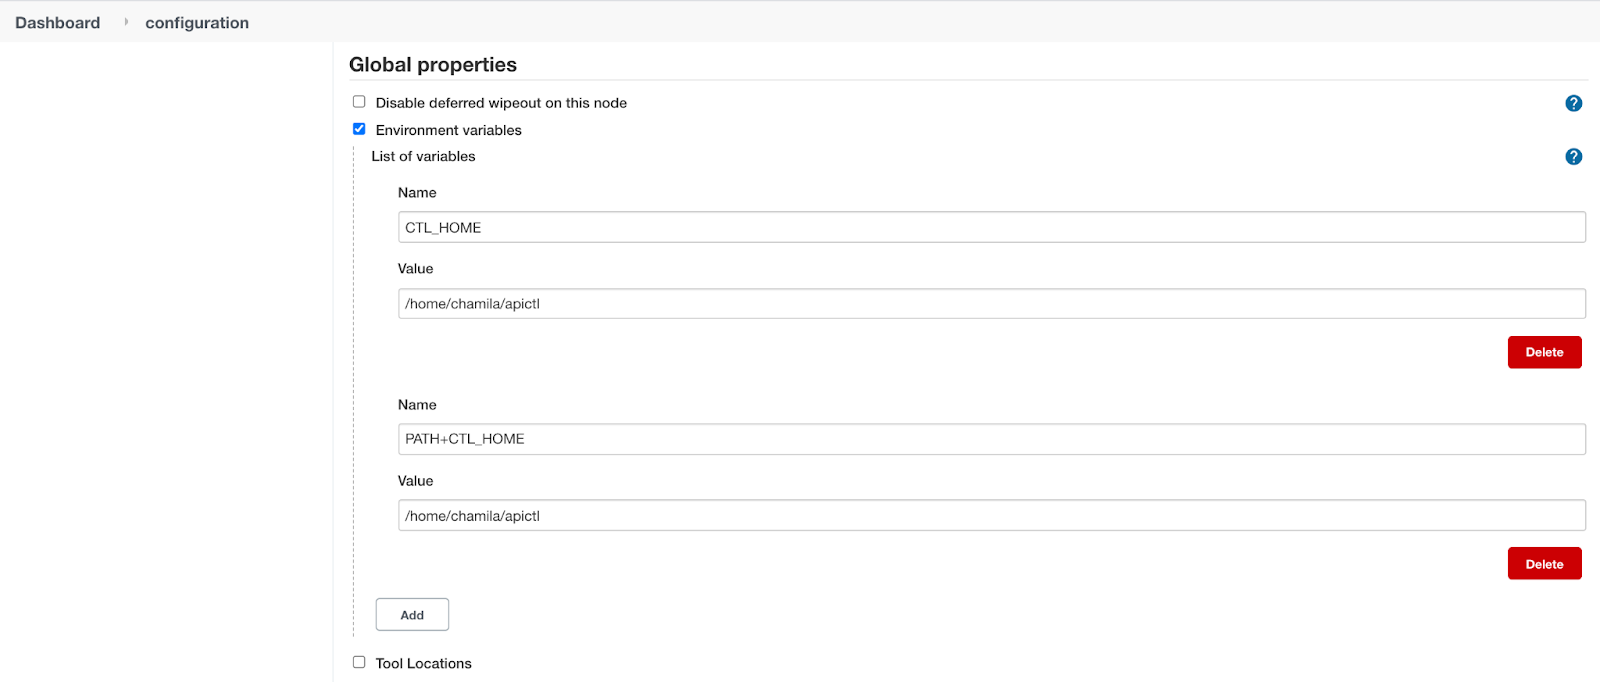
Now the Jenkins server is set up.
Step 2 - Create GitHub repositories
In this section, two repositories are created to illustrate this scenario.
-
Source Repository -https://github.com/chamilaadhi/poc-cicd-source-repo
-
Deployment Repository - https://github.com/chamilaadhi/poc-cicd-deployment-repo
Source repository contains the files and metadata related to the API. Deployment repository contains the configurations related to each environment this APIs is getting deployed.
Step 2.1 - Setup source repository
This section shows how to trigger a Jenkins job when a change is made to the repository. Lets use GitHub webhooks to trigger a Jenkins job.
- Go to the source repository and under the Settings, select Webhooks and add a webhook to the jenkins server.
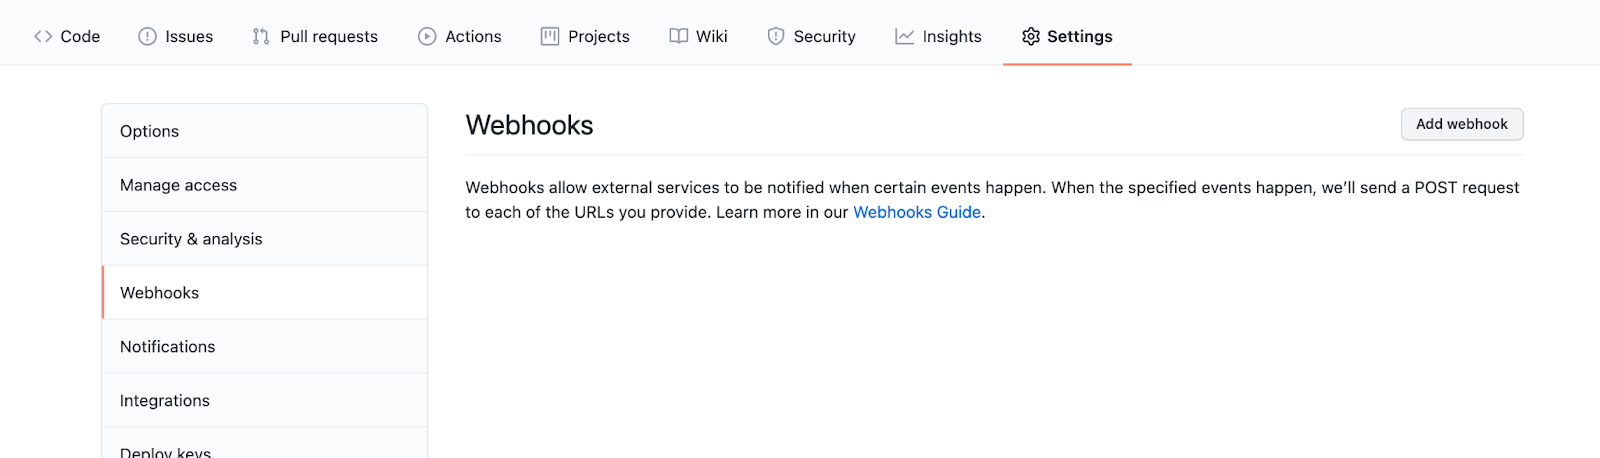
-
Use your jenkins server URL (e.g.,
http://<public_ip>:8080/github-webhook/) as the URL and Content type as application/json. -
Under the Which events would you like to trigger this webhook? section, select Let me select individual events, and select pull request and pushes.
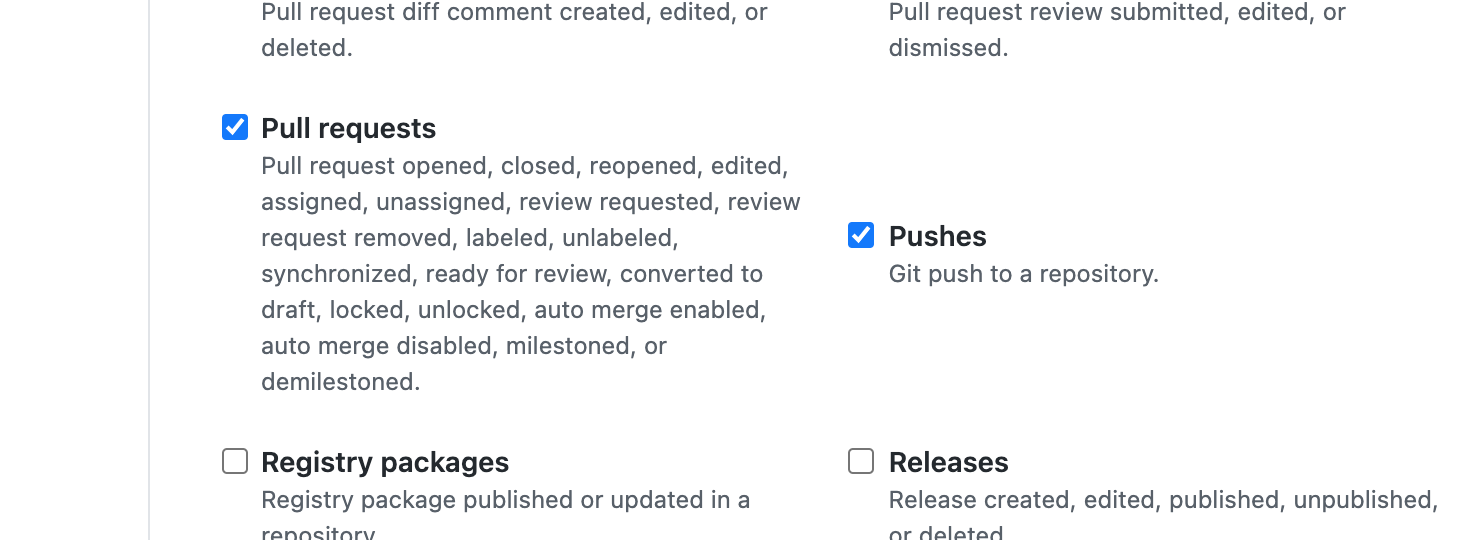
Source repository is now configured.
Now let’s initialize the source repository. This will be done from the developer’s local machine.
Note
If you haven’t setup API Controller, set it up using the apictl tool
-
Clone the source repository. Navigate to the repository folder.
$ git clone https://github.com/chamilaadhi/poc-cicd-source-repo.git $ cd poc-cicd-source-repo -
Execute the following command.
This will create a$ apictl vcs initvcs.yamlfile in the repository. Commit it to the source repository.
Now the source repository is configured.
Step 2.2 - Setup deployment repository
Deployment repository will be used to gather configurations for each deployment. To separate out the configuration, we will use git branches. Create a branch named ‘dev’ to keep the configuration related to the dev environment.
Step 3 - Setup JFrog Artifactory
Before you begin
Create a free cloud repository using https://jfrog.com/start-free/#saas. After the registration is complete, Login to https://<name>.jfrog.io/ui/
-
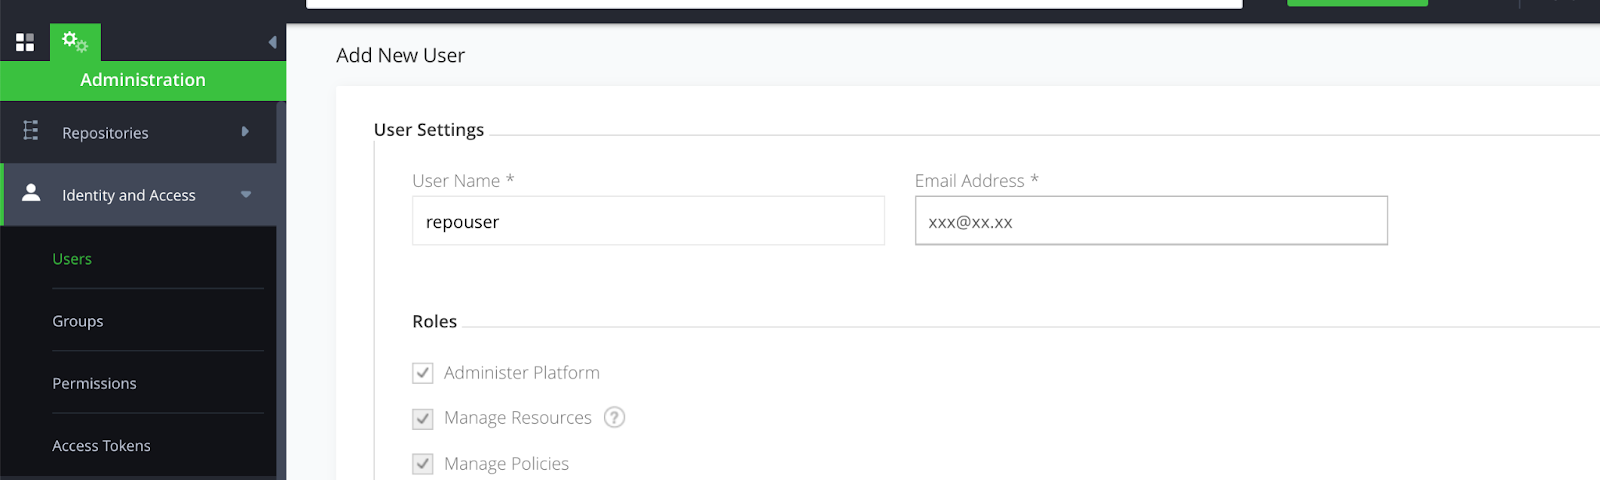
Create a user to upload artifacts. Login using admin credentials and go to Identity and Access → Users and create a user. All roles are selected in this scenario.
-
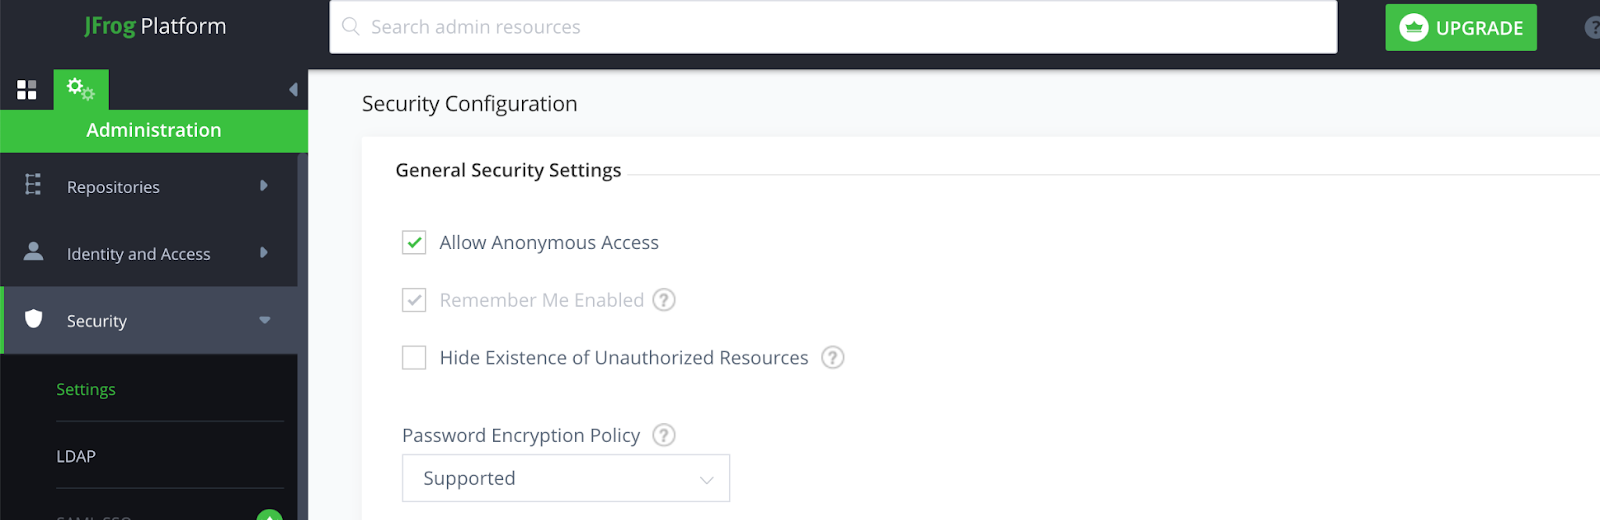
Make the repo accessible public. Go to Security → Settings and select Allow Anonymous Access
-
Create a repository to upload the artifacts. Go to Repositories and select Add Repositories. Select Generic type and provide a name (e.g.,
myrepo).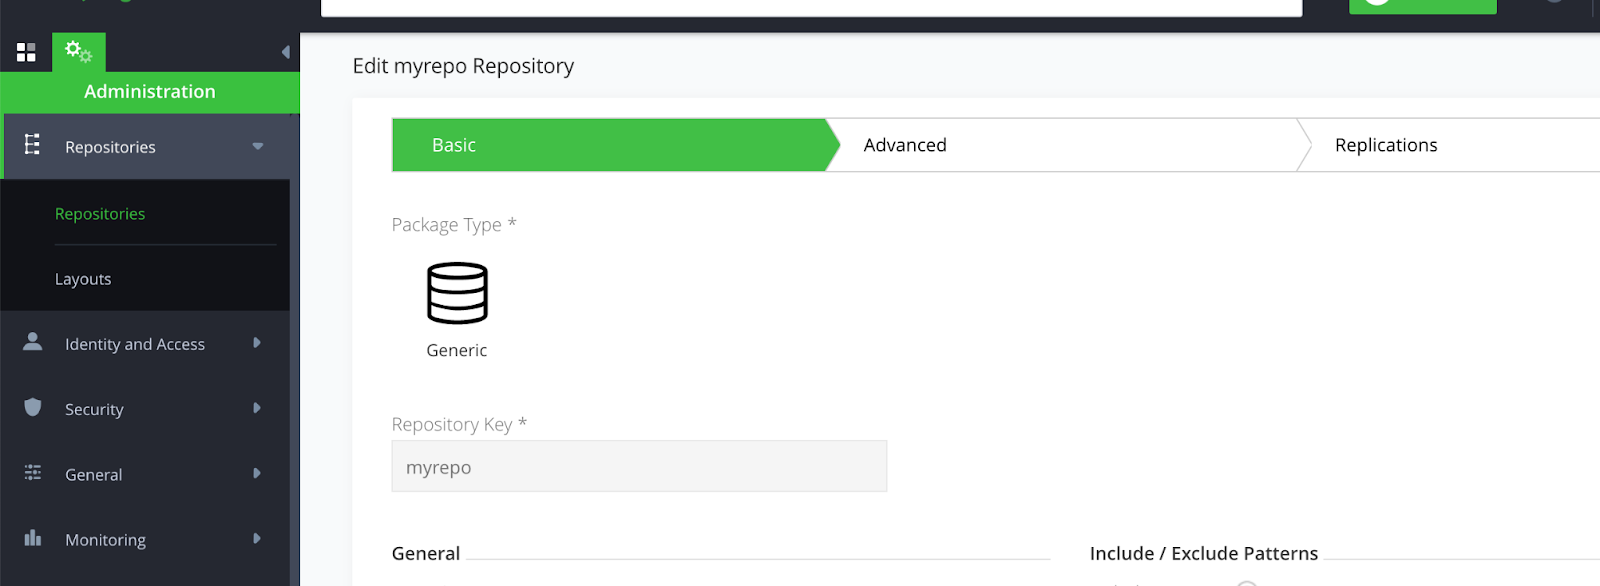
After saving, You should be able to access
https://<your_org>.jfrog.io/artifactory/<repo_name>/.Try uploading a sample resource. An example is given below.
$ touch resource.txt
$ curl -u repouser:<password> -X PUT https://xxxx.jfrog.io/artifactory/myrepo/ -T resource.txt
Access the repository URL to see the resource.
-
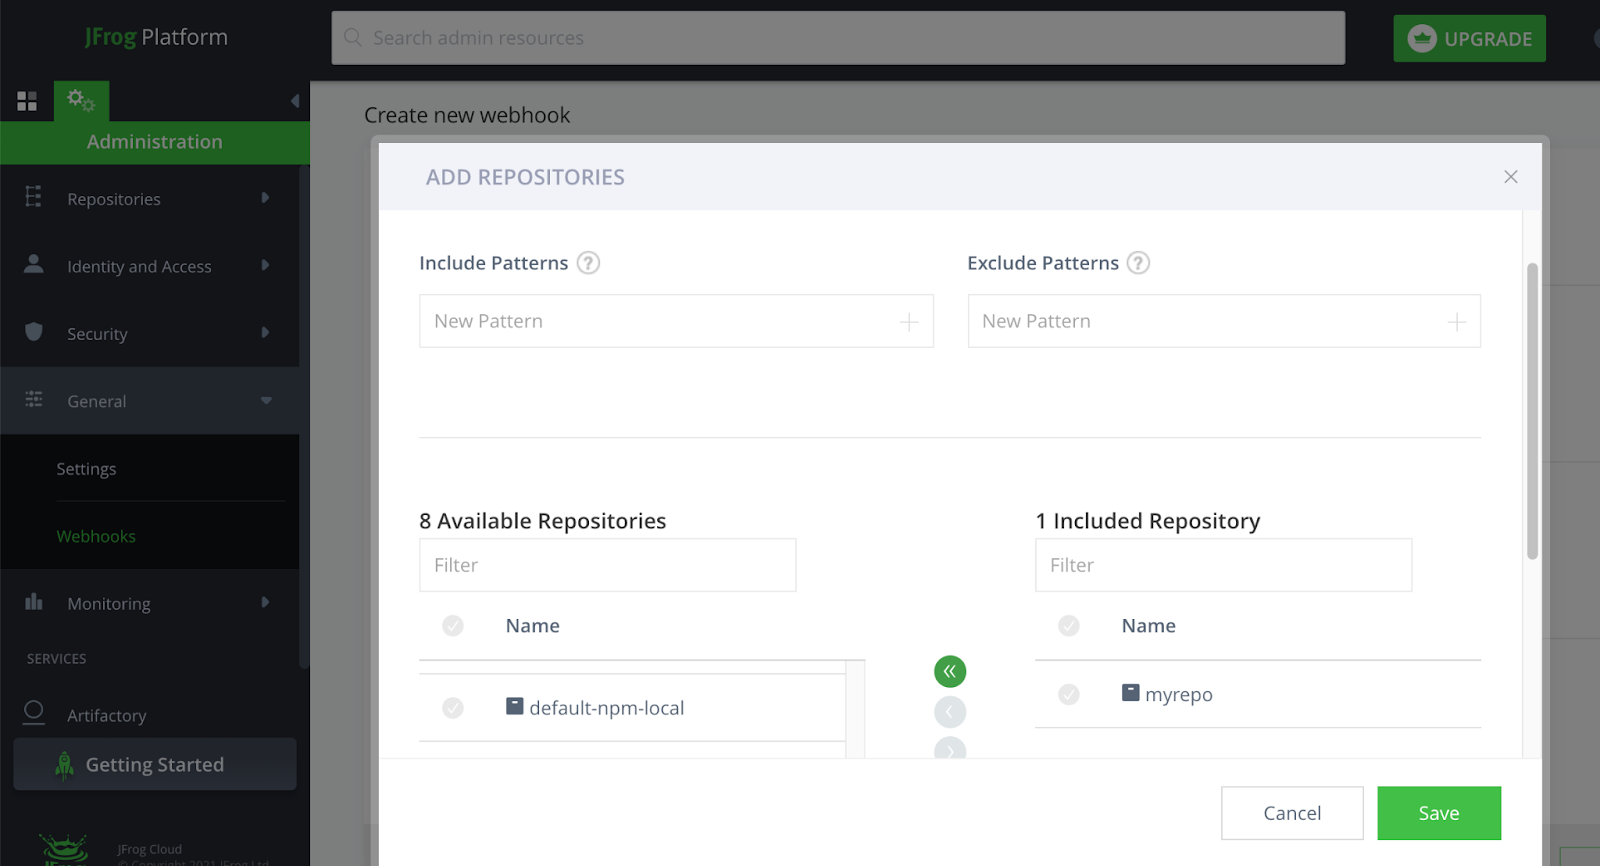
Configure a webhook to triggerb the Jenkins job.
Create a webhook to trigger the Jenkins job when a new resource is uploaded to the repository. Go to General → Webhooks and create a new one.
URL -
http://<jenkins_host>:8080/generic-webhook-trigger/invoke?token=123**Add the Event set as Artifact was deployed.
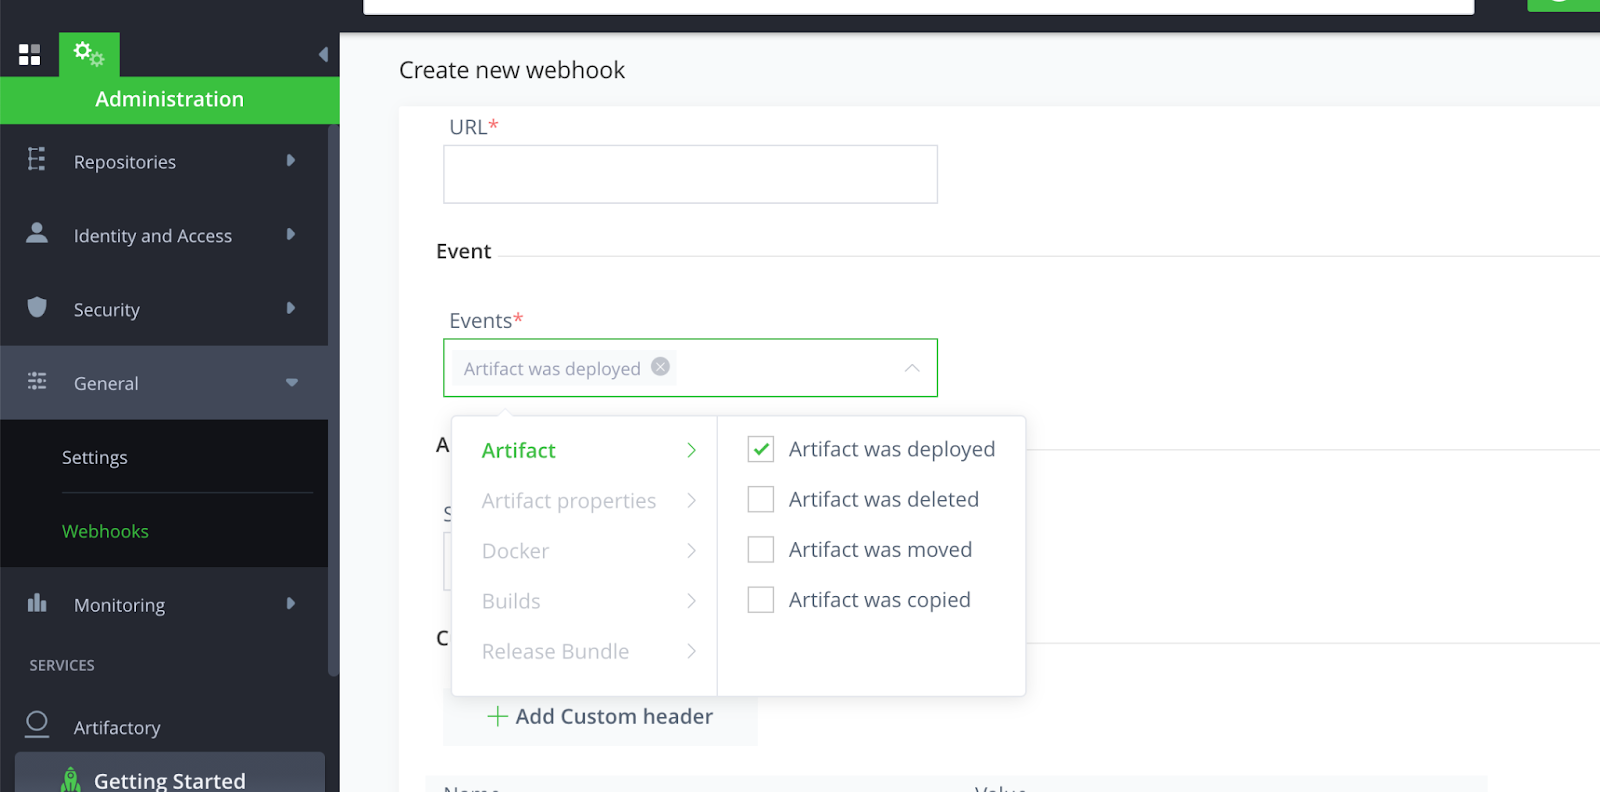
Select the repository from the new window that appears.
Step 4 - Setup API-M instances
Download the WSO2 API Manager 4.1.0 here and start the instance. Set this in a separate instance as the dev instance.
Step 5 - Configure Jenkins Jobs
Step 5.1 - Setup Global variables
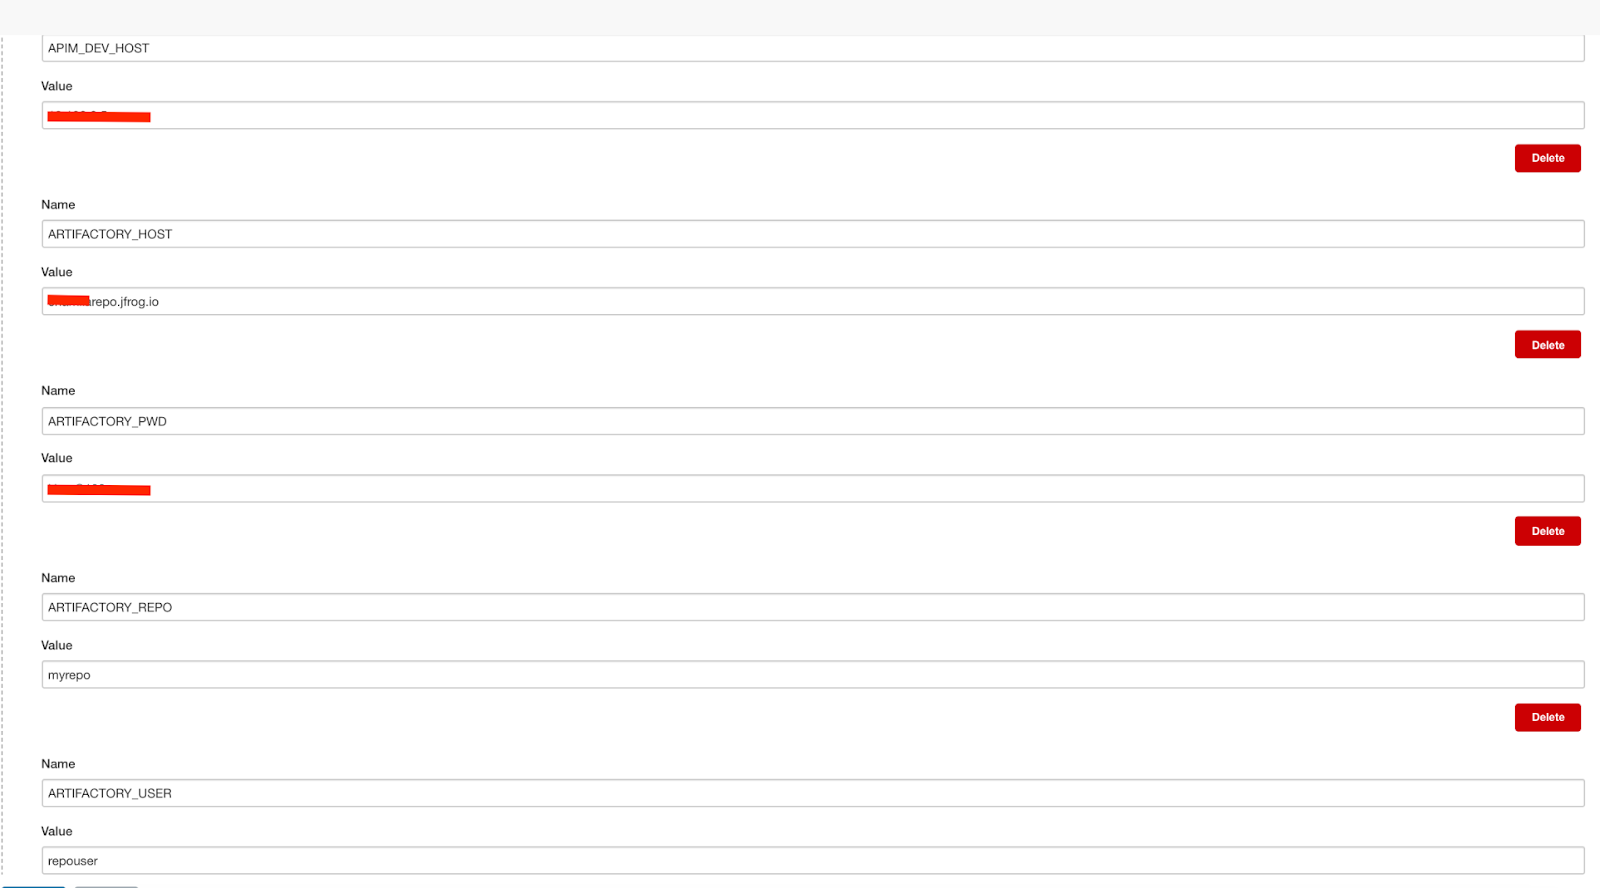
As shown in the Setup Jenkins Section, Go to Manage Jenkins section and select Configure System. Under the Global properties select Environment variables and set following variables with your environment related details.
| Variable | Description |
|---|---|
| APIM_DEV_HOST | IP or host name of the dev instance (ex 10.100.5.96 ) |
| APIM_PROD_HOST | IP or host name of the prod instance (ex 10.100.5.97 ) |
| ARTIFACTORY_HOST | Artifactory host name (ex: testrepo.jfrog.io) |
| ARTIFACTORY_PWD | Artifact uploading user’s password |
| ARTIFACTORY_REPO | Repo name.(ex: myrepo) |
| ARTIFACTORY_USER | Artifact uploading user’s username |
Step 5.2 - Setup Artifact build and upload job
-
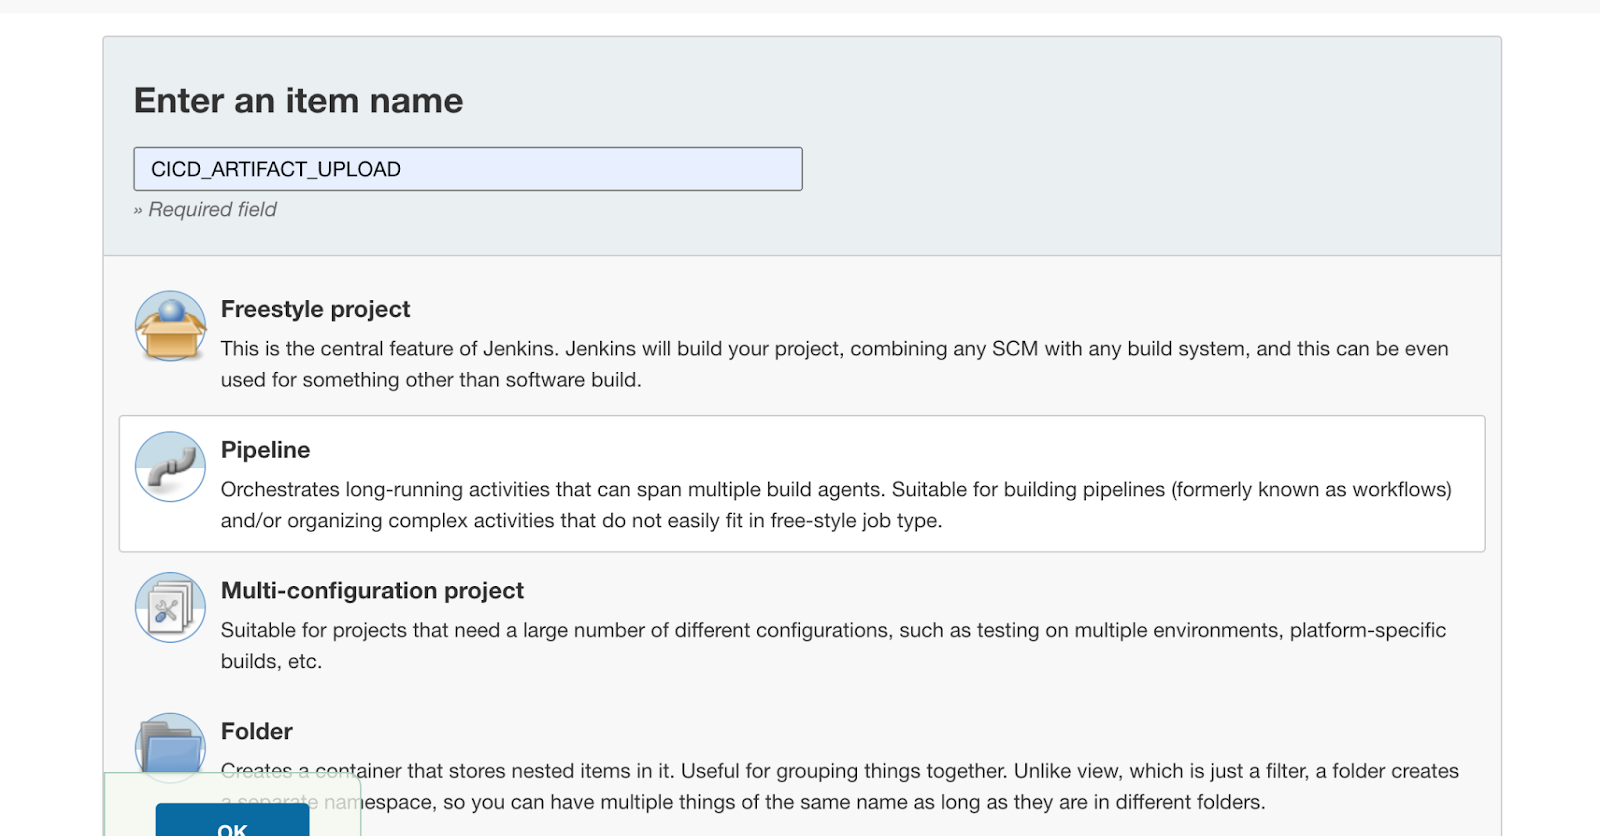
Create a jenkins Pipeline project.
-
Use this script for the pipeline.
Note
Jenkins server default workspace URL is
/var/lib/jenkins/workspace/. If you have installed the Jenkins server in a different location, change this path in the script accordingly. -
Under the Build Triggers set the GitHub hook trigger for GITScm polling.
-
Save the configuration. Now the Jenkins job is configured to listen to any change in the source repository and upload any new update to the artifact repository.
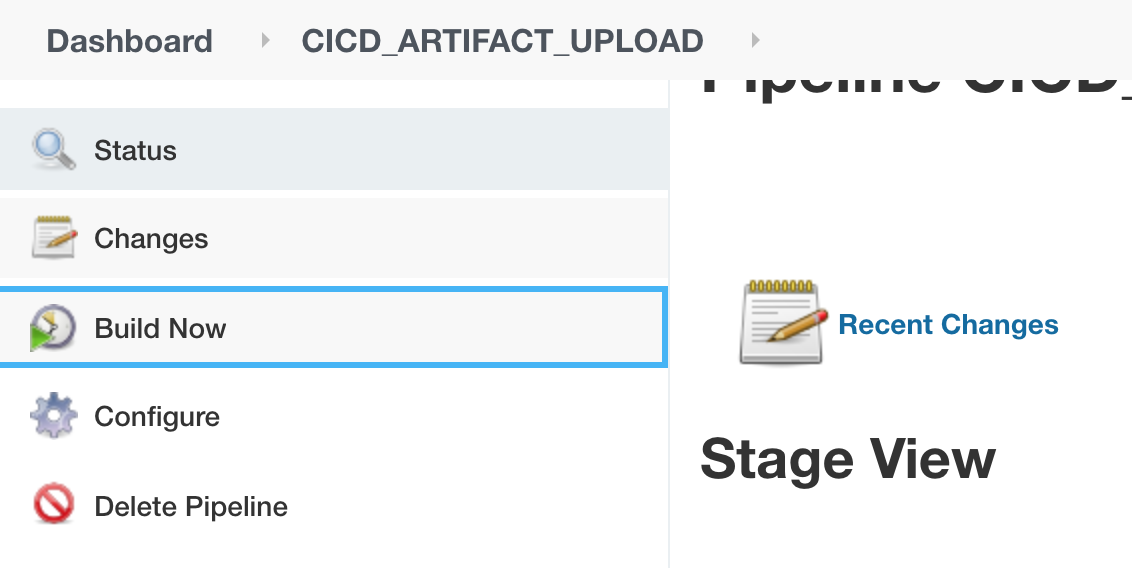
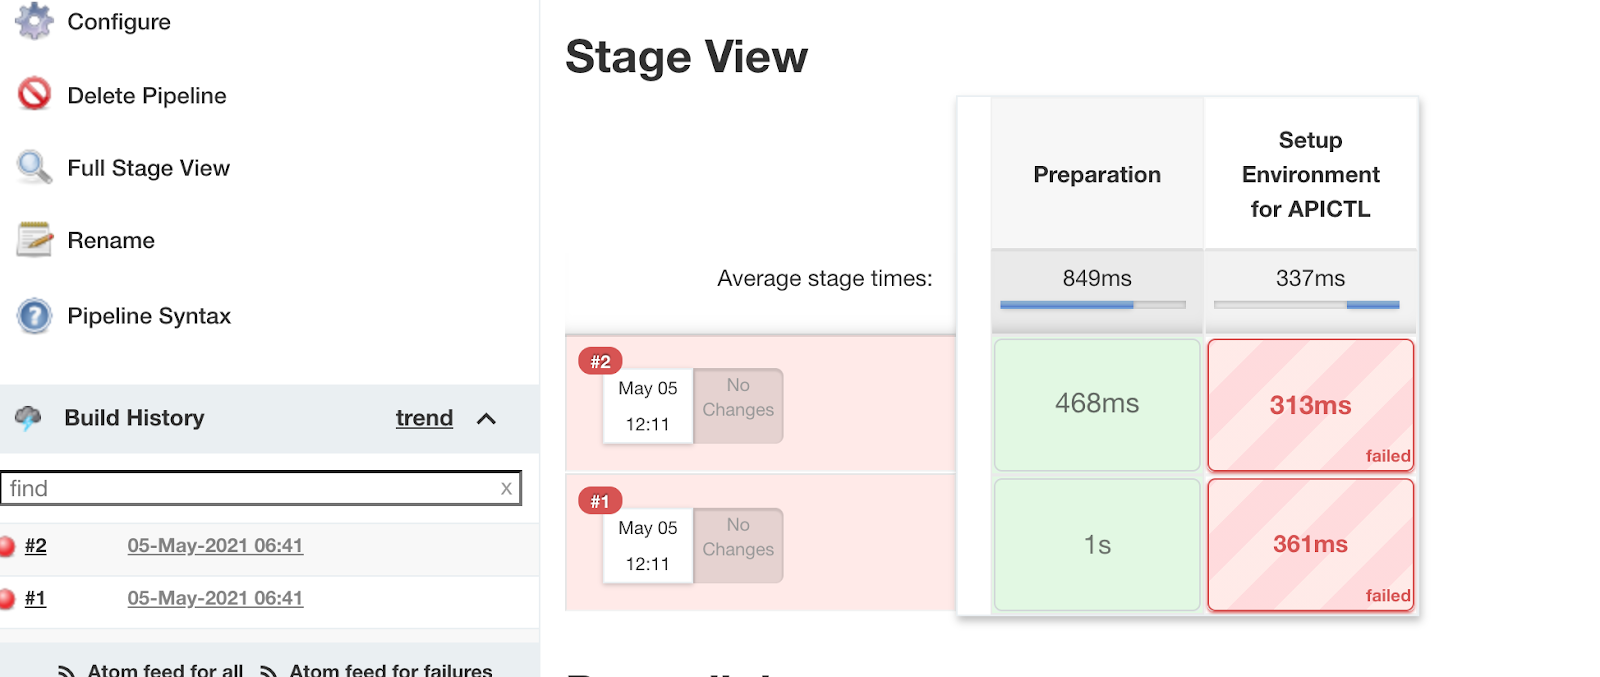
To set up, Execute a build job. Note that this will fail.
Step 5.3 - Setup Artifact deployment Job
The artifact deployment job will listen to any new updates in the Artifactory repository and deploy the artifact with the configurations in the Deployment git repository to the dev API-M environment.
-
Create a Jenkins pipeline using this script .
-
Save the script and execute a build to setup. Note that this will fail.
-
To test whether the webhook between Artifactory and the Jenkins job is working, you could execute the same upload test we did under Setup JFrog Artifactory section
$ touch resource.txt
$ curl -u repouser:<password> -X PUT https://xxxxx.jfrog.io/artifactory/myrepo/ -T resource.txt
If the configuration is working, this will trigger a new build.
Test the scenario
To test this setup, use the OpenAPI definition based method to create the APIs.
-
Create API using an OAS Definition. This will create a project with name PetstoreAPI. A sample command is given below.
$apictl init PetstoreAPI --oas https://raw.githubusercontent.com/OAI/OpenAPI-Specification/main/examples/v2.0/yaml/petstore.yaml -
Generate deployment resource using the command given below.
$apictl gen deployment-dir --source /Path/To/PetstoreAPI --destination <deployment_repo_path>/poc-cicd-deployment-repoYou will see the resources created with the following structure.
├── DeploymentArtifacts_SwaggerPetstore-1.0.0 │ ├── api_meta.yaml │ ├── certificates │ └── params.yaml -
Open the
params.yamlfile and update the content with the code given below.
The environment name is set asenvironments: - name: dev configs: endpoints: production: url: 'https://petstore.swagger.io/v2/' deploymentEnvironments: - displayOnDevportal: true deploymentEnvironment: Default deploymentVhost : localhostdev. This configuration will be used for thedevenvironment. -
Commit this to the dev branch in the deployment repository.
- Copy the PetstoreAPI folder to the source repository git location.
-
Create a file named meta.yaml inside the PetstoreAPI folder and add a version similar to following.
This version is used to deploy the bundle created using the PetstoreAPI API in the Artifactory repository.version: 1.0.0 -
Following is the content for the PetstoreAPI. Commit all the files to the git repository
├── PetstoreAPI
│   ├── Definitions
│   │   └── swagger.yaml
│   ├── README.md
│   ├── api.yaml
│   ├── api_meta.yaml
│   ├── deployment_environments.yaml
│   └── meta.yaml
When you commit to the source repository, the
CICD_ARTIFACT_UPLOADwill get triggered first and upload the built component to the Artifactory. This is displayed in the console log of the Jenkins job.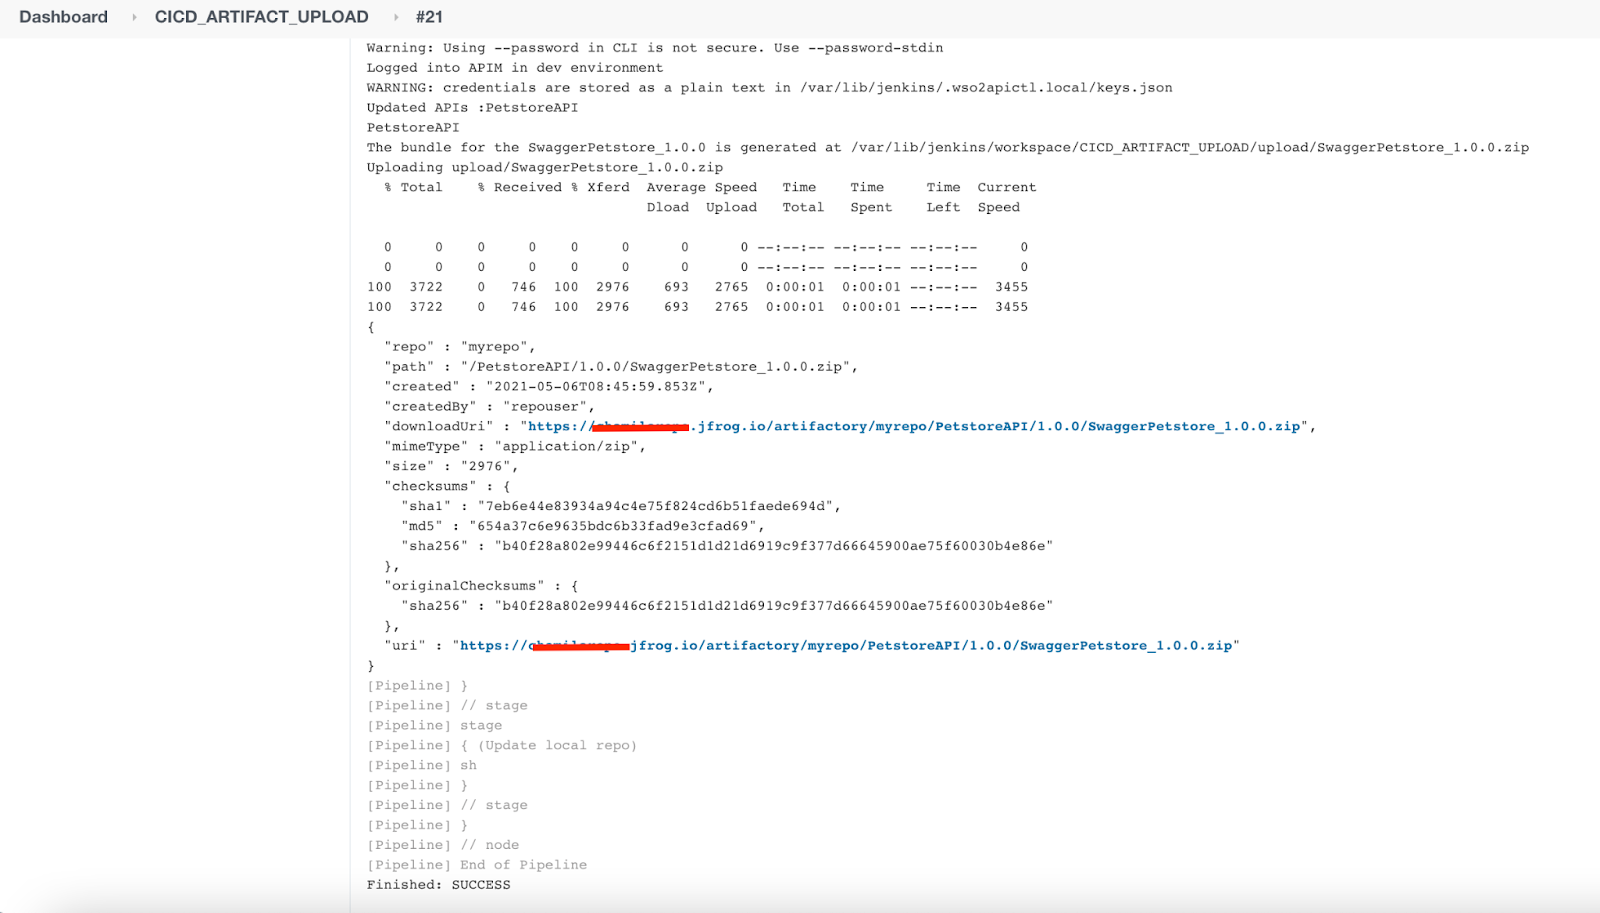
Once the bundle is uploaded to the Artifactory repository, it will trigger the deployment Jenkins job. The bundle getting deployed in API-M is displayed in the logs.
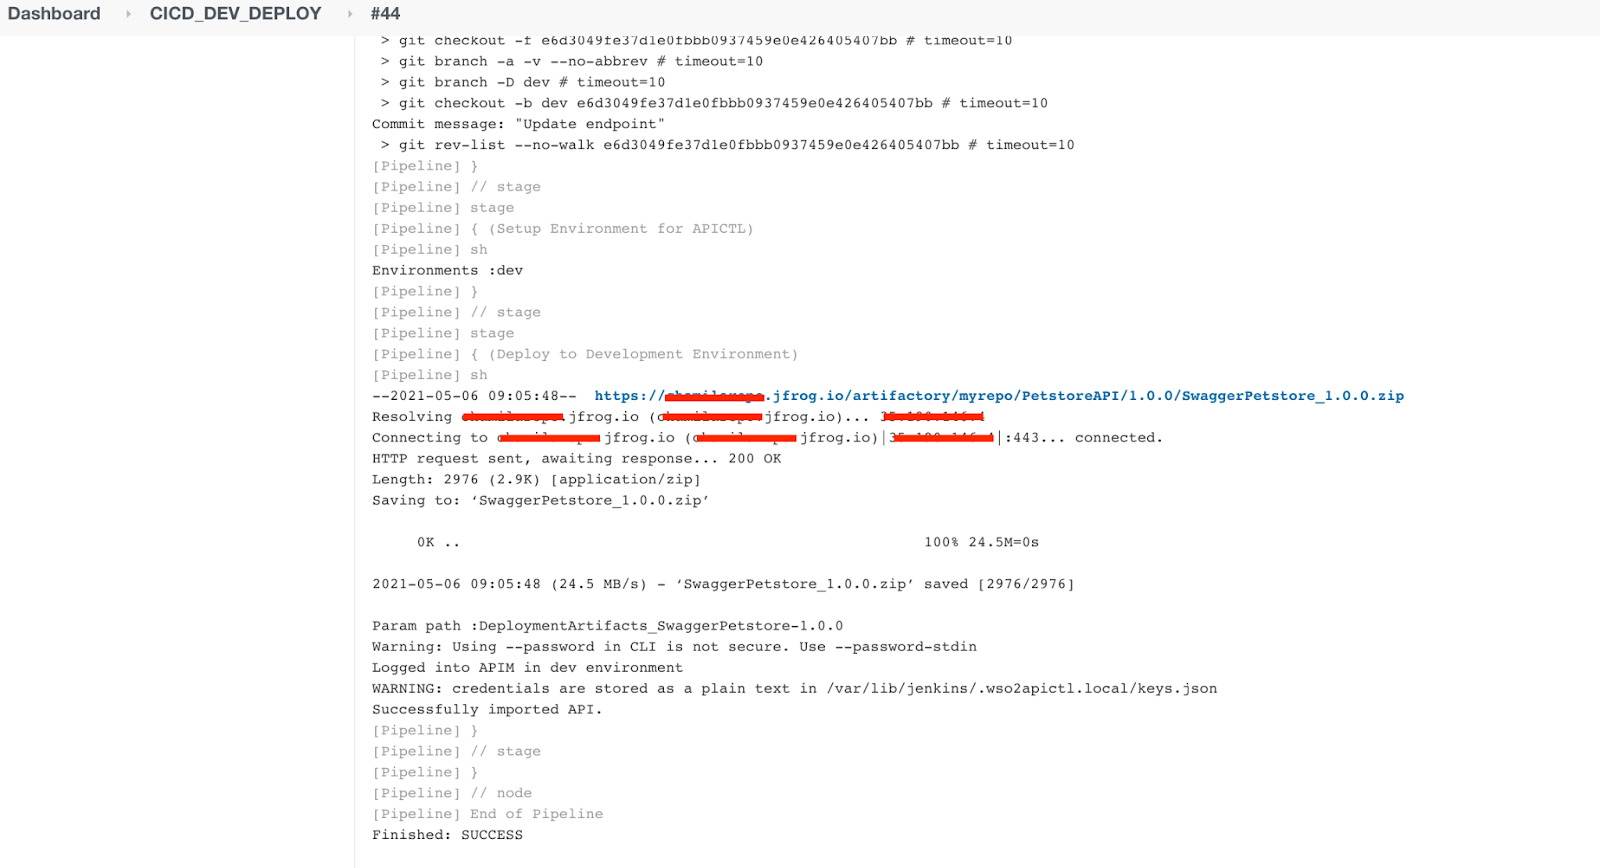
Log in to the API Manager instance and you should see the API is created.
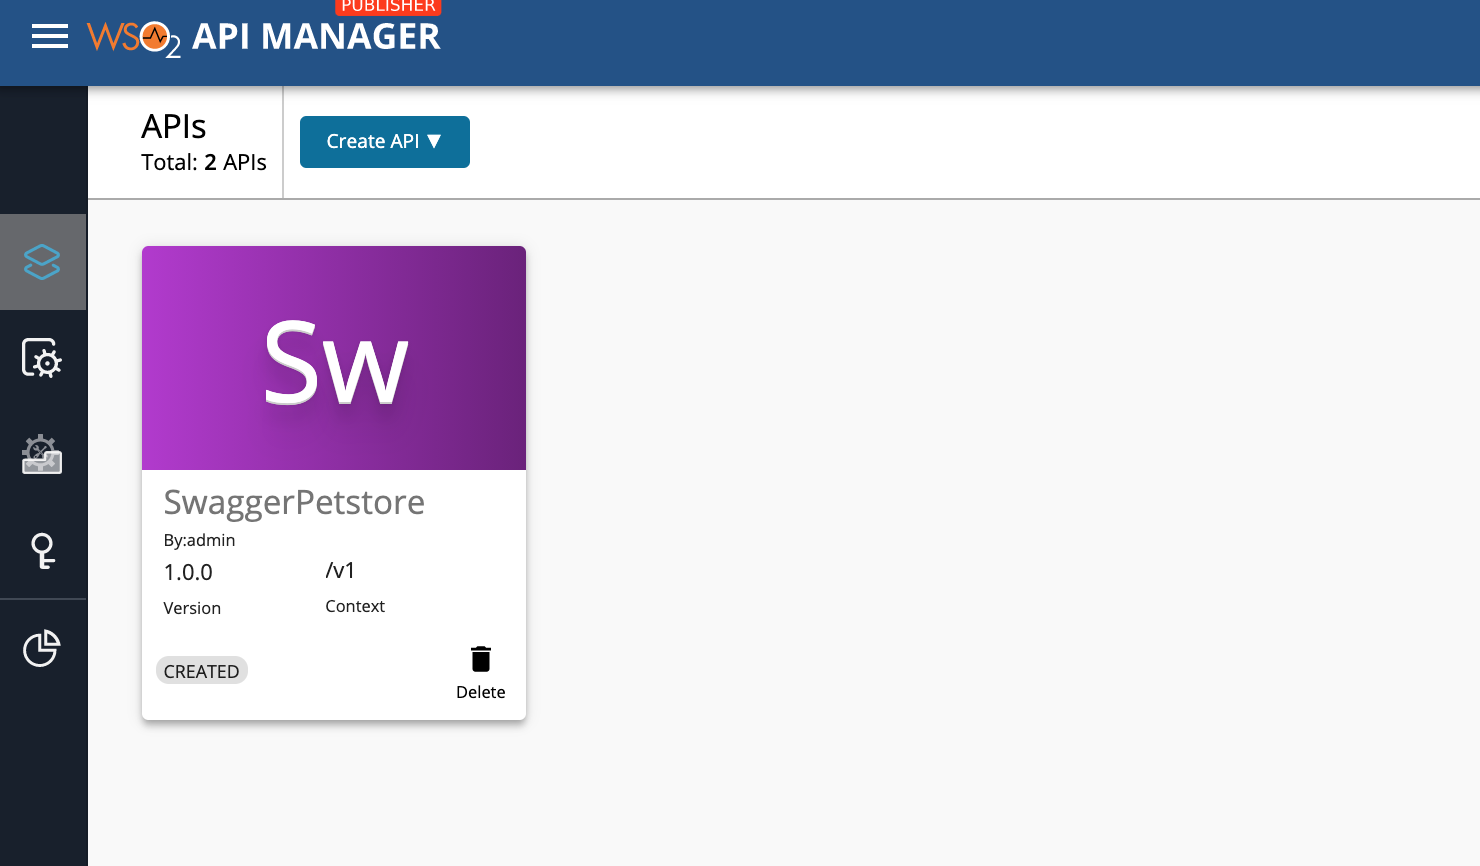
Let's update the API and see the changes. The API is in CREATED state. Let’s publish this API by following the steps given below.
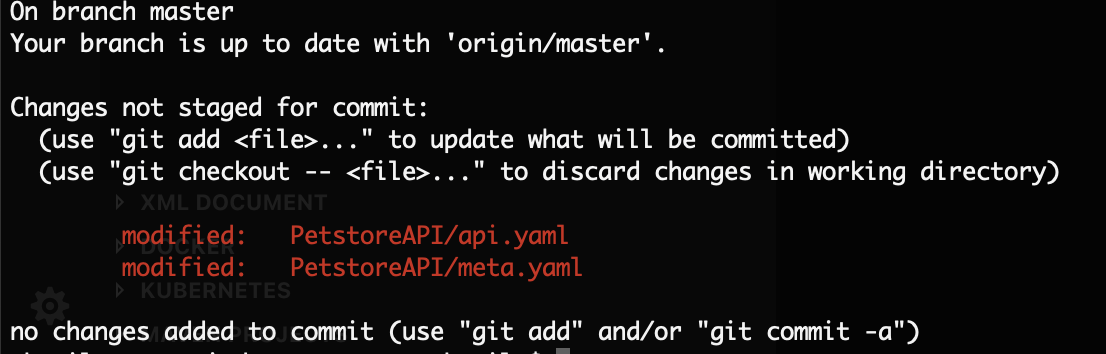
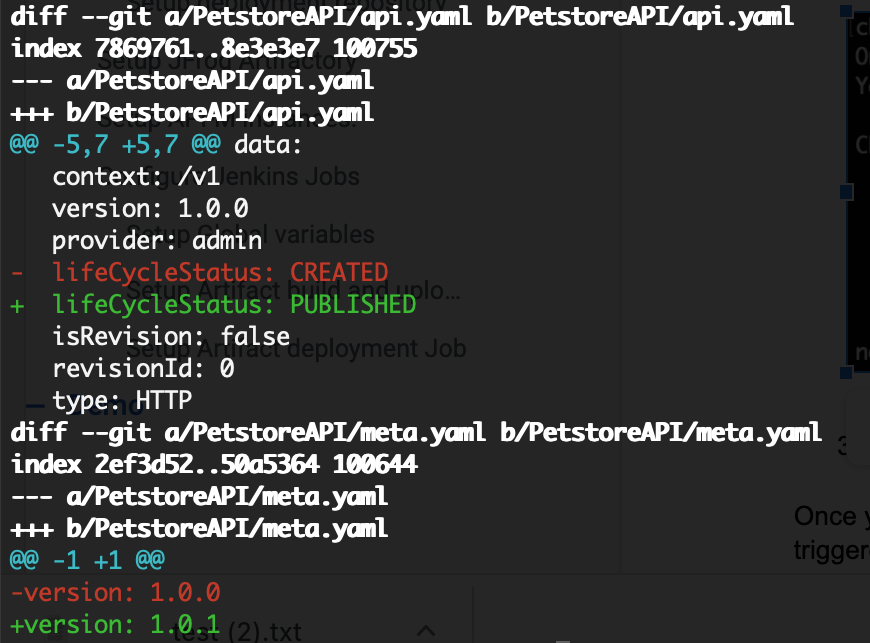
- Open the PetstoreAPI/api.yaml file and change the lifeCycleStatus to PUBLISHED
-
Open PetstoreAPI/meta.yaml file and change the version to some new value (let’s say 1.0.1) .
-
Commit both files.
Once you commit the changes to the source repository, you would see the jenkins jobs getting triggered. Log in to the Publisher Portal and check the changes.
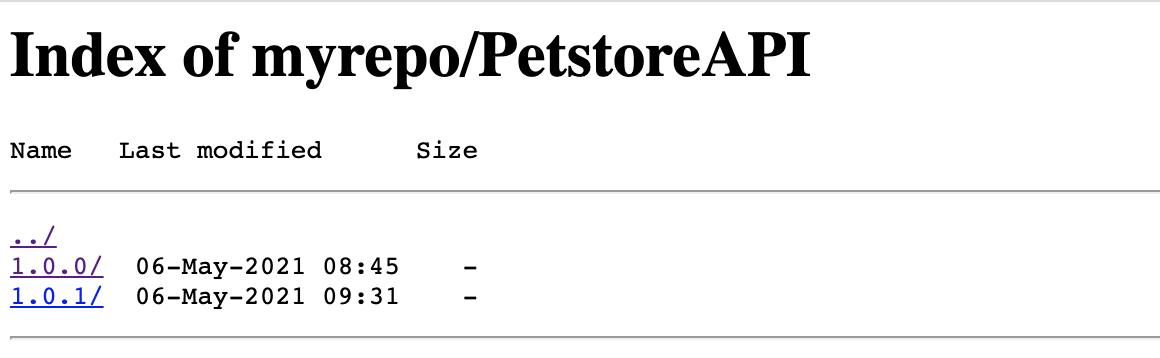
If you go to the artifactory repository and check the PetstoreAPI you will see two versions in the repository.