Create and Publish a GraphQL API
Follow the instructions in this tutorial to design, publish, and invoke a GraphQL API.
Note
For more information on GraphQL APIs, see Create a GraphQL API.
Step 1 - Start the GraphQL backend server
Let's use the Star Wars sample backend server as the backend for the GraphQL API.
-
Clone the WSO2 API Manager Samples repository.
git clone https://github.com/wso2/samples-apim -
Navigate to
graphql-backenddirectory.cd samples-apim/graphql-backend -
Run
npm installto install the necessary node modules. -
Run
npm startto start the server.Once the above steps are done, the Star Wars server will be running on
http://localhost:8080.
You can use
http://localhost:8080/graphqlas the endpoint when creating the GraphQL API.
Step 2 - Design a GraphQL API
-
Sign in to the API Publisher Portal.
https://<hostname>:9443/publisherExample:
https://localhost:9443/publisherLet's use
adminas the username and password to sign in. -
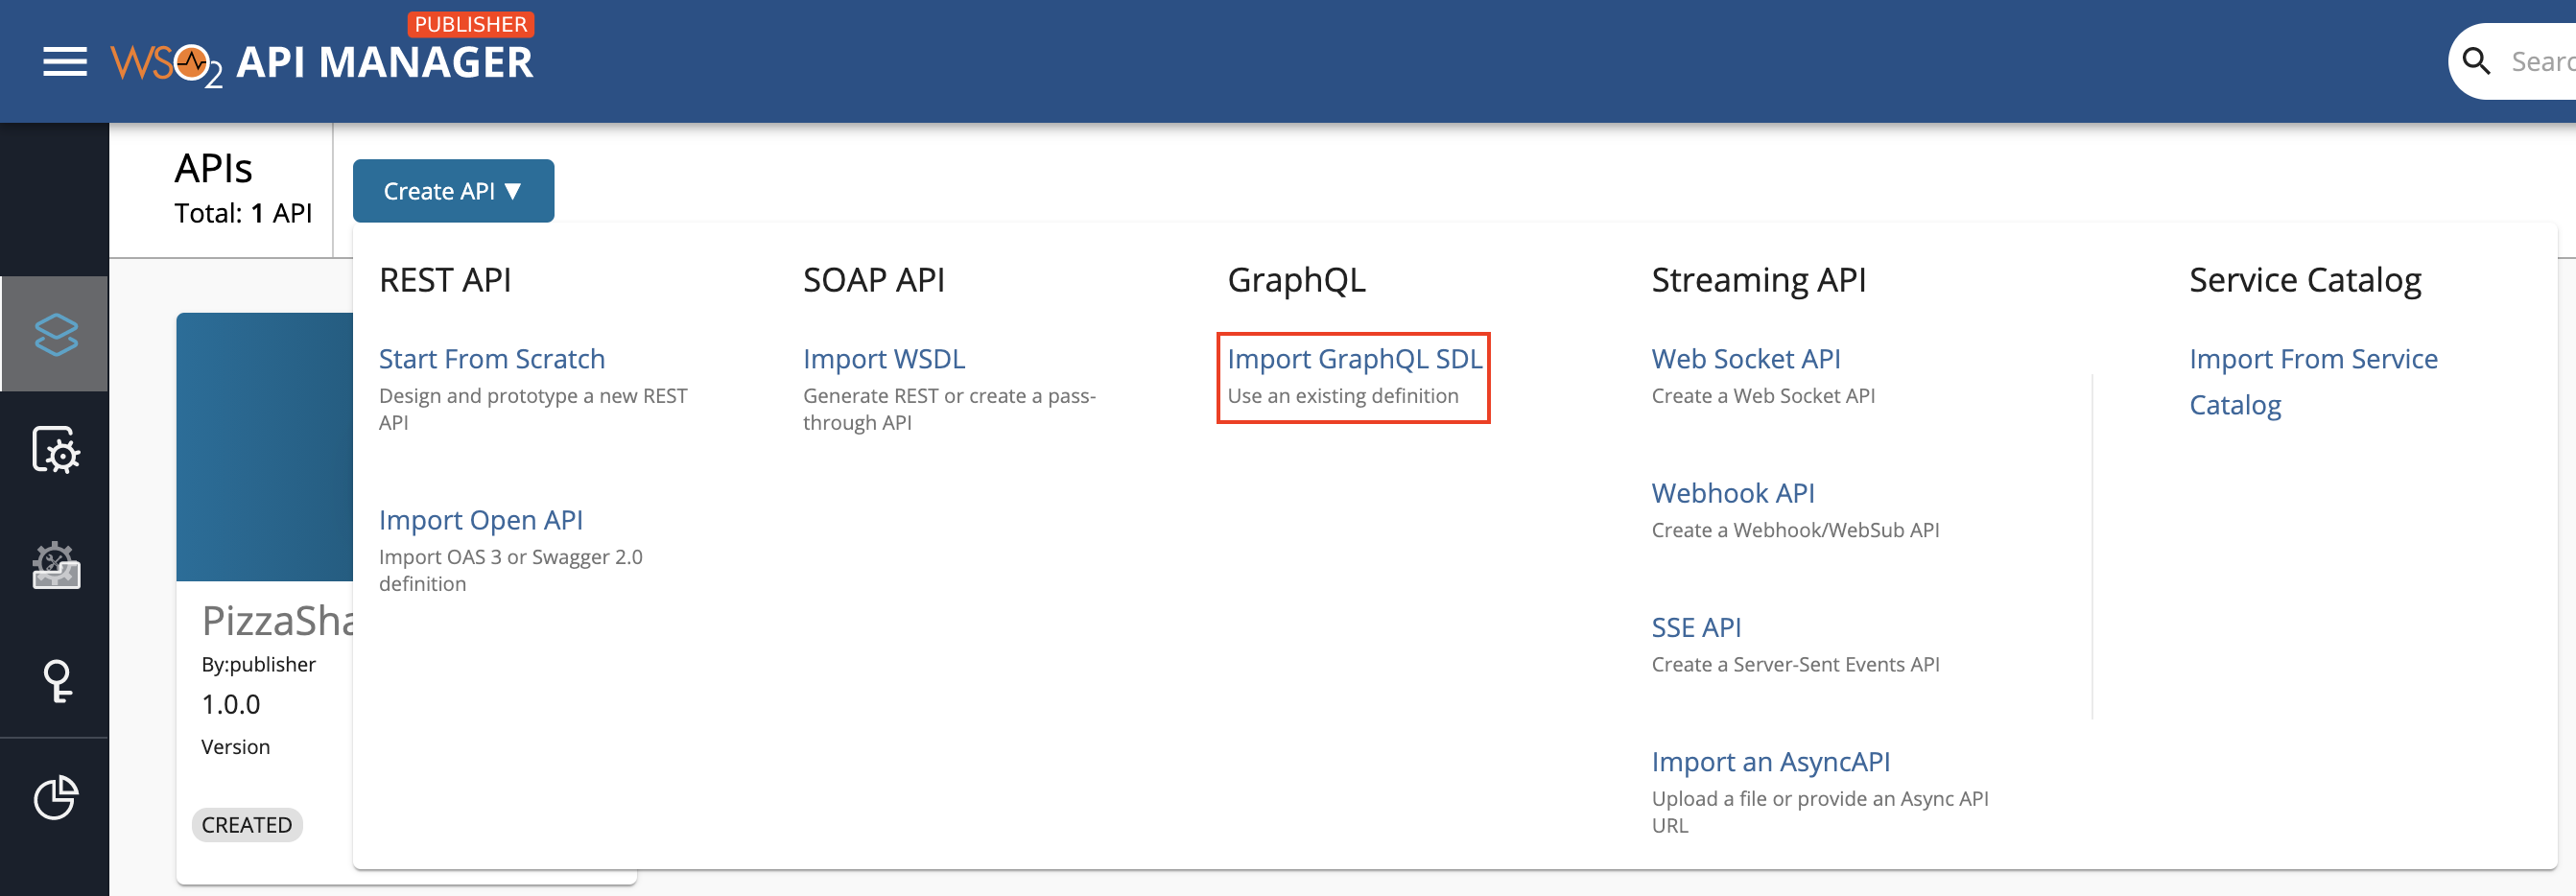
Click Create API and then click Import GraphQL SDL.
-
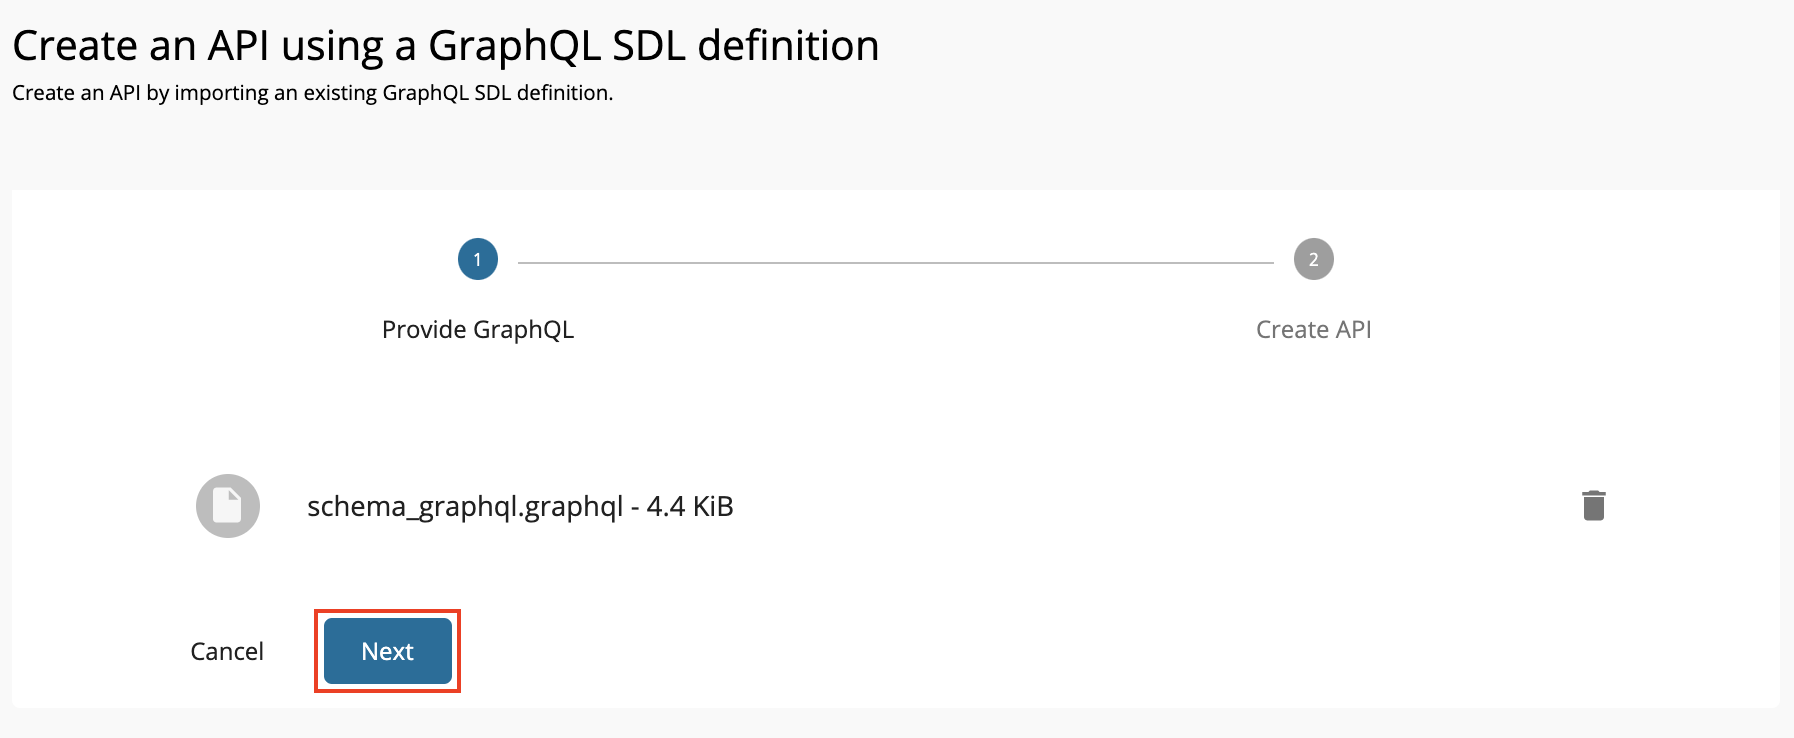
Import the schema by dragging and dropping the file or by uploading the file, and click Next.
Let's use the StarWarsAPI schema definition to create the schema file.
Note
-
You need to define the SDL Schema based on the GraphQL schema design best practices.
- The file extension can be either
.graphql,.txt, or.json. - The file name can be any name, which is based on your preference.
-
-
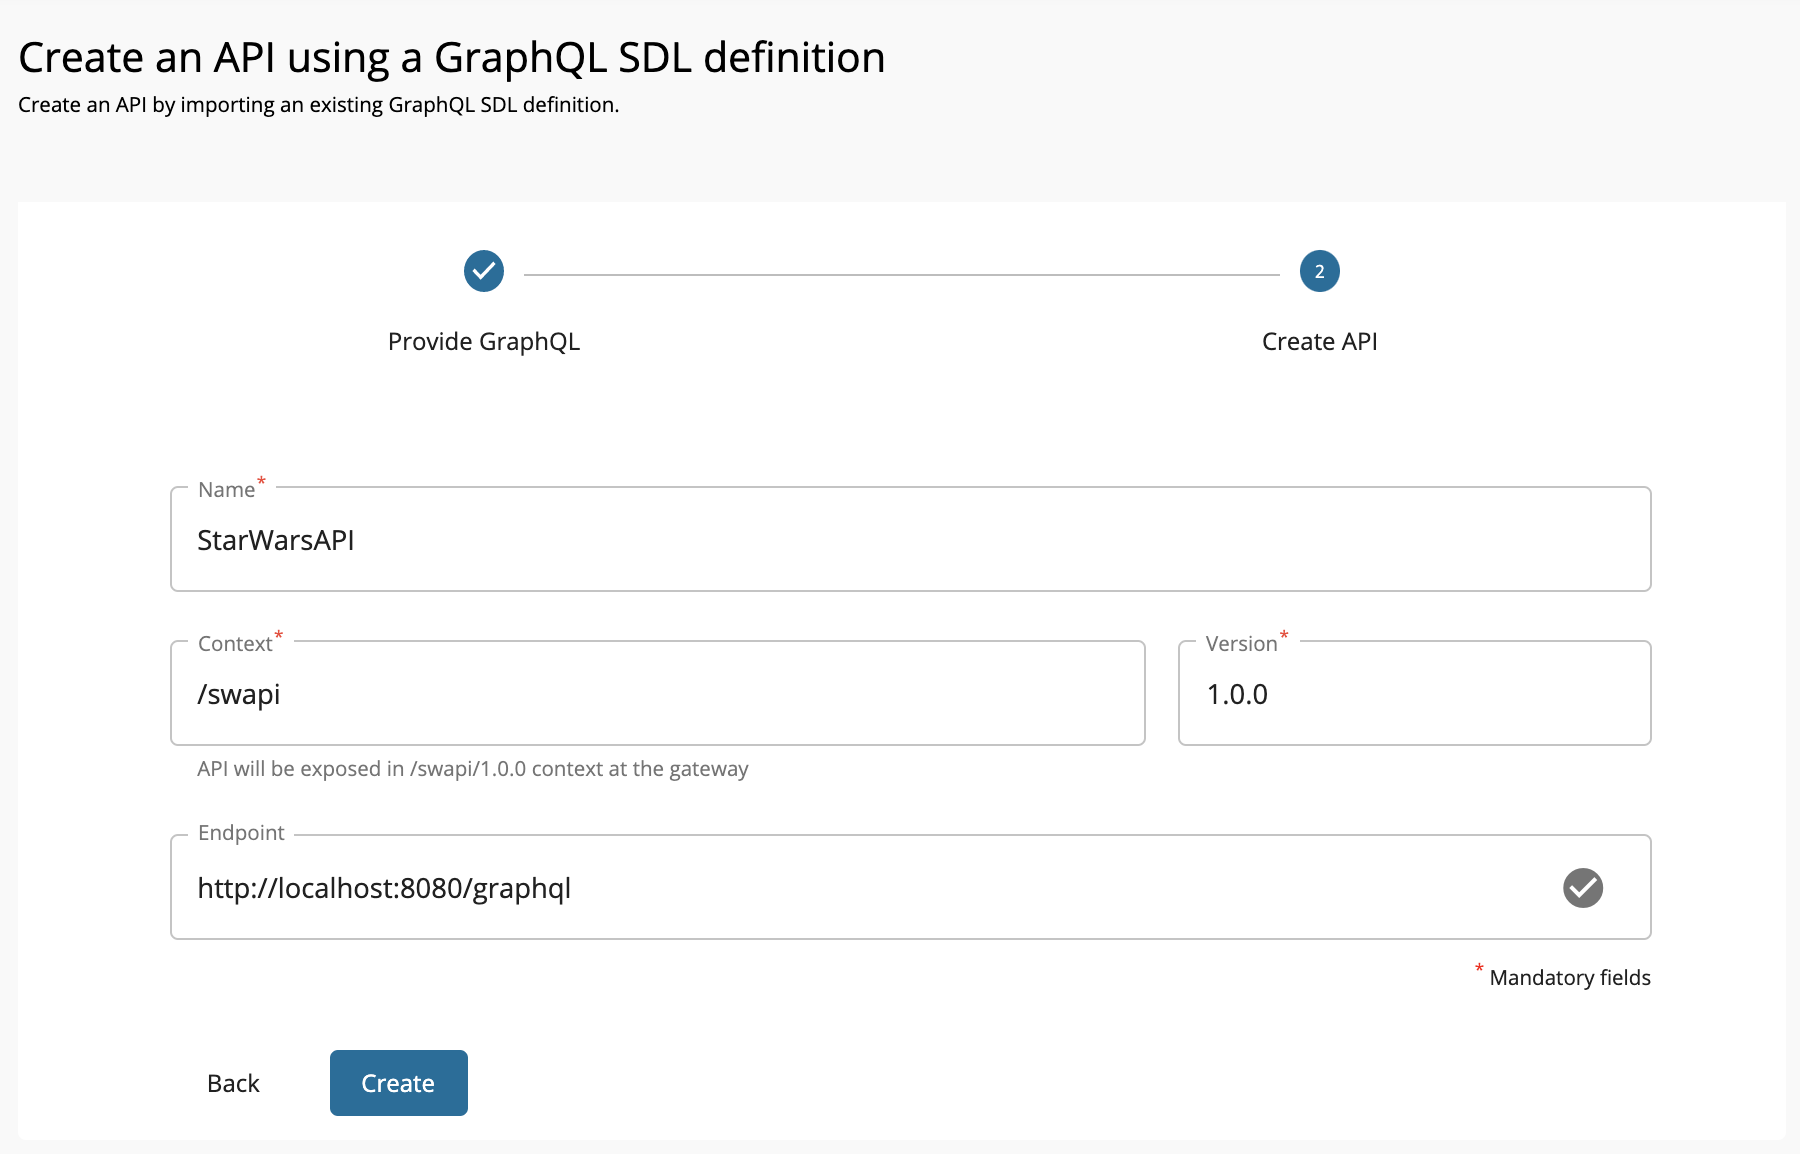
Enter the GraphQL API related details and click Create.
Let's create an API named "StarWarsAPI" using the following sample data.
FieldDescriptionName
StarWarsAPI
Context
/swapiVersion
1.0.0
Endpoint
http://localhost:8080/graphqlNote
-
When you provide the HTTP URL as the backend endpoint, WSO2 API-M will internally derive the corresponding WebSocket URL
ws://localhost:8080/graphql. - Thereafter, the API Gateway will use this WebSocket URL as the backend subscription endpoint of the GraphQL API.
[{: style="width:75%"}](../../assets/img/learn/create-graphql-api-details.png)-
Optionally, modify the existing GraphQL schema definition.
-
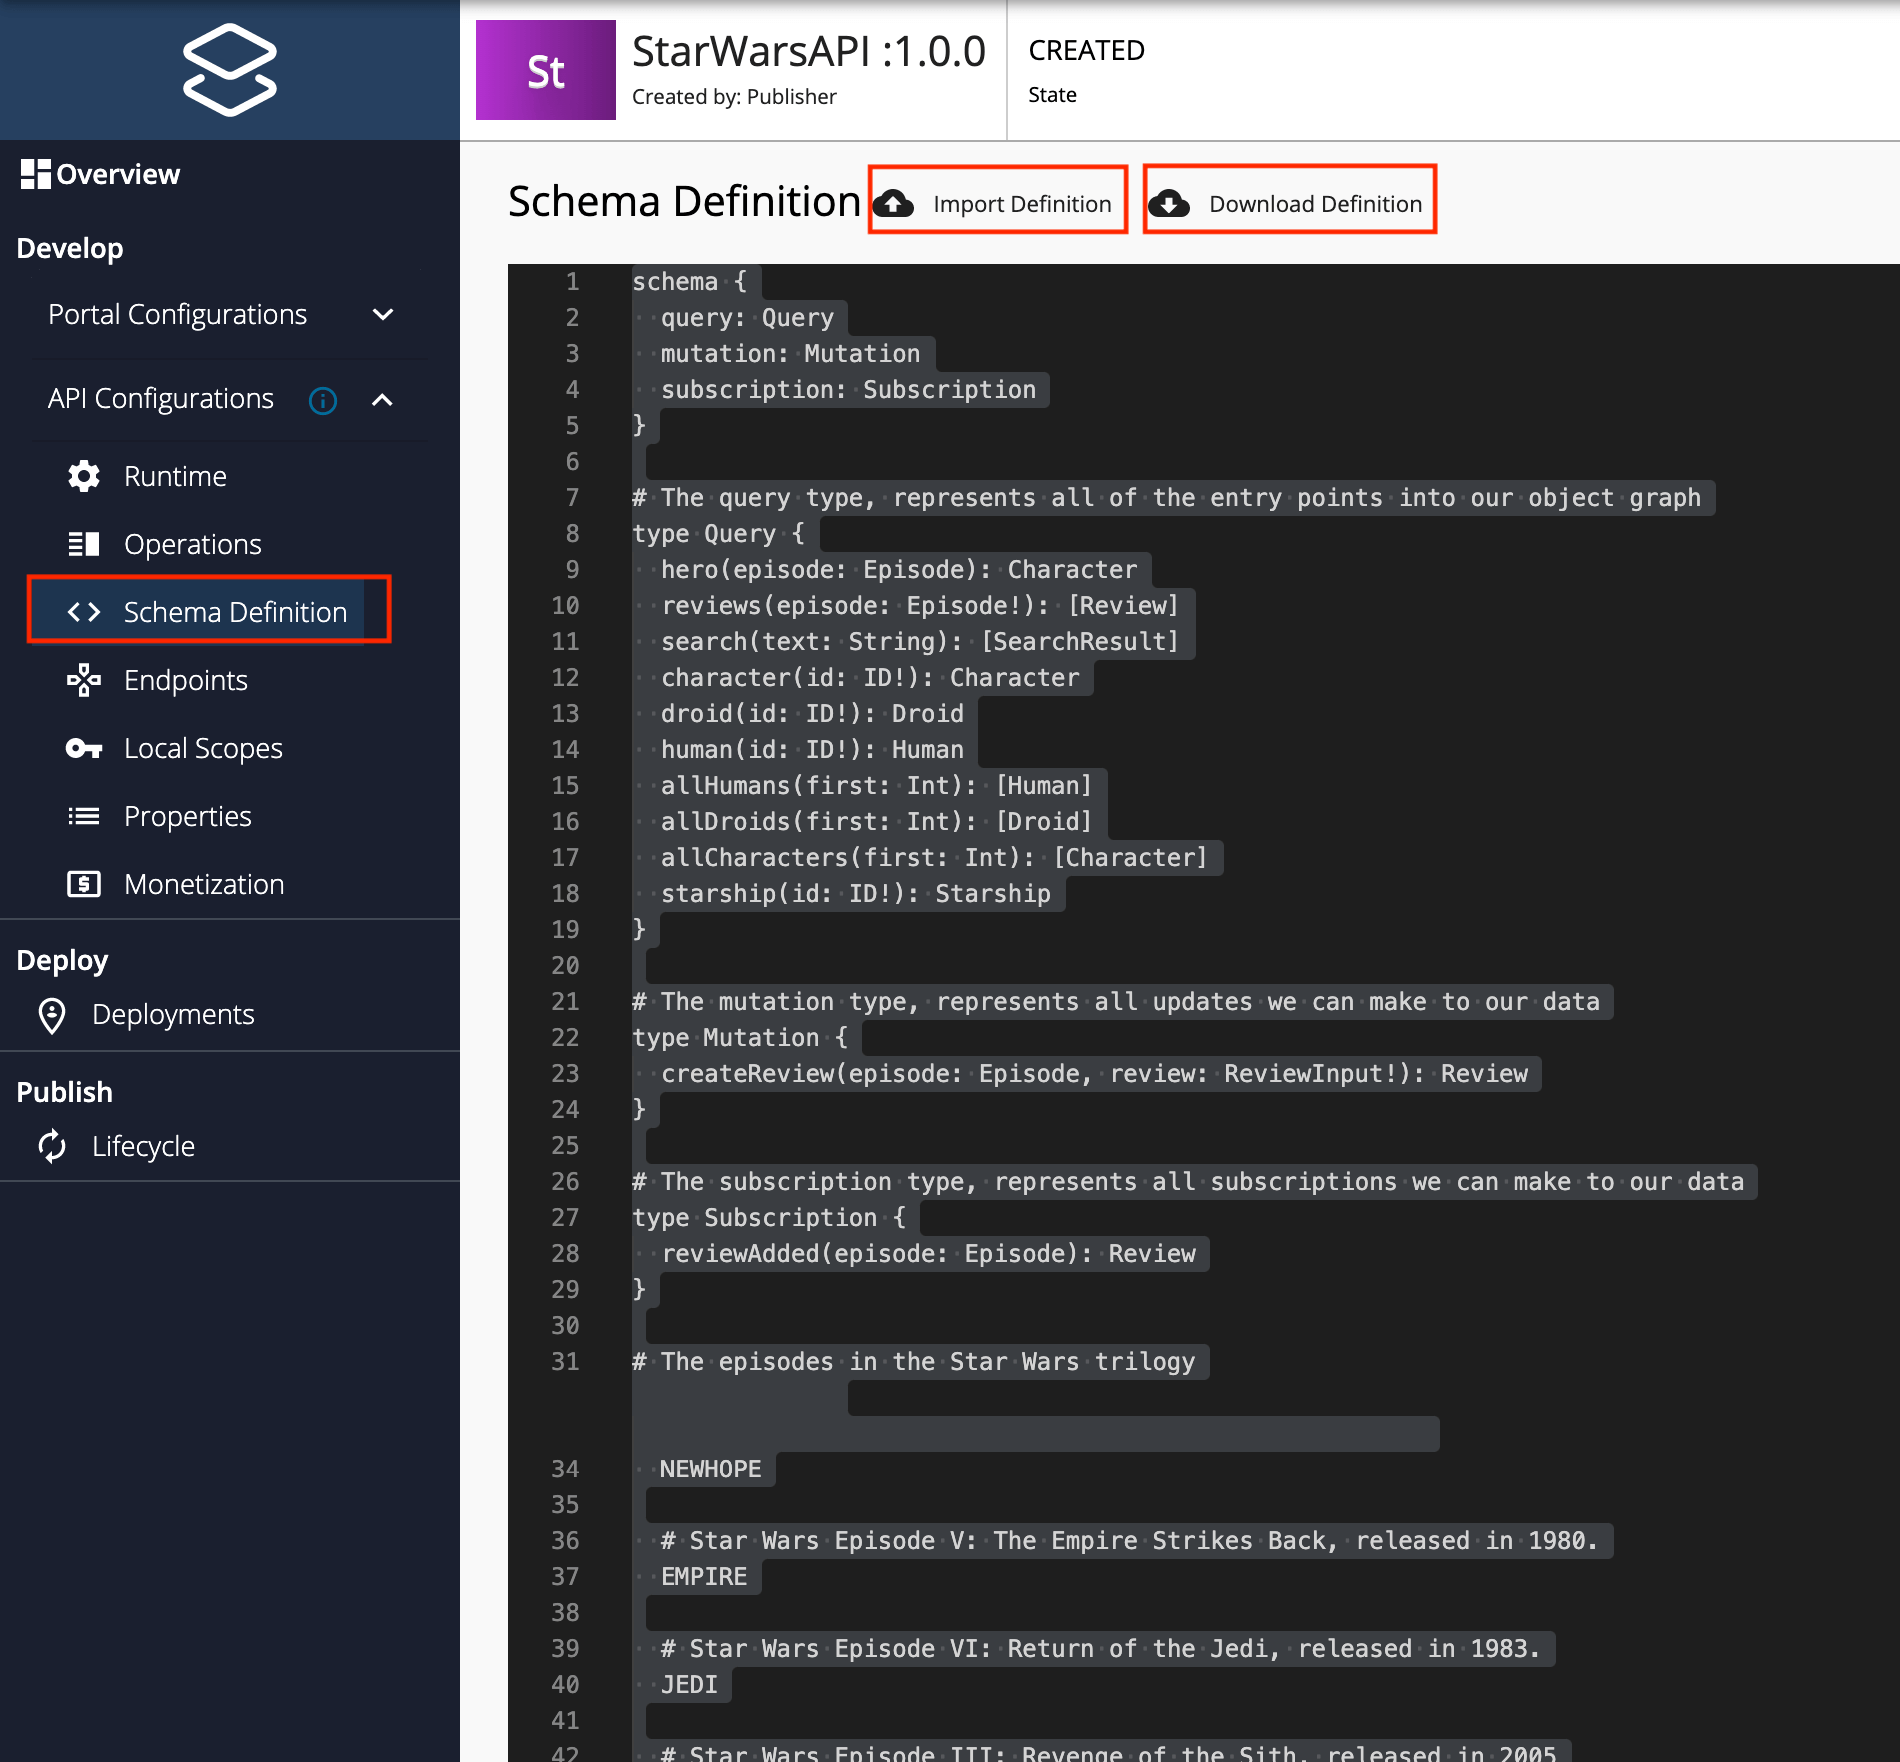
Navigate to Develop, API Configurations, and click Schema Definition.
-
Click Download Definition.
The existing GraphQL API schema gets downloaded.
-
Update the schema definition as required.
-
Click Import Definition to import the updated schema definition.
-
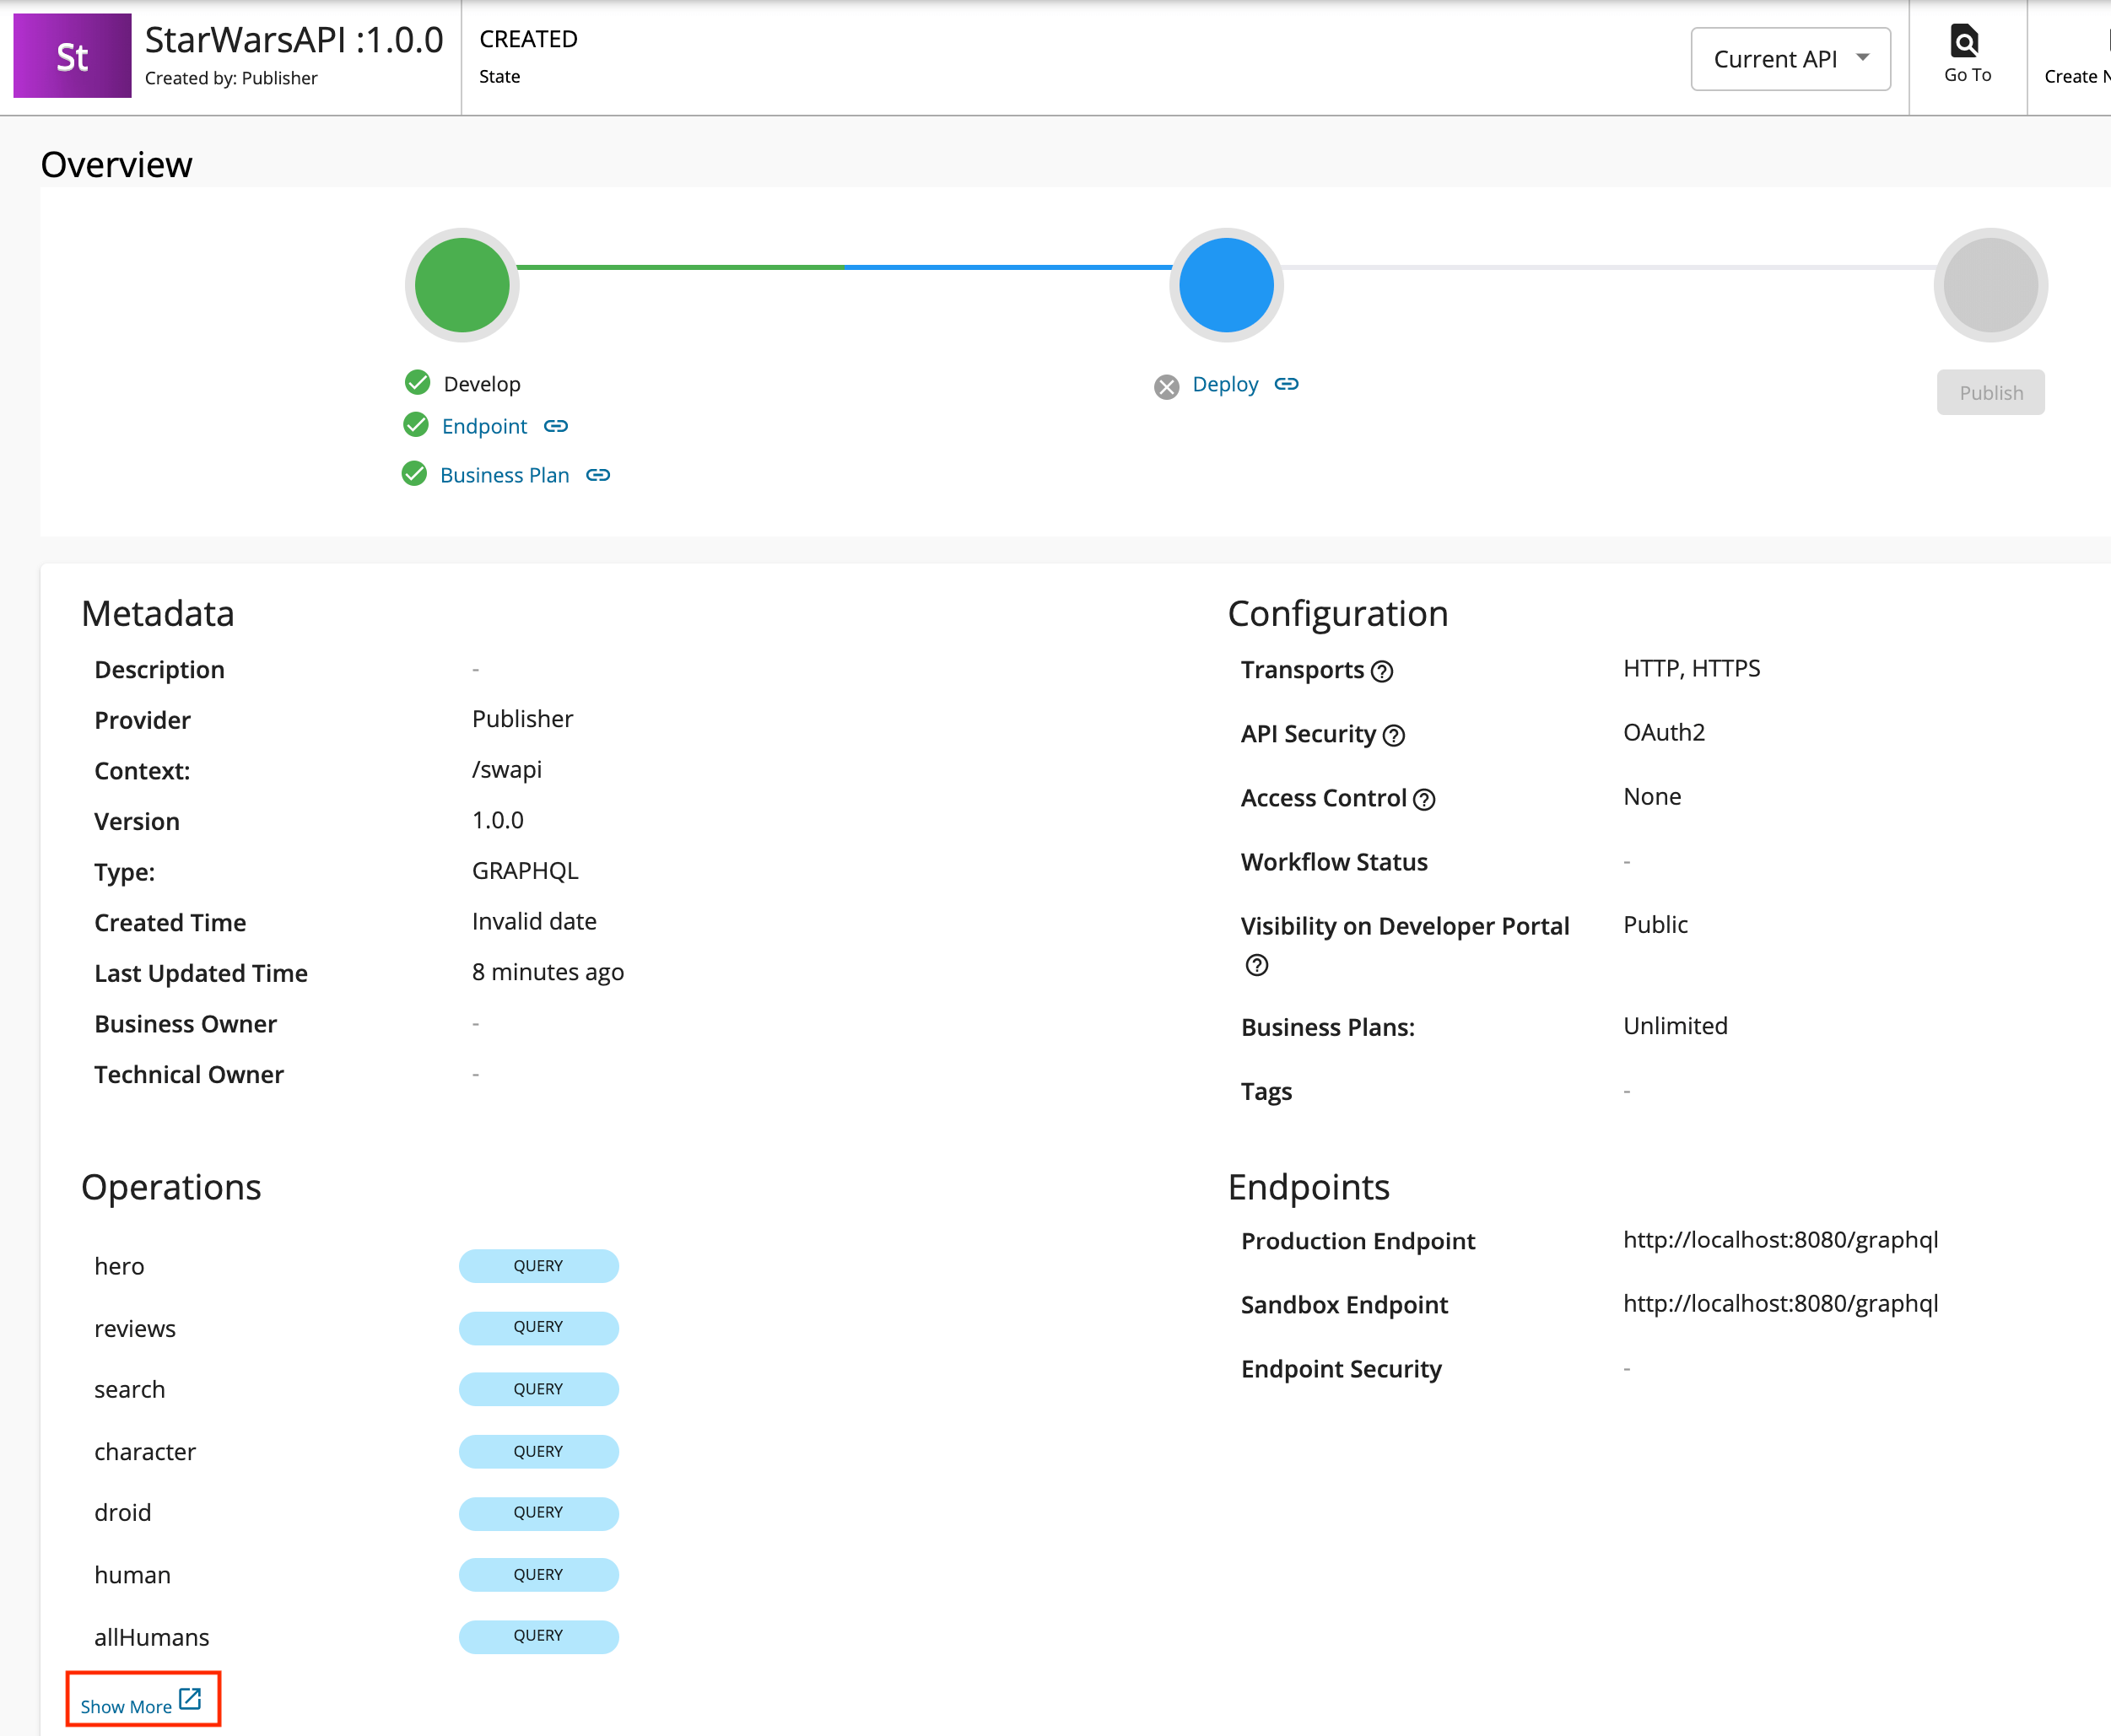
-
Update the GraphQL API operations as required.
Instead of resources, which get populated for REST APIs, operations get populated for GraphQL APIs.
-
Click Show More under the Operations section in the Overview page to navigate to the operations page.
-
Update the operations as required.
The Publisher can add Rate Limiting policies, scopes and enable/disable security for each of the GraphQL API operations.
-
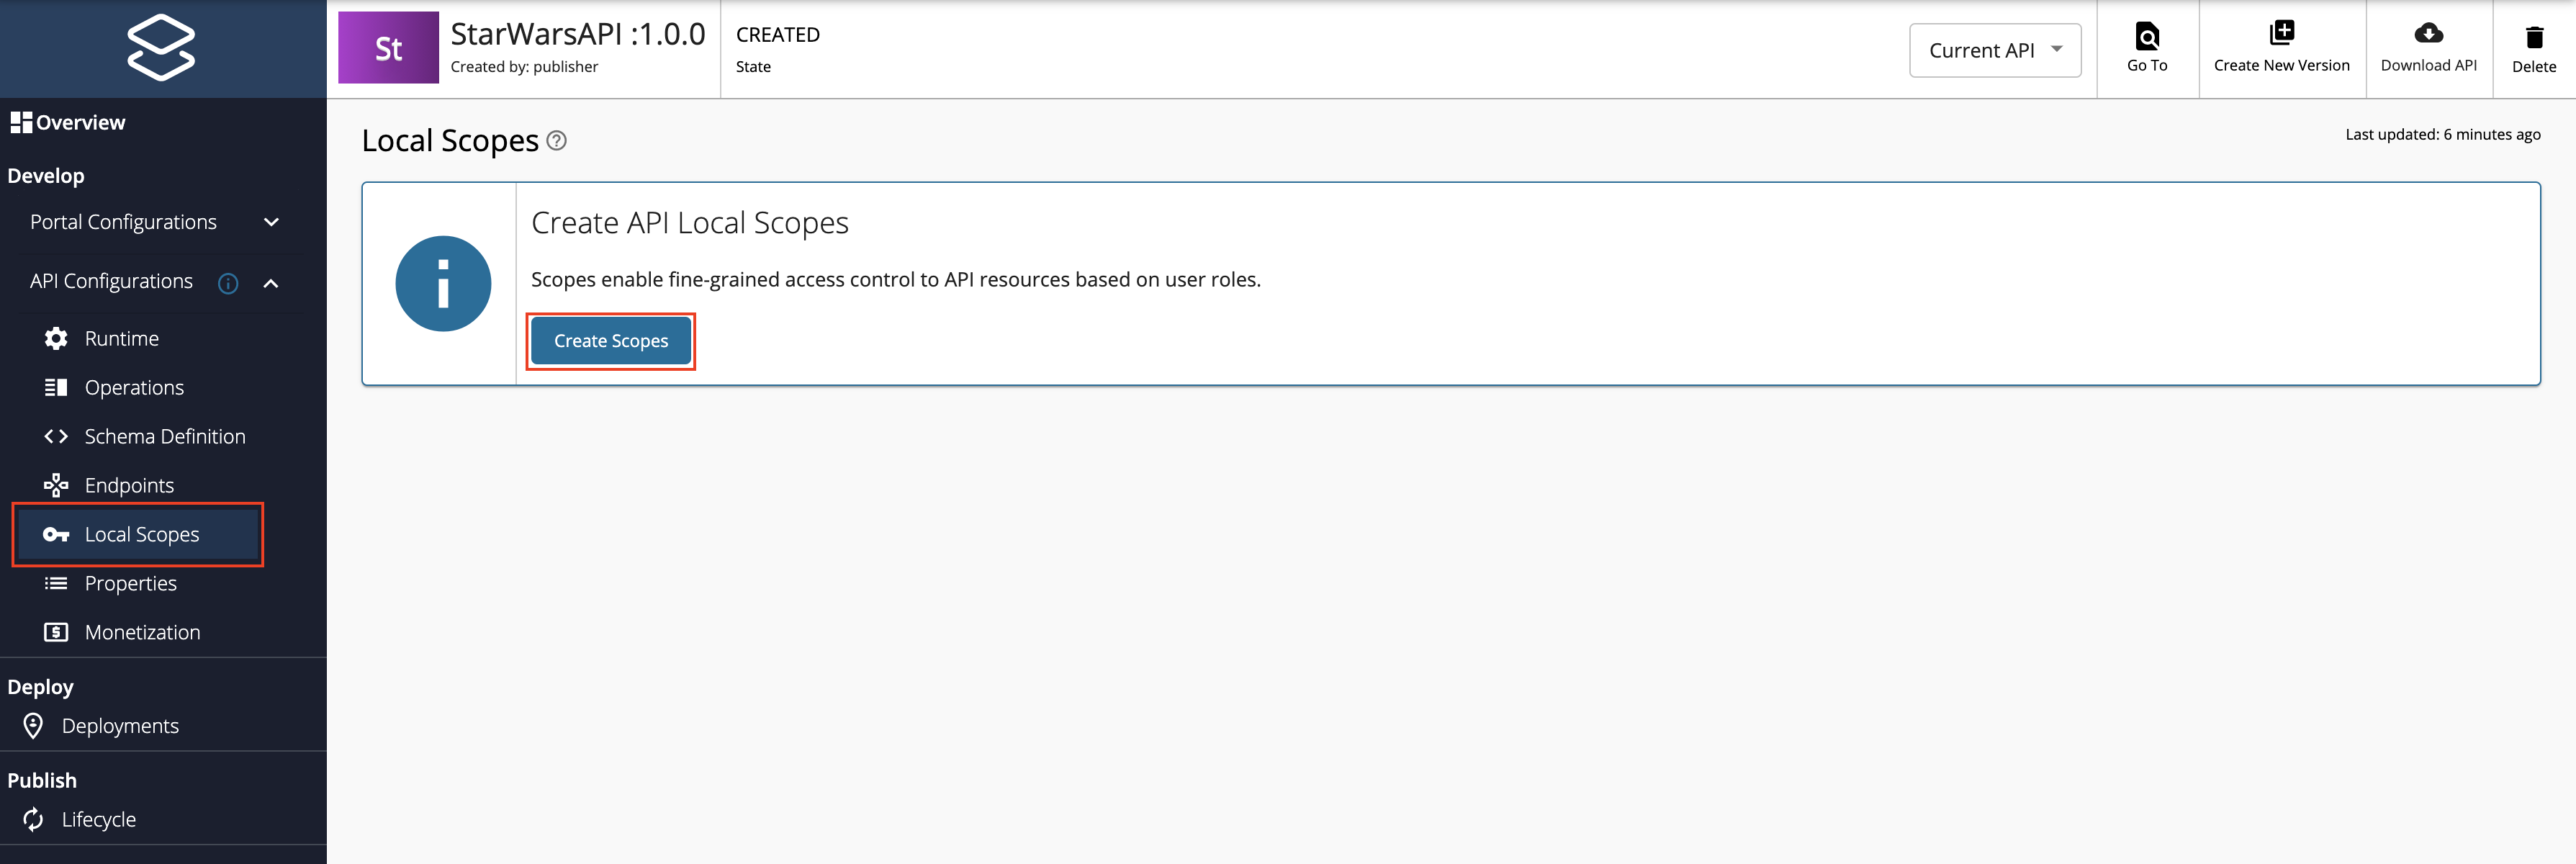
Create scopes.
Repeat the following sub-steps to create two scopes named
adminScopeandFilmSubscriberScope.-
Click Local Scopes, and then click Create Scopes.
-
Enter the required details.
Note
- The role that you enter should be a valid role that already exists in WSO2 API Manager. Make sure to assign the role to the user.
- For more information, see Adding Users and Adding User Roles.
Enter the following details for this example scenario.
Name Role FilmSubscriberFilmSubscriberadminScopeadmin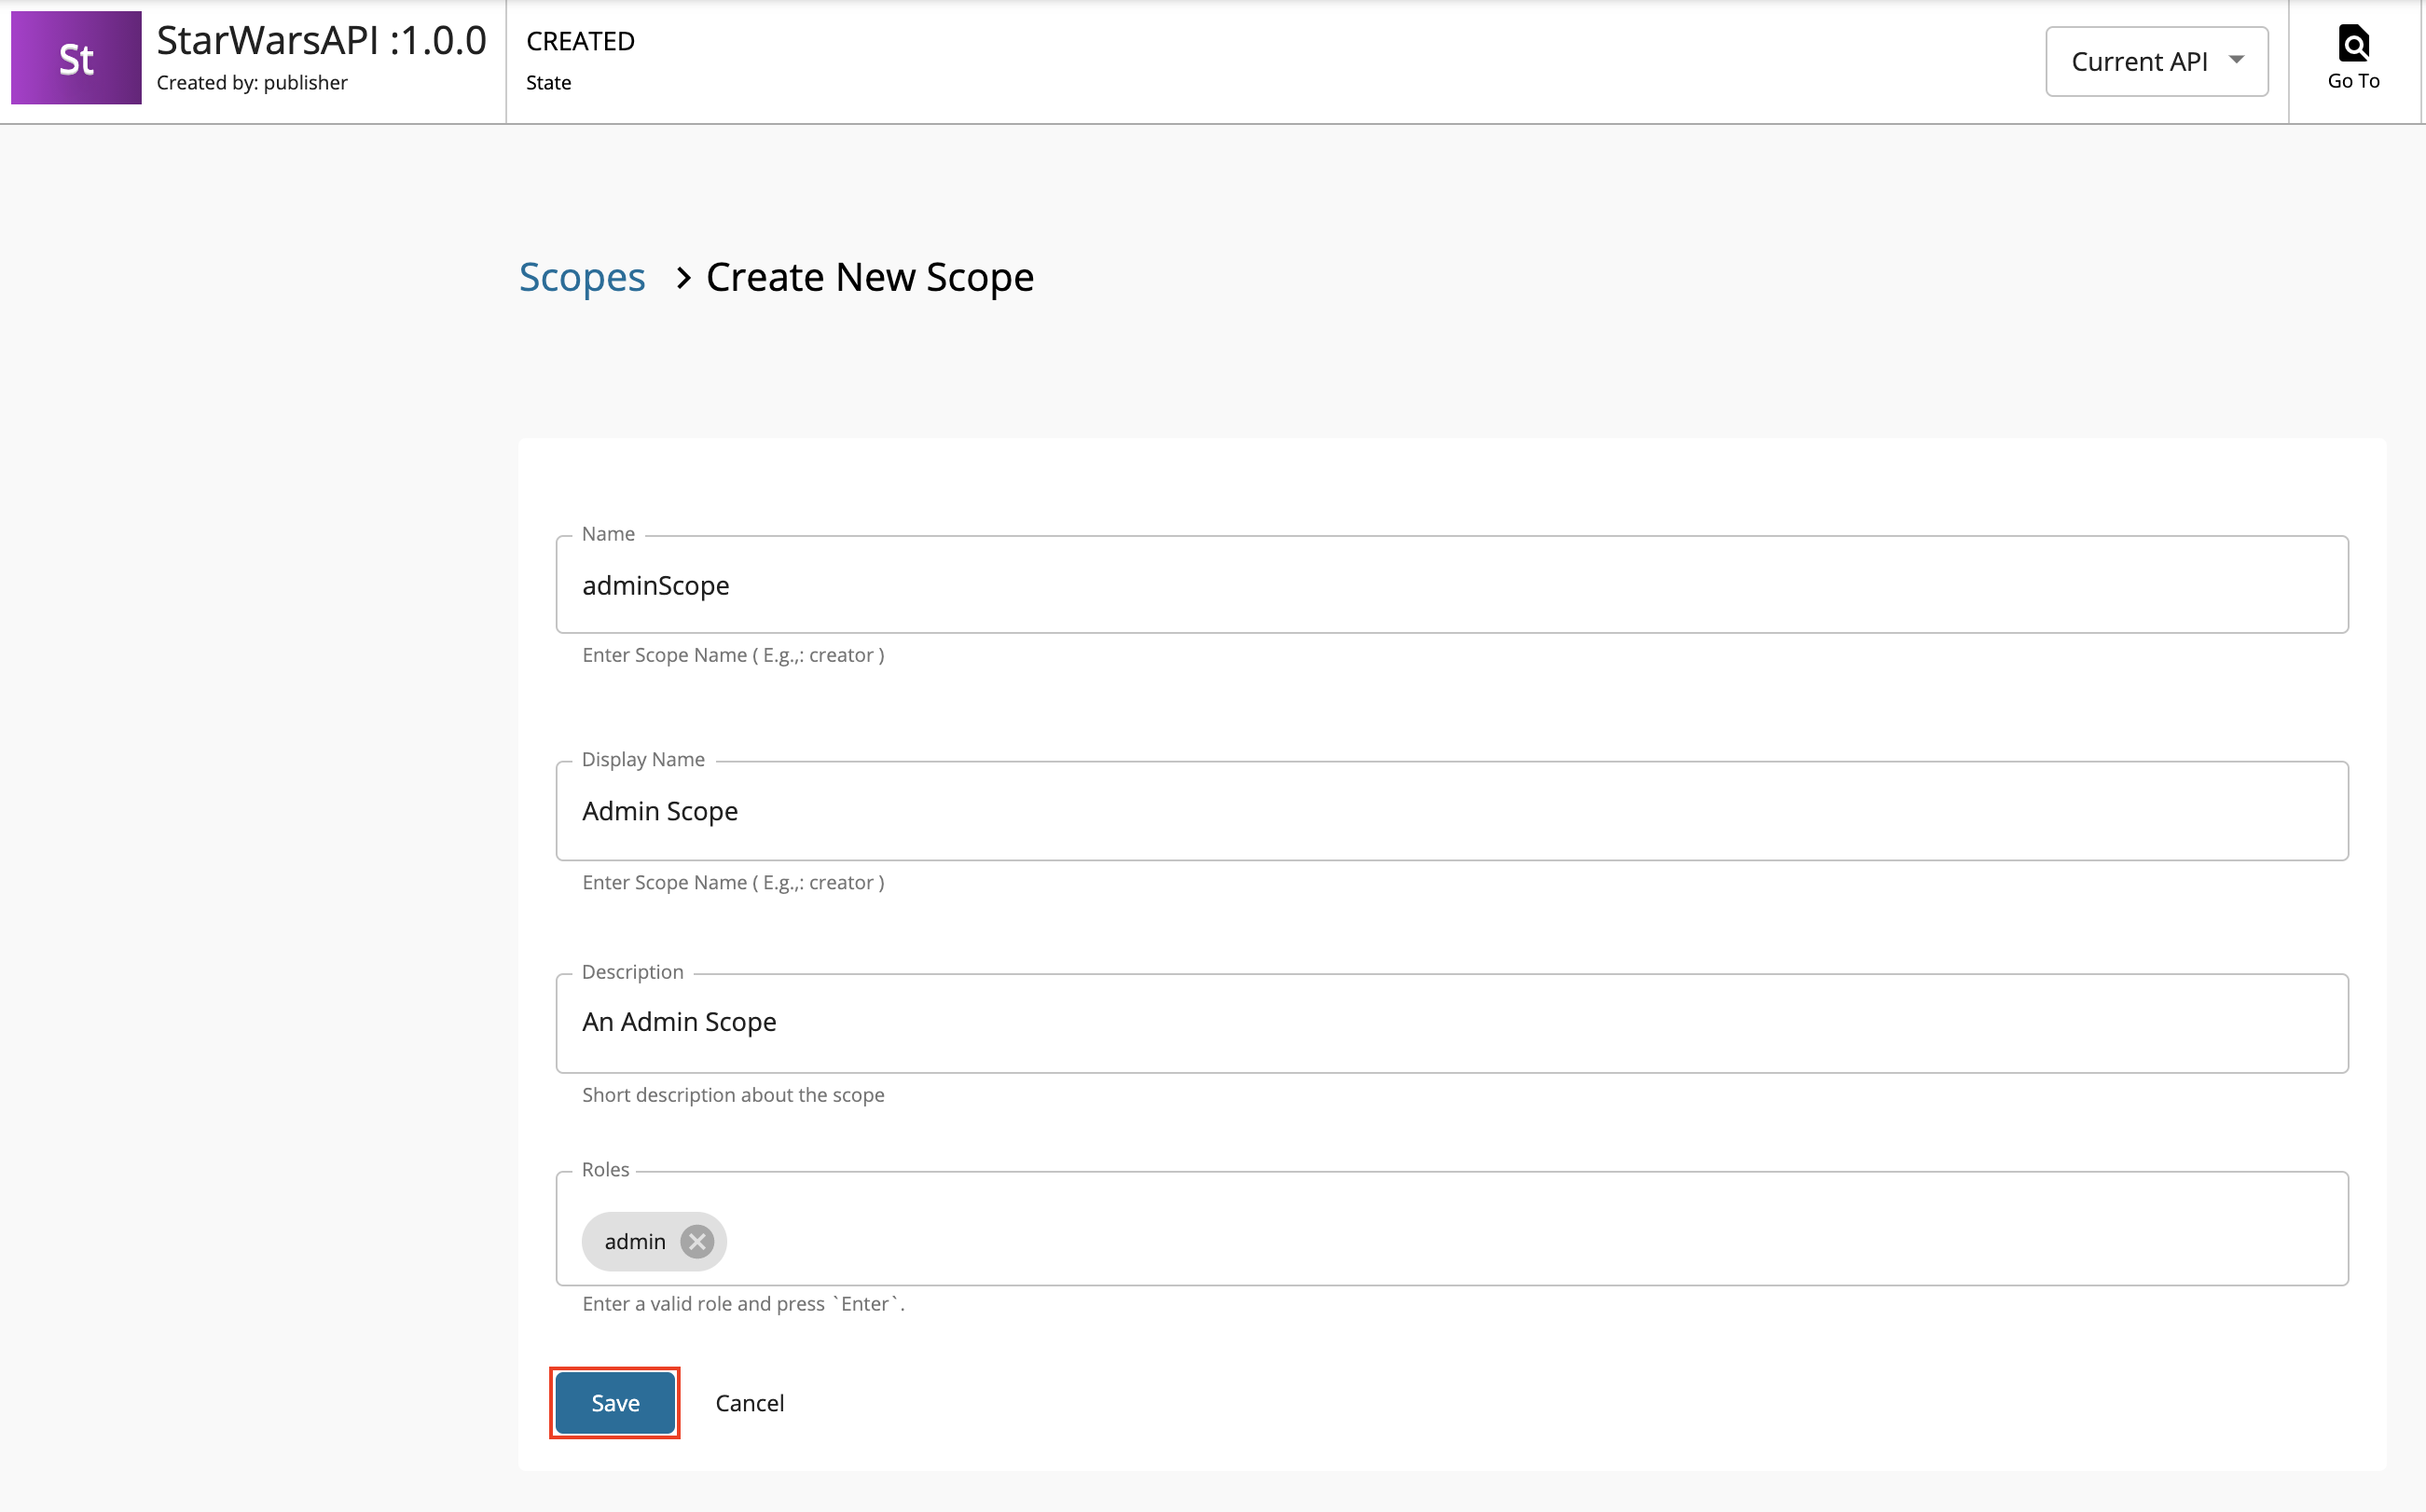
-
Press
Enterto add each role. -
Click Save.

-
-
Define the operation level configurations.
-
Click Operations.
-
Click Operation Level to apply Rate Limiting for operations.
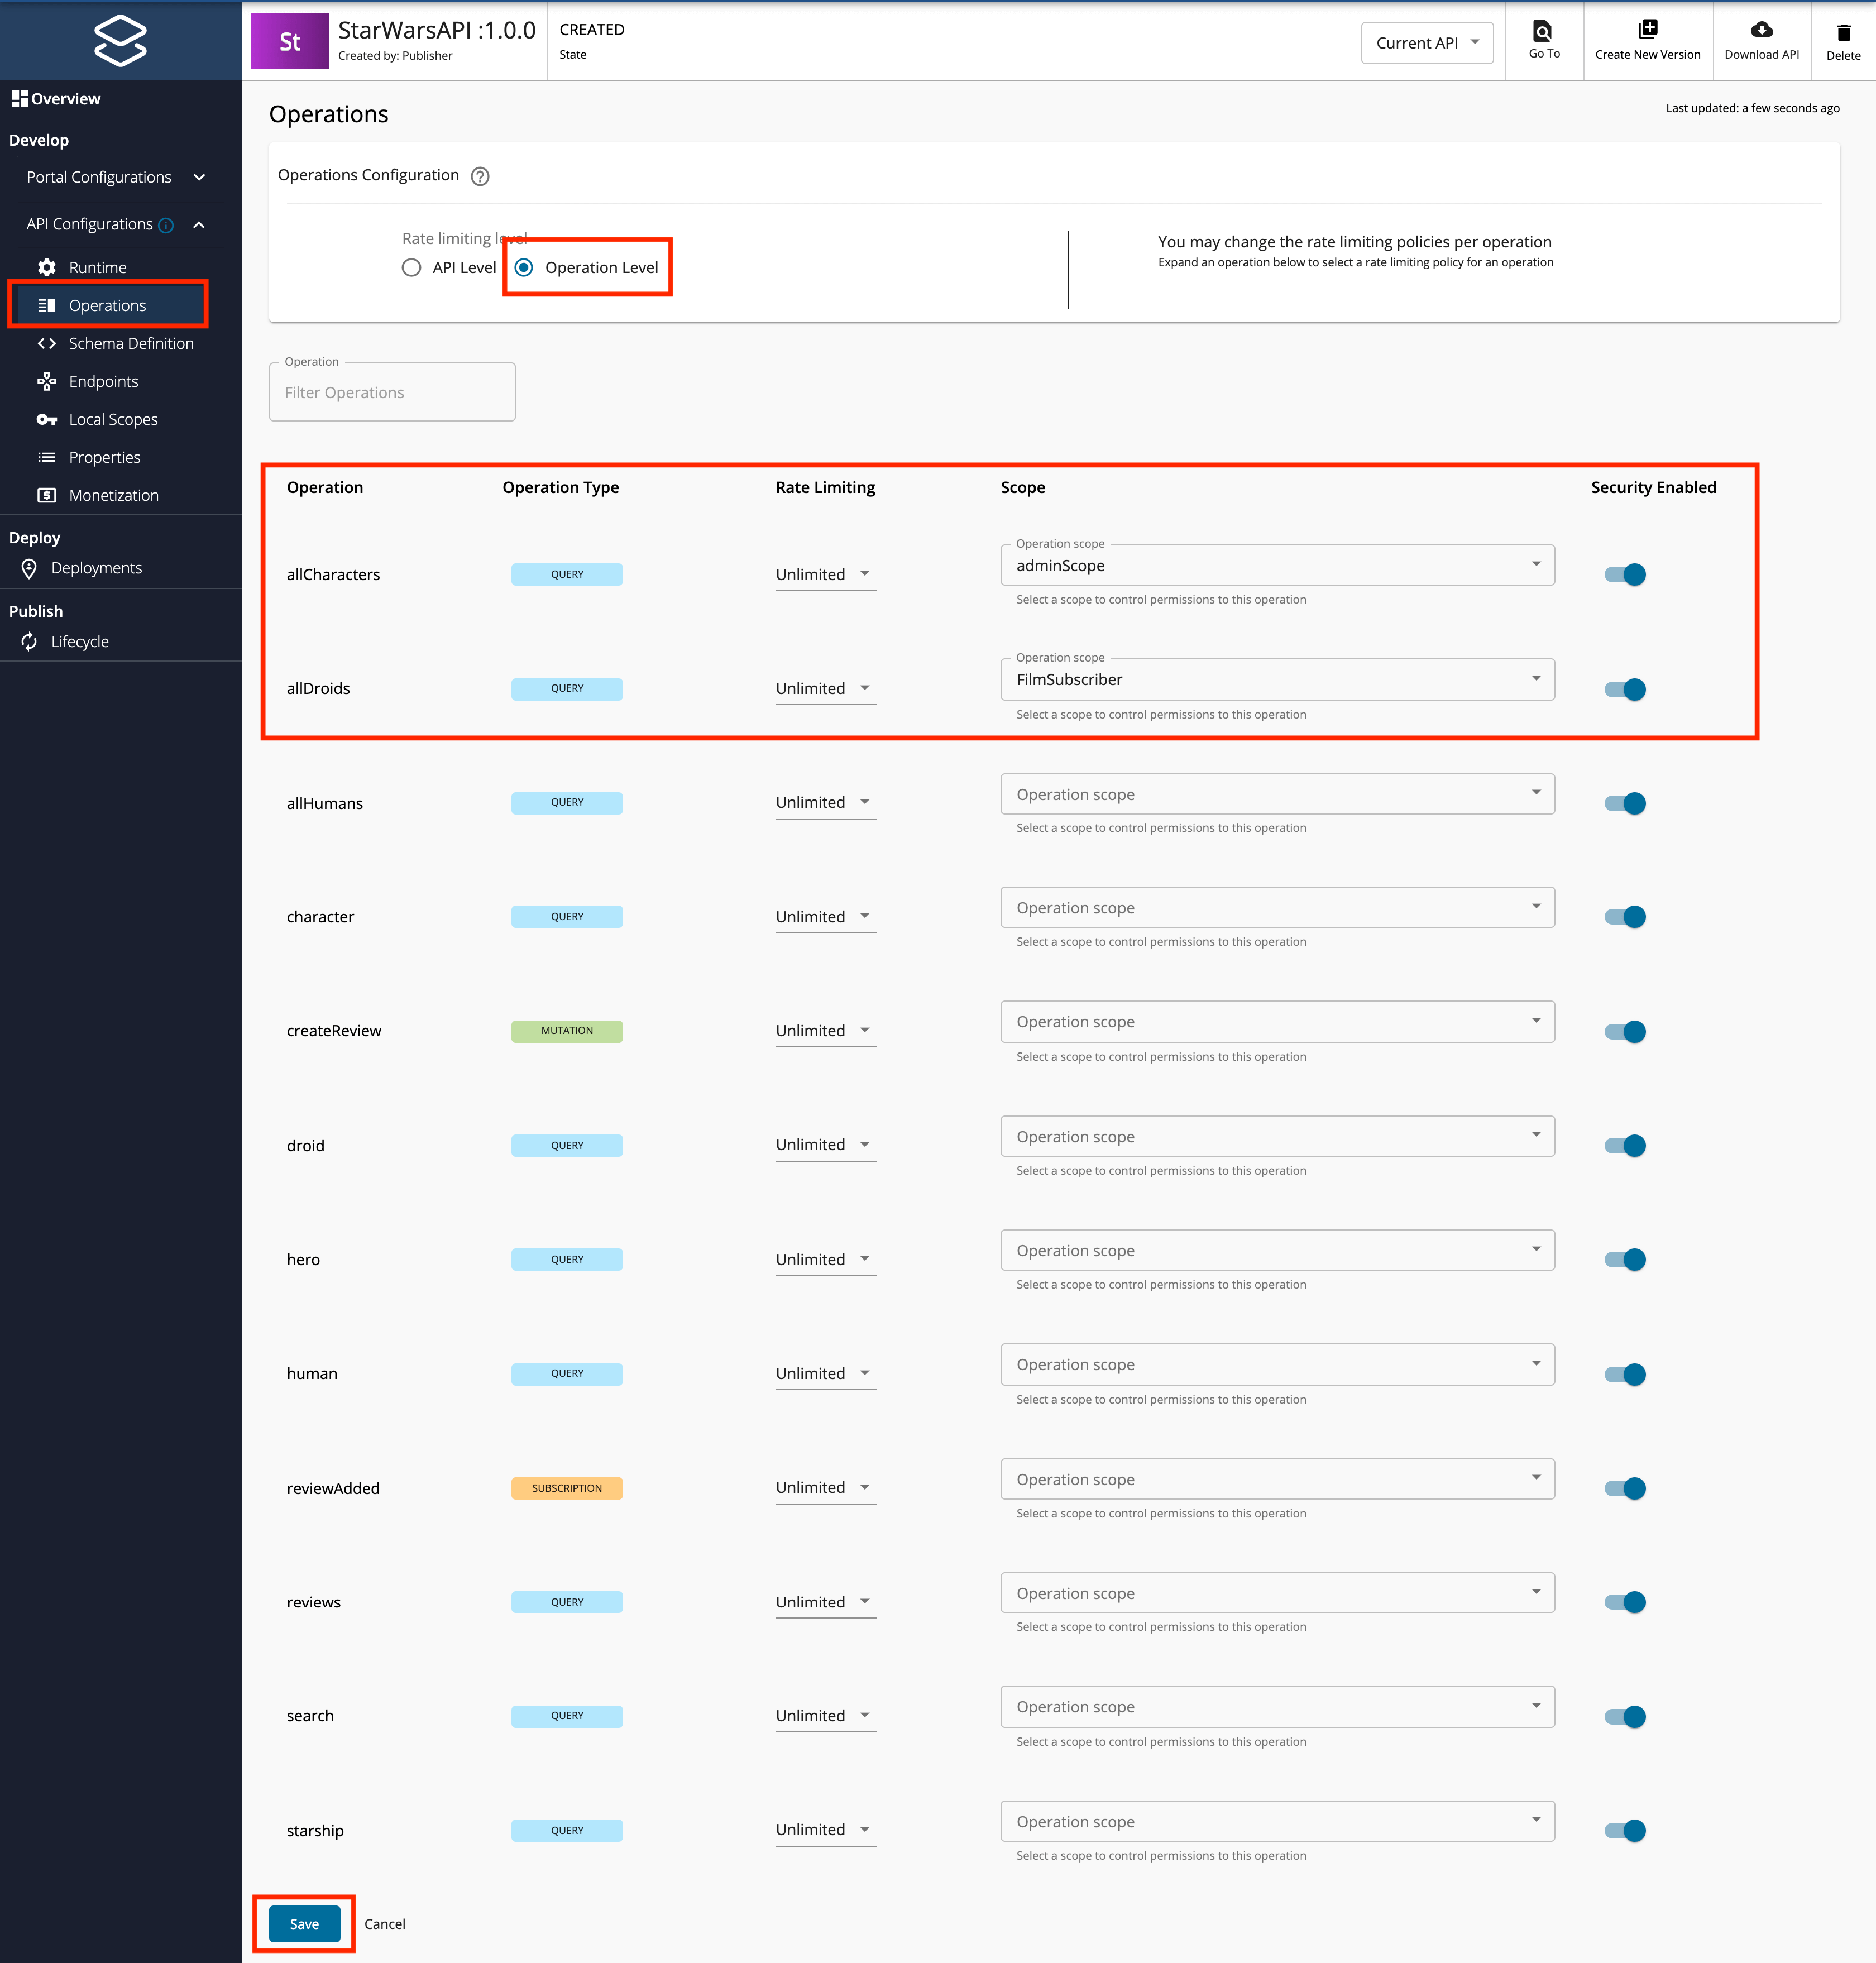
-
Select a Rate Limiting Policy, scope, and enable or disable security for each of the operations.
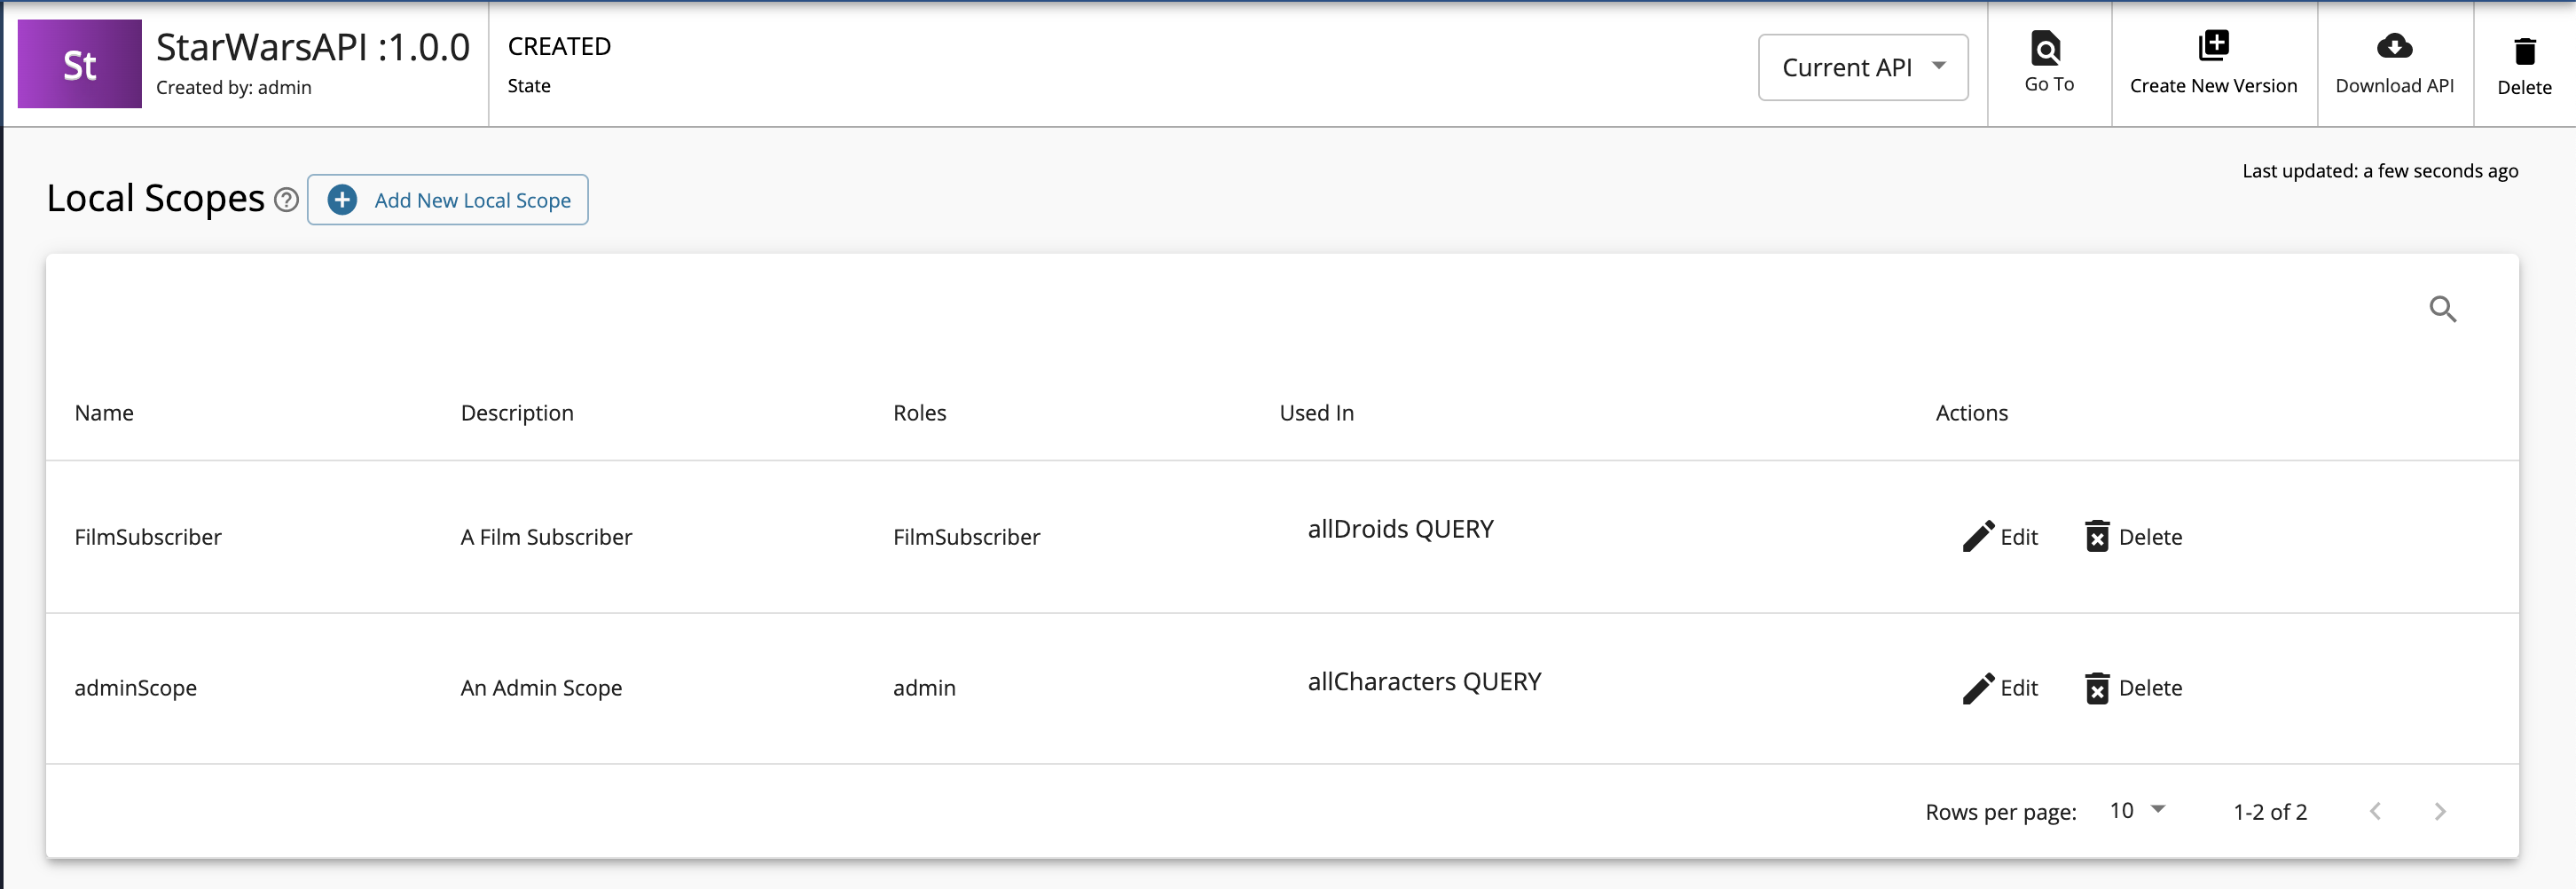
Apply the following scopes to the respective operations.
Operation Scope allDroidsFilmSubscriberallCharactersadminScope -
Click Save.
If you check the list of scopes, it should appear as follows:
-
-
-
Now, you have created and configured the GraphQL API successfully.
Step 3 - Deploy the GraphQL API
- Navigate to Deploy and click Deployments to navigate to the Deploy the API page.
-
Click Deploy to deploy the API to the API Gateway, which is the default Gateway.
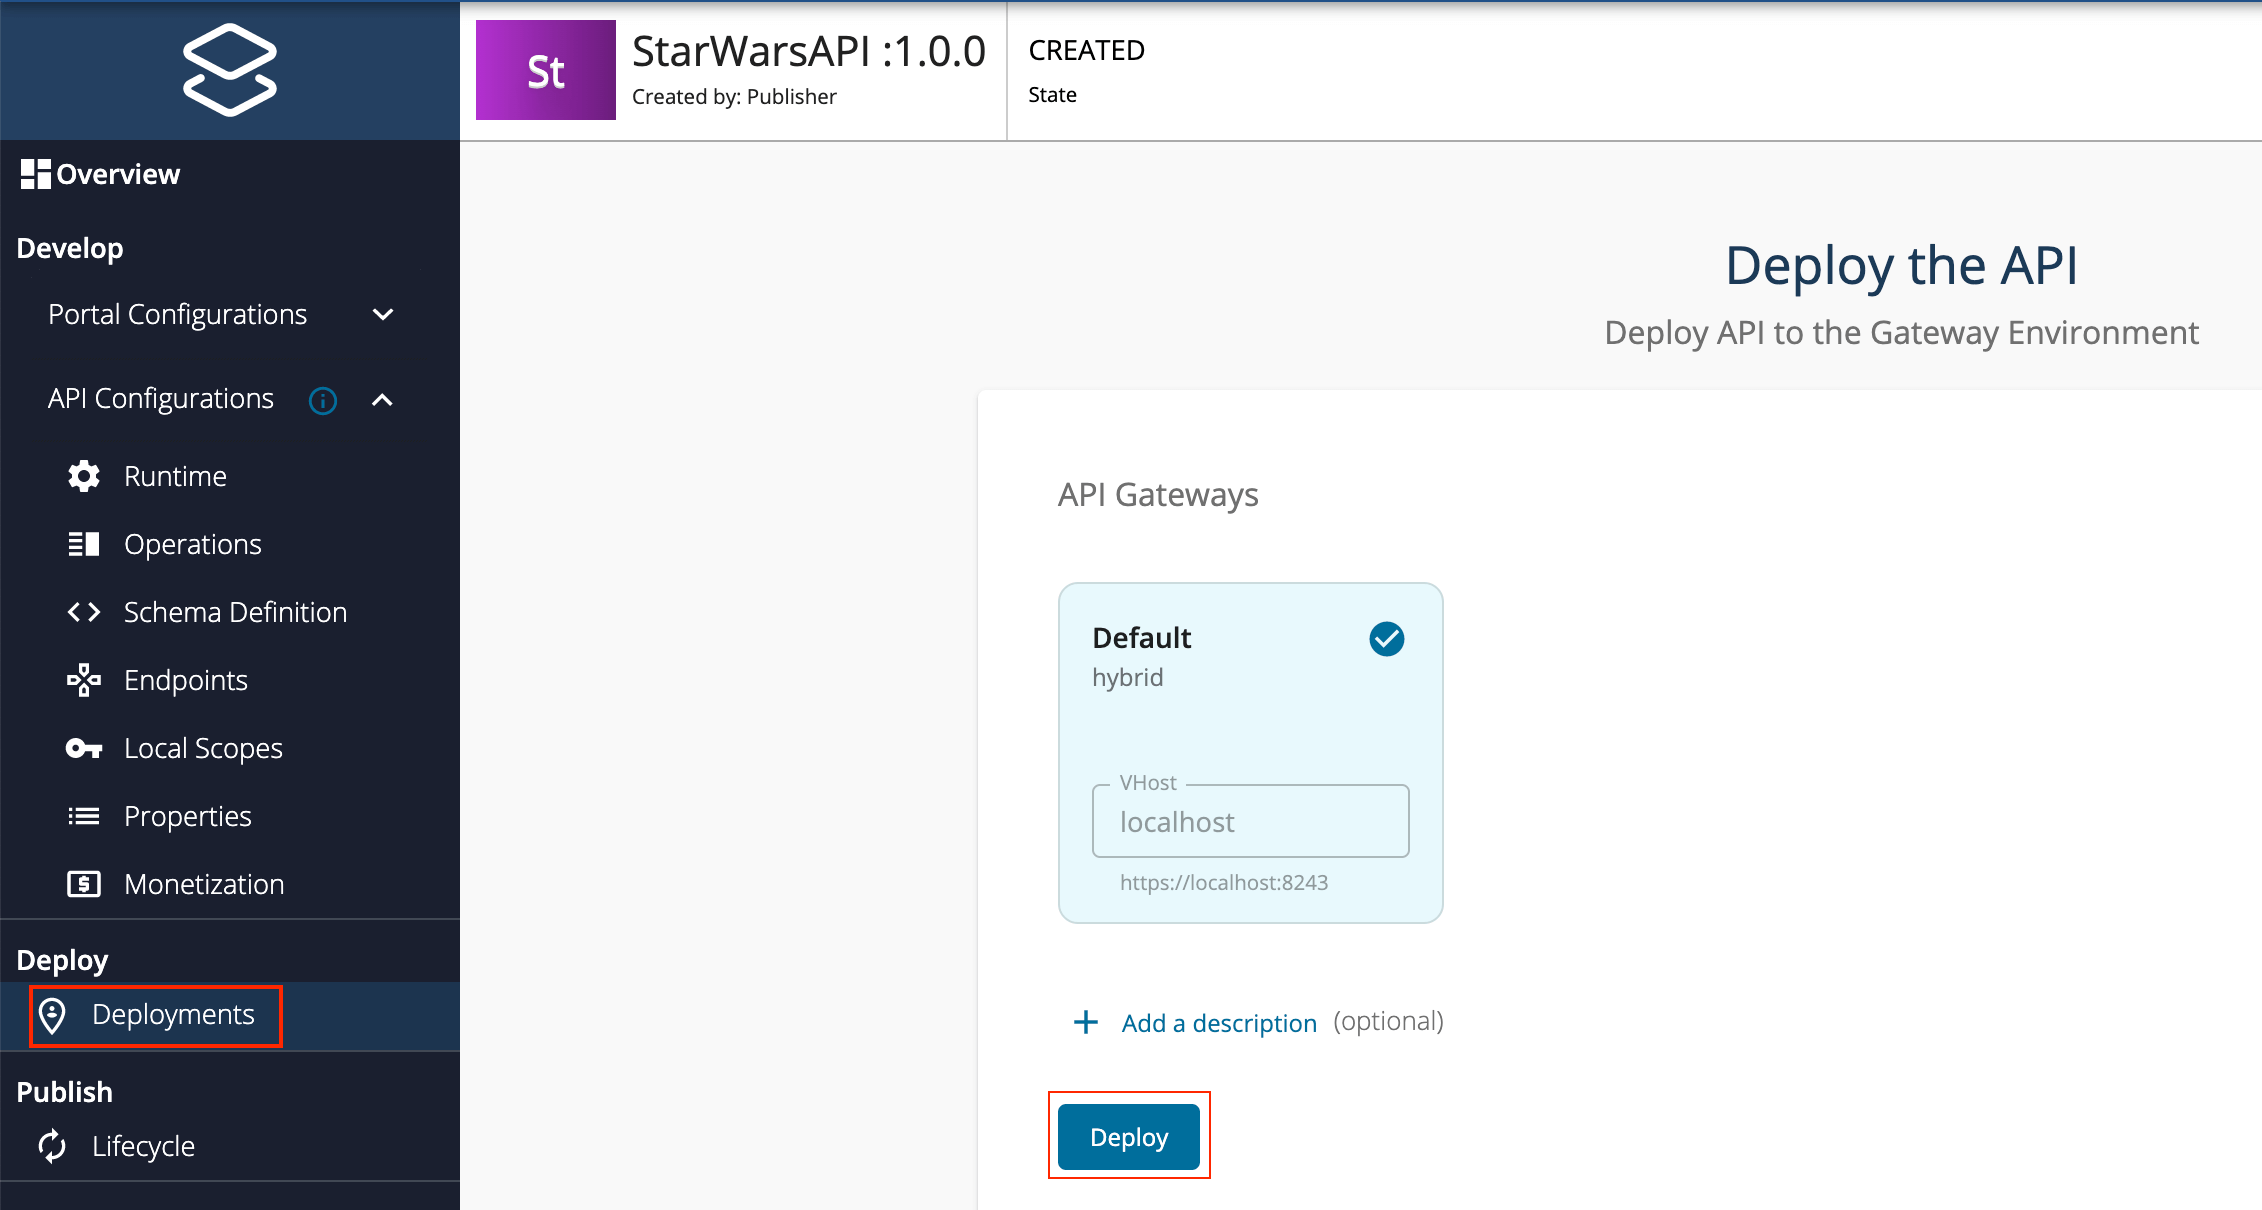
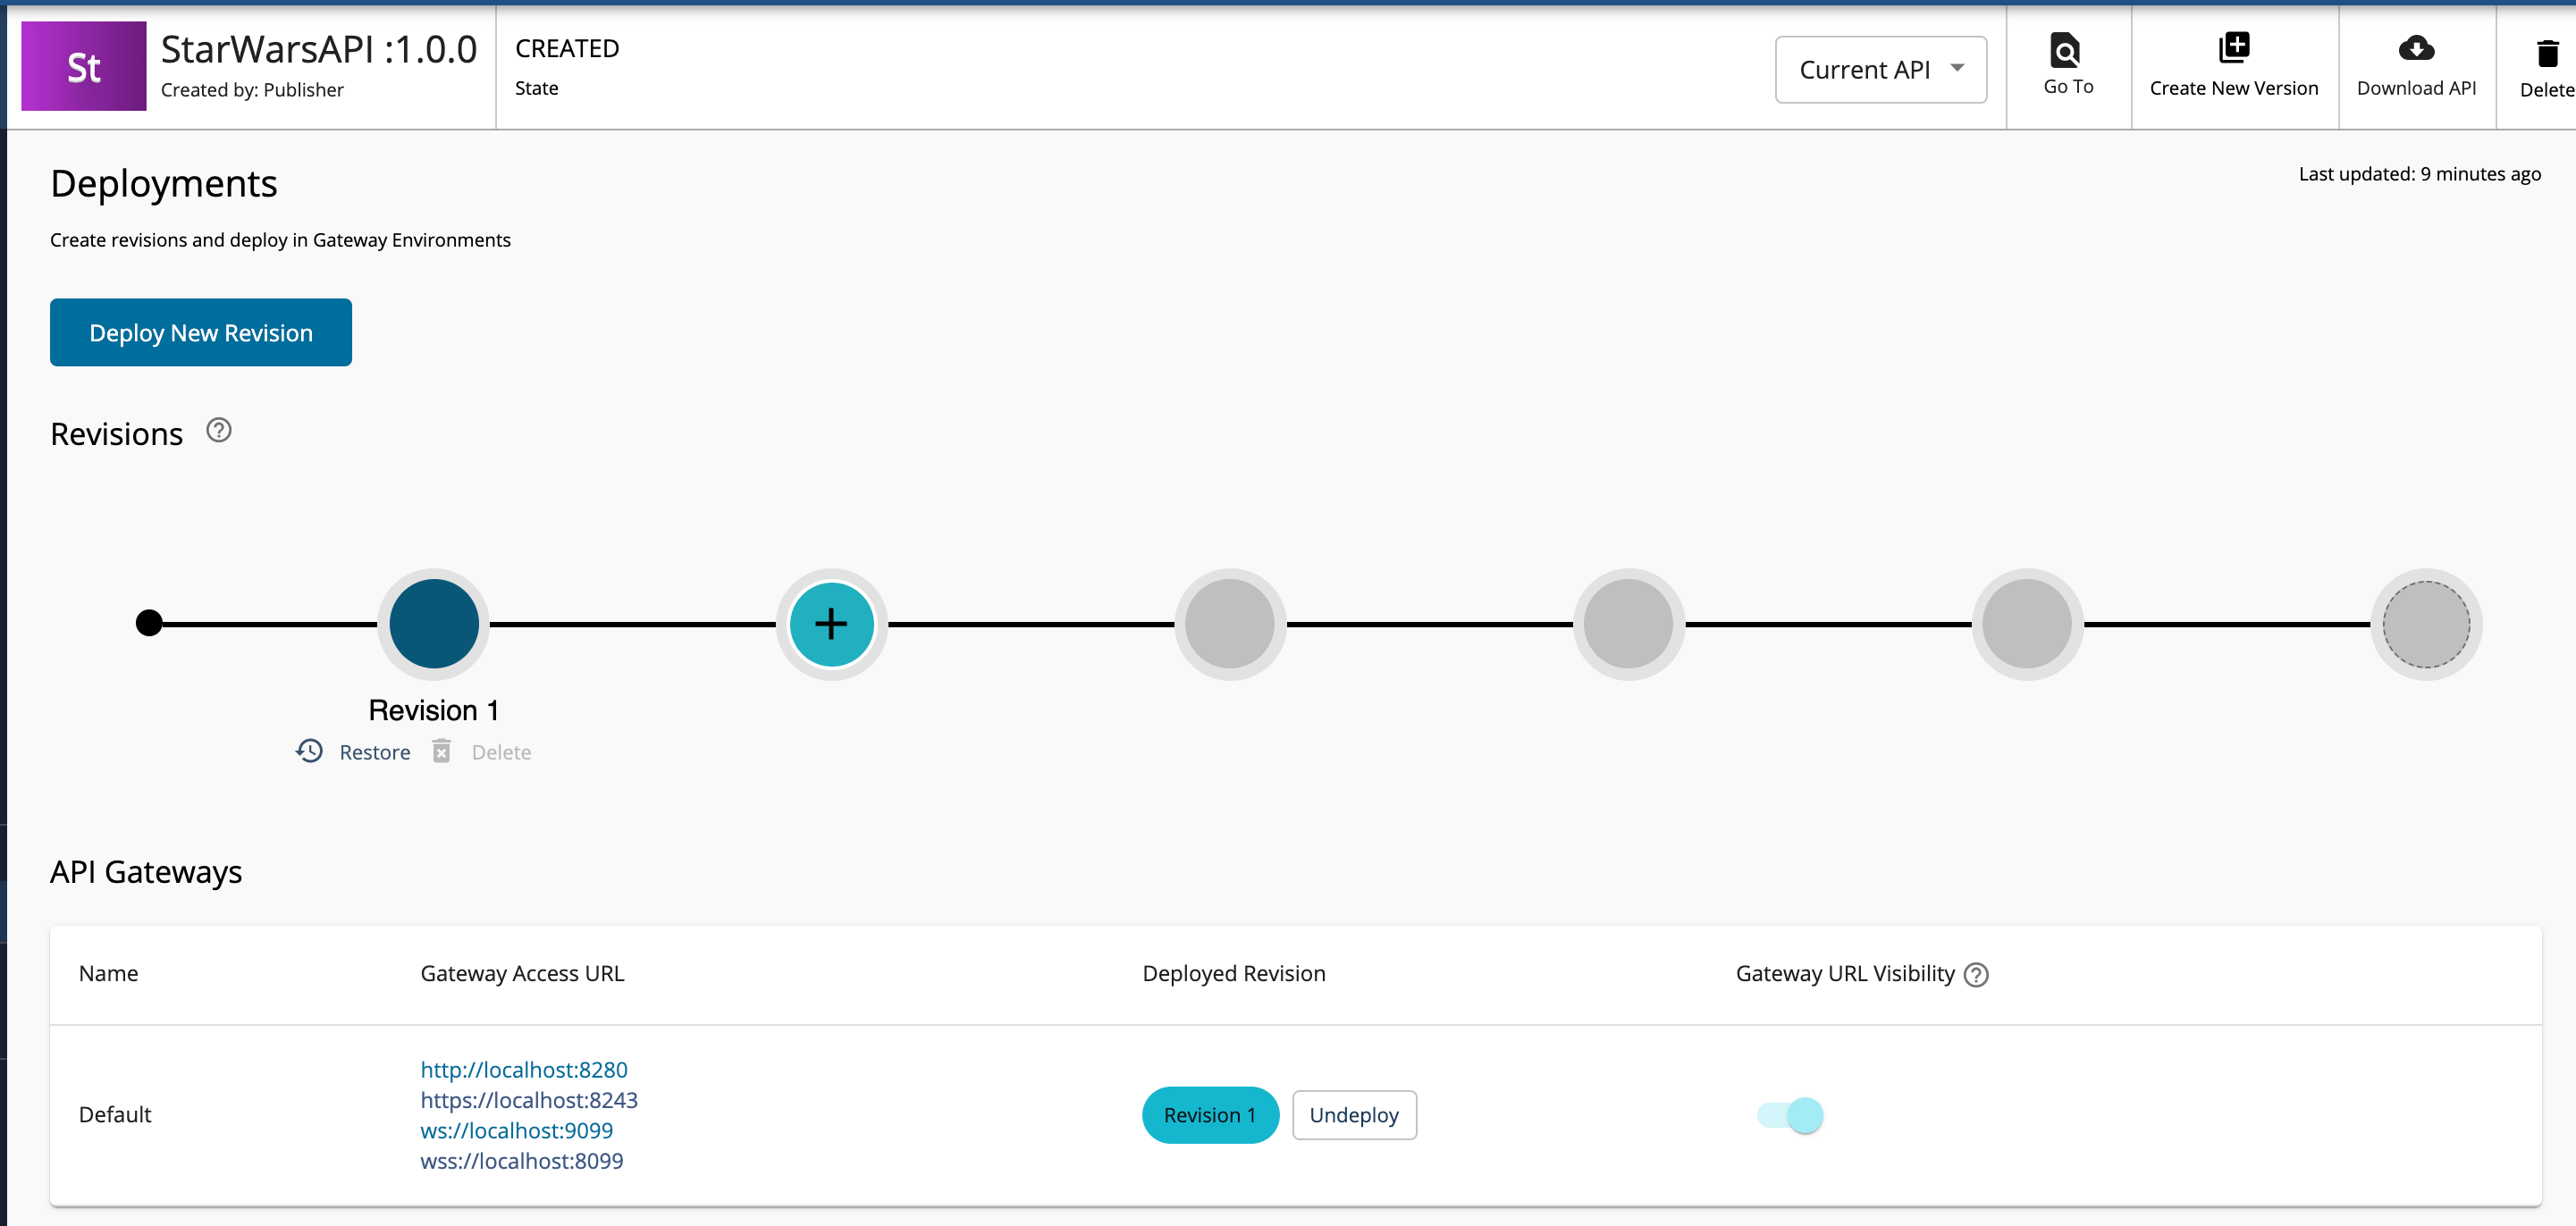
The Deployment page appears.
Step 4 - Publish the GraphQL API
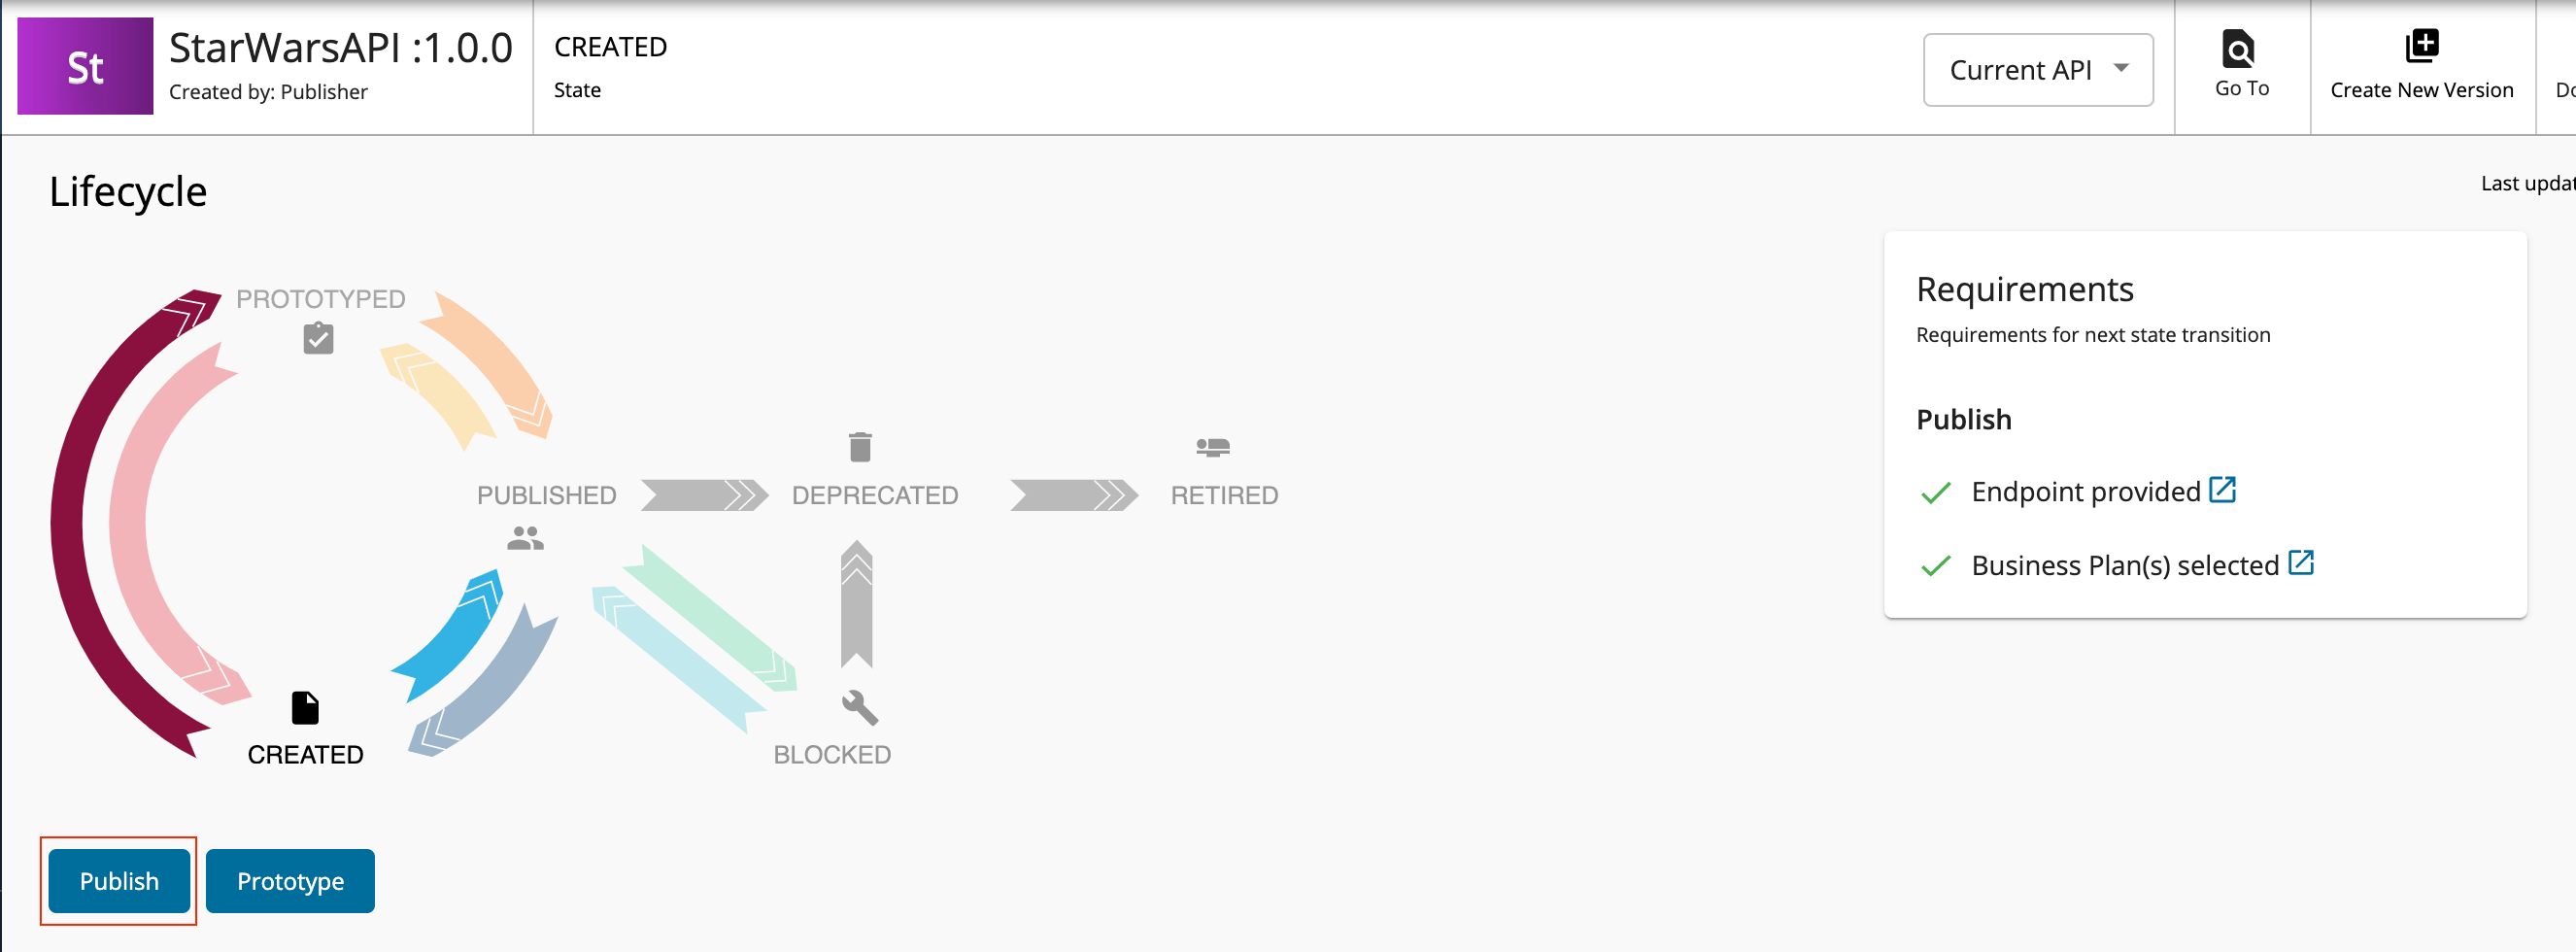
-
Navigate to Publish and click Lifecycle.
The API lifecycle page appears.
-
Click Publish to publish the API to the API Developer Portal.
Step 5 - Invoke the GraphQL API
-
Sign in to the Developer Portal.
https://<hostname>:9443/devportalExample:
https://localhost:9443/devportalLet's use
adminas the username and password to sign in.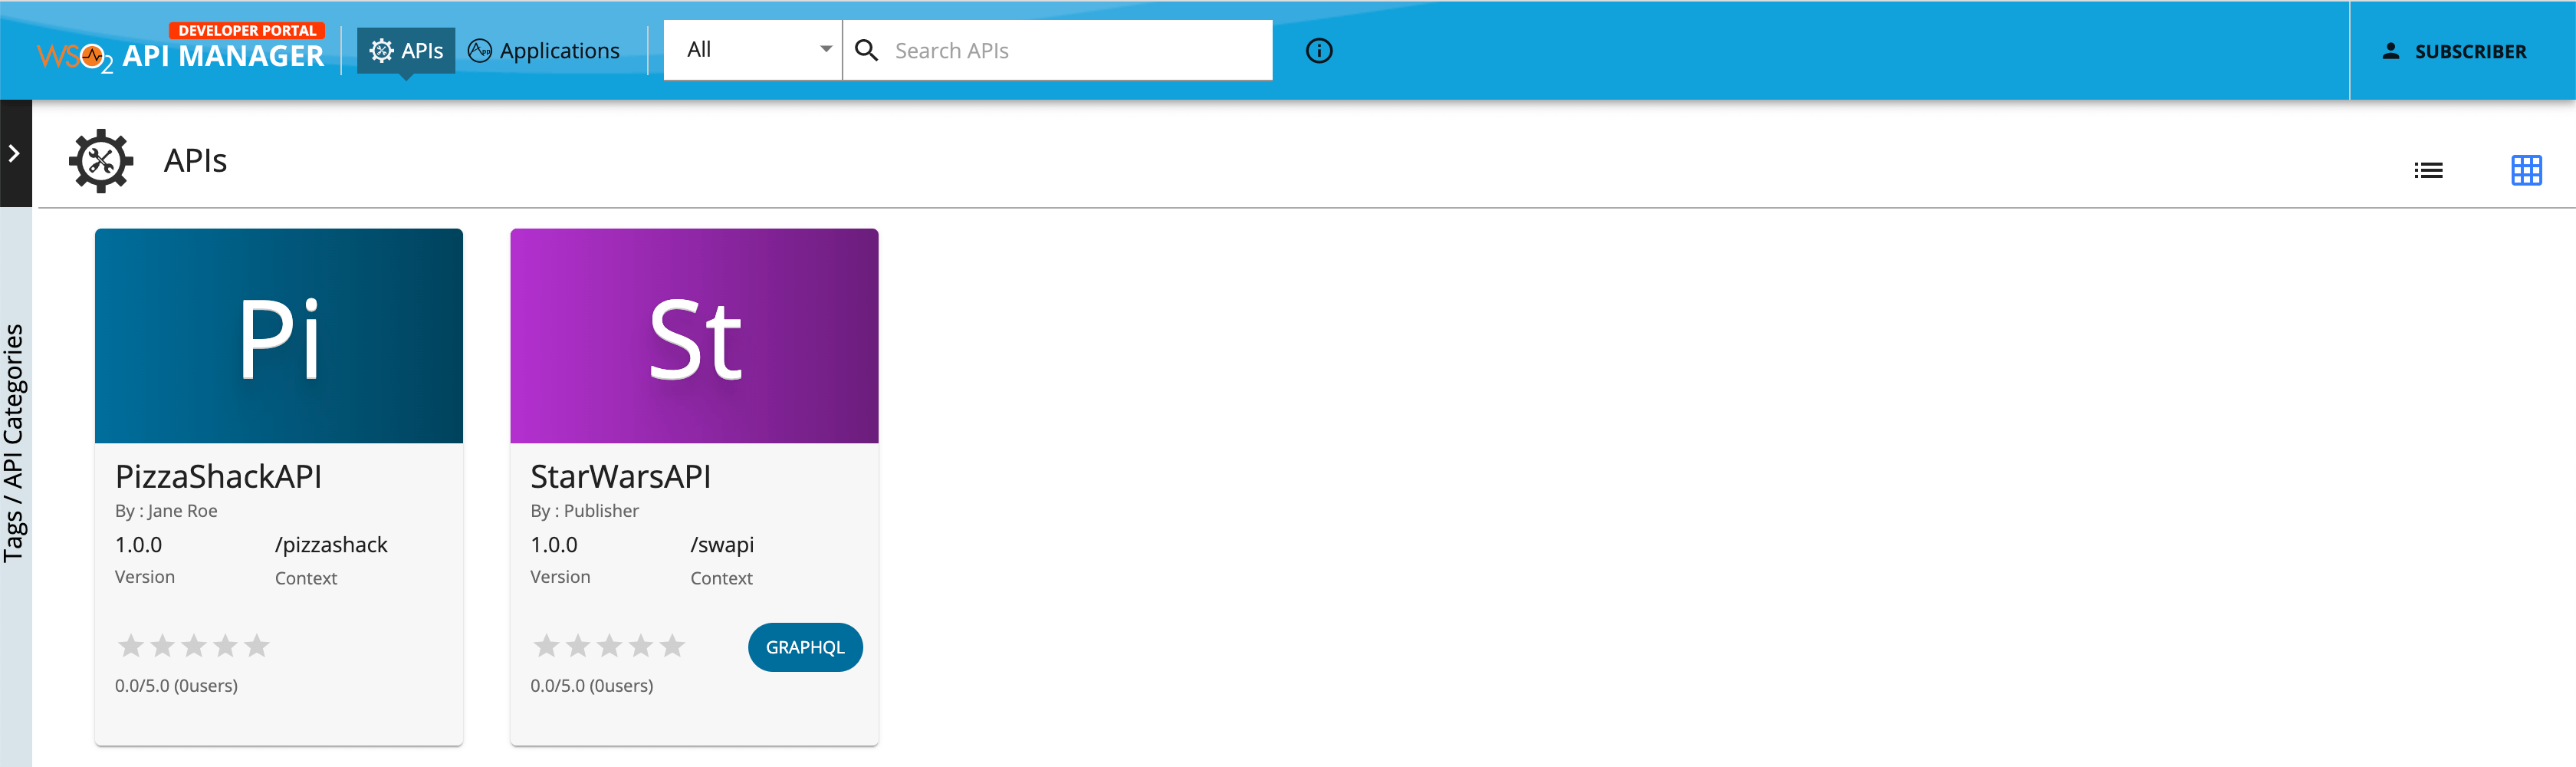
-
Click on the GraphQL API.
The API overview appears.
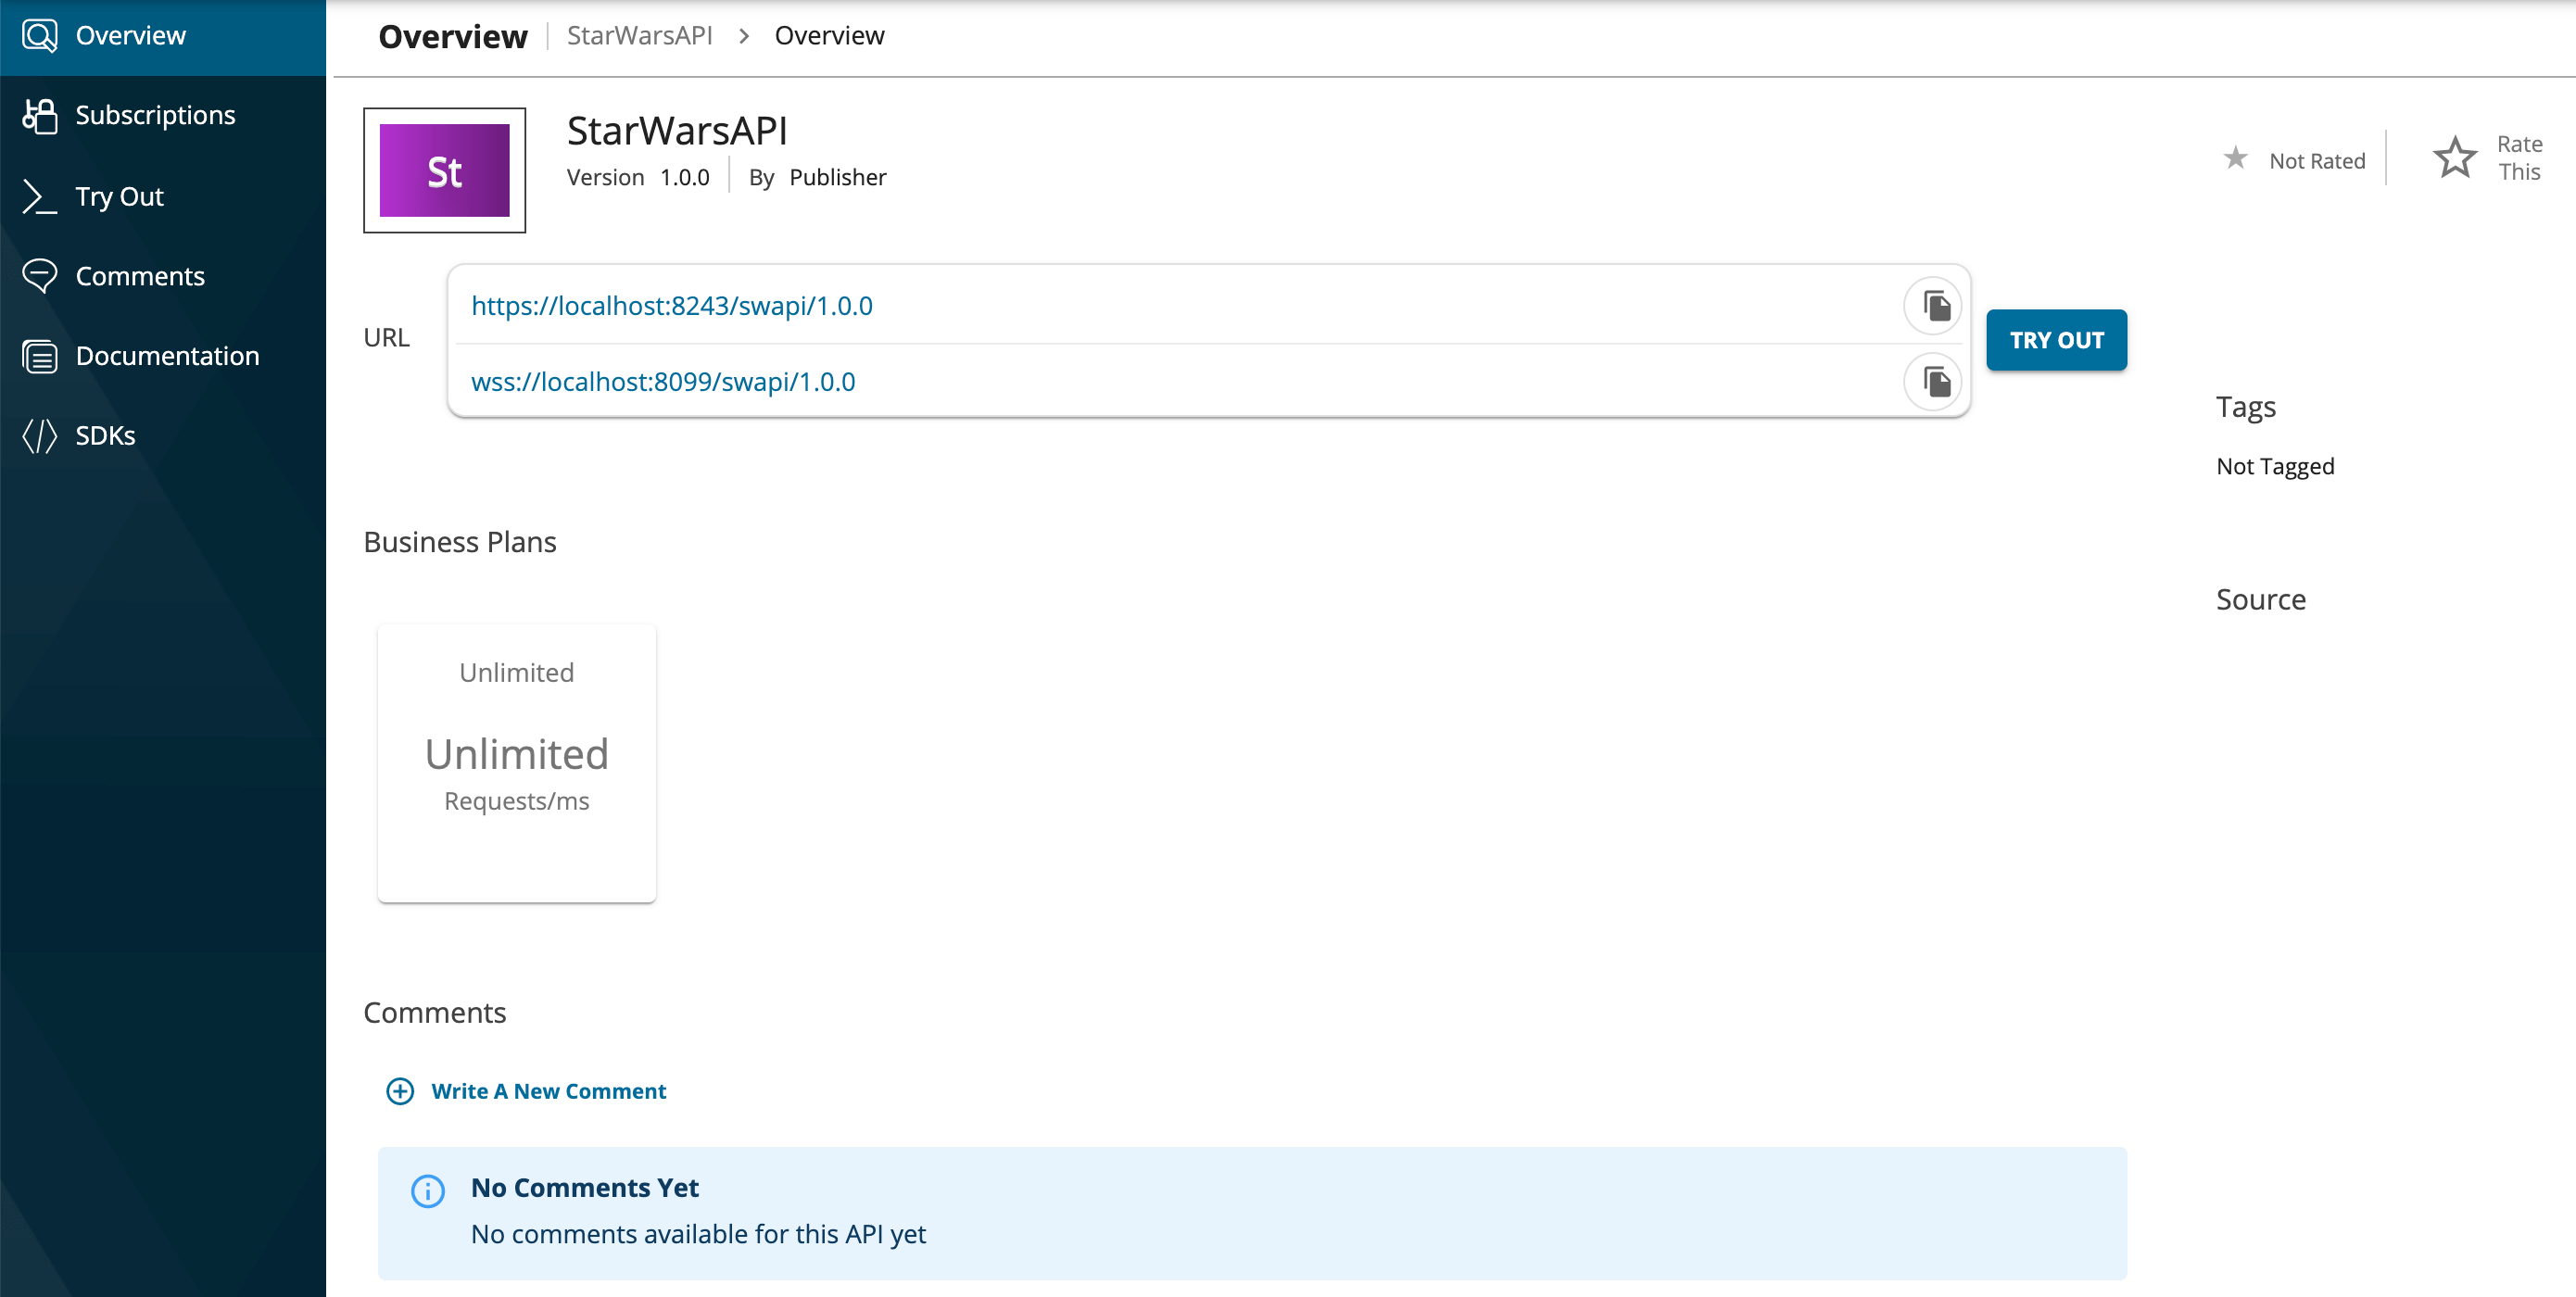
Info
- Note that both the HTTP and the WebSocket URLs of the Gateway are displayed for the GraphQL API.
- The HTTP Gateway URL is to invoke the query and mutation operations of the GraphQL API.
- The WebSocket Gateway URL is to invoke the subscription operations of the GraphQL API.
-
Subscribe to the API.
-
Click TRY OUT.
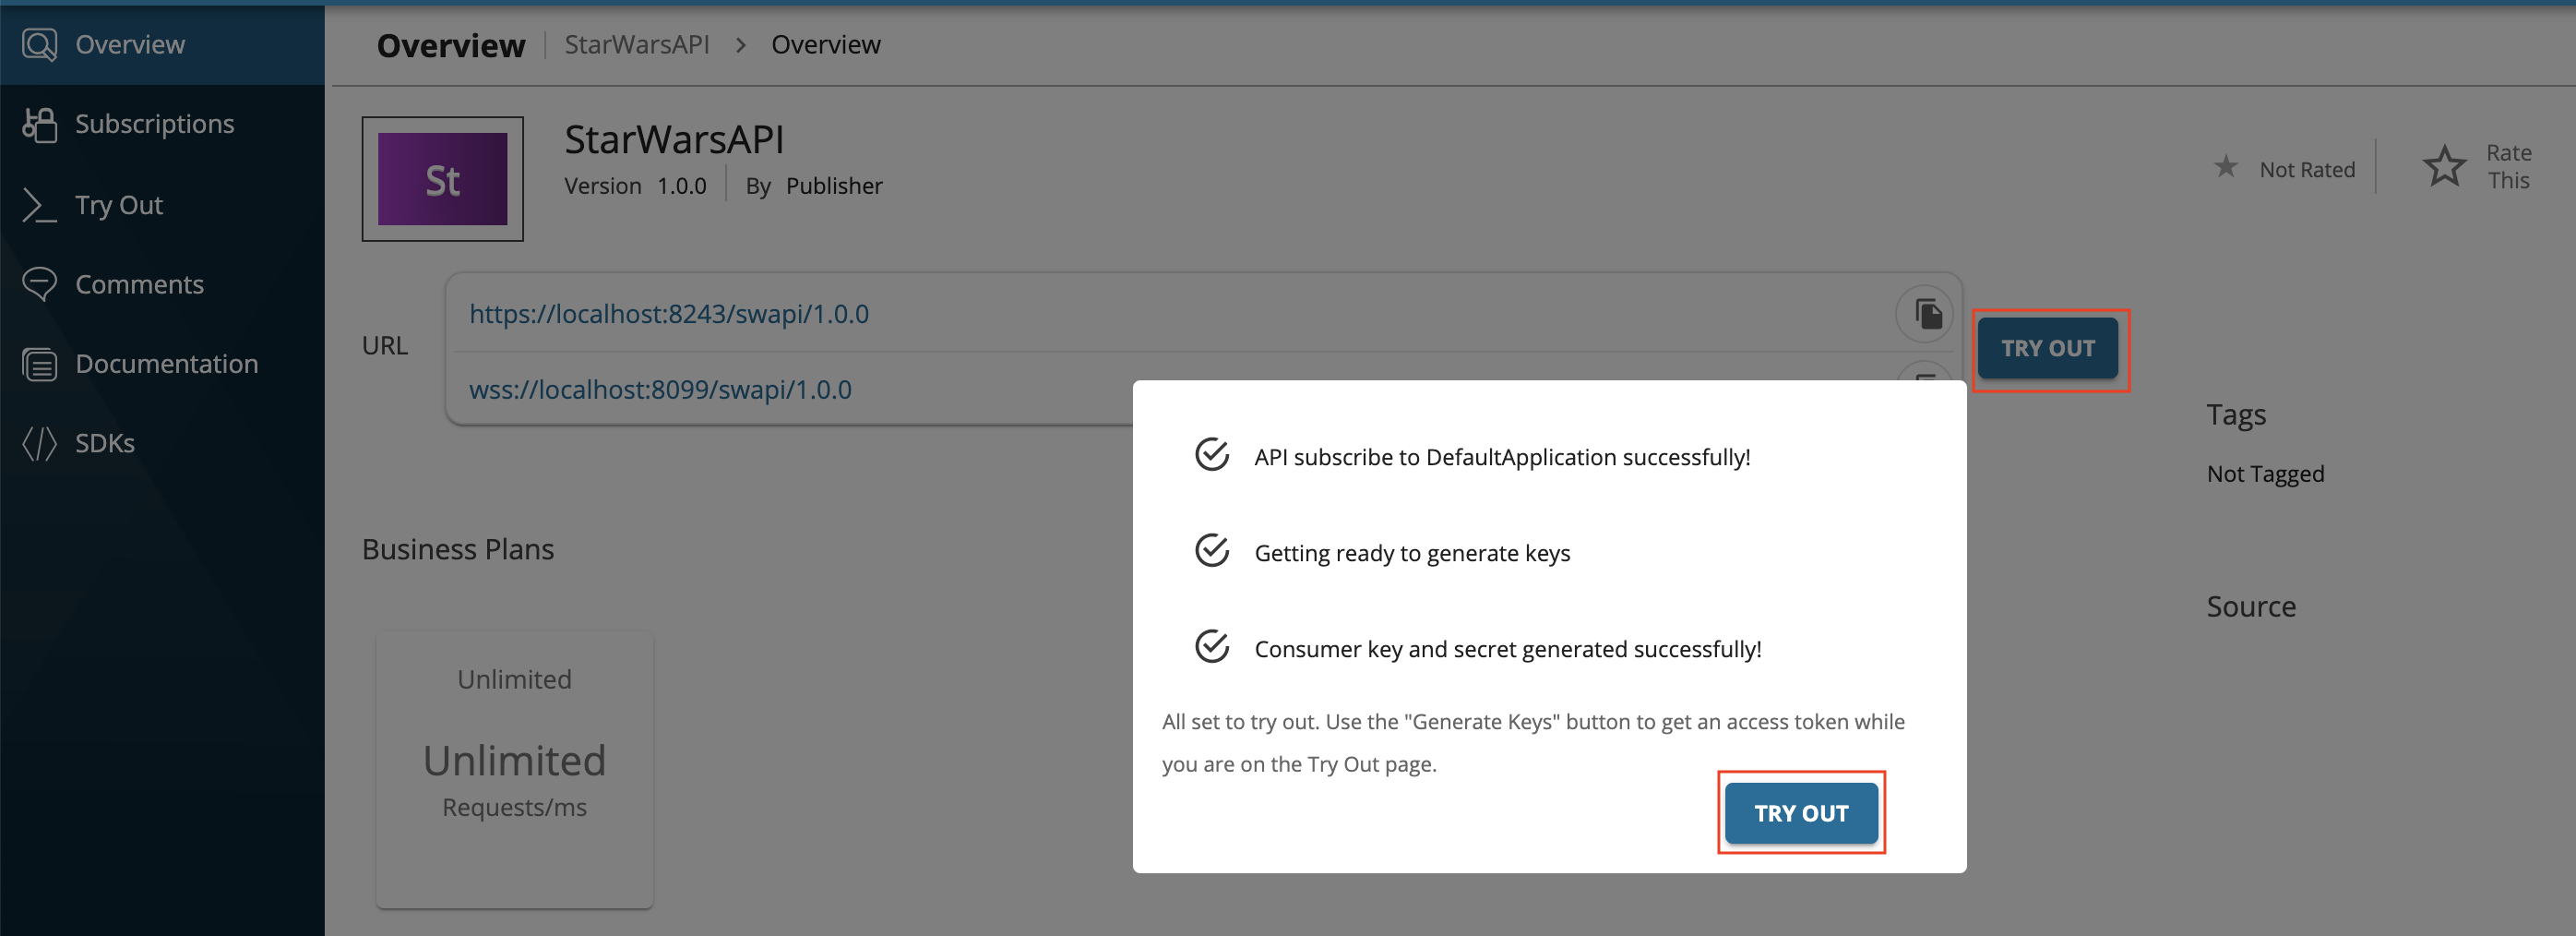
This will create a subscription for the application named
DefaultApplicationand generate a consumer key and consumer secret pair forDefaultApplication. Click TRY OUT on the pop-up window to navigate to the Try Out Console.
-
-
Try out the operations.
-
Click GET TEST KEY.

-
Step 5.1 - Optionally, try out a Query operation
Note
If you are going to invoke QUERY Operation, you should start the payload with the keyword 'query'.
If you are going to invoke MUTATION Operation, you should start the payload with the keyword 'mutation'.
-
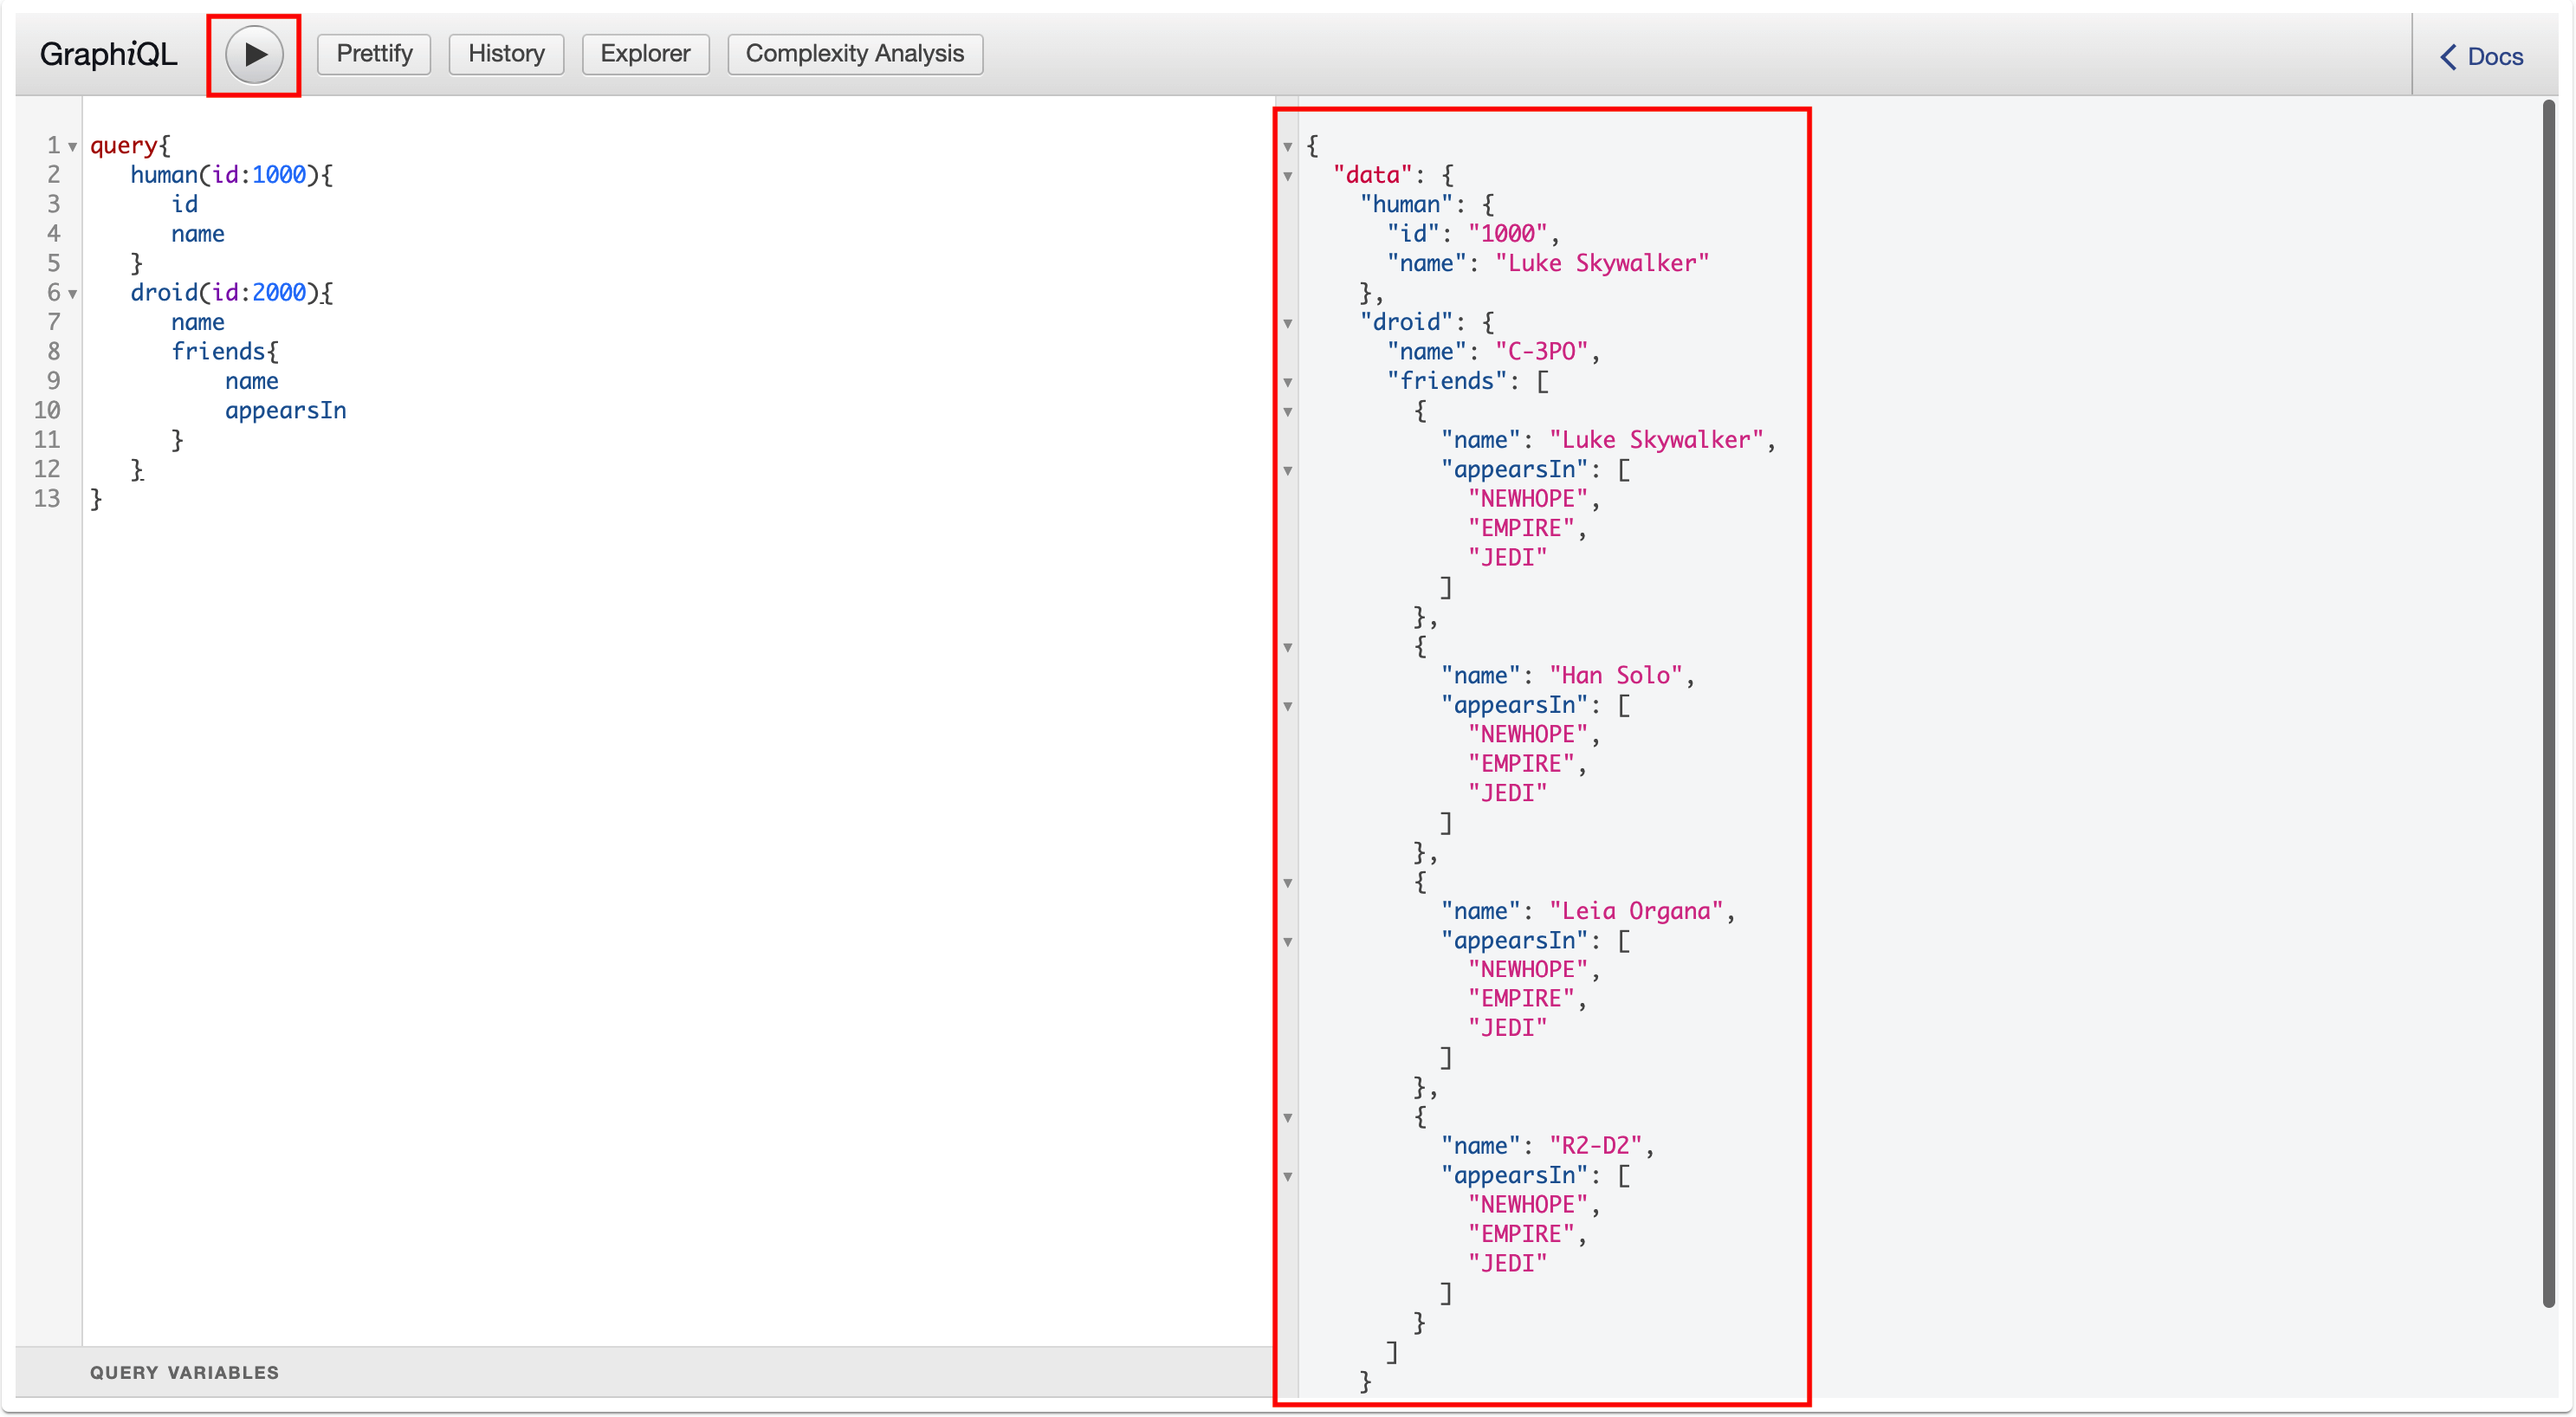
Enter the following sample payload as the StarWarsAPI request. Then click on execute button as follows.
query{
   human(id:1000){
      id
      name
   }
   droid(id:2000){
      name
      friends{
          name
          appearsIn
      }
   }
}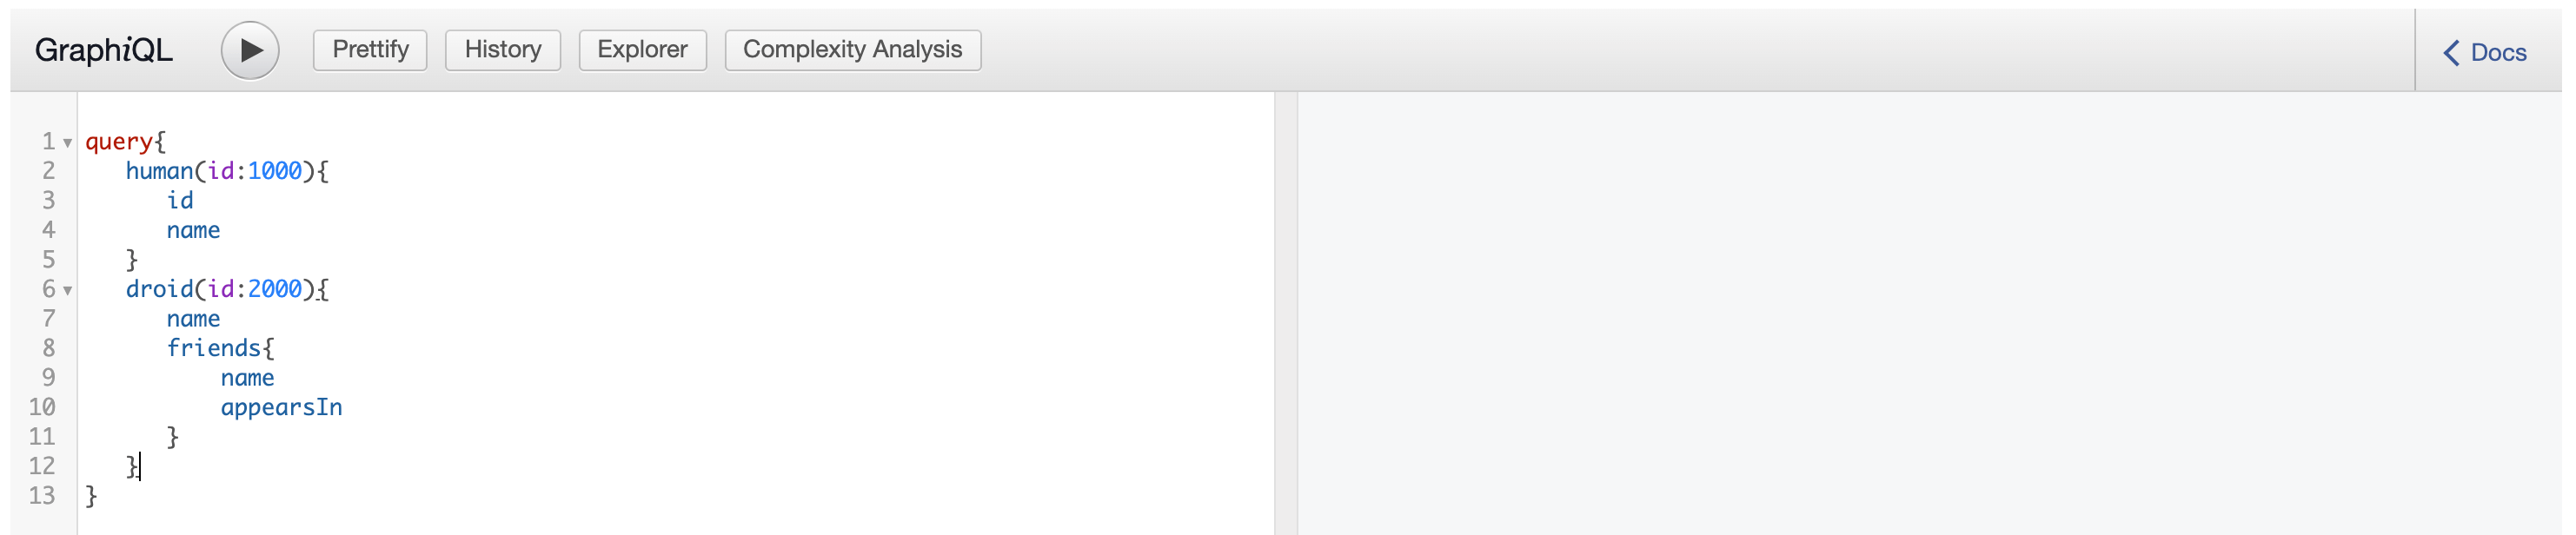
-
Click Execute.
Step 5.2 - Optionally, try out a Subscription operation
Note
If you are going to invoke SUBSCRIPTION operation, you should start the payload with the keyword
subscription.-
Enter the following sample payload as the StarWarsAPI
reviewAddedsubscription request to get real-time updates about the addition of new reviews.subscription { reviewAdded(episode: JEDI) { stars episode commentary } } -
Prepare to inspect the network calls from your browser developer tools.
For example, if you are using the Google Chrome browser.
- Right-click on the browser and click Inspect.
- Click Network to view the network calls via the browser developer tools.
-
Click Execute.
If you inspect the network calls from your browser developer tools, you can see the messages passed between the GraphiQL client and the backend.
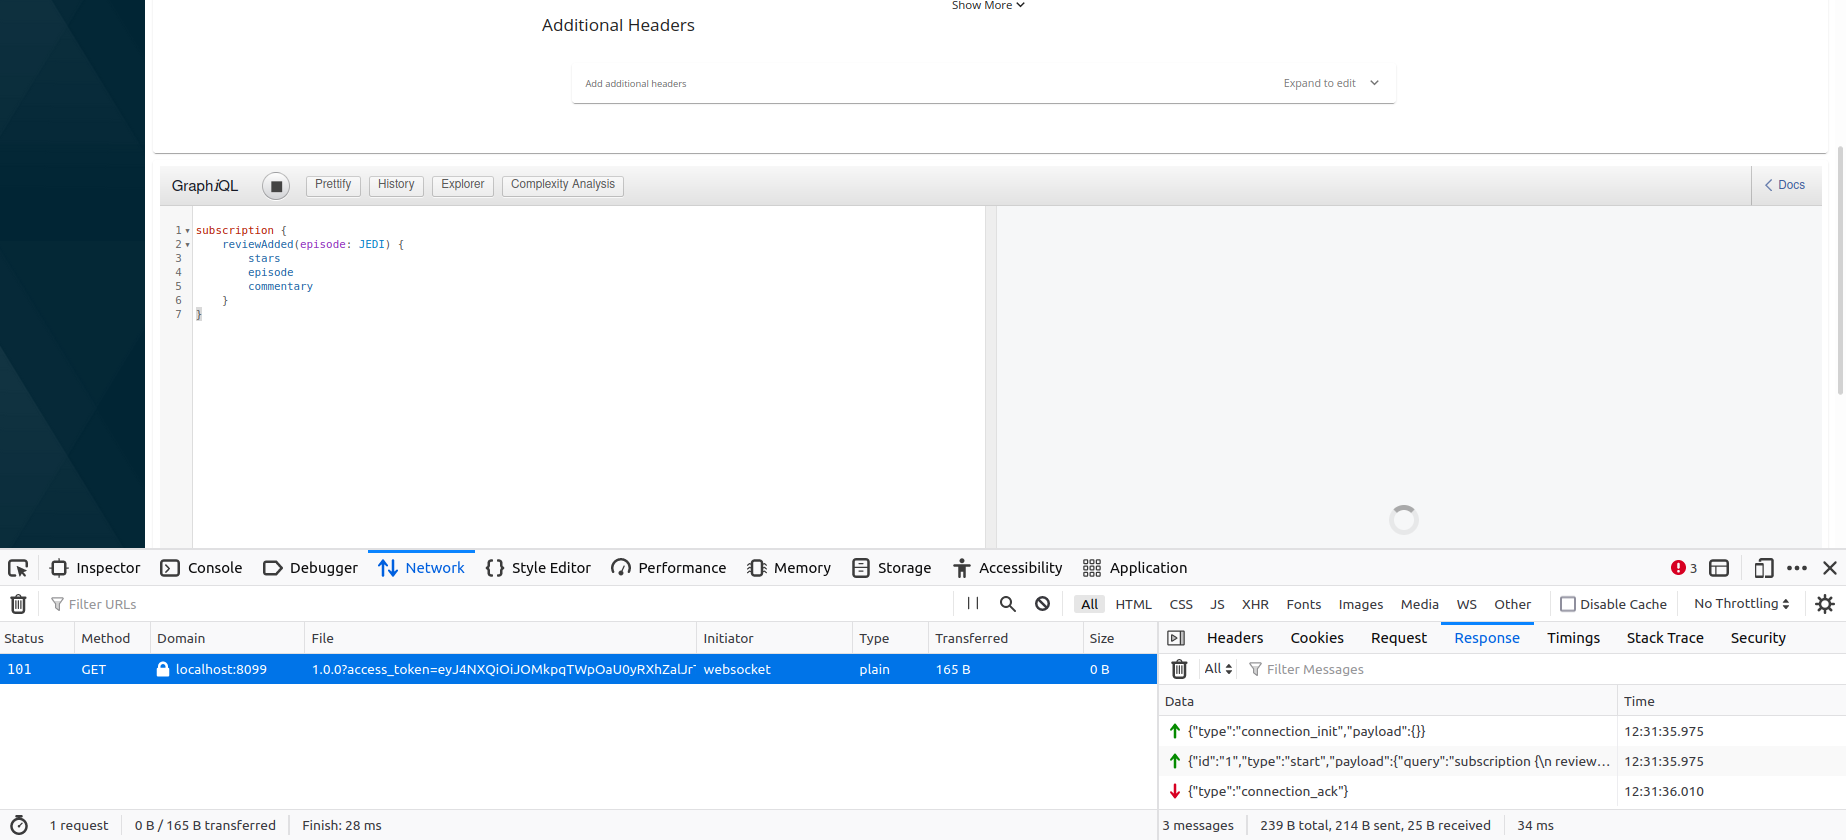
As you can see, a successful WebSocket connection is established between the client and backend via WSO2 API Gateway.
-
While keeping the Developer Portal web browser page opened, separately open a terminal and directly invoke the backend API’s
createReviewmutation operation by executing the following command.curl -X POST "http://localhost:8080/graphql" -H "accept: application/json" -H "Content-Type: application/json" -d '{"query":"mutation {createReview(episode: JEDI, review: { stars: 3, commentary: \"Excellent\"}) { stars episode commentary }}","variables":null}' -kWhen the mutation is successful, the GraphQL backend will send the following response:
{"data":{"createReview":{"stars":3,"episode":"JEDI","commentary":"Excellent"}}} -
Now go back to the Developer Portal browser page.
You can see that you have received the subscription event response that corresponds to the mutation operation you did in Step 5.2 (4).

You have successfully created and published your first GraphQL API, subscribed to it, obtained an access token for testing, and tested query and subscription operations of your API with the access token.
Top -
When you provide the HTTP URL as the backend endpoint, WSO2 API-M will internally derive the corresponding WebSocket URL