Configure Keycloak as a Key Manager
WSO2 API Manager supports multiple Key Managers. As a result, WSO2 API Manager is prepacked with an inbuilt resident Key Manager and with the use of connectors it is capable of supporting any authorization server as a Key Manager.
Therefore, WSO2 API Manager can connect Keycloak out-of-the-box using the WSO2 API-M Keycloak Connector.
Follow the instructions given below to configure Keycloak as a third-party Key Manager.
Info
For more information, see the Getting Started Guide, which is under the official Keycloak documentation.
Step 1 - Configure Keycloak
-
Sign in to the Keycloak Management Console.
http://localhost:8080/auth -
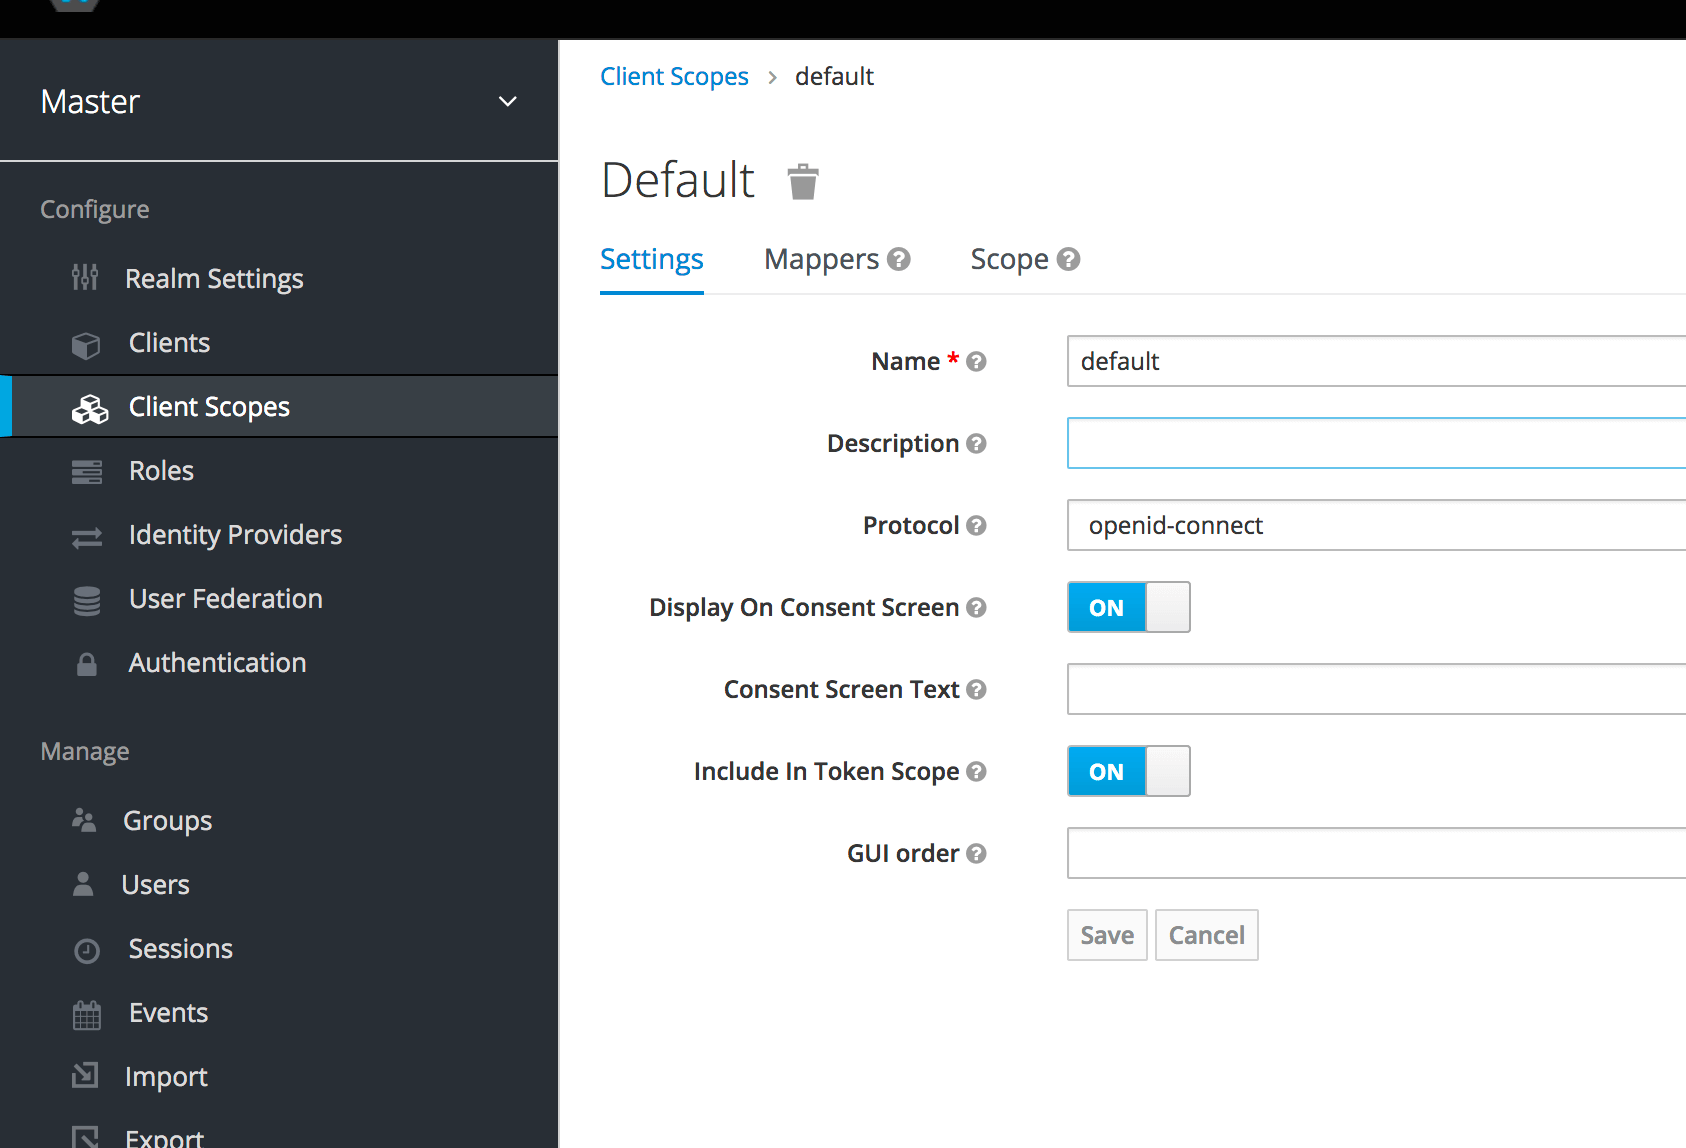
Click Client Scopes and create client scope named "default".
-
Click Clients and create a client with the following information.
Access Type Confidential Redirect URIs https://localhost:9443/ 
-
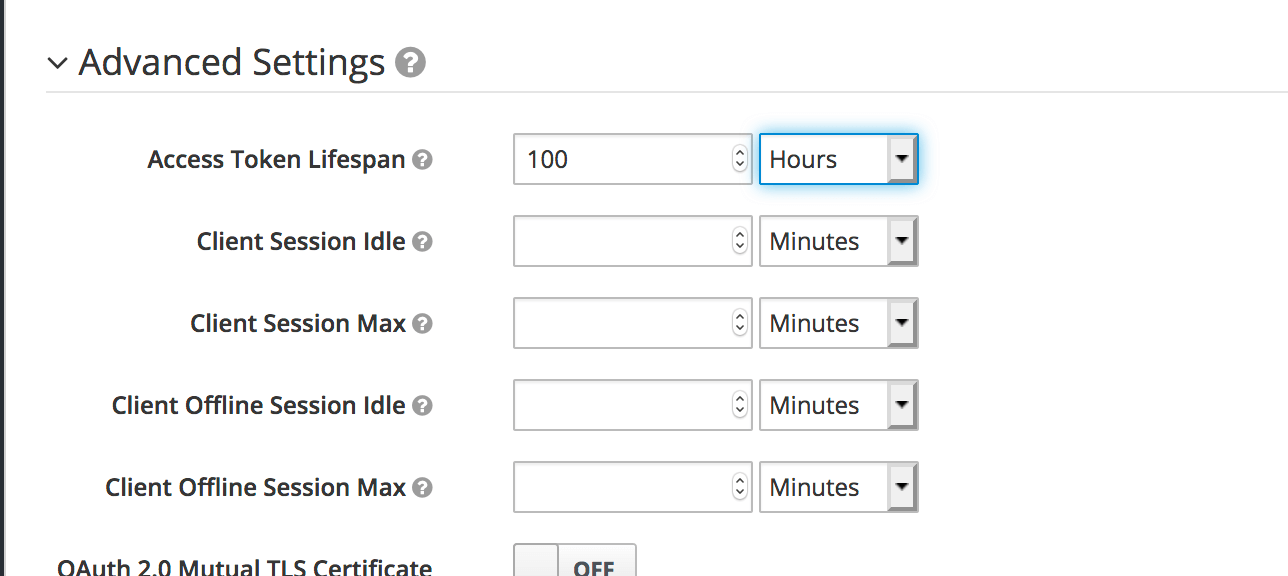
Define a longer value as the Access Token Lifespan under the Advanced Settings settings section.
-
Click Client Scopes and select the scope named
defaultas the Default Client scope.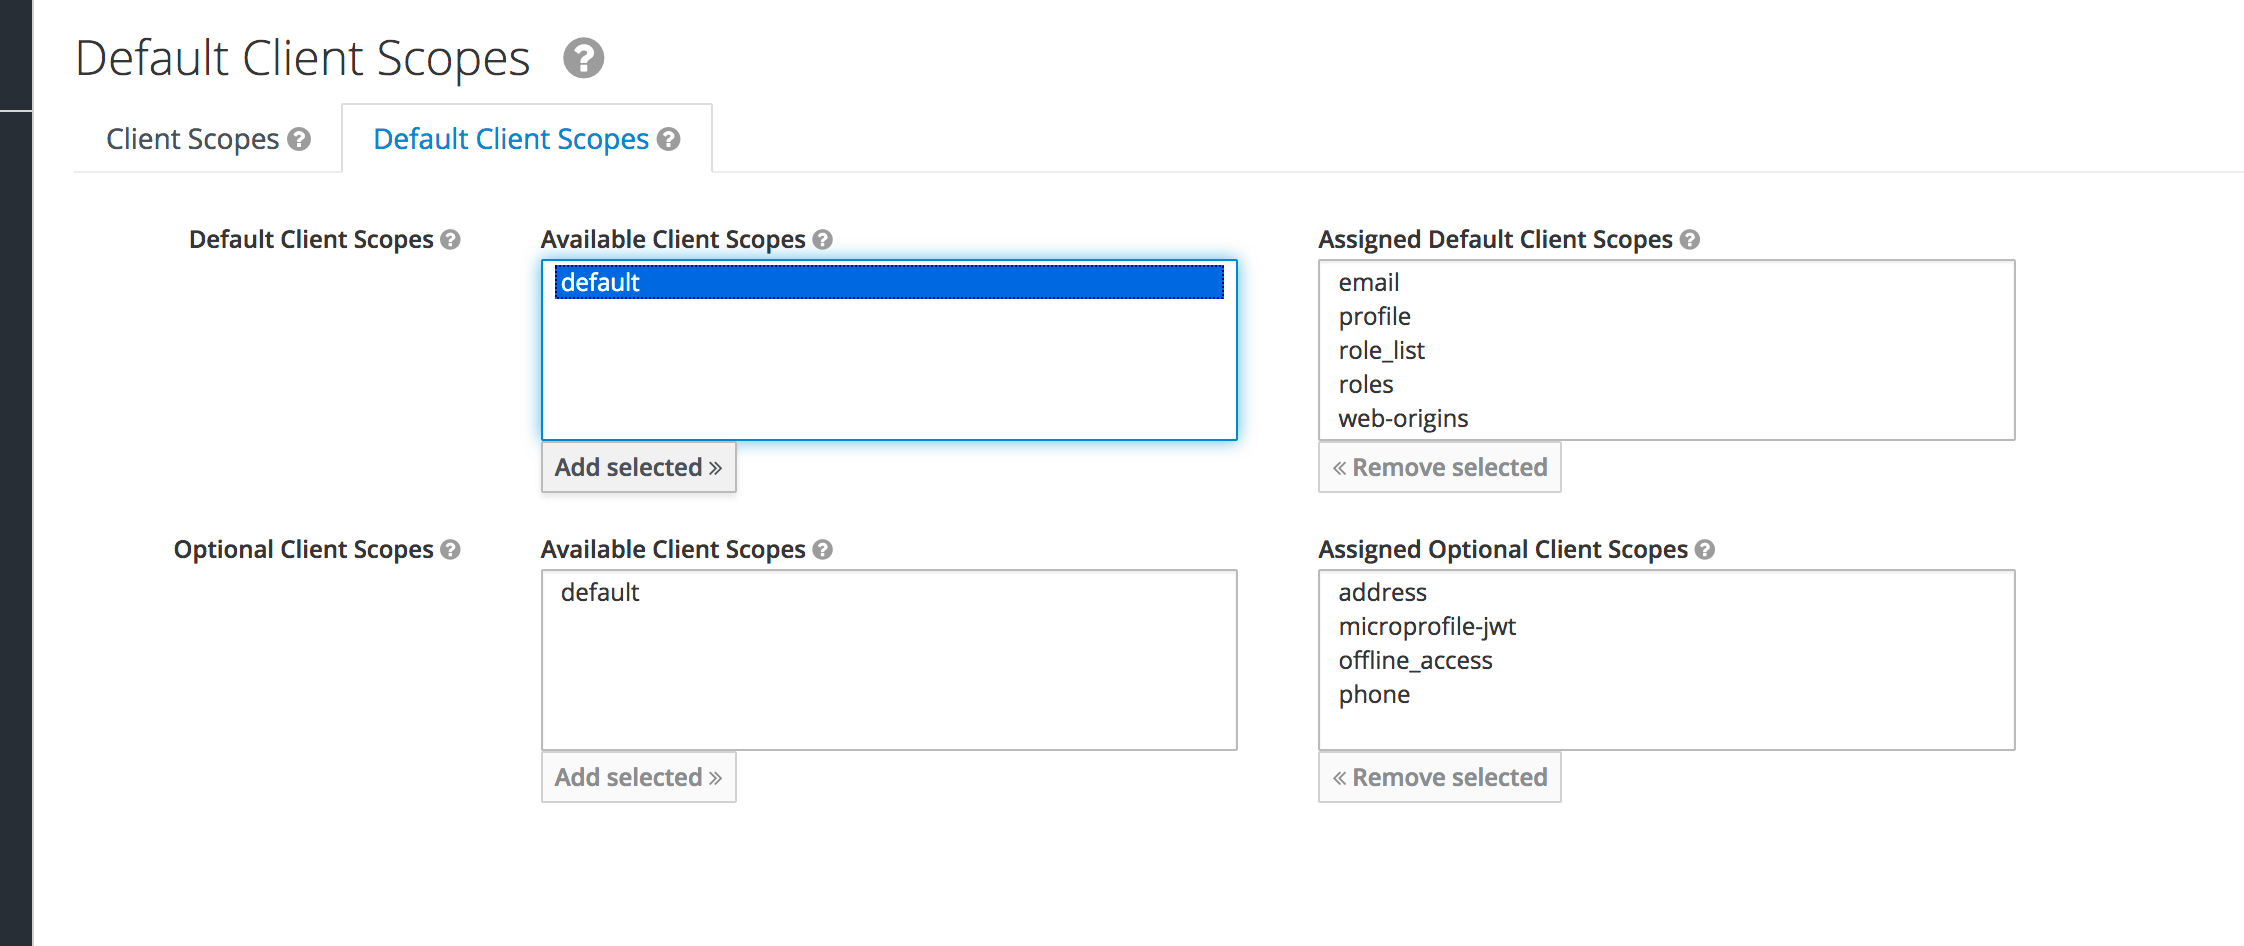
-
Click Service Account Roles and assign the
adminrole an assigned role.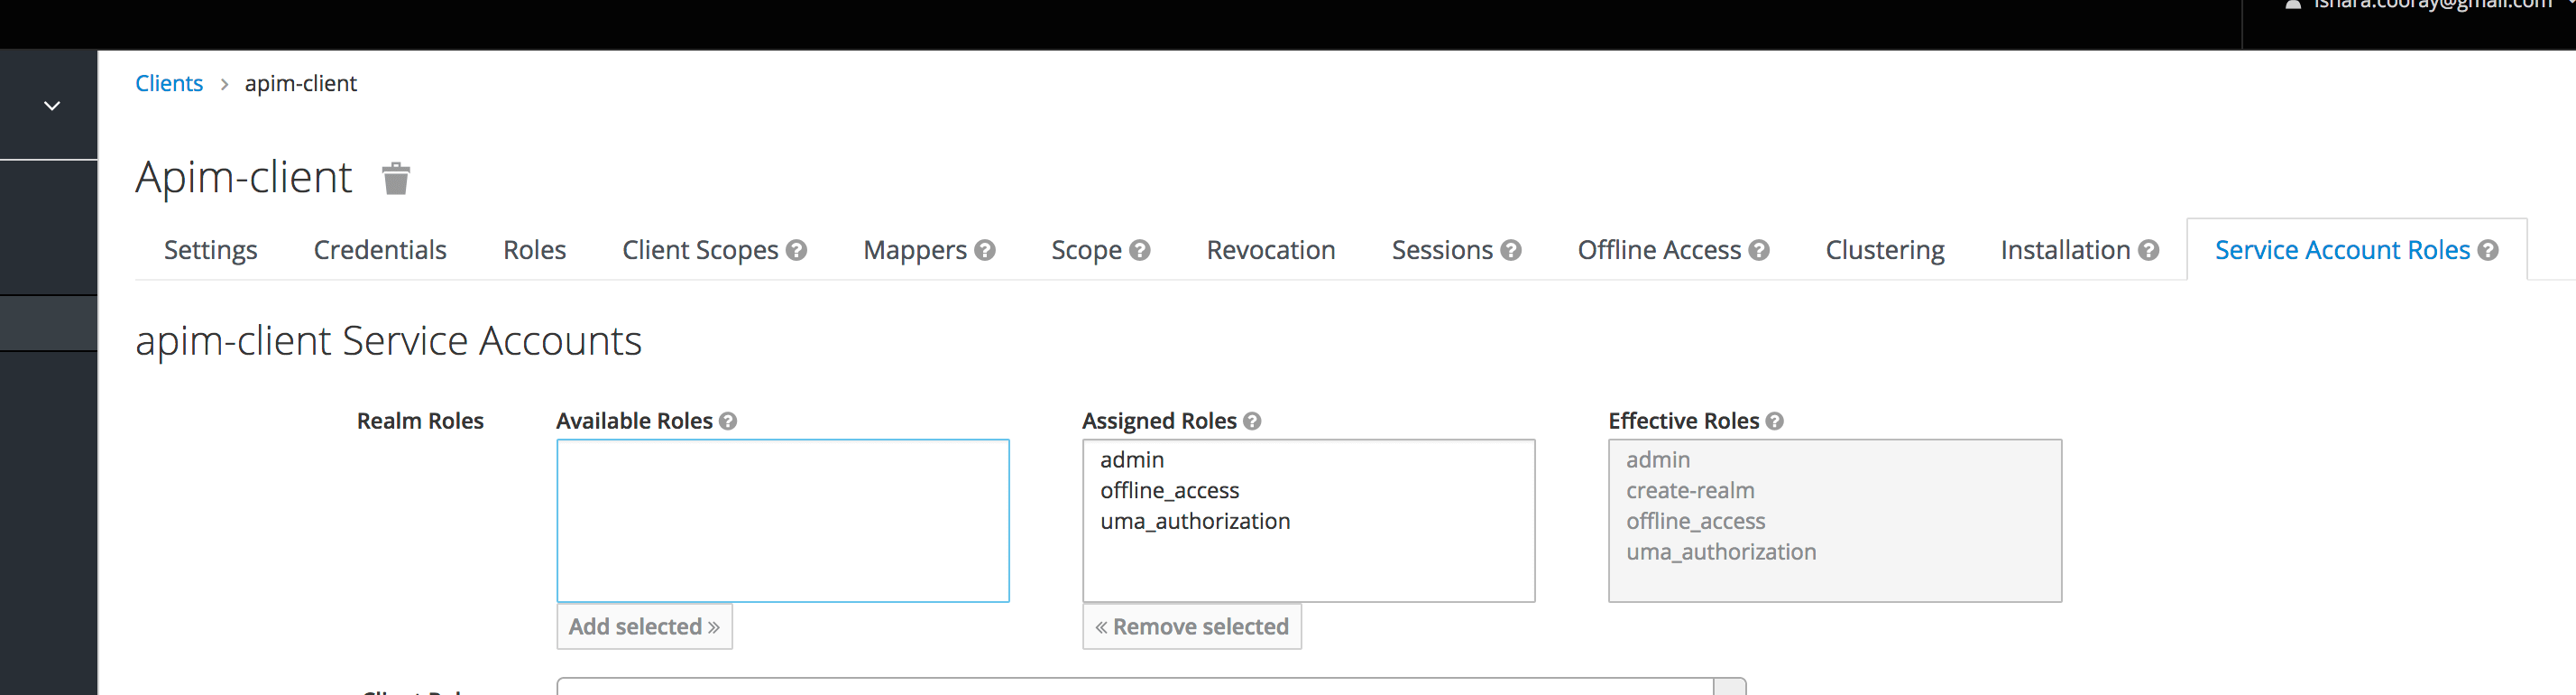
-
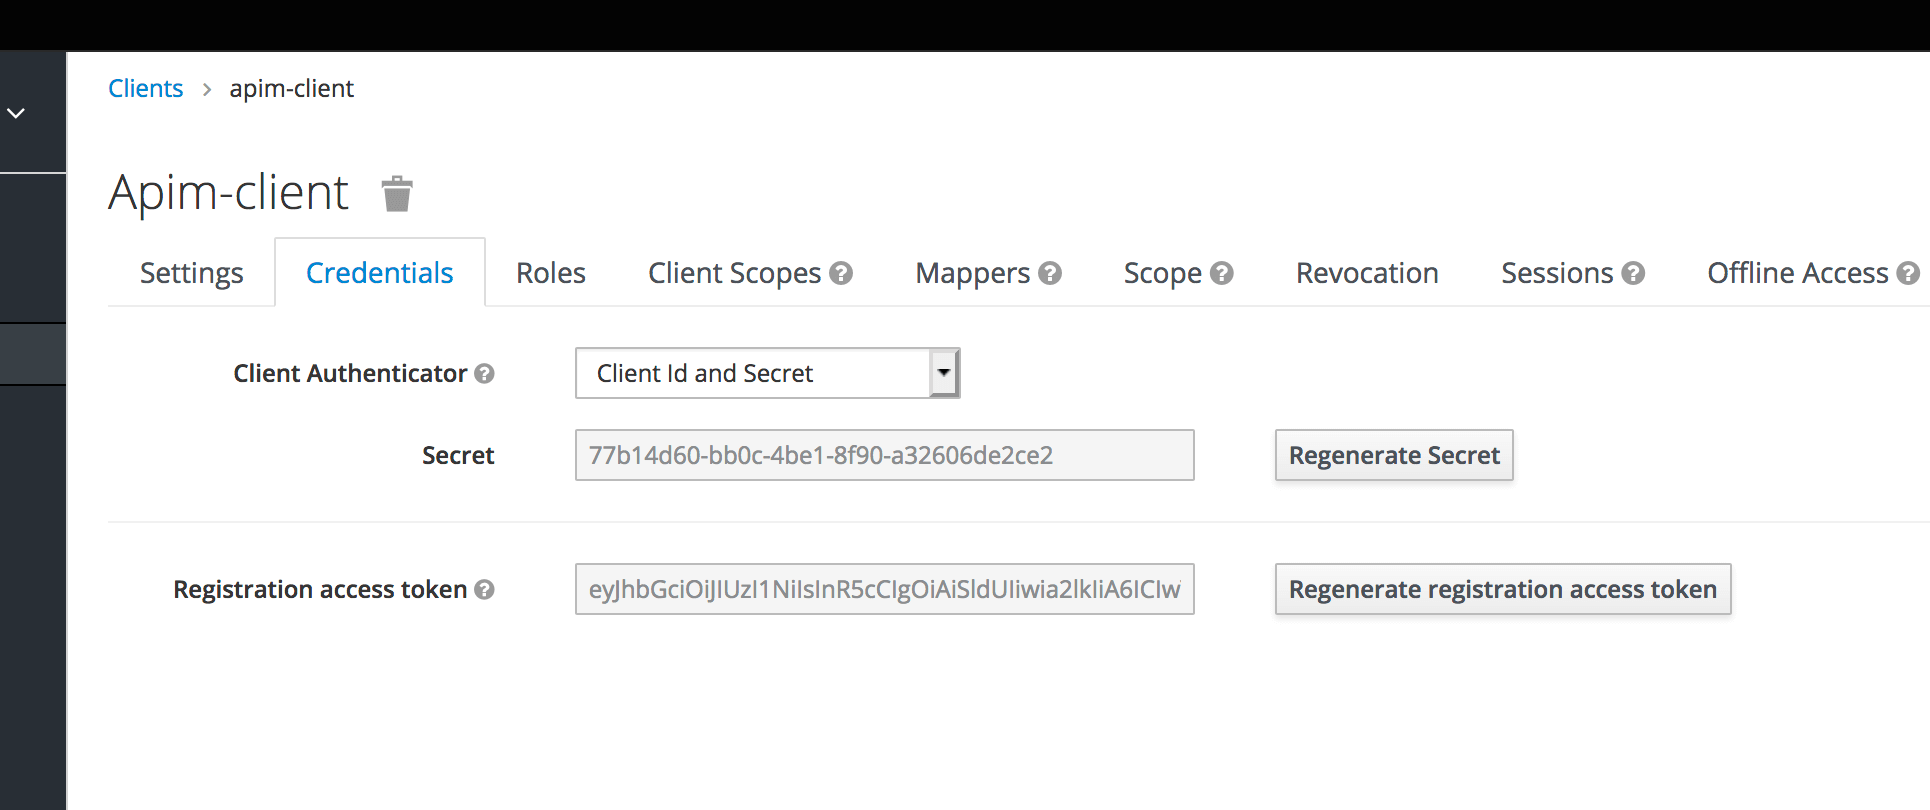
Copy the client credentials.
Step 2 - Configure WSO2 API Manager
-
Import Keycloak certificate into the WSO2 API Manager truststore.
- The default Keycloak keystore is
application.keystore. - In a standalone setup, the
application.keystorecan be found in the<KEYCLOAK_HOME>/standalone/configurationdirectory. -
Alternatively, you can use the following command to generate a self-signed certificate in Keycloak.
keytool -genkey -alias server -keyalg RSA -keysize 2048 -validity 3650 -keystore application.keystore -dname "CN=localhost,OU=Support,O=WSO2,L=Colombo,S=Western,C=LK" -storepass password -keypass password -noprompt -ext SAN=dns:localhost- The alias should be server.
- The default Keycloak keystore is
-
Export the certificate in
application.keystore.keytool -export -alias server -file keycloak.crt -keystore application.keystore -storepass password -nopromptTip
For information on Enabling SSL/HTTPS for the Keycloak Server, see the Keycloak official documentation.
-
Import the certificate into the WSO2 API-M truststore.
keytool -import -trustcacerts -alias keycloak -file keycloak.crt -keystore client-truststore.jks -storepass wso2carbon -noprompt -
Start WSO2 API Manager.
<API-M_HOME>refers to the root folder of the extracted WSO2 API-M distribution. -
Add a Key Manager.
-
Sign in to the Admin Portal.
https://<hostname>:9443/adminhttps://localhost:9443/admin -
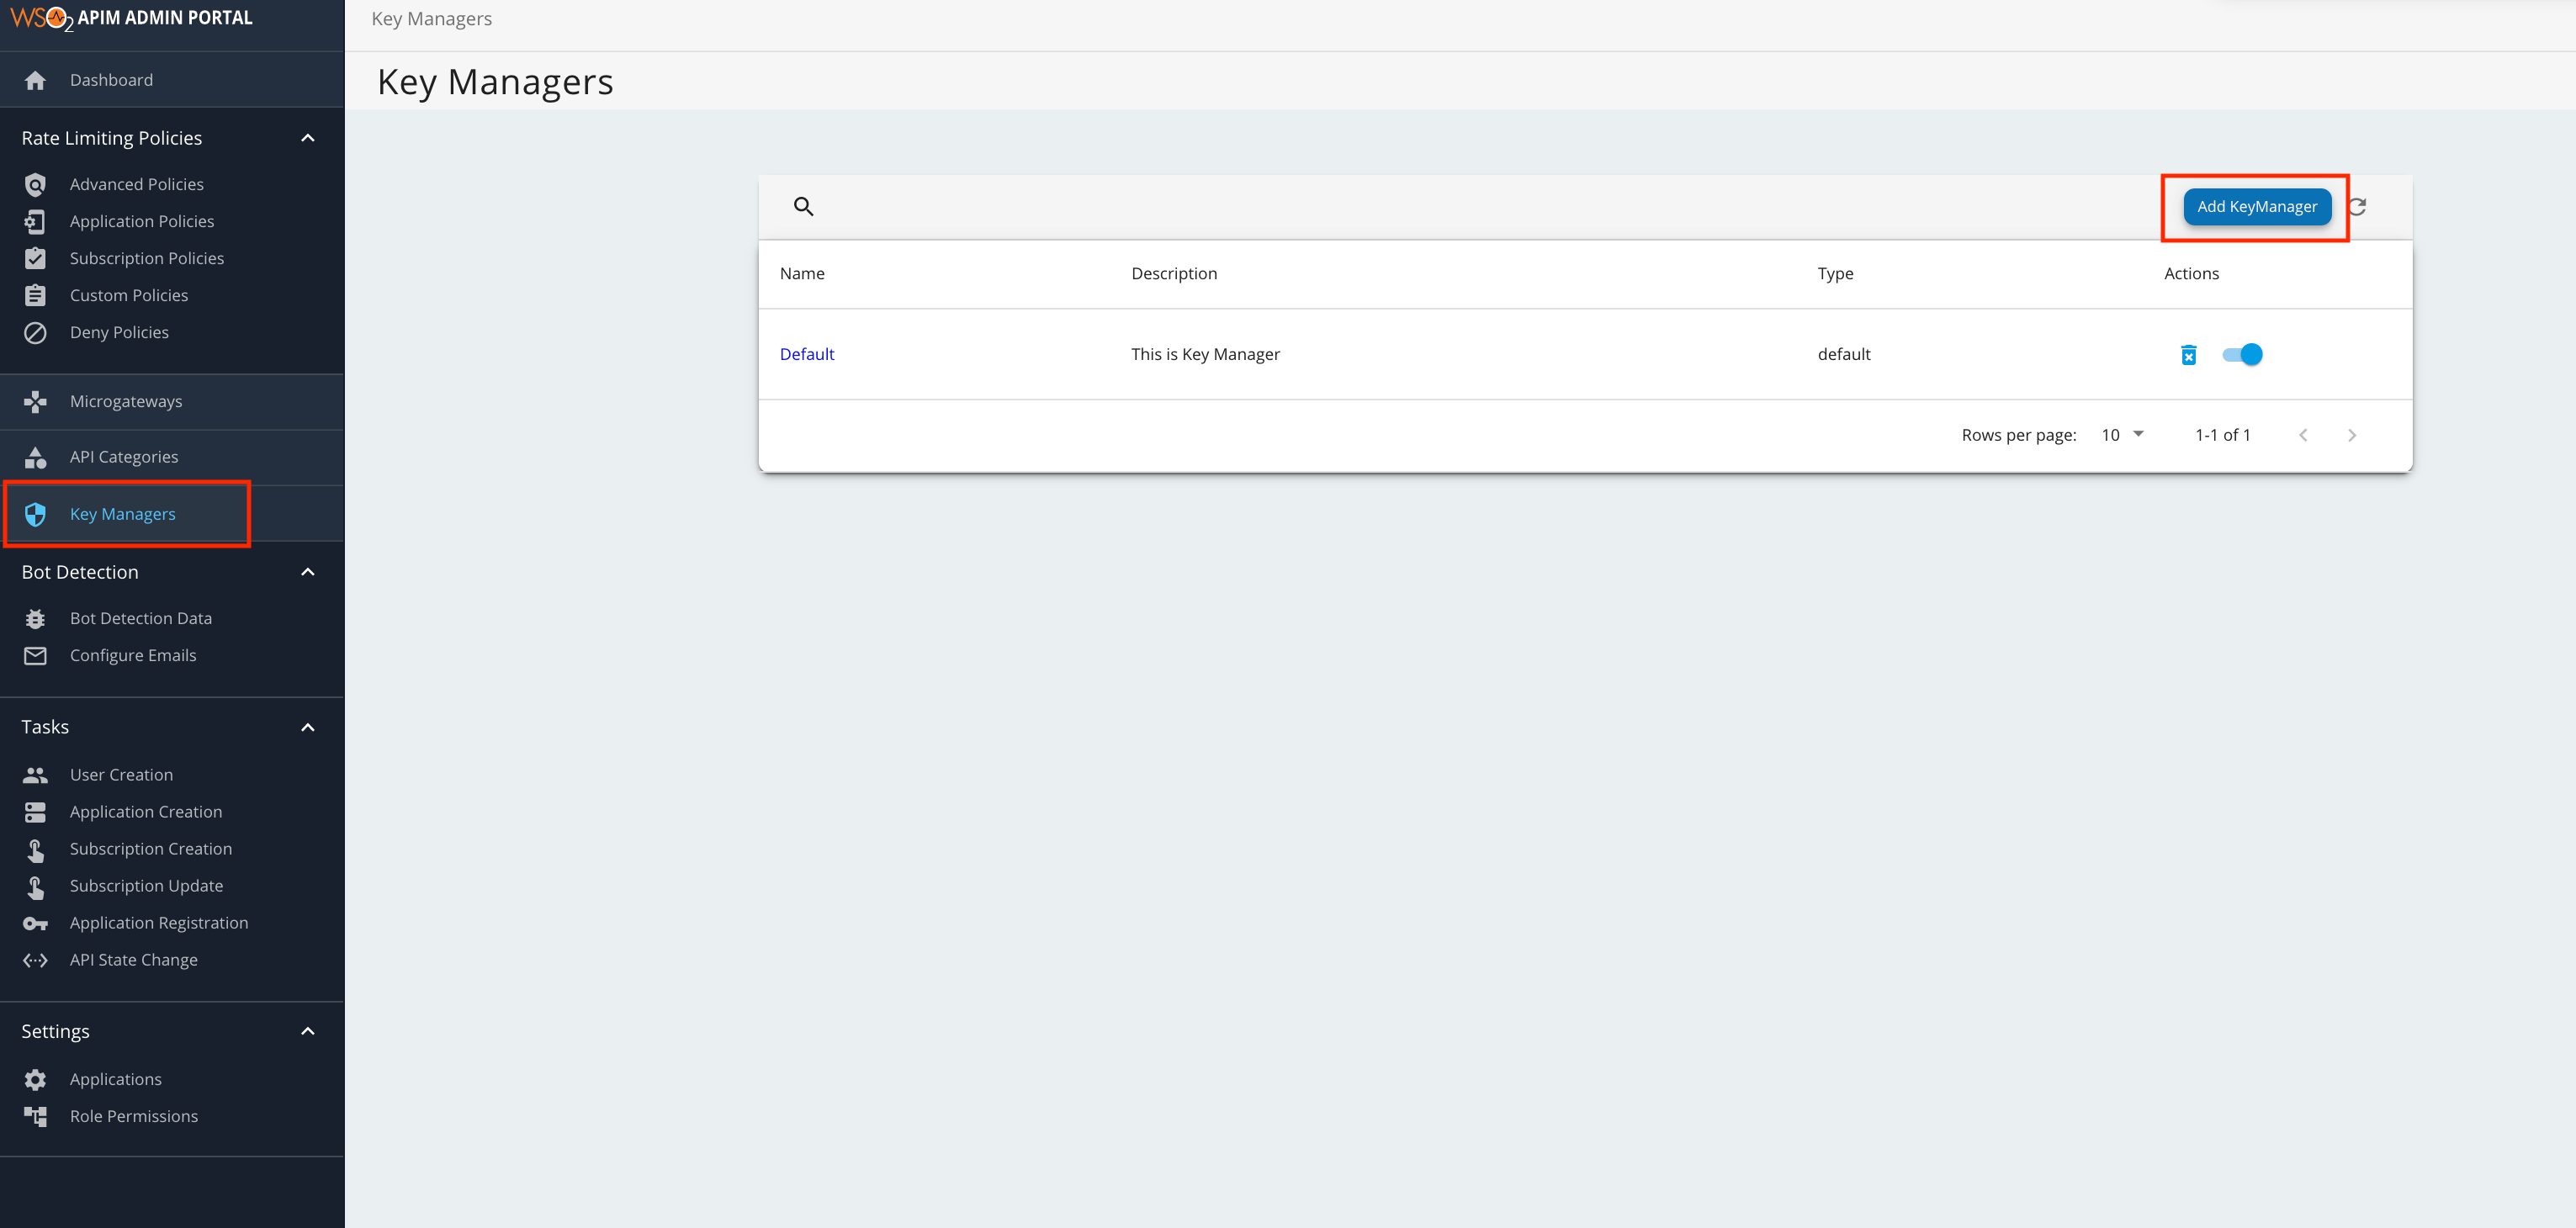
Click Key Manager and then click Add Key Manager.
-
Add the following configuration to add a new Key Manager.
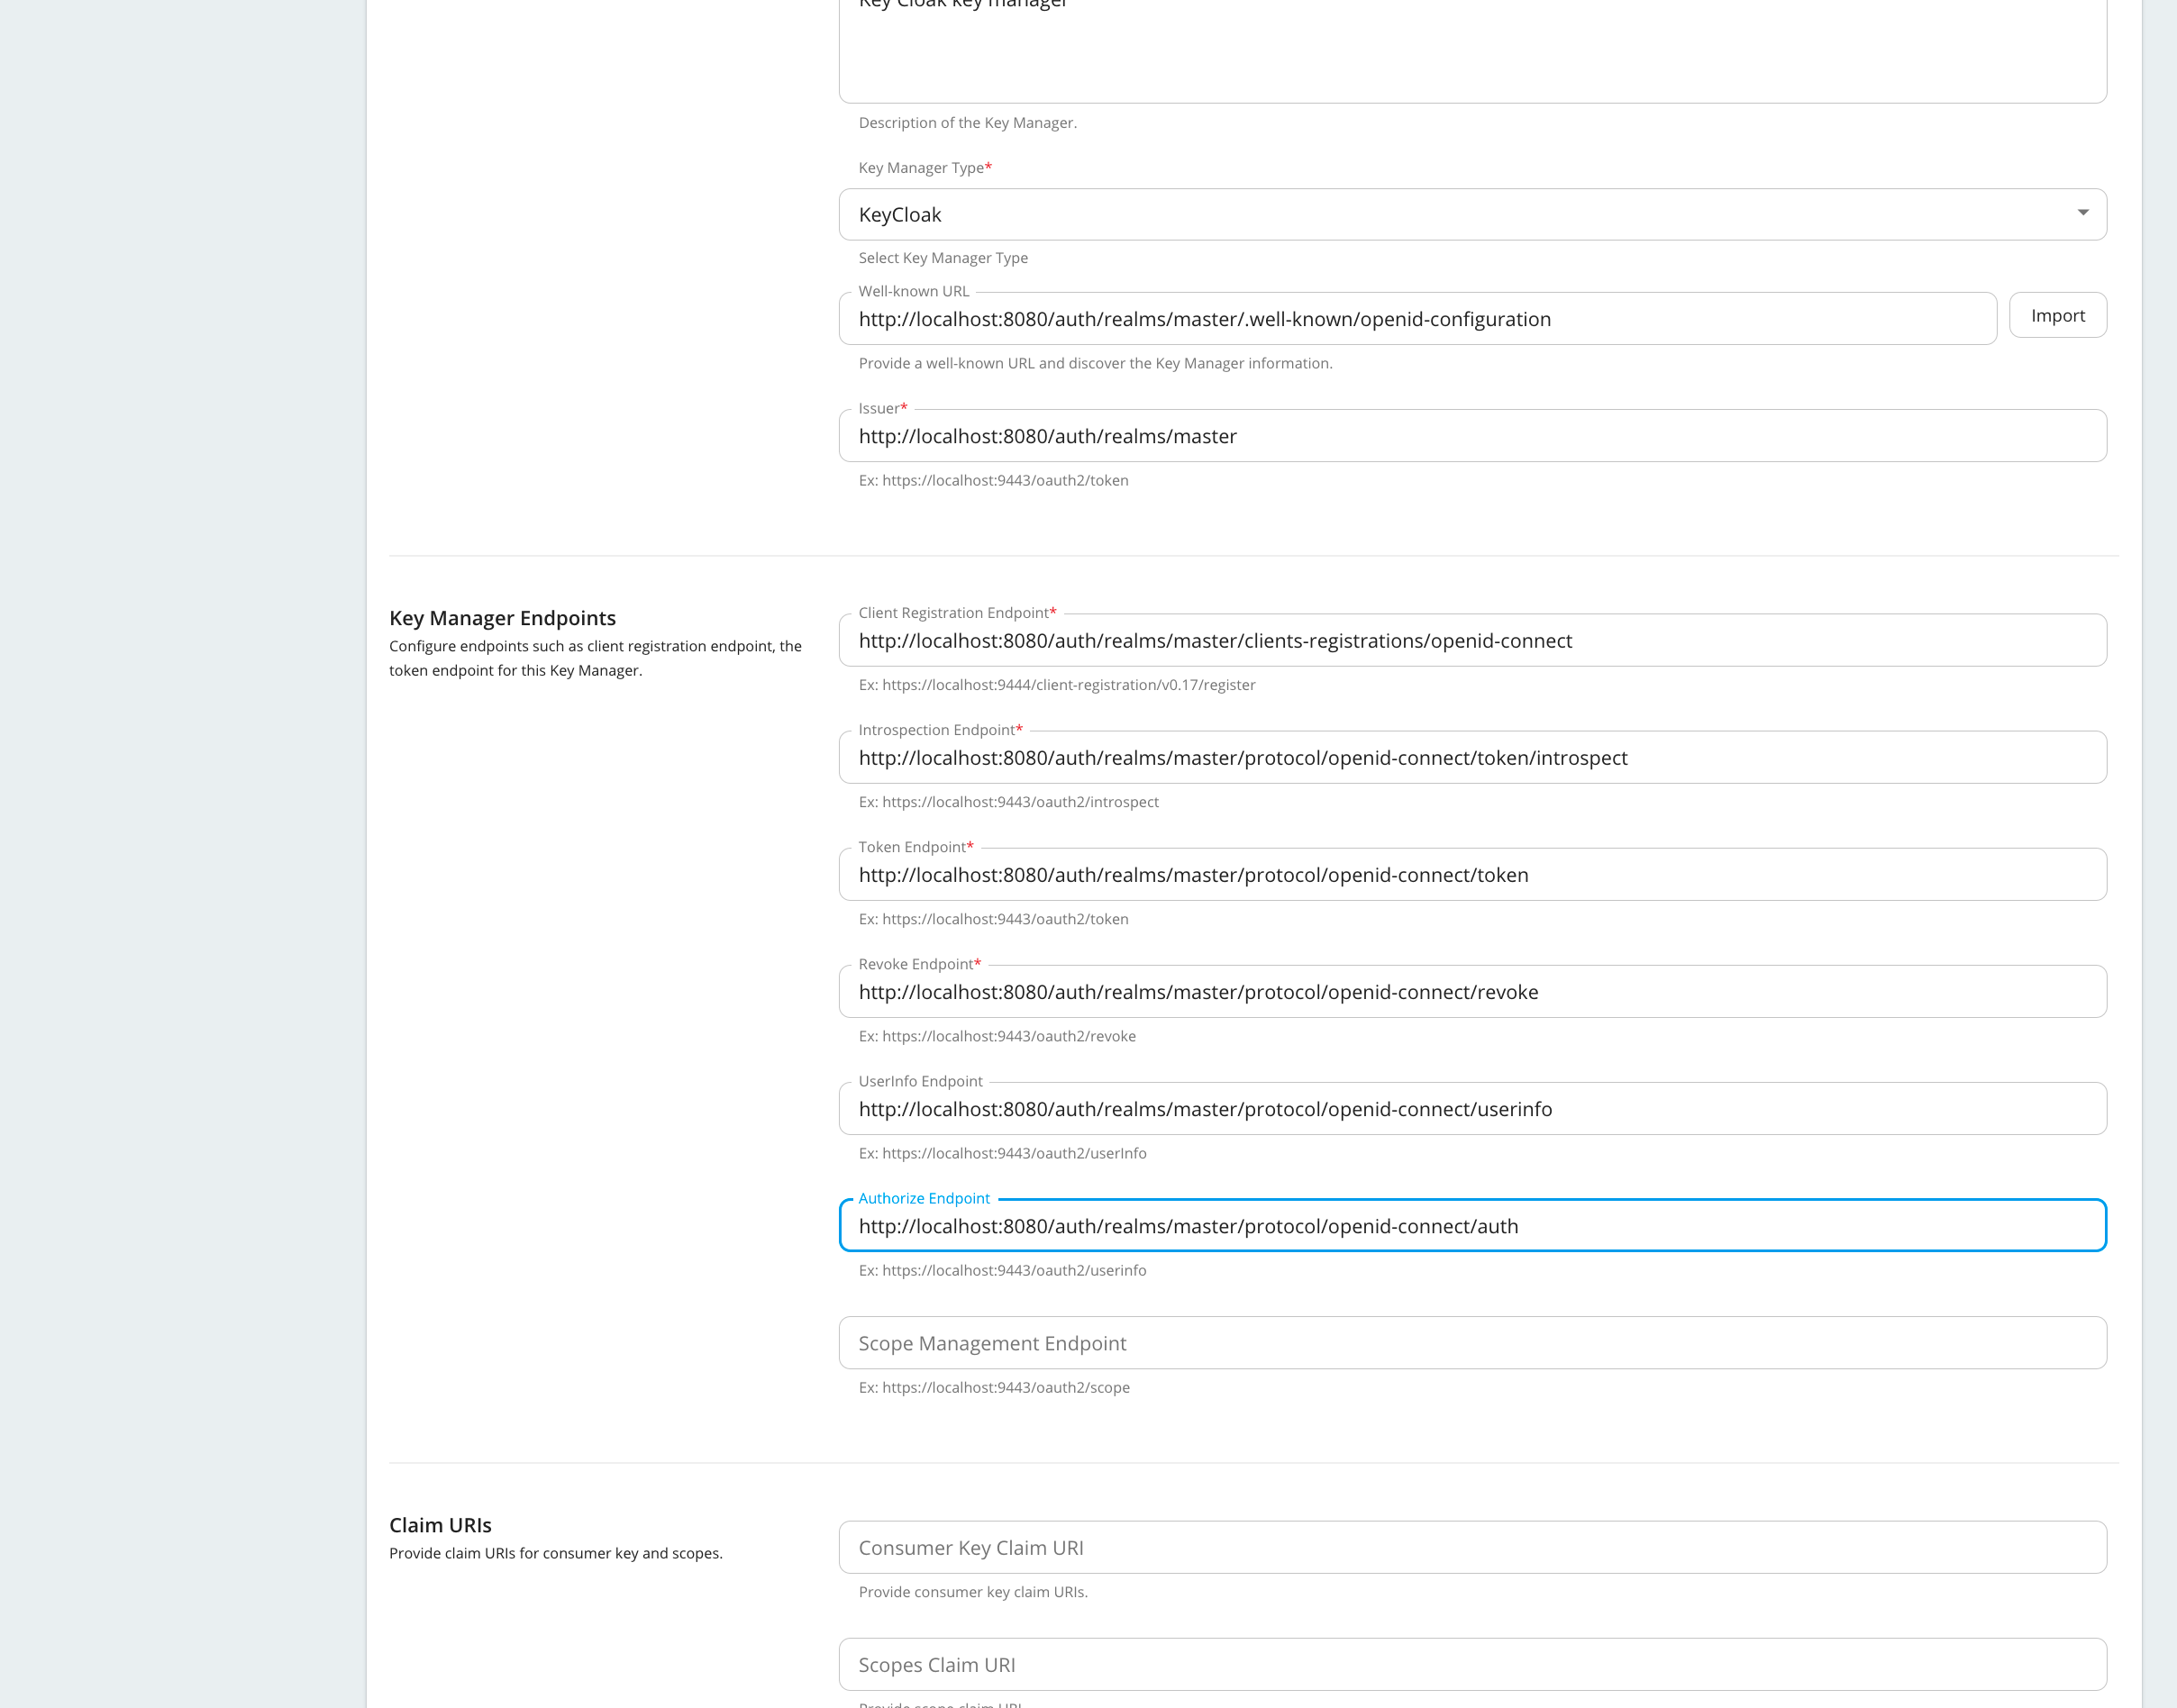
!!! tip * Configuring the well-known URL populates all the default configurations in the table once you click Import. * It is mandatory to provide the Client Id and Client Secret.
The following table provides definitions for each of the configurations.
Configuration Description Name The name of the authorization server. Mandatory Display Name A name to display on the UI. Mandatory Description A brief description of the Key Manager. Optional Key Manager Type The type of the Key Manager to be selected. Mandatory Well-known-url The well-known URL of the authorization server (Key Manager). If the well-known URL is provided, other endpoints can be imported. Optional Issuer The issuer that consumes or validates the access tokens e.g., https://localhost:8443/realms/master http://localhost:8080/realm Mandatory Key Manager Endpoints Client Registration Endpoint The endpoint to verify the identity and obtain profile information of the end-user based on the authentication performed by an authorization server. e.g., https://localhost:8443/realms/master/clients-registrations/openid-connect Mandatory Introspection Endpoint The endpoint that allows authorized protected resources to query the authorization server to determine the set of metadata for a given token that was presented to them by an OAuth client. e.g., http://localhost:8080/realms/master/protocol/openid-connect/token/introspect https://localhost:8443/realms/master/protocol/openid-connect/token/introspect Mandatory Token Endpoint The endpoint that issues the access tokens. e.g., http://localhost:8080/realms/master/protocol/openid-connect/token https://localhost:8443/realms/master/protocol/openid-connect/token Mandatory Revoke Endpoint The endpoint that revokes the access tokens. Optional Userinfo Endpoint The endpoint that allows clients to verify the identity of the end-user based on the authentication performed by an authorization server, as well as to obtain basic profile information about the end-user. Optional Authorize Endpoint The endpoint used to obtain an authorization grant from the resource owner via user-agent redirection. Optional Scope Management Endpoint The endpoint used to manage the scopes. Optional Connector Configurations Client ID The client ID obtained in Keycloak for the confidential type client e.g., apim-client. Mandatory Client Secret The client secret obtained in generated from Keycloak for the confidential type client. Mandatory Claim URIs Provide the claim URIs for the consumer key and the scopes. Consumer Key Claim URI The claim URI for the consumer key. Optional Scopes Claim URI The claim URI for scopes. Optional Grant Types The supported grant types. Optional Certificates PEM Either copy and paste the certificate in PEM format or upload the PEM file. Optional JWKS The JSON Web Key Set (JWKS) endpoint is a read-only endpoint. This URL returns Keycloak's public key set in JSON web key set format. This contains the signing key(s) the Relying Party (RP) uses to validate signatures from Keycloak. Optional Advanced Configurations Token Generation Token Generation Enables token generation via the authorization server. Optional Out Of Band Provisioning This enables the provisioning of Auth clients that have been created without the use of the Developer Portal, such as previously created Auth clients. Optional Oauth App Creation This enables the creation of Auth clients. Optional Token Validation Method The method used to validate the JWT signature. Self Validate JWT The kid value is used to validate the JWT token signature. If the kid value is not present, gateway_certificate_aliasis used.Optional Use introspect The JWKS endpoint is used to validate the JWT token signature. If this option is used to validate the tokens it is mandatory to add a Token Handling Option. For the Okta it should be JWT and it is required to specify a claim mapping as a unique identifier. e.g.,; Claim Key : iss Claim Value : https://localhost:8443/realms/master Optional Token Handling Options Provides a way to validate the token for this particular authorization server. This is mandatory if the Token Validation Method is introspect REFERENCE The tokens matching a specific regular expression (regEx) is validated. Optional JWT The tokens matching a specific JWT is validated. Optional CUSTOM The token matching a custom pattern is validated. Optional Claim Mappings Local and remote claim mapping. Optional
-
Step 3 - Generate keys using the Keycloak Key Manager
-
Sign in to the Developer Portal.
https://<hostname>:9443/devportalhttps://localhost:9443/devportal -
Click Applications.
-
Create a new application or use the default application.
-
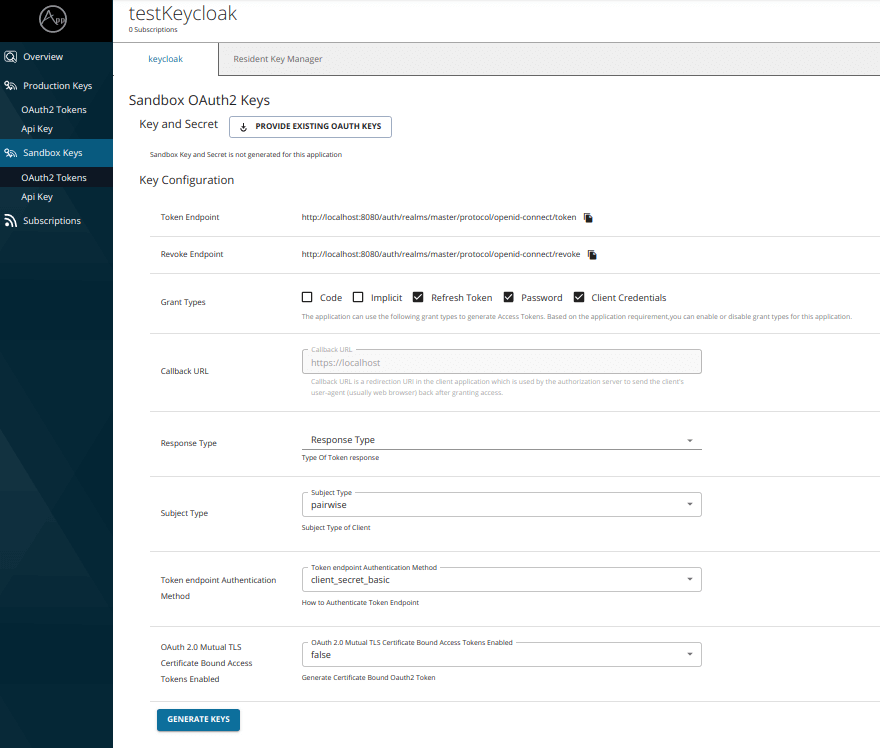
Click Sandbox Keys.
-
Select the Response Type.
-
Click Generate Keys.
Tip
- If you want to generate the tokens with scopes, those scopes should have been defined in Keycloak as mentioned in the Step 1 - (2).
- When generating a token in the Developer Portal, you need to have the
codeandimplicitgrant types selected and you need to enter the response type asnone. Without these, the token generation process fails.