Salesforce Inbound Endpoint Example
The Salesforce streaming Inbound Endpoint allows you to perform various operations on Salesforce streaming data.
The Salesforce streaming API receives notifications based on the changes that happen to Salesforce data with respect to an SQQL (Salesforce Object Query Language) query you define, in a secured and scalable way. For more information, navigate to Salesforce streaming documentation.
What you'll build
The Salesforce inbound endpoint is a listening inbound endpoint that can consume messages from Salesforce. This injects messages to an integration sequence. However, for simplicity of this example, we will just log the message. You can extend the sample as required using WSO2 mediators.
In this example we can trigger the notifications to the Salesforce Inbound Endpoint via creating the Platform events or PushTopic methods. Please note that our example configurations are based on creating the PushTopic method. You can use the instructions given in the sf-rest inbound endpoint configuration documentation.
The following diagram illustrates all the required functionality of the Salesforce inbound operations that you are going to build.
For example, we are building an integrated example driven through the Salesforce connector and Salesforce Inbound Endpoint. The user calls the Salesforce REST API. It invokes the create sequence and creates a new account in Salesforce. Then, through the retrieve sequence, it displays all the existing account details to the user.
Now that you have configured the Salesforce Inbound Endpoint, use the following Inbound Endpoint configuration to retrieve account details from your Salesforce account. The Salesforce inbound endpoint acts as a message receiver. You can inject that message into the mediation flow for getting the required output.
Configure inbound endpoint using WSO2 Integration Studio
-
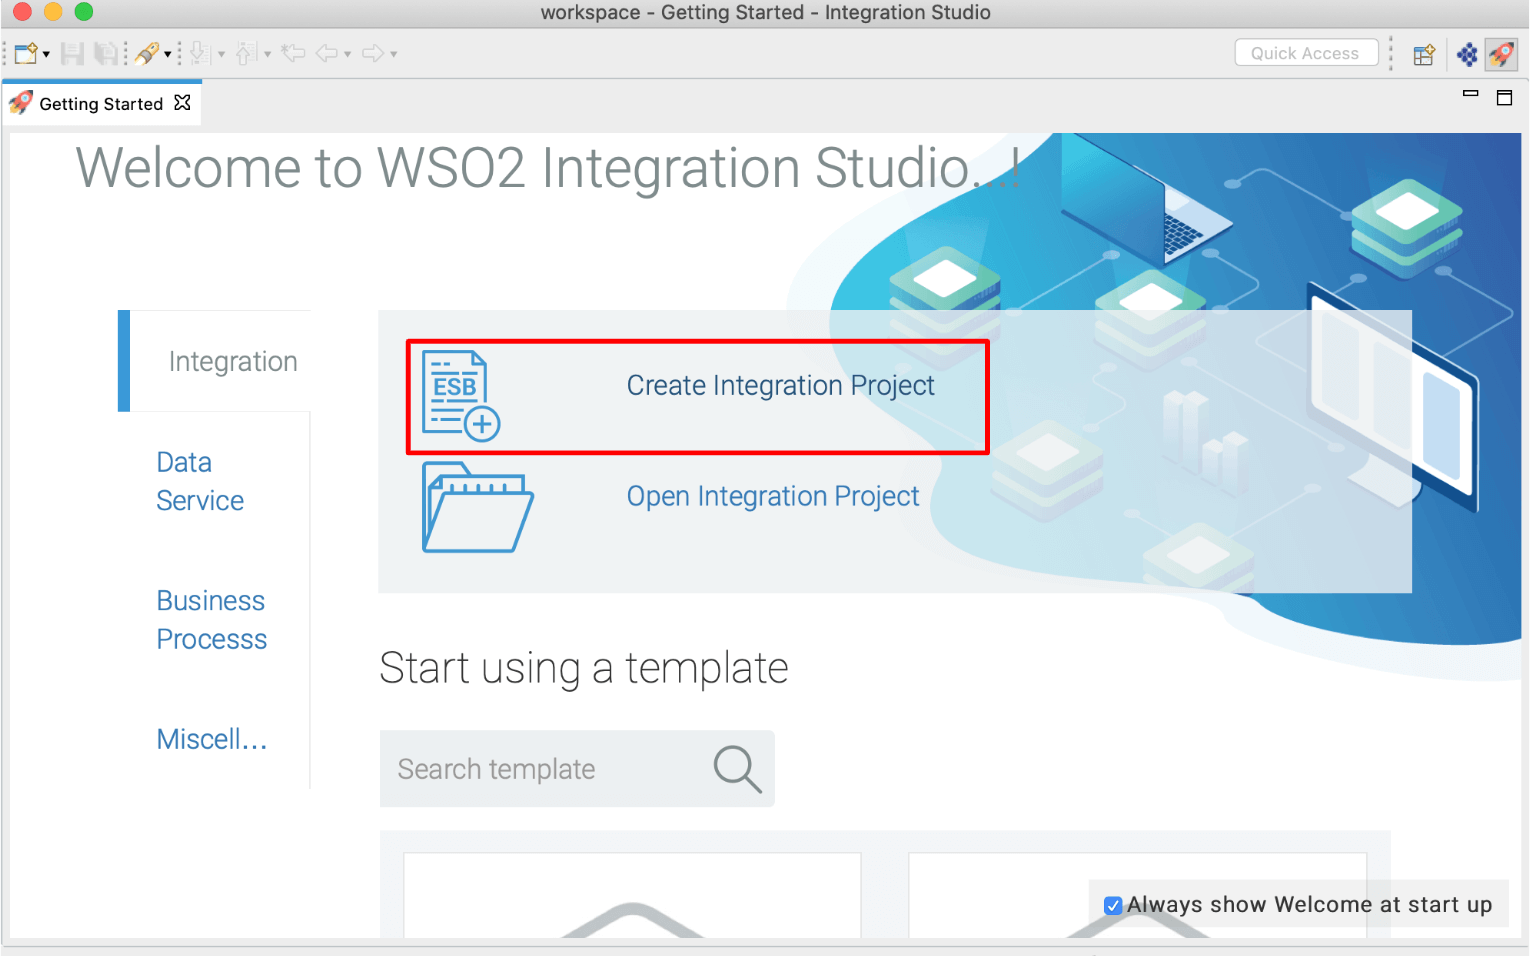
Download WSO2 Integration Studio. Create an Integration Project as below.

-
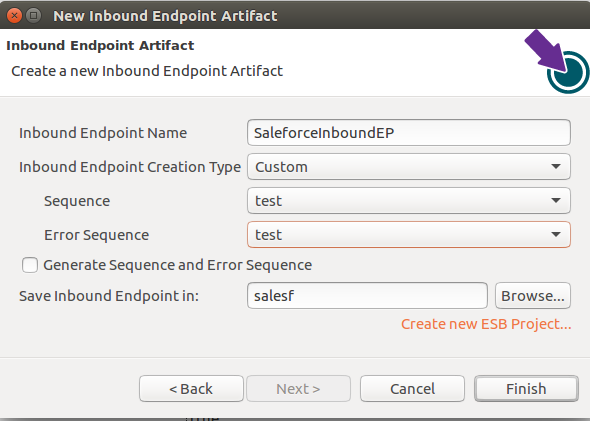
Right click on Created Integration Project -> New -> Inbound Endpoint -> Create A New Inbound Endpoint -> Inbound Endpoint Creation Type and select as custom -> Click Next.

-
Click on Inbound Endpoint in design view and under
propertiestab, update class name toorg.wso2.carbon.inbound.salesforce.poll.SalesforceStreamData. -
Navigate to the source view and update it with the following configuration as required.
<?xml version="1.0" encoding="UTF-8"?>
<inboundEndpoint xmlns="http://ws.apache.org/ns/synapse"
                 name="SaleforceInboundEP"
                 sequence="test"
                 onError="fault"
                 class="org.wso2.carbon.inbound.salesforce.poll.SalesforceStreamData"
                 suspend="false">
   <parameters>
      <parameter name="inbound.behavior">polling</parameter>
      <parameter name="interval">100</parameter>
      <parameter name="sequential">true</parameter>
      <parameter name="coordination">true</parameter>
      <parameter name="connection.salesforce.replay">false</parameter>
      <parameter name="connection.salesforce.EventIDStoredFilePath">/home/kasun/Documents/SalesForceConnector/a.txt</parameter>
      <parameter name="connection.salesforce.packageVersion">37.0</parameter>
      <parameter name="connection.salesforce.salesforceObject">/topic/Account</parameter>
      <parameter name="connection.salesforce.loginEndpoint">https://login.salesforce.com</parameter>
      <parameter name="connection.salesforce.userName">Username</parameter>
      <parameter name="connection.salesforce.password">test123XXXXXXXXXX</parameter>
      <parameter name="connection.salesforce.waitTime">5000</parameter>
      <parameter name="connection.salesforce.connectionTimeout">20000</parameter>
      <parameter name="connection.salesforce.soapApiVersion">22.0</parameter>
   </parameters>
</inboundEndpoint>In this example for simplicity we will just log the message, but in a real world use case, this can be any type of message mediation.
<?xml version="1.0" encoding="UTF-8"?>
<sequence name="test" onError="fault" xmlns="http://ws.apache.org/ns/synapse">
    <log level="full"/>
    <drop/>
</sequence>Note: To configure the
connection.salesforce.passwordparameter value, please use the steps given under the topicReset Security Tokenin the Salesforce inbound endpoint configuration document.
Exporting Integration Logic as a CApp
CApp (Carbon Application) is the deployable artefact on the integration runtime. Let us see how we can export integration logic we developed into a CApp. To export the Solution Project as a CApp, a Composite Application Project needs to be created. Usually, when a solution project is created, this project is automatically created by Integration Studio. If not, you can specifically create it by navigating to File -> New -> Other -> WSO2 -> Distribution -> Composite Application Project.
-
Right click on Composite Application Project and click on Export Composite Application Project.

-
Select an Export Destination where you want to save the .car file.
-
In the next Create a deployable CAR file screen, select inbound endpoint and sequence artifacts and click Finish. The CApp will get created at the specified location provided in the previous step.
Deployment
-
Navigate to the connector store and search for
SalesforceRest. Click onSalesforce Inbound Endpointand download the .jar file by clicking onDownload Inbound Endpoint. Copy this .jar file into/lib folder. -
Copy the exported carbon application to the
<PRODUCT-HOME>/repository/deployment/server/carbonappsfolder. -
Start the integration server.
Testing
Note: If you want to test this scenario by inserting data manually into the created object records, please follow the steps given under topic
Testing the PushTopic Channelin the Salesforce inbound endpoint configuration document.
Please use the Salesforce REST Connector example testing steps to test this Inbound Endpoint scenario;
Save a file called data.json with the following payload (change the value of Name field as Manager).
{
 "sObject":"Account",
 "fieldAndValue": {
    "name": "Manager",
    "description":"This Account belongs to WSO2"
  }
}curl -X POST -d @data.json http://localhost:8280/salesforcerest --header "Content-Type:application/json"Expected response
To: , MessageID: urn:uuid:2D8F9AFA30E66278831587368713372, Direction: request, Payload: {"event":{"createdDate":"2020-04-20T07:45:12.686Z","replayId":4,"type":"created"},"sobject":{"Id":"0012x0000048j9mAAA","Name":"Manager"}}What's next
- You can deploy and run your project using different Micro Integrator installation options.
- To customize this example for your own scenario, see Salesforce Inbound Endpoint Reference documentation for all operation details of the connector.
