Requeue a message preserving the message order with a delay in case of error
This sample demonstrates how WSO2 Micro Integrator can ensure guaranteed delivery of messages by requeueing messages when an error occurs during delivery. That is, the Micro Integrator can be configured to requeue messages to a RabbitMQ queue when the delivery fails.
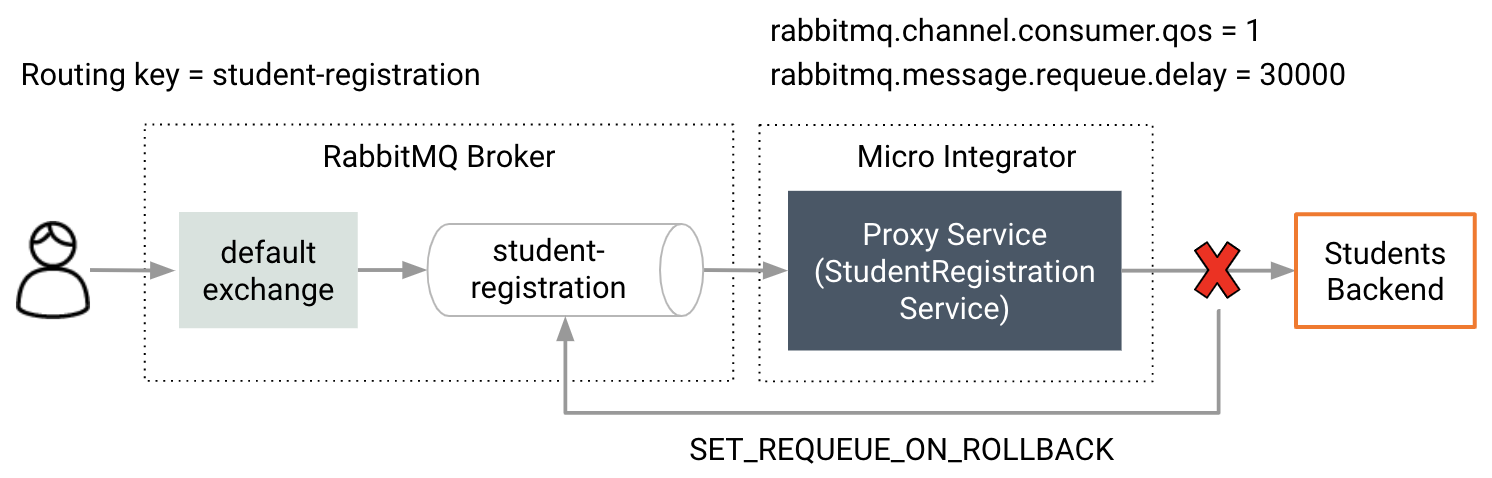
As shown in the following example, the Micro Integrator first consumes the request message from the RabbitMQ queue and sends it to the back-end HTTP endpoint. If the HTTP endpoint becomes unavailable, the message will be returned
to the student-registration queue in the RabbitMQ broker until the endpoint becomes available again.
Synapse configurations
See the instructions on how to build and run this example.
<proxy xmlns="http://ws.apache.org/ns/synapse"
       name="StudentRegistrationService"
       transports="rabbitmq"
       startOnLoad="true">
   <description/>
   <target>
      <inSequence>
         <log level="custom">
            <property name="Message Received" expression="$body"/>
         </log>
         <call blocking="true">
            <endpoint>
               <http uri-template="http://localhost:8280/students"/>
            </endpoint>
         </call>
         <log level="custom">
            <property name="Status" value="The message process successfully"/>
         </log>
      </inSequence>
      <faultSequence>
         <log level="custom">
            <property name="Status" value="Could not process the message"/>
         </log>
         <property name="SET_REQUEUE_ON_ROLLBACK" value="true" scope="axis2"/>
      </faultSequence>
   </target>
   <parameter name="rabbitmq.queue.auto.ack">false</parameter>
   <parameter name="rabbitmq.channel.consumer.qos">1</parameter>
   <parameter name="rabbitmq.message.requeue.delay">30000</parameter>
   <parameter name="rabbitmq.queue.name">student-registration</parameter>
   <parameter name="rabbitmq.connection.factory">AMQPConnectionFactory</parameter>
</proxy>
Build and run
- Set up WSO2 Integration Studio.
- Create an integration project with an ESB Configs module and an Composite Exporter.
- Create the proxy service with the configurations given above.
- Enable the RabbitMQ sender and receiver in the Micro-Integrator from the deployment.toml. Refer the configuring RabbitMQ documentation for more information.
- Deploy the artifacts in your Micro Integrator.
- Make the
http://localhost:8280/studentsendpoint unavailable temporarily. - Make sure you have a RabbitMQ broker instance running.
- Publish a message to the
student-registrationqueue.