Adding Internationalization and Localization
The API Manager includes two Web interfaces, namely the API Publisher and Developer Portal. The steps below explain how you can localize the API Publisher and the Developer Portal.
Changing the browser language
Note
-
The web applications are shipped with the following default and additional languages for demonstration and testing purposes.
Web Application Supported Languages Defaultlanguage Additionallanguages Developer Portal English SpanishArabicSinhala API Publisher English Sinhala -
If the language that you set in the browser settings is not a supported language of the API Publisher and/or the Developer Portal web application, "English" is set as the language by default in the web applications.
-
Therefore, if you need to change the language and the language is not supported, make sure to add the language first before changing the browser language.
Set your browser language to a preferred language by following the user guide that corresponds to your browser.
For example, let's assume that you are using Google Chrome, and let's change the browser language to "Spanish".
-
Navigate to the
chrome://settings/languagesURL in your browser.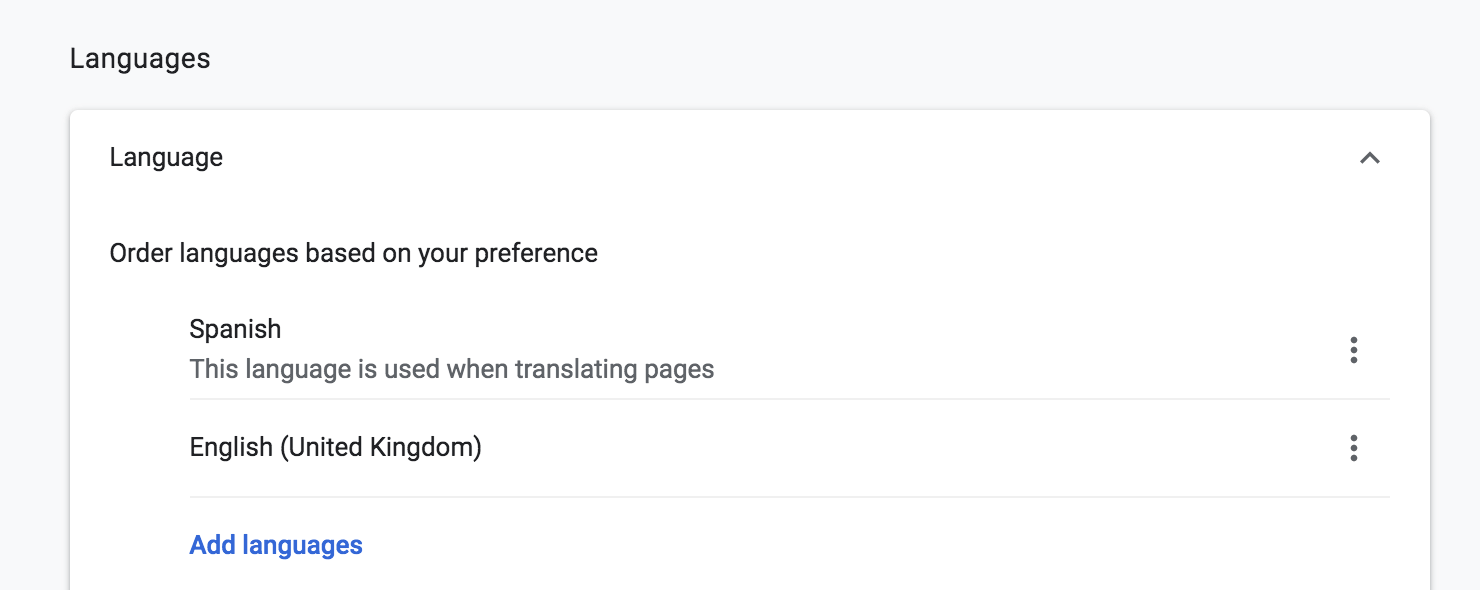
-
Add the highest preference to "Spanish", so that "Spanish" moves to the top of the language list.
-
Refresh the API Publisher and Developer Portal web apps.
The text in the browser will be translated into Spanish.
Adding a new language
Info
All the text in the Developer Portal or the API Publisher are loaded via an external JSON file. These JSON files are asynchronously fetched from the browser based on the browser locale. The locale files are available in the following locations.
| Publisher |
<APIM_HOME>/repository/deployment/server/jaggeryapps/publisher/site/public/locales
|
| Developer Portal | <APIM_HOME>/repository/deployment/server/jaggeryapps/devportal/site/public/locales
|
Follow the instructions below to add a new language to the Developer Portal or the API Publisher.
Let's add support for the French language to the Developer Portal.
-
Identify the two-letter locale code for the language that you want to add to the Developer Portal.
The locale code for the French language is
fr. -
Make a copy of the
en.jsonfile and rename it based on the locale code.Rename the copy of the
<APIM_HOME>/repository/deployment/server/jaggeryapps/devportal/site/public/locales/en.jsonfile tofr.json.Info
If you are setting the browser locale to a specific regional language, for example, French (Switzerland), the language with the regional code is
fr-ch. In this scenario too the two letter locale code isfr, because WSO2 API Manager does not support regional language switching. -
Change all the values that correspond to the key-value pairs to the language that you want to add to the Developer Portal.
The JSON file (
<locale-code>.json) has key-value pairs as follows:"Apis.Details.ApiConsole.ApiConsole.title": "Try Out", "Apis.Details.ApiConsole.SelectAppPanel.applications": "Appplications",-
Convert each of the values into French.
Finding the keys to modify
Sometimes going through the list of keys and modifying each of the values that correspond to a specific language is not going to be enough. You may need to find a key that is responsible for a particular text in the UI. Let’s consider the following scenario.
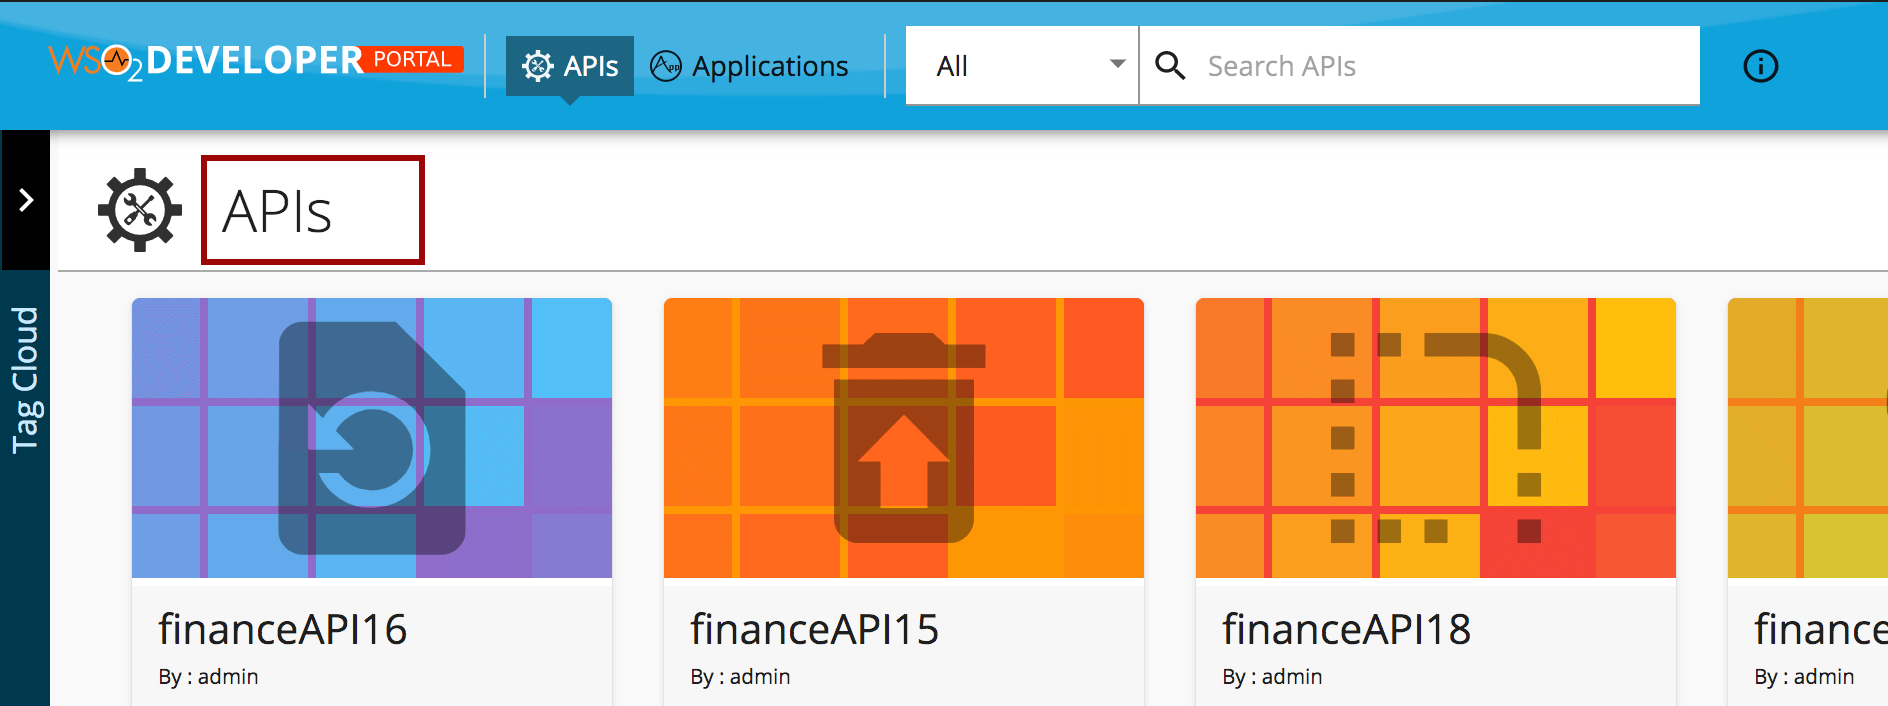
Let's find the key for the main title named APIs in the following screen.
-
Right-click over the title named APIs and select Inspect Element.
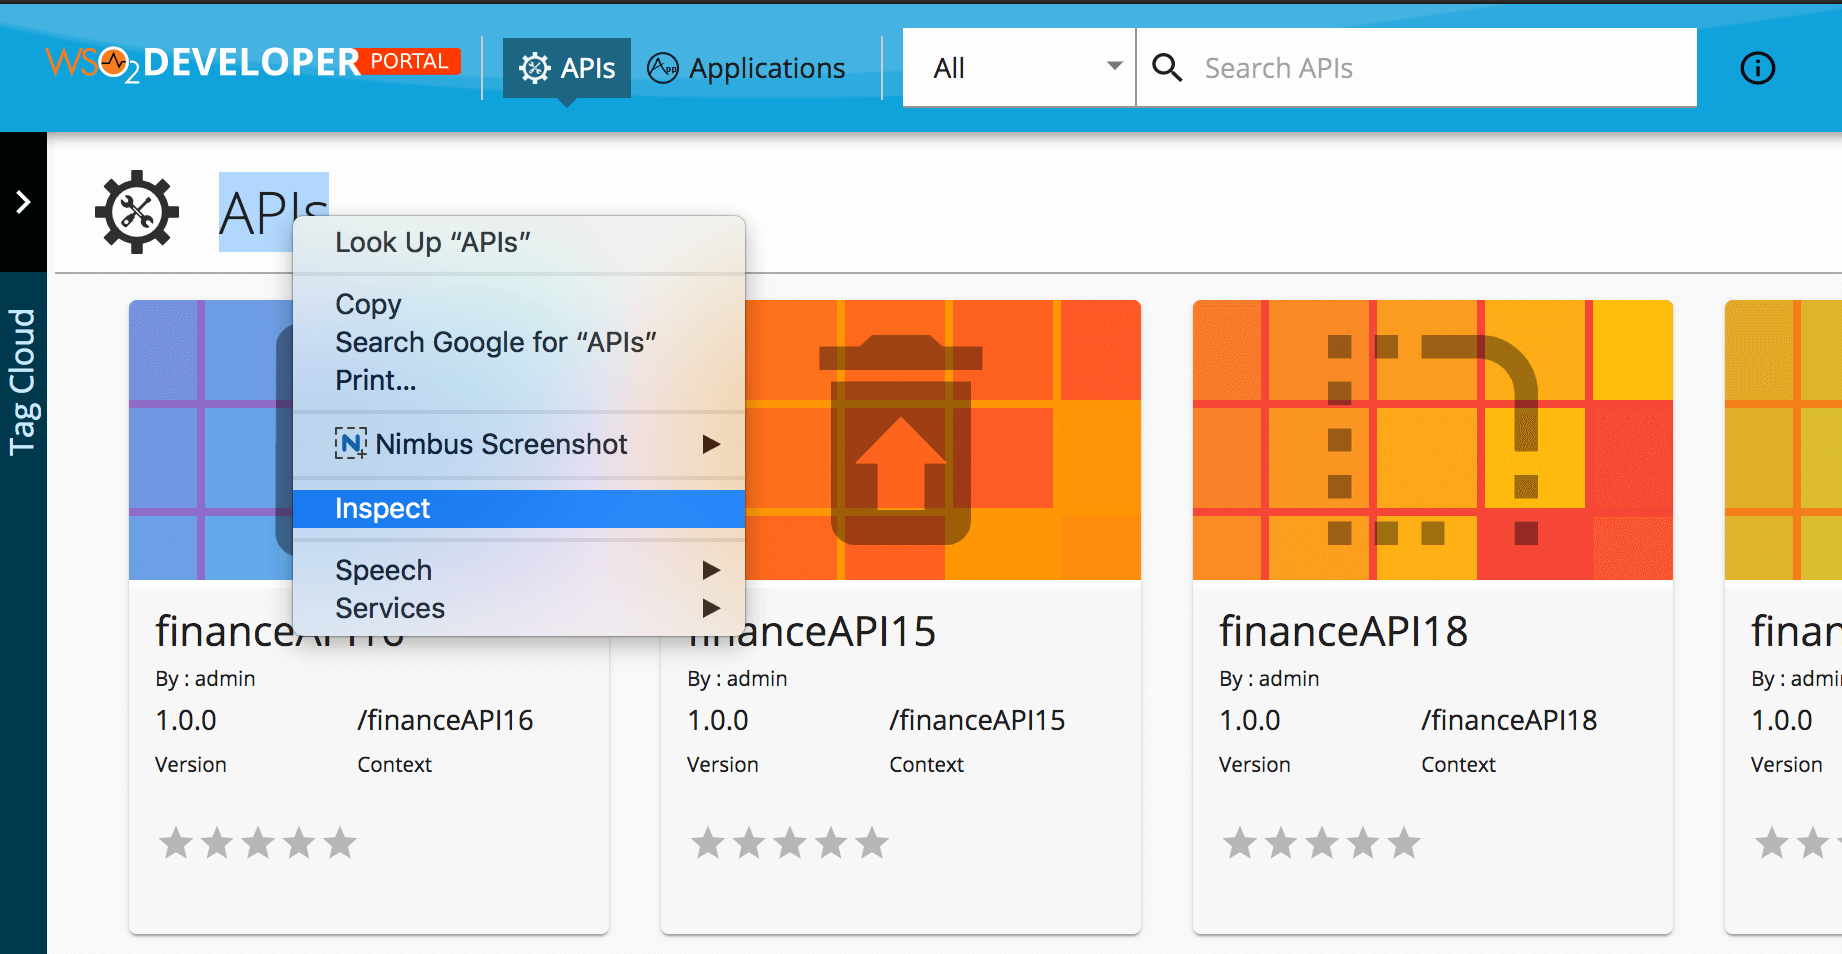
The Chrome Developer Tools will open.
-
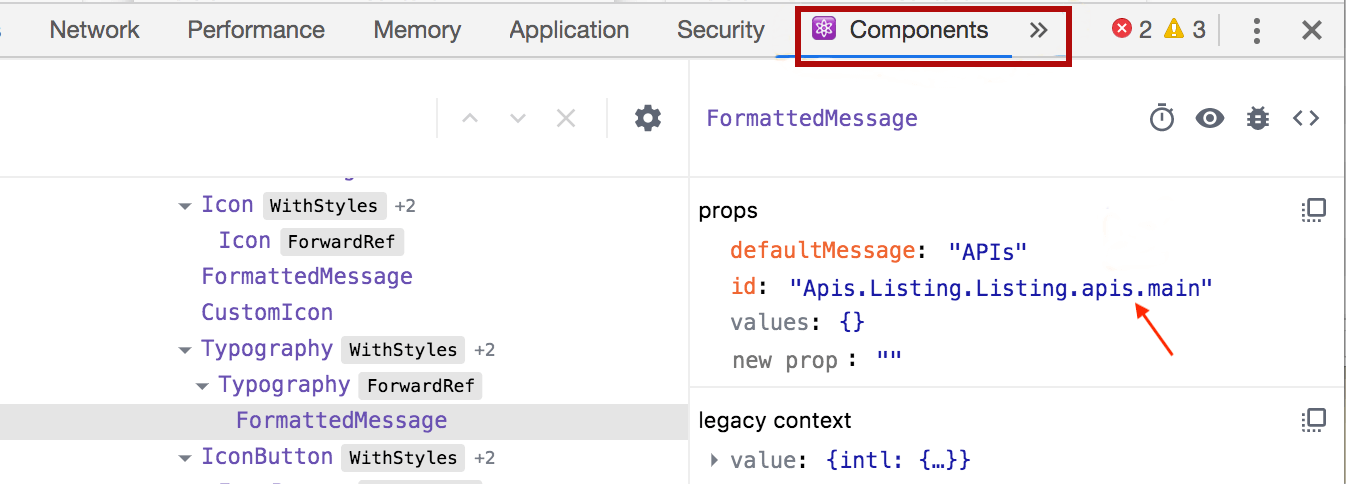
Click on Components and copy the ID of the text component.
Changing the direction of the UI
WSO2 API Manager has the capability of direction change for the Developer Portal web application. This feature enables you to entirely change the default direction of the UI from LTR (Left To Right) to RTL (Right to Left). This is required if you are trying to add support for languages such as Arabic.
Follow the instructions below to change the direction of the UI:
-
Add the specific configuration in the
defaultTheme.jsfile.Add the following configuration to change the page direction to RTL (Right To Left).
!!! note If you have already done customizations to the default theme, make sure to merge the following with the existing changes carefully.
const Configurations = { direction: 'rtl', }; -
Reload the Developer Portal to view the changes.
Info
If you have done the theme changes for the instance via the <APIM_HOME>/repository/deployment/server/jaggeryapps/devportal/site/public/theme/defaultTheme.js file the above configuration is valid. However, if it is the tenant theme file (defaultTheme.json) the variable assignment is not required and the defaultTheme.json file has to be a valid JSON file. For example, the valid configuration that should go into the defaultTheme.json file to change the page direction to RTL (Right To Left) is as follows:
{
"direction": "rtl",
}
Tip
Learn more about Tenant theming.
Enabling the language switch
WSO2 API Manager has the capability of language switching for the Developer Portal web application.
Note
- When you switch between languages via the language switch, it will take precedence over the browser locale.
- If you do not select a language and -
- If the browser locale exists in the list of languages given in the language switch, the browser locale will be automatically selected from the list of available languages.
- If the browser locale does not exist in the list of languages, then "English" will get automatically set as the language switch.
- When you enable the language switch, the direction of each language will take precedence over the root level direction.
Follow the instructions below to enable the language switch:
-
Open the
<APIM_HOME>/repository/deployment/server/jaggeryapps/devportal/site/public/theme/defaultTheme.jsfile. -
Add the following configuration to the file to enable the language switch.
Note
If you have already done customizations to the default theme, make sure to merge the following with the existing changes carefully.
const Configurations = { custom: { languageSwitch: { active: true, } } }; -
Optionally, add a language.
Note
This is only applicable if you have added a new language to the respective web application, which is not a language that is available by default.
const DefaultConfigurations = { direction: 'ltr', custom: { languageSwitch: { active: true, languages: [ { key: 'fn', image: '/site/public/images/flags/fn.png', imageWidth: 24, // in pixles text: 'French', direction: 'ltr', } ] } } } -
Customize the language switch if required.
The following are the additional parameters that are available to customize the language switch.
Key value showFlagdefault set to true. Setting the value tofalsewill hide the flag and display only the text.showTextdefault set to true. Setting the value tofalsewill hide the text and display only the flag.minWidthSets the width of the whole element. The default is set to 60 pixels. const DefaultConfigurations = { direction: 'ltr', custom: { languageSwitch: { active: false, languages: [ { key: 'fn', image: '/site/public/images/flags/fn.png', imageWidth: 24, // in pixles text: 'French', direction: 'ltr', } ], showFlag: true, showText: true, minWidth: 60, // Width of the language switcher in pixles } } } -
Reload the Developer Portal to view the changes.
Now, a switch will be displayed in the top menu to change the language.

Languages available by default
The following are the languages available by default.
languages: [
    {
        key: 'en',
        image: '/site/public/images/flags/en.png',
        imageWidth: 24, // in pixles
        text: 'English',
        direction: 'ltr',
    },
    {
        key: 'es',
        image: '/site/public/images/flags/sp.png',
        imageWidth: 24, // in pixles
        text: 'Spanish',
        direction: 'ltr',
    },
    {
        key: 'ar',
        image: '/site/public/images/flags/ar.png',
        imageWidth: 24, // in pixles
        text: 'Arabic',
        direction: 'rtl',
    },
    {
        key: 'si',
        image: '/site/public/images/flags/si.png',
        imageWidth: 24, // in pixles
        text: 'Sinhala',
        direction: 'ltr',
    }
]
Complete configuration related to localization
The following is the complete configuration related to localization.
const DefaultConfigurations = {
    direction: 'ltr',
    custom: {
        languageSwitch: {
            active: false,
            languages: [
                {
                    key: 'en',
                    image: '/site/public/images/flags/en.png',
                    imageWidth: 24, // in pixles
                    text: 'English',
                    direction: 'ltr',
                },
                {
                    key: 'es',
                    image: '/site/public/images/flags/sp.png',
                    imageWidth: 24, // in pixles
                    text: 'Spanish',
                    direction: 'ltr',
                },
                {
                    key: 'ar',
                    image: '/site/public/images/flags/ar.png',
                    imageWidth: 24, // in pixles
                    text: 'Arabic',
                    direction: 'rtl',
                },
                {
                    key: 'si',
                    image: '/site/public/images/flags/si.png',
                    imageWidth: 24, // in pixles
                    text: 'Sinhala',
                    direction: 'ltr',
                }
            ],
            showFlag: true,
            showText: true,
            minWidth: 60, // Width of the language switcher in pixles
        }
    }
}
Advanced concepts
The following document describes how i18n is implemented in the API Publisher and the Developer Portal web applications, how you can auto-generate the language file, and how to programmatically convert the locale file from one language to any other language.
How internationalization (i18n) works in WSO2 API Manager React Apps
Top