Create and Publish a WebSub/WebHook API
This tutorial will guide you to create a WebHook API which will listen to the issues created in GitHub and send you a notification upon creation. Follow the instructions in this tutorial to design and publish a WebSub/WebHook API, and register a WebHook for it.
The tutorial demonstrates a simple WebSub/WebHook API that monitors your GitHub repository for new issues, and receives events when an issue is created.
Step 1 - Design a WebSub/WebHook API
-
Sign in to the Publisher.
https://<hostname>:9443/publisherFor testing purposes, you can use
https://localhost:9443/publisherandadminas the username and password. -
Click CREATE API, go to Streaming API, and Click WebHook API.
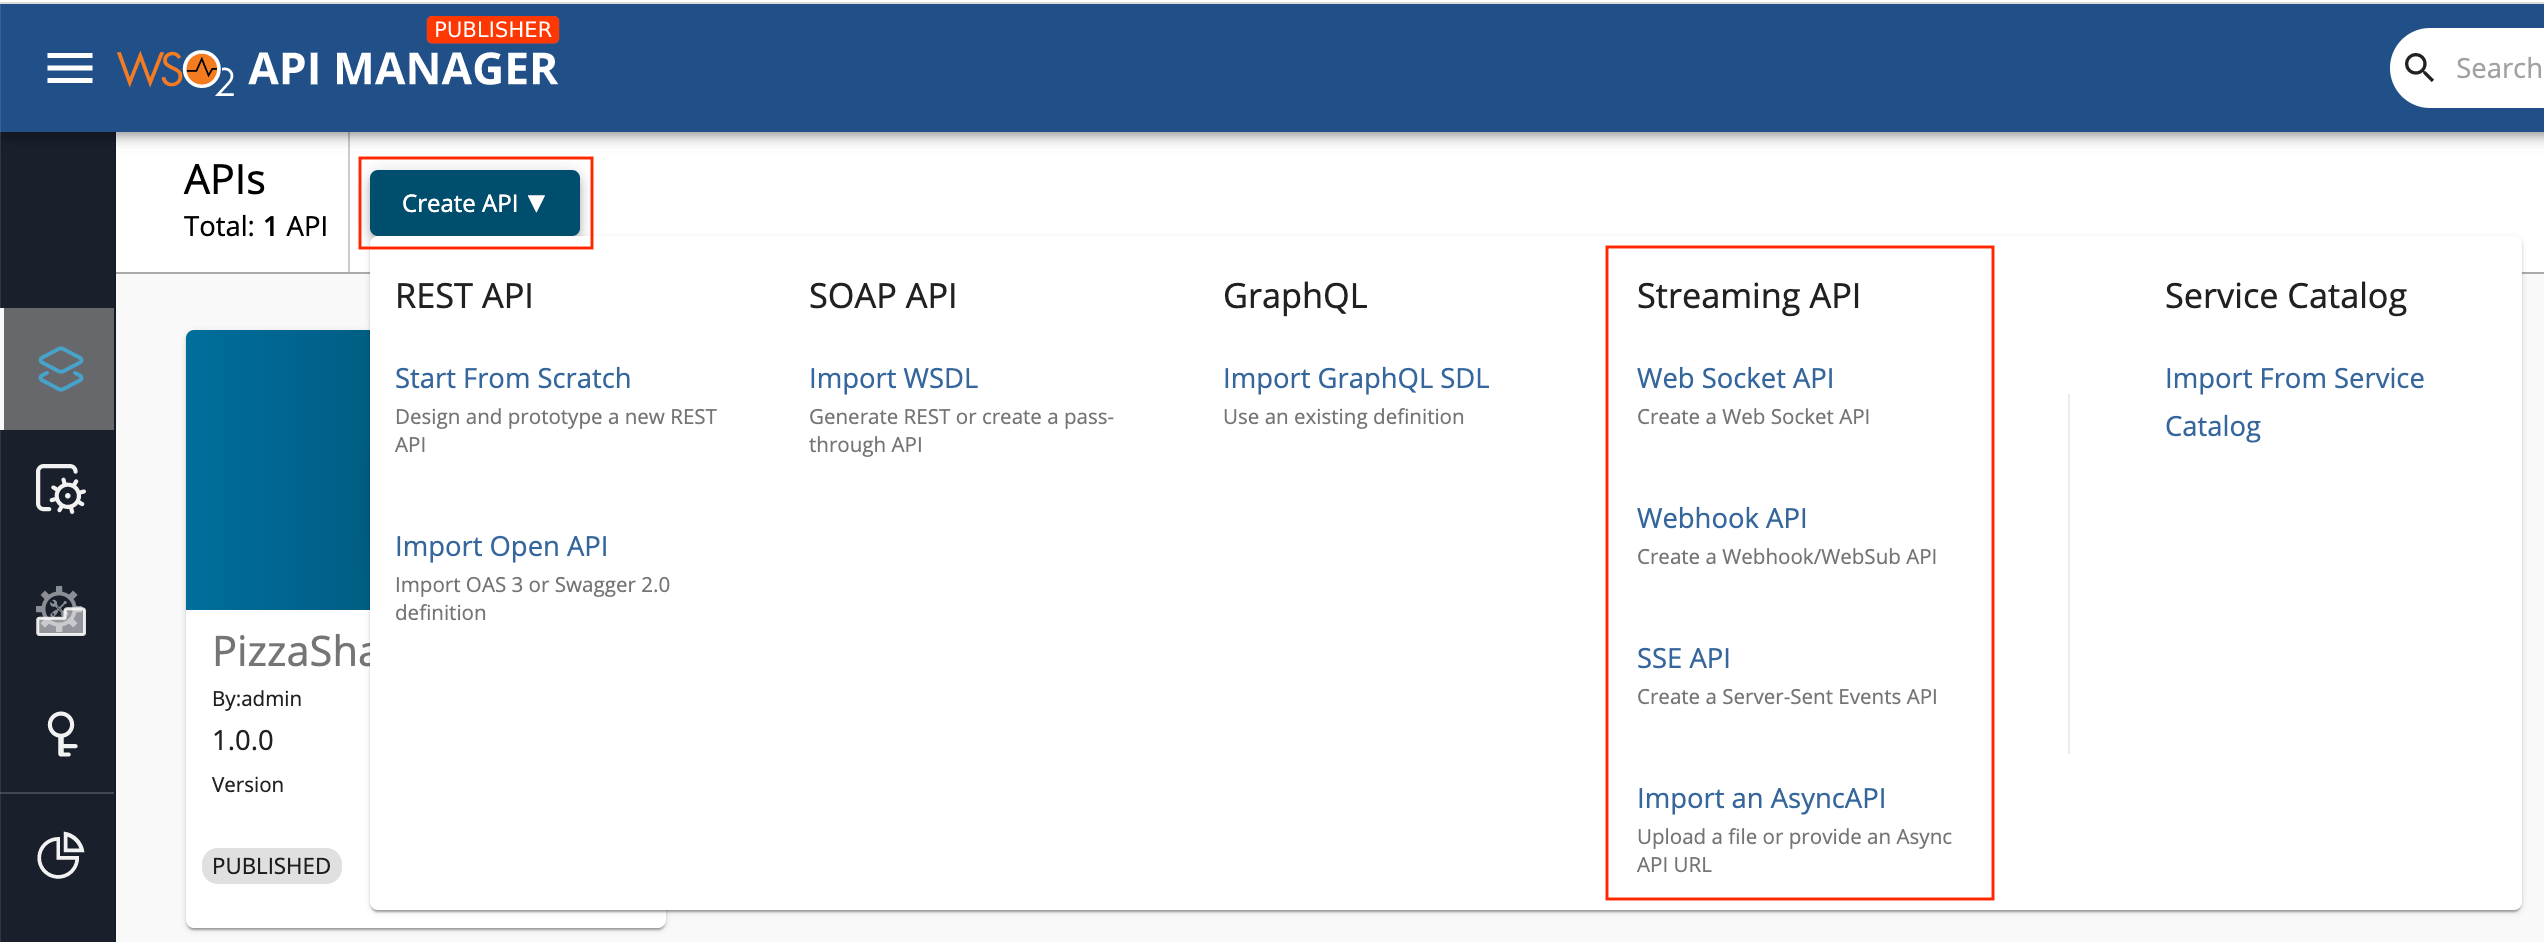
Note
The CREATE button will only appear for a user who has the
creatorrole permission. -
Enter the details of the new WebSub/WebHook API.
Field Sample value Name RepoWatcher Context /repo-watcher Version 1.0.0 Protocol WebSub -
Click CREATE.
The overview page of the created WebSub/WebHook API appears.
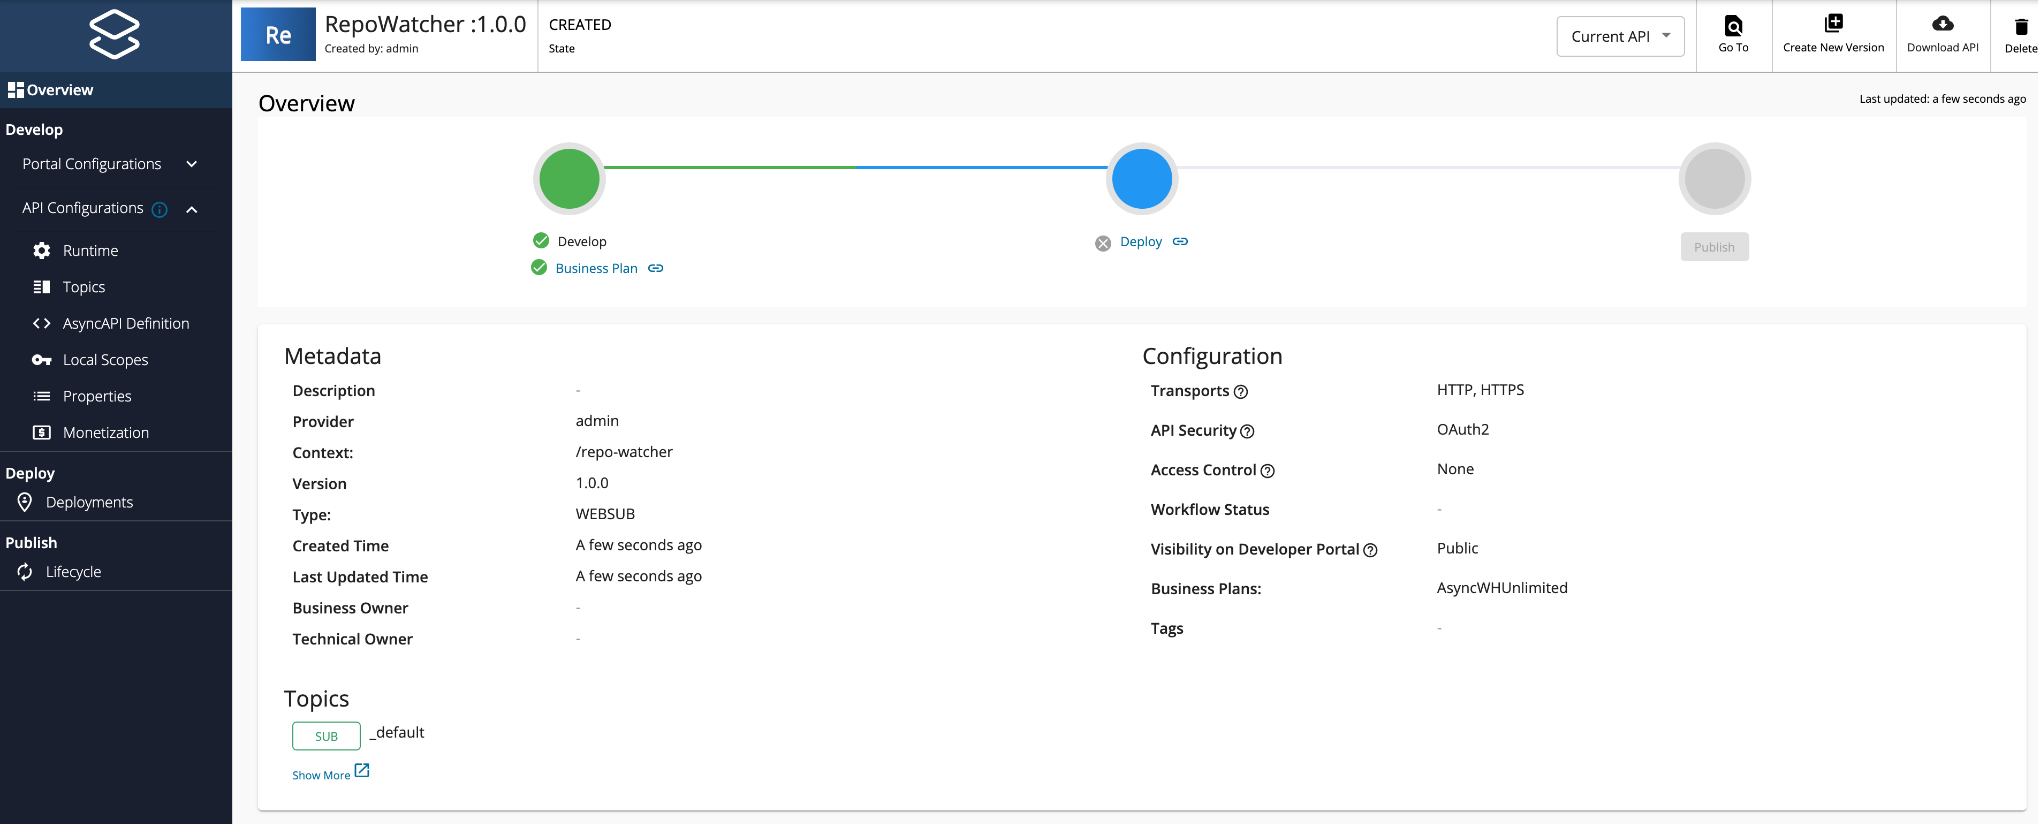
-
Add a topic to the WebSub/WebHook API.
-
Click Topics and navigate to the Topics page.
-
Click Add Topic, add a topic with the name /issues, click Add, and finally click Save.

-
-
Generate a secret.
-
Expand the Subscription Configuration section in the Topics page.

-
Select SHA1 as the Signing Algorithm.
-
Click Generate to generate a secret.
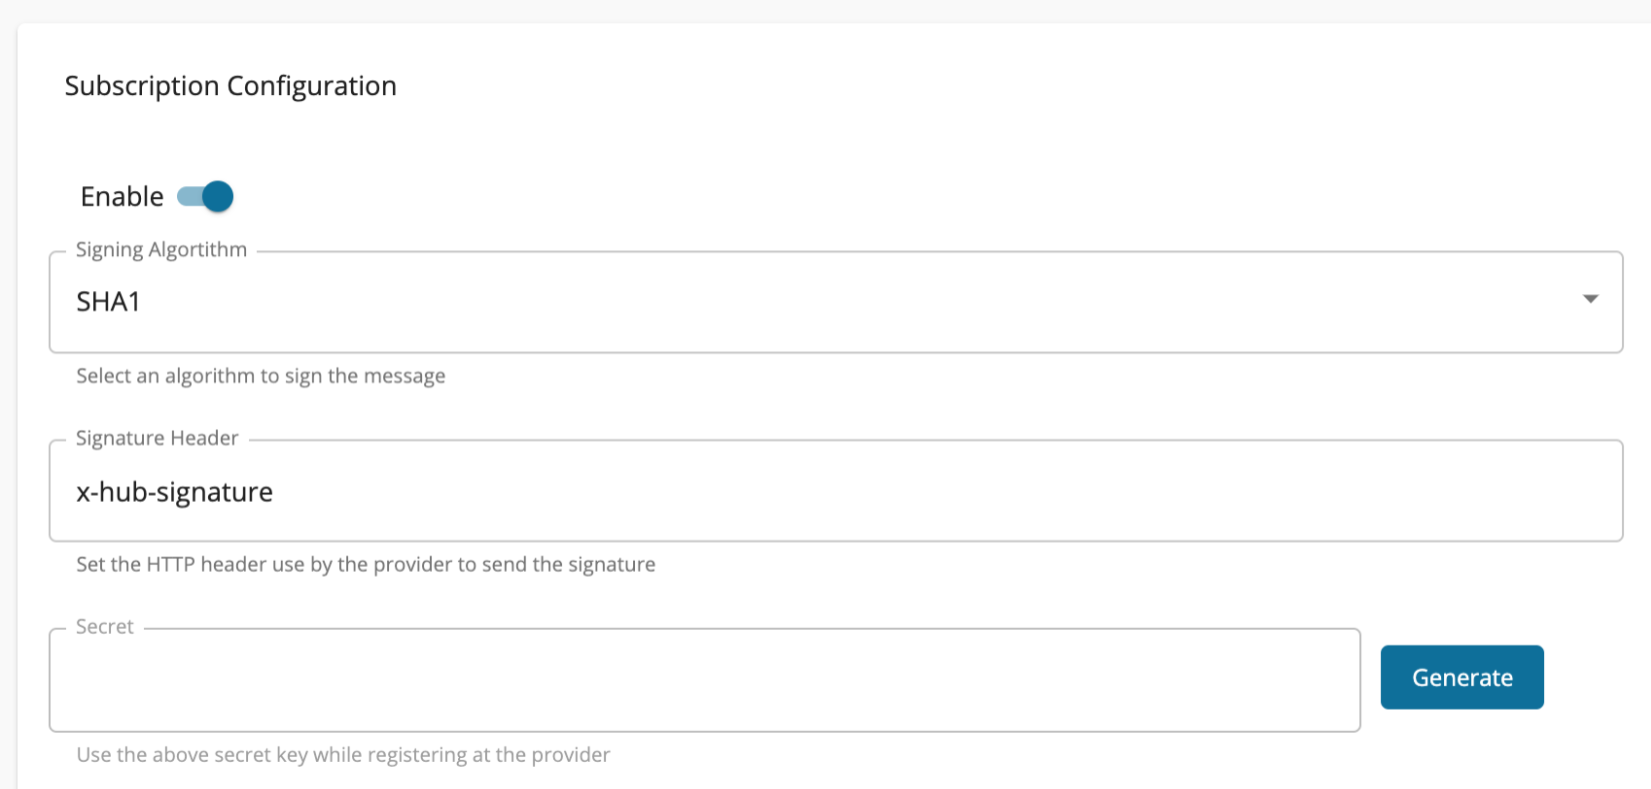
-
Copy the generated secret.
Let's refer to the generated secret as
[generated_secret]. -
Click Save.
-
-
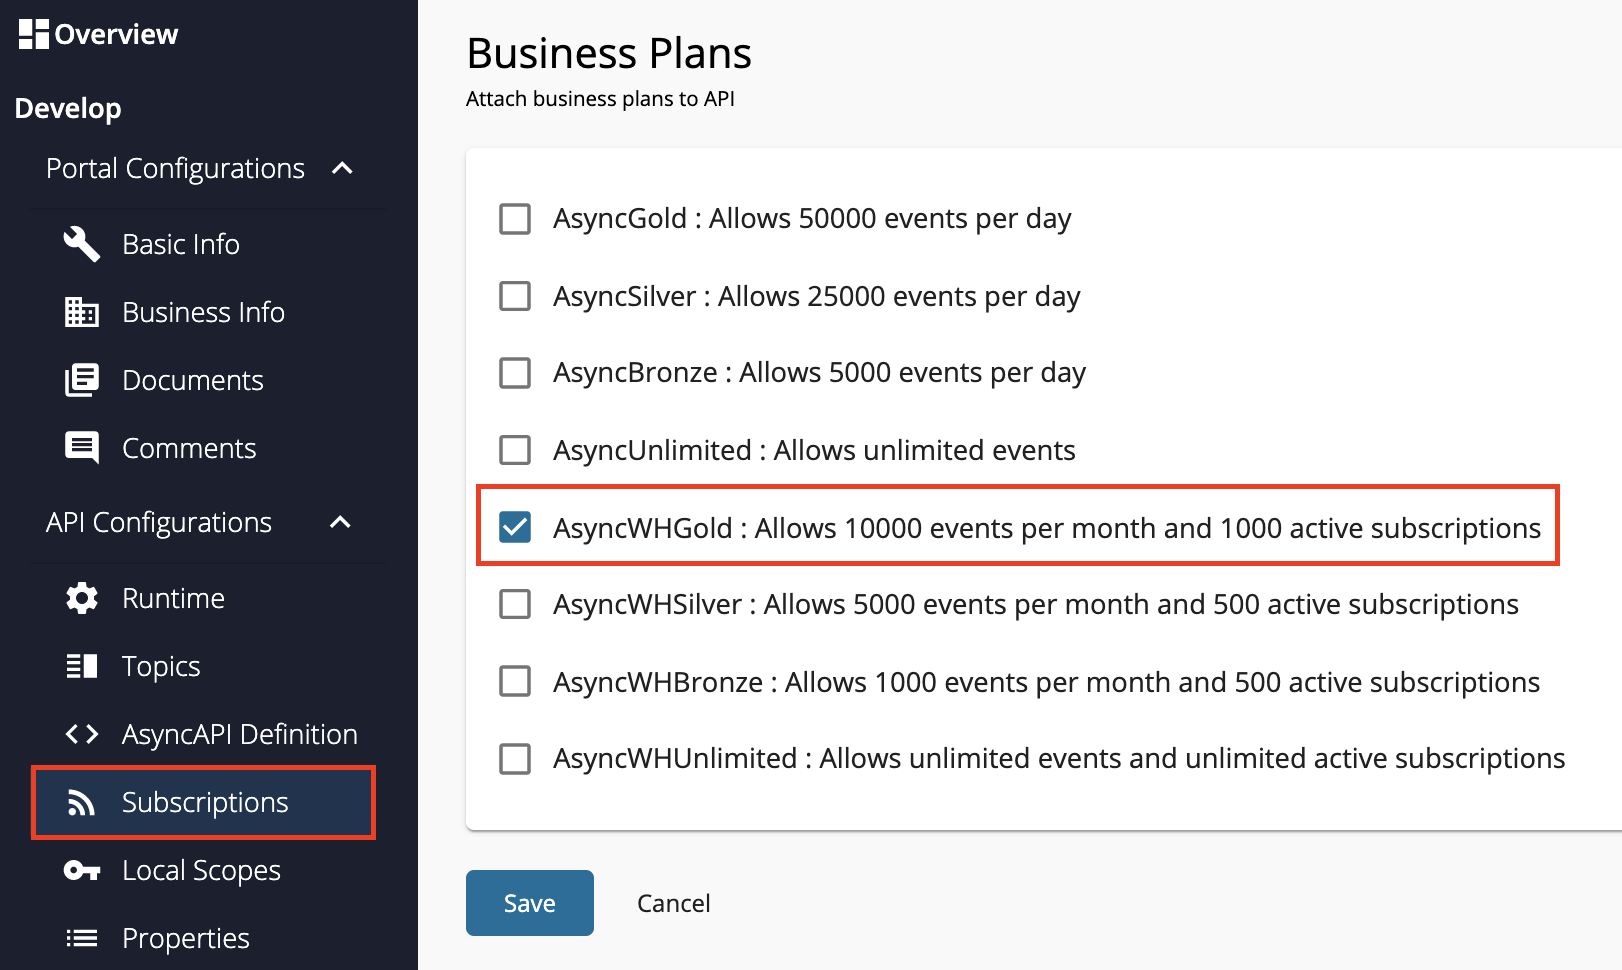
Attach business plans to the WebSub/WebHook API.
-
Click Portal Configurations and click Subscriptions to navigate to the Business Plans page.
-
Select AsyncWHGold and click on Save.
-
Now, you have created and configured the WebSub API (WebHook API) successfully.
Step 2 - Forward a Public URL
A public URL should be forwarded to localhost:9021, so that your local server can be accessible to the WebHook provider (GitHub). ngrok can be used for this purpose.
-
Download ngrok, and start it.
This will forward a public URL to
localhost:9021../ngrok http 9021 -
Copy the HTTP URL that is forwarded to
http://localhost:9021, as shown in ngrok's terminal.In the following example, it is
http://3b1*******c9.ngrok.io.Forwarding http://3b1*******c9.ngrok.io -> http://localhost:9021 Forwarding https://3b1*******c9.ngrok.io -> http://localhost:9021
Step 3 - Add a WebHook to your GitHub Repository
Note
You can use an existing GitHub repository of yours, or create a new one for this purpose.
-
Go to Settings of your GitHub repository.
-
Click WebHooks, navigate to the WebHooks page, and click Add WebHook.

-
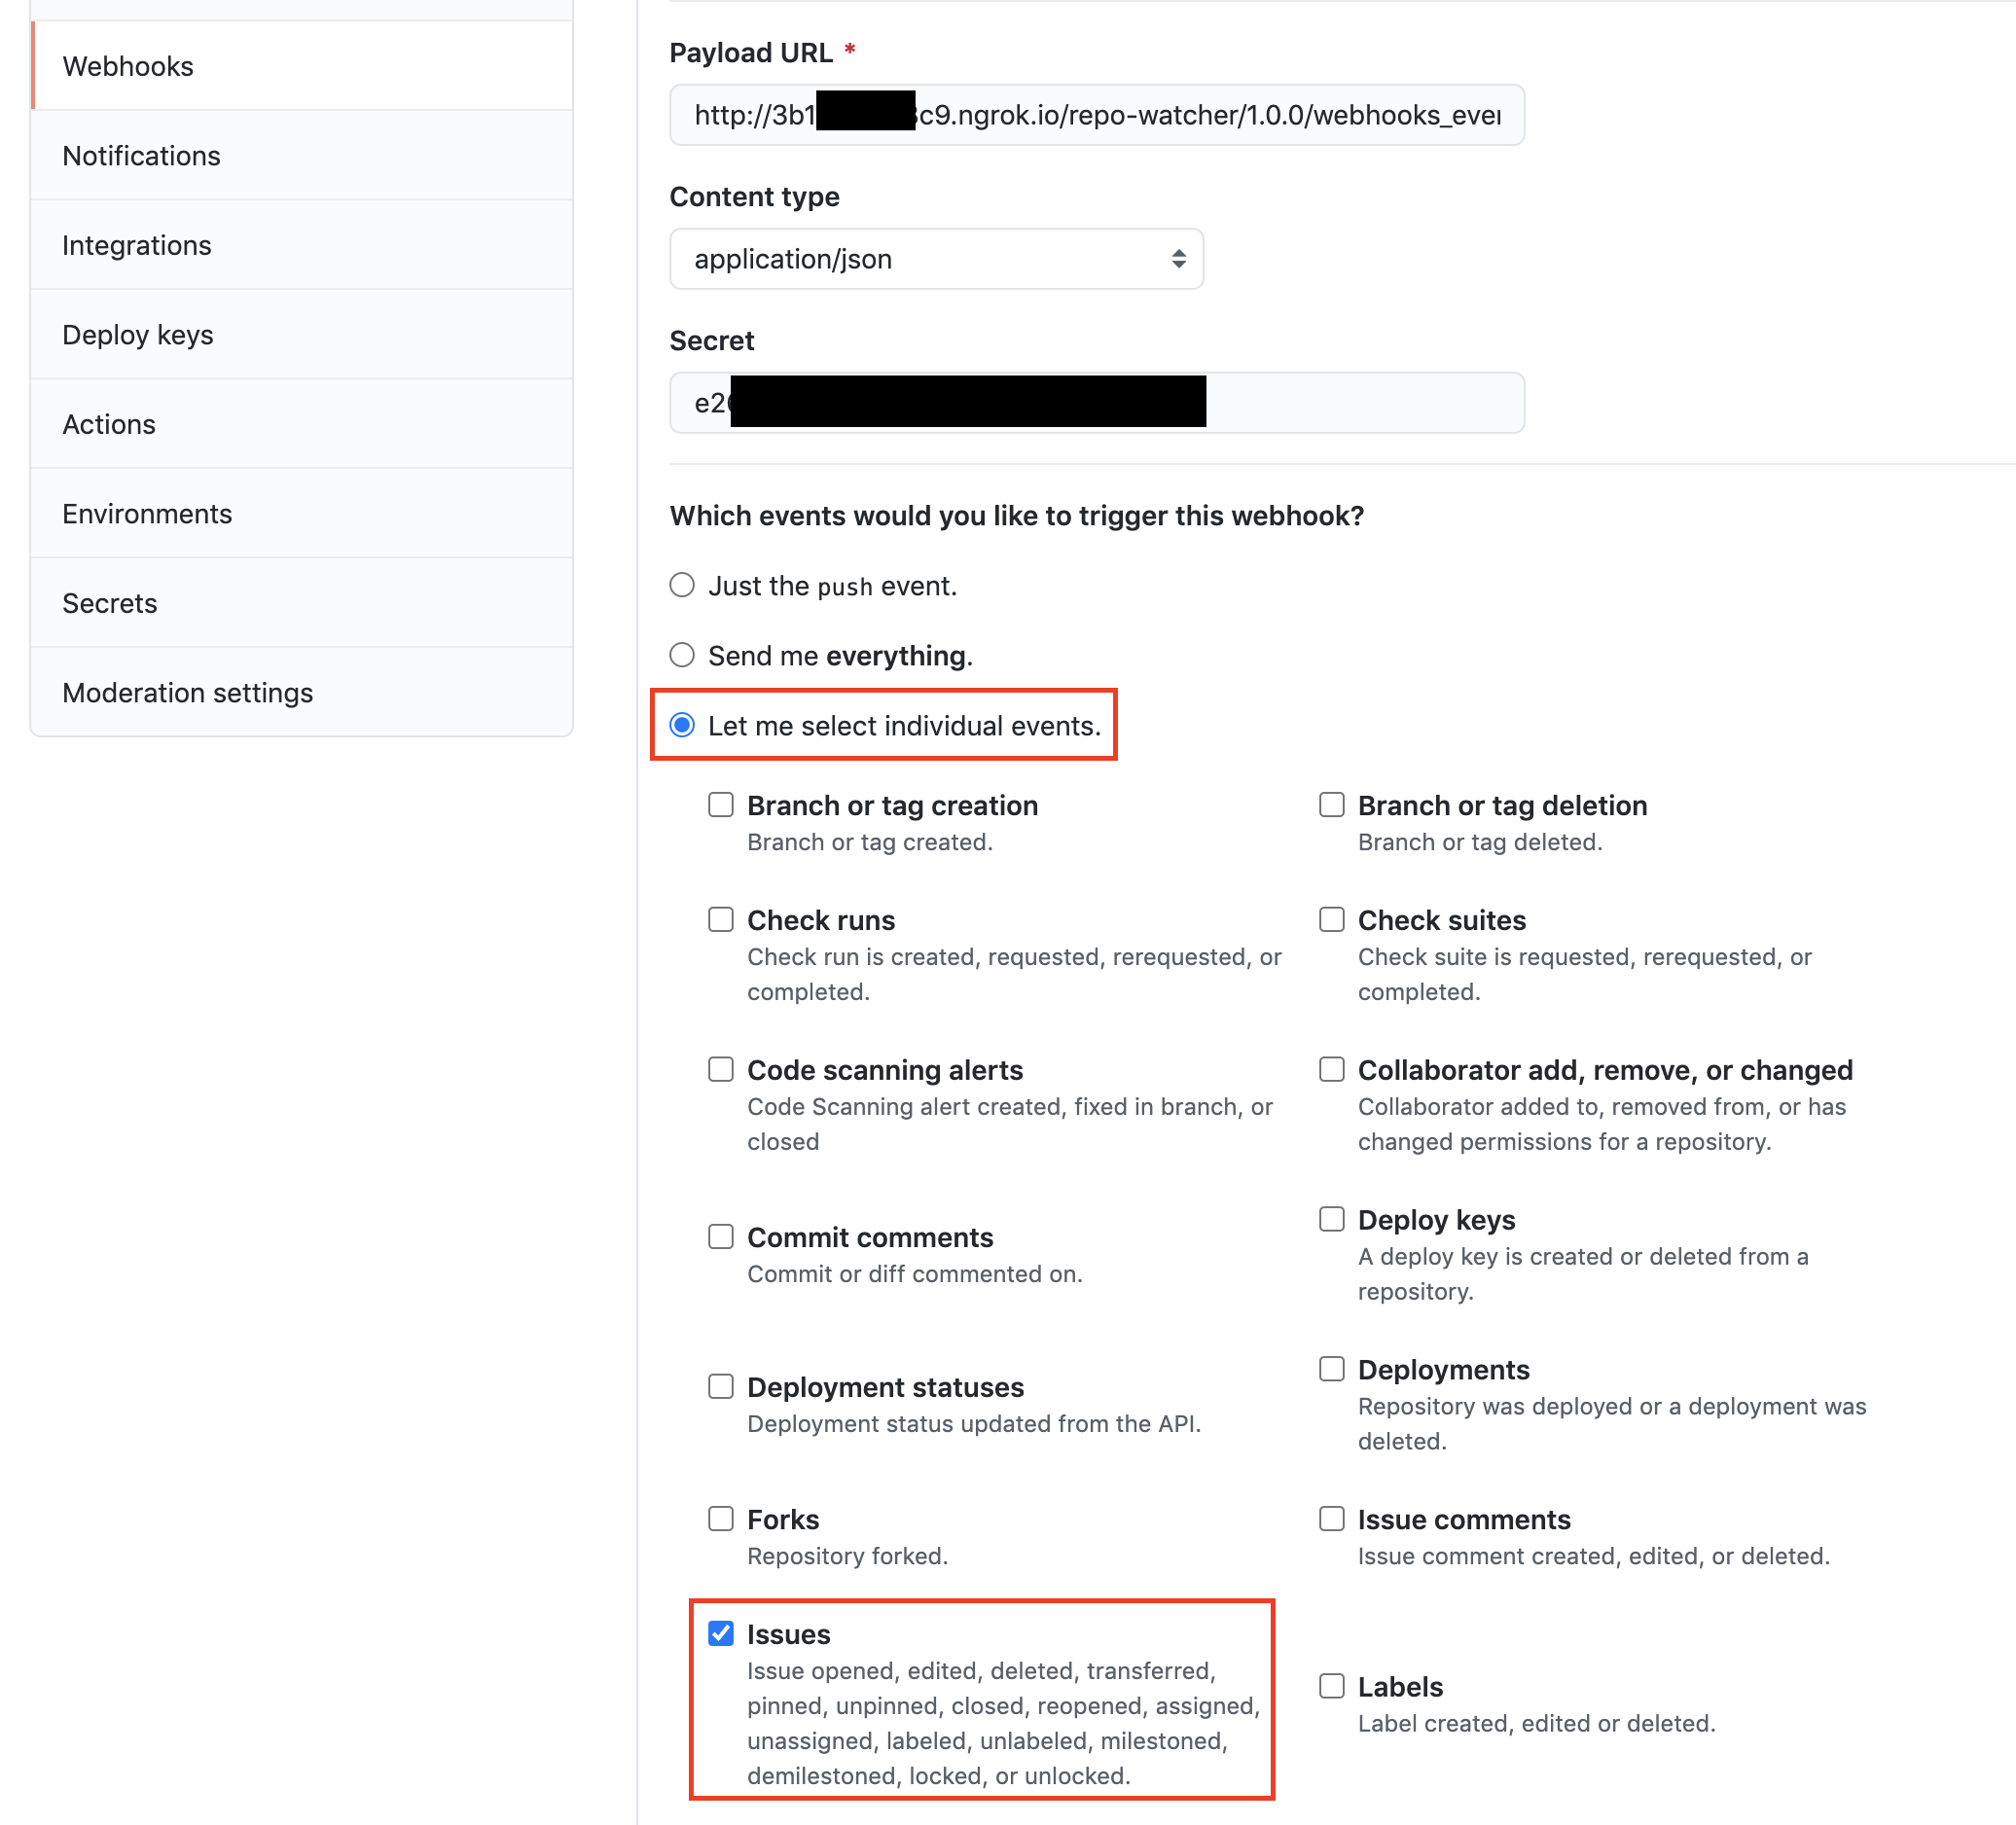
Configure the WebHook.
-
Go back to the WSO2 API Publisher, click Topics to navigate to the Topics page, and expand the /issues topic.
-
Copy the Callback URL.
https://{GATEWAY_HOST}:9021/repo-watcher/1.0.0/webhooks_events_receiver_resource?topic=/issues -
Go back to your GitHub repository's WebHooks page.
Provide the following values.
Field Value Payload URL http://3b1*******c9.ngrok.io/repo-watcher/1.0.0/webhooks_events_receiver_resource?topic=/issuesThis is obtained by replacing
https://{GATEWAY_HOST}:9021part of the /issues topic's Callback URL, with the forwarding HTTP URL from ngrock (For example,http://3b1*******c9.ngrok.io).Content type application/json Secret [generated_secret]This is the secret you obtained from the Subscription Configuration section of the WebSub/WebHook API's Topics.
Which events would you like to trigger this WebHook? Select Let me select individual events, and check Issues.
-
Click Add WebHook.
-
Step 4 - Publish the WebSub/WebHook API
-
Go to WSO2 API Publisher.
-
Click Lifecycle to navigate to the API lifecycle.
-
Click PUBLISH to publish the API to the API Developer Portal.
-
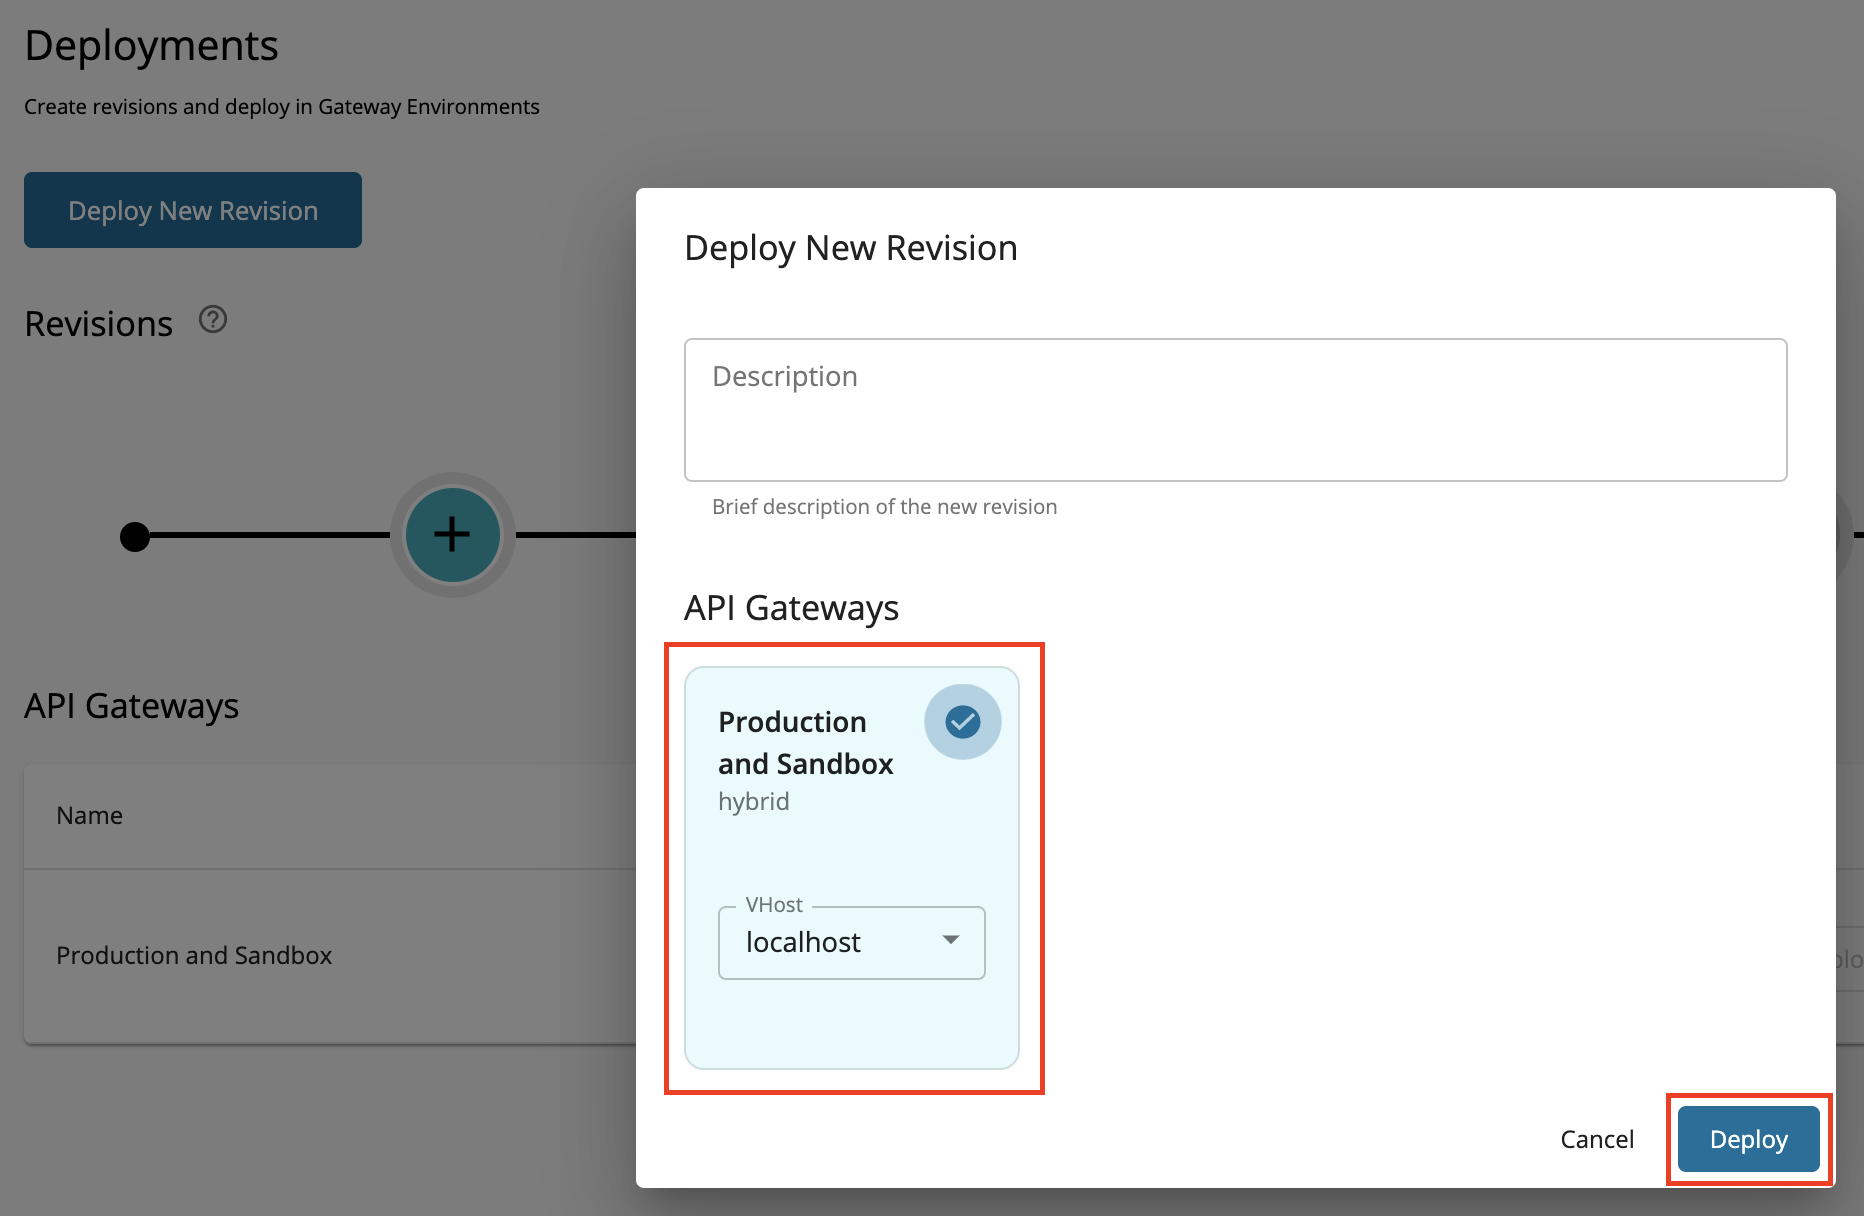
Click Deployments to navigate to the Deployments page.
-
Click Deploy New Revision.
-
Select Production and Sandbox, choose localhost as the VHost, and click on Deploy.
Step 5 - Create a Callback URL
-
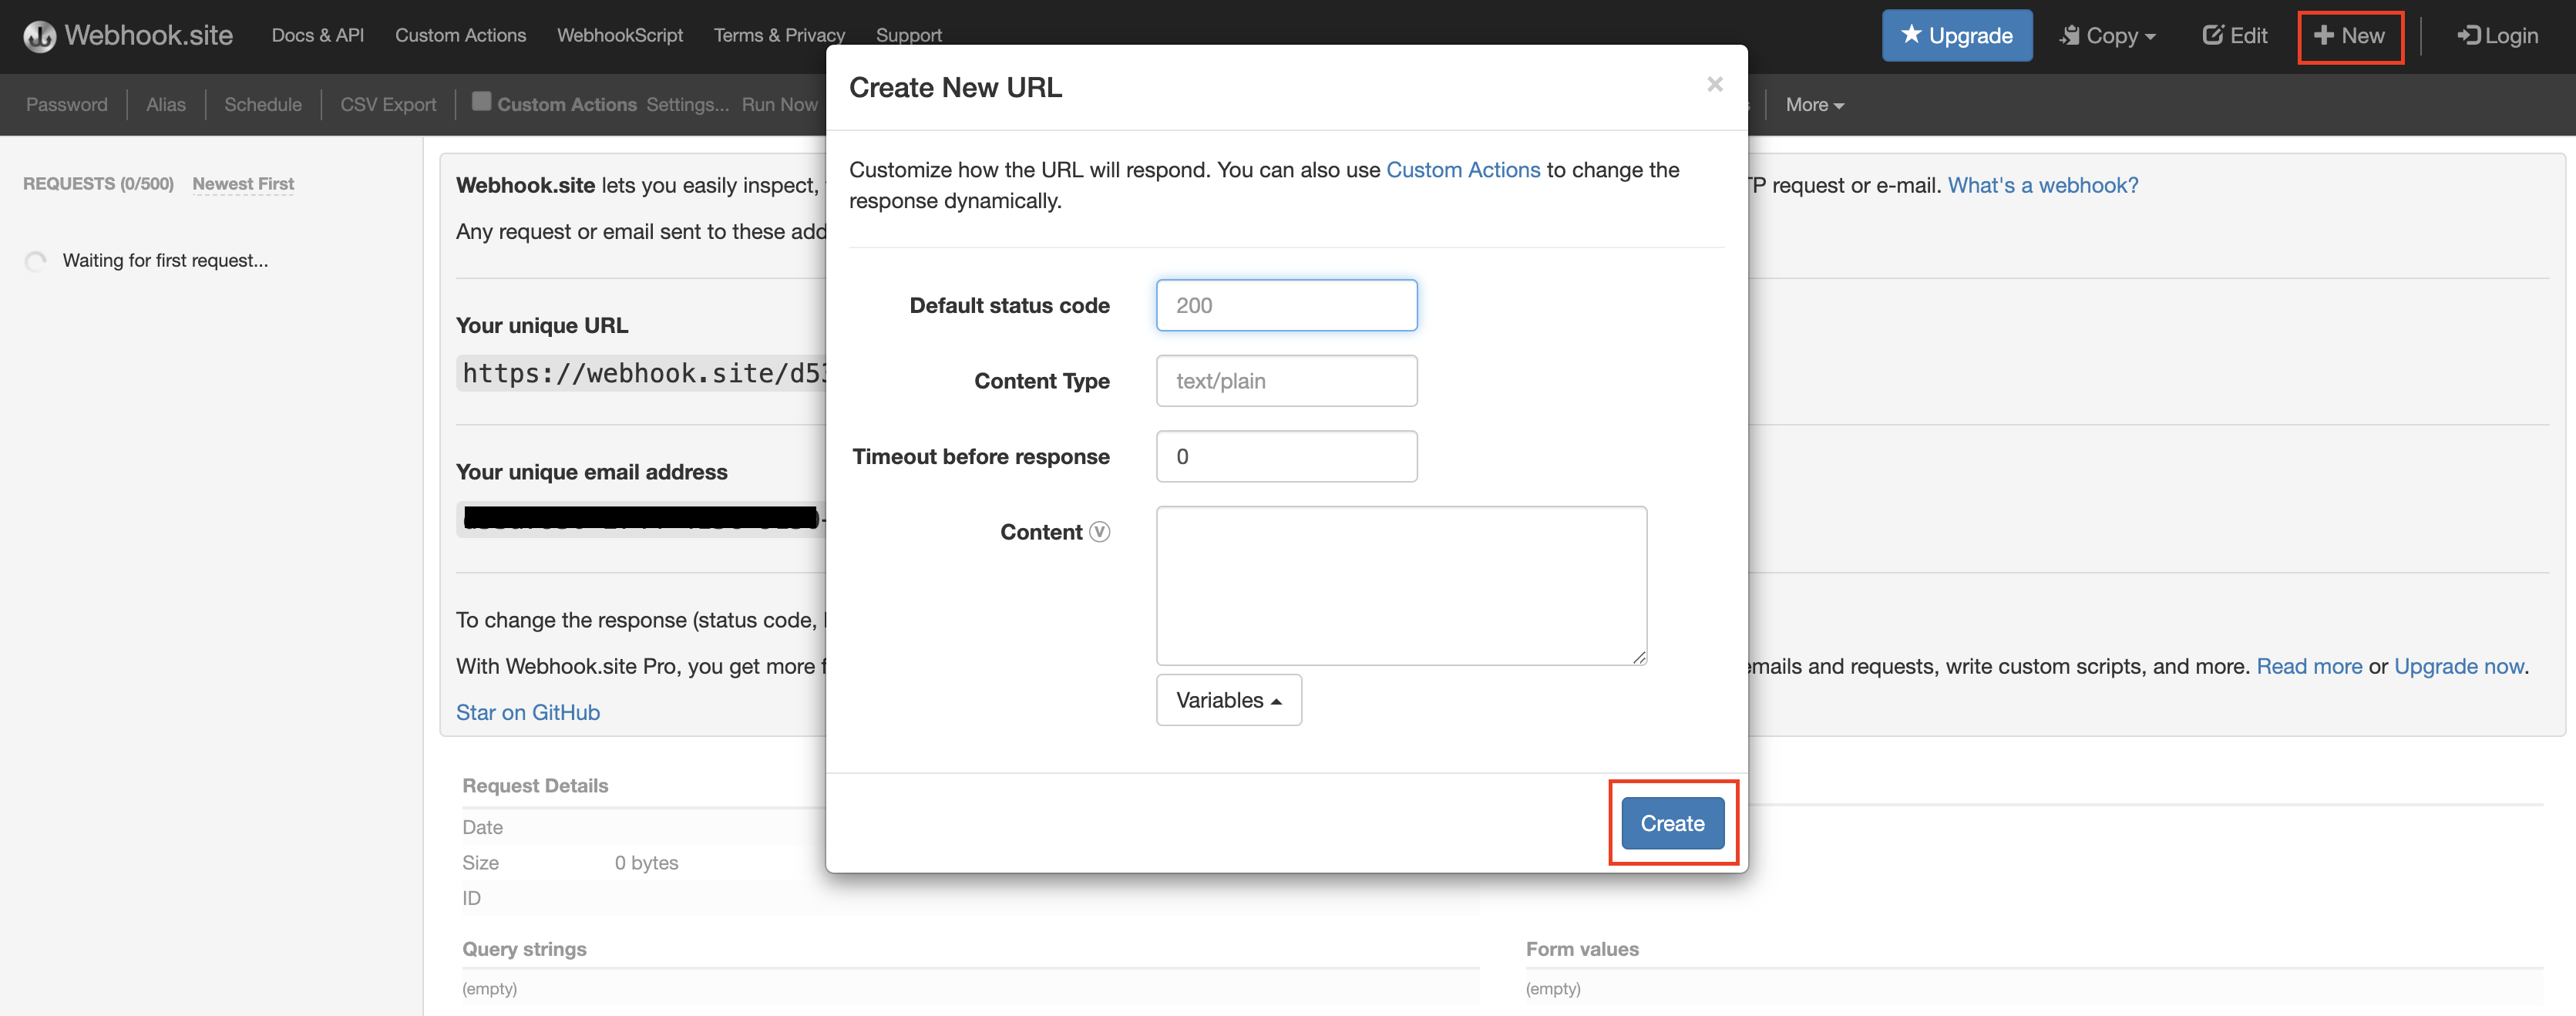
Go to https://webhook.site.org.
-
Click New, leave the default values, and click Create.
A unique URL will be created for you.
-
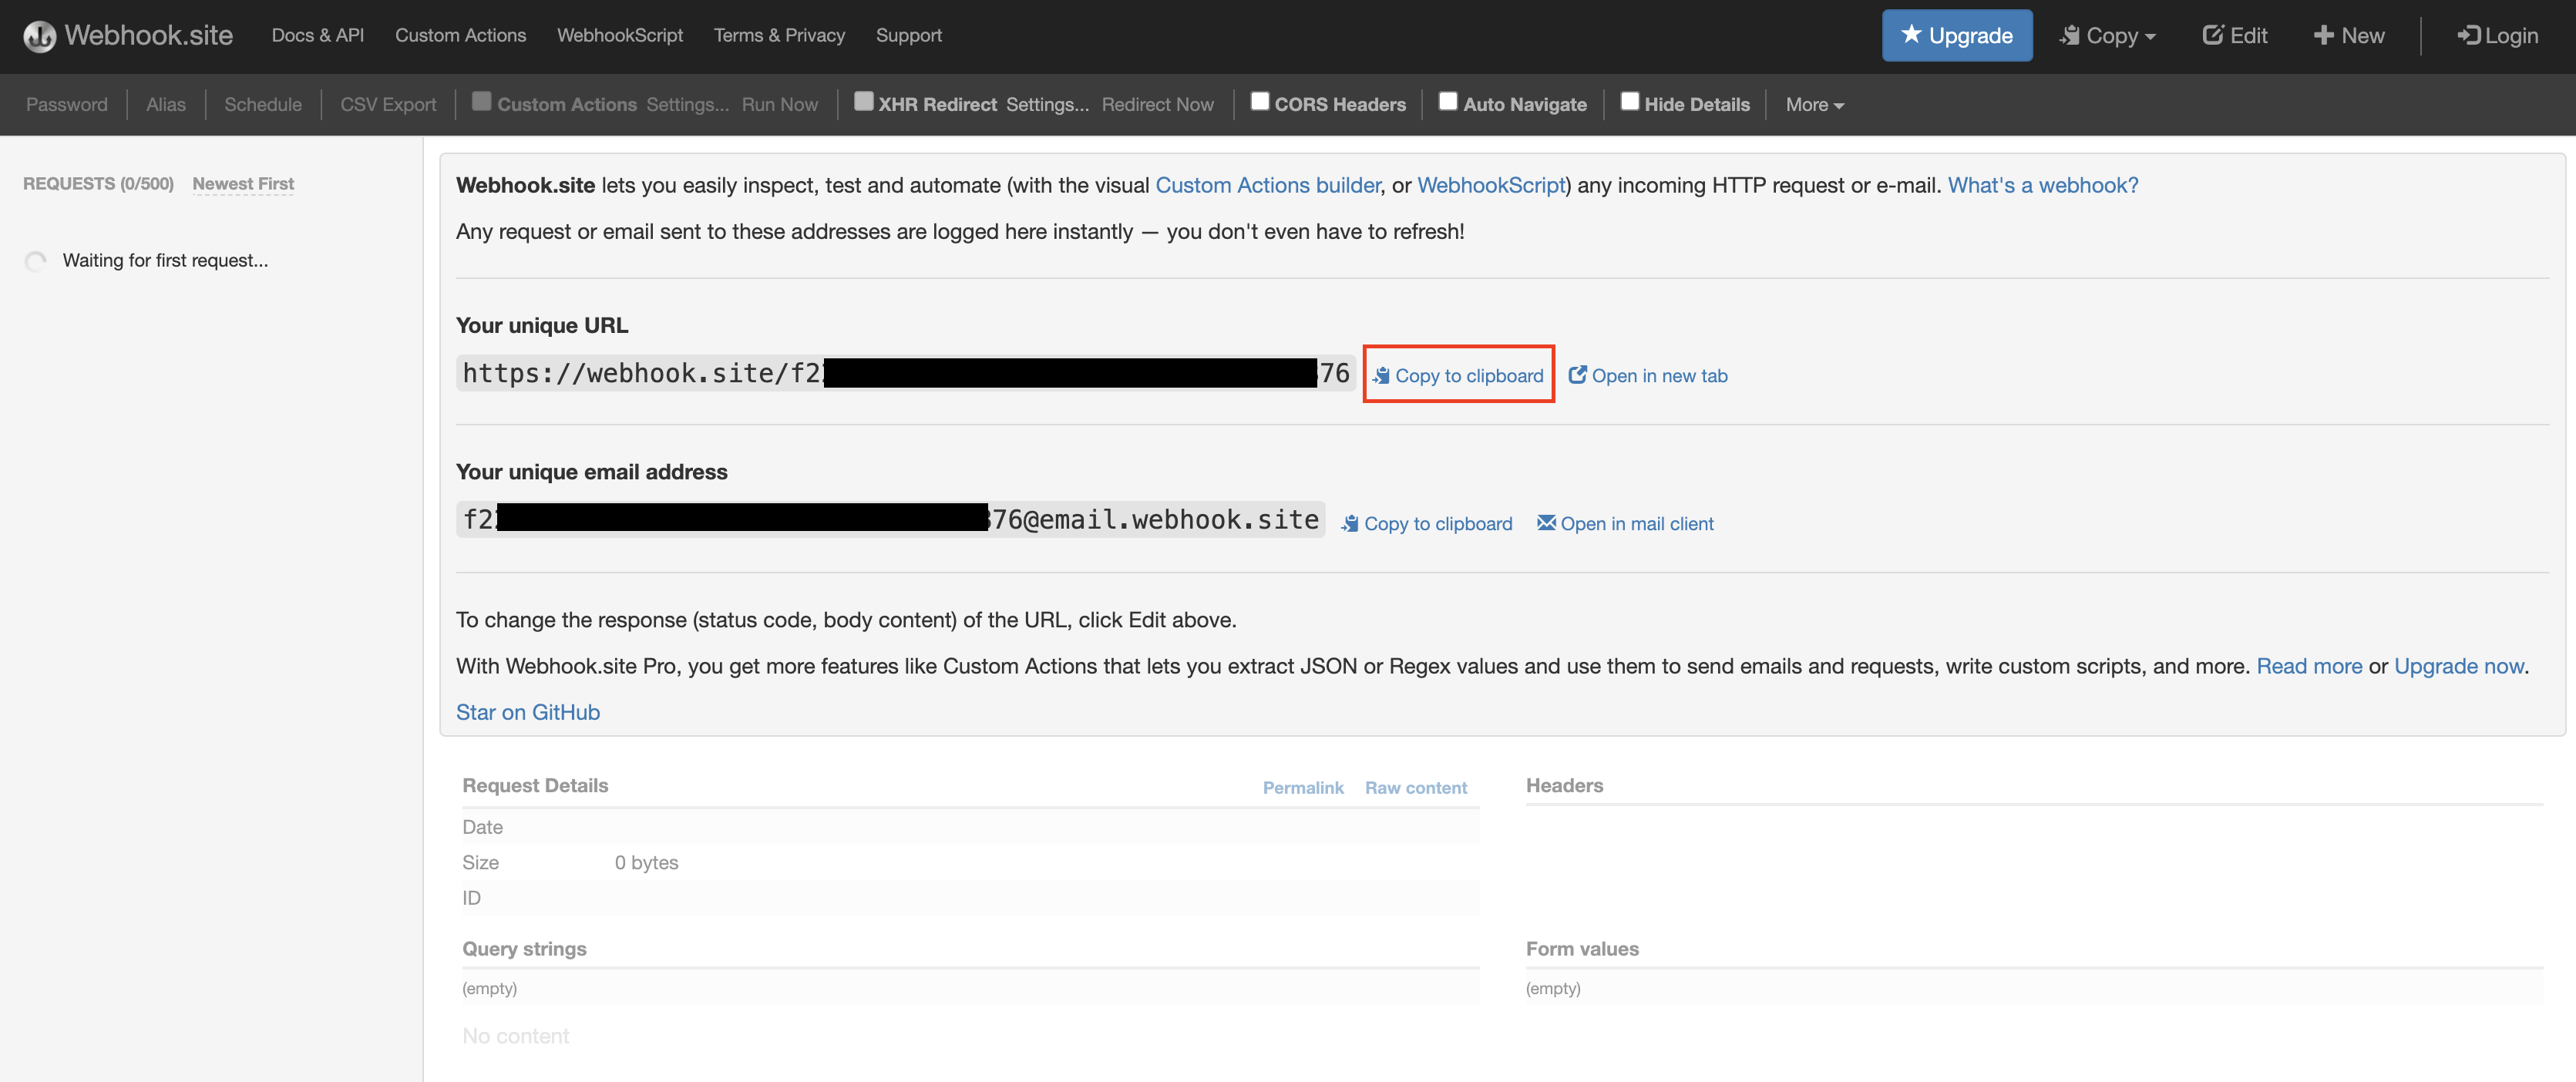
Click Copy to clipboard which is next to Your unique URL.
-
URL-encode the unique URL that you copied.
Let's refer to the URL-encode unique URL as
[encoded_hub_callback]. -
Leave the webpage open as you will need to come back to it again.
Step 6 - Invoke the WebSub/WebHook API
-
Sign in to the Developer Portal.
https://<hostname>:9443/devportalFor testing purposes, you can use
https://localhost:9443/devportalandadminas the username and password. -
Click on the WebSub/WebHook API.
The API overview appears.
-
Subscribe to the API.
-
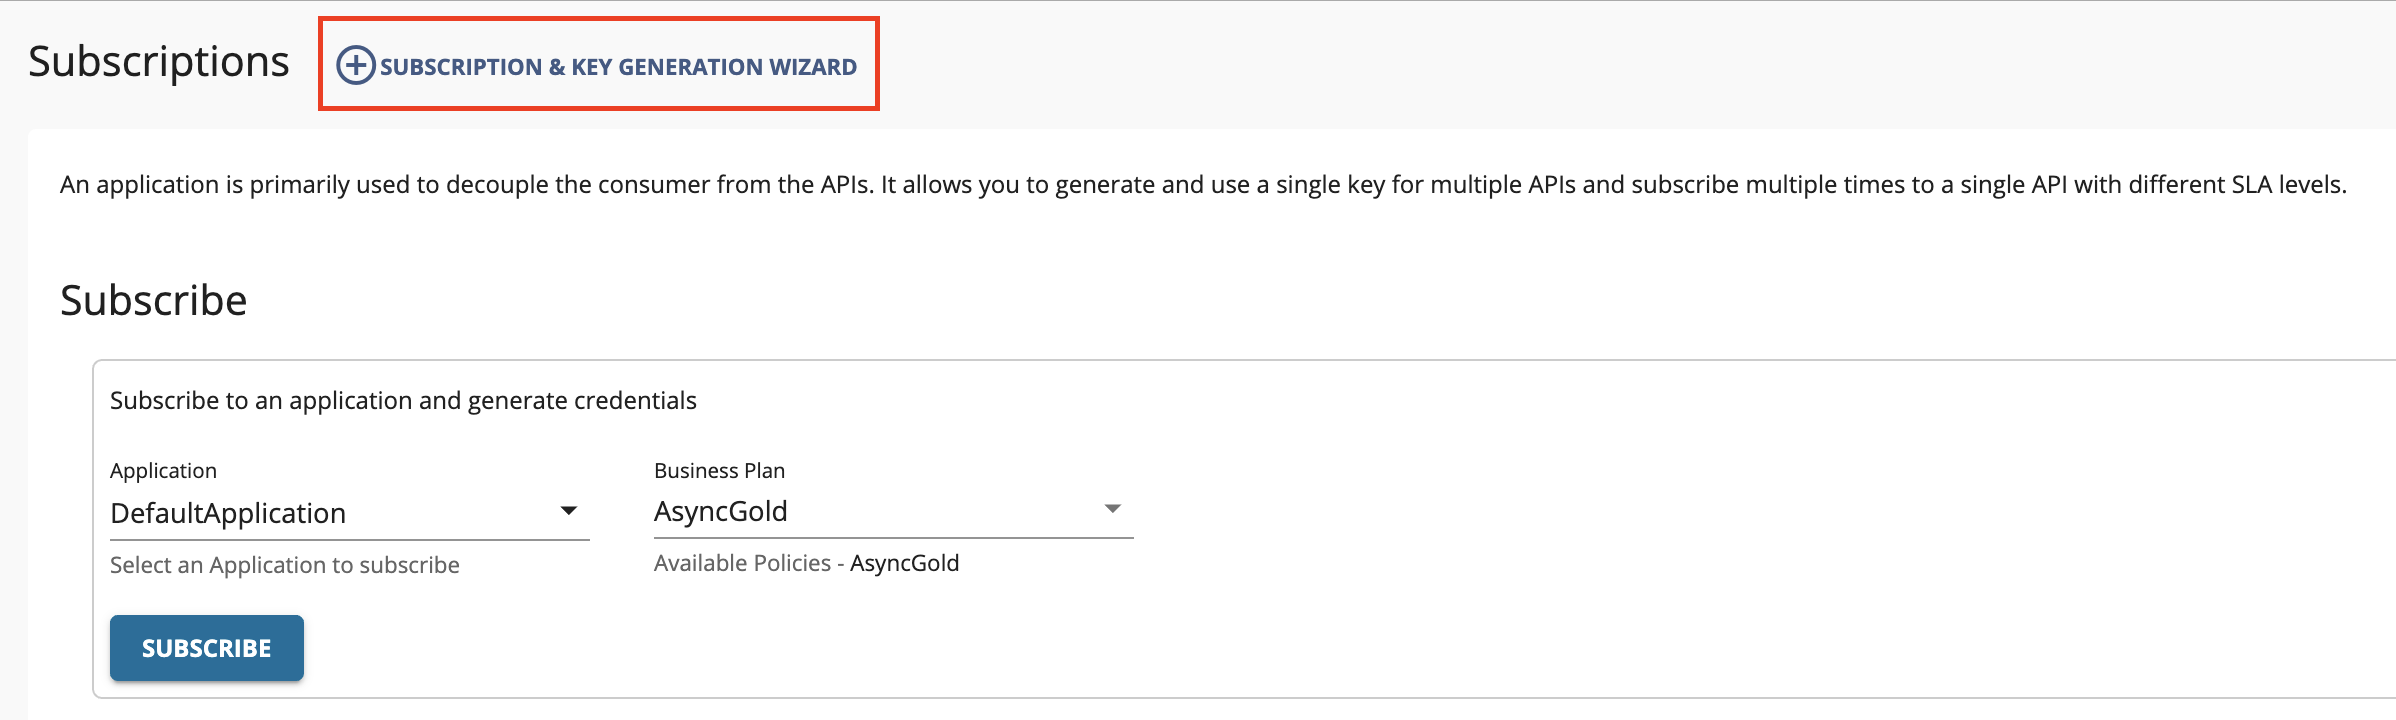
Click Subscriptions to go to the Subscriptions page and click SUBSCRIPTION & KEY GENERATION WIZARD.
This wizard takes you through the steps of creating a new application, subscribing, generating keys, and generating an access token to invoke the API.
Note
You can use any application (e.g., JWT or OAuth) to subscribe to the API.
-
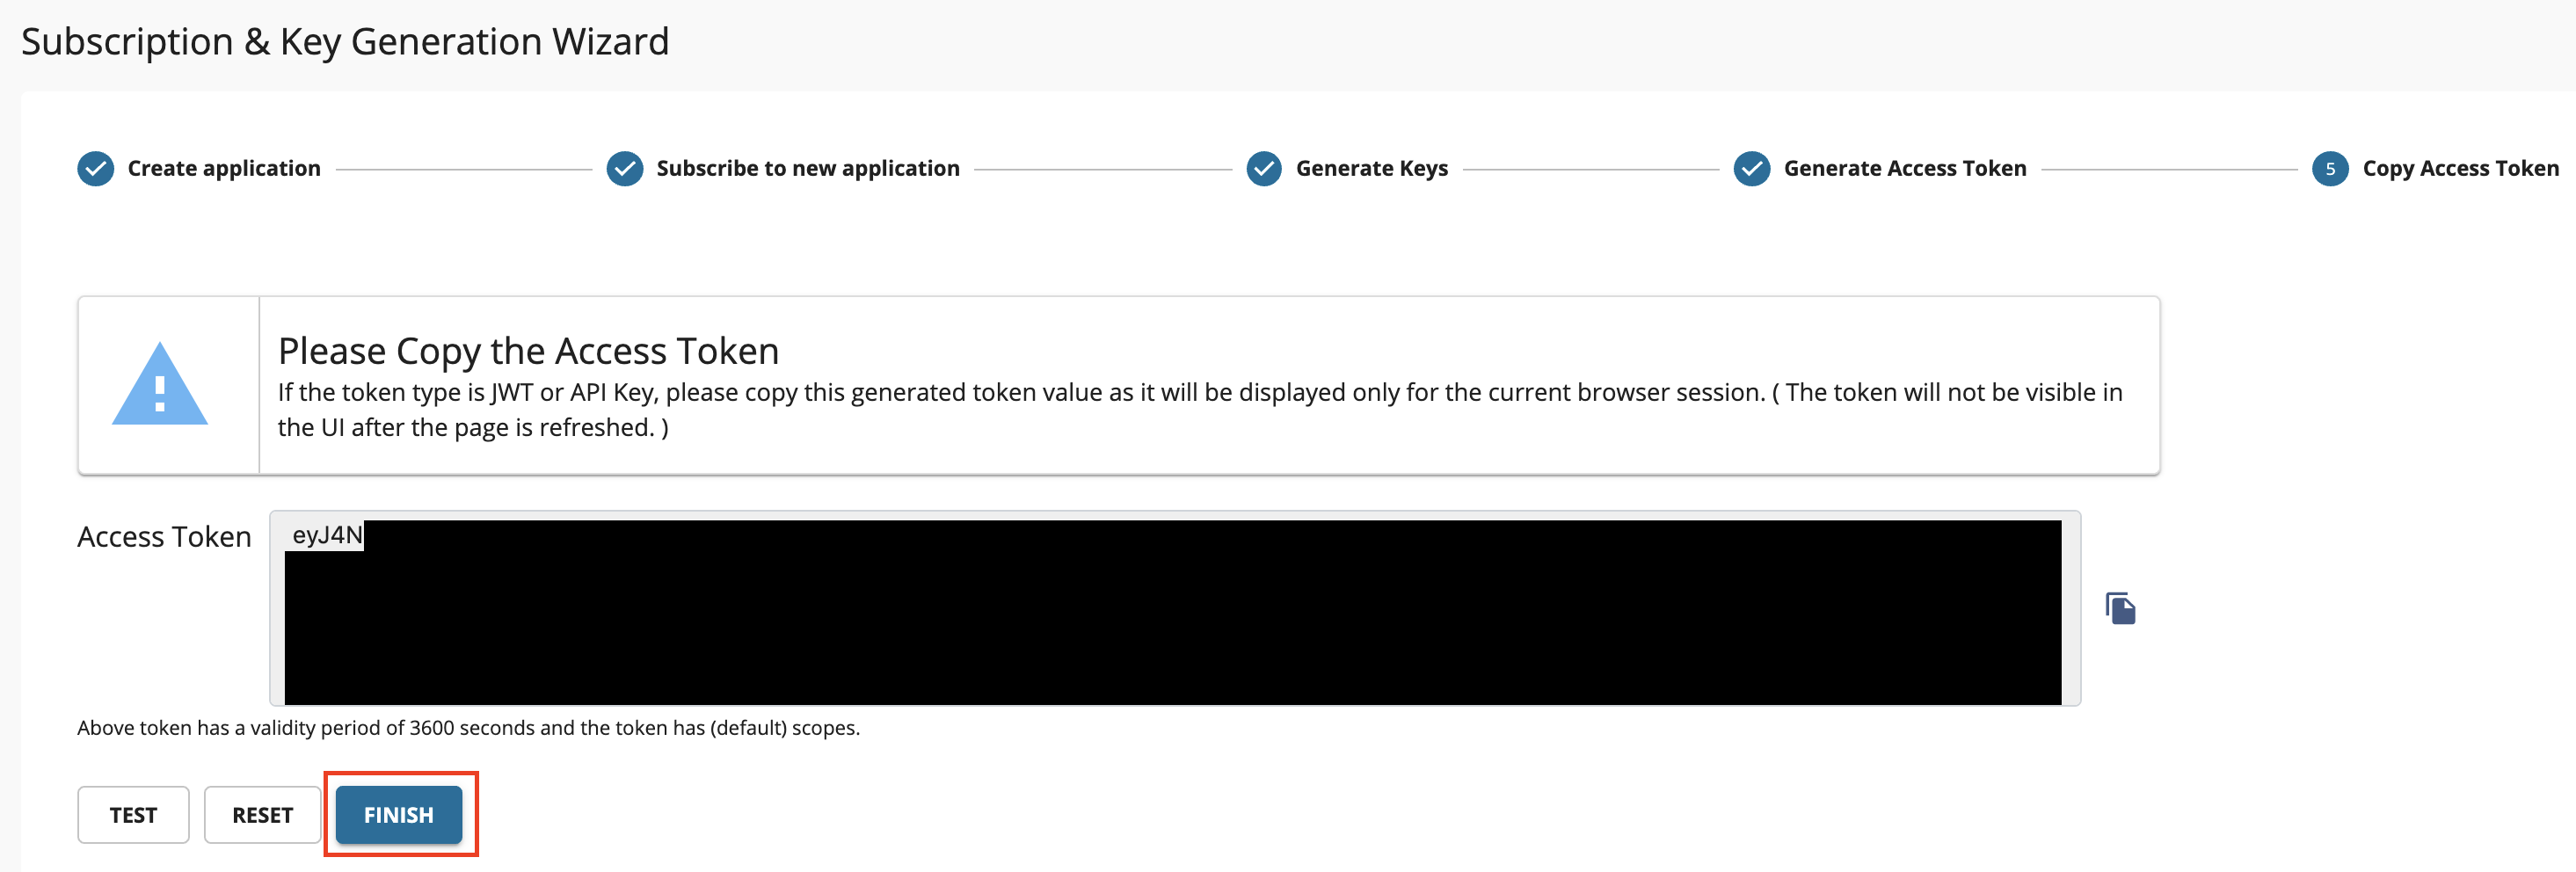
Copy the authorization token that appears, and click FINISH.
-
-
Try out the operations.
-
Subscribe to the /issues topic.
-
Subscribe the callback URL with the /issues topic by executing the following cURL command.
Replace `[encoded_hub_callback]` and `accesstoken` with the values you have obtained.curl -X POST 'http://localhost:8280/repo-watcher/1.0.0?hub.callback=[encoded_hub_callback]&hub.mode=subscribe&hub.secret=newValue&hub.lease_seconds=50000000&hub.topic=/issues' -H "Authorization: Bearer [accesstoken]" -
Click Subscriptions to go to the Subscriptions page of your application in the Developer Portal.
-
Click the WebSub API's subscription entry.
This will list down the subscription that you just made. -
Go to your GitHub repo and create a new issue.
This will trigger the GitHub WebHook you have created. -
Go back to the webpage at https://webhook.site.org, where you created the callback URL.
A new request which denotes the issue creation would have appeared.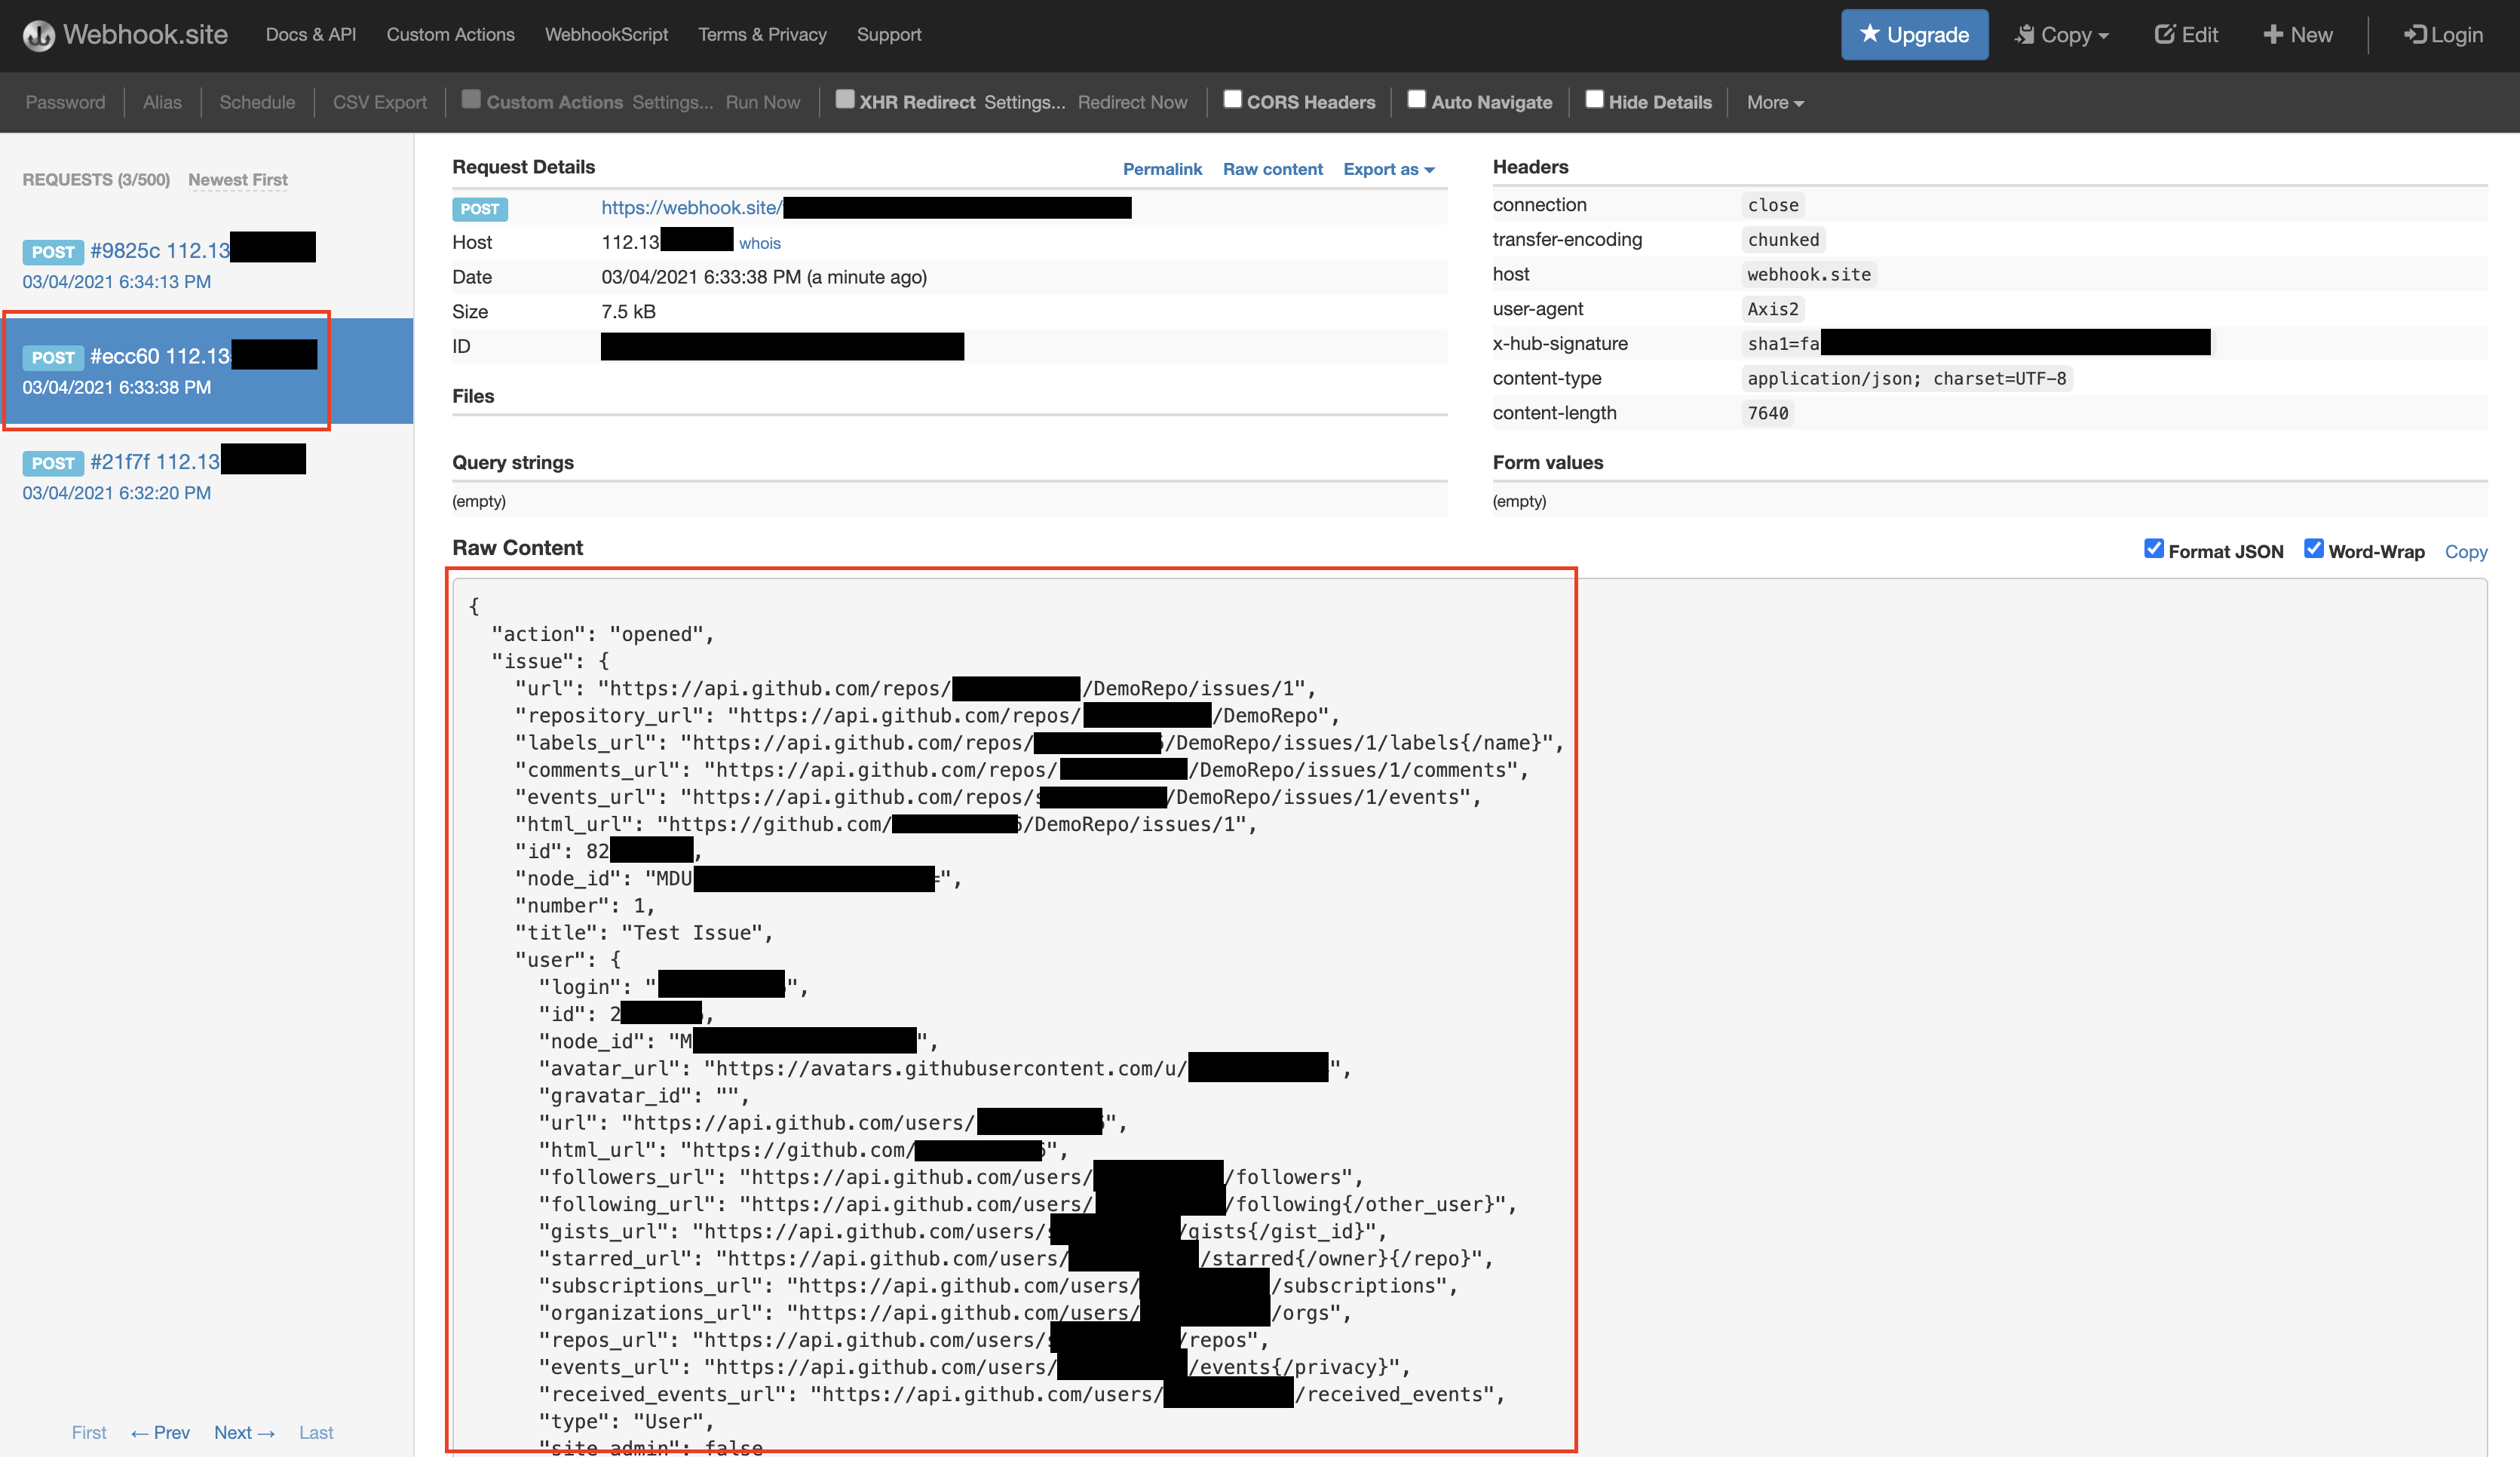
-
-
Unsubscribe from the /issues topic.
Unsubscribe the callback URL from the /issues topic by executing the following cURL command.
Replace
[encoded_hub_callback]andaccesstokenwith the values you have obtained.curl -X POST 'http://localhost:8280/repo-watcher/1.0.0?hub.callback=[encoded_hub_callback]&hub.mode=unsubscribe&hub.secret=newValue&hub.lease_seconds=50000000&hub.topic=/issues' -H "Authorization: Bearer [accesstoken]"
-
You have successfully created and published your first WebSub/WebHook API, subscribed to it, obtained an access token for testing, created a subscription to a WebHook, and tested your API with the access token.
Top