Expose a SOAP service as a REST API
WSO2 API Manager supports the management of an existing SOAP and WSDL based services exposing as REST APIs. The organizations who have SOAP/ WSDL based services, can easily bridge their existing services to REST without the cost of a major migration. WSO2 API Manager supports two kinds of services as one for performing a "pass through" of the SOAP message to the backend and other one is generating a RESTful API from the backend SOAP service.
This tutorial will explain the steps to design, publish and invoke a SOAP service as a RESTful API using Pass Through
Step 1 - Design a SOAP service as a REST API
-
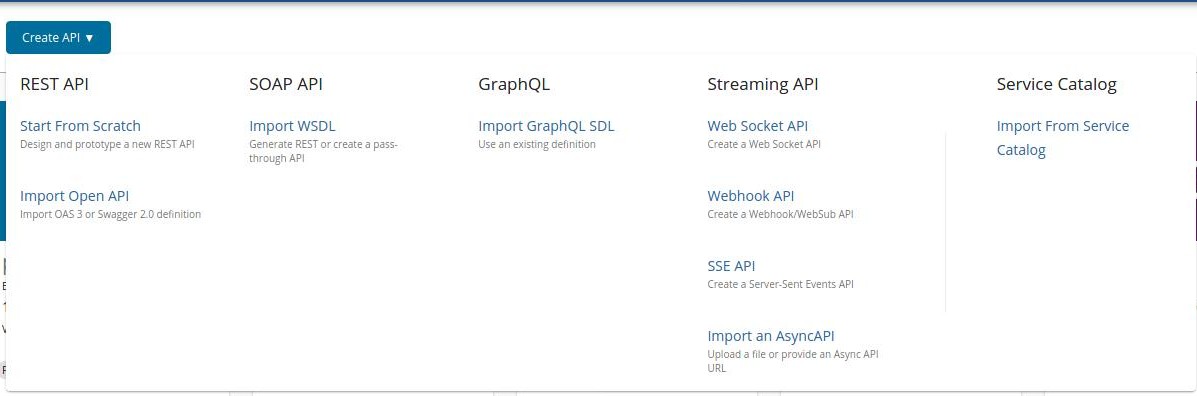
Sign in to the API Publisher and click CREATE API.
-
Select Pass Through option and thereafter, select one of the following options:
-
WSDL URL - If you select this option, you need to provide an endpoint URL.
-
WSDL Archive/File - If you select this option, click Browse and upload either an individual WSDL file or a WSDL archive, which is a WSDL project that has multiple WSDLs.
Note
When uploading a WSDL archive, all the dependent wsdls/xsds that are referred in the parent WSDL file should reside inside the WSDL archive itself. If not, the validation will fail at the point of API creation.
This example uses the WSDL
http://ws.cdyne.com/phoneverify/phoneverify.asmx?wsdlfrom CDYNE as the endpoint here, but you can use any SOAP backend of your choice.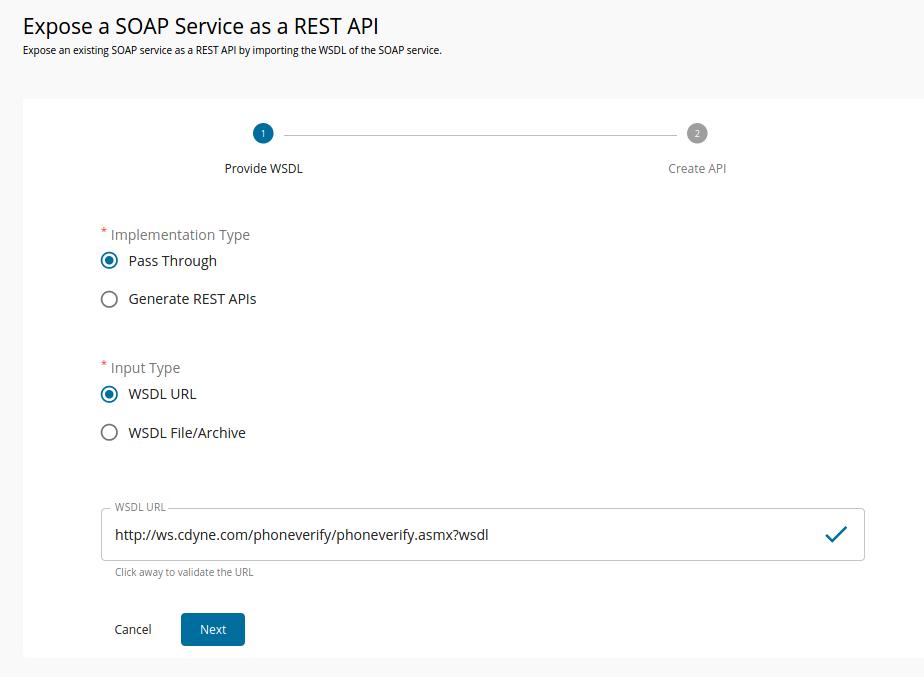
-
-
Click NEXT button to proceed to the next phase and Provide the information in the table below and click CREATE button.
Field Sample value Name PhoneVerification Context /phoneverify Version 1.0 Endpoint http://ws.cdyne.com/phoneverify/phoneverify.asmx 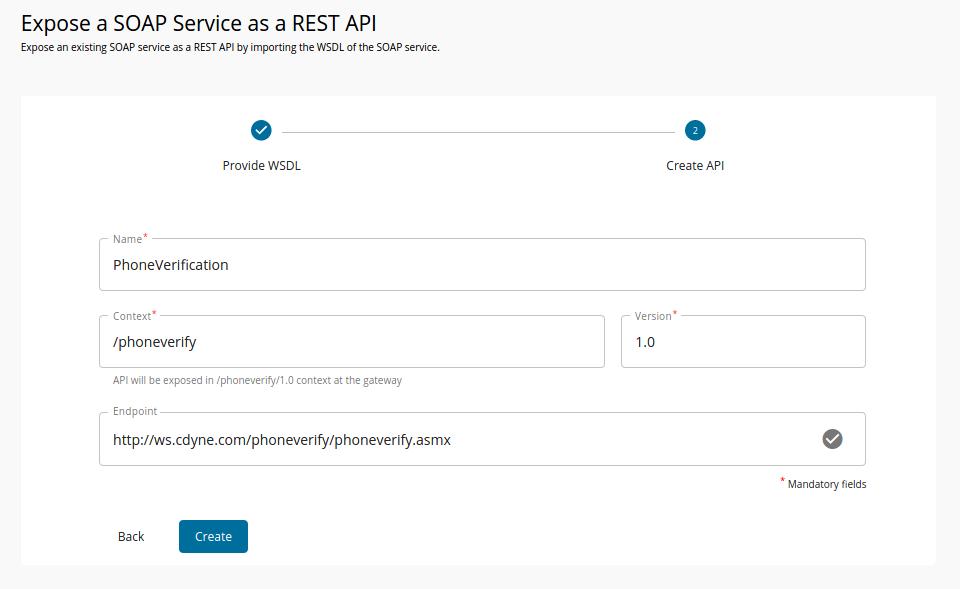
-
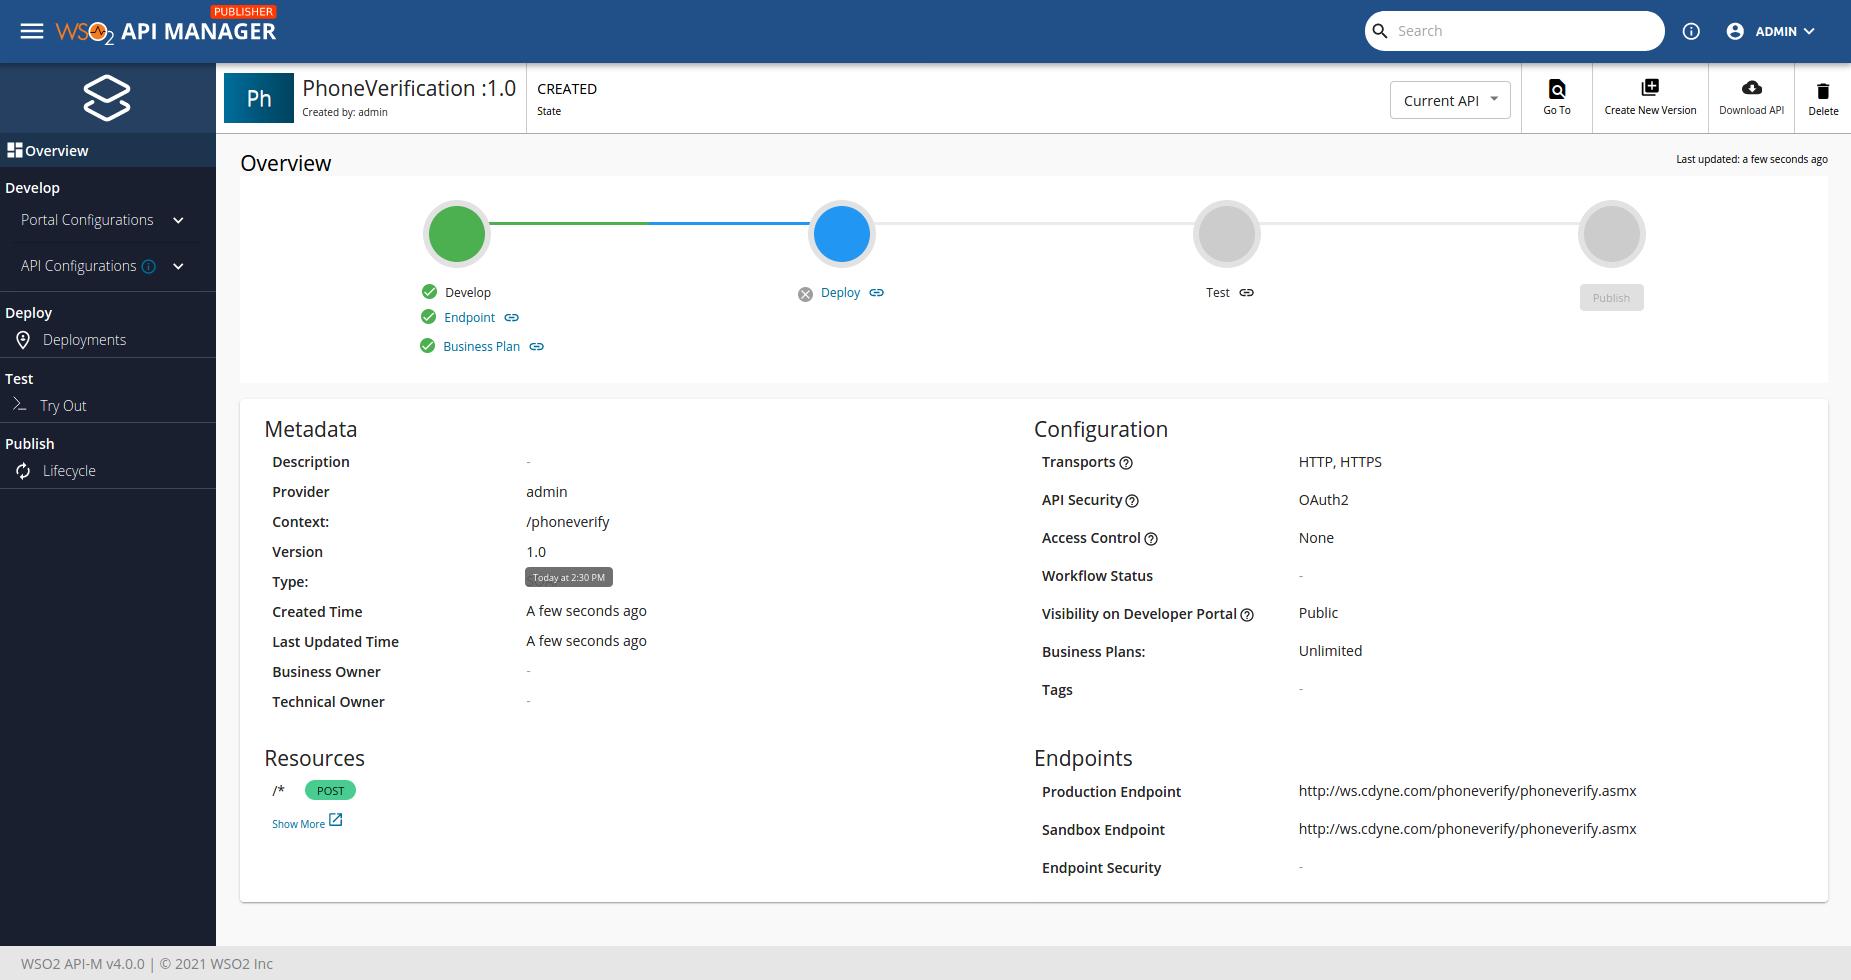
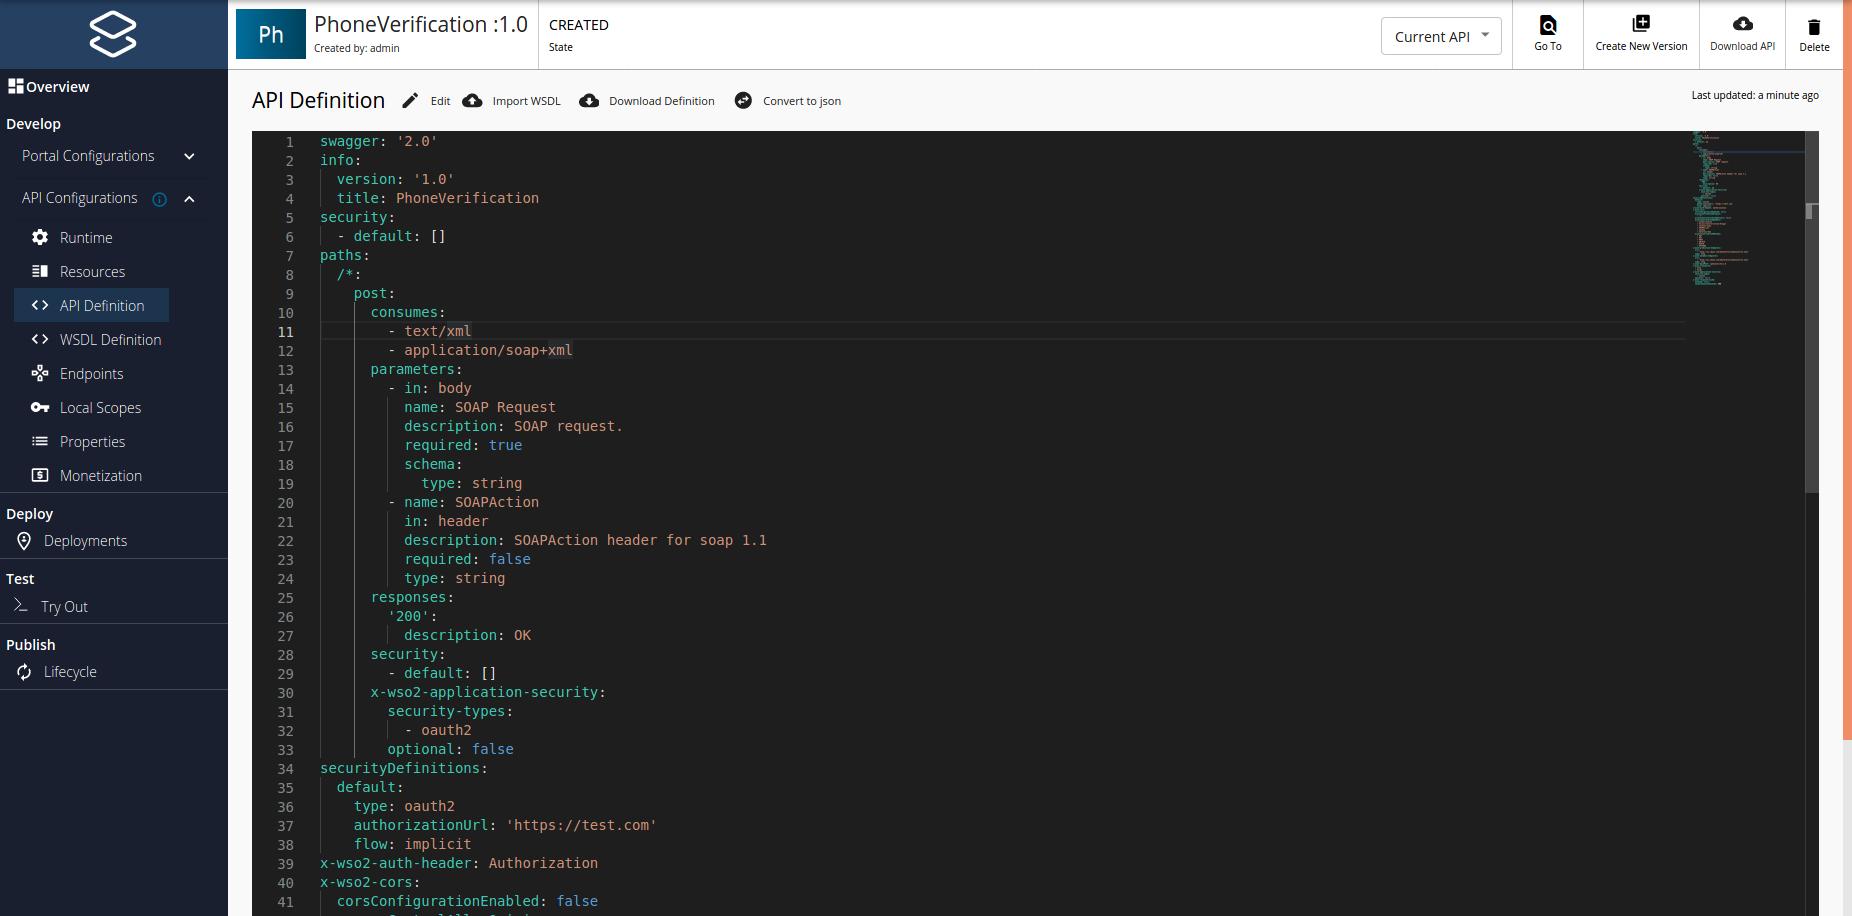
The created API appears in the publisher as follows.
-
API definition of the Created schema has been displayed at API Definition tab.
Note
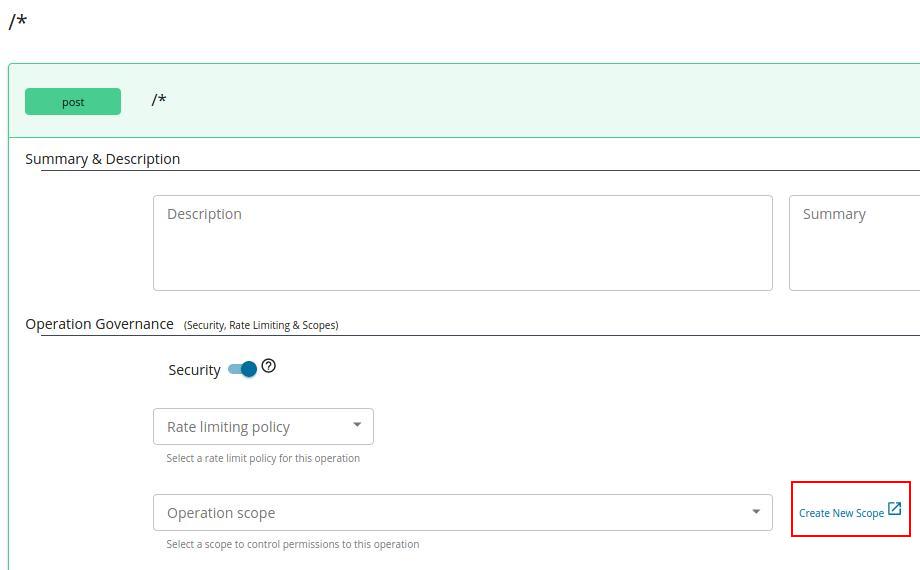
If you wish to add scopes to the resources that were created, navigate to Resources and expand the resources. Thereafter, creating new scopes and specify them under operation scope. If you specify a scope, you need to use the same scope when generating access tokens for the subscribed application to invoke the API. For more information on working with the scopes, see OAuthscopes
Note
Note that when creating this API, the default option of Rate limiting level , was selected to API Level. For more information on setting advanced throttling policies, see Enforce Throttling and Resource Access Policies.
-
Navigate to Life Cycle and Click Publish button. You have now published SOAP API at the Developer portal.
Step 2 - Invoke a SOAP service as a REST API.
-
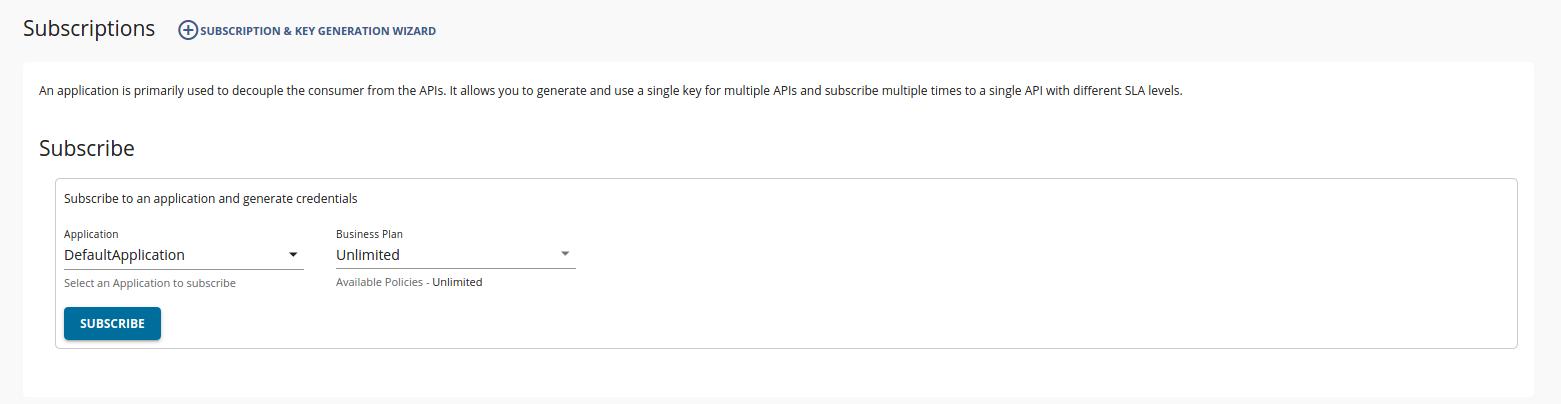
Log in to the developer portal, navigate to Subscriptions tab and subscribe to the API using (e.g.,DefaultApplication)
-
Click the MANAGE APP button when prompted View Credentials.

-
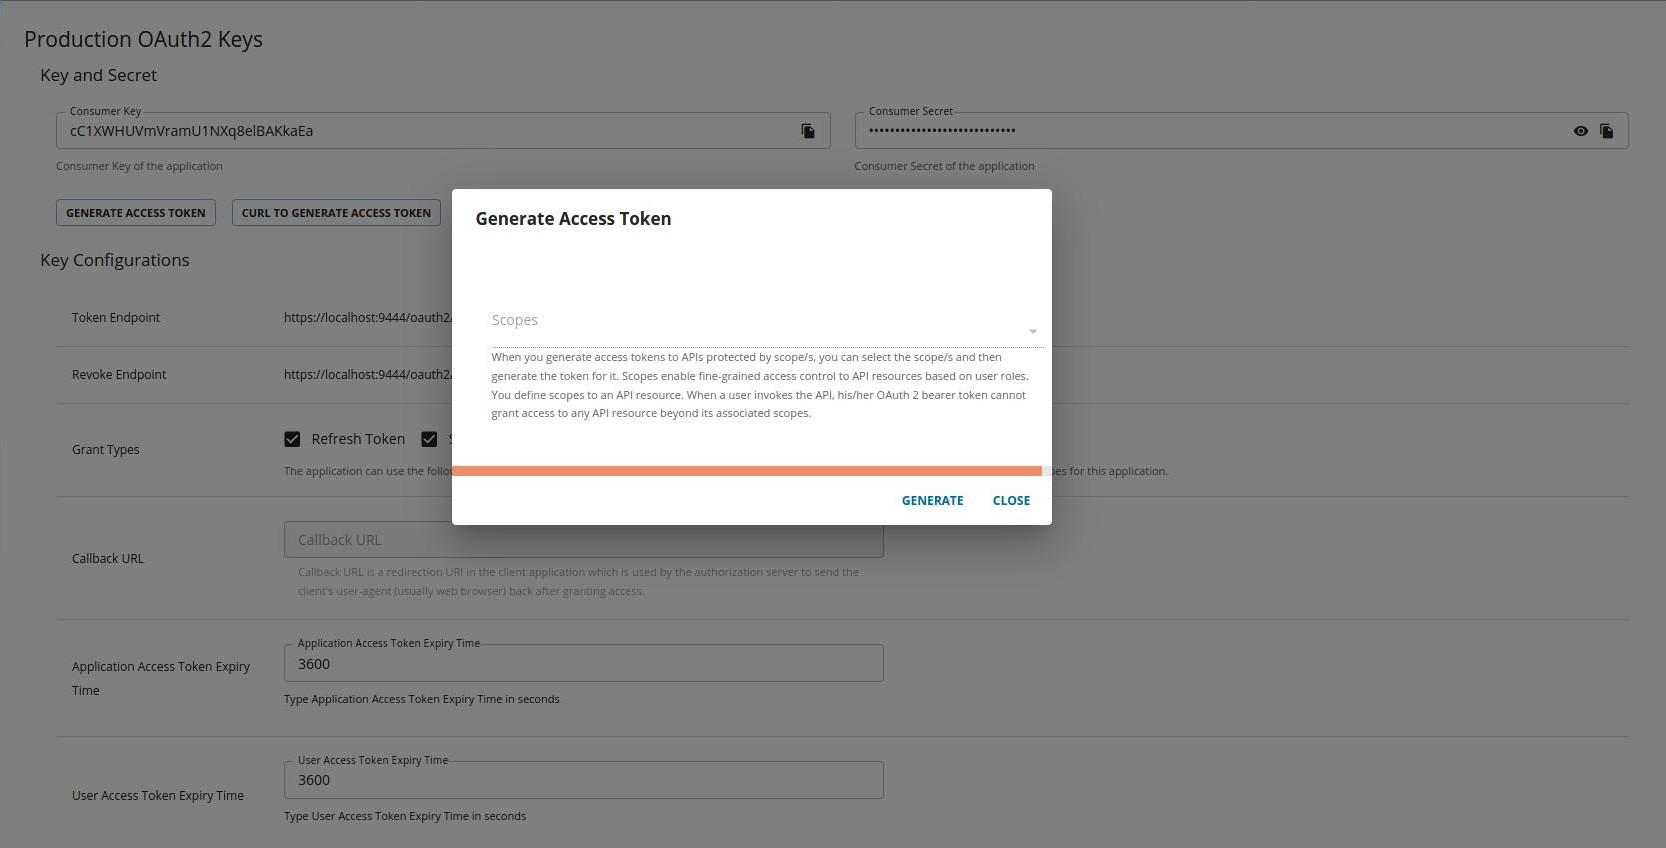
Click GENERATED ACCESS TOKEN and then it prompt a popup to create an application access token.
-
Click GENERATE.
The generated JSON Web Token (JWT) appears in the popup. Make sure to copy it.

Let's invoke the API.
-
Navigate to TryOut tab and paste the token at Access token input field.
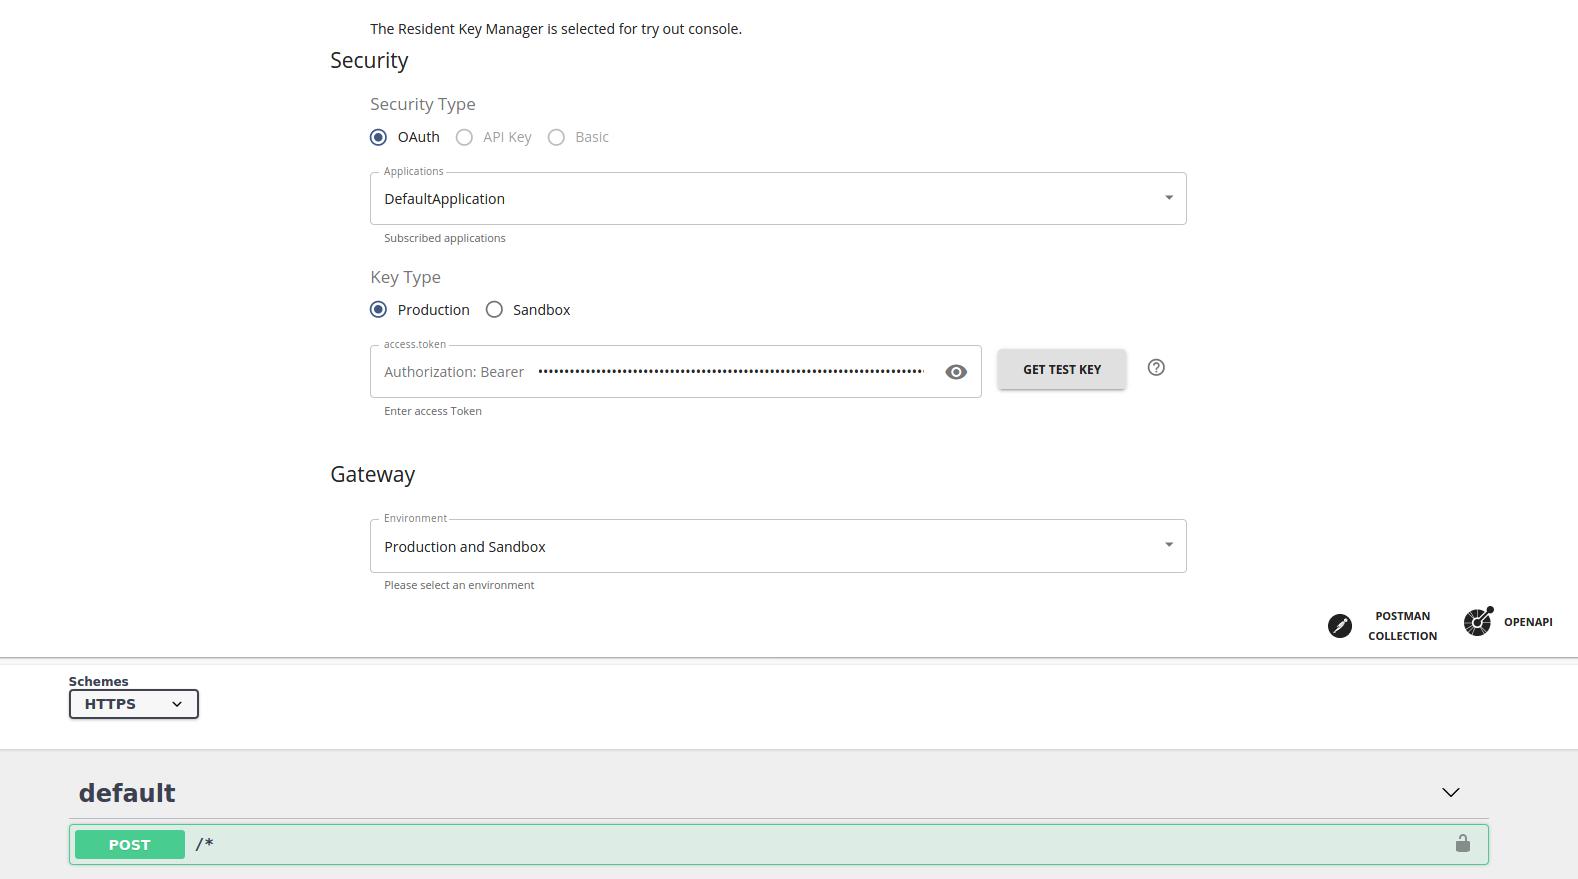
-
Expand the POST method and click Try it out . Enter the following, and click Execute to invoke the API.
SOAP Request <soap:Envelope xmlns:xsi="http://www.w3.org/2001/XMLSchema-instance" xmlns:xsd="http://www.w3.org/2001/XMLSchema" xmlns:soap="http://schemas.xmlsoap.org/soap/envelope/"> <soap:Body> <CheckPhoneNumber xmlns="http://ws.cdyne.com/PhoneVerify/query"> <PhoneNumber>18006785432</PhoneNumber> <LicenseKey>18006785432</LicenseKey> </CheckPhoneNumber> </soap:Body> </soap:Envelope>SOAP Action http://ws.cdyne.com/PhoneVerify/query/CheckPhoneNumber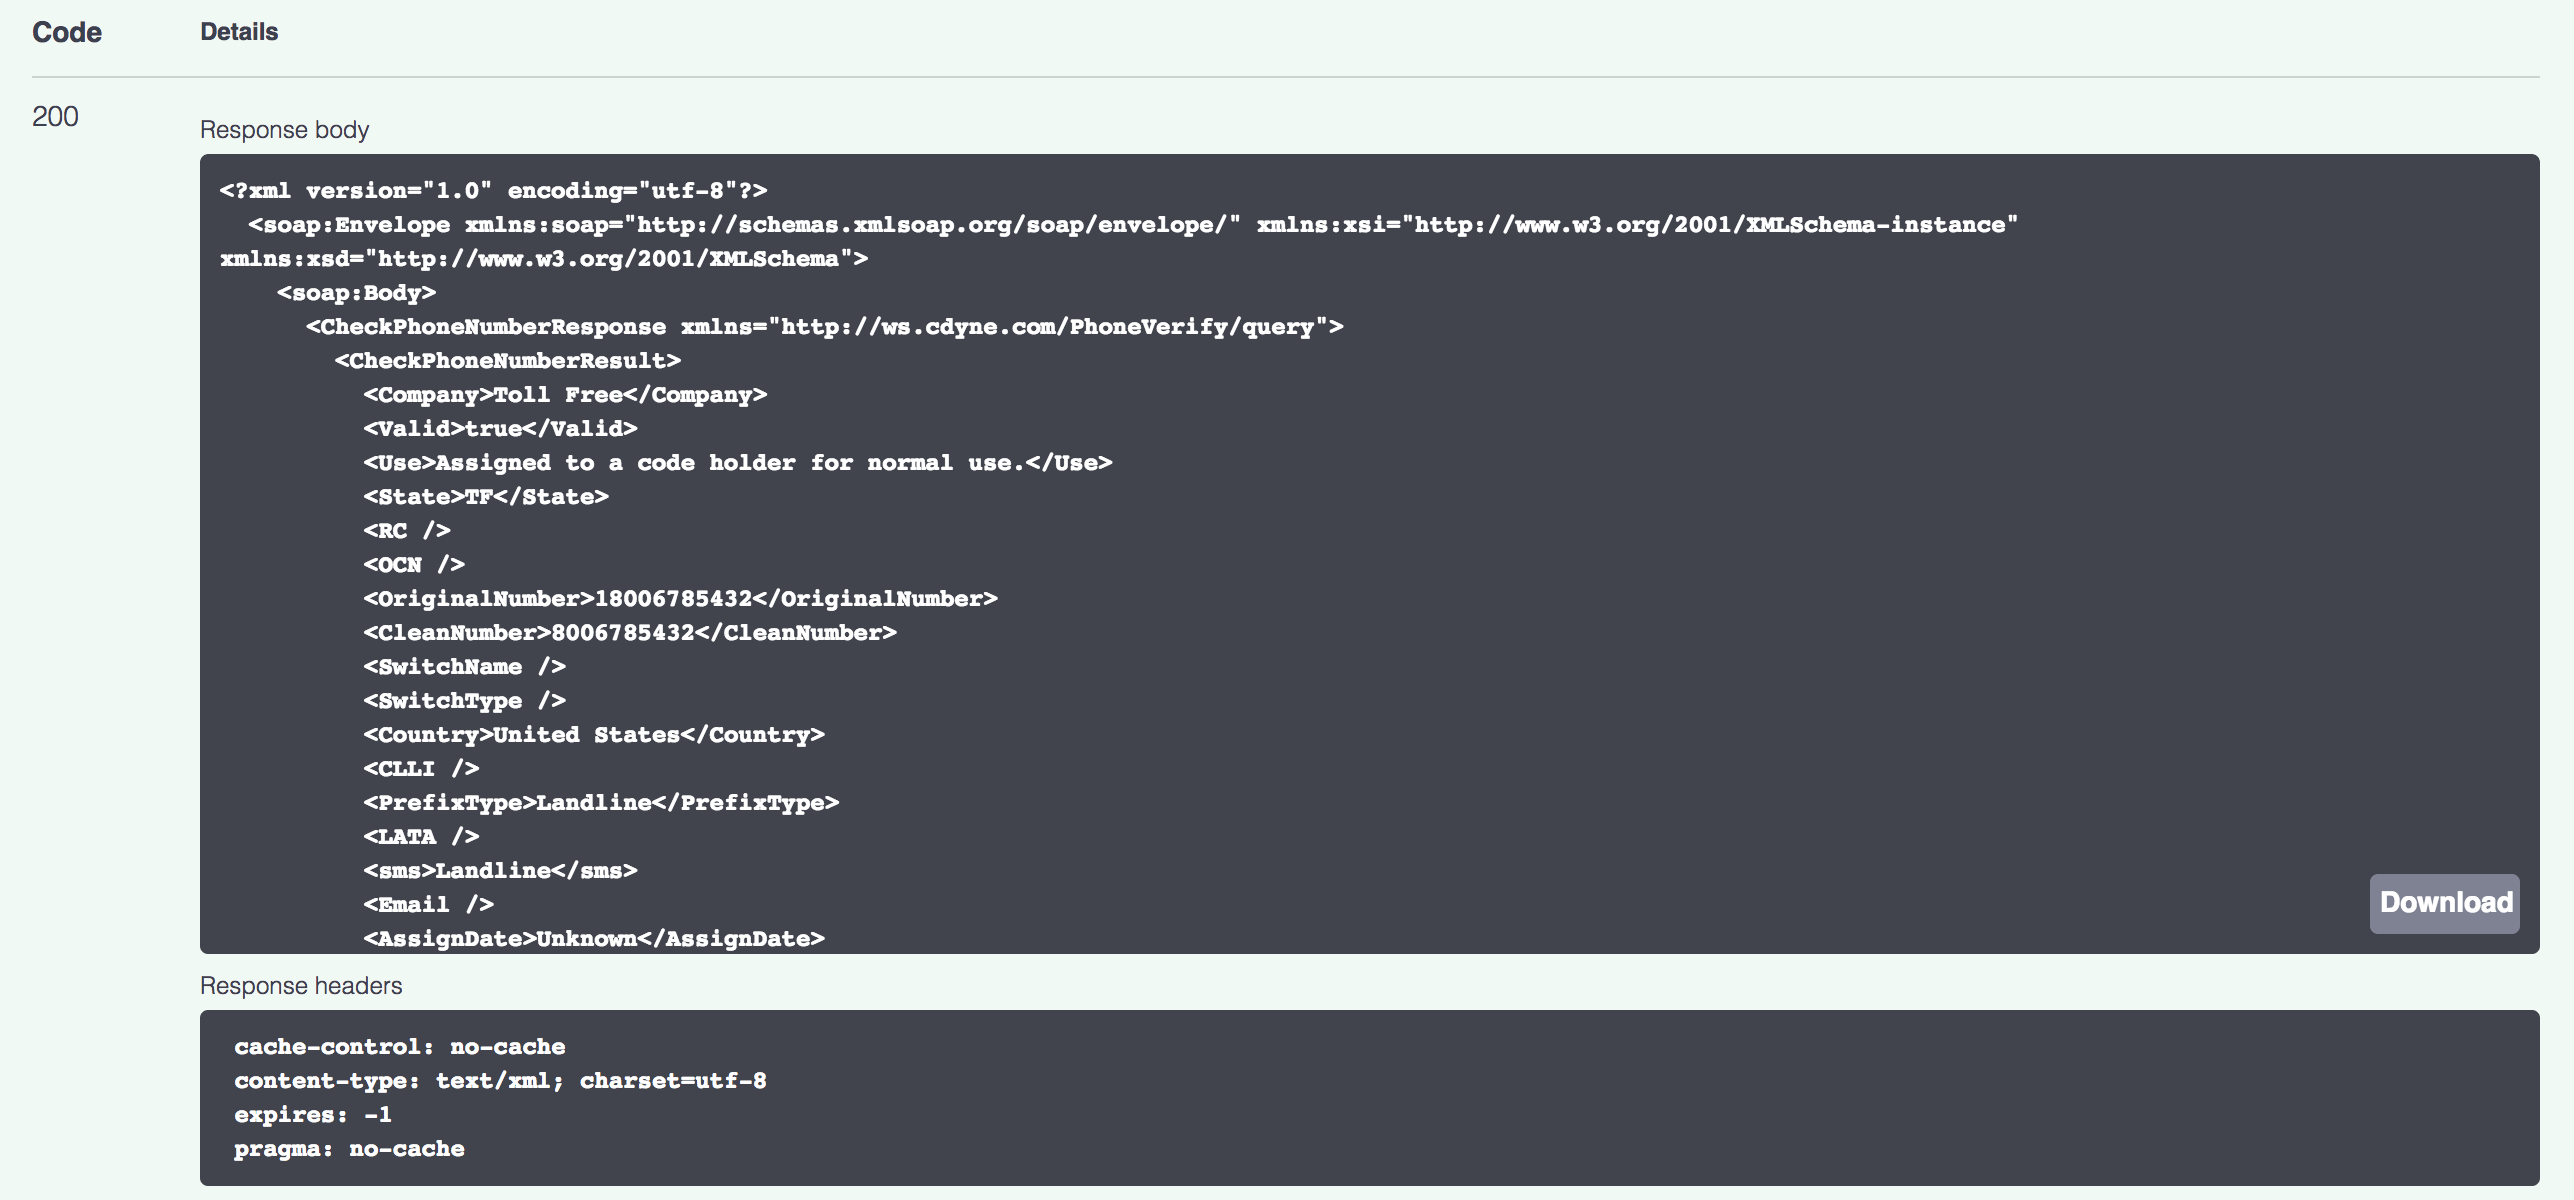
-
Note the API response that appears on the console.
Note
You can also invoke this API using a third-party tool such as SOAP UI. For more information on how to invoke an API using a SOAP client, see Invoke an API using a SOAP Client .