Quick Start Guide
Let's start Choreo Connect with a WSO2 API Manager instance which will be acting as the Control Plane, deploy an API via Publisher, and invoke the API with an Access Token from Developer Portal.
Before you begin
Make sure you have installed Docker and Docker Compose on your machine. Set up and allocate the following resources for Docker.
- Minimum CPU : 4vCPU
- Minimum Memory : 4GB
Important
Production Deployments - Choreo Connect
The Docker Compose based deployment option explained here is only for tryout purposes. This method is not recommended for production deployments. For production deployments, you can use the following.
- Kubernetes based Choreo Connect deployment with Helm artifacts or YAML artifacts
- Production Deployment Guideline for Choreo Connect
Production Deployments - API Manager
The Docker Compose files referred in this guide are to deploy API Manager with basic configurations. They are the docker-compose scripts provided with the Choreo Connect distribution and are only meant for tryout purposes. In order to deploy WSO2 API Manager in production grade, you can use the following.
- Docker setup artifacts from the API Manager page
- Production Deployment Guideline for API Manager
Step 1 - Download and extract the Choreo Connect distribution .zip file
- Download the latest Choreo Connect distribution from https://wso2.com/choreo/choreo-connect/.
- Extract the Choreo Connect distribution .zip file. The extracted folder will be called as
CHOREO-CONNECT_HOMEhereafter.
Step 2 - Download WSO2 API Manager 4.2.0 .zip file
- Download WSO2 API Manager 4.2.0 distribution .zip file from https://wso2.com/api-manager/.
- Place the .zip file in
CHOREO-CONNECT_HOME/docker-compose/choreo-connect-with-apim/dockerfiles/apim/.
Step 3 - Start Choreo Connect and API Manager
-
Add the host entry to
/etc/hostsfile as shown below in order to access the API Manager Publisher and Developer Portal.127.0.0.1 apim -
Start Choreo Connect and API Manager on docker by executing the docker compose script inside the
CHOREO-CONNECT_HOME/docker-compose/choreo-connect-with-apimfolder.docker-compose up -dOnce the containers are up and running, you can monitor the status of the containers using the following command.
docker ps | grep choreo-connect-
Step 4 - Create and publish an API via API Manager
-
Navigate to the Publisher Portal.
https://apim:9444/publisher/ -
Sign in with
admin/adminas the credentials.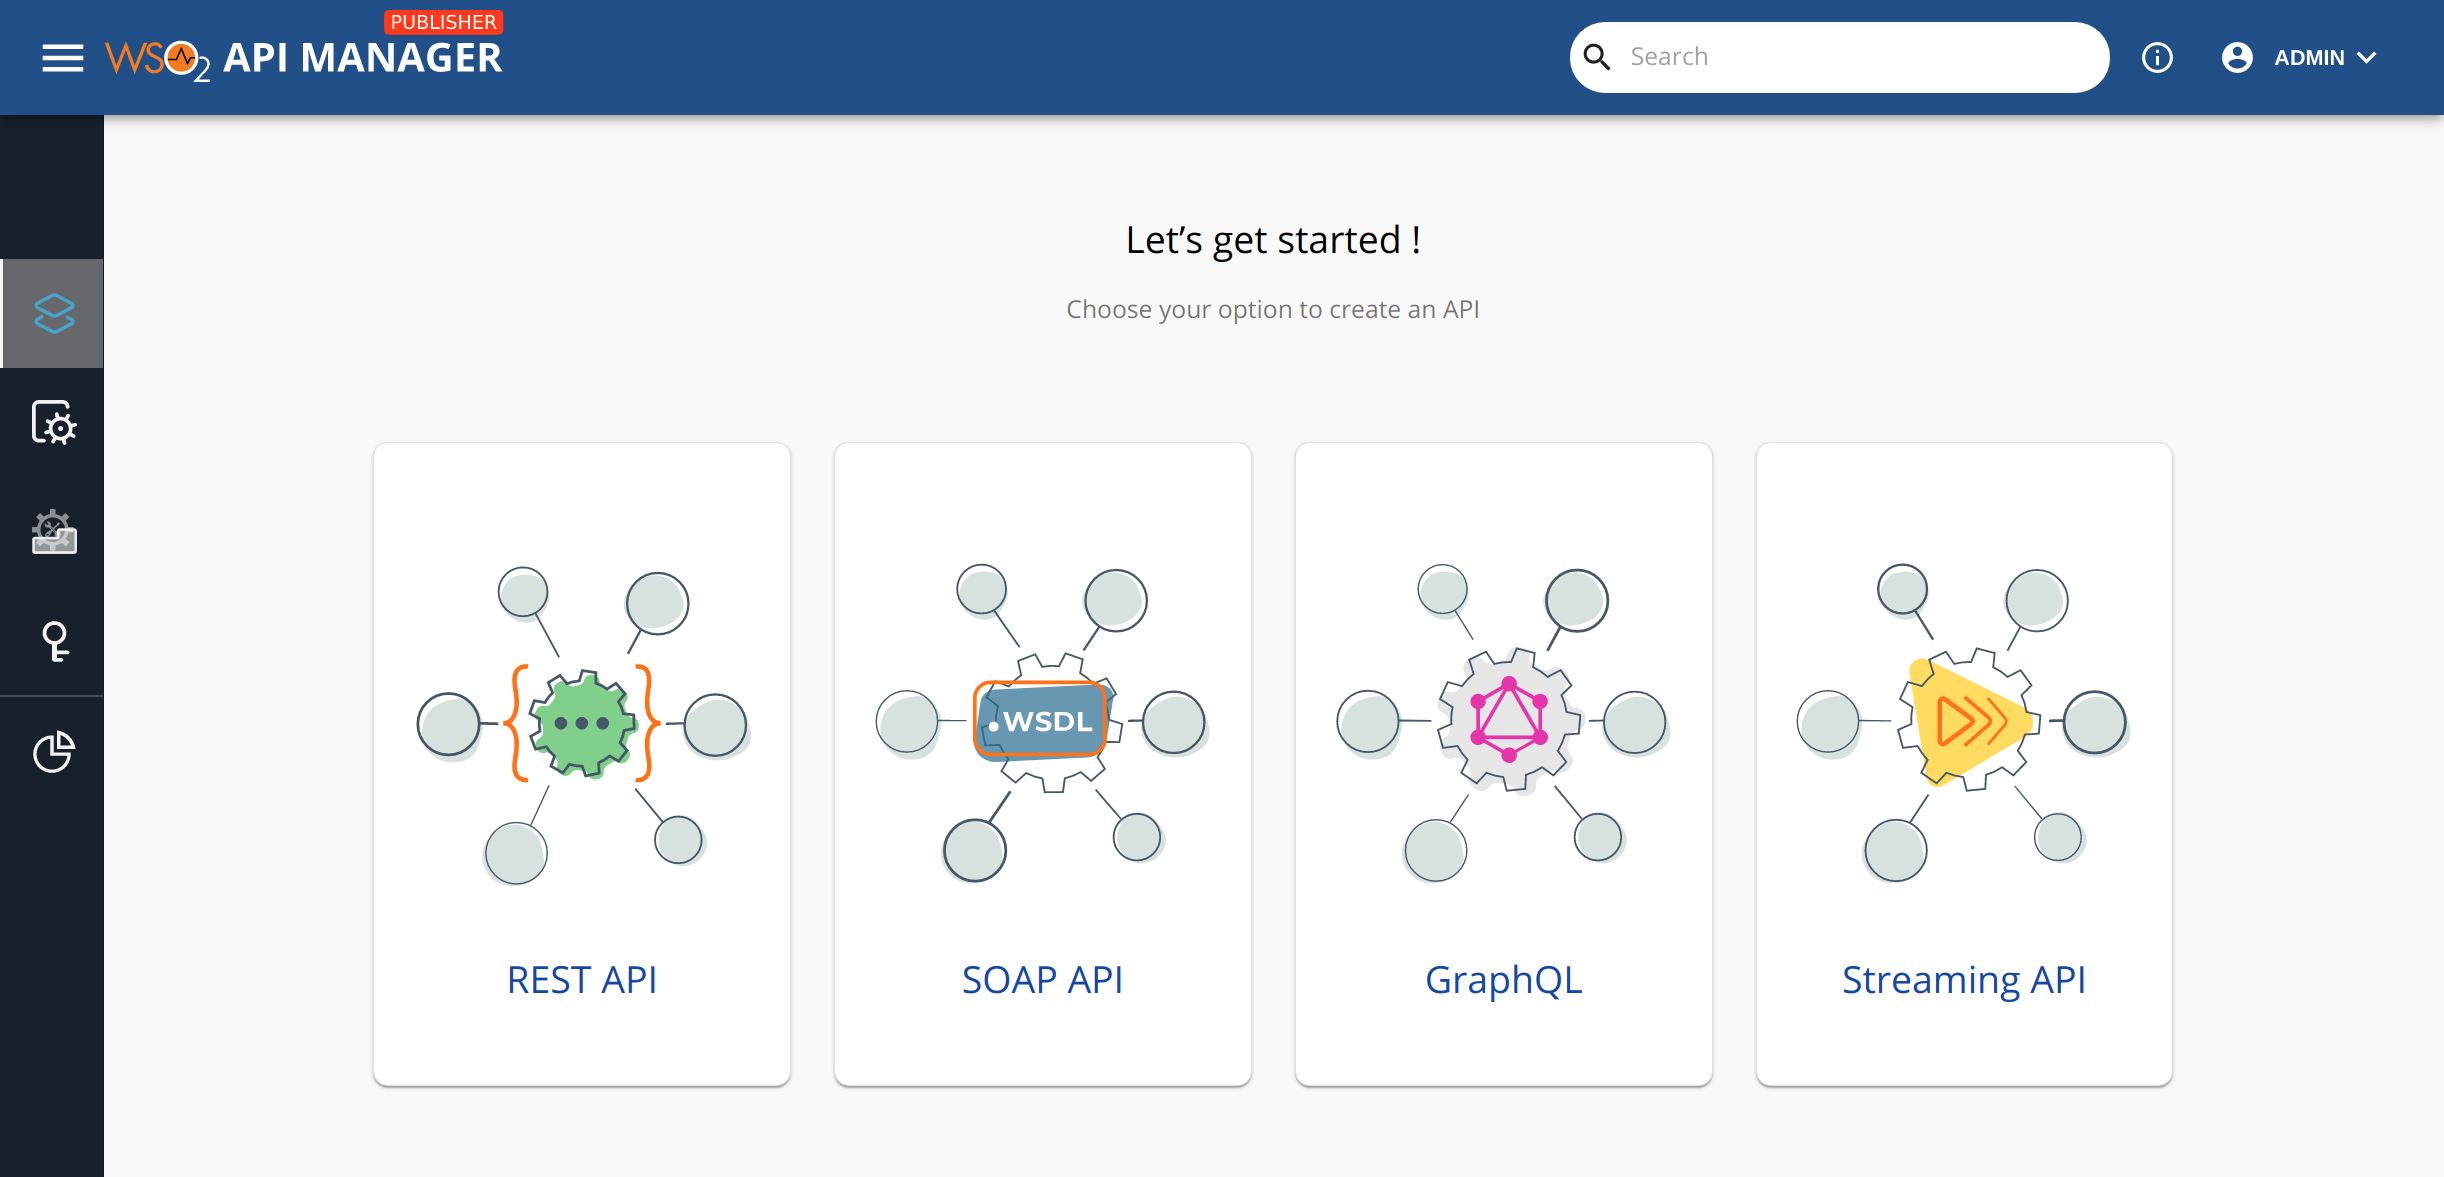
-
Select REST API from the home screen and then click Start From Scratch.
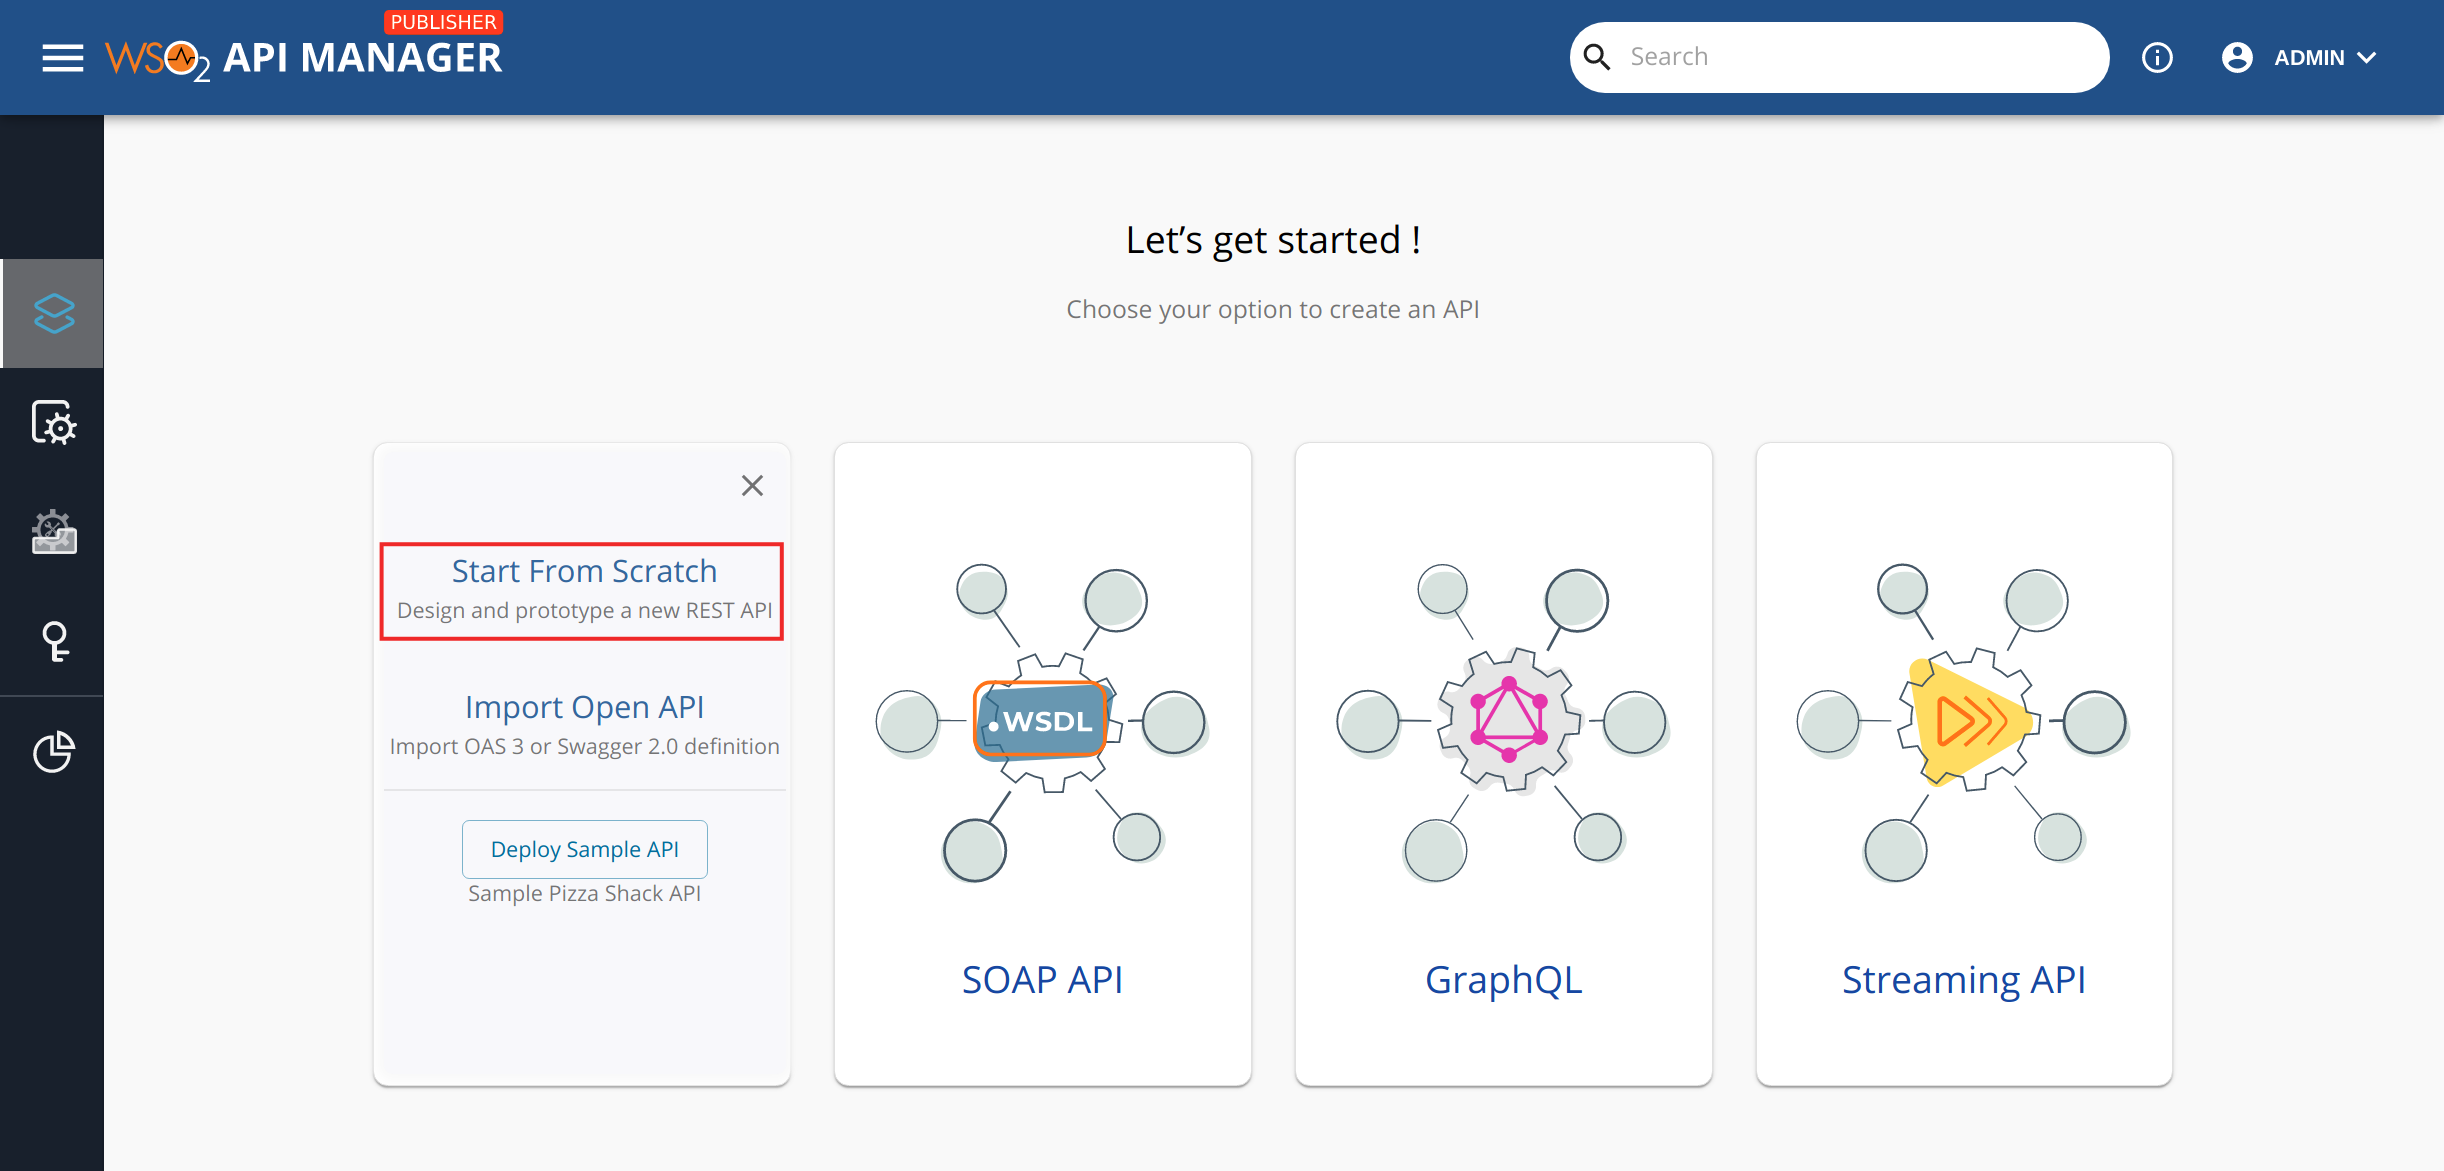
-
Enter the following API details.
Field Value Name HelloWorld Context /hello Version 1.0.6 Endpoint https://run.mocky.io/v2/5185415ba171ea3a00704eed Note
We are using a mock service from https://designer.mocky.io/ as the endpoint to test the API. The above endpoint returns the json payload
{"hello": "world"}.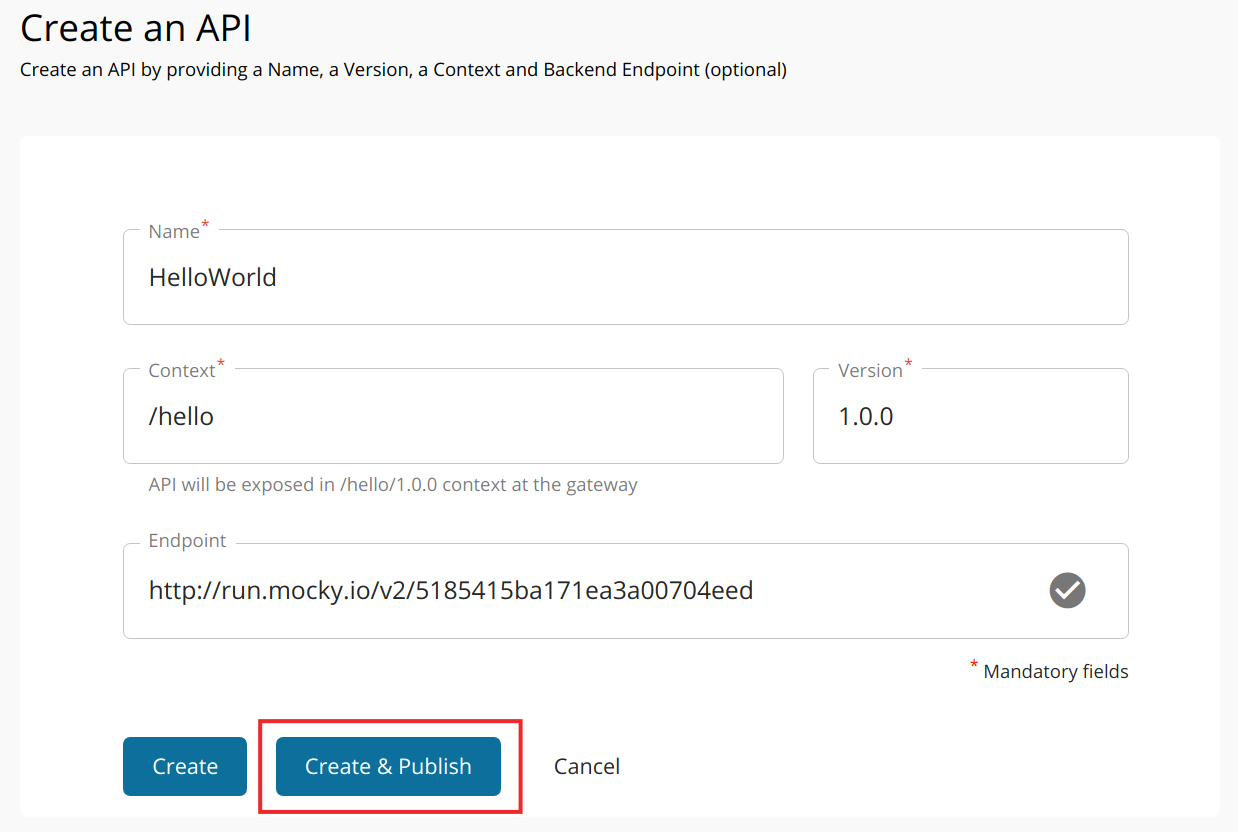
-
Click Create & Publish.
This will publish your first API on the Developer Portal as well as deploy it on Choreo Connect. You now have an OAuth 2.0 secured REST API that is ready to be consumed.
Tip
If you are further updating the API, remember create a new revision from the Deployments tab and deploy the newly created revision to the Gateway, for the changes to be reflected in Choreo Connect.
Step 5 - Invoke the API from Publisher
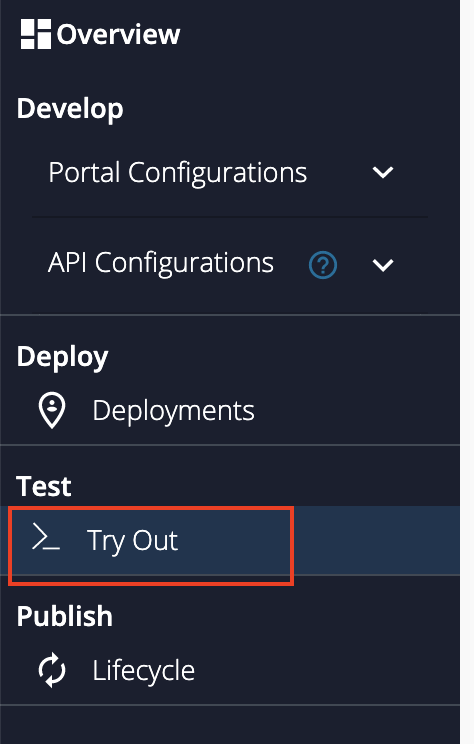
-
Open Try Out from the left menu bar.
-
In the Try Out page, you will find an Internal Key that has already been generated for you. You can click the button Generate Key whenever you need a new token.

Tip
When invoking the API, this Internal Key authentication token will be included in the header
Internal-Key. To learn more, click Internal Key. -
Select one of the listed HTTP methods. Click Try it out and then click Execute to invoke the API.
That's it! You have successfully invoked an API deployed in Choreo Connect.
You can follow the next few steps to get an idea about API Subscriptions, Application Rate limiting and Production Access Tokens.
Step 6 - Subscribe to the API and generate a token
-
Navigate to the Developer Portal and select the newly created API.
https://apim:9444/devportal/ -
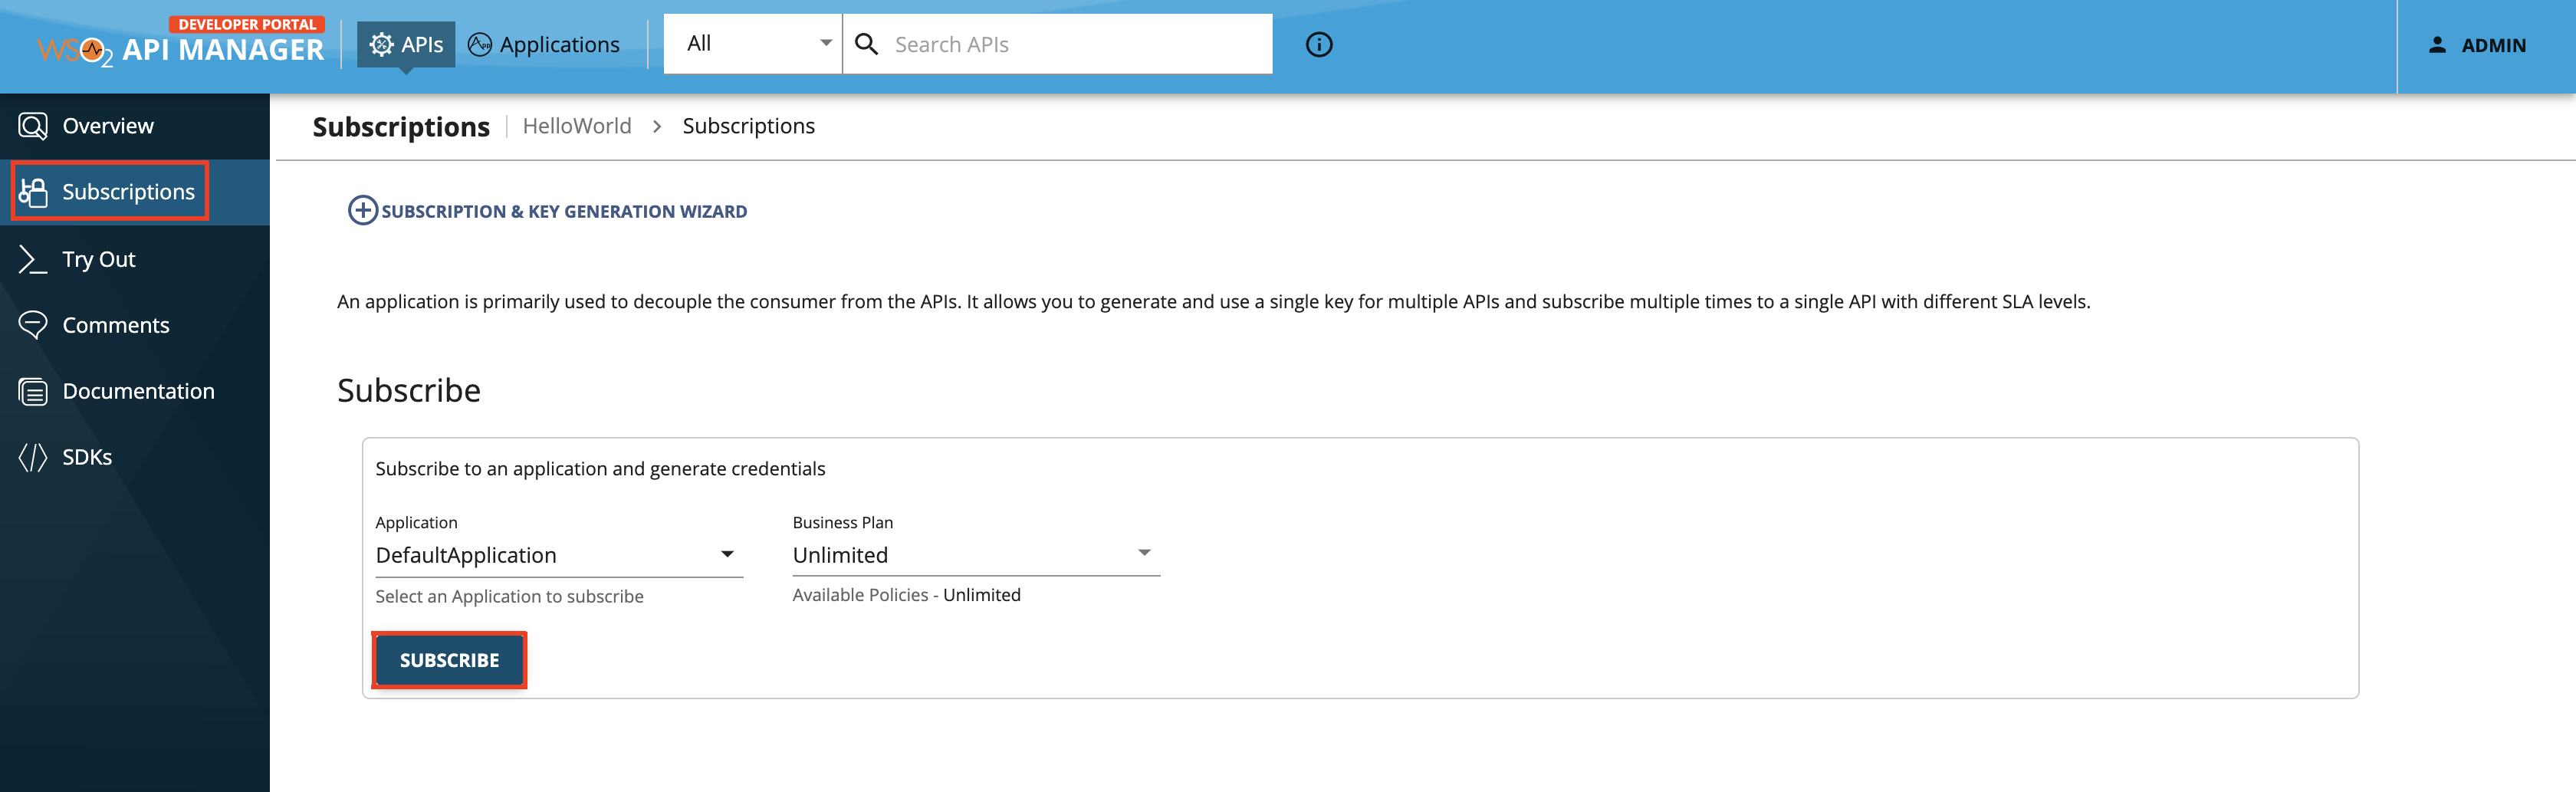
Navigate to the Subscriptions page.
-
Subscribe the API to the default application visible as DefaultApplication with an available Rate Limiting Policy.
-
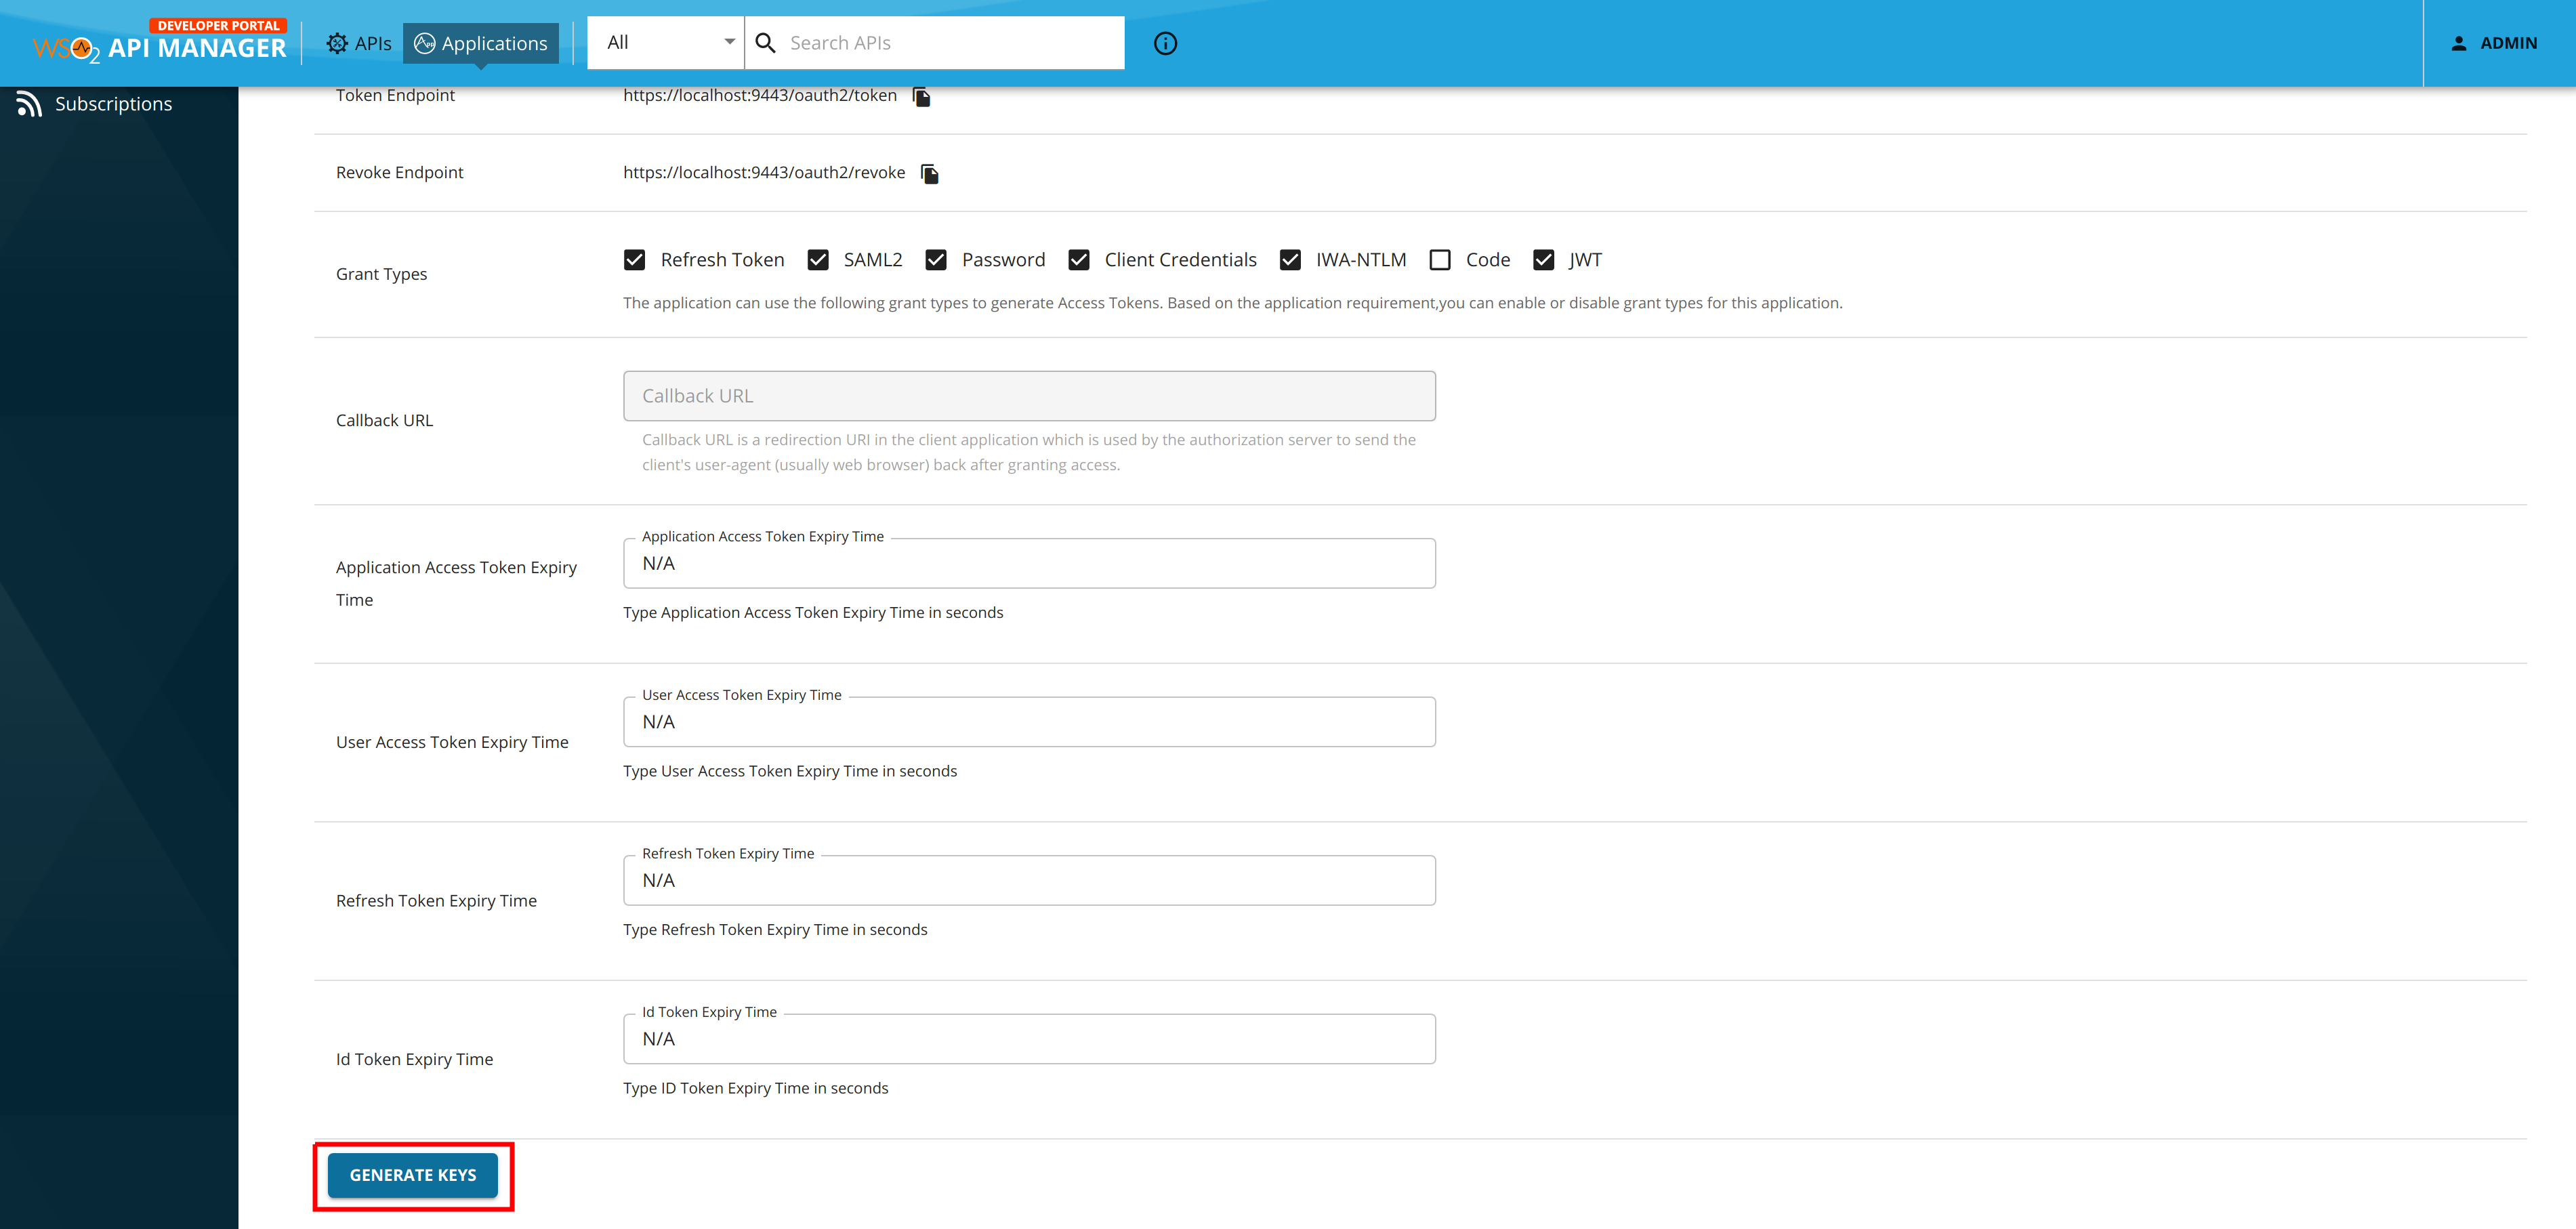
Navigate to the Applications tab.
-
Click on DefaultApplication, navigate to Production Keys page and click Generate keys to generate a production key.
Tip
To generate keys for the Sandbox endpoint, go to the Sandbox Keys tab. For more information, see Maintaining Separate Production and Sandbox Gateways.
-
Copy the generated access token before proceeding to the next step.
Step 7 - Invoke the API from Developer Portal
Follow the instructions below to invoke the previously created API with the generated token.
-
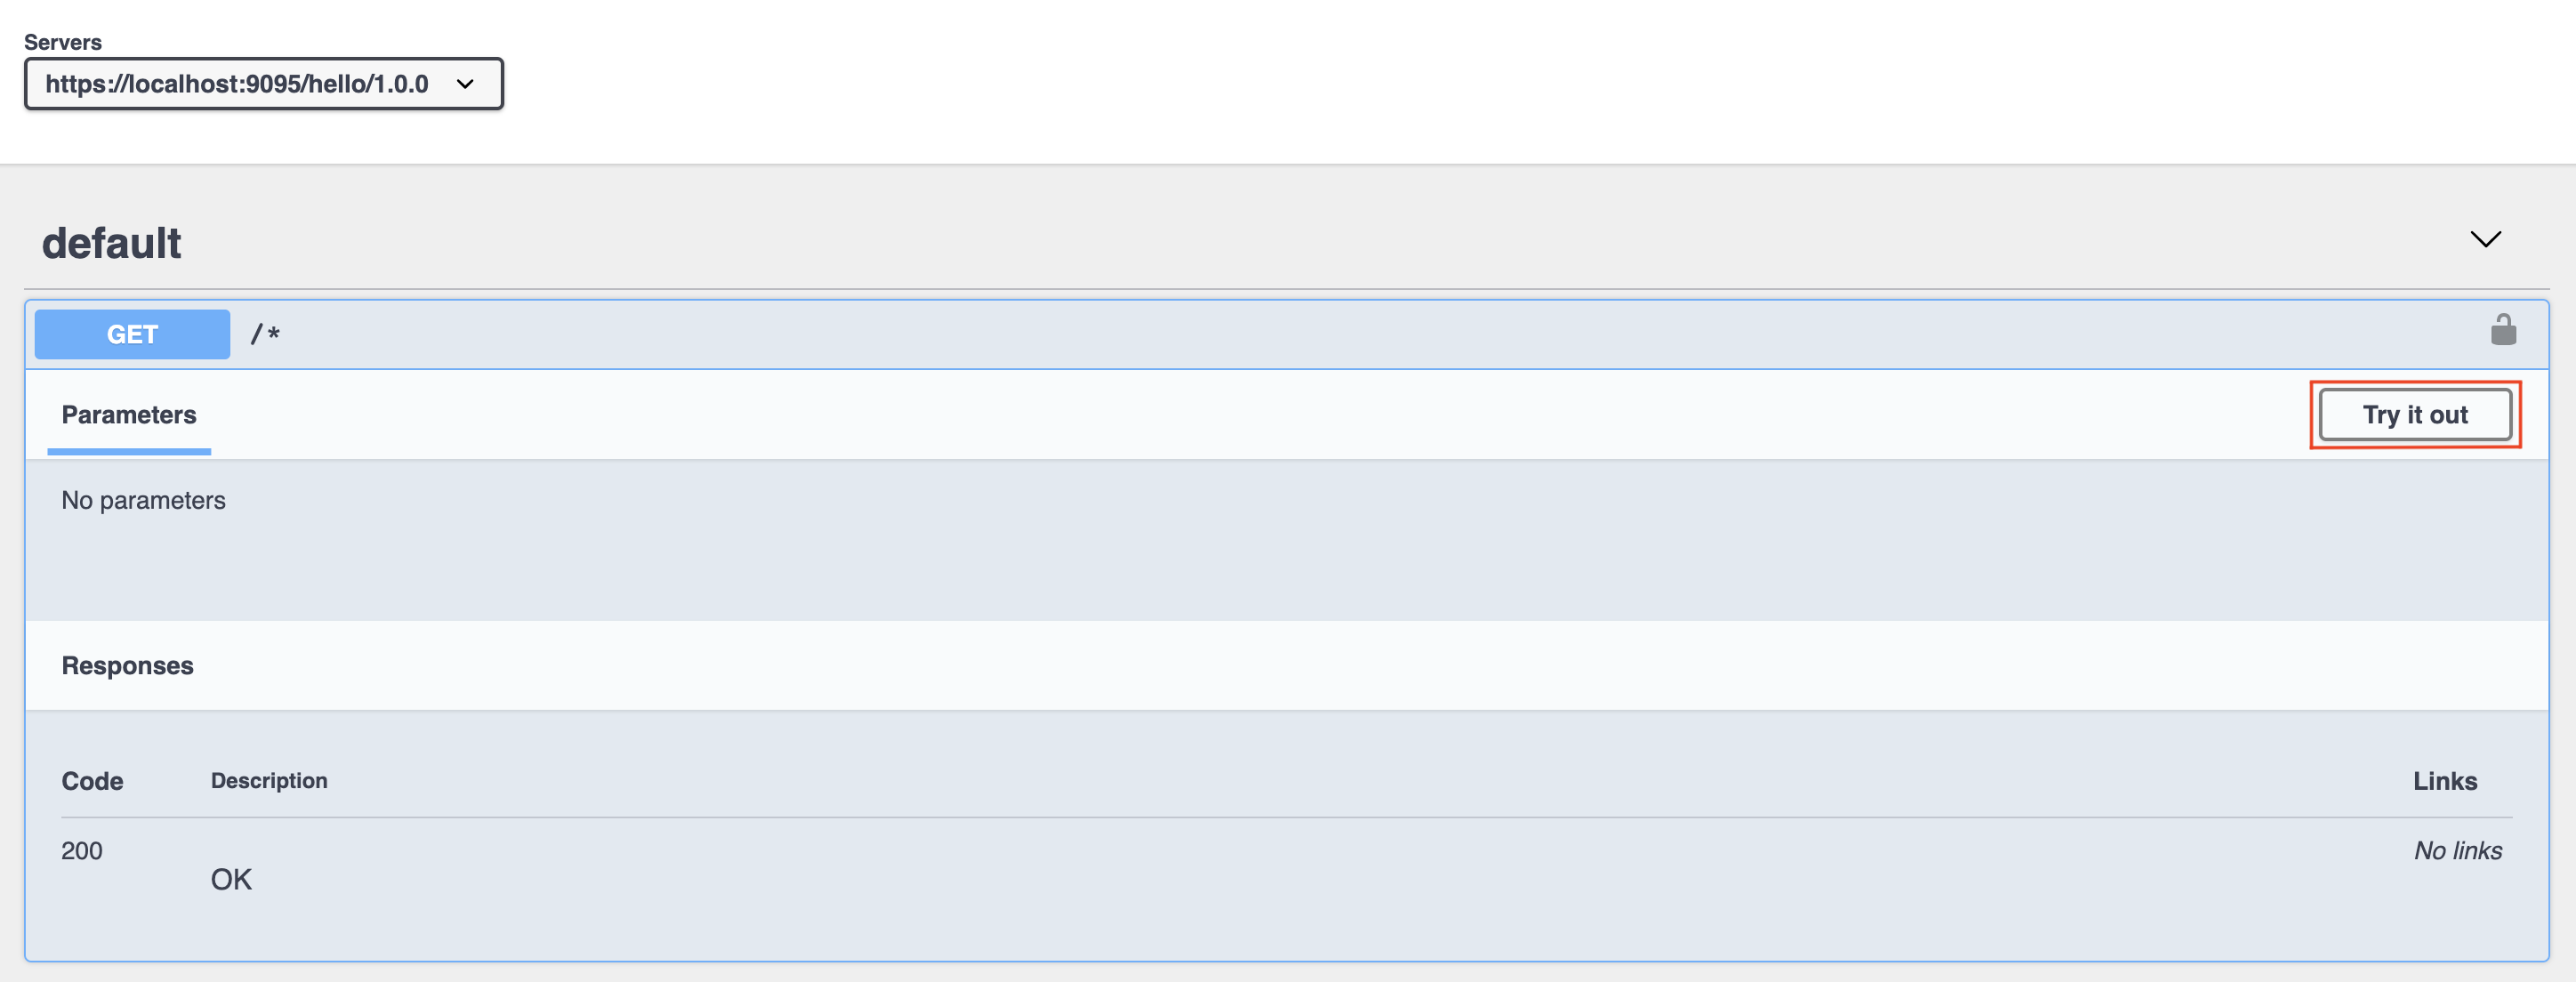
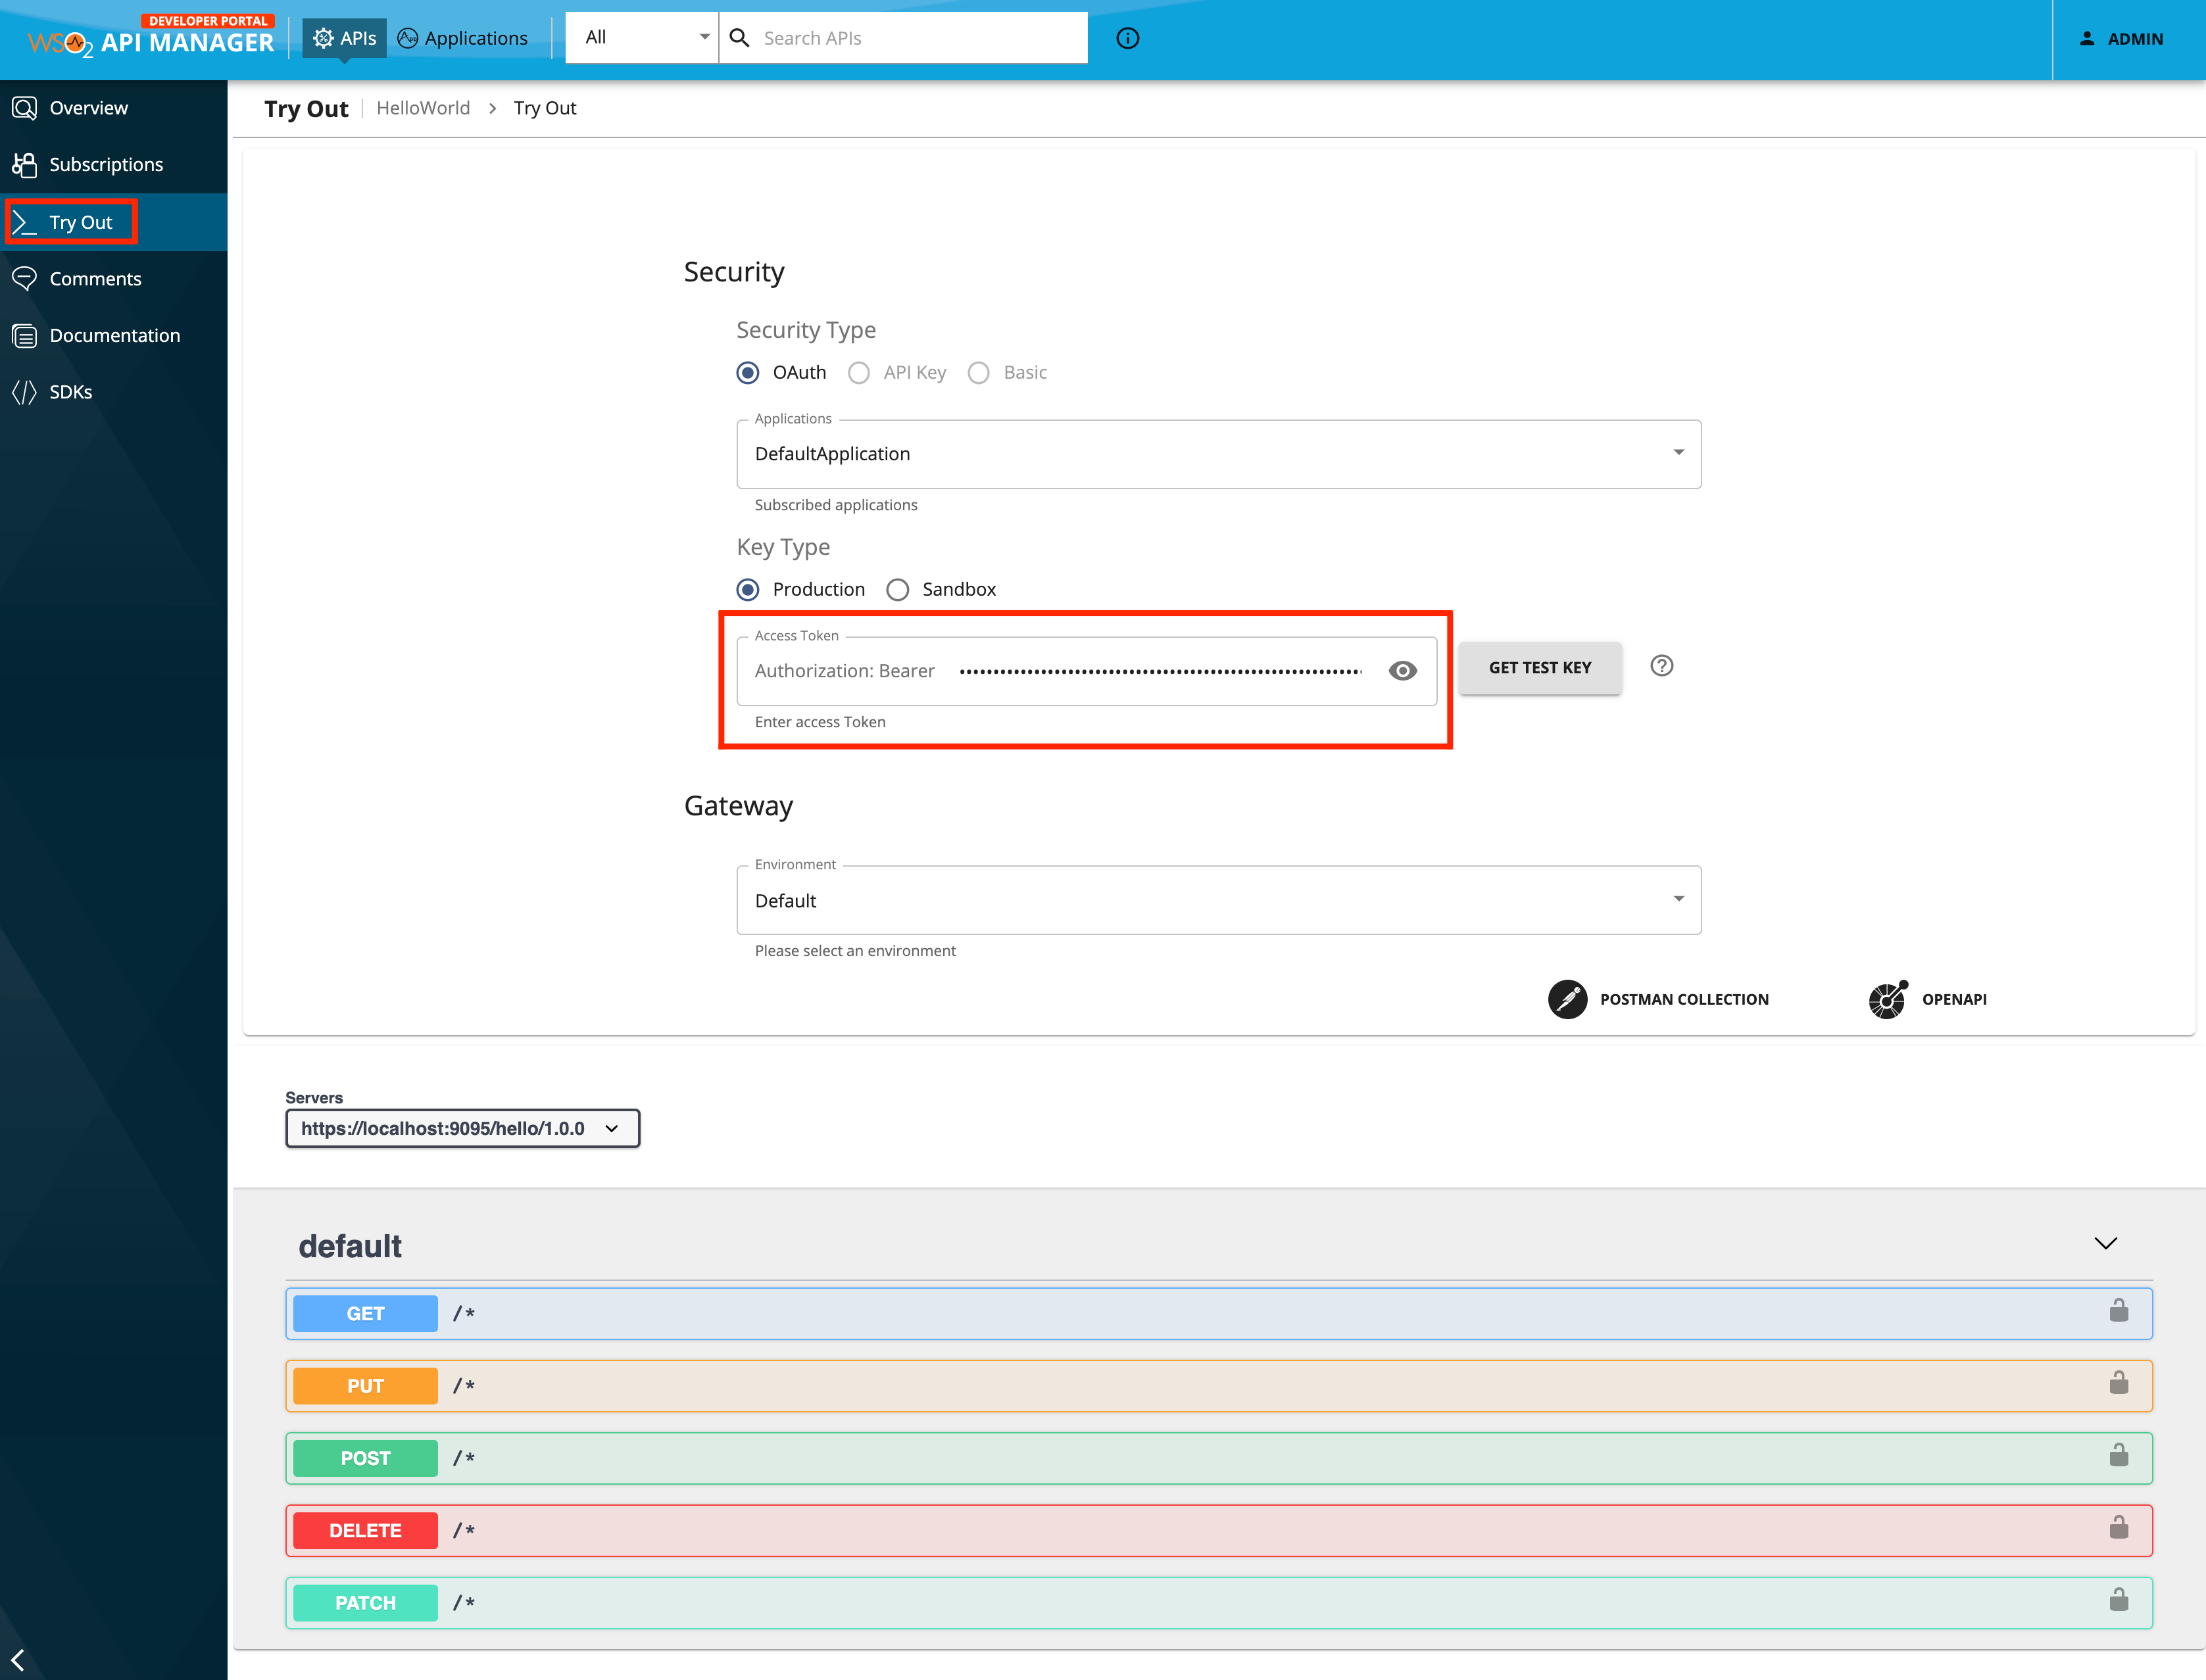
Go back to the APIs tab and select your API. Click Try Out on the left menu bar.
The resources of the API will be listed.
-
Paste the access token that you previously copied in the Access Token field.
-
If this is the first time you are using the API test console from your browser, open a new tab and navigate to the
https://localhost:9095/URL.This will prompt your browser to accept the certificate used by Choreo Connect. This is required because, by default, Choreo Connect uses a self-signed certificate that is not trusted by web browsers.
Important
This self-signed certificate used by Choreo Connect must be replaced when deploying the system in production.
-
Click on the
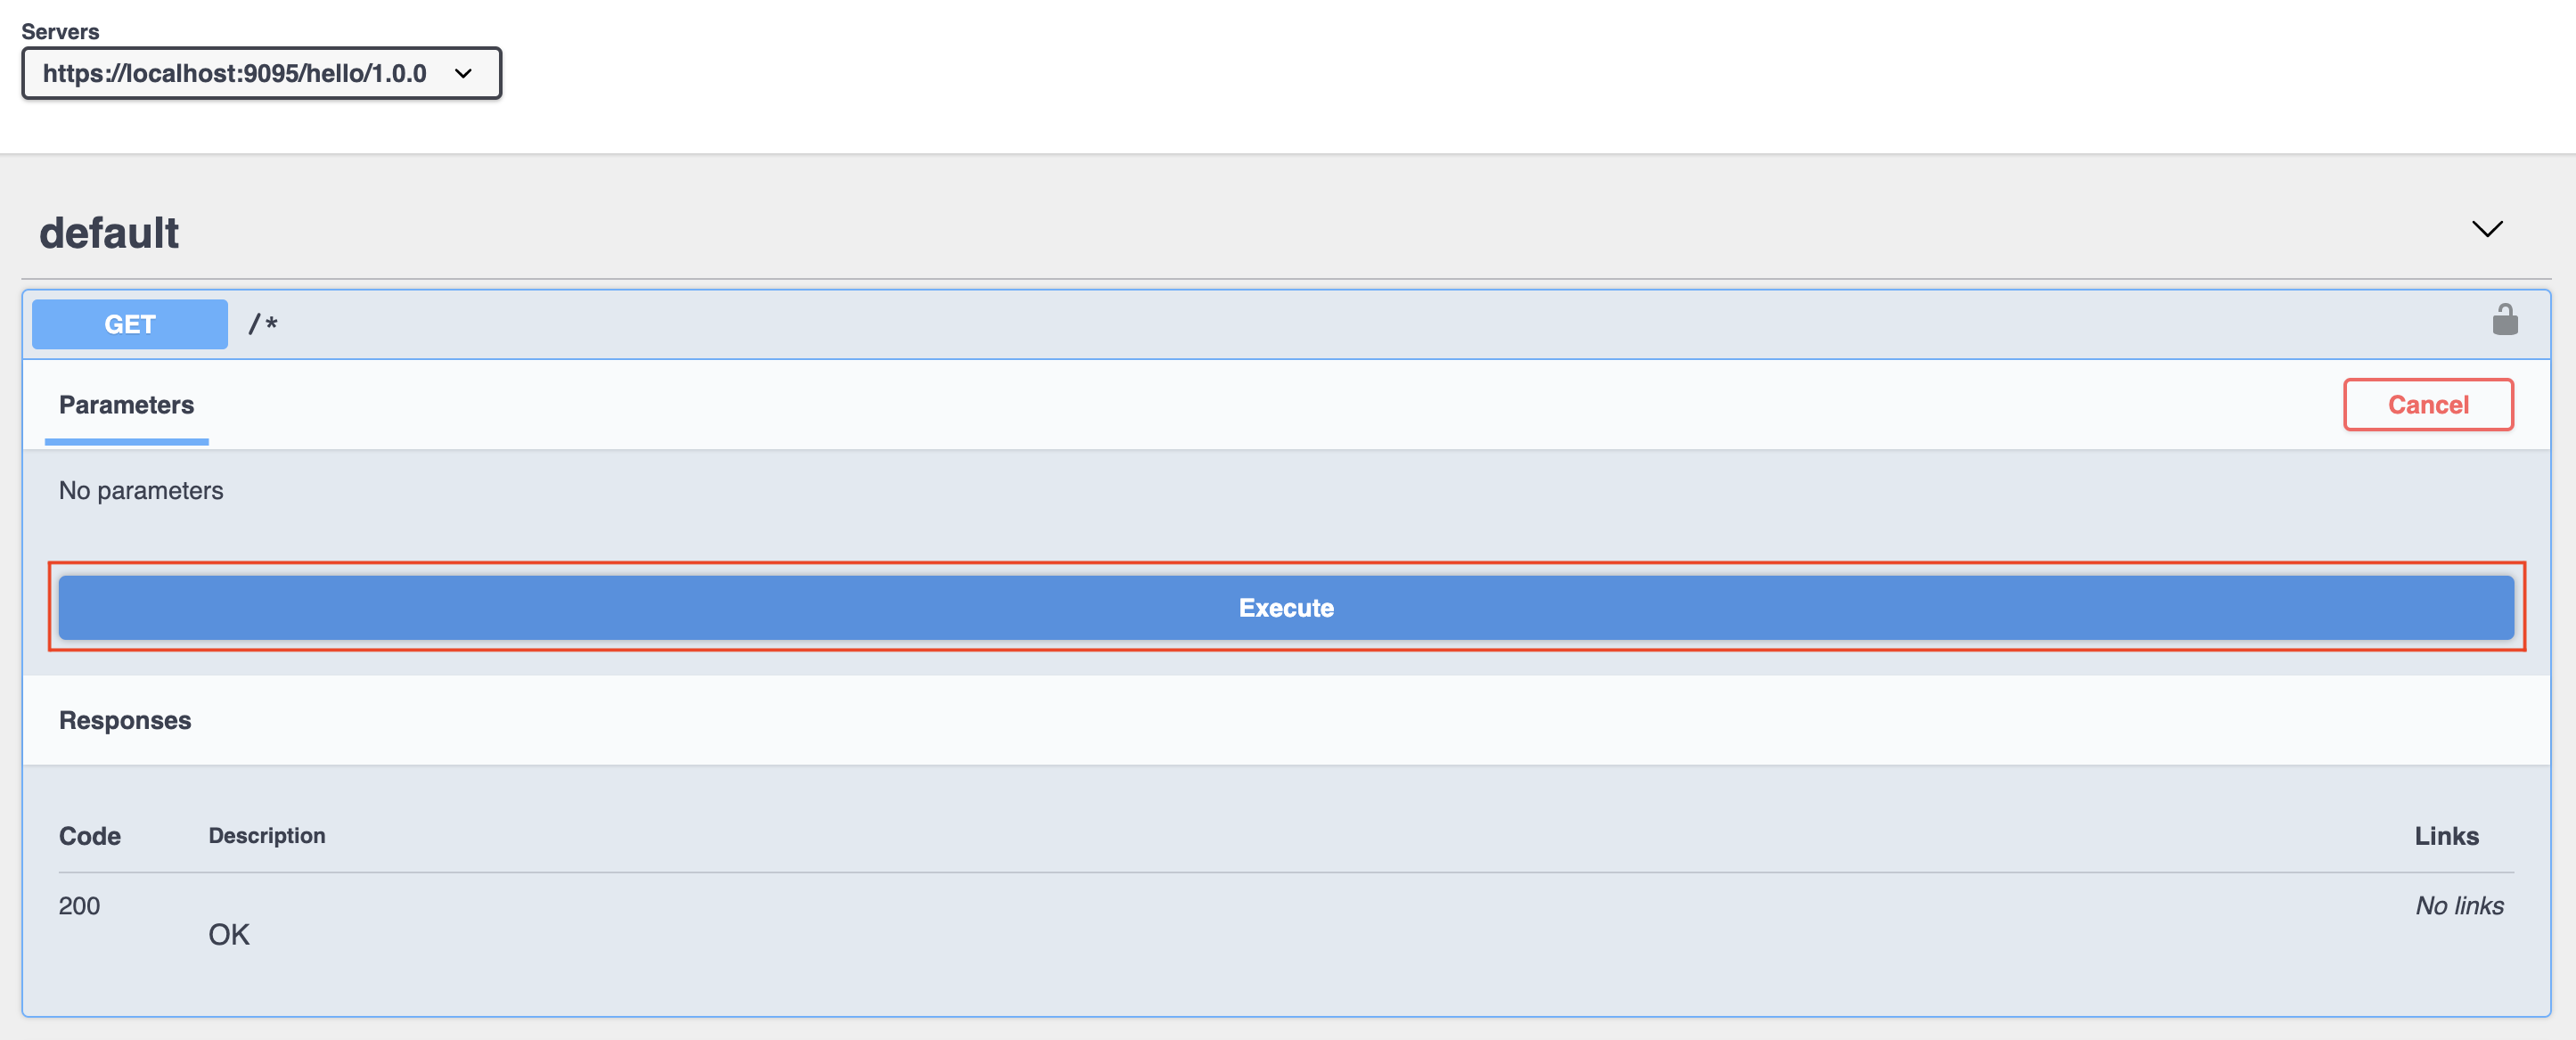
GETresource of the API to expand the resource and click Try It Out. -
Click Execute.
You should see the
{"hello" : "world"}response from the API.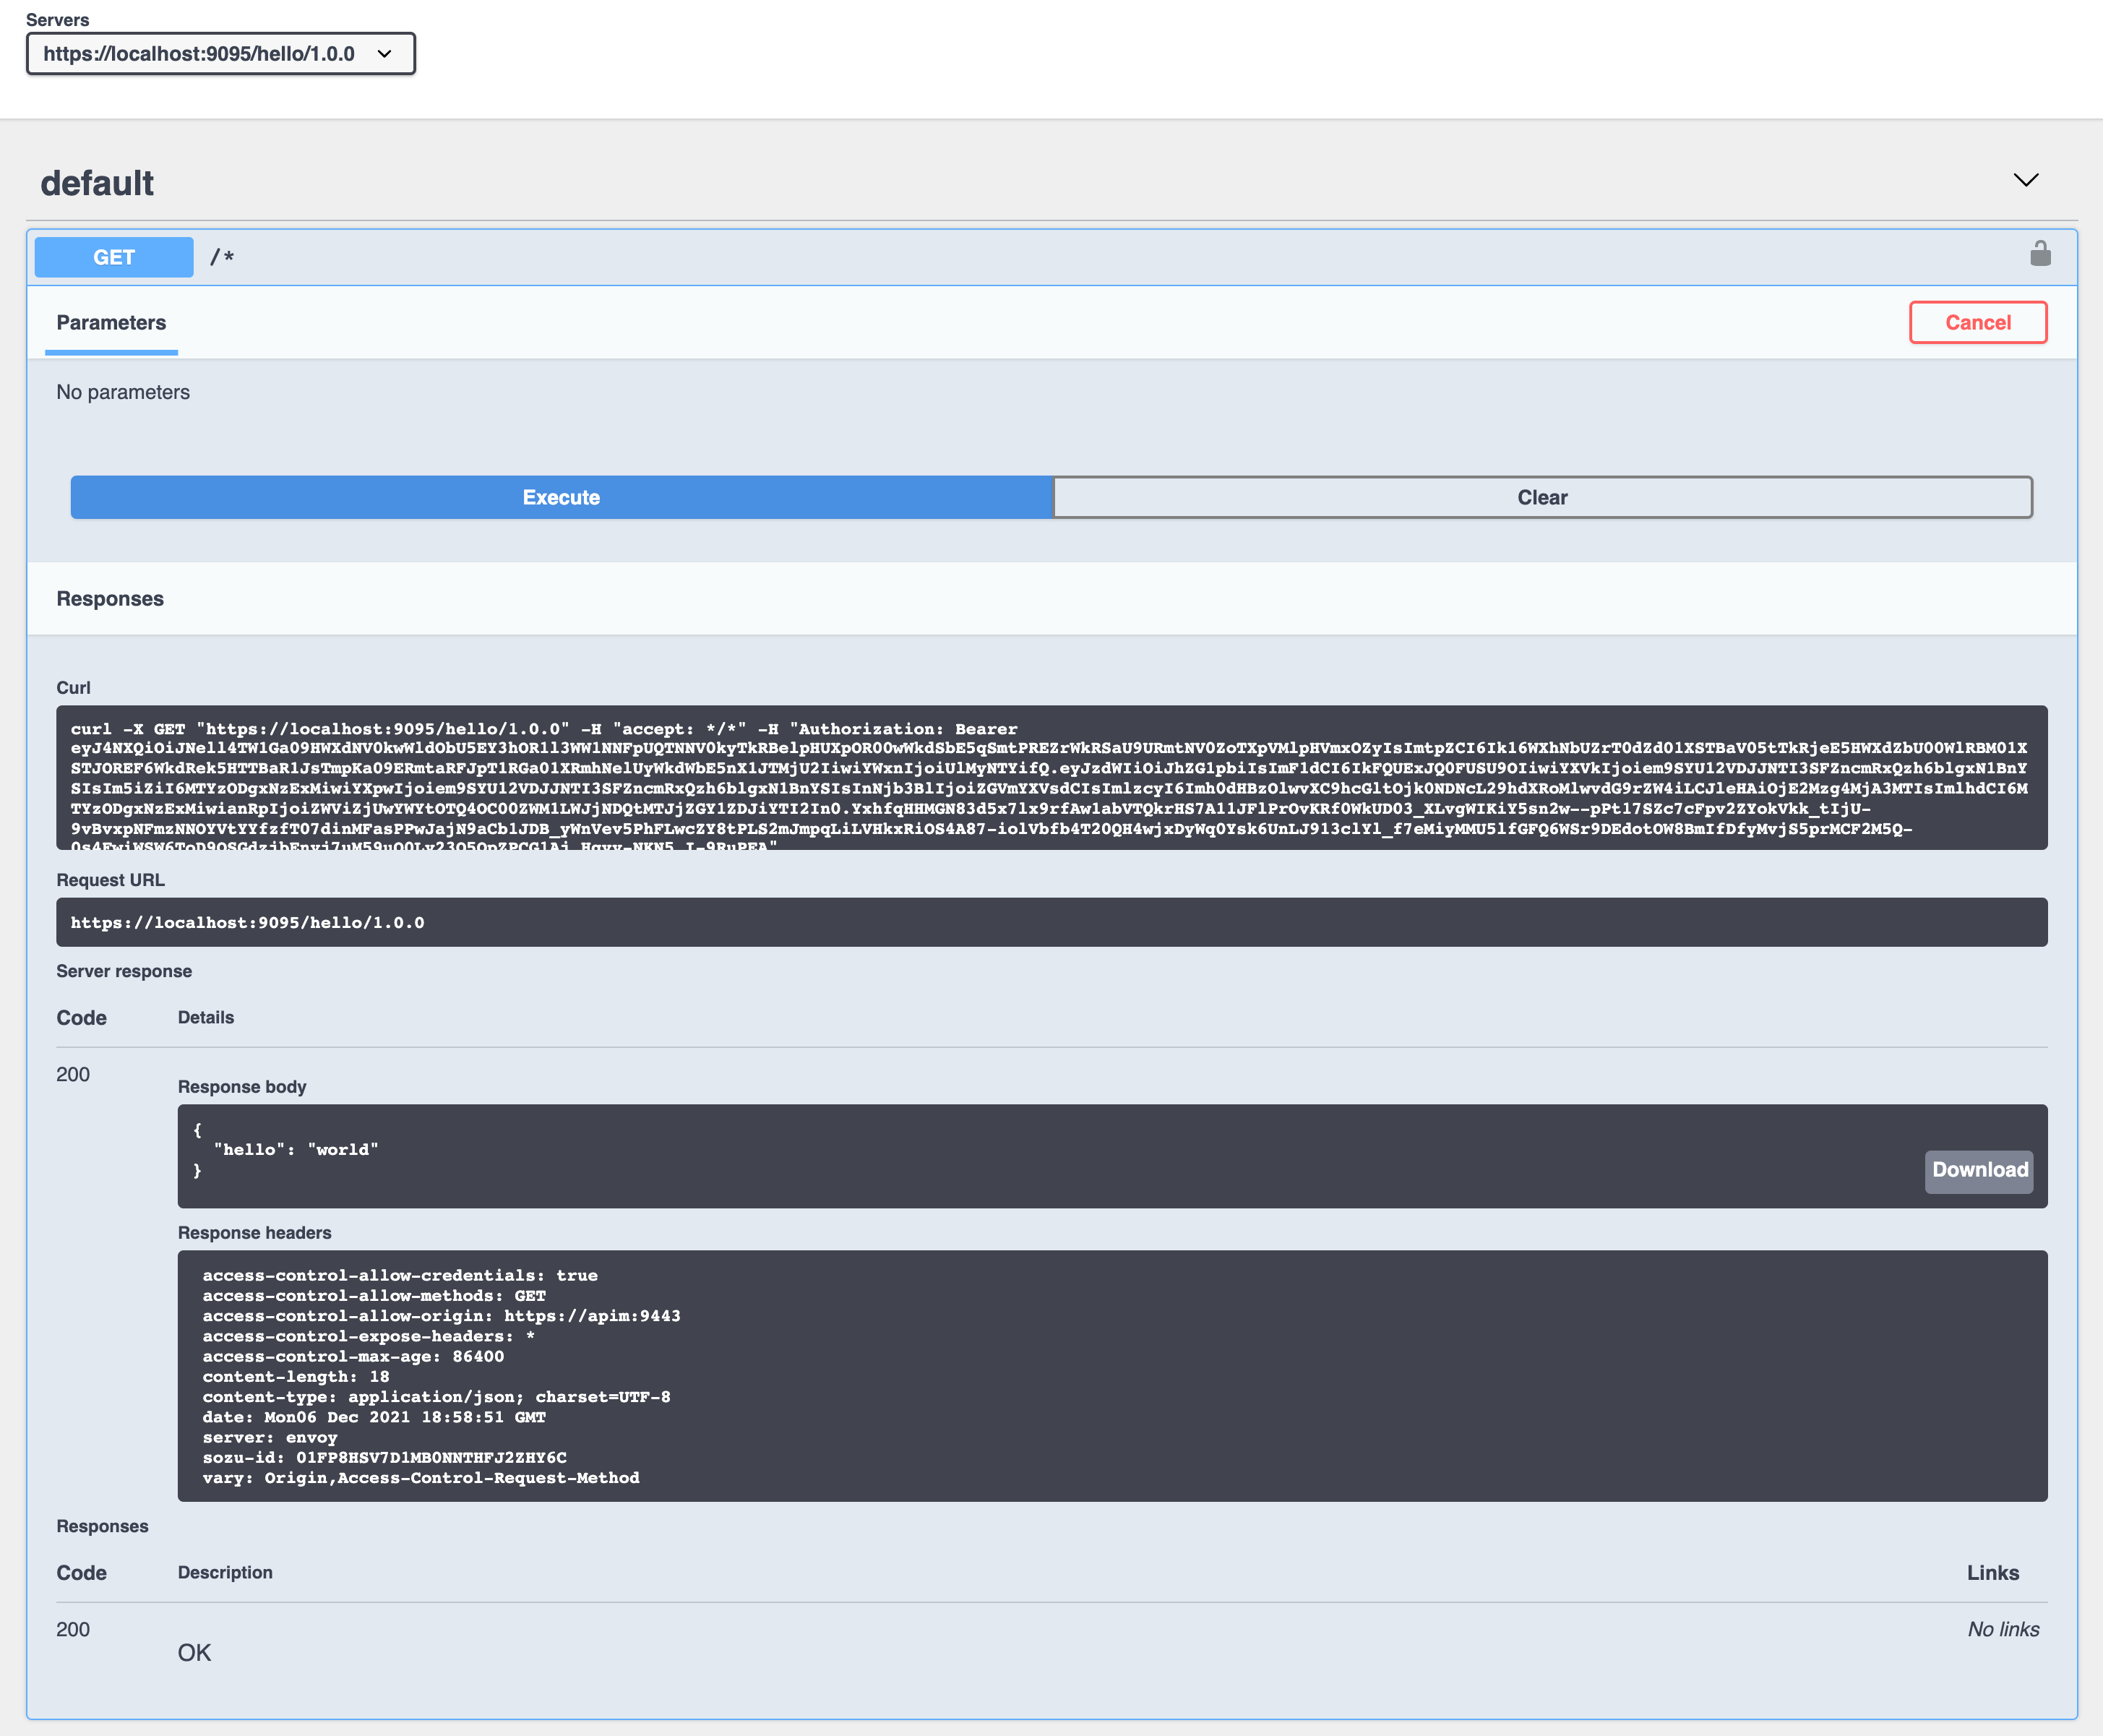
Congratulations! You have successfully created your first API, subscribed to it through an OAuth 2.0 application, obtained an access token for testing, and invoked your API with Choreo Connect.