Create and Publish an AWS Lambda API
When using AWS Lambda, you can execute your code without having to manage or provision servers. For more information on AWS Lambda, see What is AWS Lambda?. WSO2 API Manager has integrated the support for invoking AWS Lambda functions through WSO2 API Gateway to get the benefits of AWS Lambda. Follow the steps below to create and publish an AWS Lambda API.
Step 1 - Create a REST API
-
Sign in to the API Publisher Portal
https://<hostname>:9443/publisher. -
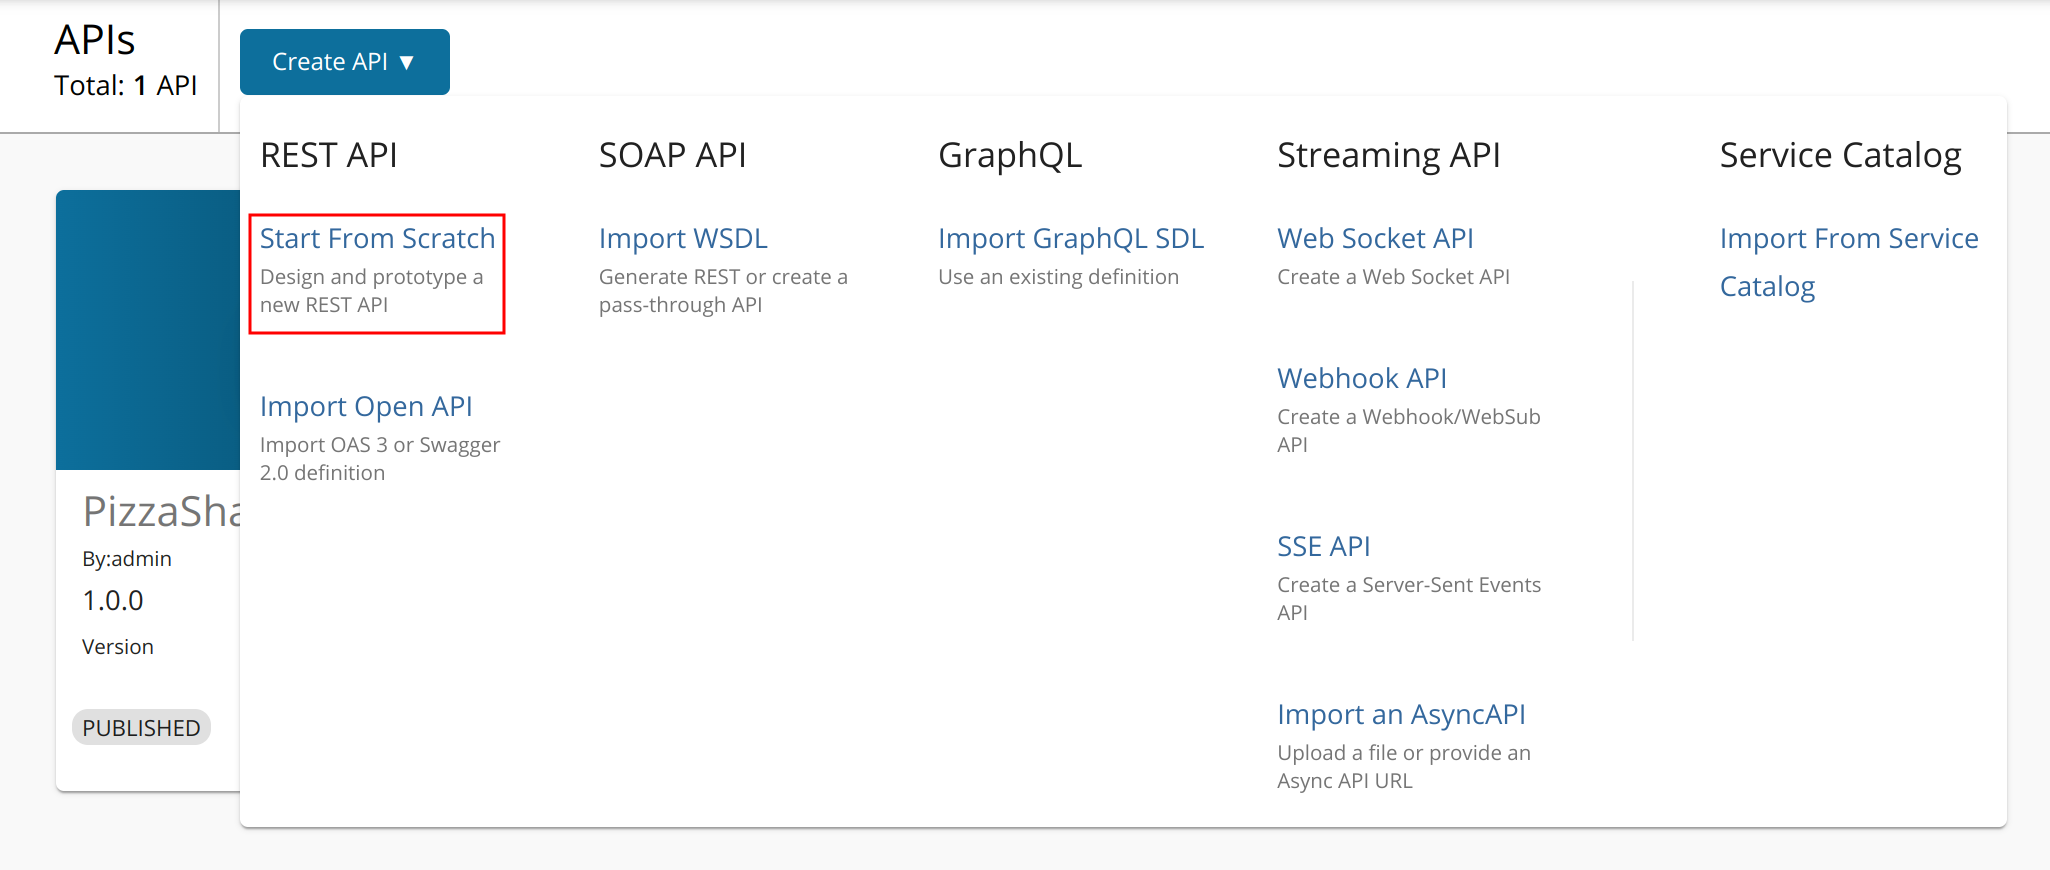
Click CREATE API and then click Start From Scrach.
-
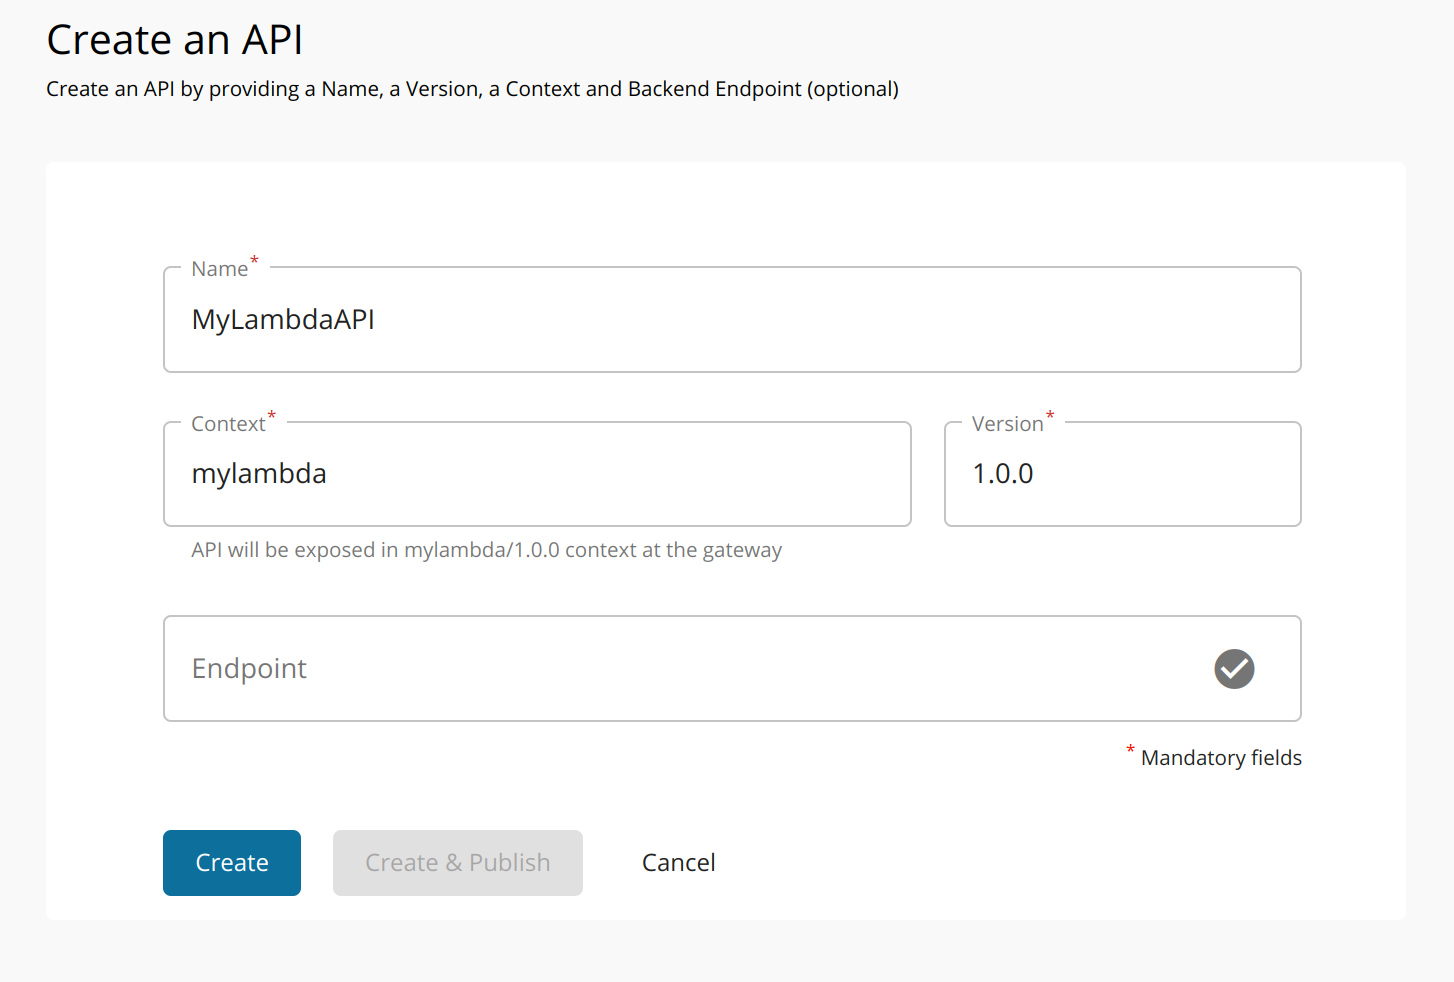
Enter the API details without an endpoint URL and click Create.
Step 2 - Add AWS Lambda Endpoint
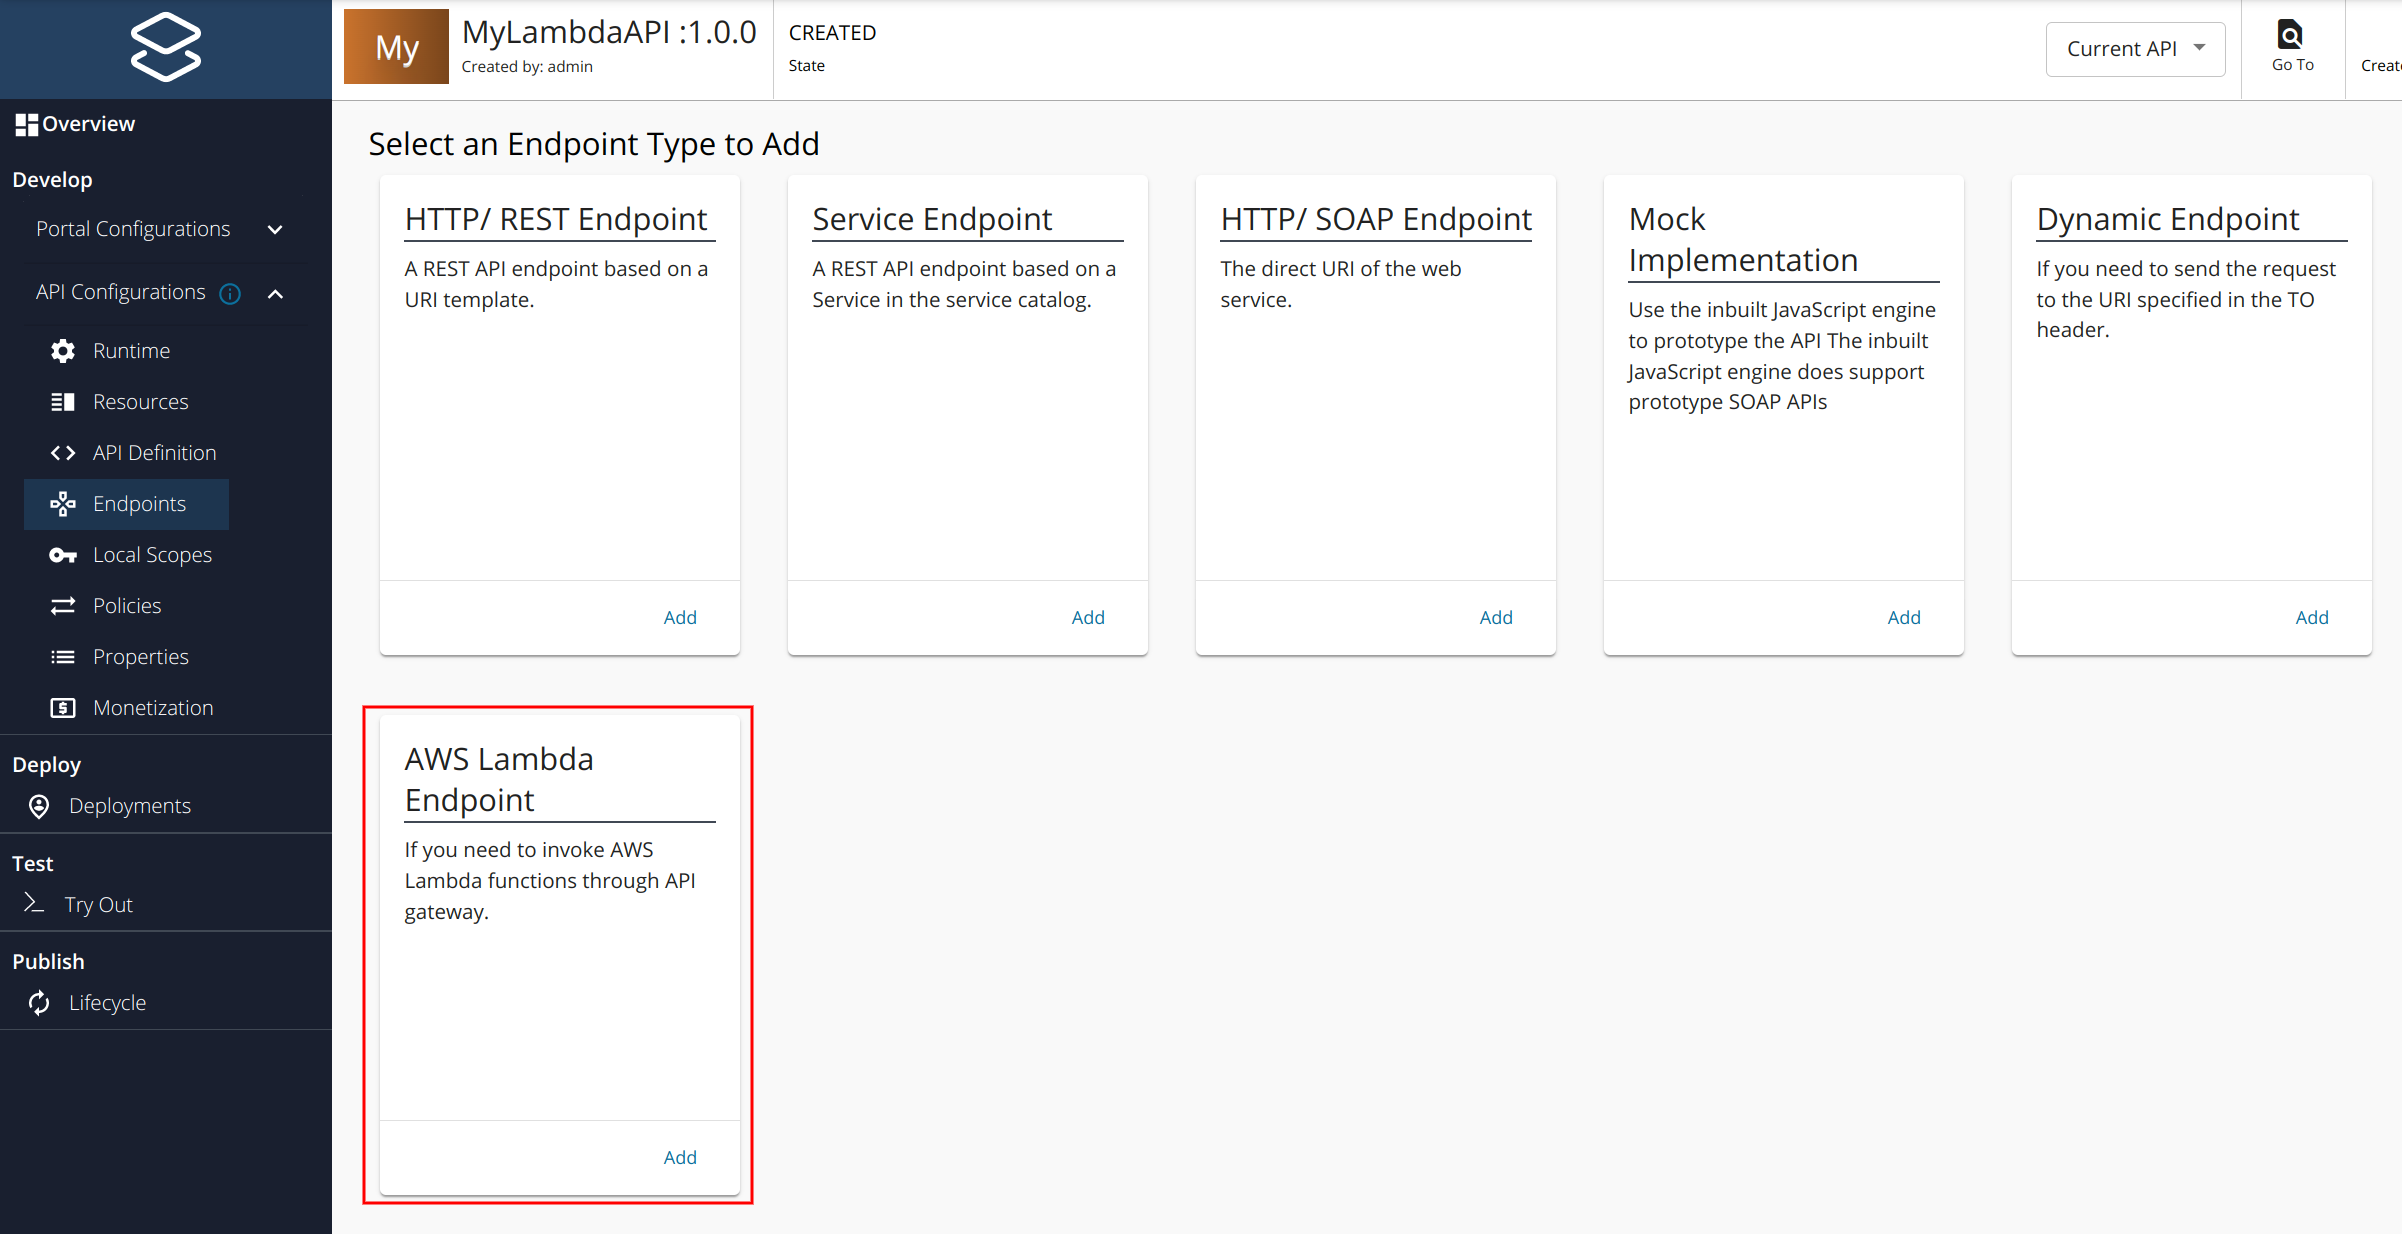
- Click Endpoints to navigate to Endpoints page.
-
Navigate to the AWS Lambda Endpoint type and click ADD.
-
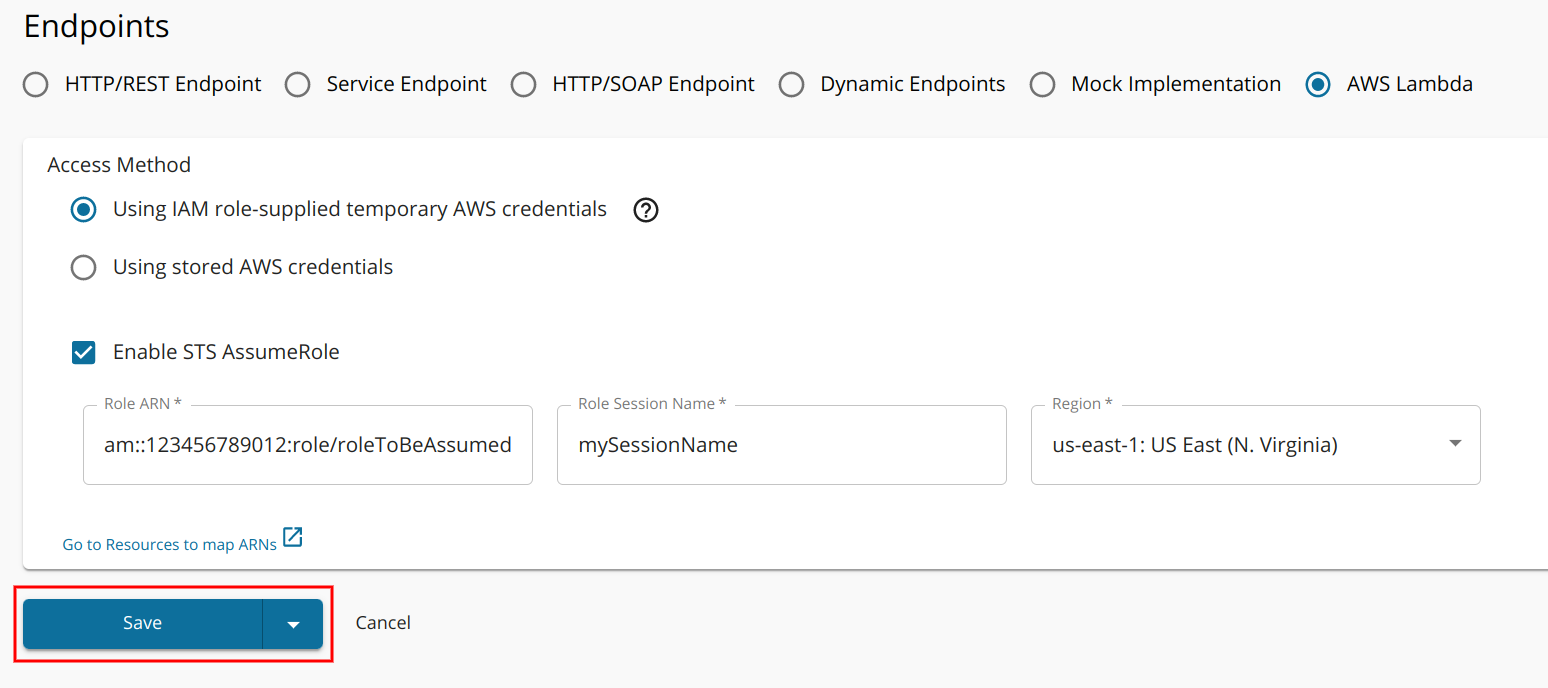
Select the preferred Access Method
AWS SDK needs AWS credentials and AWS region to invoke AWS Lambda functions. The access method defines how you provide those AWS credentials. There are two ways that you can select.
-
Using IAM role-supplied temporary AWS credentials
If API Manager is running on an AWS EC2 or ECS instance, it is recommended to select this method. You need to attach an IAM role with both
AWSLambda_ReadOnlyAccessandAWSLambdaRolepermissions to the insatance so that it can grant permission to applications to list and invoke Lambda functions. For more information on attaching an IAM role to EC2, see Using an IAM Role to Grant Permissions to Applications Running on Amazon EC2 Instances. -
Using stored AWS credentials
If API Manager is not running on an AWS instance, select this method. Note that it is not recommended to enter root credentials of the AWS account. Instead create a separate user account with both
AWSLambda_ReadOnlyAccessandAWSLambdaRolepermissions and enter credentials of that account. For more information see Best practices for managing AWS access keys.
-
-
[Optional] Enable STS AssumeRole
Note
In both options above, Lambda function should belong to the same AWS account. You need to enable STS AssumeRole for cross-account Lambda function invocation.
If your Lambda functions exists on different AWS account, you can use AWS STS AssumeRole feature. For more information see AWS STS AssumeRole. However, you should setup required policies in both accounts to assume a role.
-
For Using IAM role-supplied temporary AWS credentials method, IAM role with
AWS_AssumeRolePolicypermission should be attached to the EC2 instance instead of a role withAWSLambda_ReadOnlyAccessandAWSLambdaRolepermissions. -
Similarly for Using stored AWS credentials method, use credentials of a separate user account with
AWS_AssumeRolePolicyinstead of a user account withAWSLambda_ReadOnlyAccessandAWSLambdaRolepermissions. Also, enter region of AWS STS endpoint for the Region. For more information see Managing AWS STS in an AWS Region.
After that check
Enable STS AssumeRoleand enter required values to configure STS AssumeRole.Field Value Role ARN ARN of the role to be assumed Role Session Name String value to uniquely identify the session Region Region of AWS Lambda functions -
-
Click Save.
Note
You will get an error message if you have not set the Access Method properly.
Step 3 - Map Function ARNs to Resources
Note
For more information on ARNs, see Amazon Resource Names (ARNs).
- Click Resources to navigate to the Resources page.
-
Configure the resources.
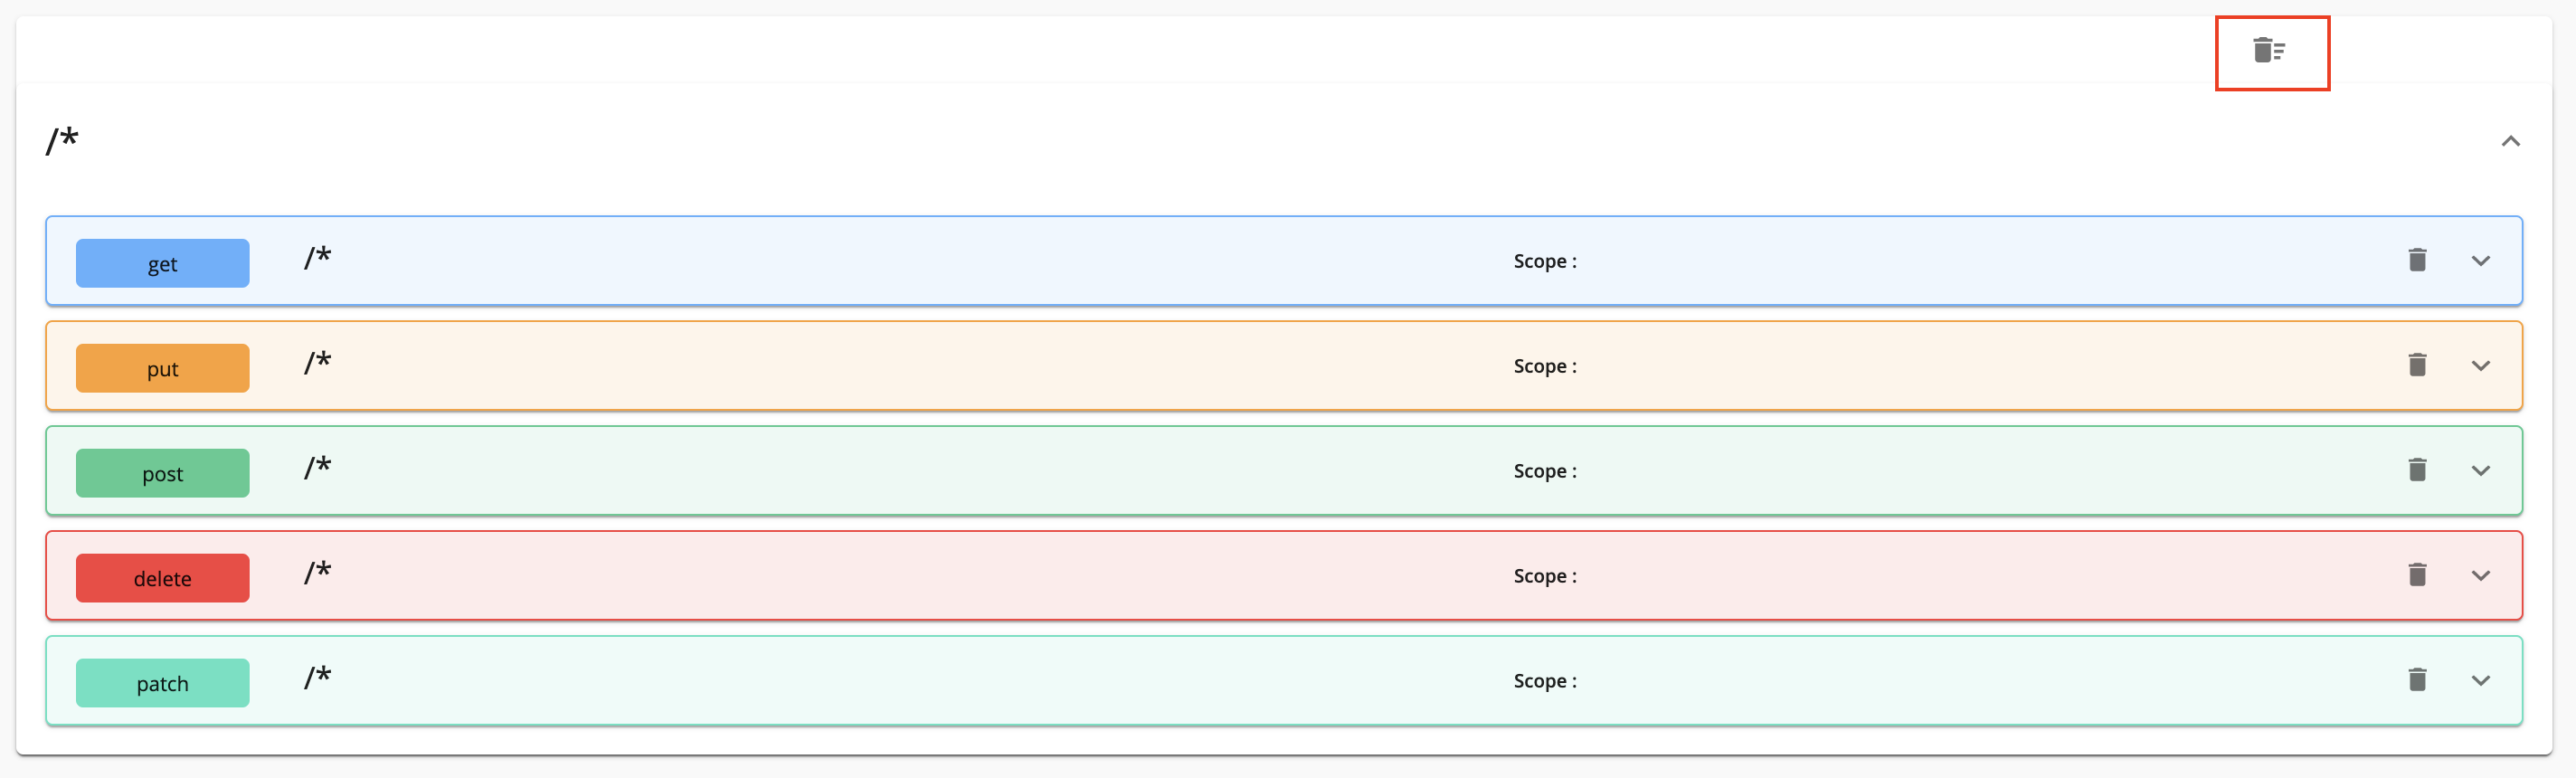
By default, the API will have five resources with
/*as the URL pattern.-
Click delete, as shown below, to remove all the existing resources.
-
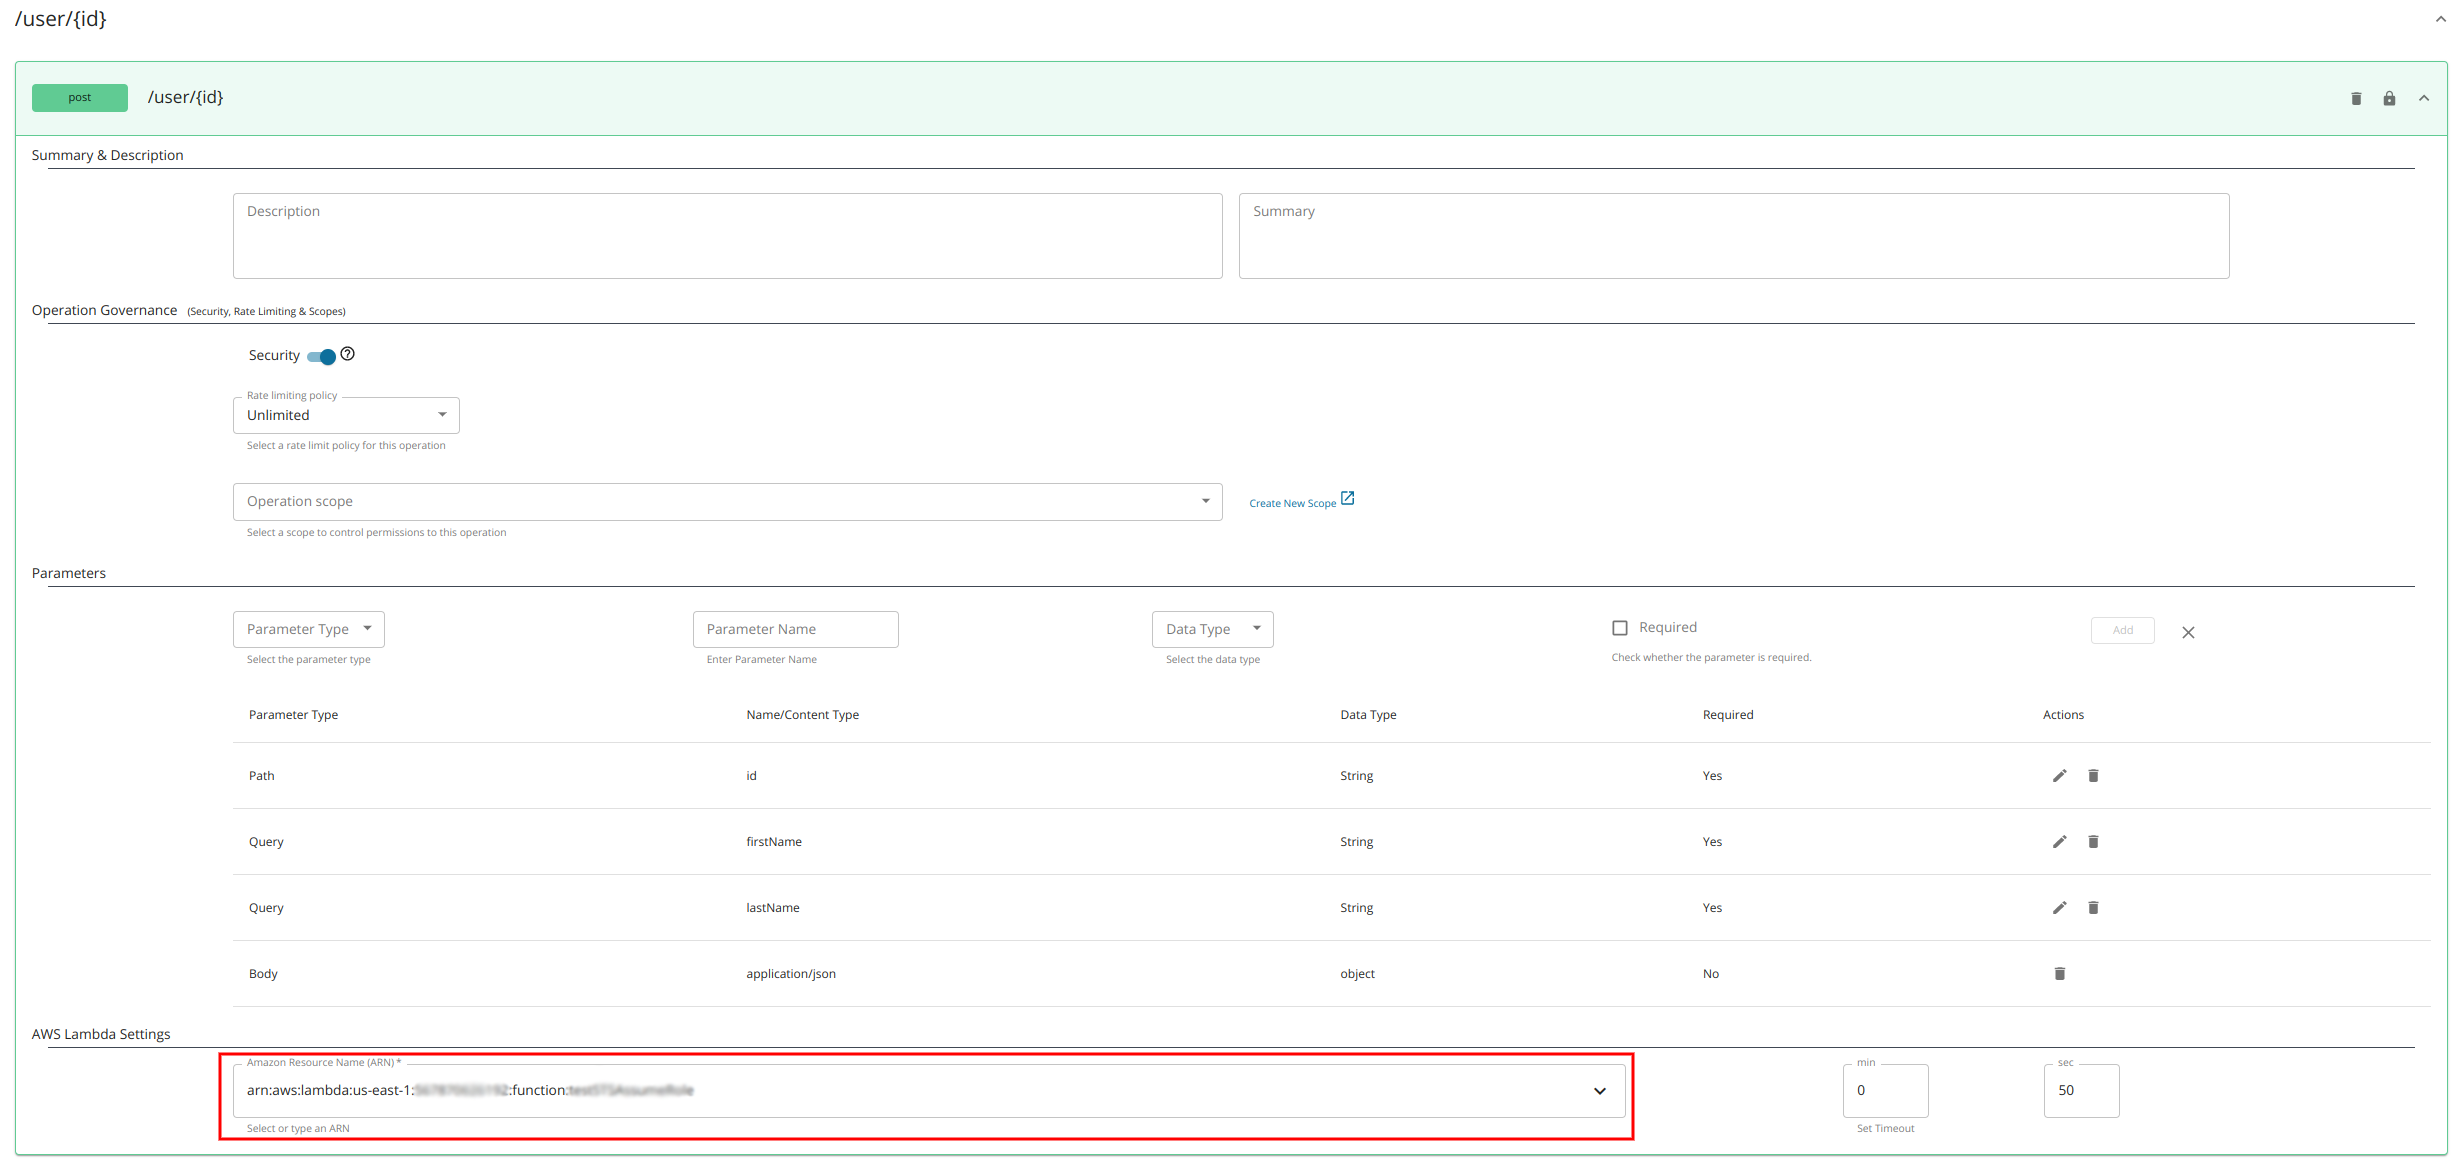
Add a new resource.
- Select a HTTP Verb.
- Enter a meaningful name for URI Pattern (You can add path parameter as well).
- Click (+) to add a new resource.

-
-
Under AWS Lambda Settings, select or type Amazon Resource Name (ARN) for the resource.
-
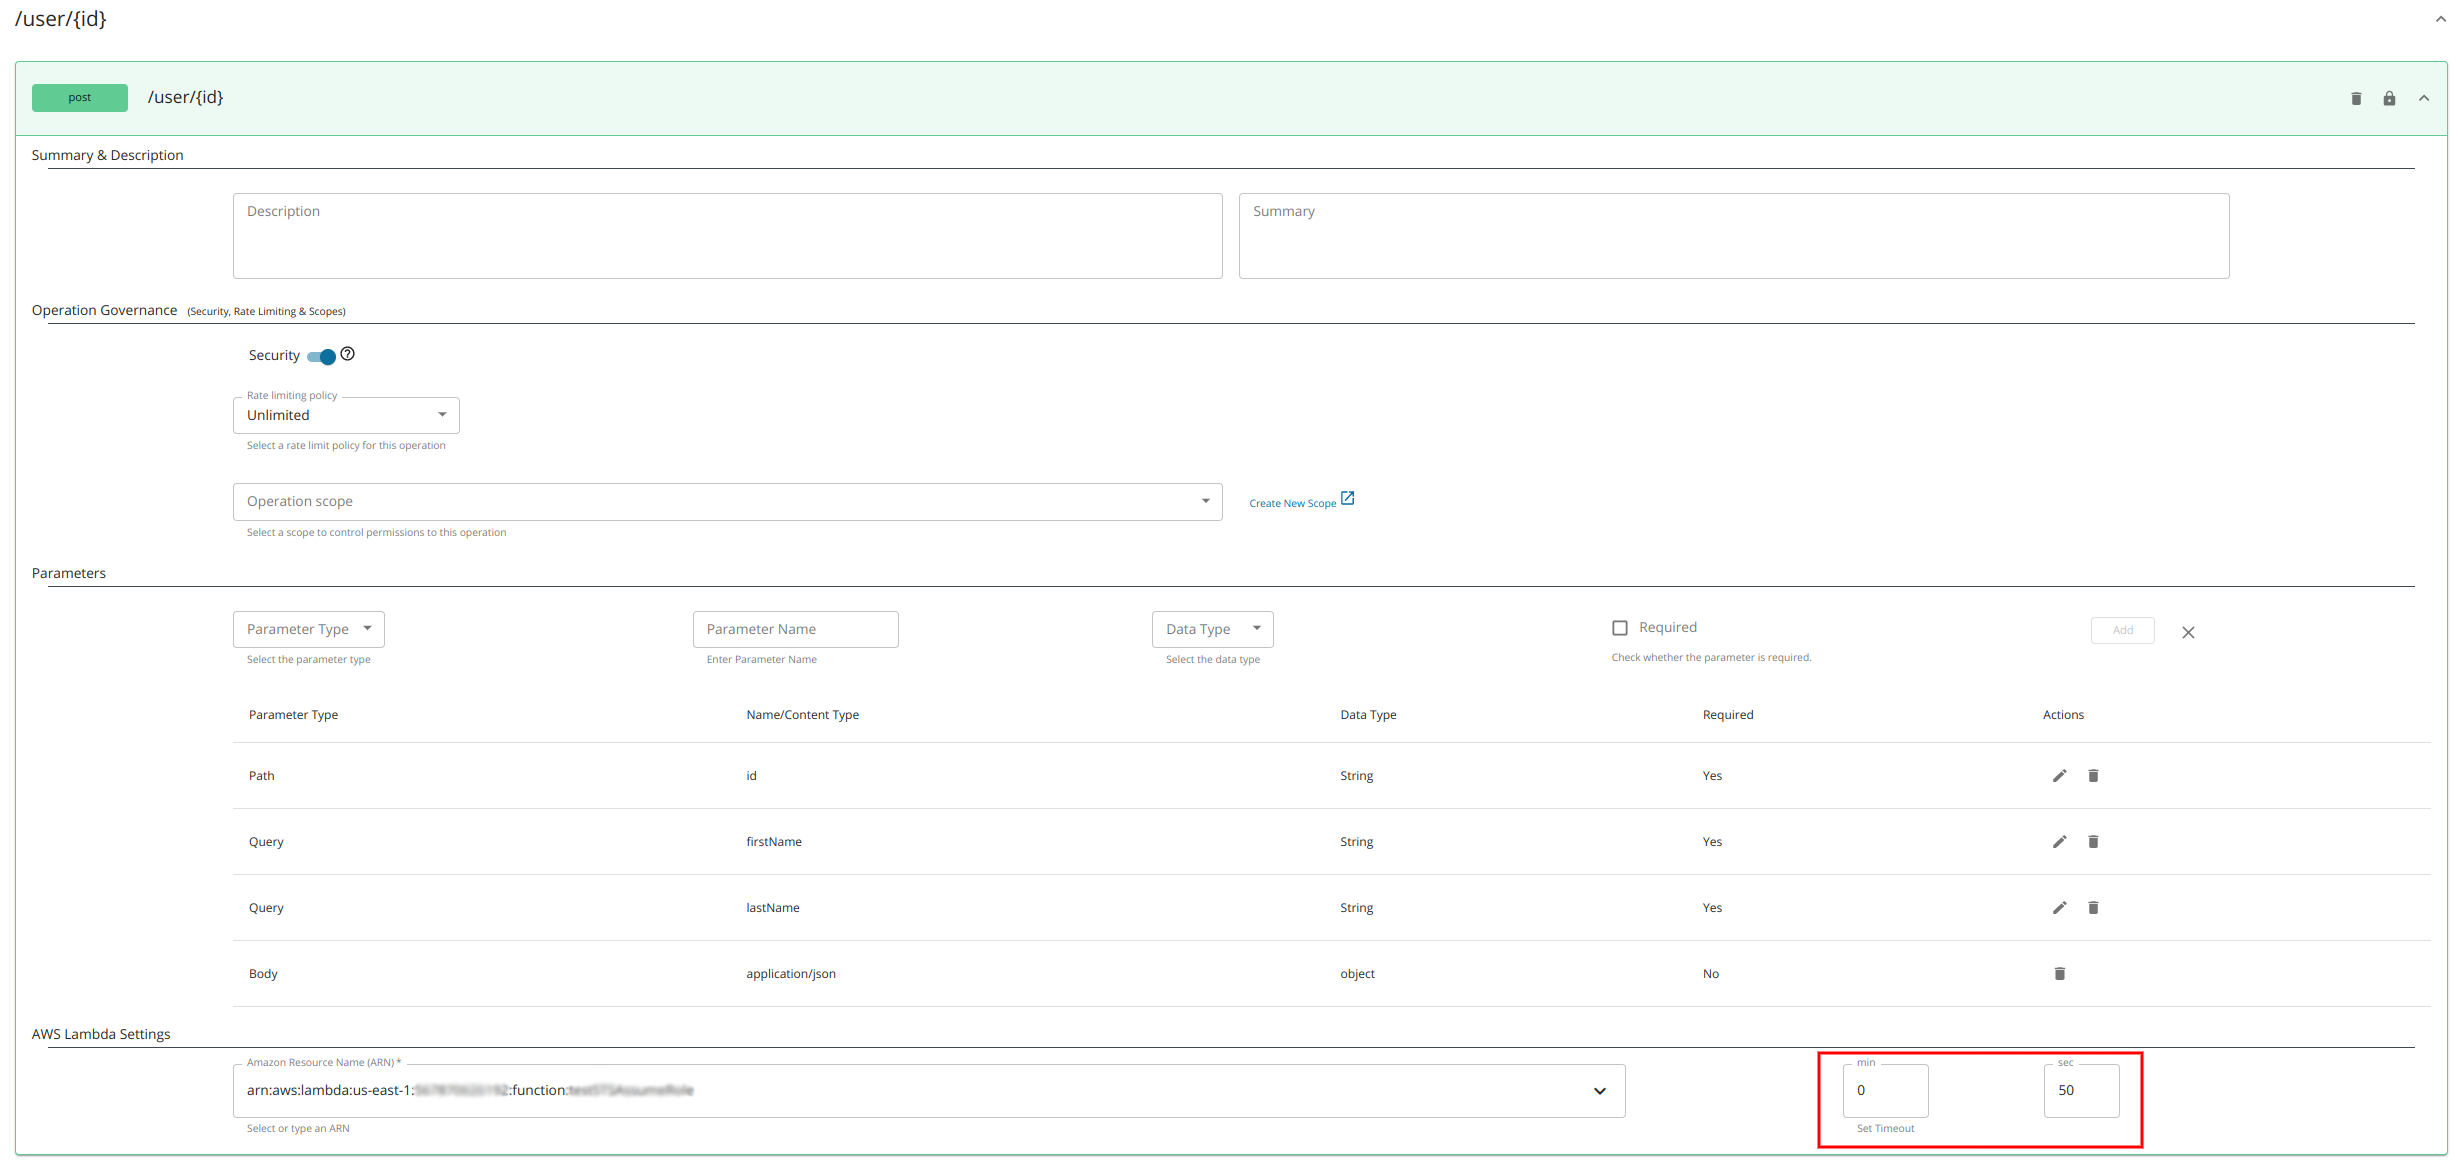
Optionally, change the AWS SDK Client Execution Timeout by changing the Set Timeout option.
The default AWS SDK Client Execution Timeout is 50 seconds.
- Min Timeout - 1 second
- Max Timeout - 15 minutes
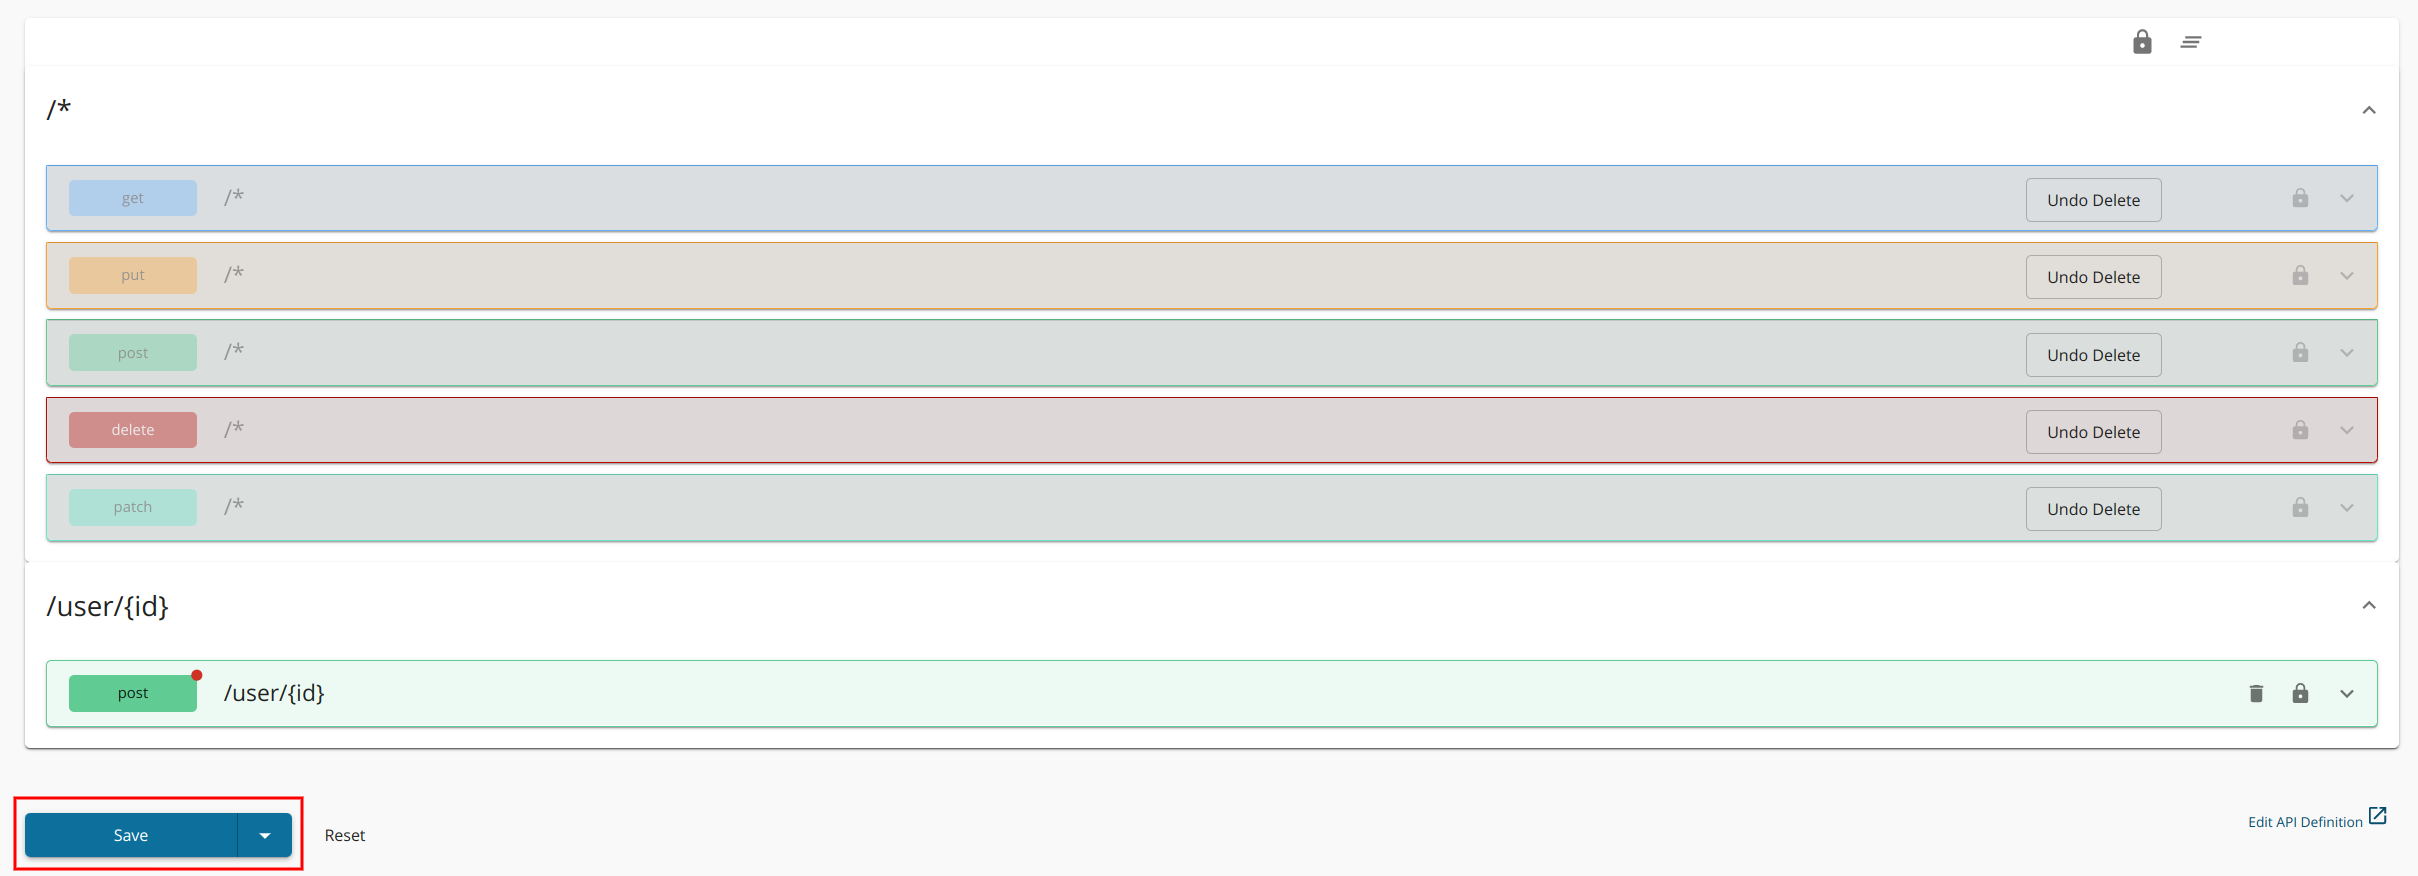
-
Click SAVE.
Note
From version 4.1.0 onwards, WSO2 API Manager supports the Lambda Proxy Integration concept by default. You can pass path parameters, query parameters, and headers along with the payload to the Lambda backend. These properties can be accessed via the event object parameter of the Lambda function. For example refer to following sample event object.
    {
        "headers":{
            "Host":"localhost:8243",
            "Origin":"https://localhost:9443",
            "Referer":"https://localhost:9443/",
        },
        "pathParameters":{
            "id":"7"
        },
        "queryStringParameters":{
            "lastName":"Doe",
            "firstName":"John"
        },
        "httpMethod":"POST",
        "path":"/user/{id}",
        "body":{
            "message":"Hello, World!"
        }
    }
Step 4 - Deploy and Publish the AWS Lambda API
- Go to Deployments page and click on Deploy button to deploy the API to Gateway.
- Go to Lifecycle page and click on PUBLISH to publish the API to Developer Portal.
You have successfully published the AWS Lambda API. Try invoking the Lambda API in the Developer Portal.