Create a Policy
Listed below are two ways of creating a new policy. Depending on whether you need the policy to be accessible only within a specific API or available for all APIs, you can decide on the option you need to follow.
- Creating a Common Policy
- Creating an API Specific Policy
Warning
When creating custom policies, please note that certain mediators cannot be used within these policies as they are not supported by the API Gateway. Specifically, the following mediators are not supported:
Callmediator in non-blocking modeSendmediator
Creating a Common Policy
A common policy is a globally maintained policy and you can easily utilize this policy at the operation level of any desired API. Note that these policies are not bound to any API and they are merely templates that you can easily use. Now let’s see how you can create such a policy. Follow the instructions below to create a new common policy.
-
Sign in to the WSO2 API Publisher.
https://<hostname>:9443/publisher -
Navigate to Policies tab from the left menu and click Add New Policy.
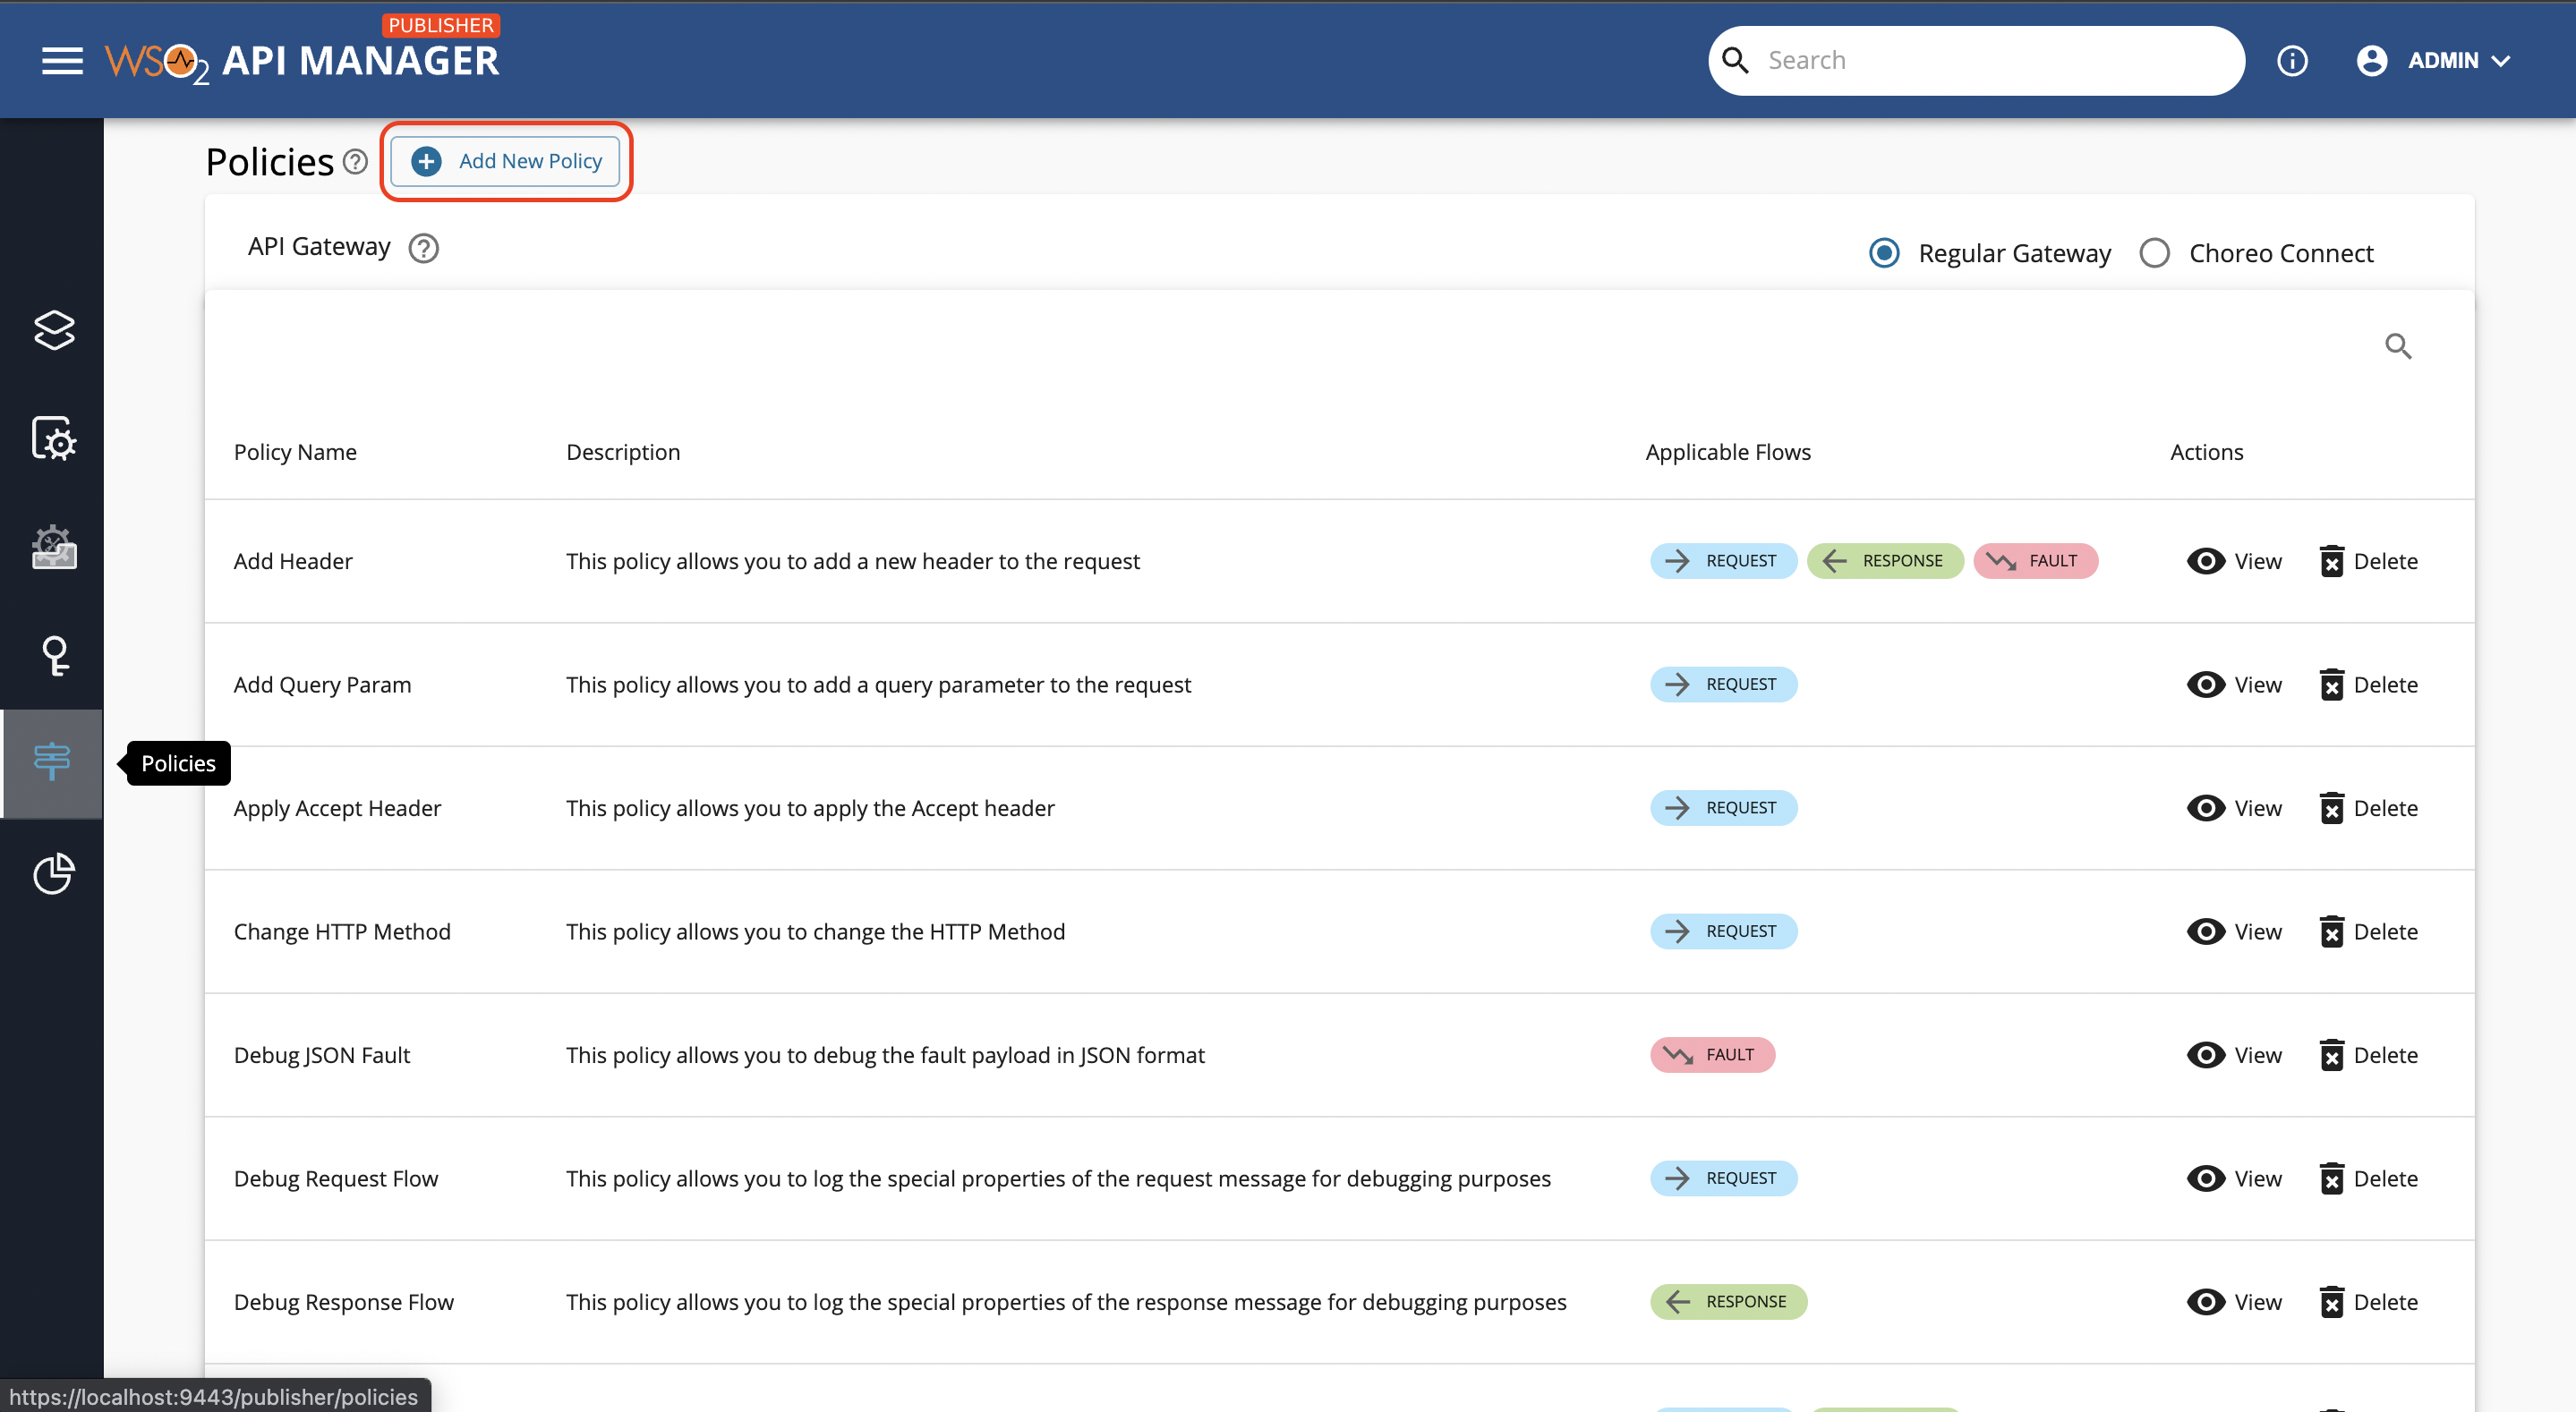
Note
Common policy list will vary depending on the selected
API Gateway. -
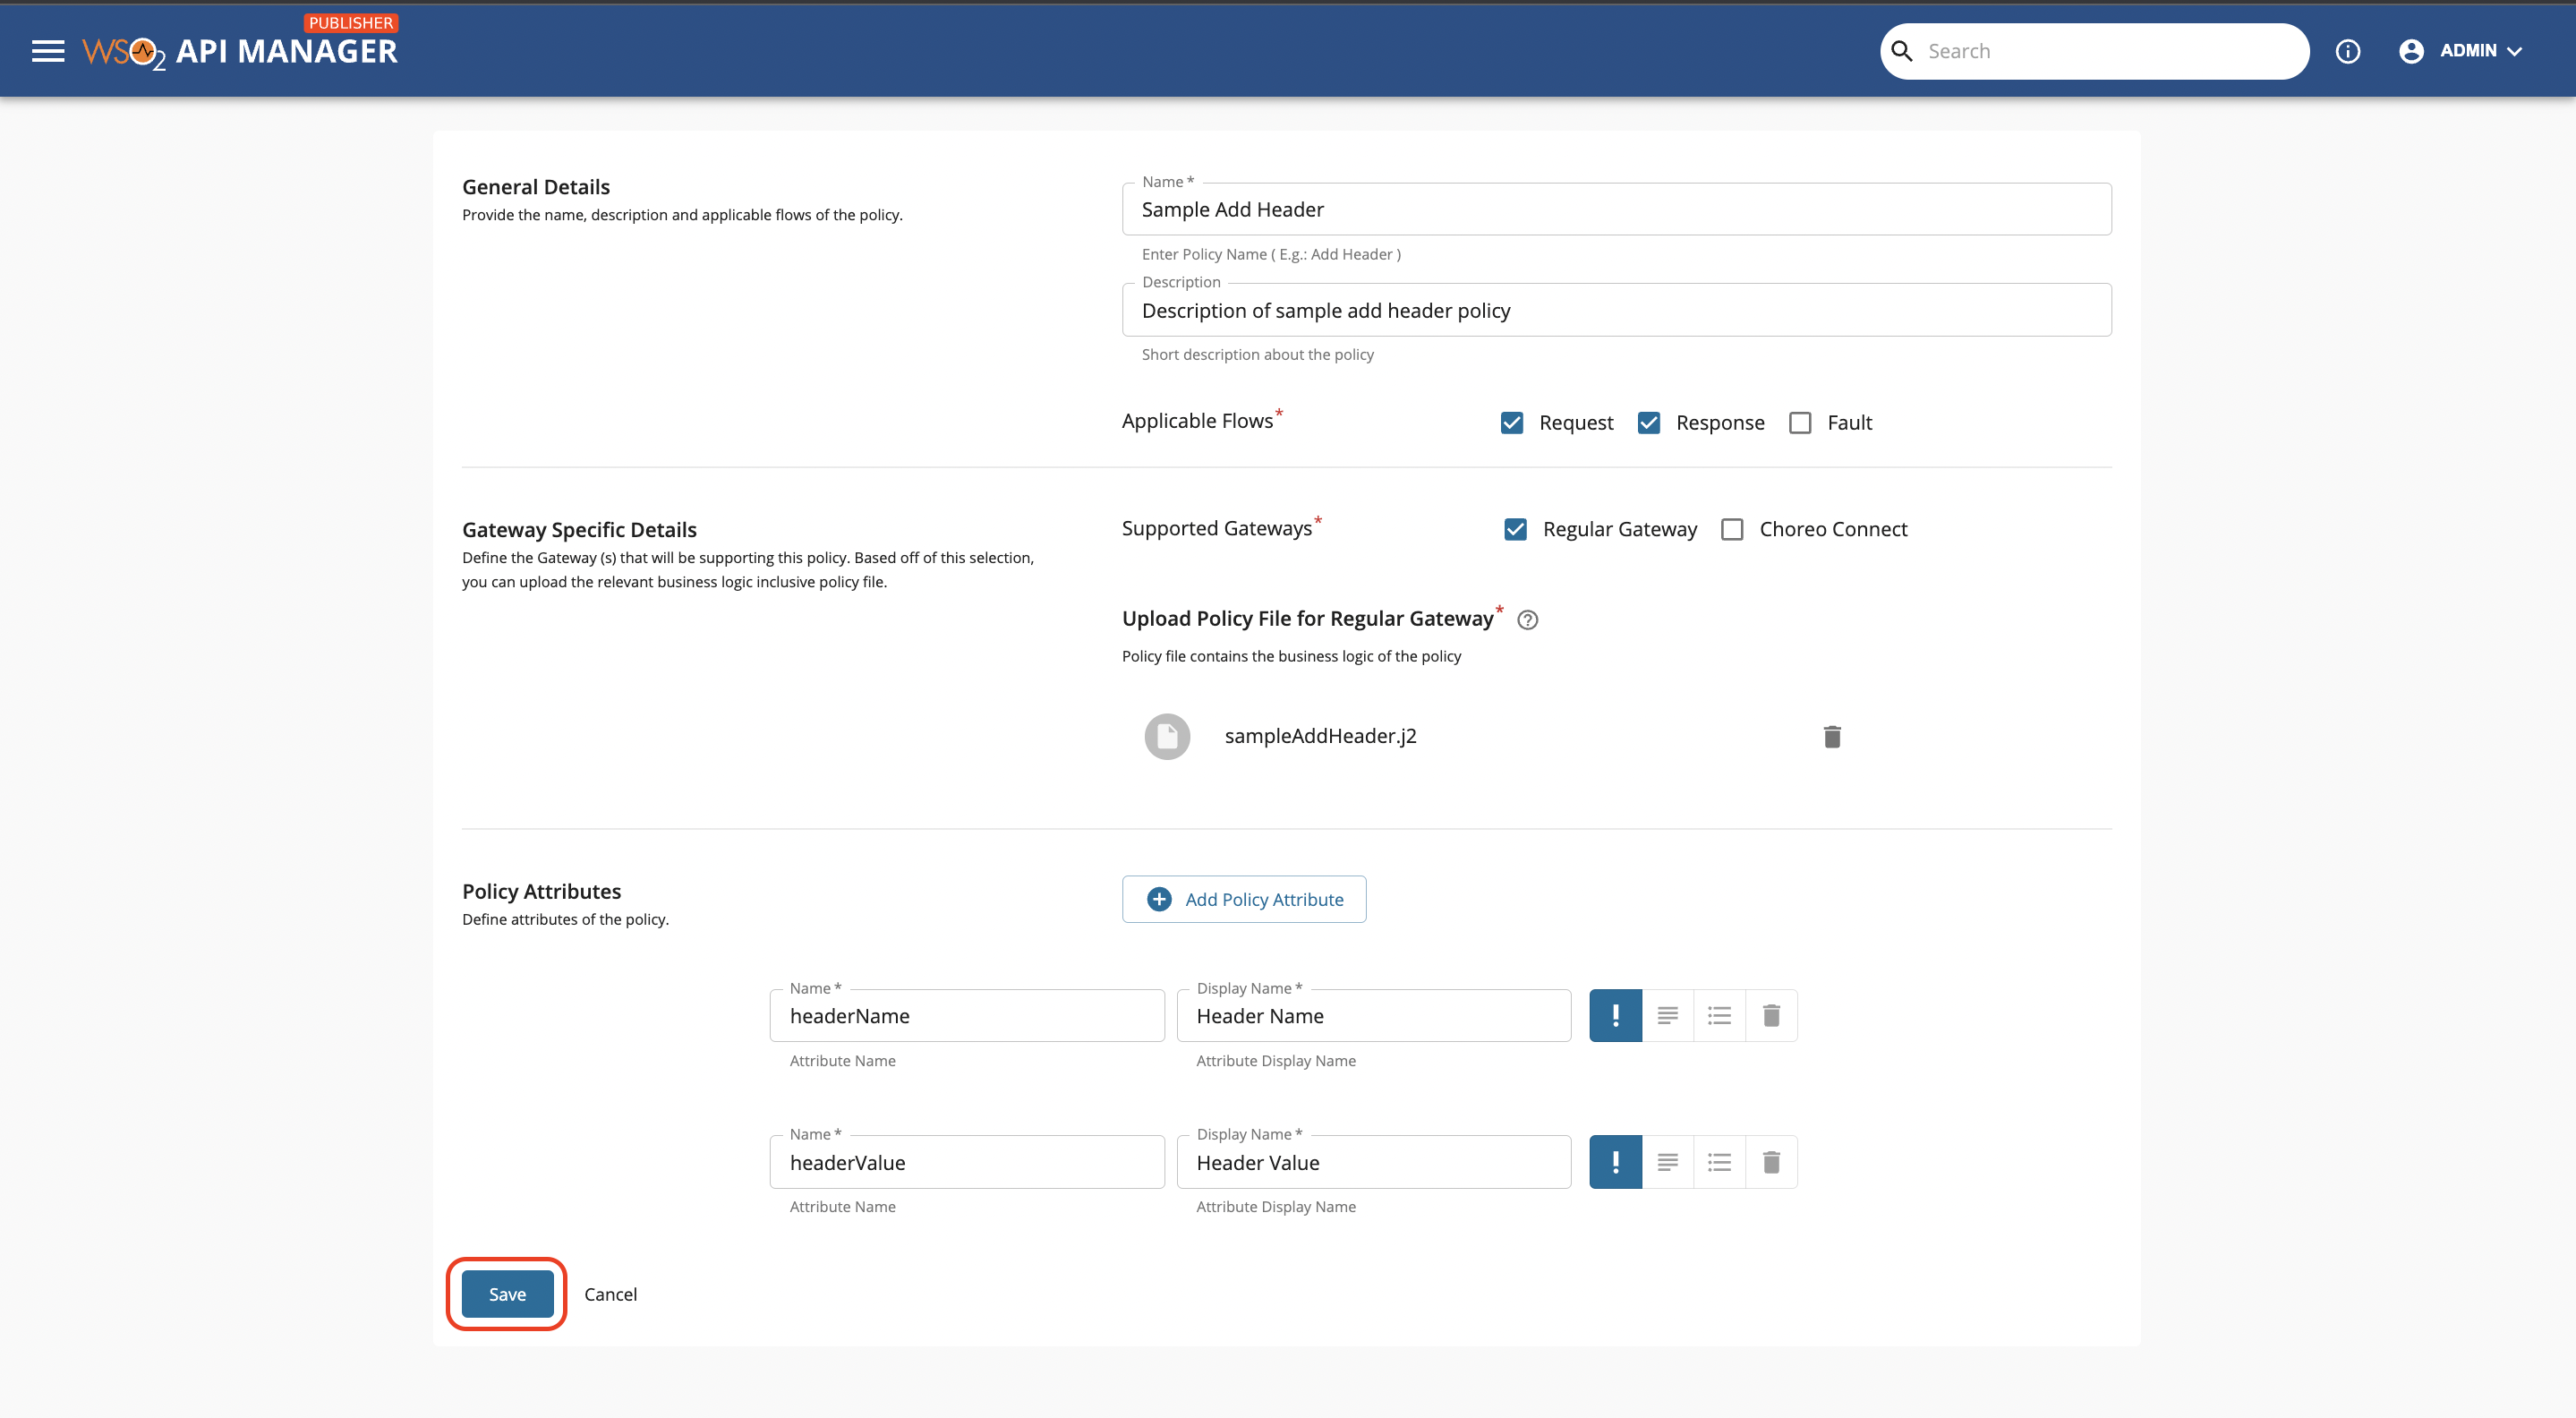
Let’s create a policy named Sample Add Header for demo purposes. First let’s fill the General Details section using the following details.
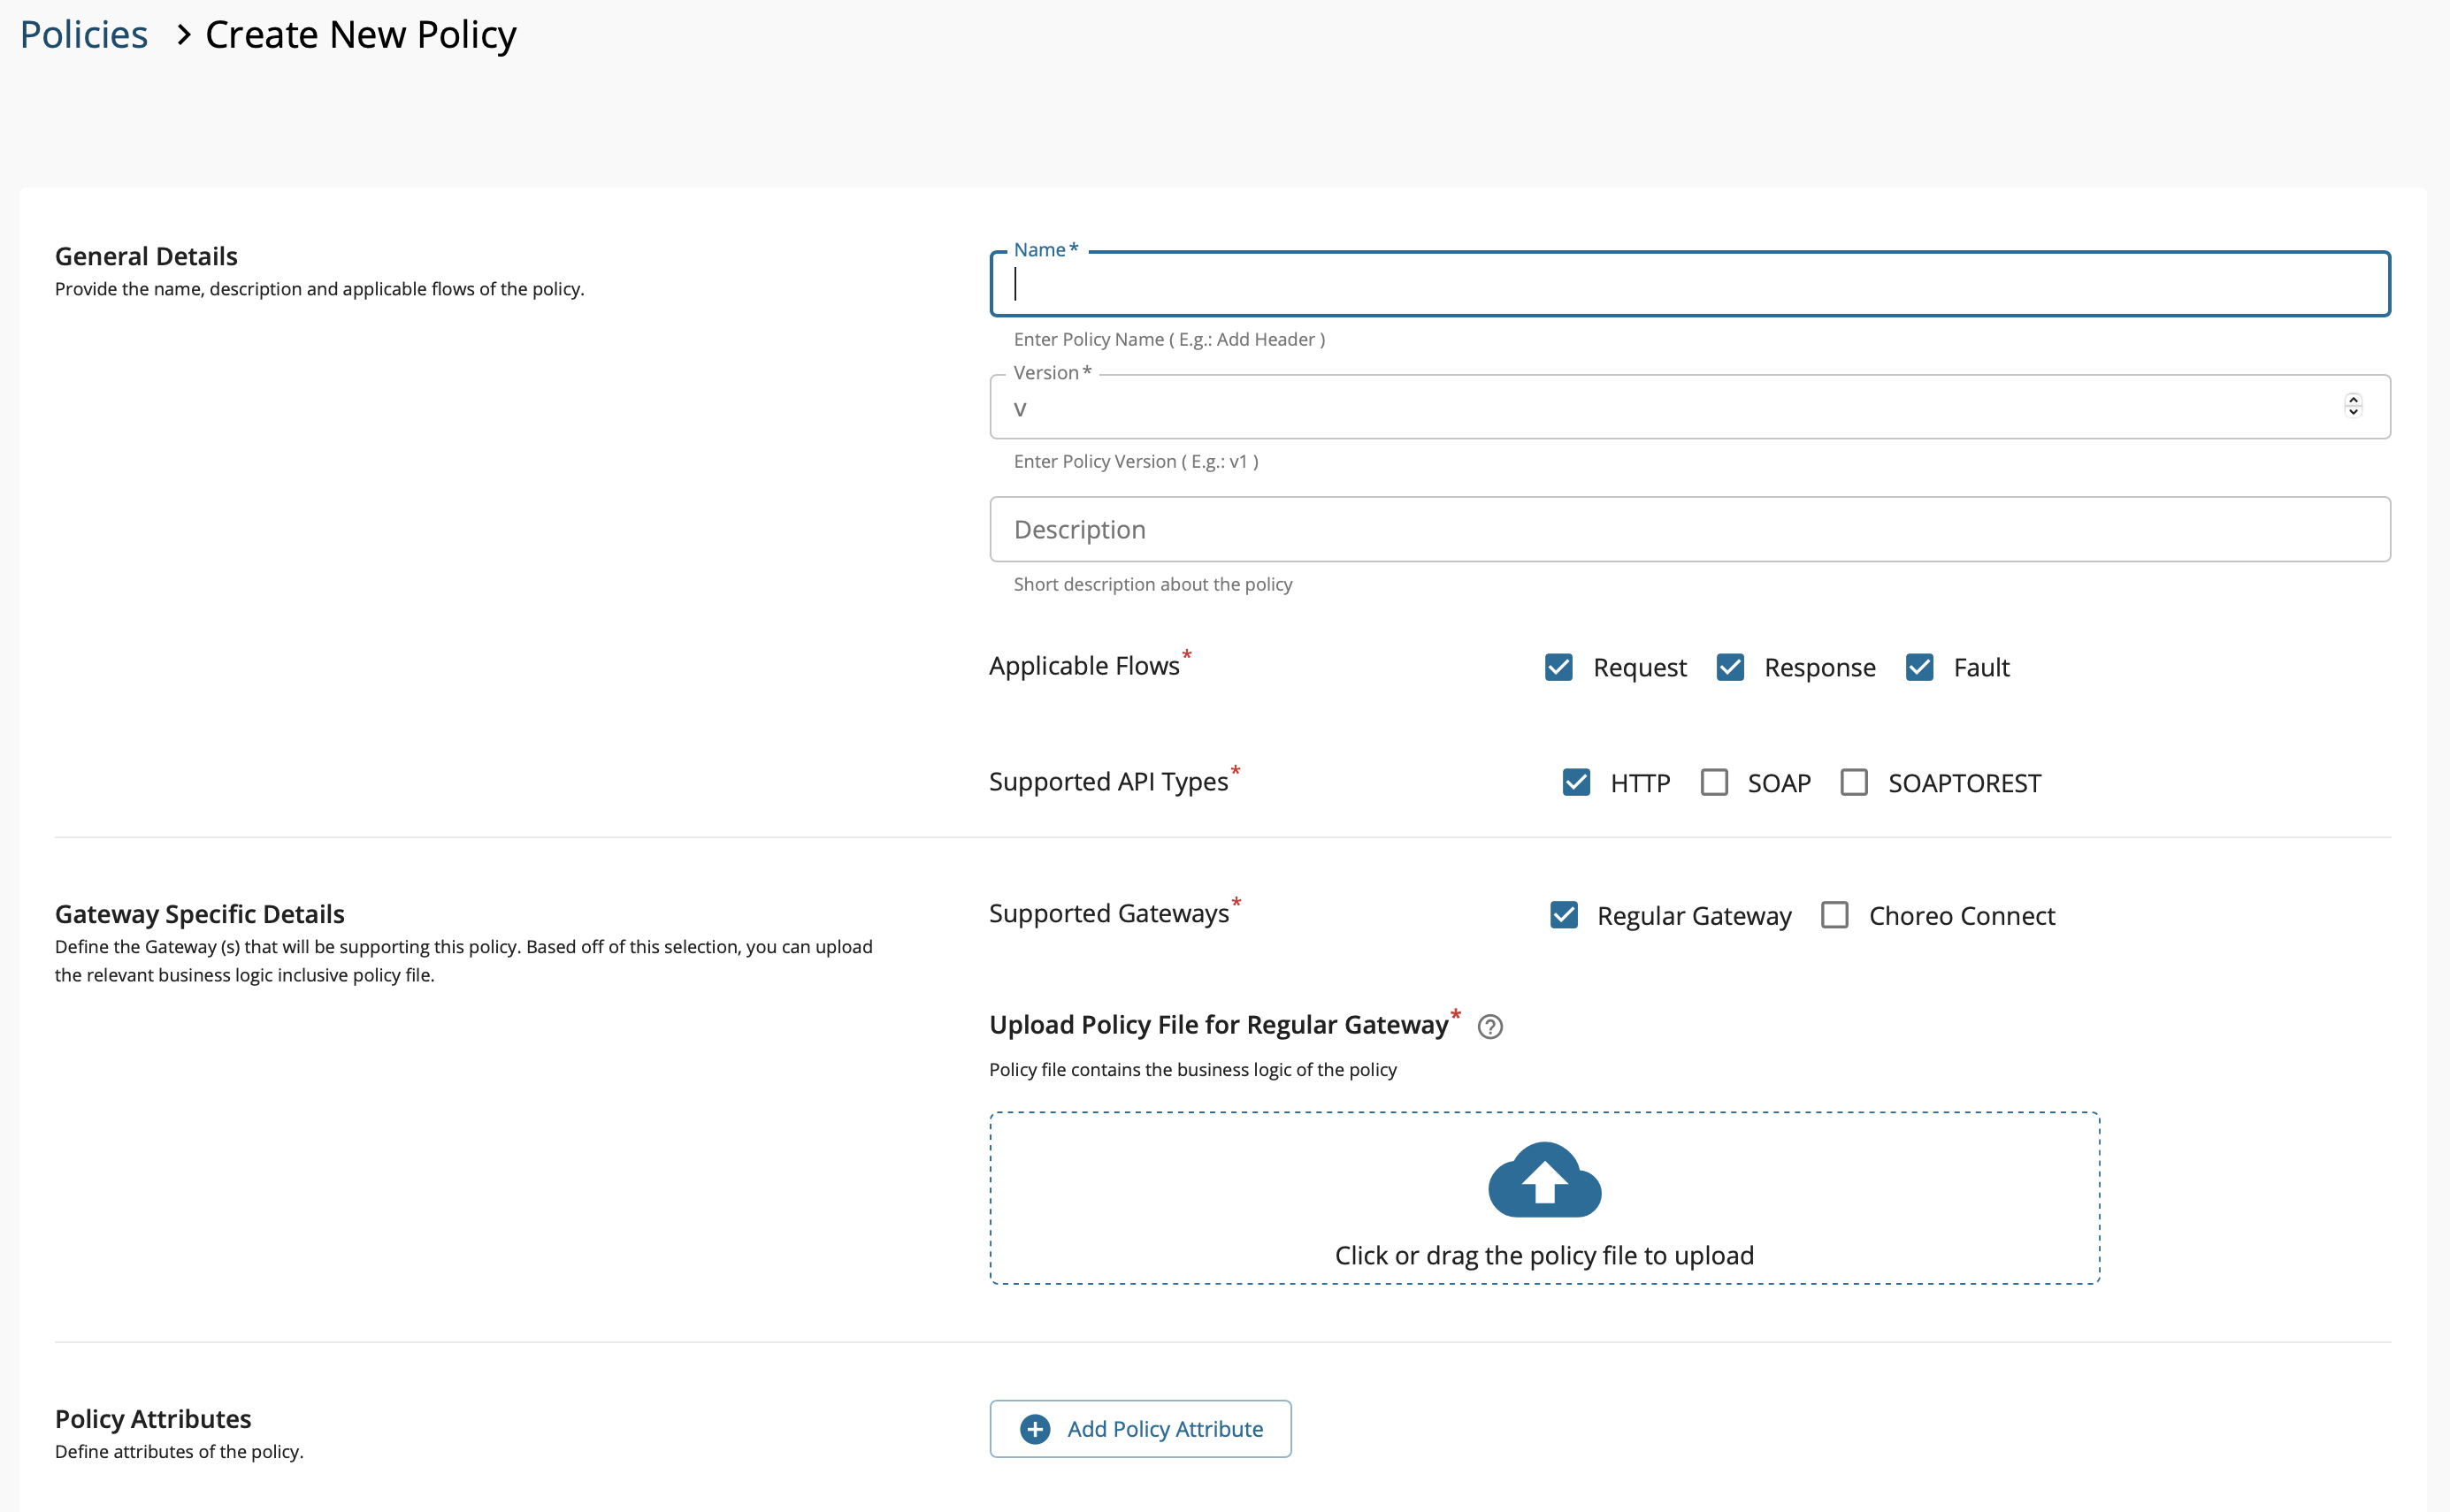
Field Sample Value Name Sample Add Header Description Description of sample add header policy Applicable Flows Request, Response -
Next, we move on to the Gateway Specific Details section. This is where we upload the policy file that contains the business logic of the policy. The sample policy that we are creating here will be for the
Regular Gateway (Synapse Gateway), and hence, the policy should be a.j2or.xmlfile. Use the table provided below to fill this section of the form.Field Sample Value Supported Gateways Regular Gateway Upload Policy File Copy the below content to a file named sampleAddHeader.j2and upload.<property action="set" name="{{headerName}}" value="{{headerValue}}" scope="transport" />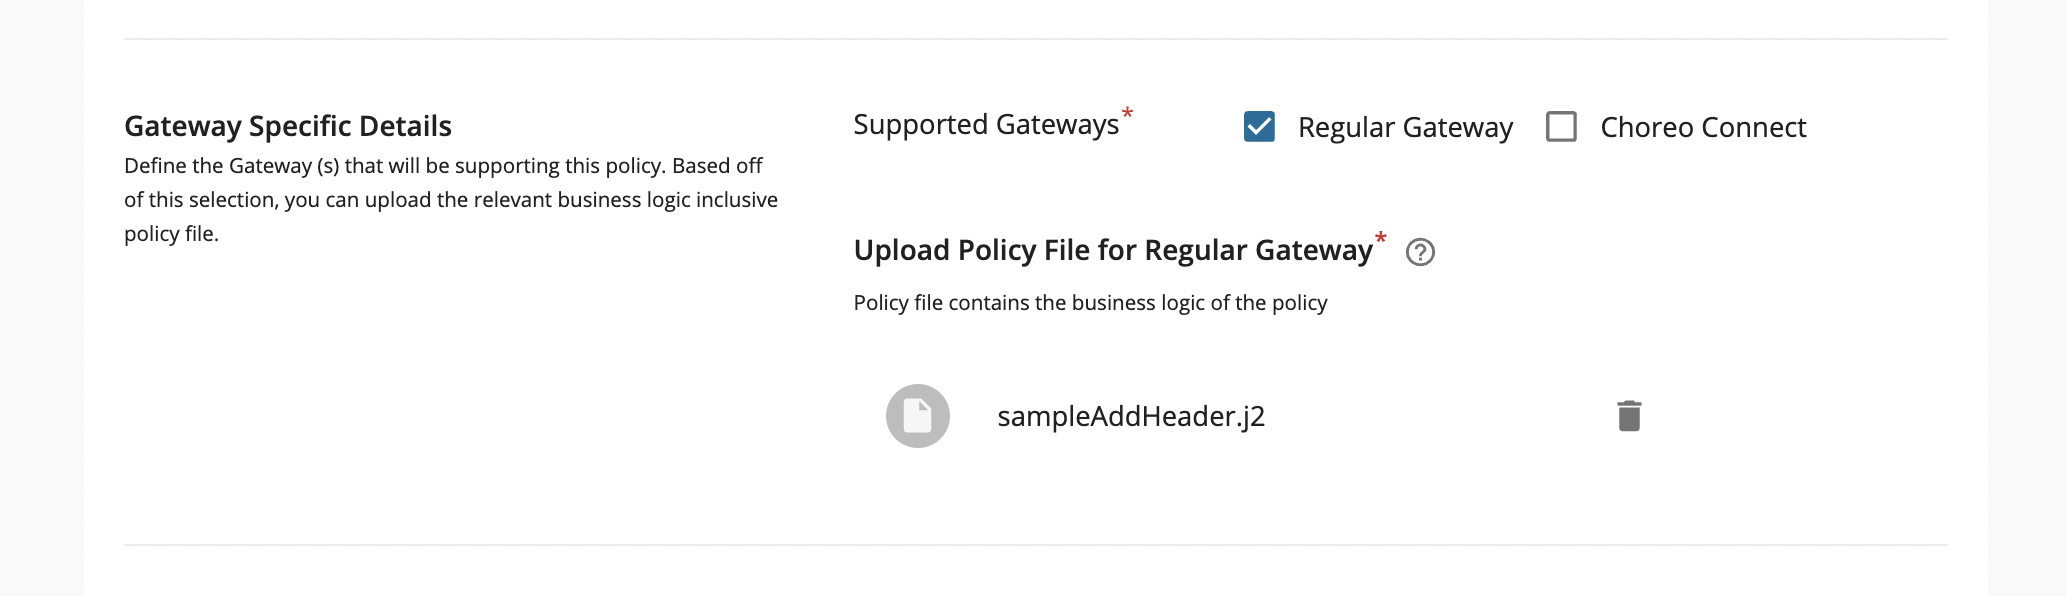
Note
Please note that the policy content should not contain any XML – Prolog components. E.g.,: Should not begin with
<?xml version="1.0" encoding="UTF-8" standalone="yes" ?>. You have to start from a root element or child elements.Note
Please note that JS scripts can be used inside the custom policy code to access Java classes, methods, and native objects. By default, all the classes are visible to these scripts. However, it is recommended to restrict access to these by adding the following configuration to the
deployment.tomlfile:[synapse_properties] 'limit_java_class_access_in_scripts.enable' = true # or false 'limit_java_class_access_in_scripts.list_type' = "ALLOW_LIST" # or BLOCK_LIST 'limit_java_class_access_in_scripts.class_prefixes' = "java.util"To further configure script mediation access control, please refer to the Restrict Access to Java classes and Java Methods/Native Objects in Scripts documentation.
-
The final section in the form is the Policy Attributes section. These attributes are derived from the policy file that you uploaded in the previous step. If you observe the policy content you should notice two dynamic values embedded into that policy, namely the headerName and headerValue. Those are the attributes that we should include when creating our policy (note that you can have a static policy with no attributes if the policy content is static). Let’s fill the Policy Attributes section using the following details.
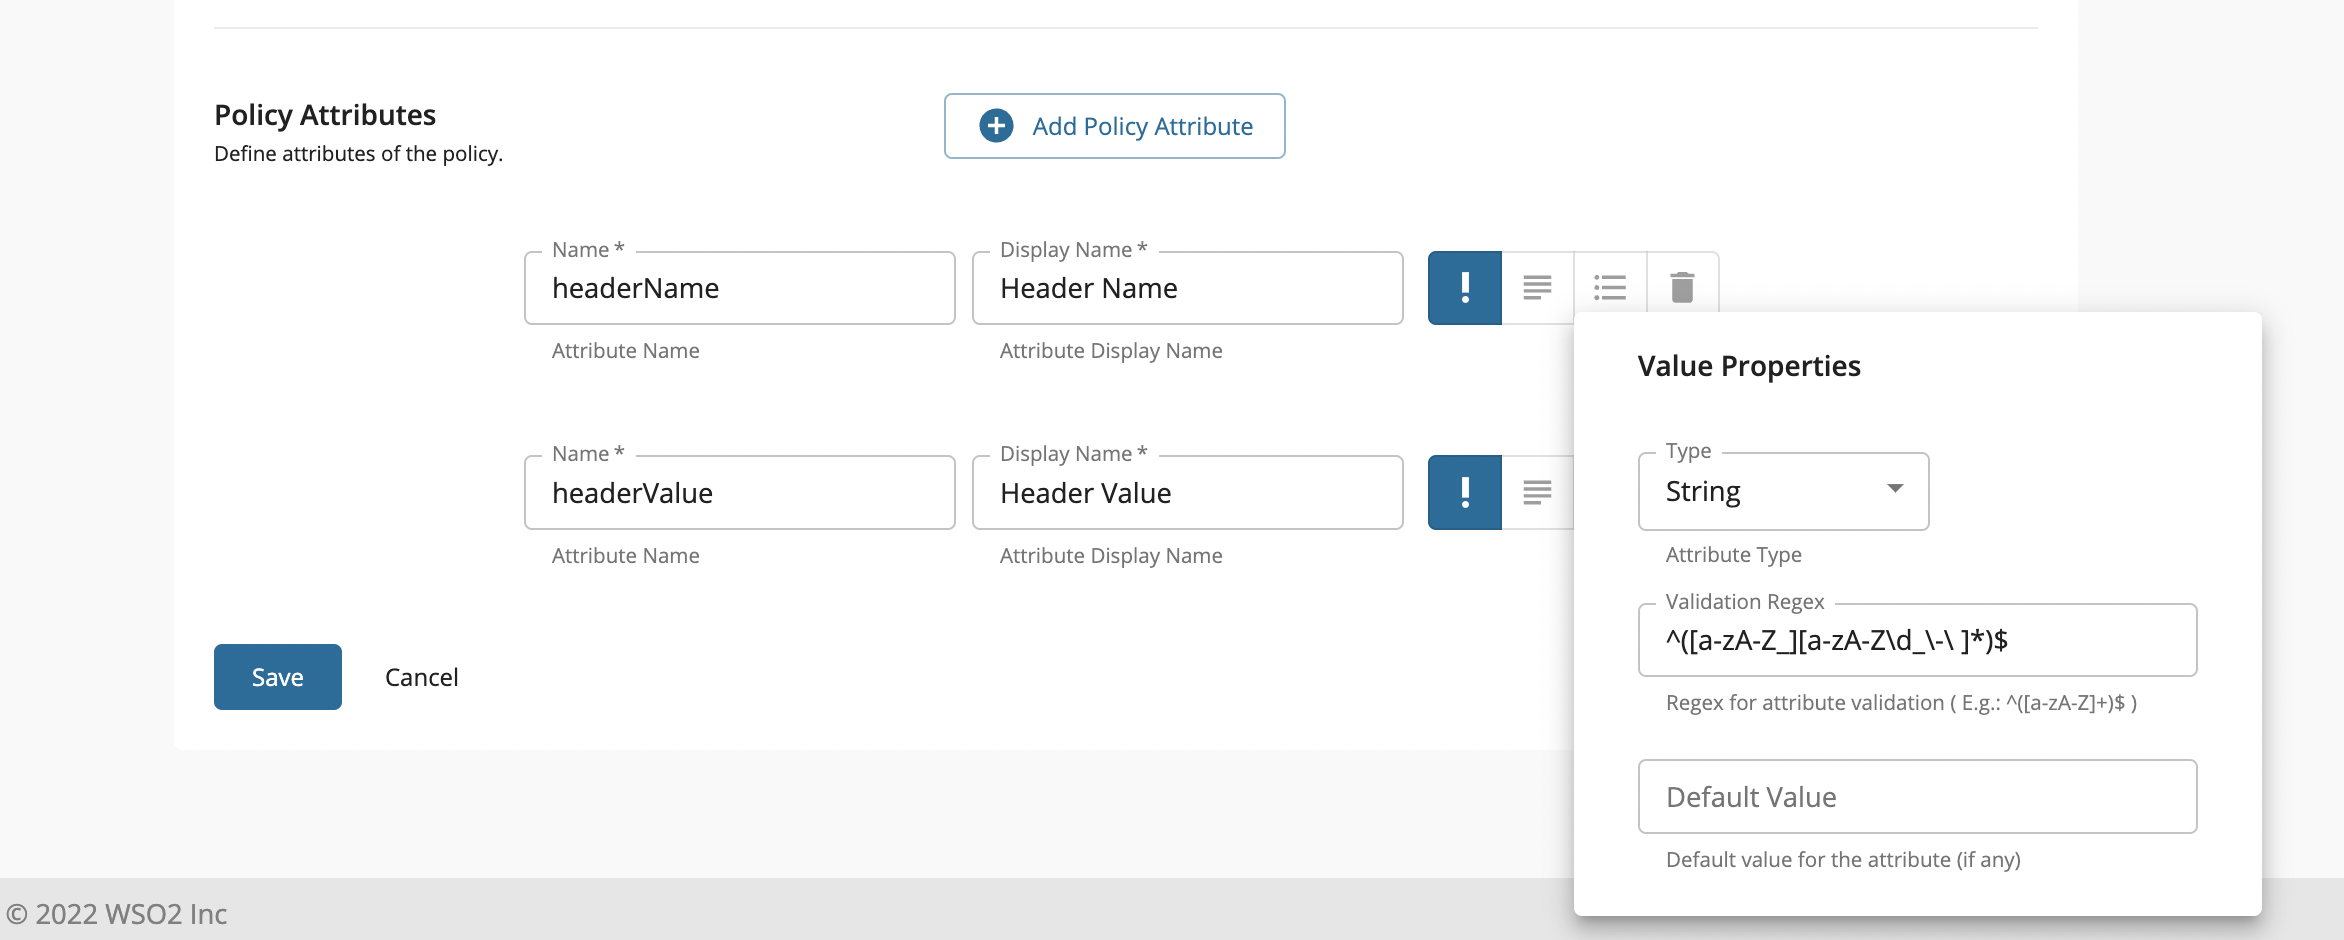
Attribute 1
Field Sample Value Name headerName Display Name Header Name Required True Description Name of the header to be added Type String Validation Regex ^([a-zA-Z_][a-zA-Z\d_\-\ ]*)$ Default Value Leave this blank Attribute 2
Field Sample Value Name headerValue Display Name Header Value Required True Description Value of the header Type String Validation Regex ^([a-zA-Z\d_][a-zA-Z\d_\-\ ]*)$ Default Value Leave this blank -
Once that is done, the completed form should look like the below screenshot. We can now click on Save.
-
Now the newly created policy will appear in the table. You can go ahead and search for this policy to verify.
-
Try viewing this policy by clicking on View action. Note that you can download the policy as a
.zipfile using the Download Policy button.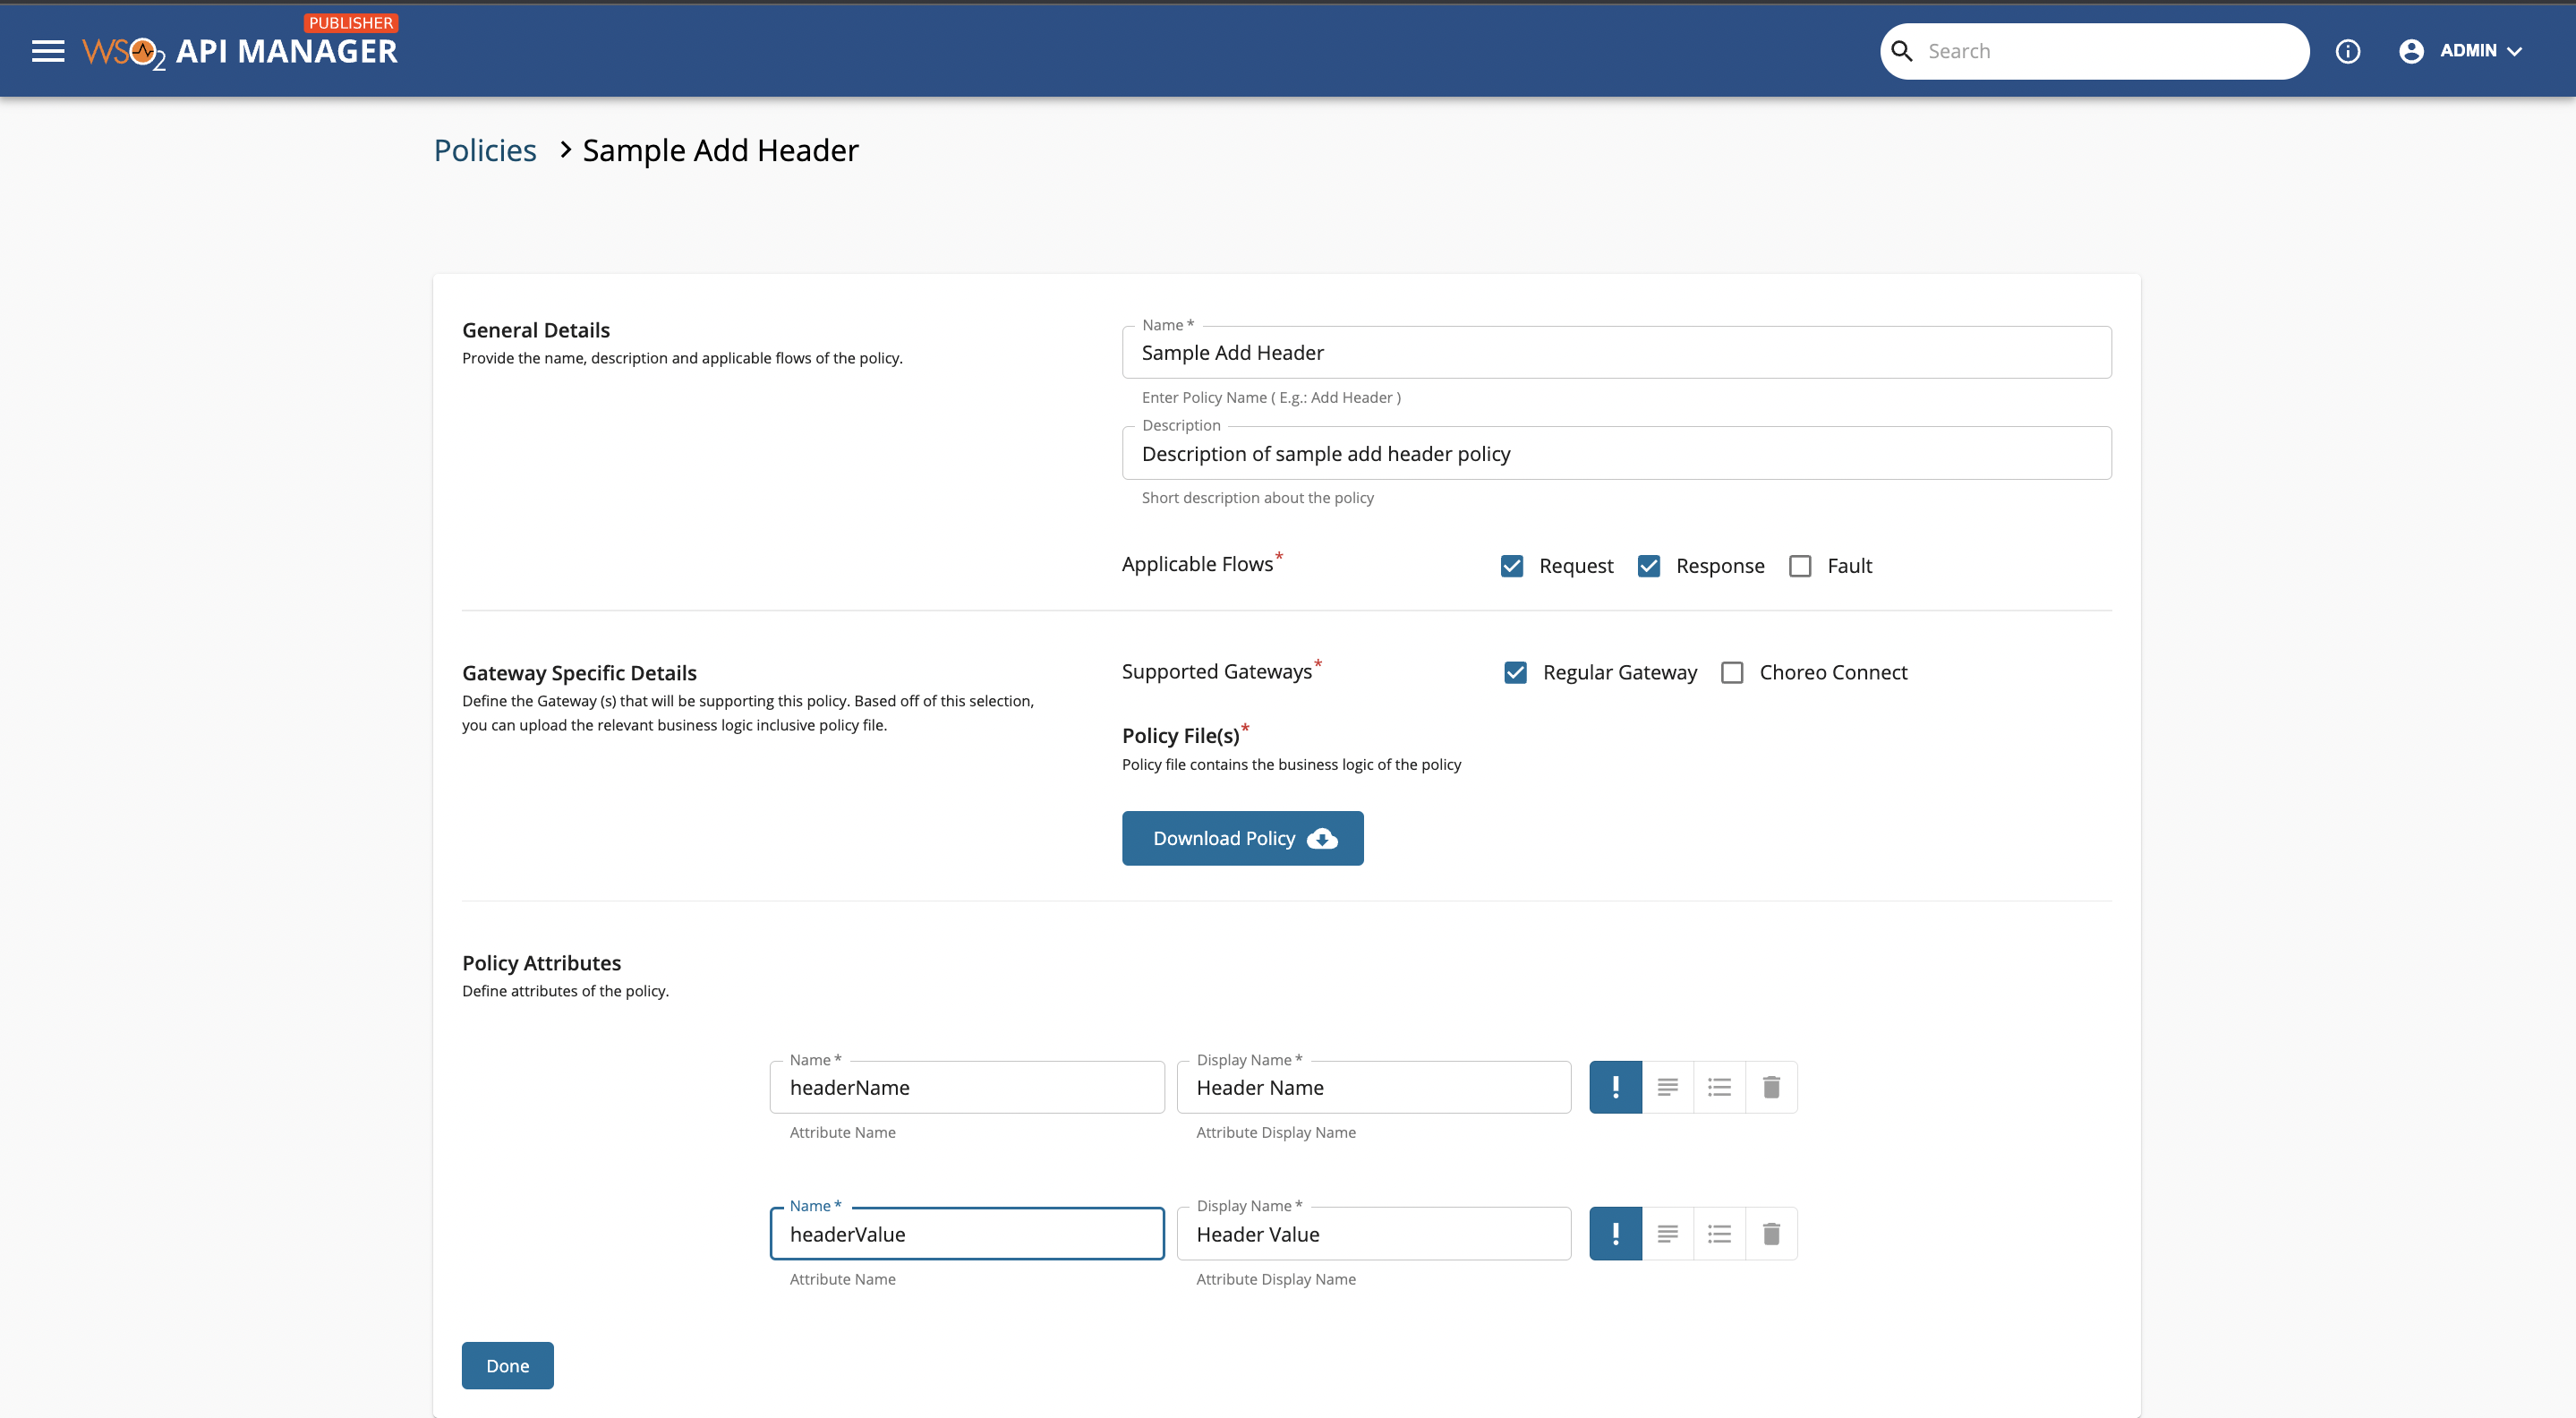
Creating an API Specific Policy
If you would rather create a policy that is local to the API, you can follow the below provided steps to create such a policy.
-
Sign in to the WSO2 API Publisher.
https://<hostname>:9443/publisher -
Click on any API (e.g.,
PizzaShackAPI 1.0.0) and navigate to the Policies tab. You will see a screen like below. Click on the Add New Policy button in order to create an API specific policy.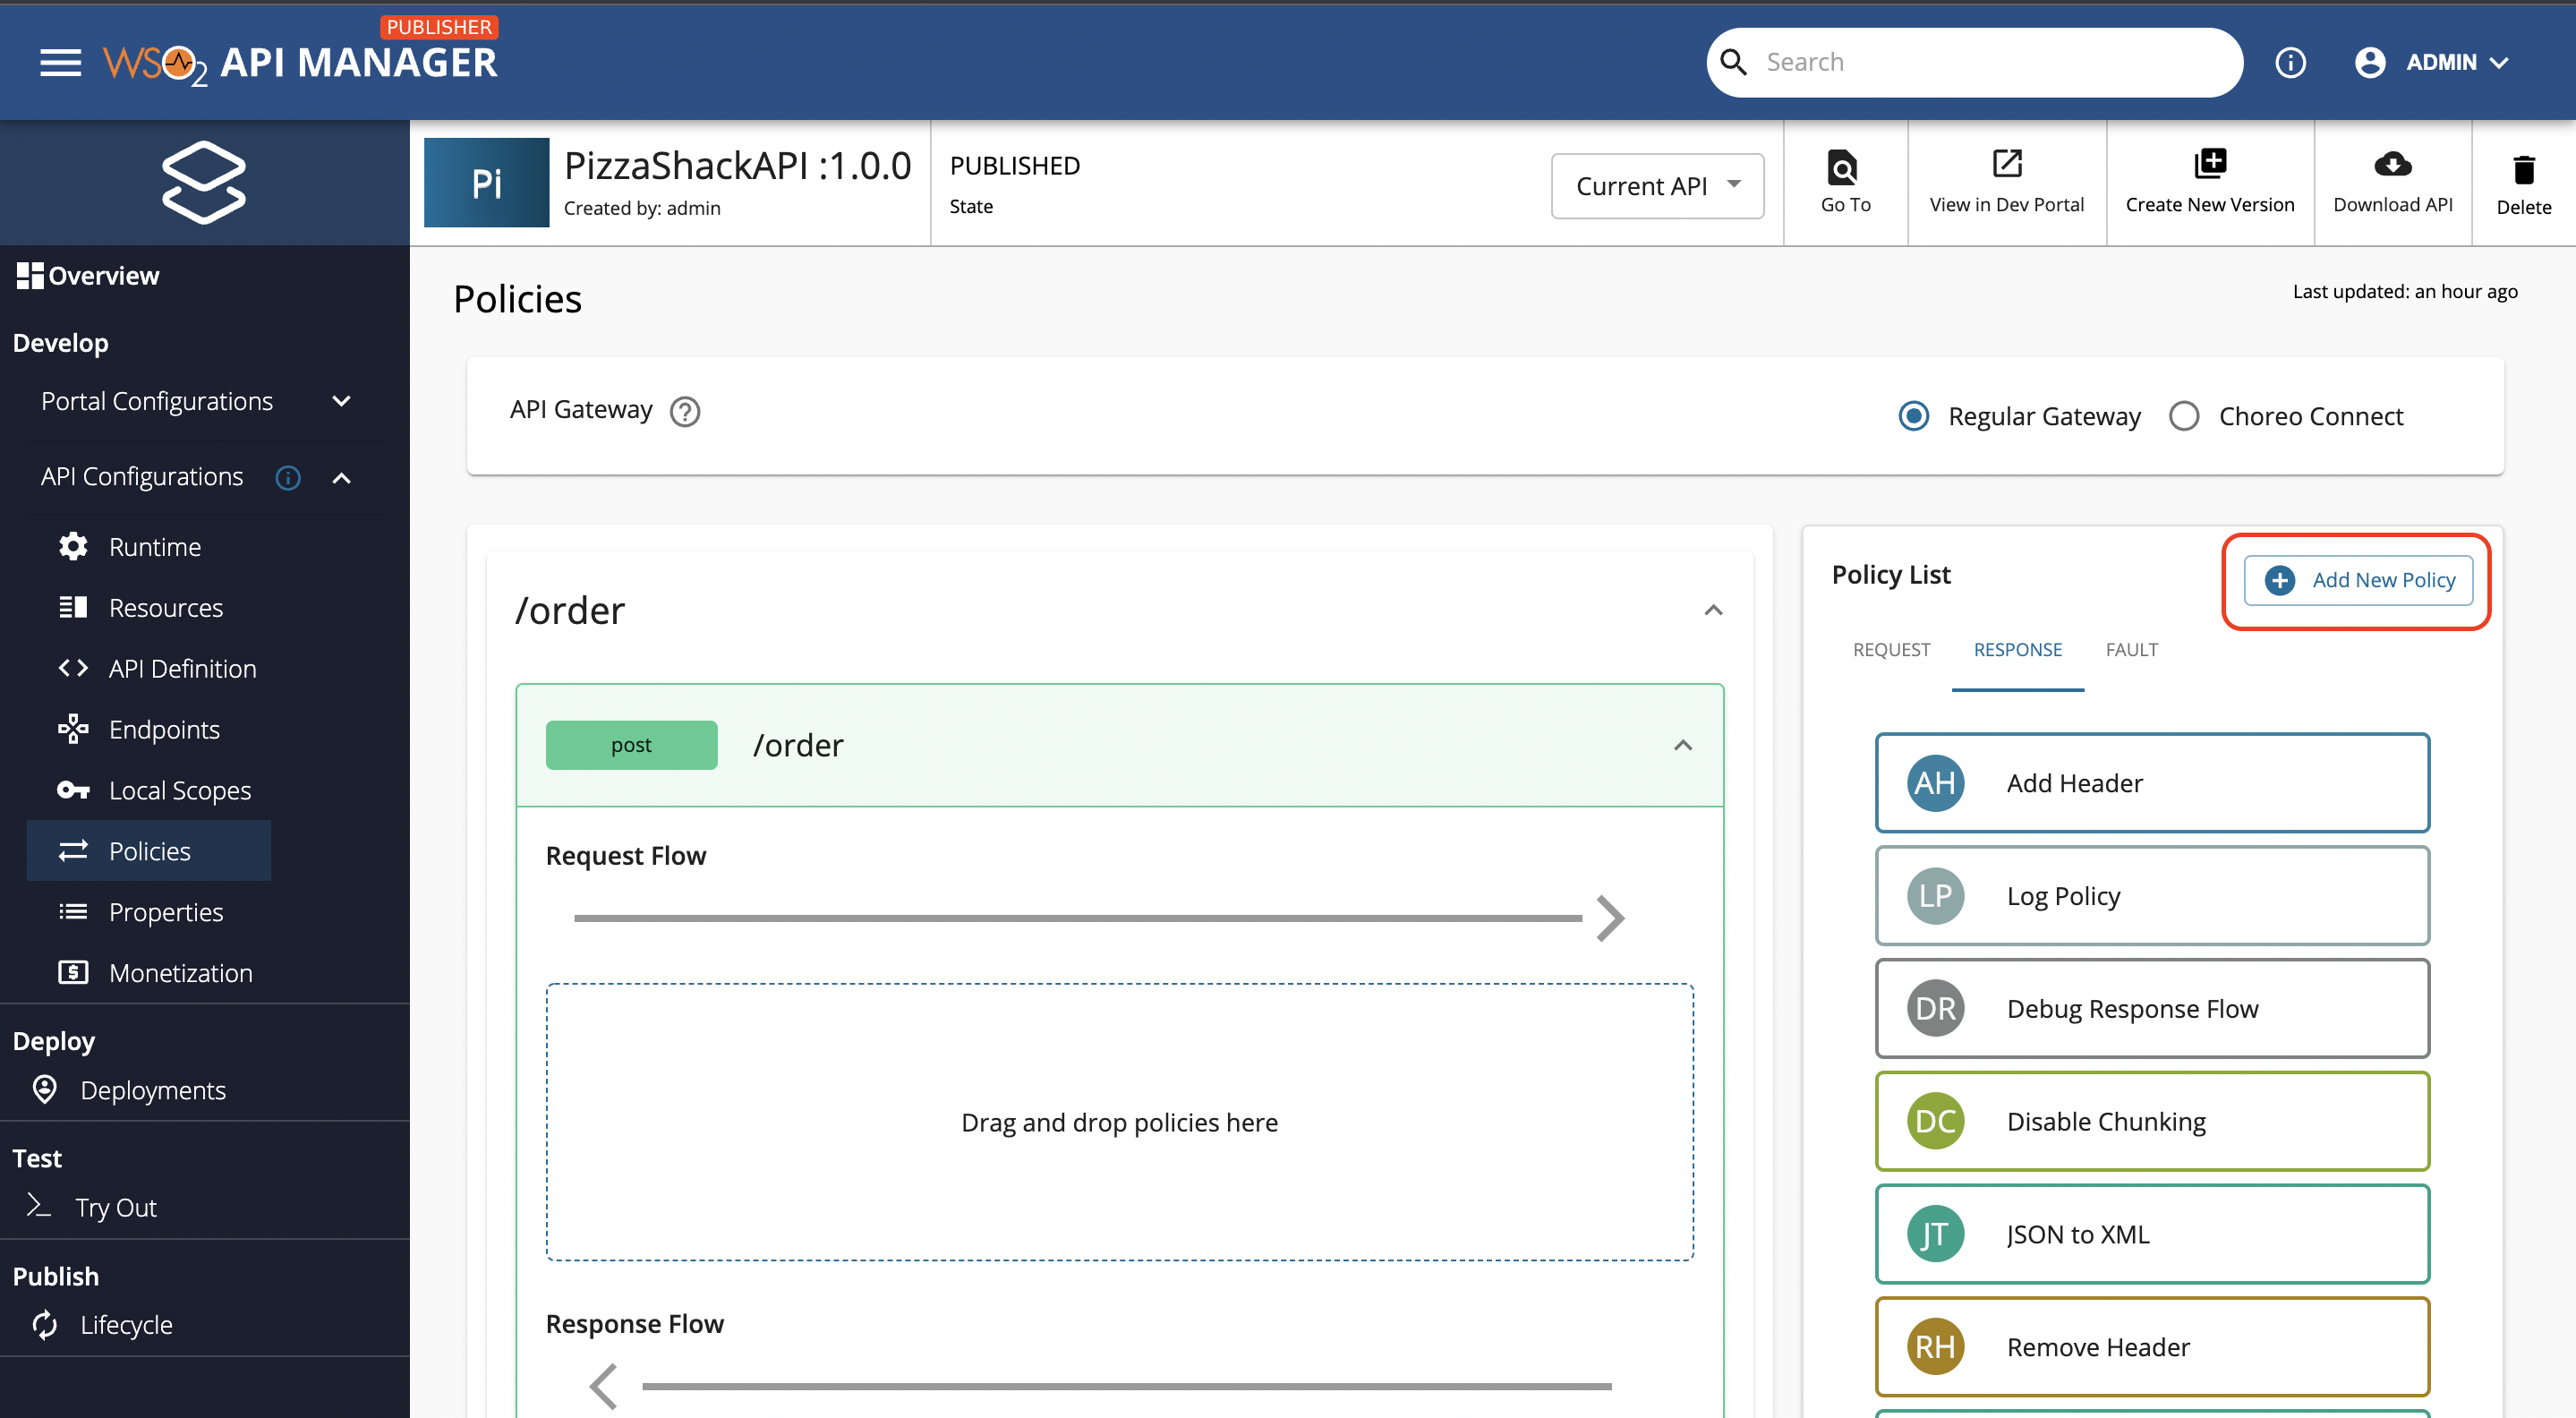
-
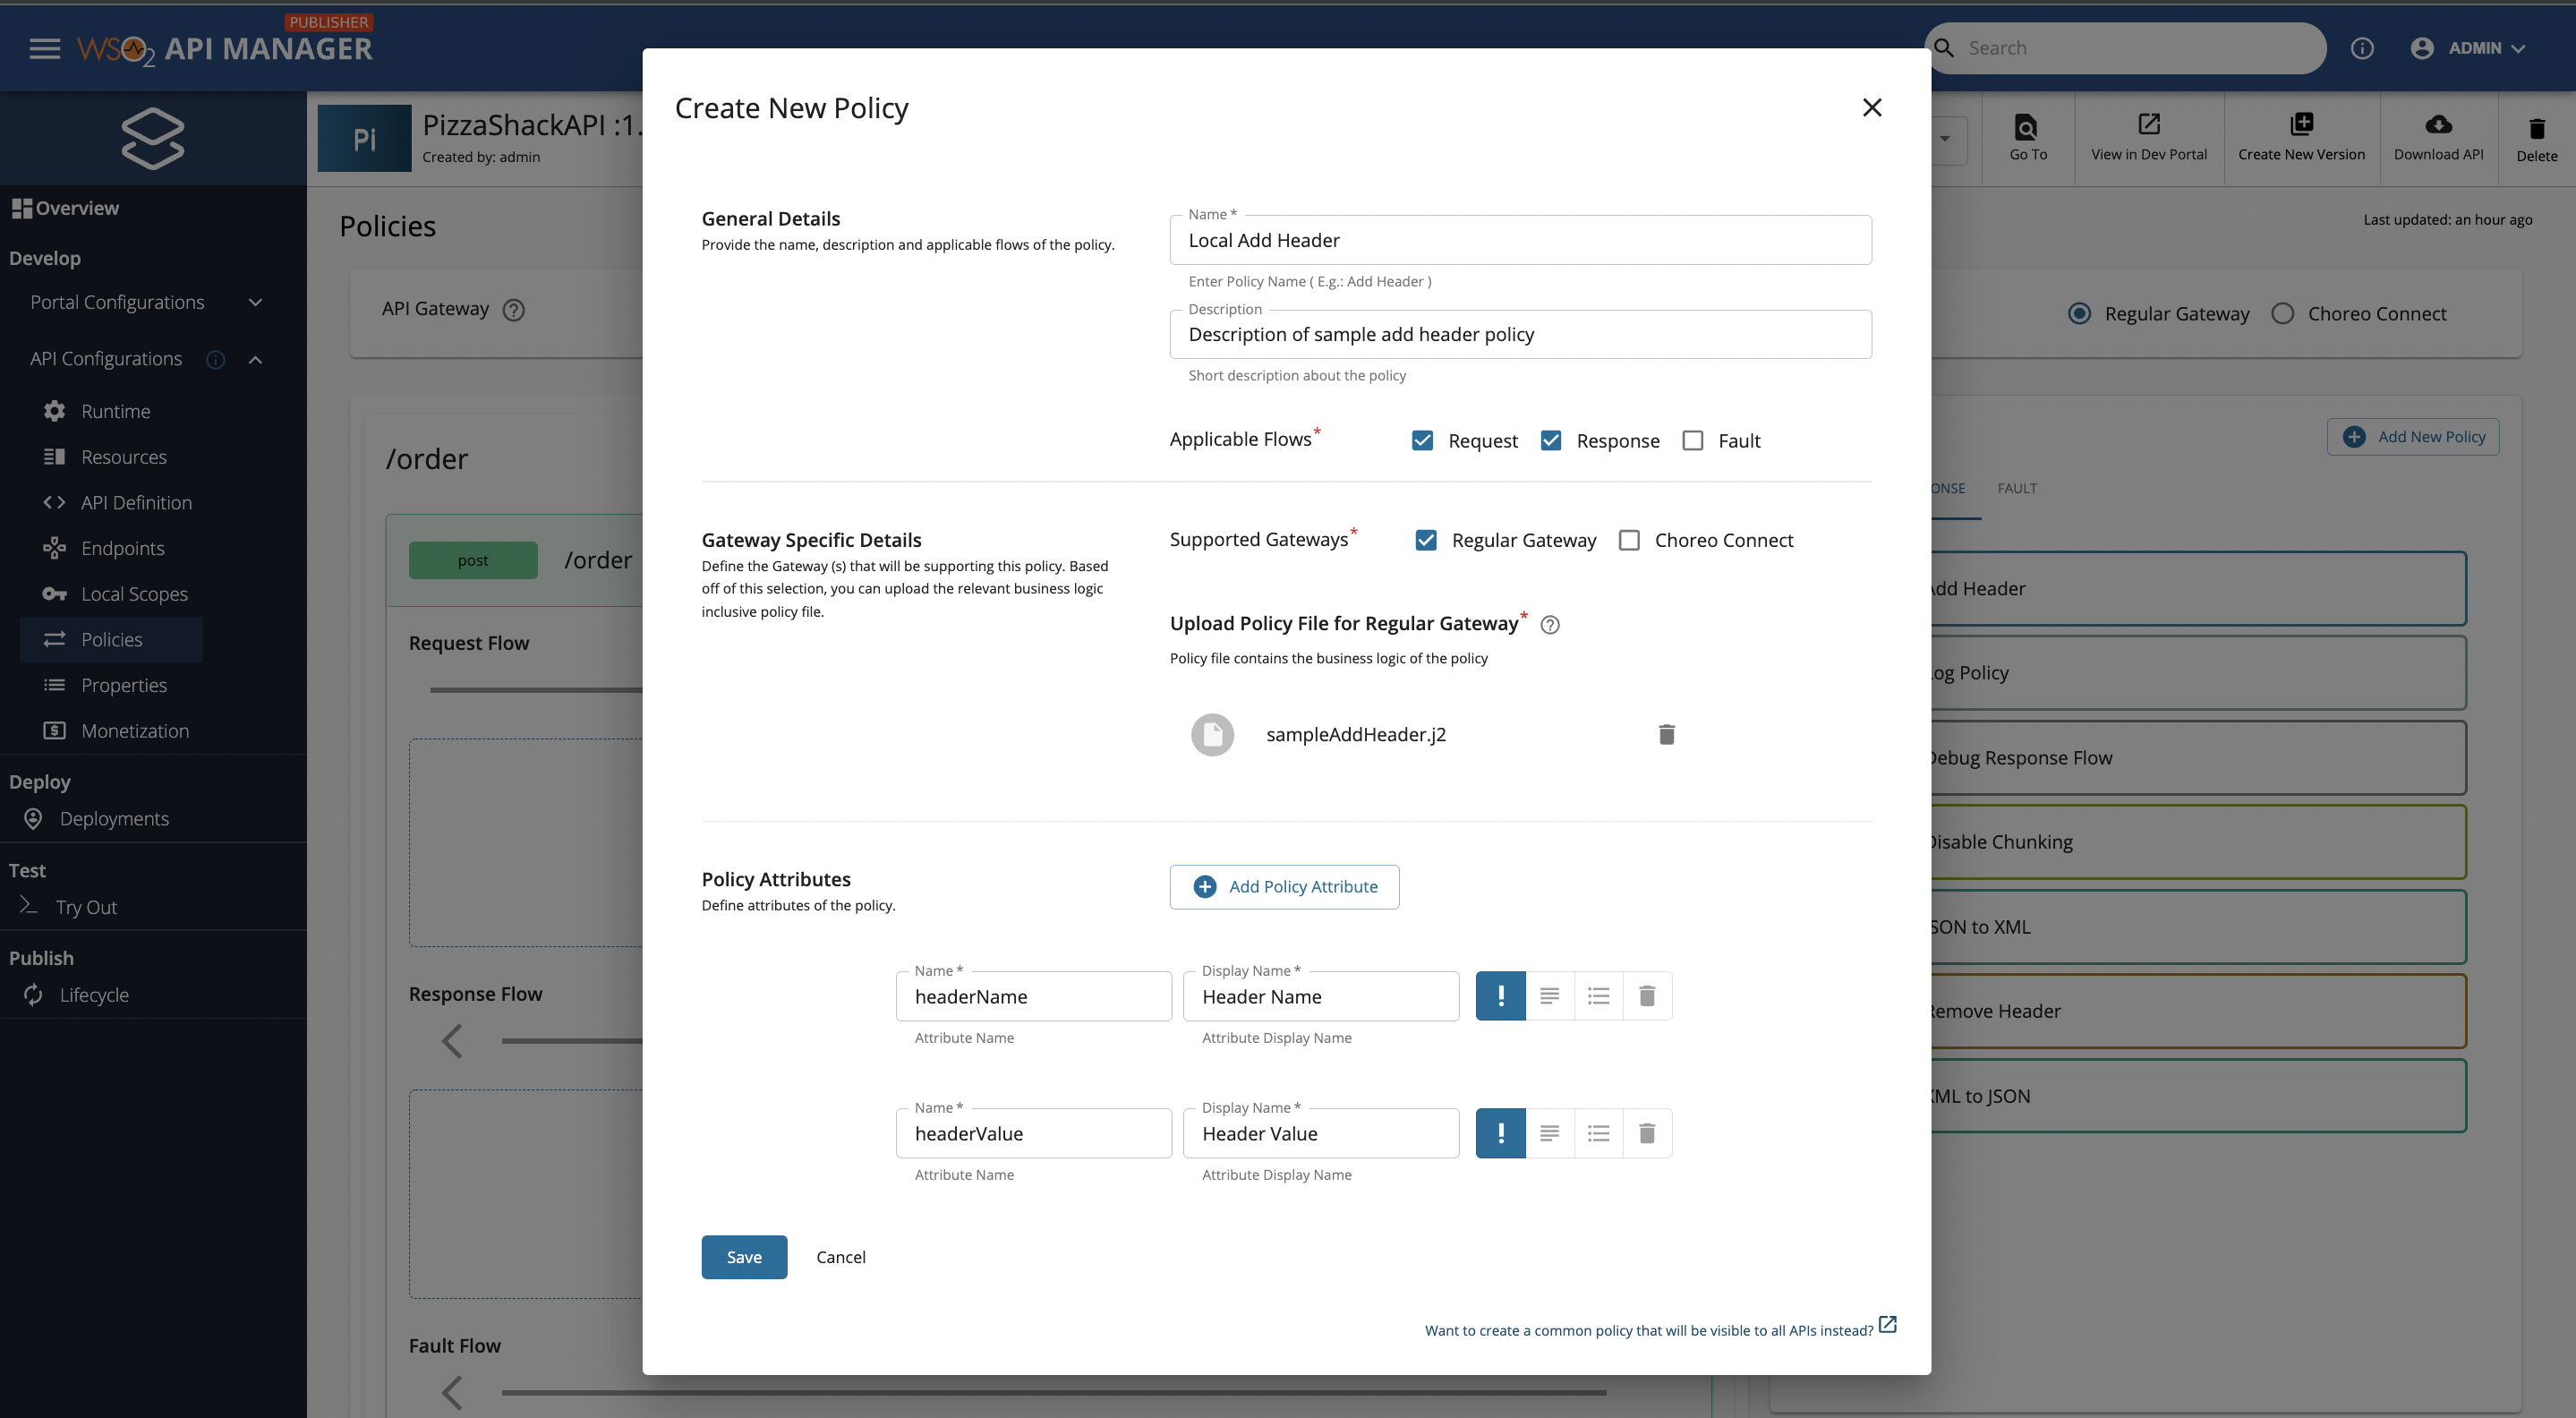
Then you will be prompted to enter the policy details. Let’s name this API specific policy as Local Add Header. Please refer to steps 3 to 5 from the common policy creation guide above to fill the rest of the form. Fully filled form should look like the below screenshot. Then click on Save.
-
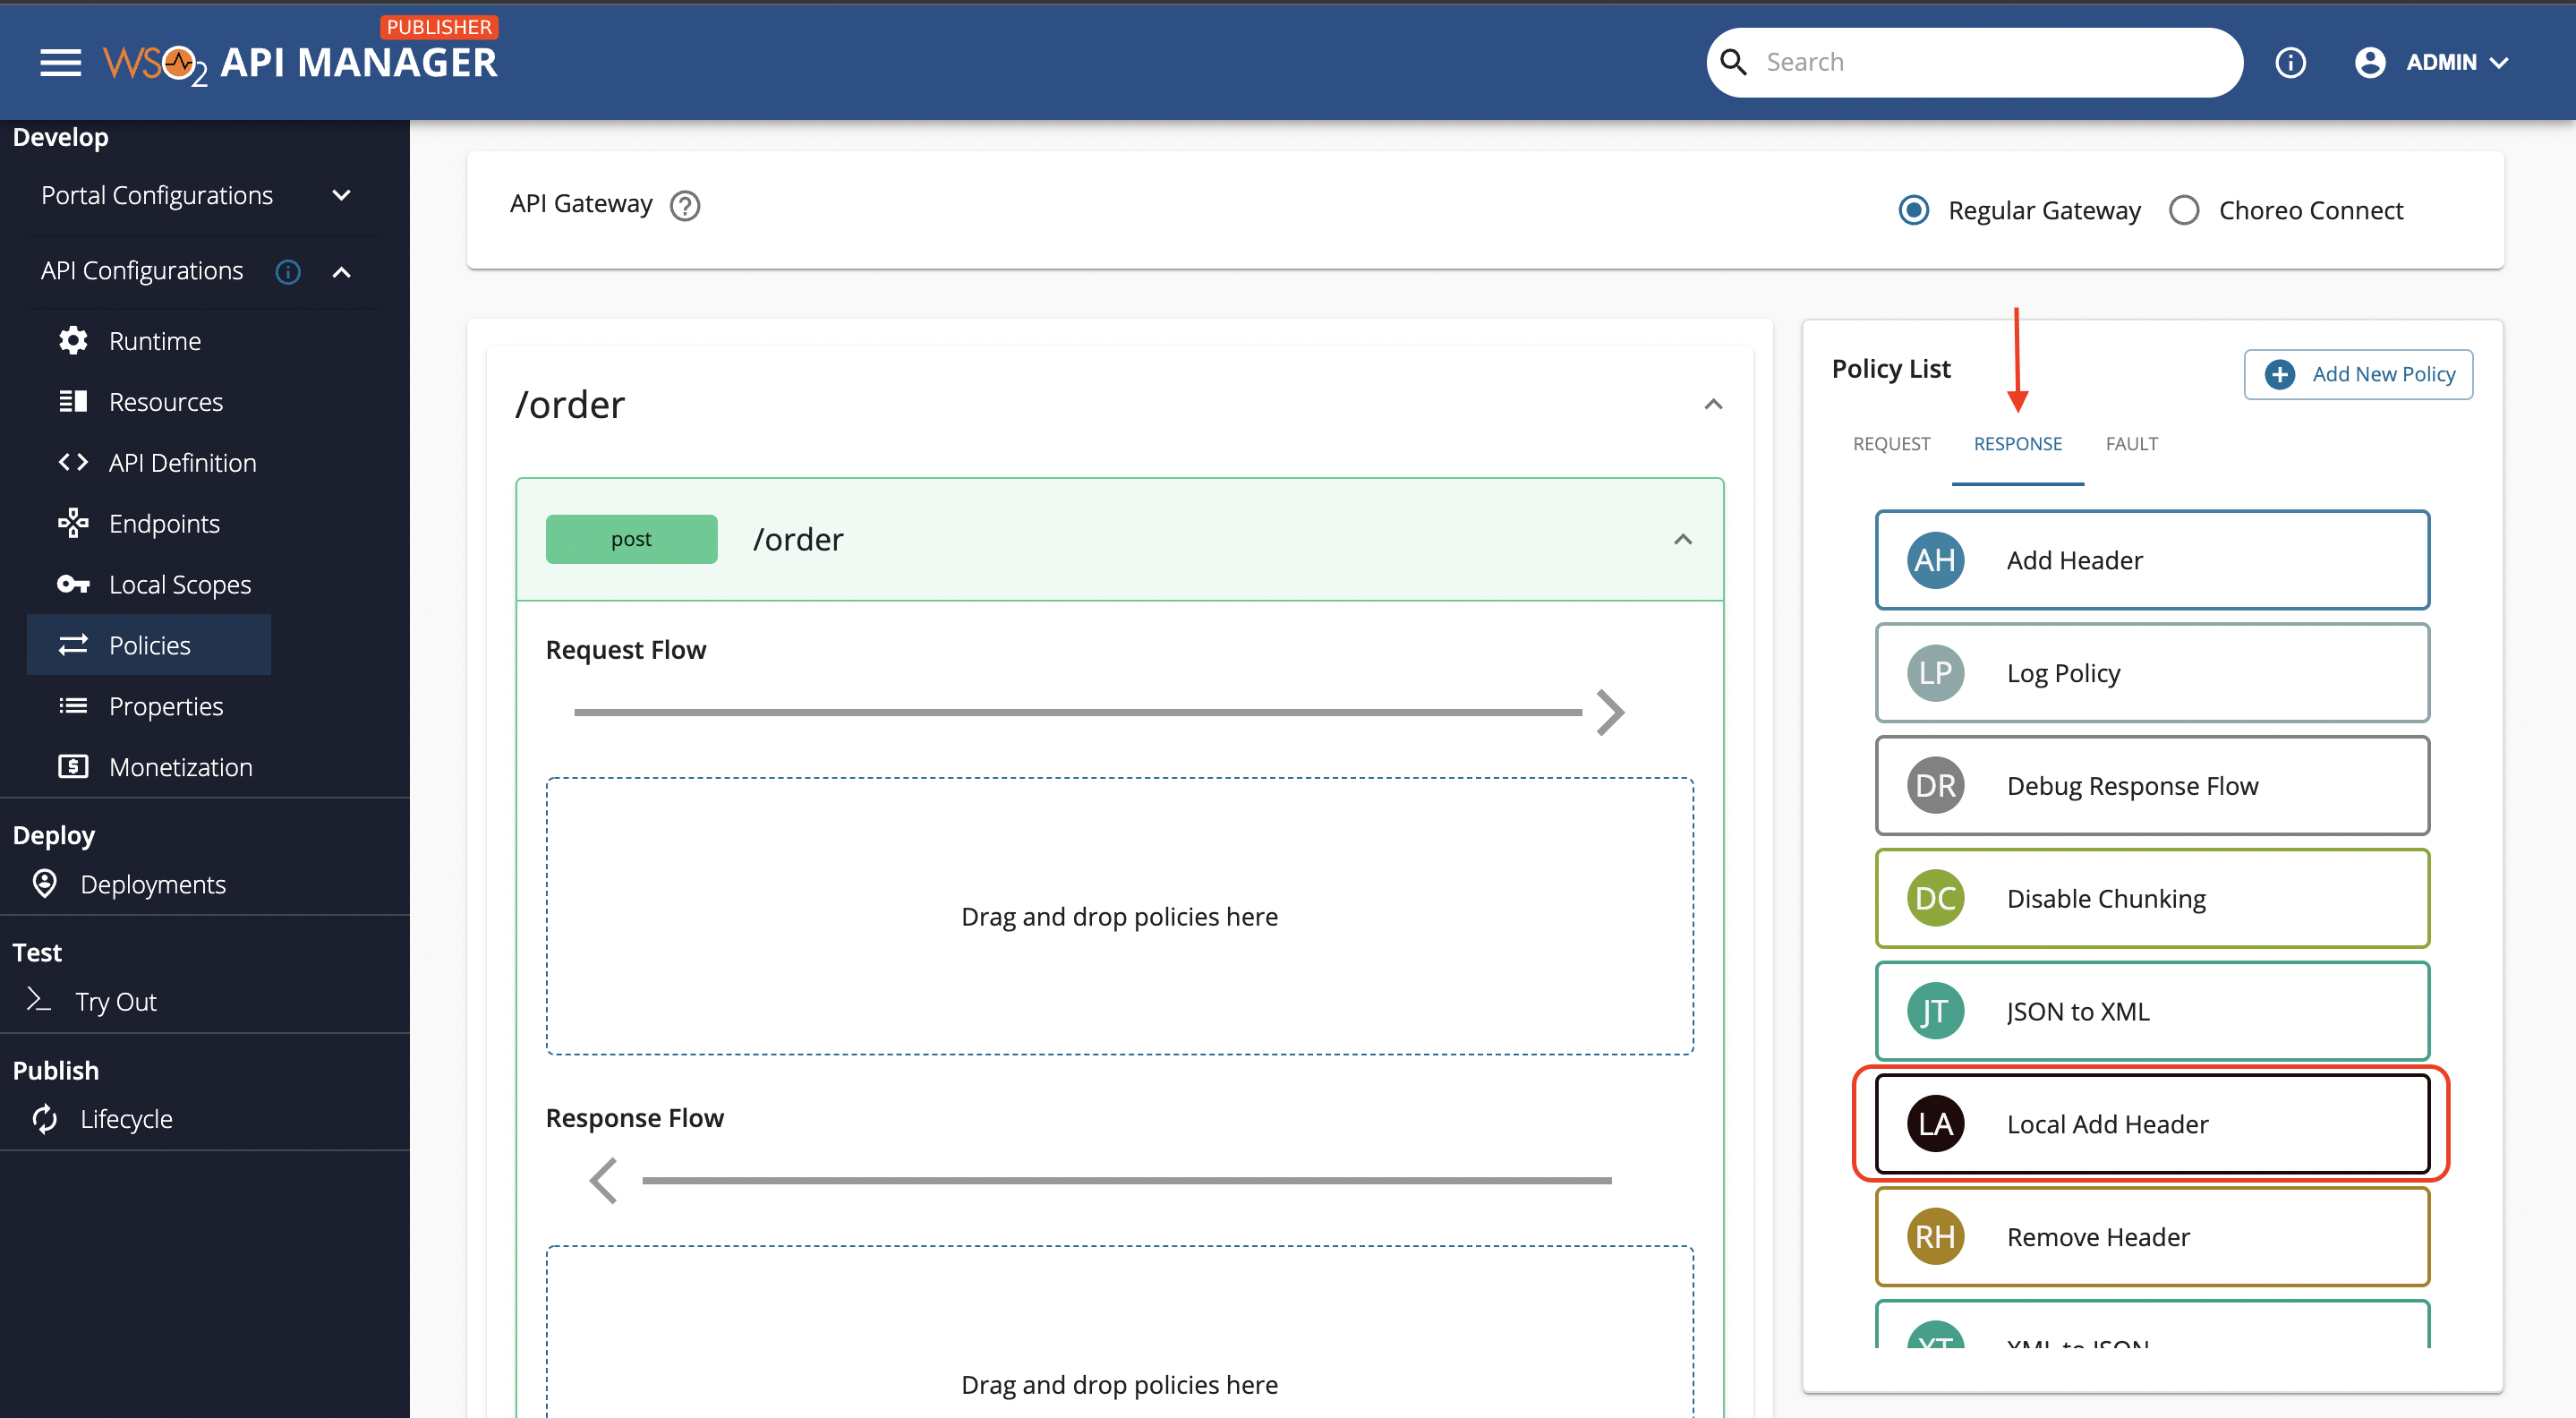
You should be able to see a policy named Local Add Header under the Request tab and Response tab of the Policy List.
-
Once you hover over the Local Add Header policy that you created, you should be able to see the view icon and delete icon as shown in the screenshot below.
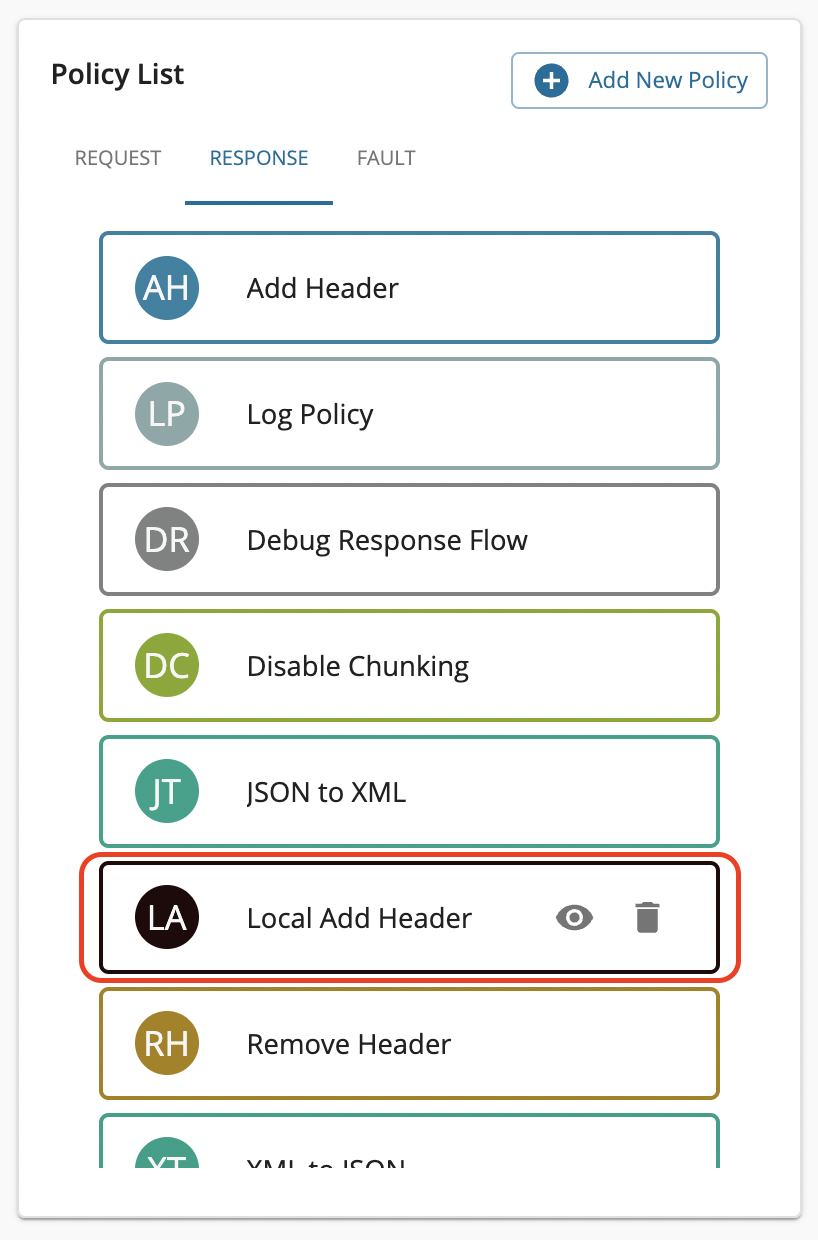
- If you click on the View action, you will be prompted with a populated policy form with the details you entered.
- If you choose to delete the policy, you can click on the Delete action that appears on policy hover. It will ask for your consent before deleting the API specific policy. On confirmation that policy will be deleted.
Note
The
Common Policiesonly permit the View action as opposed to theAPI Specific Policiesthat permit both View and Delete actions. If you wish to delete a common policy, you need to navigate to the globally maintained common policy list to do so.Note
Please note that JS scripts can be used inside the custom policy code to access Java classes, methods, and native objects. By default, all the classes are visible to these scripts. However, it is recommended to restrict access to these by adding the following configuration to the
deployment.tomlfile:[synapse_properties] 'limit_java_class_access_in_scripts.enable' = true # or false 'limit_java_class_access_in_scripts.list_type' = "ALLOW_LIST" # or BLOCK_LIST 'limit_java_class_access_in_scripts.class_prefixes' = "java.util"To further configure script mediation access control, please refer to the Restrict Access to Java classes and Java Methods/Native Objects in Scripts documentation.