Running the Micro Integrator in Automation Mode
The WSO2 Micro Integrator (MI) runtime has introduced a new automation mode that triggers, runs, and stops an integration job on demand. Paired with the latest capabilities of WSO2 Integration Studio, this new mode provides developers with a more efficient way to handle integration tasks, especially in cloud-native environments. This documentation outlines how to utilize the automation mode in MI using the WSO2 Integration Studio
Automation mode in MI runtime
WSO2 Micro Integrator runtime offers two operational modes:
- Server Mode: A long-running process mode. Historically, this was the primary mode for MI, tailored for service and event-handler component types.
- Automation Mode: Introduced to cater to the demands of evolving cloud environments, this mode is geared toward short-lived processes, making it ideal for manual and scheduled task components.
Update Level 29
Note that the Running MI in Automation Mode is only available from update level 29 onwards for WSO2 Micro Integrator 4.2.0 (wso2mi-4.2.0.29 that WSO2 released on the 19th of September, 2023).
Historically confined to server mode, MI's exclusive operational mode limited its adaptability, particularly in dynamic cloud environments that demanded short-lived, task-specific executions. The newly introduced automation mode addresses these constraints by providing a flexible mechanism for streamlined task execution, aligning seamlessly with cloud-native best practices. In this mode, MI executes the specified main sequence from start to finish, allowing for efficient task executions without the need for a persistent server process.
Before you begin
Before you try out the steps in this guide, complete the following:
- Download and install the latest Micro Integrator.
- Download the relevant WSO2 Integration Studio based on your operating system.
Design the integration
The main sequence is essential in the automation mode. It serves as the core of your task's integration logic, dictating its execution path. A well-constructed main sequence ensures a consistent and optimal flow for your tasks in the automation mode. Follow the steps below to design the main sequence:
- Open WSO2 Integration Studio.
- Create an Integration Project with Create ESB Configs and Create Composite Exporter options enabled.
- Create a sequence with your integration scenario.
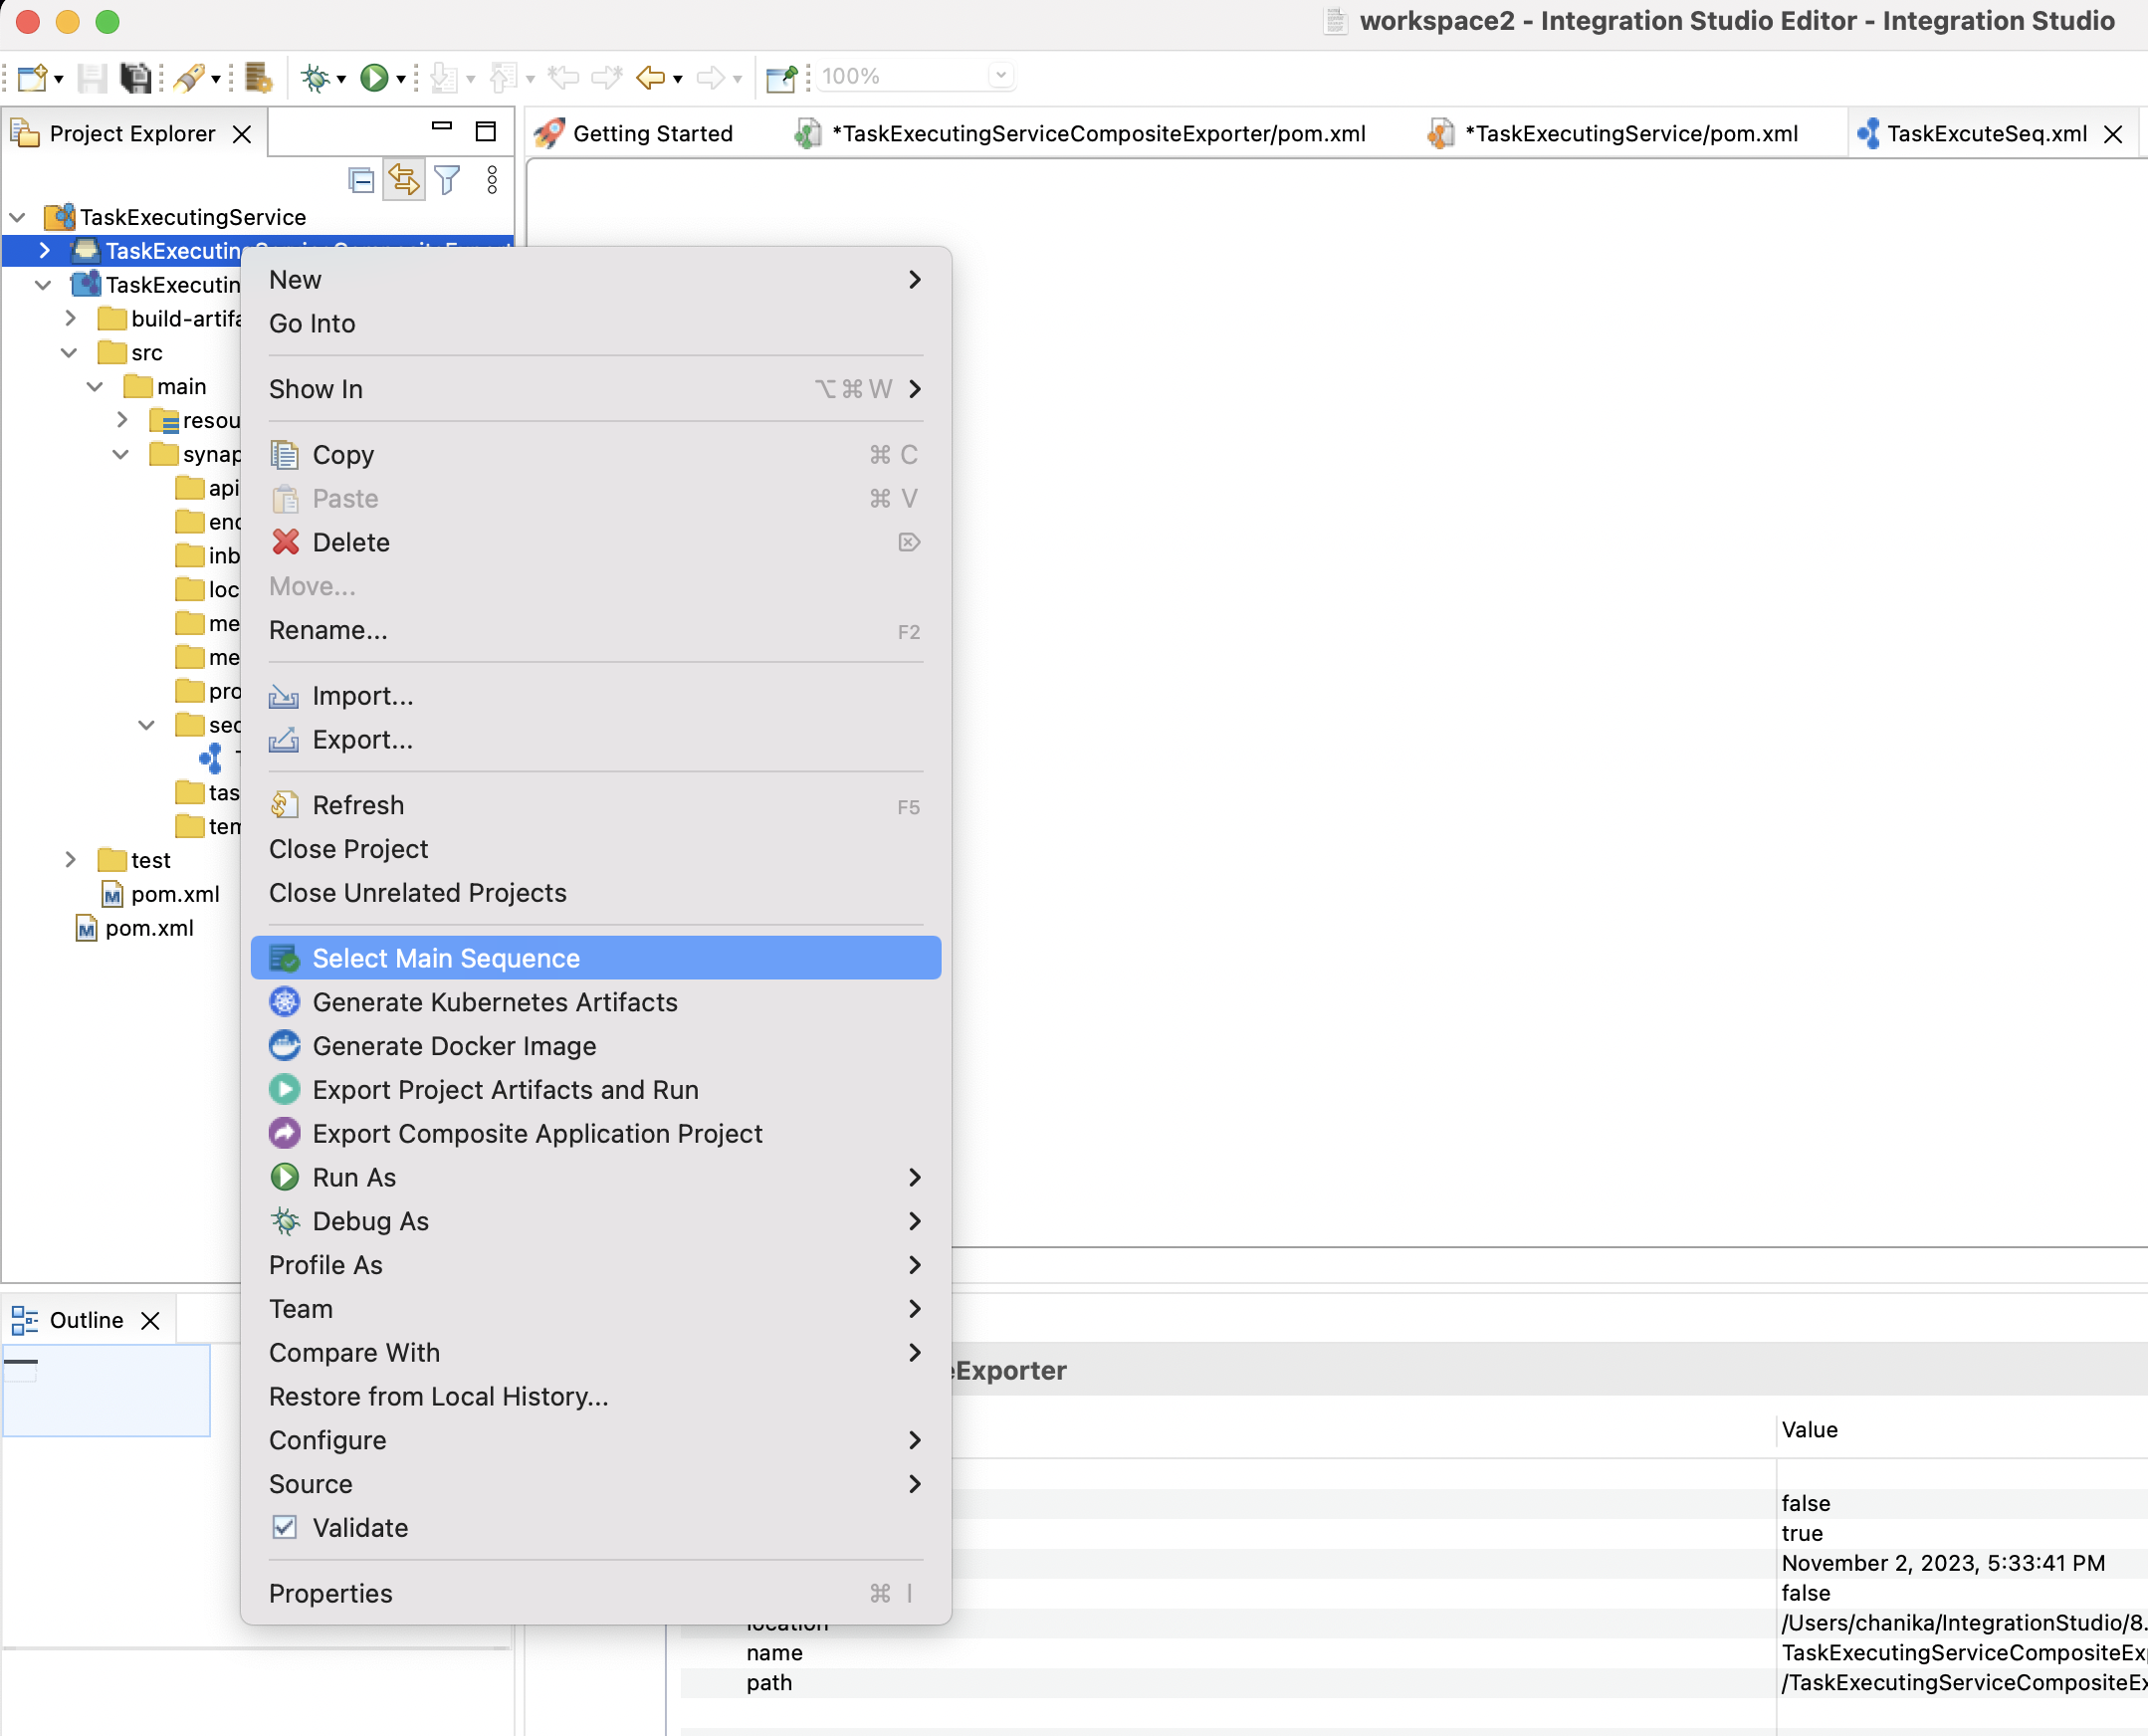
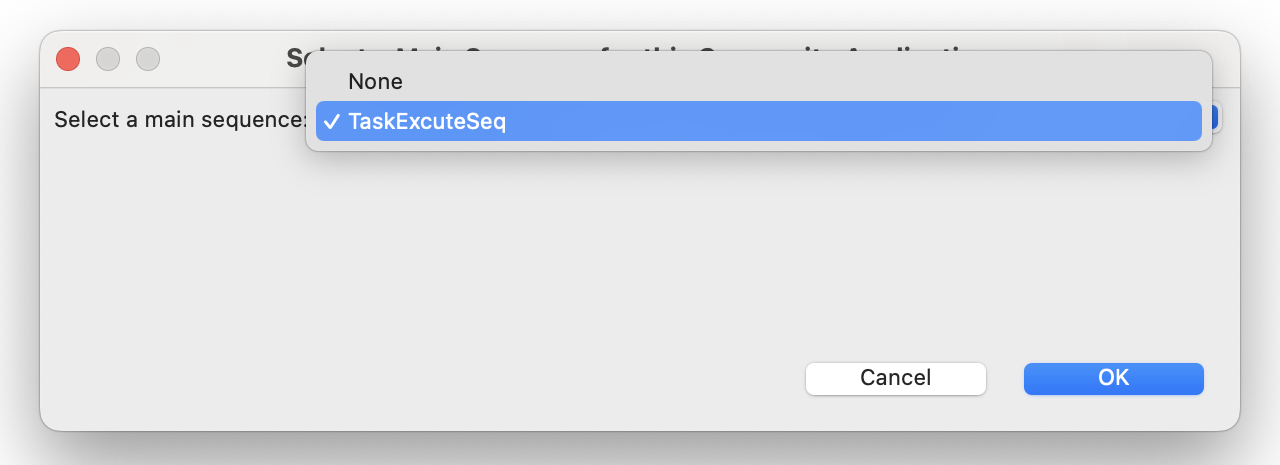
- Define the configured sequence as a main sequence for the composite application.


This sequence, designated as the main sequence, plays a crucial role in guiding the task's operational flow. While WSO2 Integration Studio provides various mediators for assistance, prioritize clarity and efficiency in your logic.
- Deploy the composite application. Ensure that the main sequence, with other related artifacts, is packaged appropriately in the
Composite Application project. For a detailed guide on packaging, refer to the WSO2 documentation on packaging synapse artifacts.
Starting the MI in automation mode
Follow the steps given below to start the server.
-
Open a command prompt as explained below.
On Linux/macOS Establish an SSH connection to the server, log on to the text Linux console, or open a terminal window. On Windows Click Start >Run, type cmd at the prompt, and then press Enter. -
Navigate to the
<MI_HOME>/binfolder from your command line. -
Execute one of the commands given below.
-
To start in automation Mode:
sh micro-integrator.sh --car <composite_application_name>micro-integrator.bat --car <composite_application_name>For example:
sh micro-integrator.sh --car TaskExecutingServiceCompositeExportermicro-integrator.bat --car TaskExecutingServiceCompositeExporter