Using Dynamic Data in apictl Projects
The WSO2 API Controller (apictl) can inject dynamic values based on environment variables to various project files. The use of environment variables is a very convenient way of controlling inputs in almost every CI/CD platform.
Add dynamic data to environment configurations
To allow easily configuring environment-specific details, by default, the apictl supports an additional parameter file. For more information on using an environment parameter file, see Configuring Environment Specific Parameters.
The file supports detecting environment variables during the API (or API Product) import process. You can use the notation ${DEV_URL} to specify environment variables to any attribute in this file.
Follow the instructions below to add dynamic data to environment configurations of an API.
-
Initialize an API Project using the below command.
apictl init PetstoreProject --oas https://petstore.swagger.io/v2/swagger.json -
Create a file named
params.yamlwith the below content.environments: - name: development configs: endpoints: production: url: ${DEV_ENV_PROD_URL} config: retryTimeOut: ${DEV_ENV_PROD_RE_TO} retryDelay: ${DEV_ENV_PROD_RE_DELAY} sandbox: url: ${DEV_ENV_SAND_URL} -
Export the environment variables with required values.
export DEV_ENV_PROD_URL=https://petstore.swagger.io/v2
export DEV_ENV_PROD_RE_DELAY=10
export DEV_ENV_PROD_RE_TO=5
export DEV_ENV_SAND_URL=https://sand.petstore.swagger.io/v2
SET DEV_ENV_PROD_URL=https://petstore.swagger.io/v2 SET DEV_ENV_PROD_RE_DELAY=10 SET DEV_ENV_PROD_RE_TO=5 SET DEV_ENV_SAND_URL=https://sand.petstore.swagger.io/v2 -
Import the API Project
apictl import api -f PetstoreProject --environment development --params params.yamlWarning
If an environment variable is not set, the command will fail and request to set the required missing environment variables on the system.
Note
apictl import-apicommand has been deprecated from apictl 4.0.0 onwards. Instead useapictl import apias shown above.
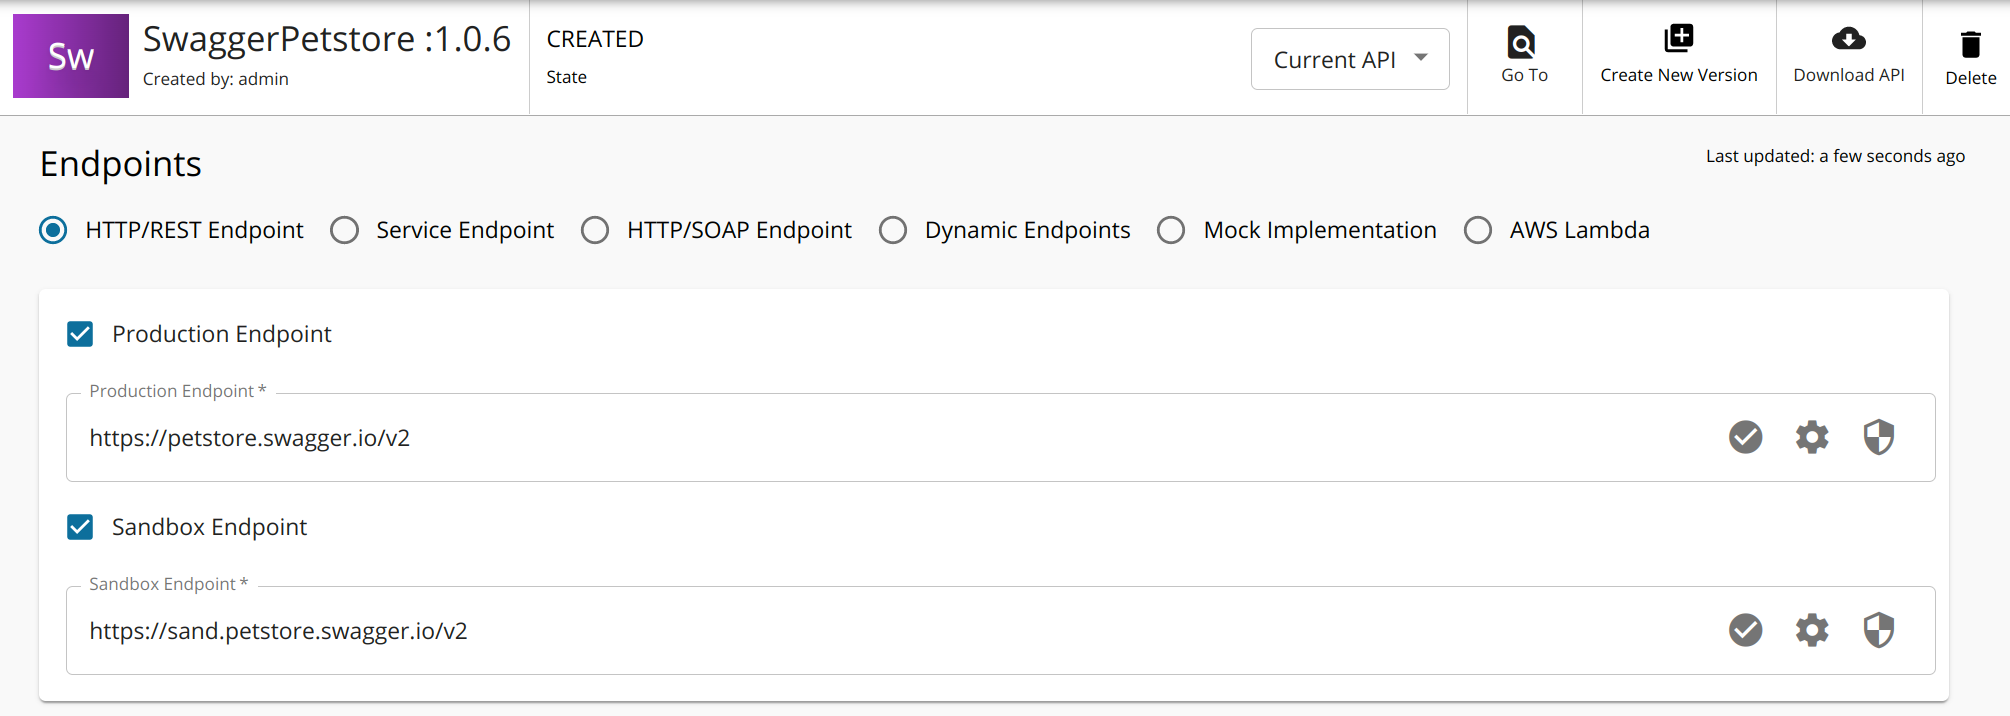
Once the project is successfully imported, sign-in to the WSO2 API Manager (WSO2 API-M) Publisher Portal and check the Endpoints section of the imported API. The URLs specified as environment variables will appear there.
Add dynamic data to Operation Policies in an API project
Other than the API (or API Product) Environment Configuration (params.yaml), the apictl supports environment variable substitution in operation policies.
For example, consider we need to send a special header to the backend when calling the SwaggerPetstore API we created above. The value of the header should be a dynamic value which the apictl should have control over.
-
Create the below operation policy template
addCustomLogMessage.j2inPetstoreProject/Policiesfolder.<sequence xmlns="http://ws.apache.org/ns/synapse" name="custom-header-in"> <header name="X-ENV-KEY" value="${ENV_KEY}" scope="transport" /> <log level="custom"> <property name="Sent header(X-ENV-KEY)" value="${ENV_KEY}"/> </log> </sequence> -
Define the metadata of the above sequence by creating a new file named
addCustomLogMessage.yamlin thePetstoreProject/Policiesfolder.type: operation_policy_specification version: v4.2.0 data: category: Mediation name: addCustomLogMessage version: v1 displayName: Custom Log Policy description: "Using this policy, you can log the important details of the request" applicableFlows: - request - response - fault supportedGateways: - Synapse supportedApiTypes: - HTTP policyAttributes: [] -
Open
PetstoreProject/api.yamland change the following settings.- Replace
lifeCycleStatusvalue fromCREATEDtoPUBLISHED. This is to ensure that the API will be Published once imported. - Add the operation policy under the field (list)
operationsas shown below. (Here, the operation policy that we created in the above steps has been attached to the operation/pet/{petId})
  operations:
   -
    id: ""
    target: /pet/{petId}
    verb: GET
    authType: Application & Application User
    throttlingPolicy: Unlimited
    operationPolicies:
     request:
      -
       policyName: addCustomLogMessage
       parameters: {}
     response: []
     fault: []
A sample configuration after applying the above changes is shown below.
type: api version: v4.2.0 data: name: SwaggerPetstore description: 'This is a sample server Petstore server. You can find out more about Swagger at [http://swagger.io](http://swagger.io) or on [irc.freenode.net, #swagger](http://swagger.io/irc/). For this sample, you can use the api key `special-key` to test the authorization filters.' context: /v2/1.0.6 version: 1.0.6 lifeCycleStatus: PUBLISHED operations: - id: "" target: /pet/{petId} verb: GET authType: Application & Application User throttlingPolicy: Unlimited operationPolicies: request: - policyName: addCustomLogMessage parameters: {} response: [] fault: [] ... - Replace
-
Export the environment variables with required values.
export ENV_KEY=dev_101SET ENV_KEY=dev_101 -
Import the API Project.
apictl import api -f PetstoreProject --environment development --params params.yaml --updateNote
apictl import-apicommand has been deprecated from apictl 4.0.0 onwards. Instead useapictl import apias shown above. -
Generate a token and invoke the API
$ apictl get keys -e development -n SwaggerPetstore -v 1.0.6 -r admin
eyJ0eXAiOiJKV1QiLCJhbGciOiJSUz....RWrACAUNSFBpxz1lRLqFlDiaVJAg

$ curl -H "Authorization: Bearer eyJ0eXAiOiJKV1QiLCJhbGciOiJSUz....RWrACAUNSFBpxz1lRLqFlDiaVJAg" https://localhost:8243/v2/1.0.6/pet/1 -k
{"id":1,"category":{"id":1001,"name":"Animal"},"name":"doggie","photoUrls":["img/test/dog.jpeg","img/test/dog1.jpeg"],"tags":[{"id":2001,"name":"Pet"},{"id":2002,"name":"Animal"}],"status":"available"}
Note
apictl get-keyscommand has been deprecated from the API Controller 4.0.0 onwards. Instead useapictl get keysas shown above.
Upon successful invocation, the header X-ENV-KEY: dev_101 will be sent to the backend of the API. The below log will be printed in the API gateway's terminal.
INFO - LogMediator {api:SwaggerPetstore:v1.0.6} Sent header(X-ENV-KEY) = dev_101