Scheduling ESB Tasks
Follow the instructions given below to create a Scheduled Task in WSO2 Integration Studio.
Instructions
Creating the Scheduled Task artifact
-
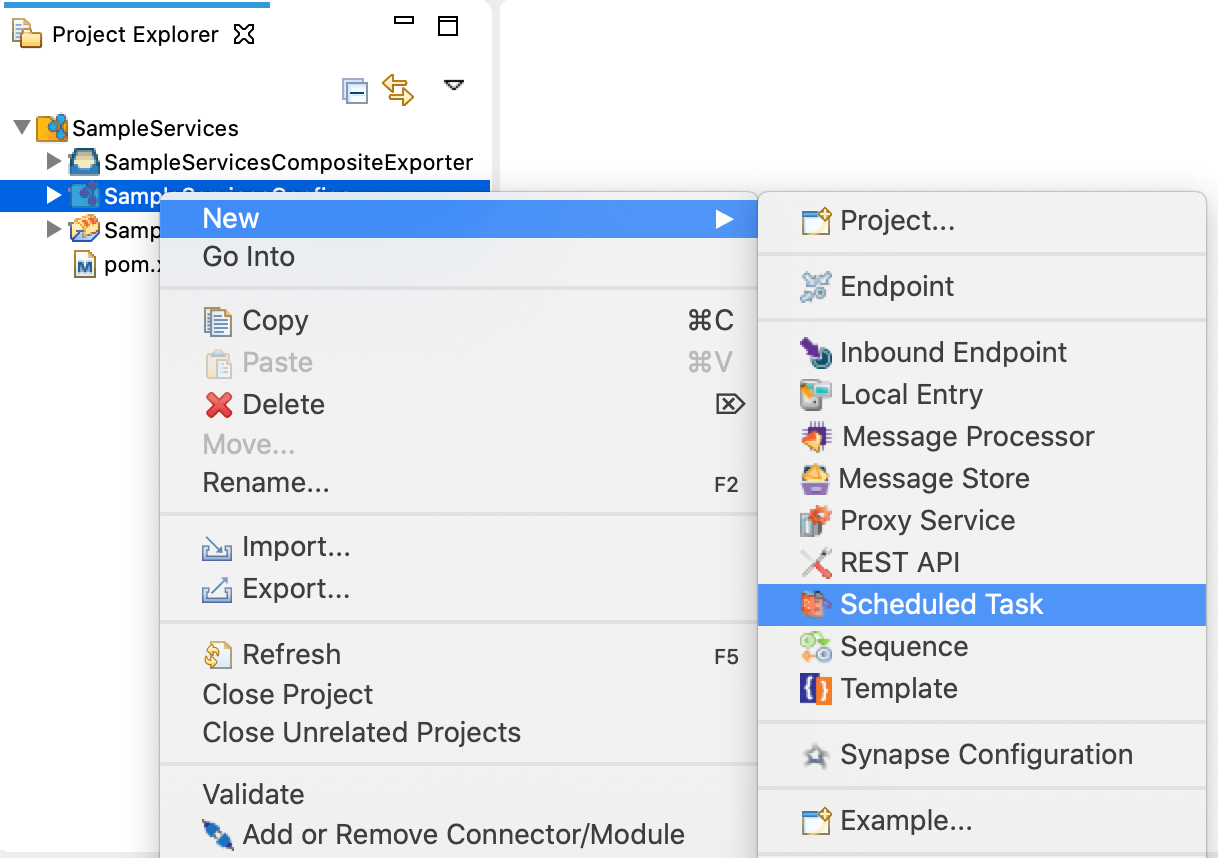
Right-click the ESB Config project and click New → Scheduled Task.
-
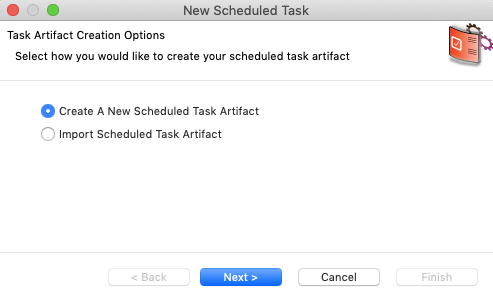
Select Create a New Scheduled Task Artifact and click Next.
-
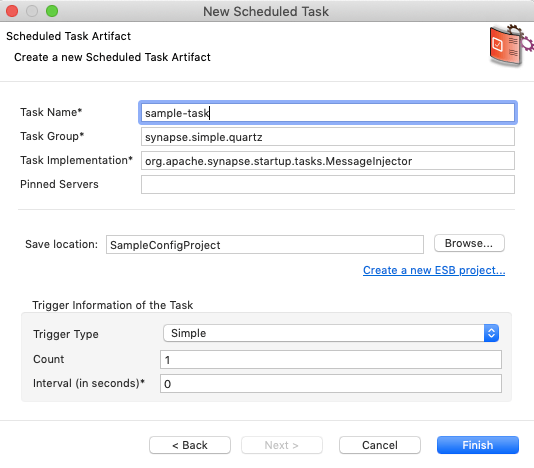
Specify values for the required parameter for the scheduled task.
-
Specify the location to save the artifact:
- To save the scheduled task in an existing ESB Config project in your workspace, click Browse and select that project.
- To save the scheduled task in a new ESB Config project, click Create new Project and create the new project.
-
Click Finish.
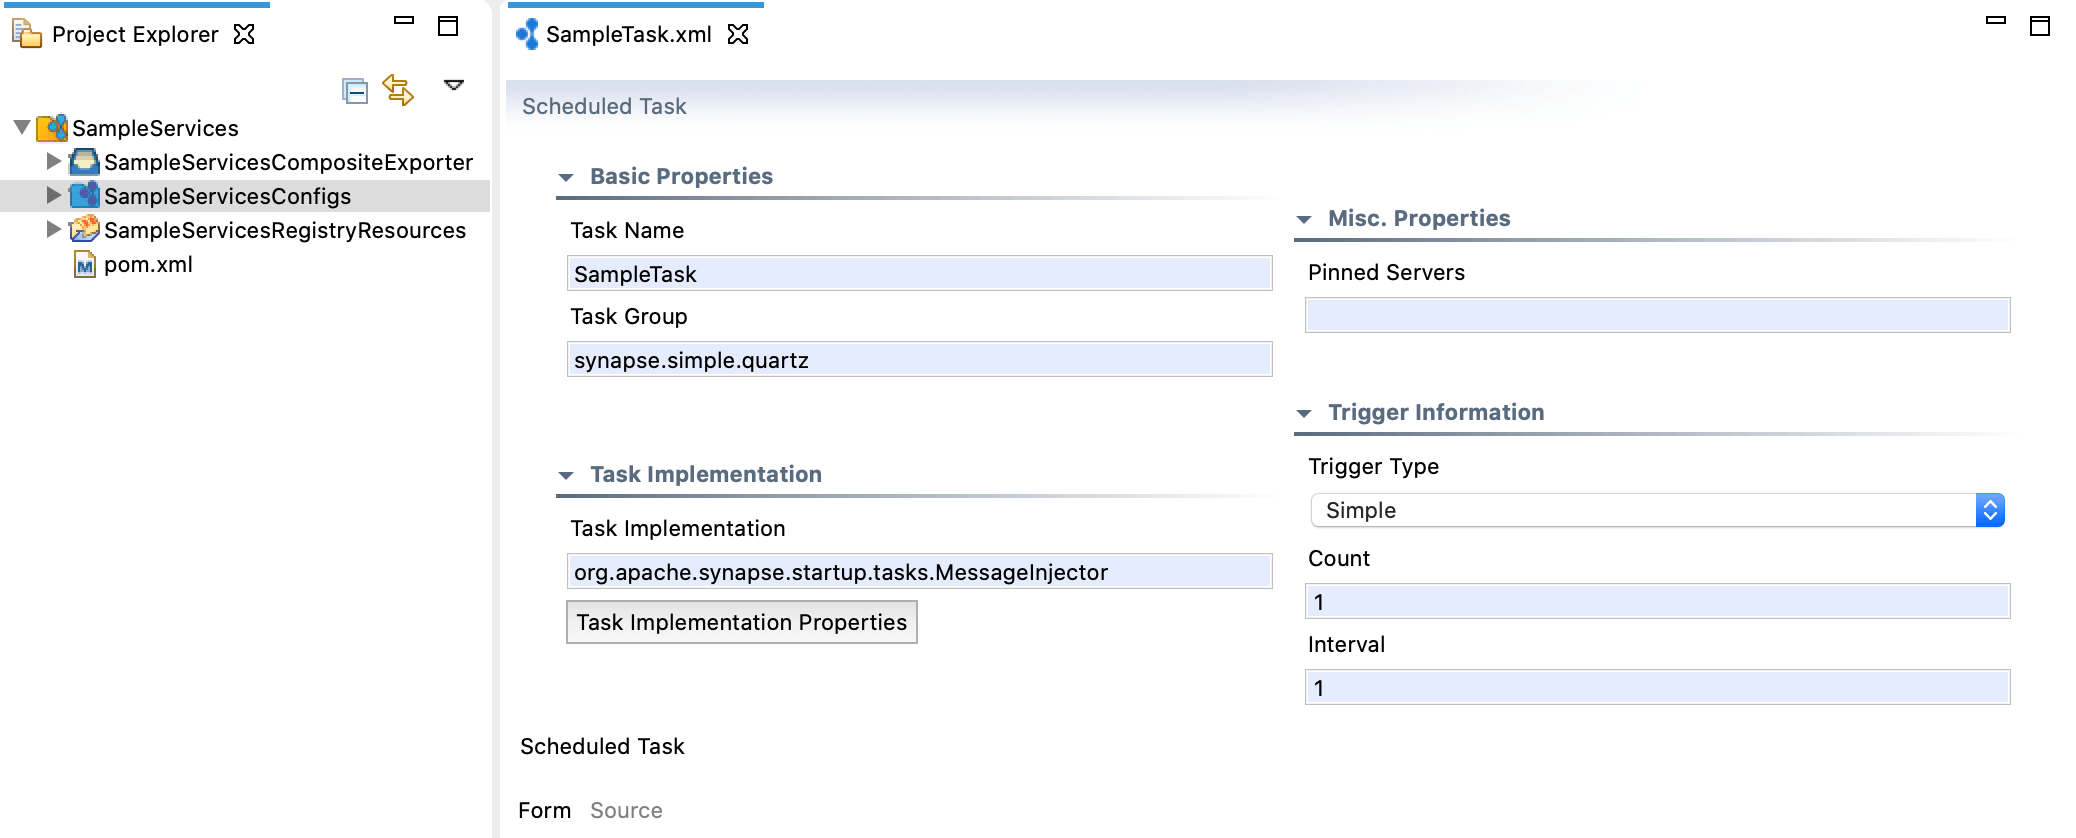
The scheduled task is created in the
src/main/synapse-config/tasksfolder under the ESB Config project you specified. -
To use the scheduled task, update the properties.
Updating properties
Update the task properties to specify the incoming message that should trigger the task and the destination to which the message should be injected.
-
Open the new artifact from the project explorer.
-
In the Form view, you can optionally modify already specified property values.
-
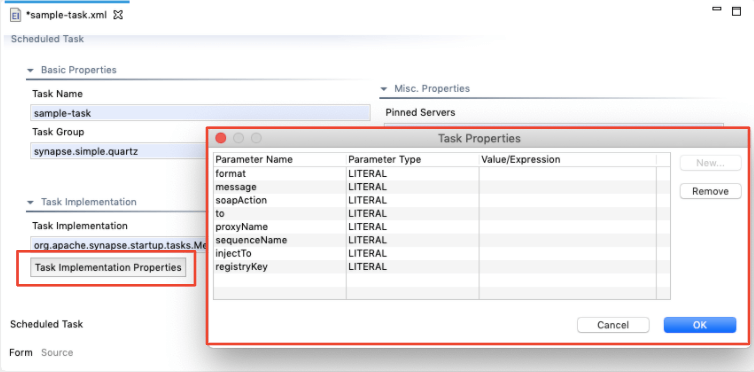
Click Task Implementation Properties to open the Task Properties dialog box.
-
Update the properties.
Examples
Tutorials
- See the tutorial on periodically executing an integration process using a scheduled task