Create graphql api
Step 1 - Start the GraphQL backend server
Let's use the Star Wars sample backend server as the backend for the GraphQL API.
-
Clone the WSO2 API Manager Samples repository.
git clone https://github.com/wso2/samples-apim -
Navigate to
graphql-backenddirectory.cd samples-apim/graphql-backend -
Run
npm installto install the necessary node modules. -
Run
npm startto start the server.Once the above steps are done, the Star Wars server will be running on
http://localhost:8080.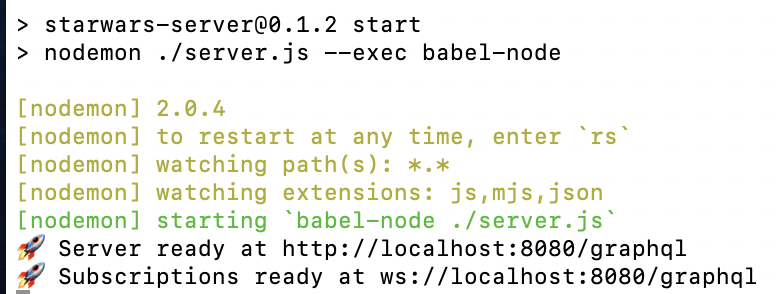
You can use
http://localhost:8080/graphqlas the endpoint when creating the GraphQL API.
Step 2 - Design a GraphQL API
-
Sign in to the API Publisher Portal.
https://<hostname>:9443/publisherExample:
https://localhost:9443/publisherLet's use
adminas the username and password to sign in. -
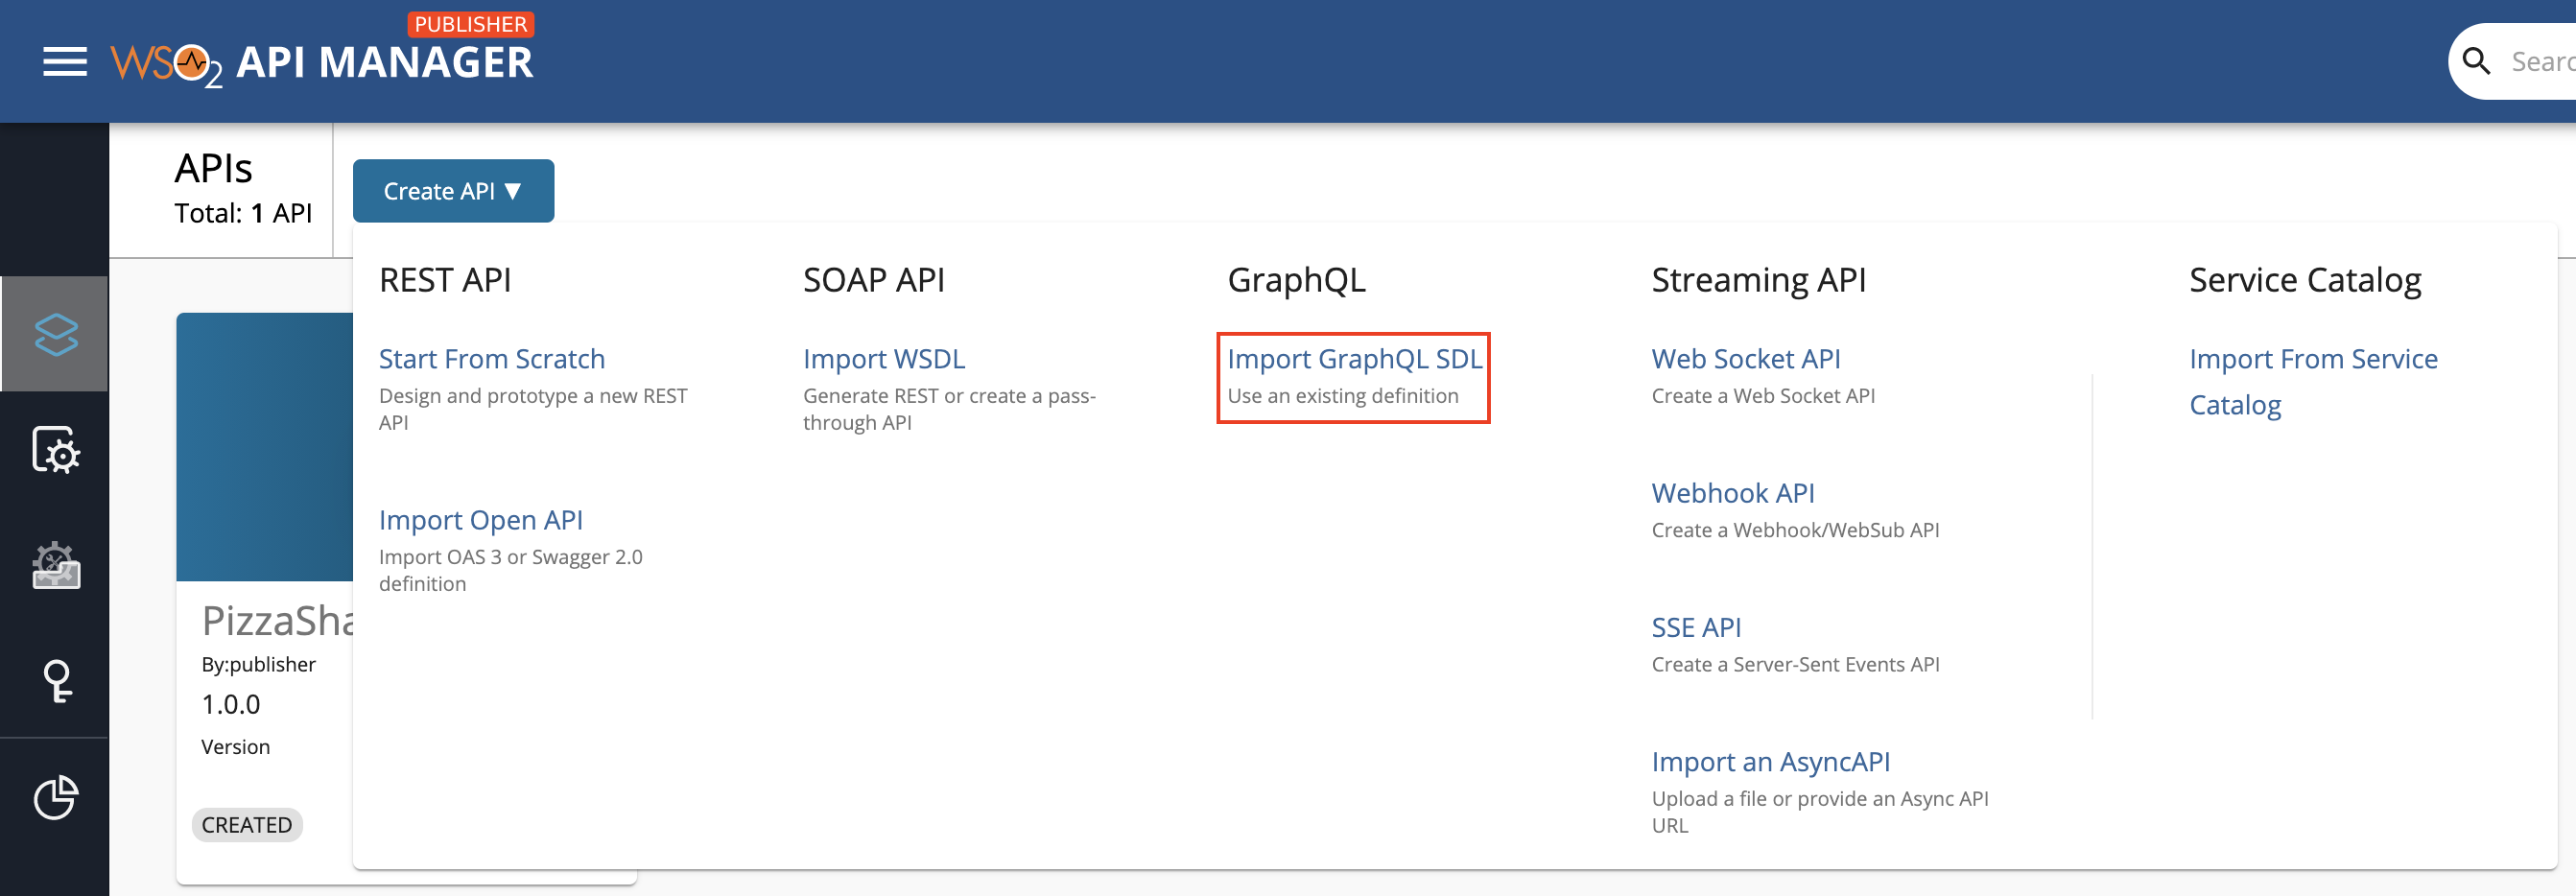
Click Create API and then click Import GraphQL SDL.
-
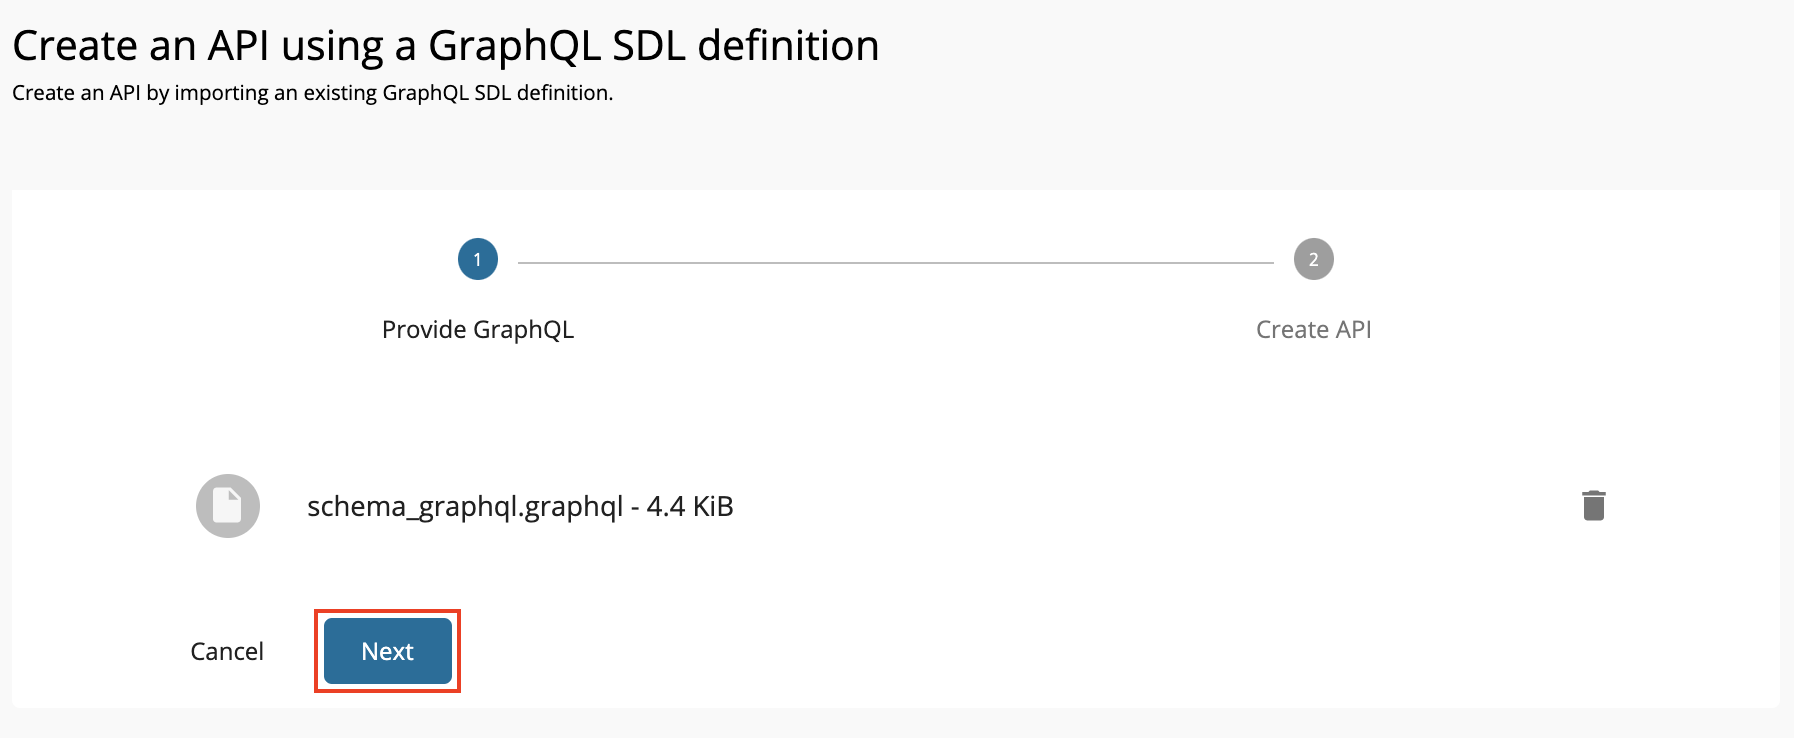
Import the schema by dragging and dropping the file or by uploading the file, and click Next.
Let's use the StarWarsAPI schema definition to create the schema file.
Note
-
You need to define the SDL Schema based on the GraphQL schema design best practices.
- The file extension can be either
.graphql,.txt, or.json. - The file name can be any name, which is based on your preference.
-
-
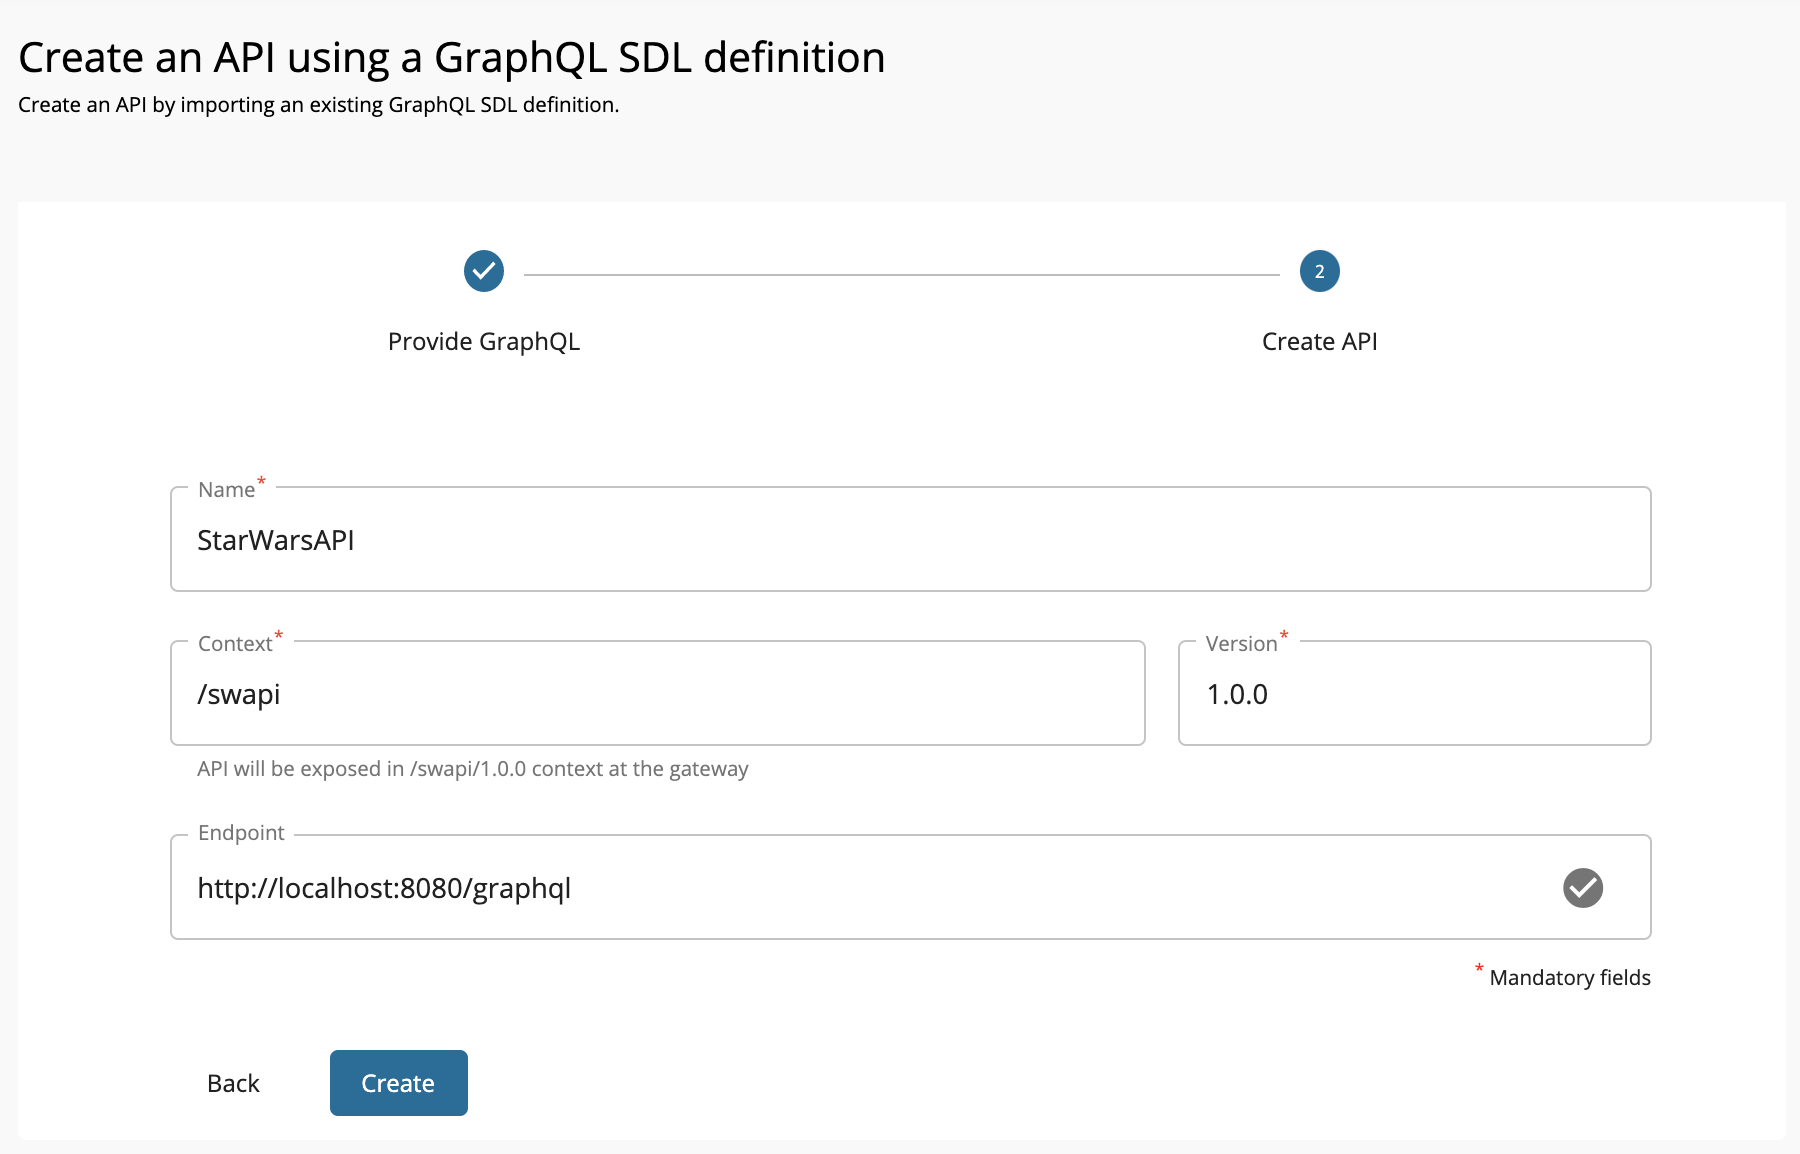
Enter the GraphQL API related details and click Create.
Let's create an API named "StarWarsAPI" using the following sample data.
FieldDescriptionName
StarWarsAPI
Context
/swapiVersion
1.0.0
Endpoint
http://localhost:8080/graphql
-
When you provide the HTTP URL as the backend endpoint, WSO2 API-M will internally derive the corresponding WebSocket URL
ws://localhost:8080/graphql. - Thereafter, the API Gateway will use this WebSocket URL as the backend subscription endpoint of the GraphQL API.
-
When you provide the HTTP URL as the backend endpoint, WSO2 API-M will internally derive the corresponding WebSocket URL
-
Optionally, modify the existing GraphQL schema definition.
-
Navigate to Develop, API Configurations, and click Schema Definition.
-
Click Download Definition.
The existing GraphQL API schema gets downloaded.
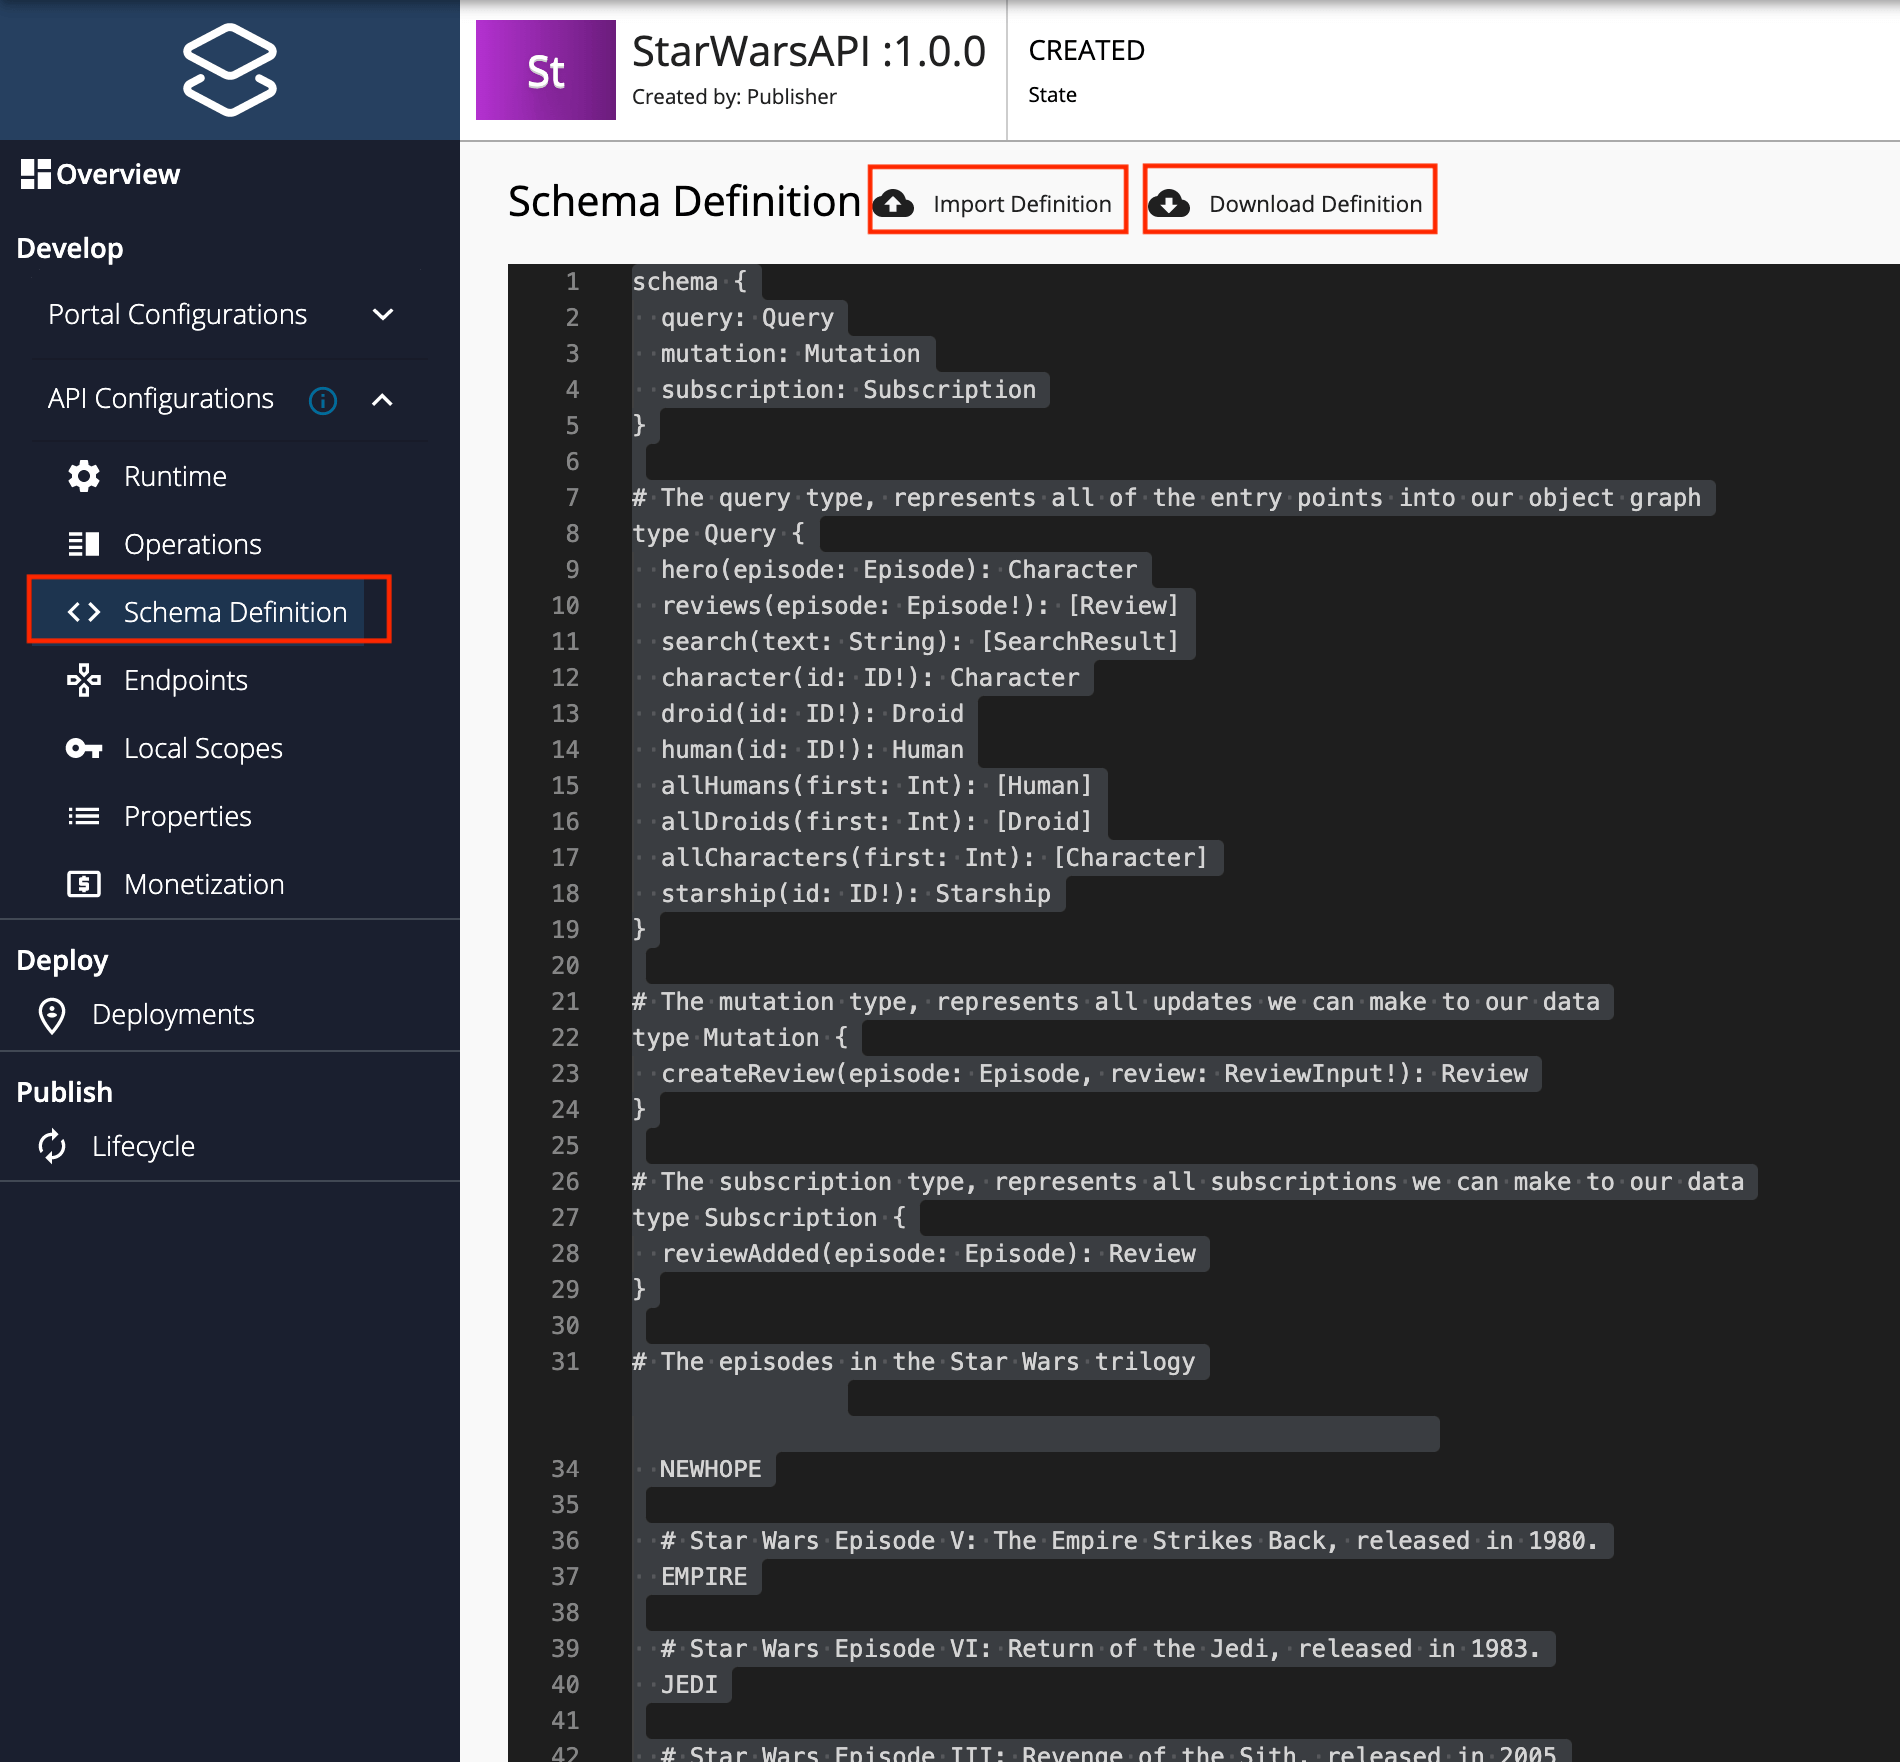
-
Update the schema definition as required.
-
Click Import Definition to import the updated schema definition.
-
-
Update the GraphQL API operations as required.
Instead of resources, which get populated for REST APIs, operations get populated for GraphQL APIs.
-
Click Show More under the Operations section in the Overview page to navigate to the operations page.

-
Update the operations as required.
The Publisher can add Rate Limiting policies, scopes and enable/disable security for each of the GraphQL API operations.
-
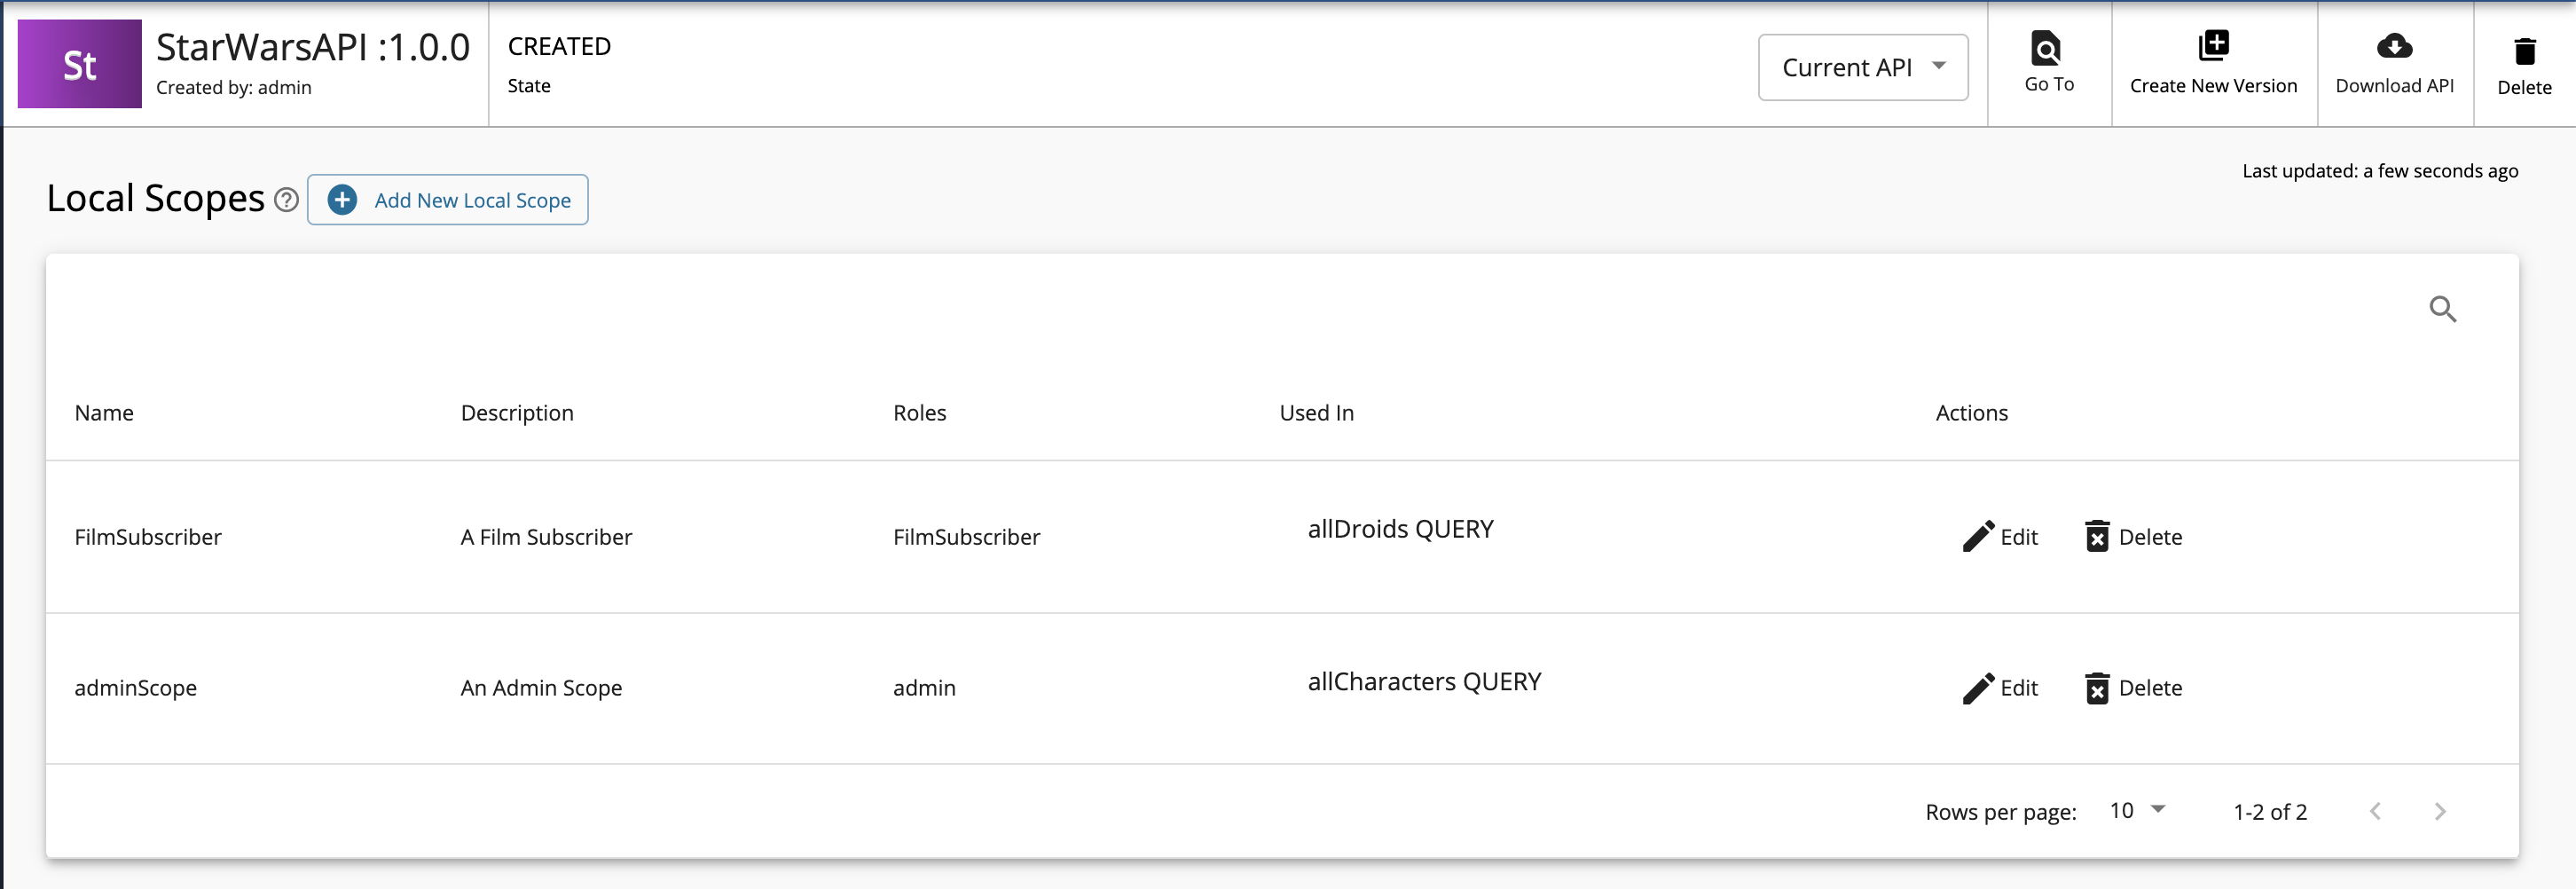
Create scopes.
Repeat the following sub-steps to create two scopes named
adminScopeandFilmSubscriberScope.-
Click Local Scopes, and then click Create Scopes.

-
Enter the required details.
Note
- The role that you enter should be a valid role that already exists in WSO2 API Manager. Make sure to assign the role to the user.
- For more information, see Adding Users and Adding User Roles.
Enter the following details for this example scenario.
Name Role FilmSubscriberFilmSubscriberadminScopeadmin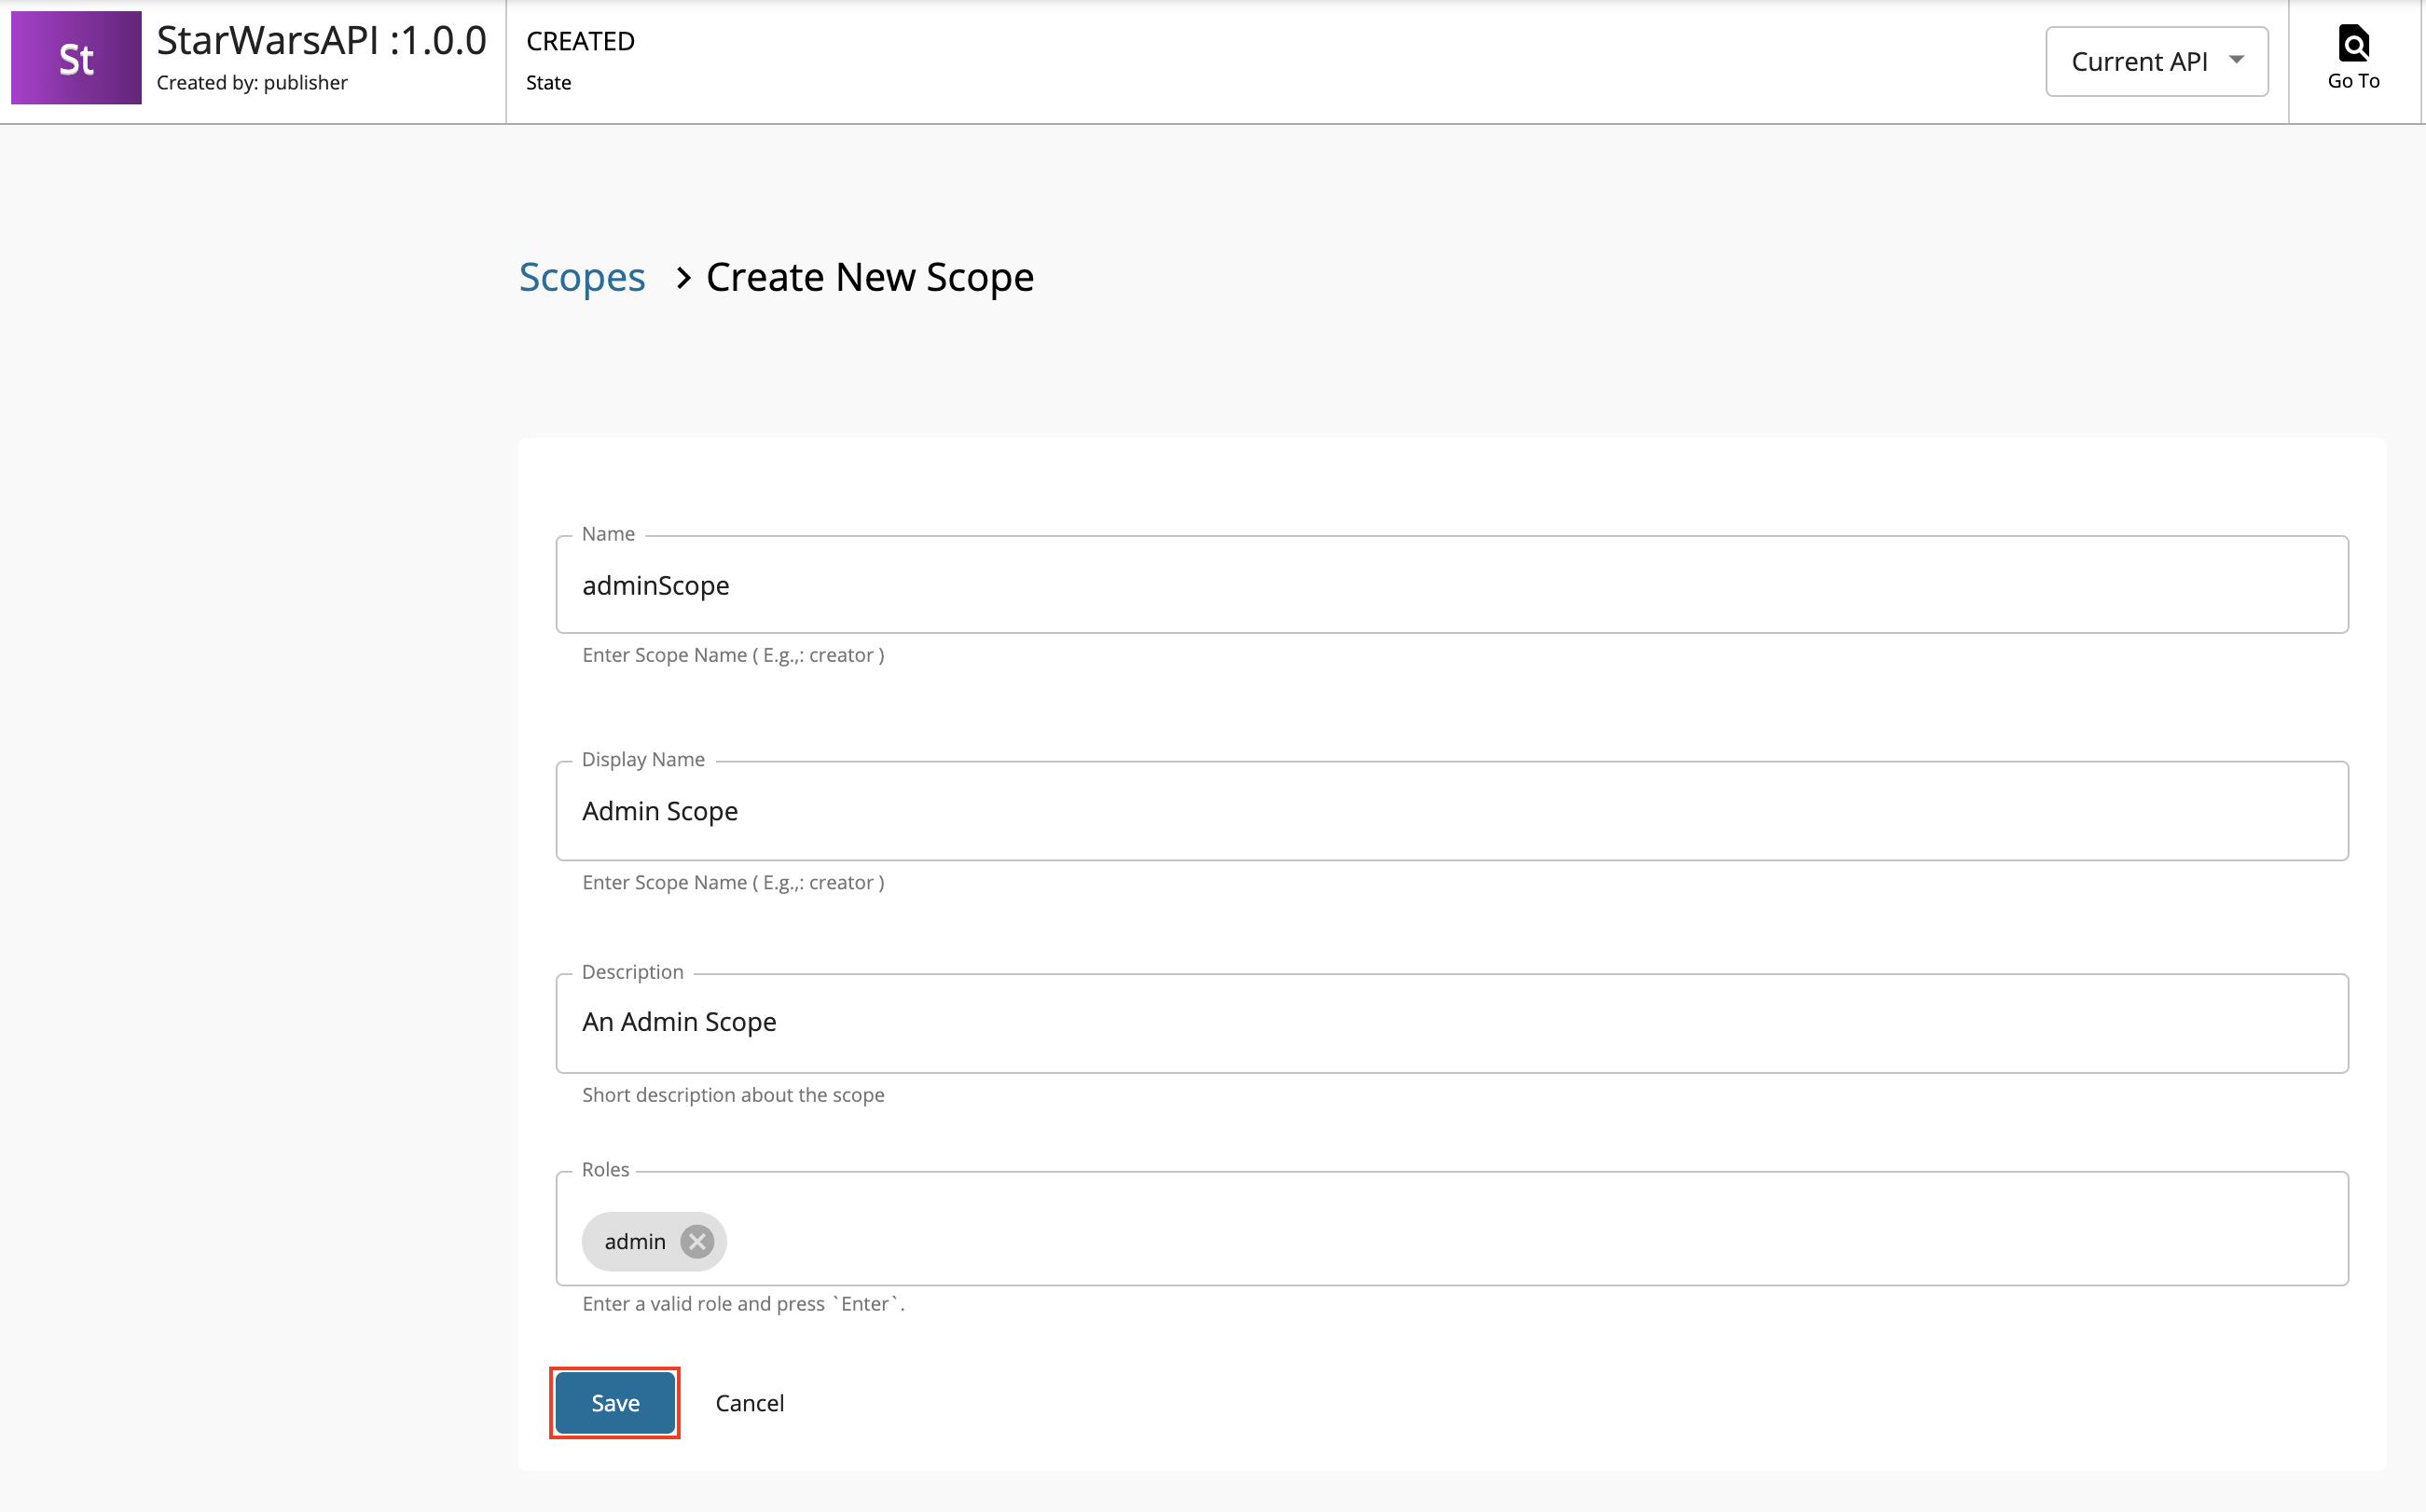
-
Press
Enterto add each role. -
Click Save.
-
-
Define the operation level configurations.
-
Click Operations.
-
Click Operation Level to apply Rate Limiting for operations.
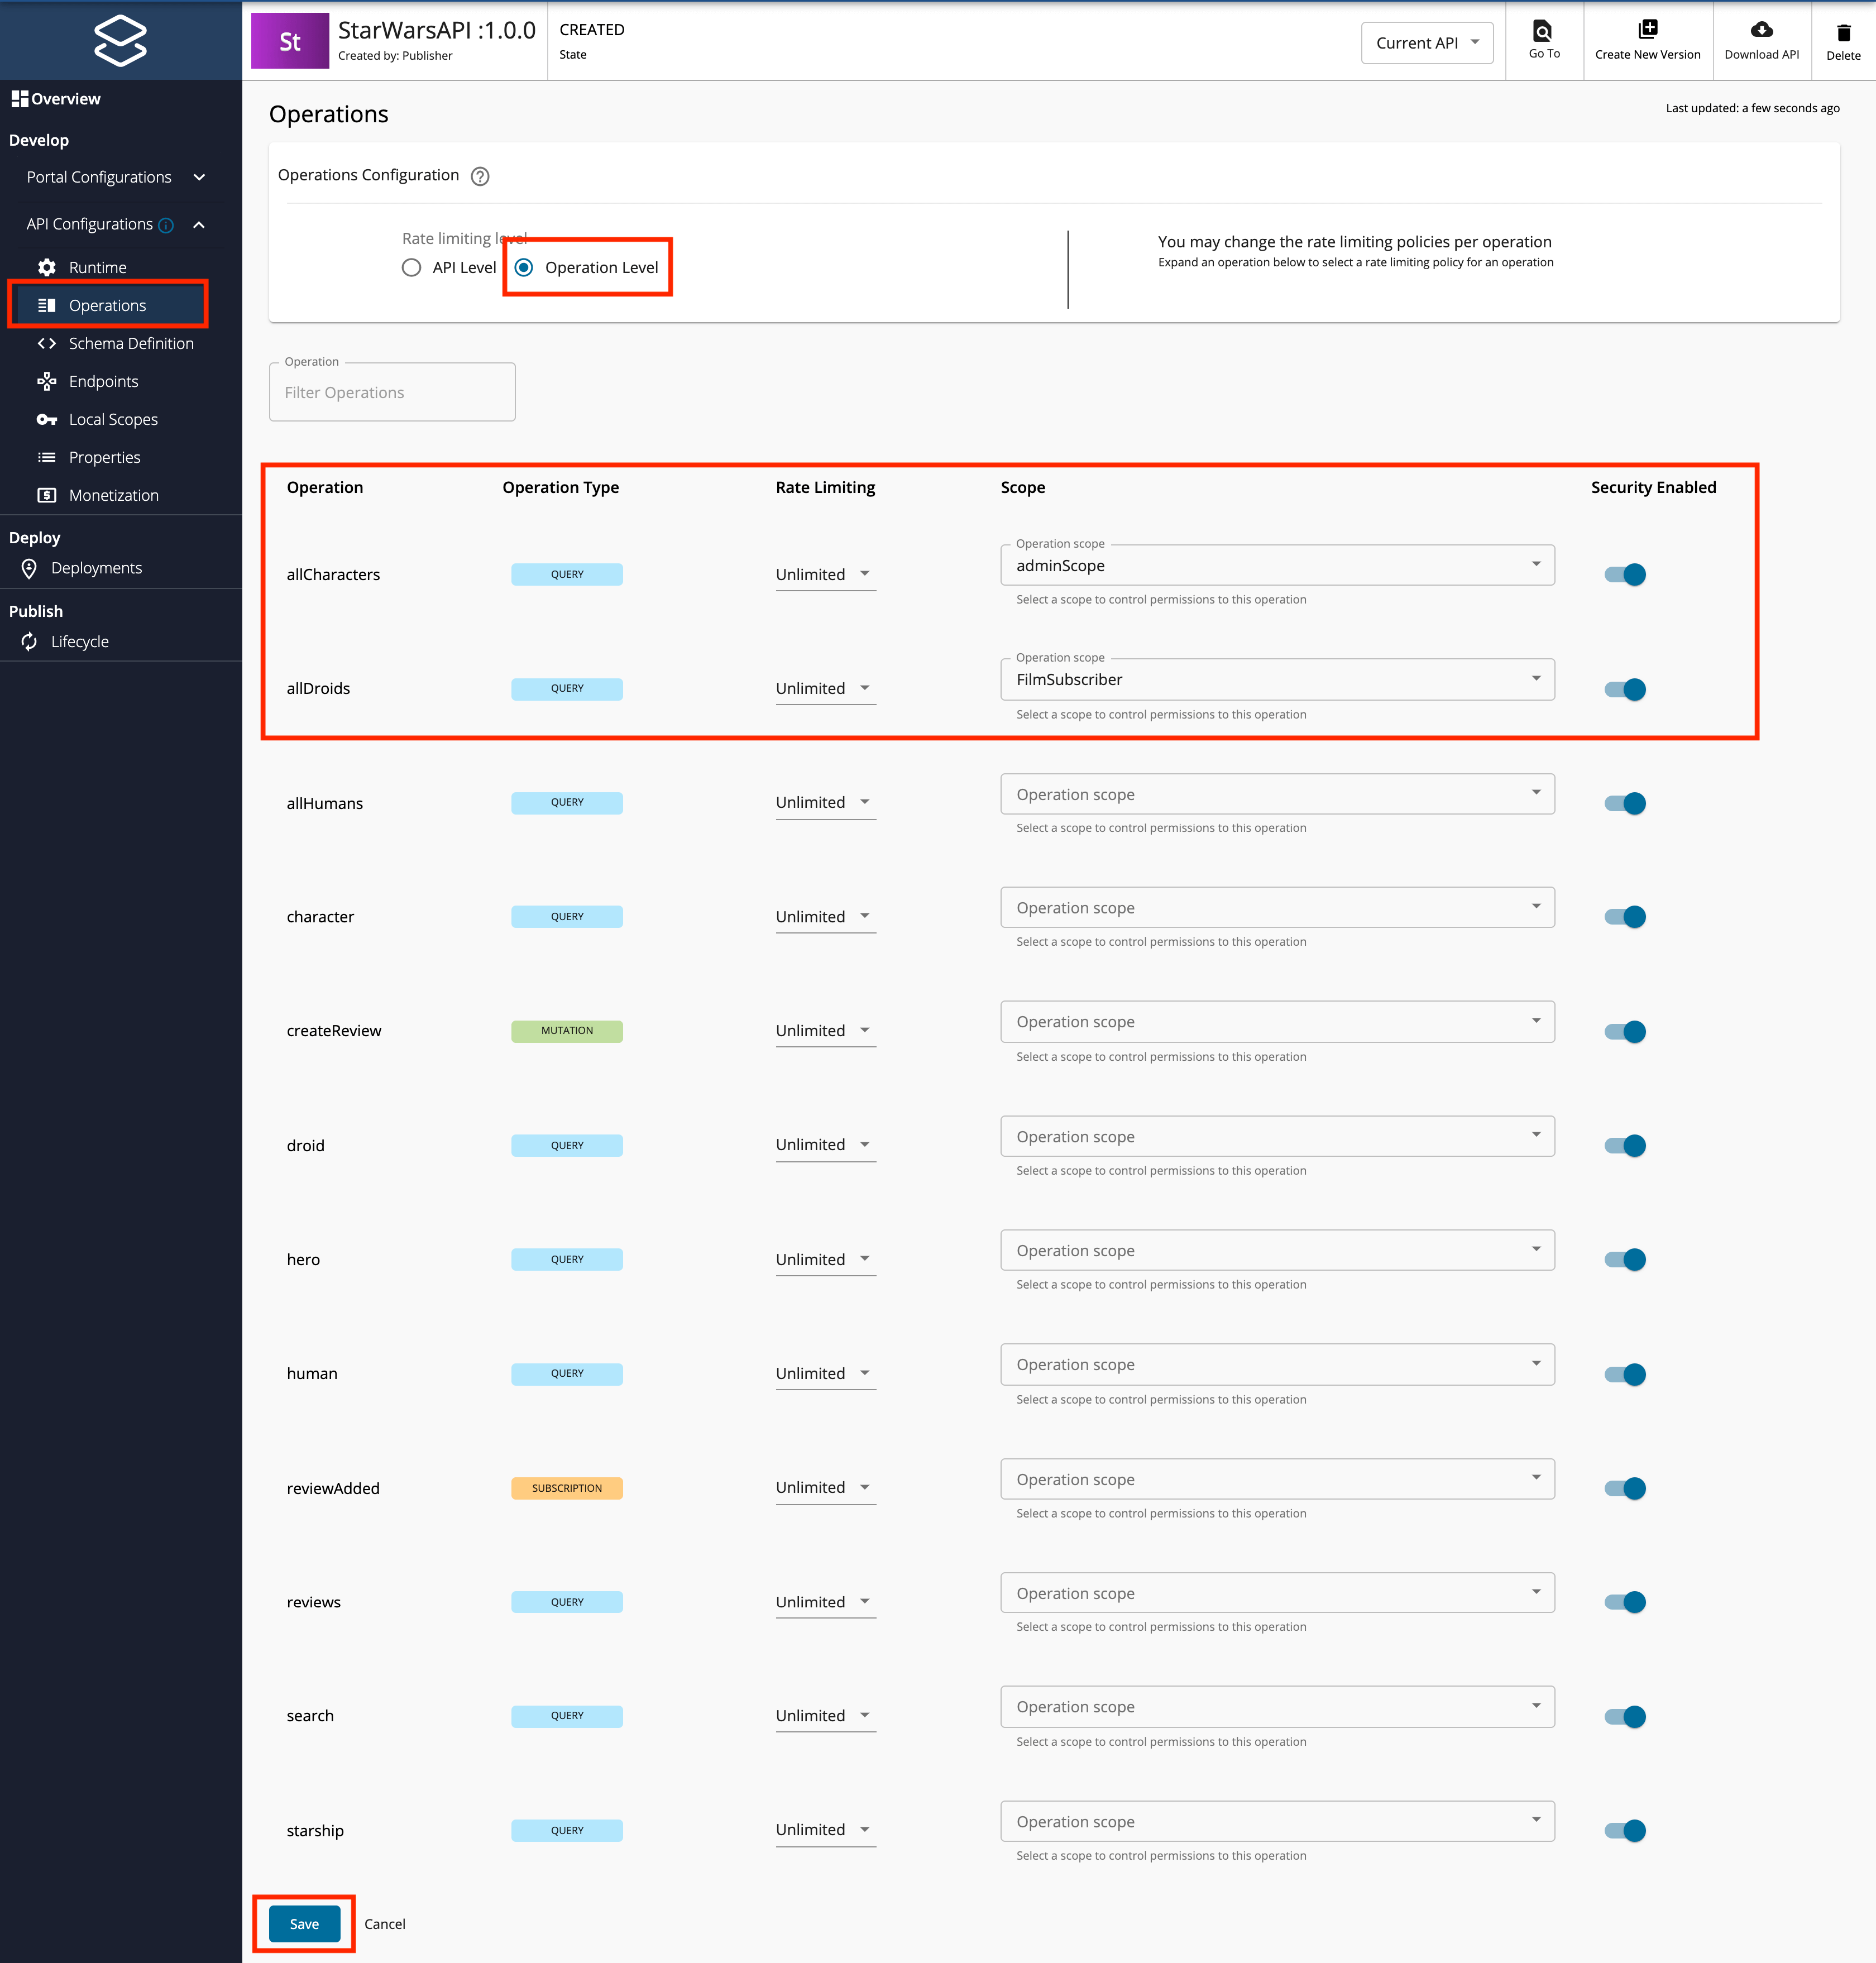
-
Select a Rate Limiting Policy, scope, and enable or disable security for each of the operations.
Apply the following scopes to the respective operations.
Operation Scope allDroidsFilmSubscriberallCharactersadminScope -
Click Save.
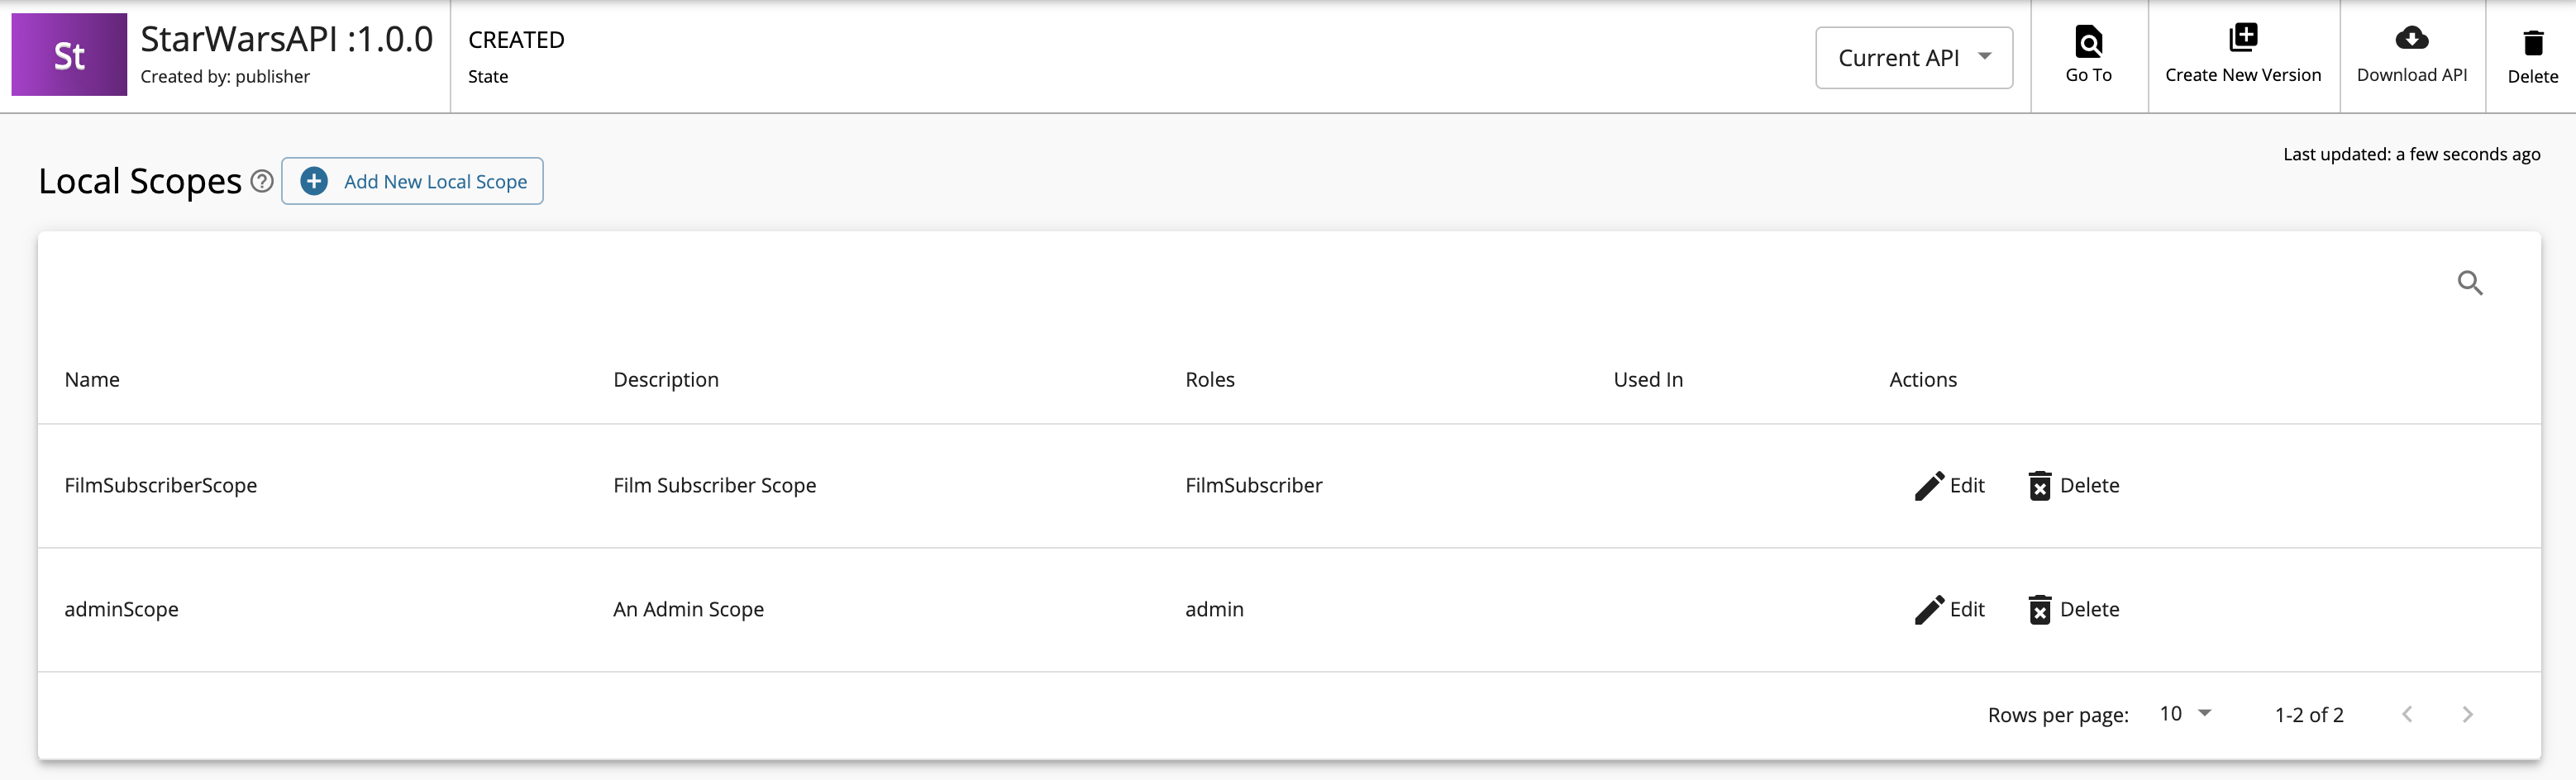
If you check the list of scopes, it should appear as follows:
-
-
-