Configure Asgardeo as a Key Manager
WSO2 API Manager supports multiple Key Managers at the same time. As a result, WSO2 API Manager is prepacked with an inbuilt resident Key Manager, and with the use of connectors, it is capable of supporting any authorization server as a Key Manager.
WSO2 API Manager can connect Asgardeo by WSO2 out-of-the-box using the WSO2 API-M Asgardeo Connector.
Follow the instructions given below to configure Asgardeo as a third-party Key Manager:
Step 1 - Configure Asgardeo
-
Log into the Asgardeo Console and create or select the organization you want to use with WSO2 API Manager.
-
Create an OAuth Application that will act as the management client for WSO2 API Manager.
-
Navigate to Applications →
+ New Application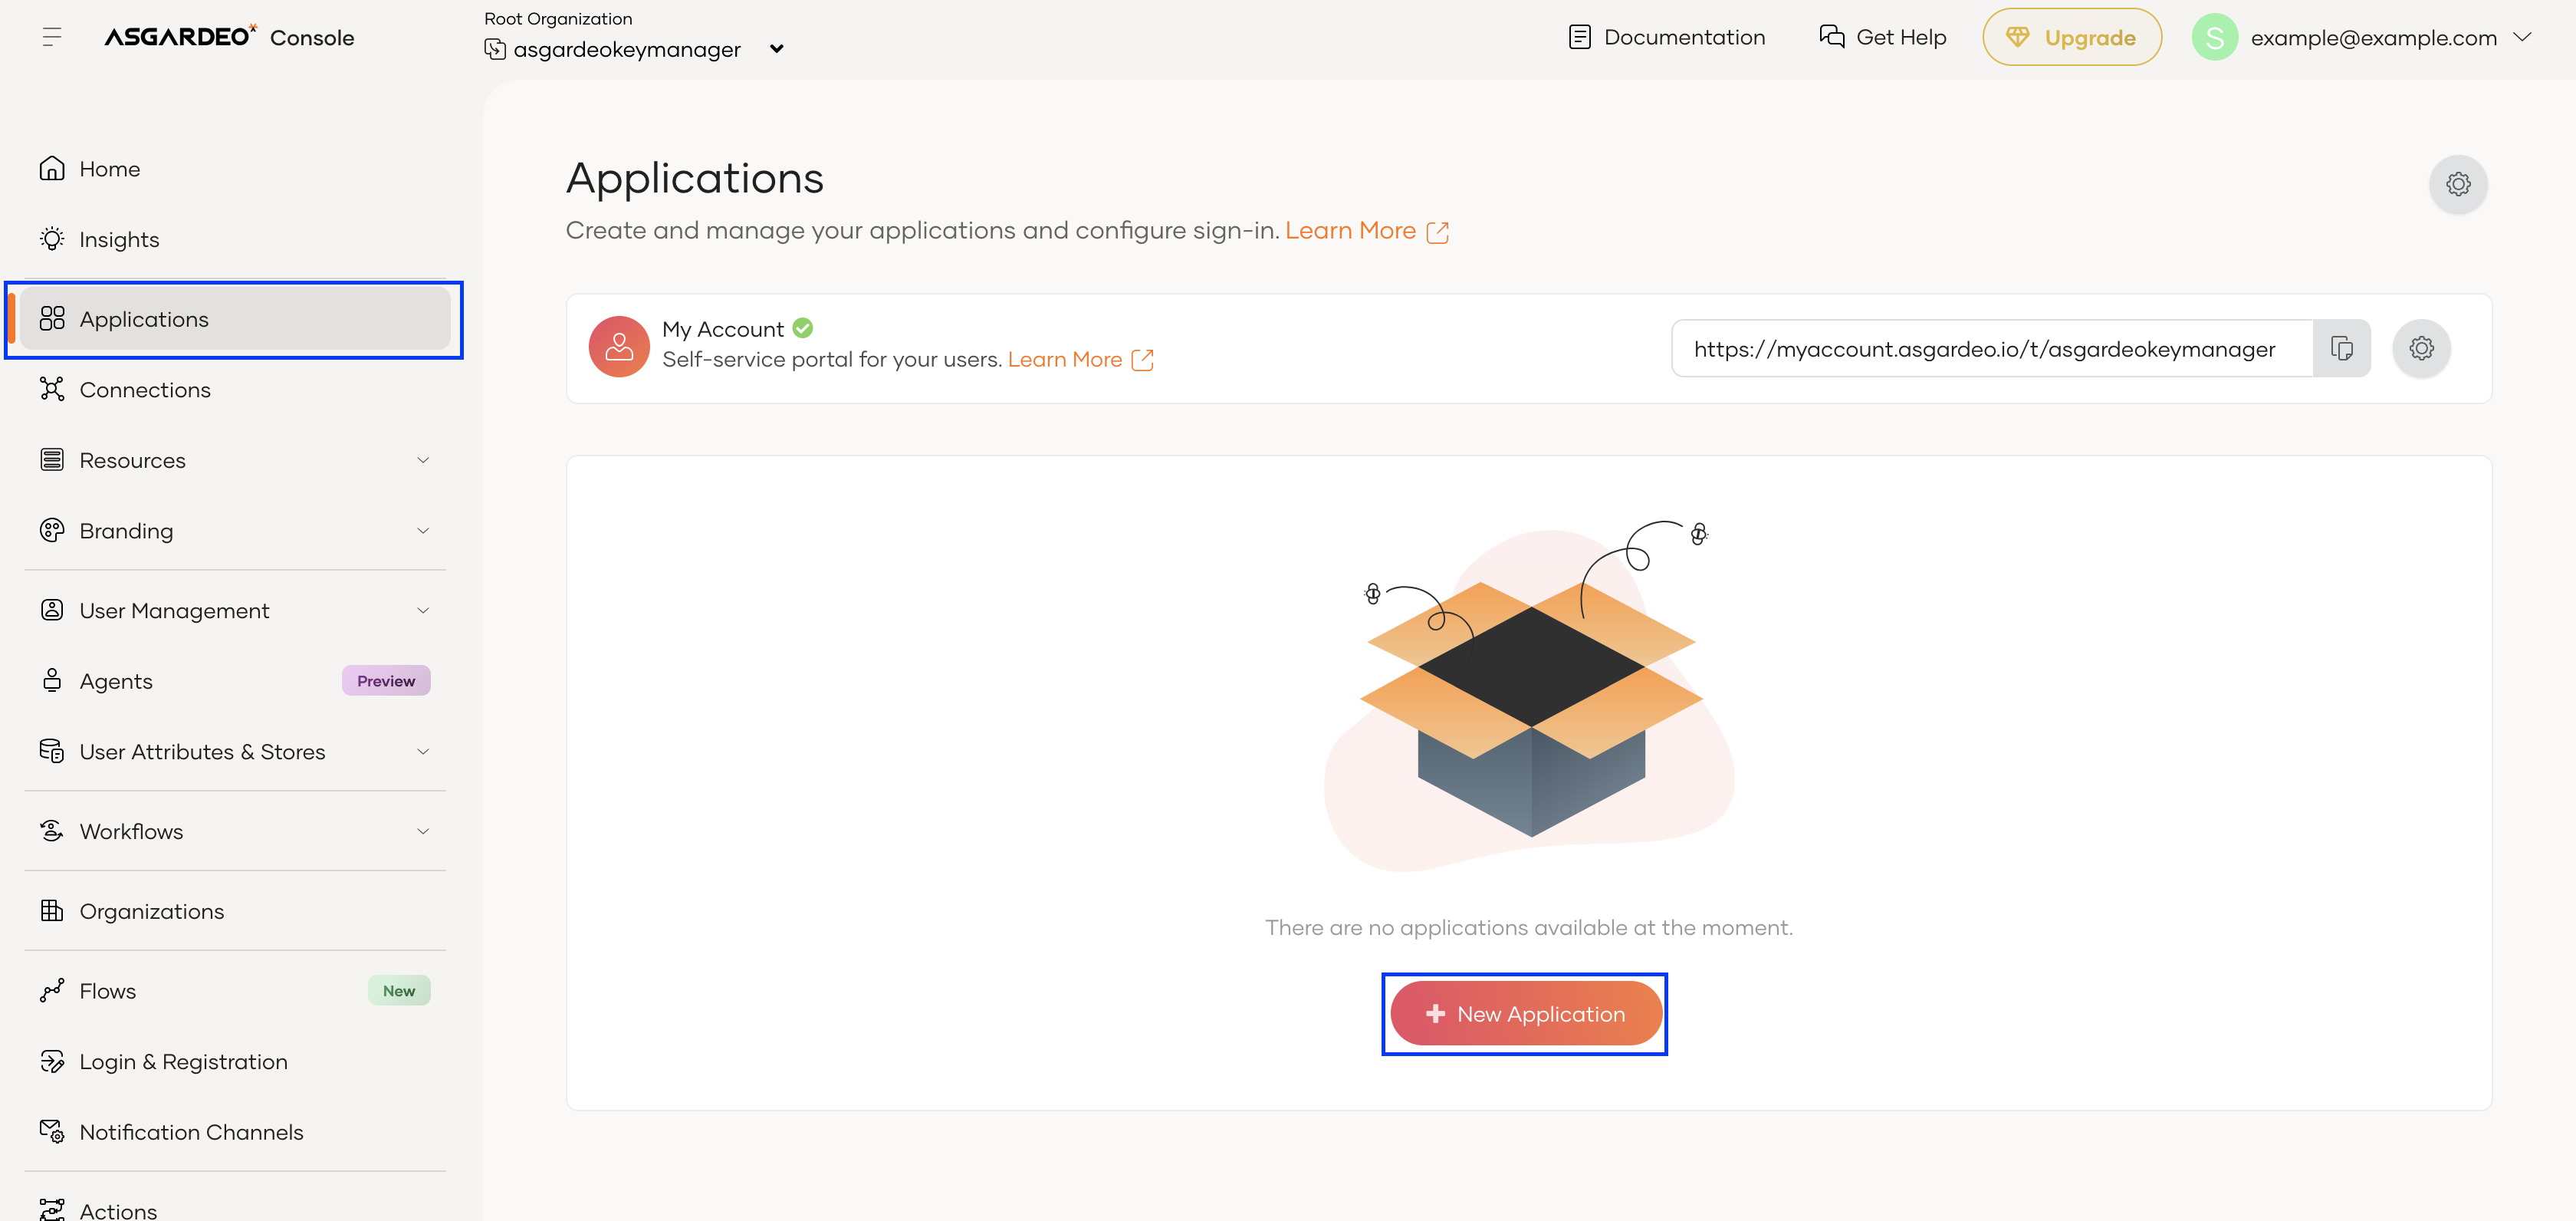
-
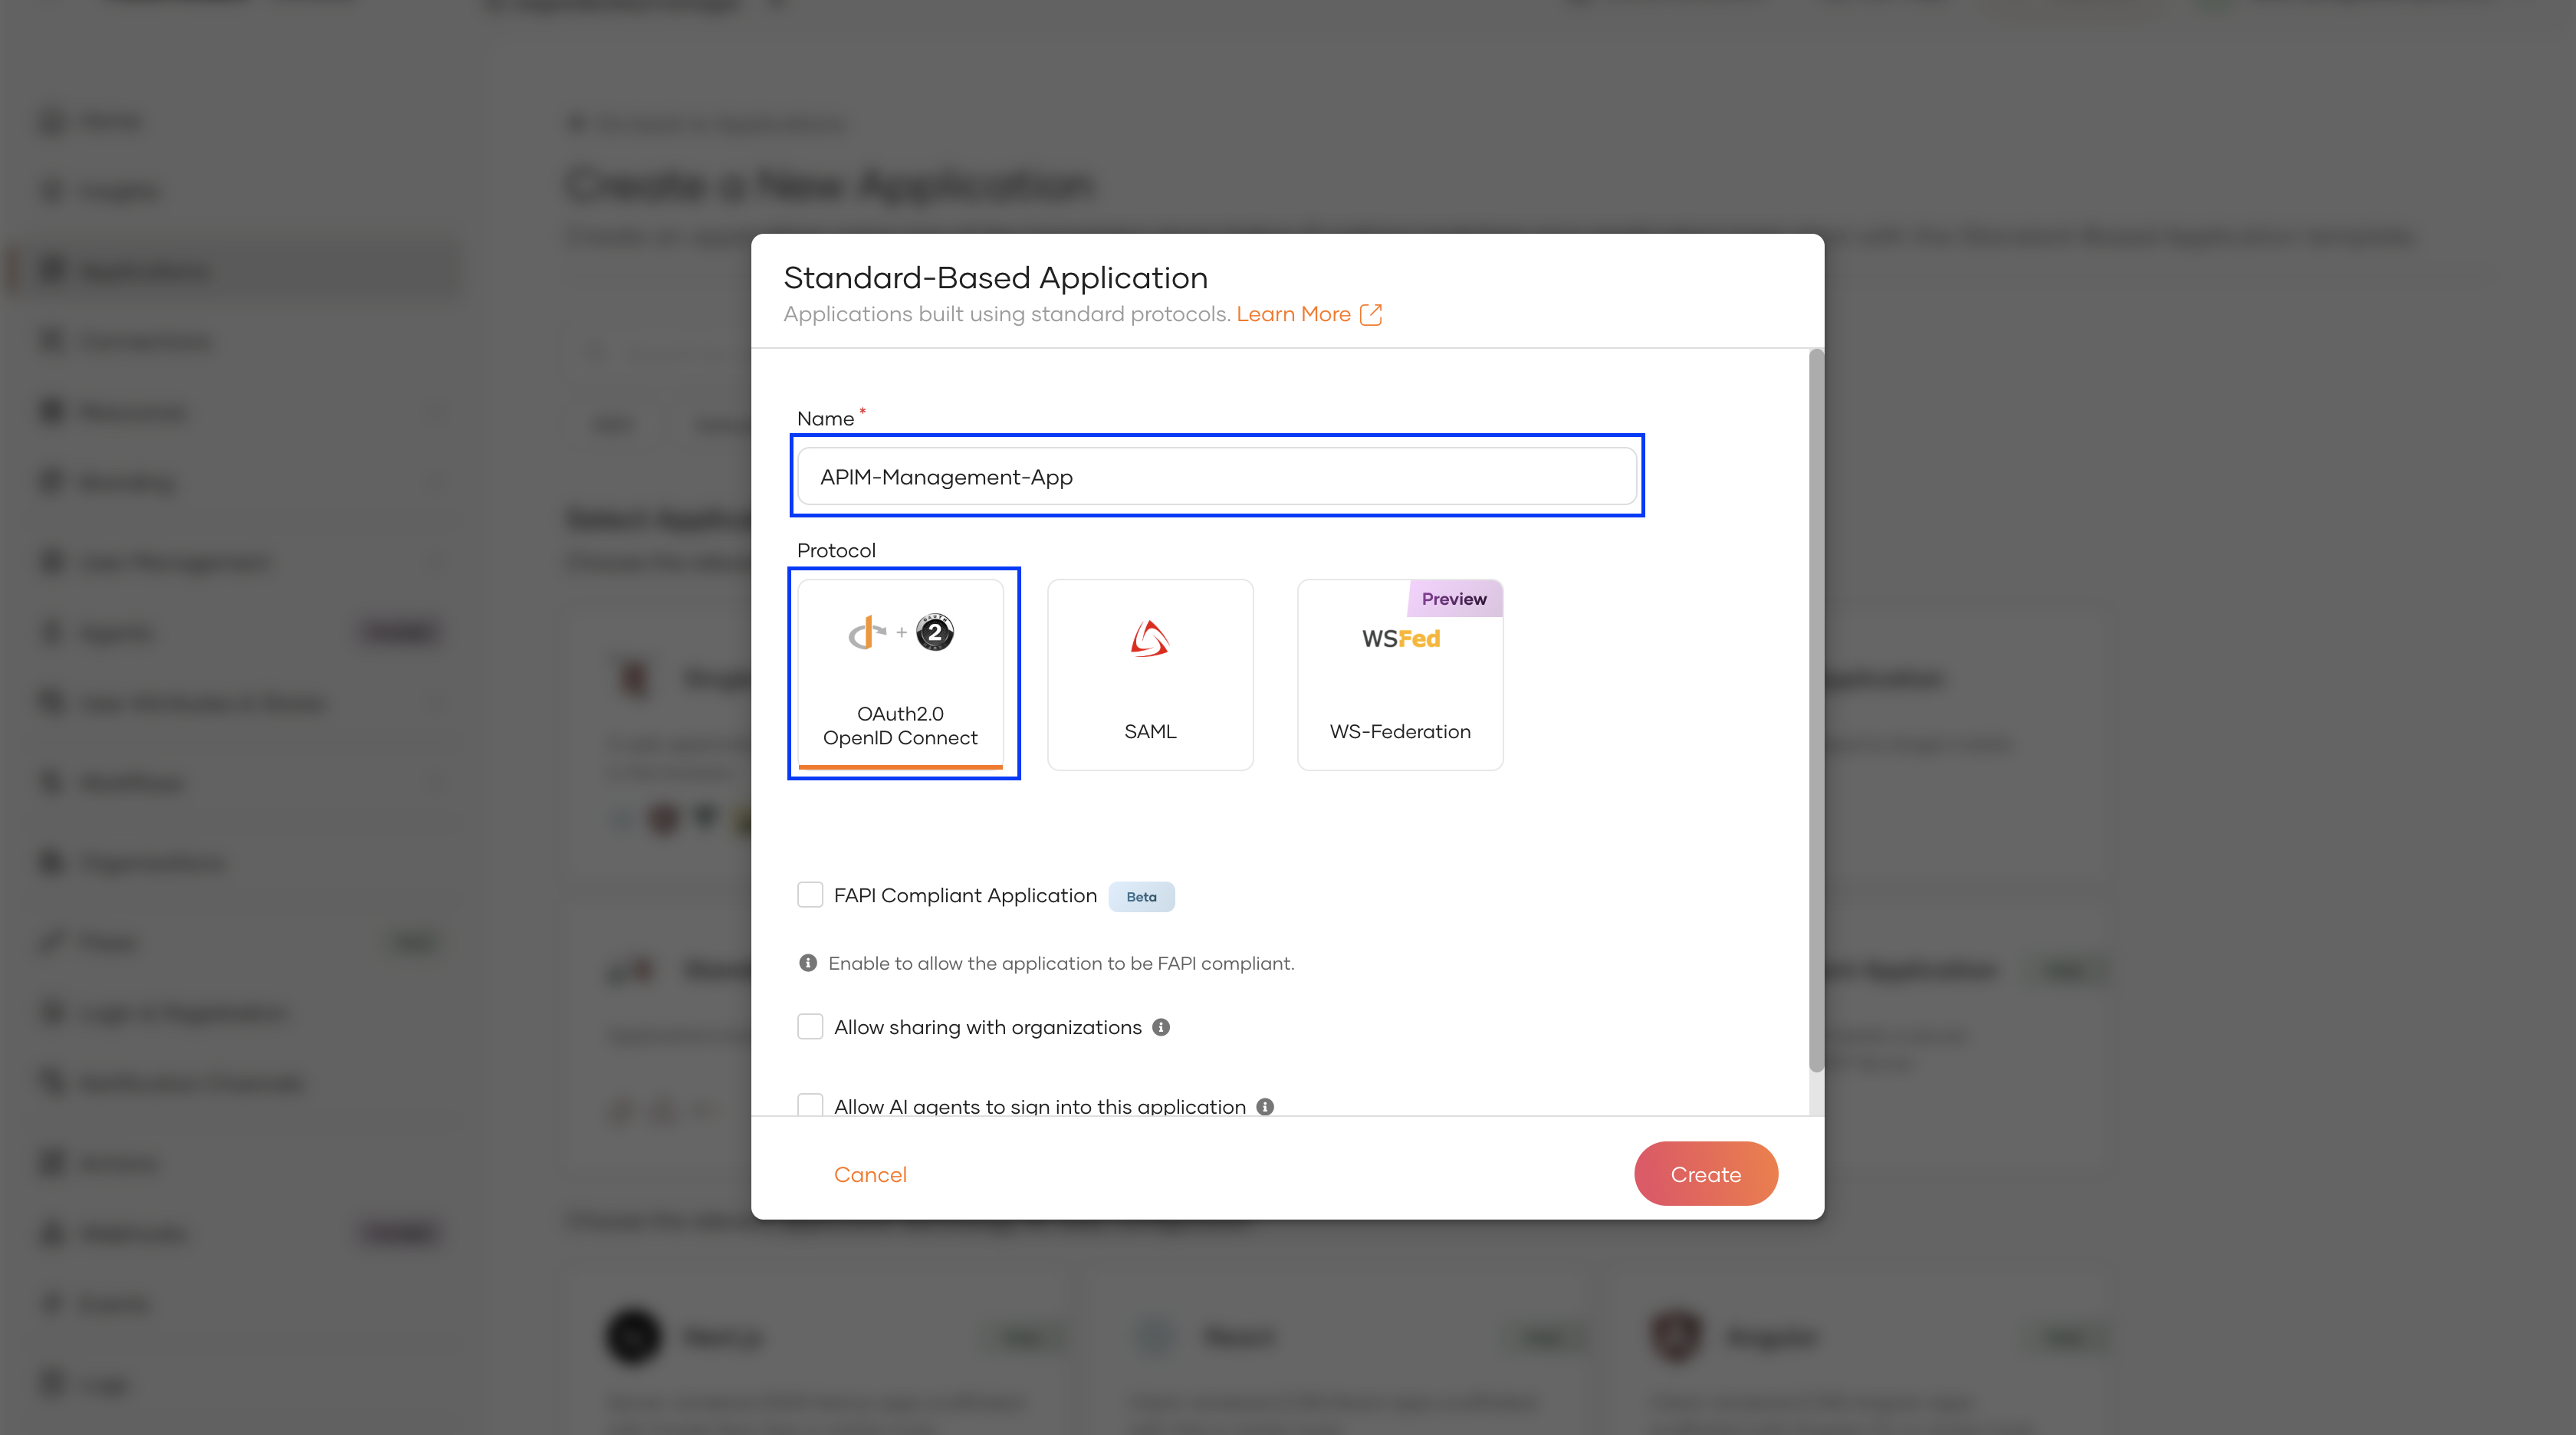
Create a Standard-Based Application with the following Name and Protocol.
Name Protocol APIM-Management-App OAuth 2.0 + OpenID Connect 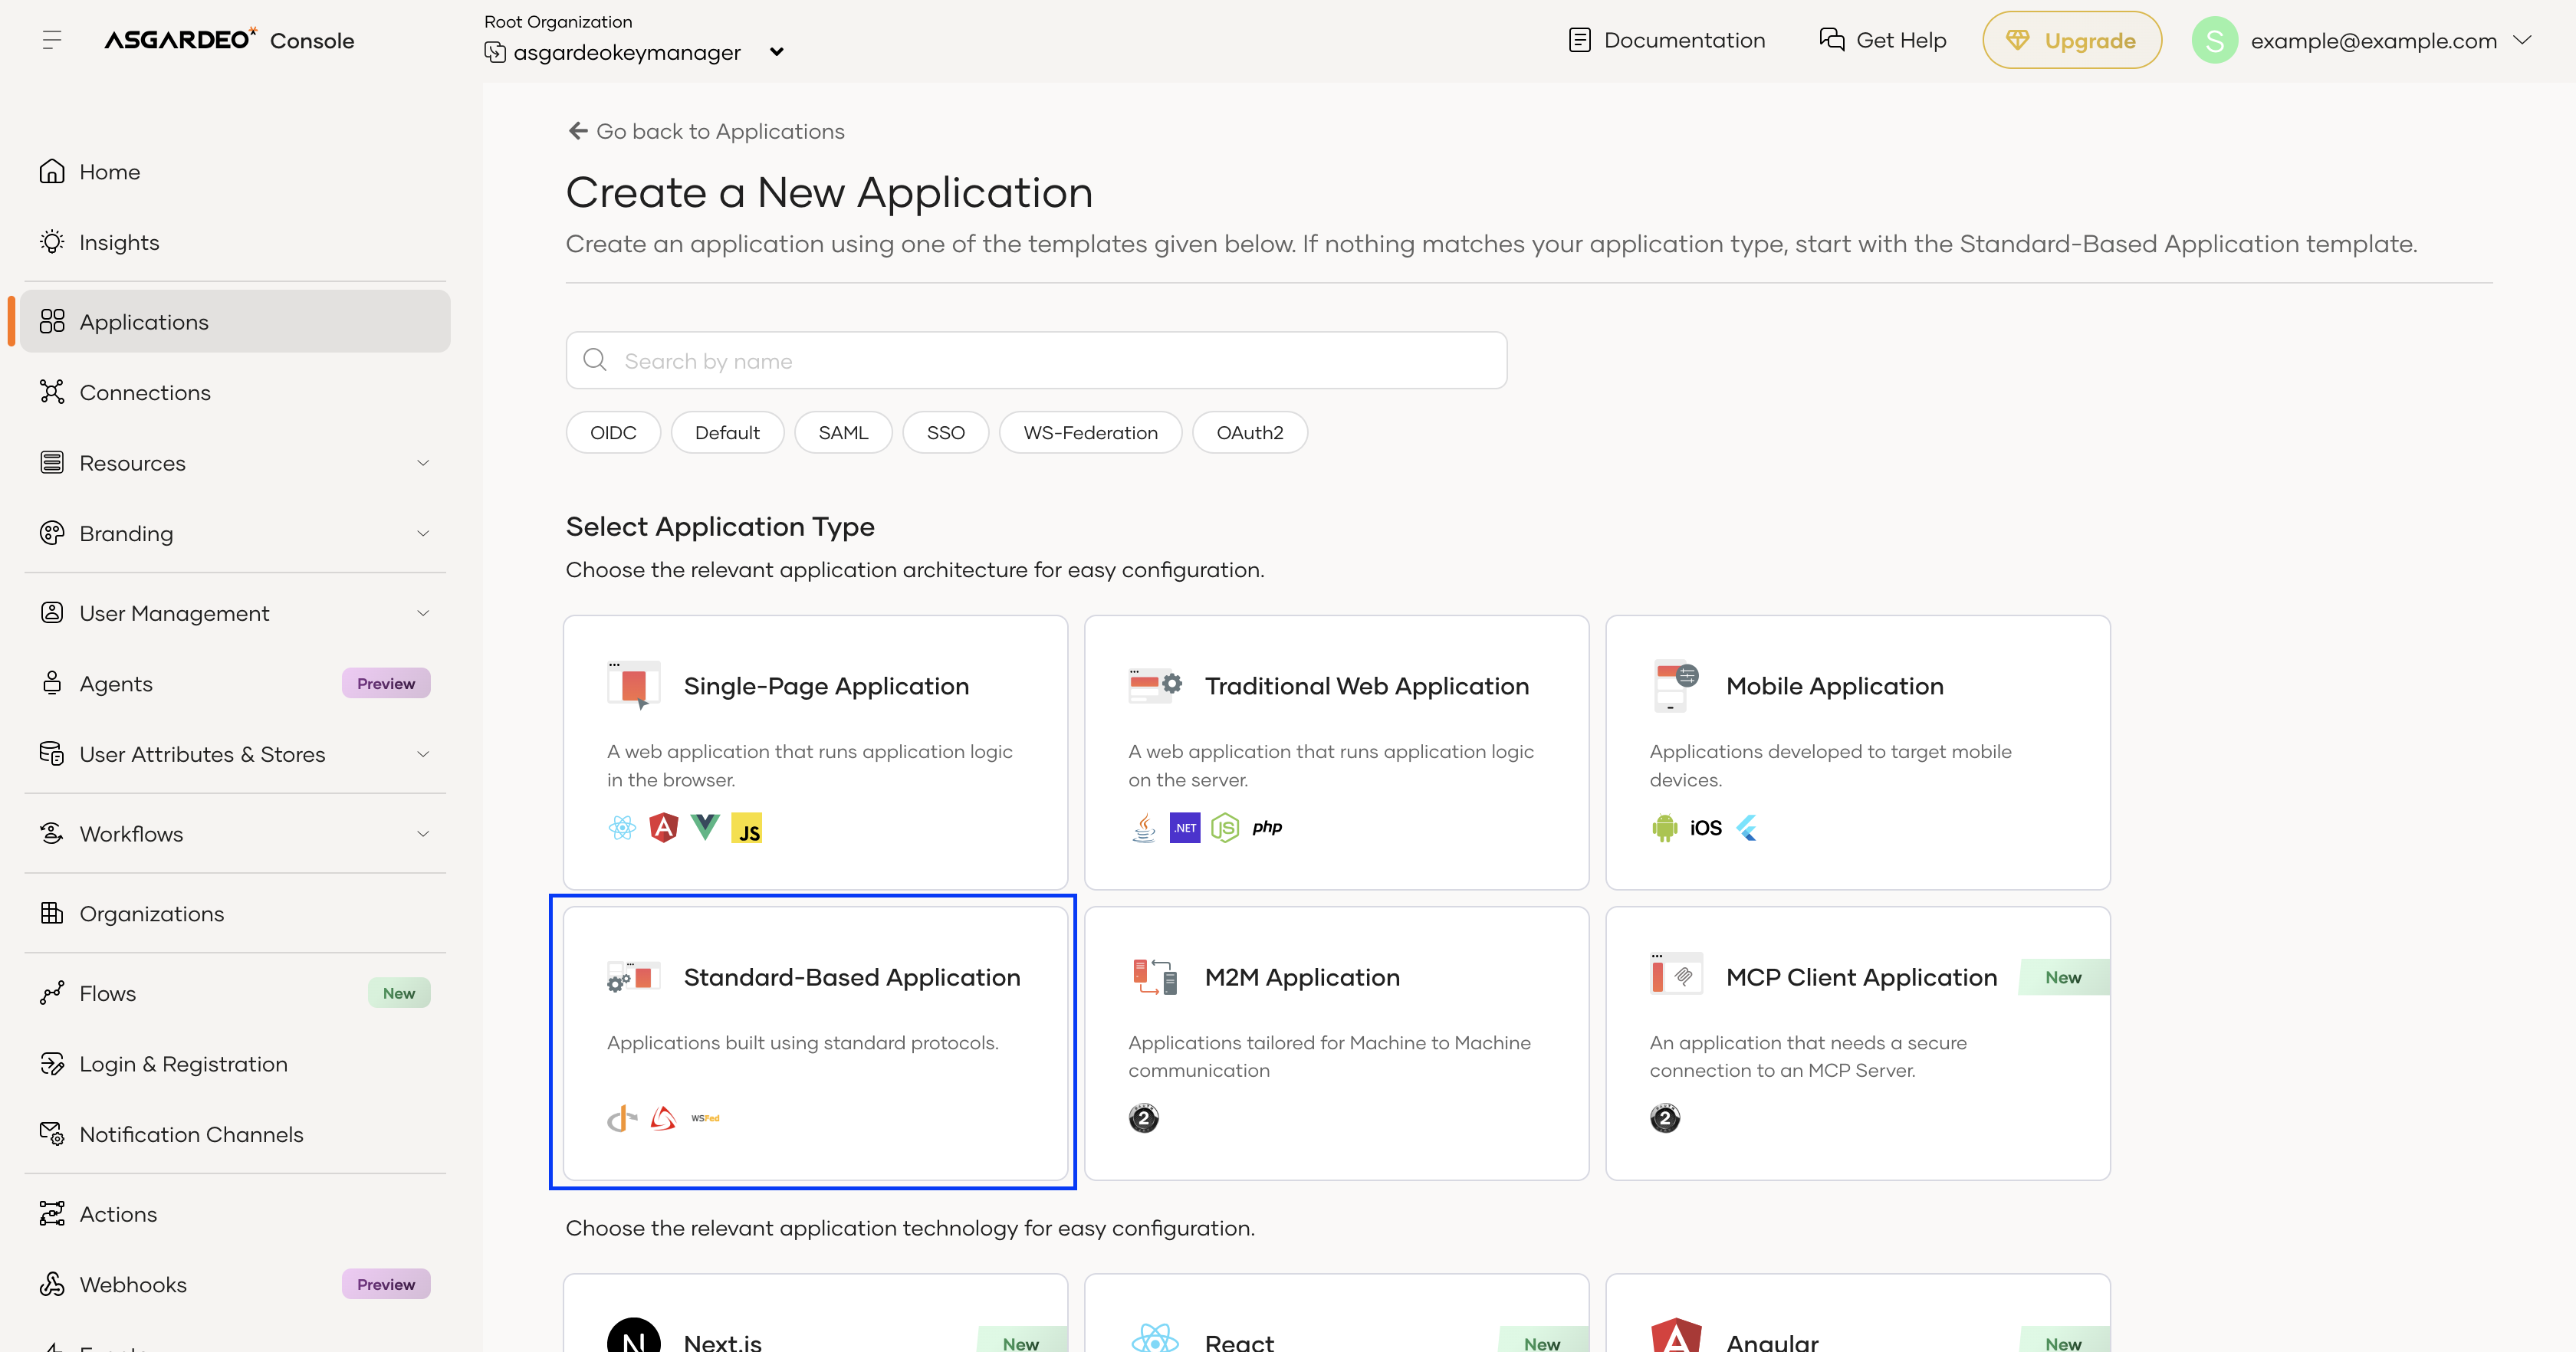
-
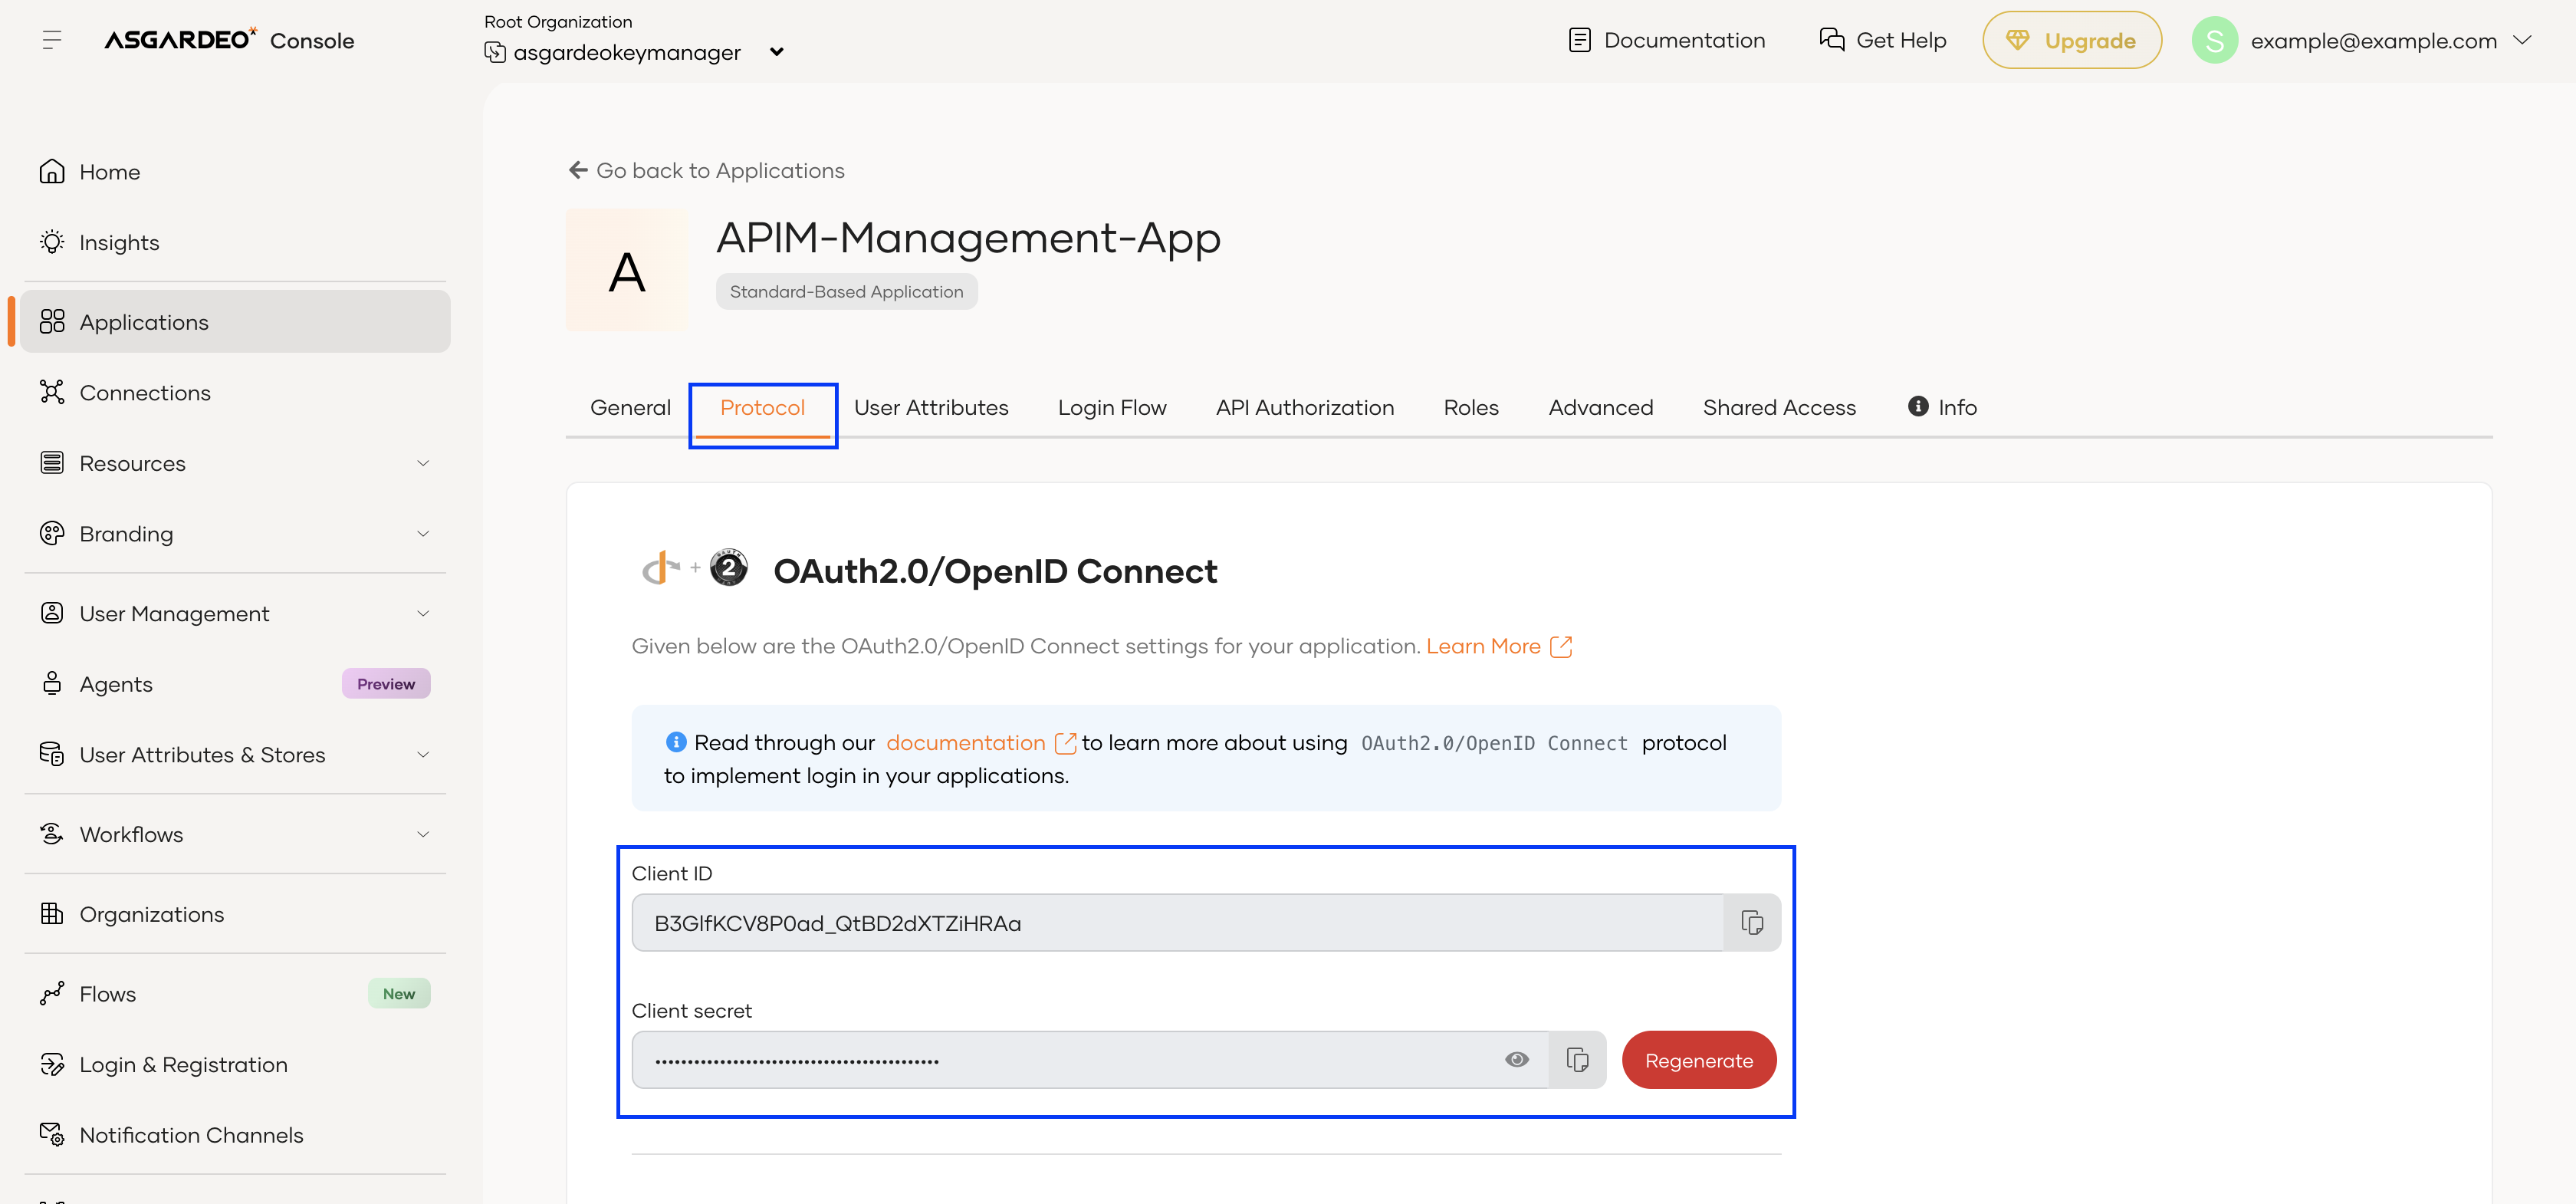
In the page that follows, make note of the Client ID and Client secret found under Protocol.
-
-
Authorize the Management OAuth Application to use the required Management APIs.
-
Navigate to API Authorization →
+ Authorize API resourcein the created application.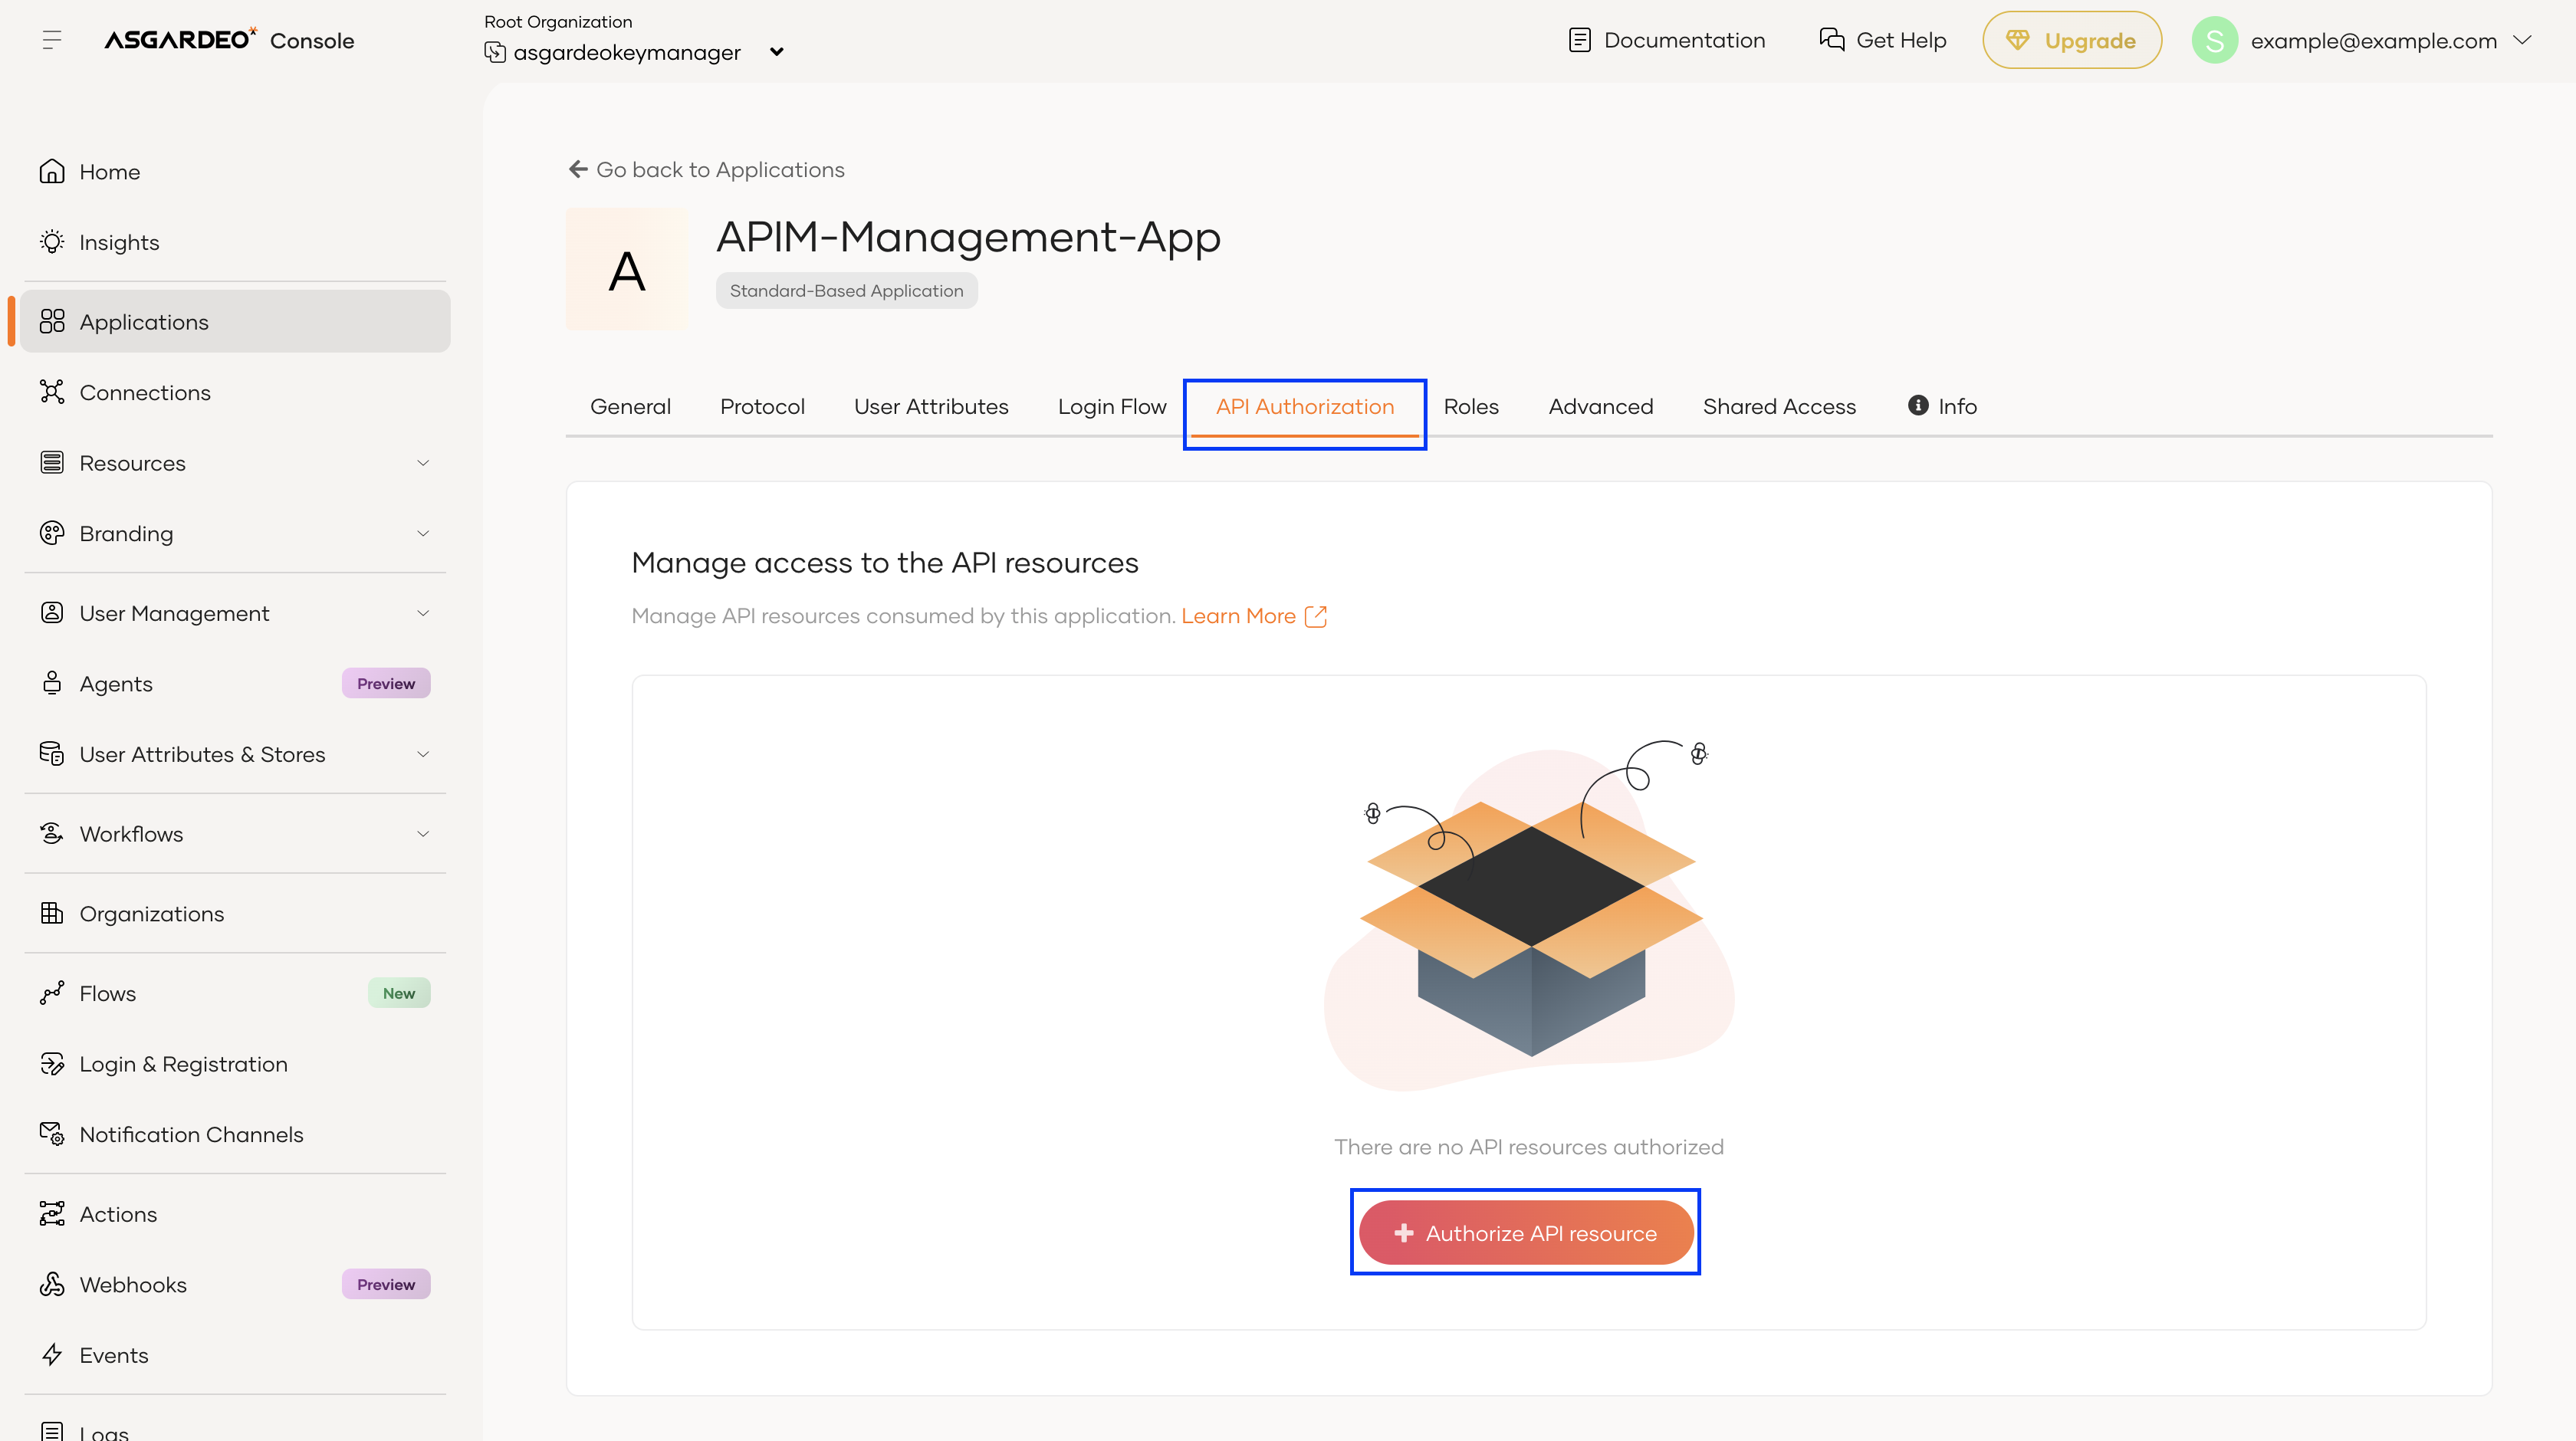
-
In the popped-up window, select the Management API
OAuth DCR APIas the API Resource,Select Allfor Authorized Scopes, and click on Finish.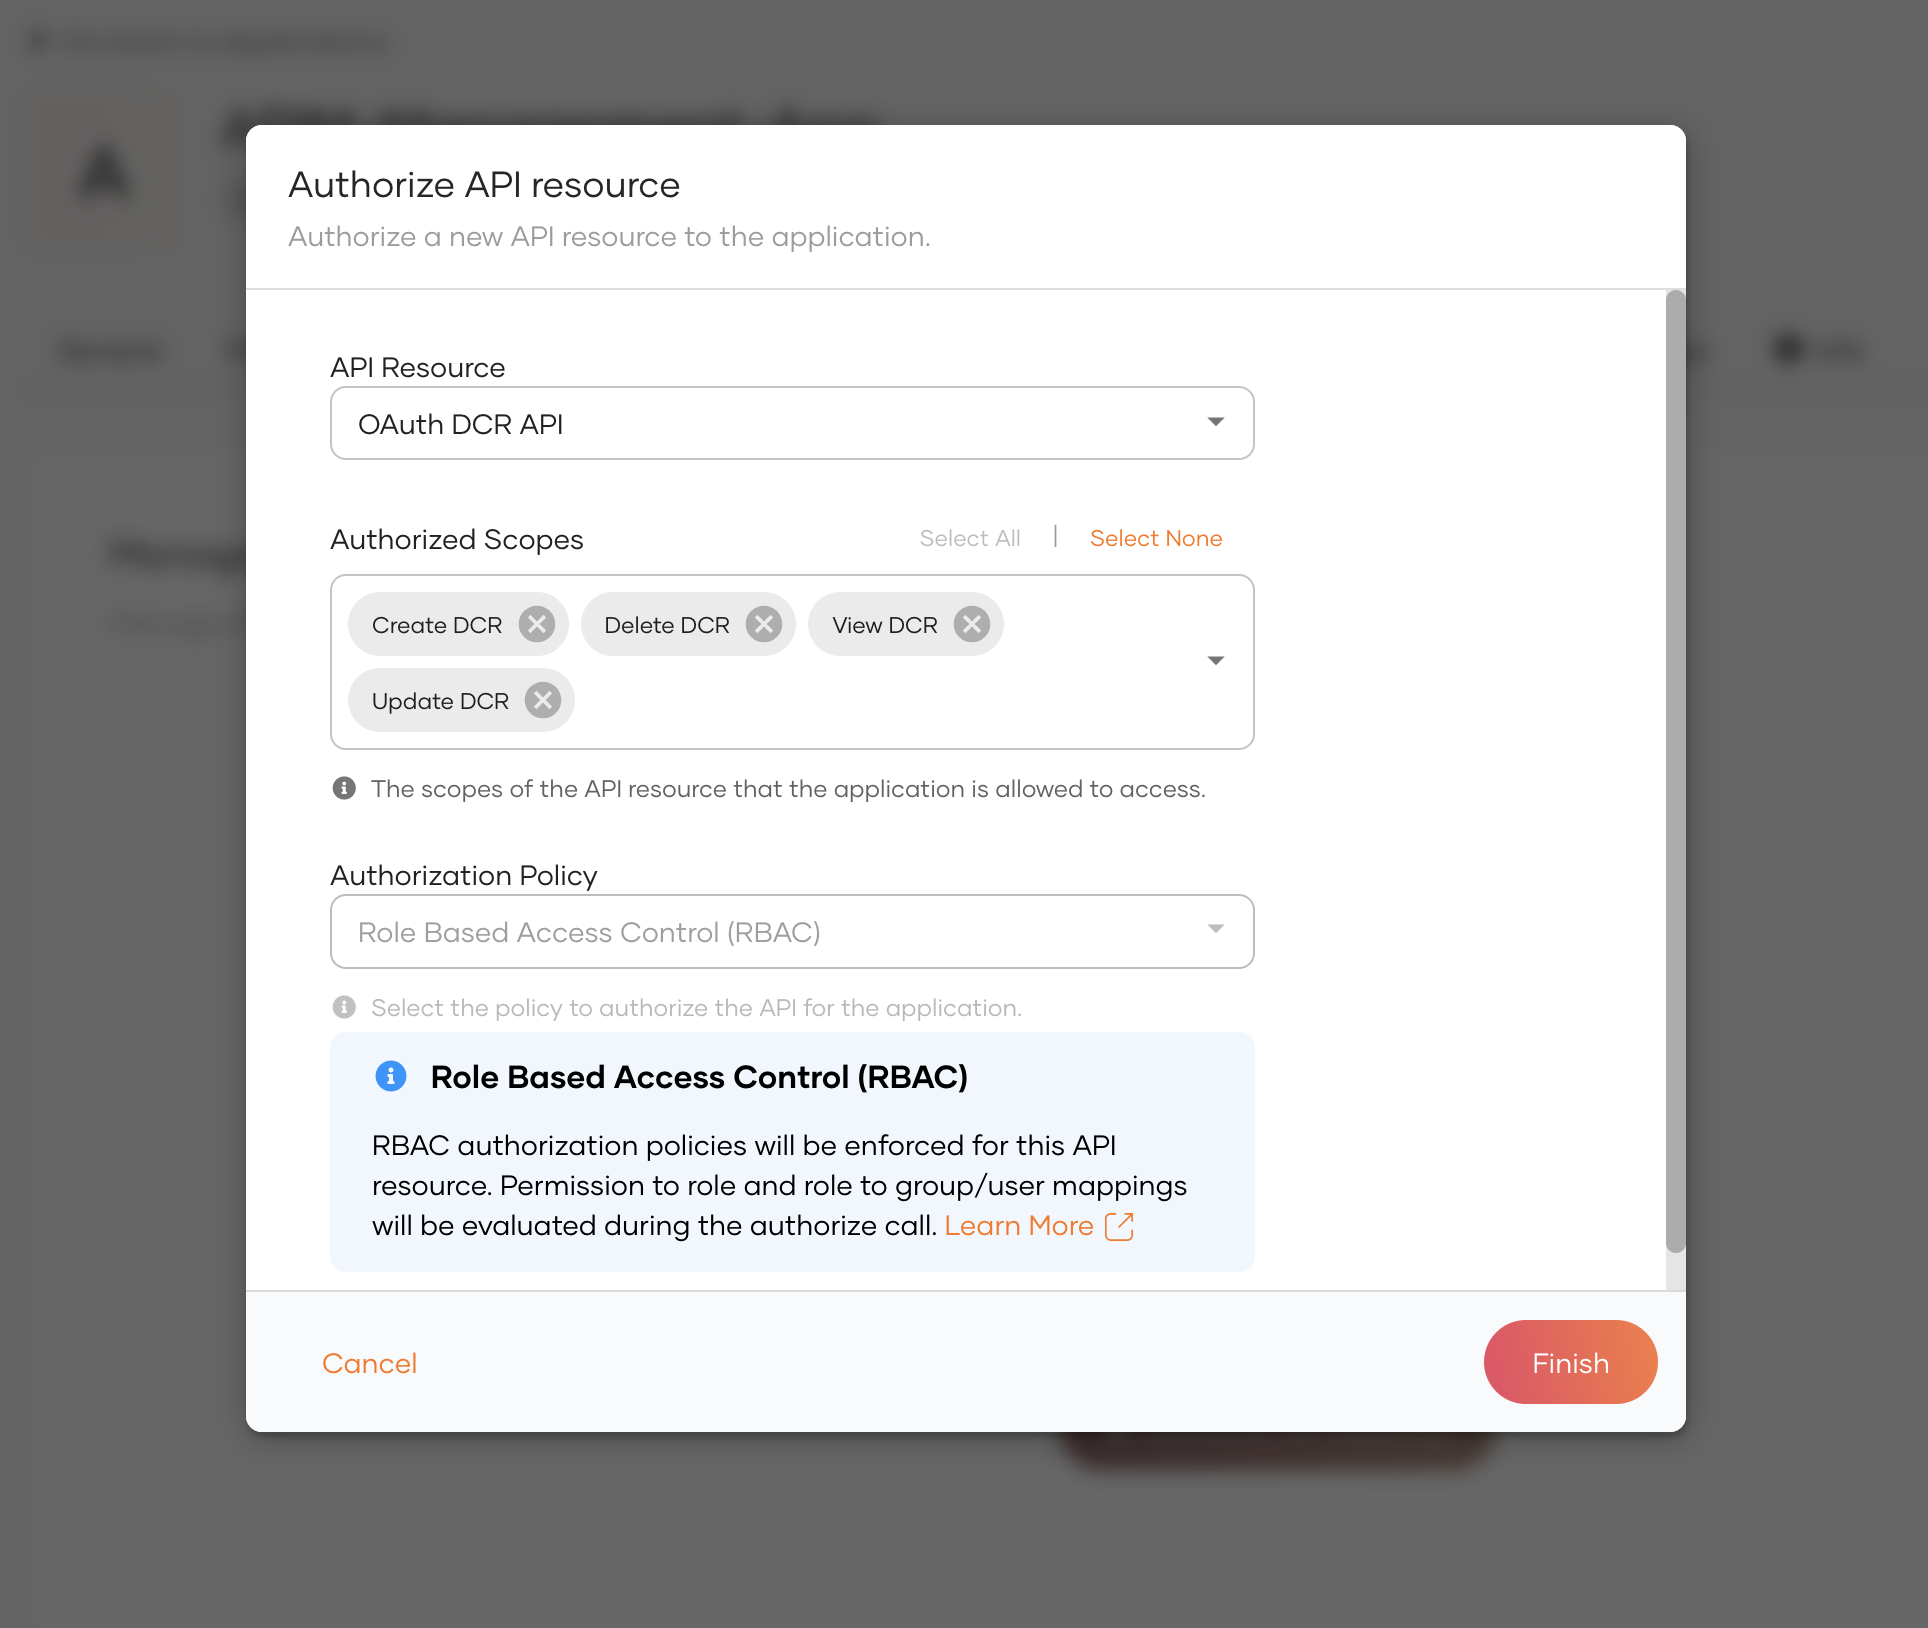
Note
If the required API Resource doesn't appear, please allow a few moments for the API Resources list to finish loading. Reload the page if the issue persists.
Note
Ensure you have authorized the Management API version of the API Resource. It is a common mistake to authorize the Organization API version instead.
-
Repeat the previous step for the following Management APIs:
- API Resource Management API
- SCIM2 Roles V1/V2 API
-
-
Create an API Resource that serves as a global container for the scopes defined in WSO2 API Manager.
-
Navigate to Resources → API Resources →
+ New API Resource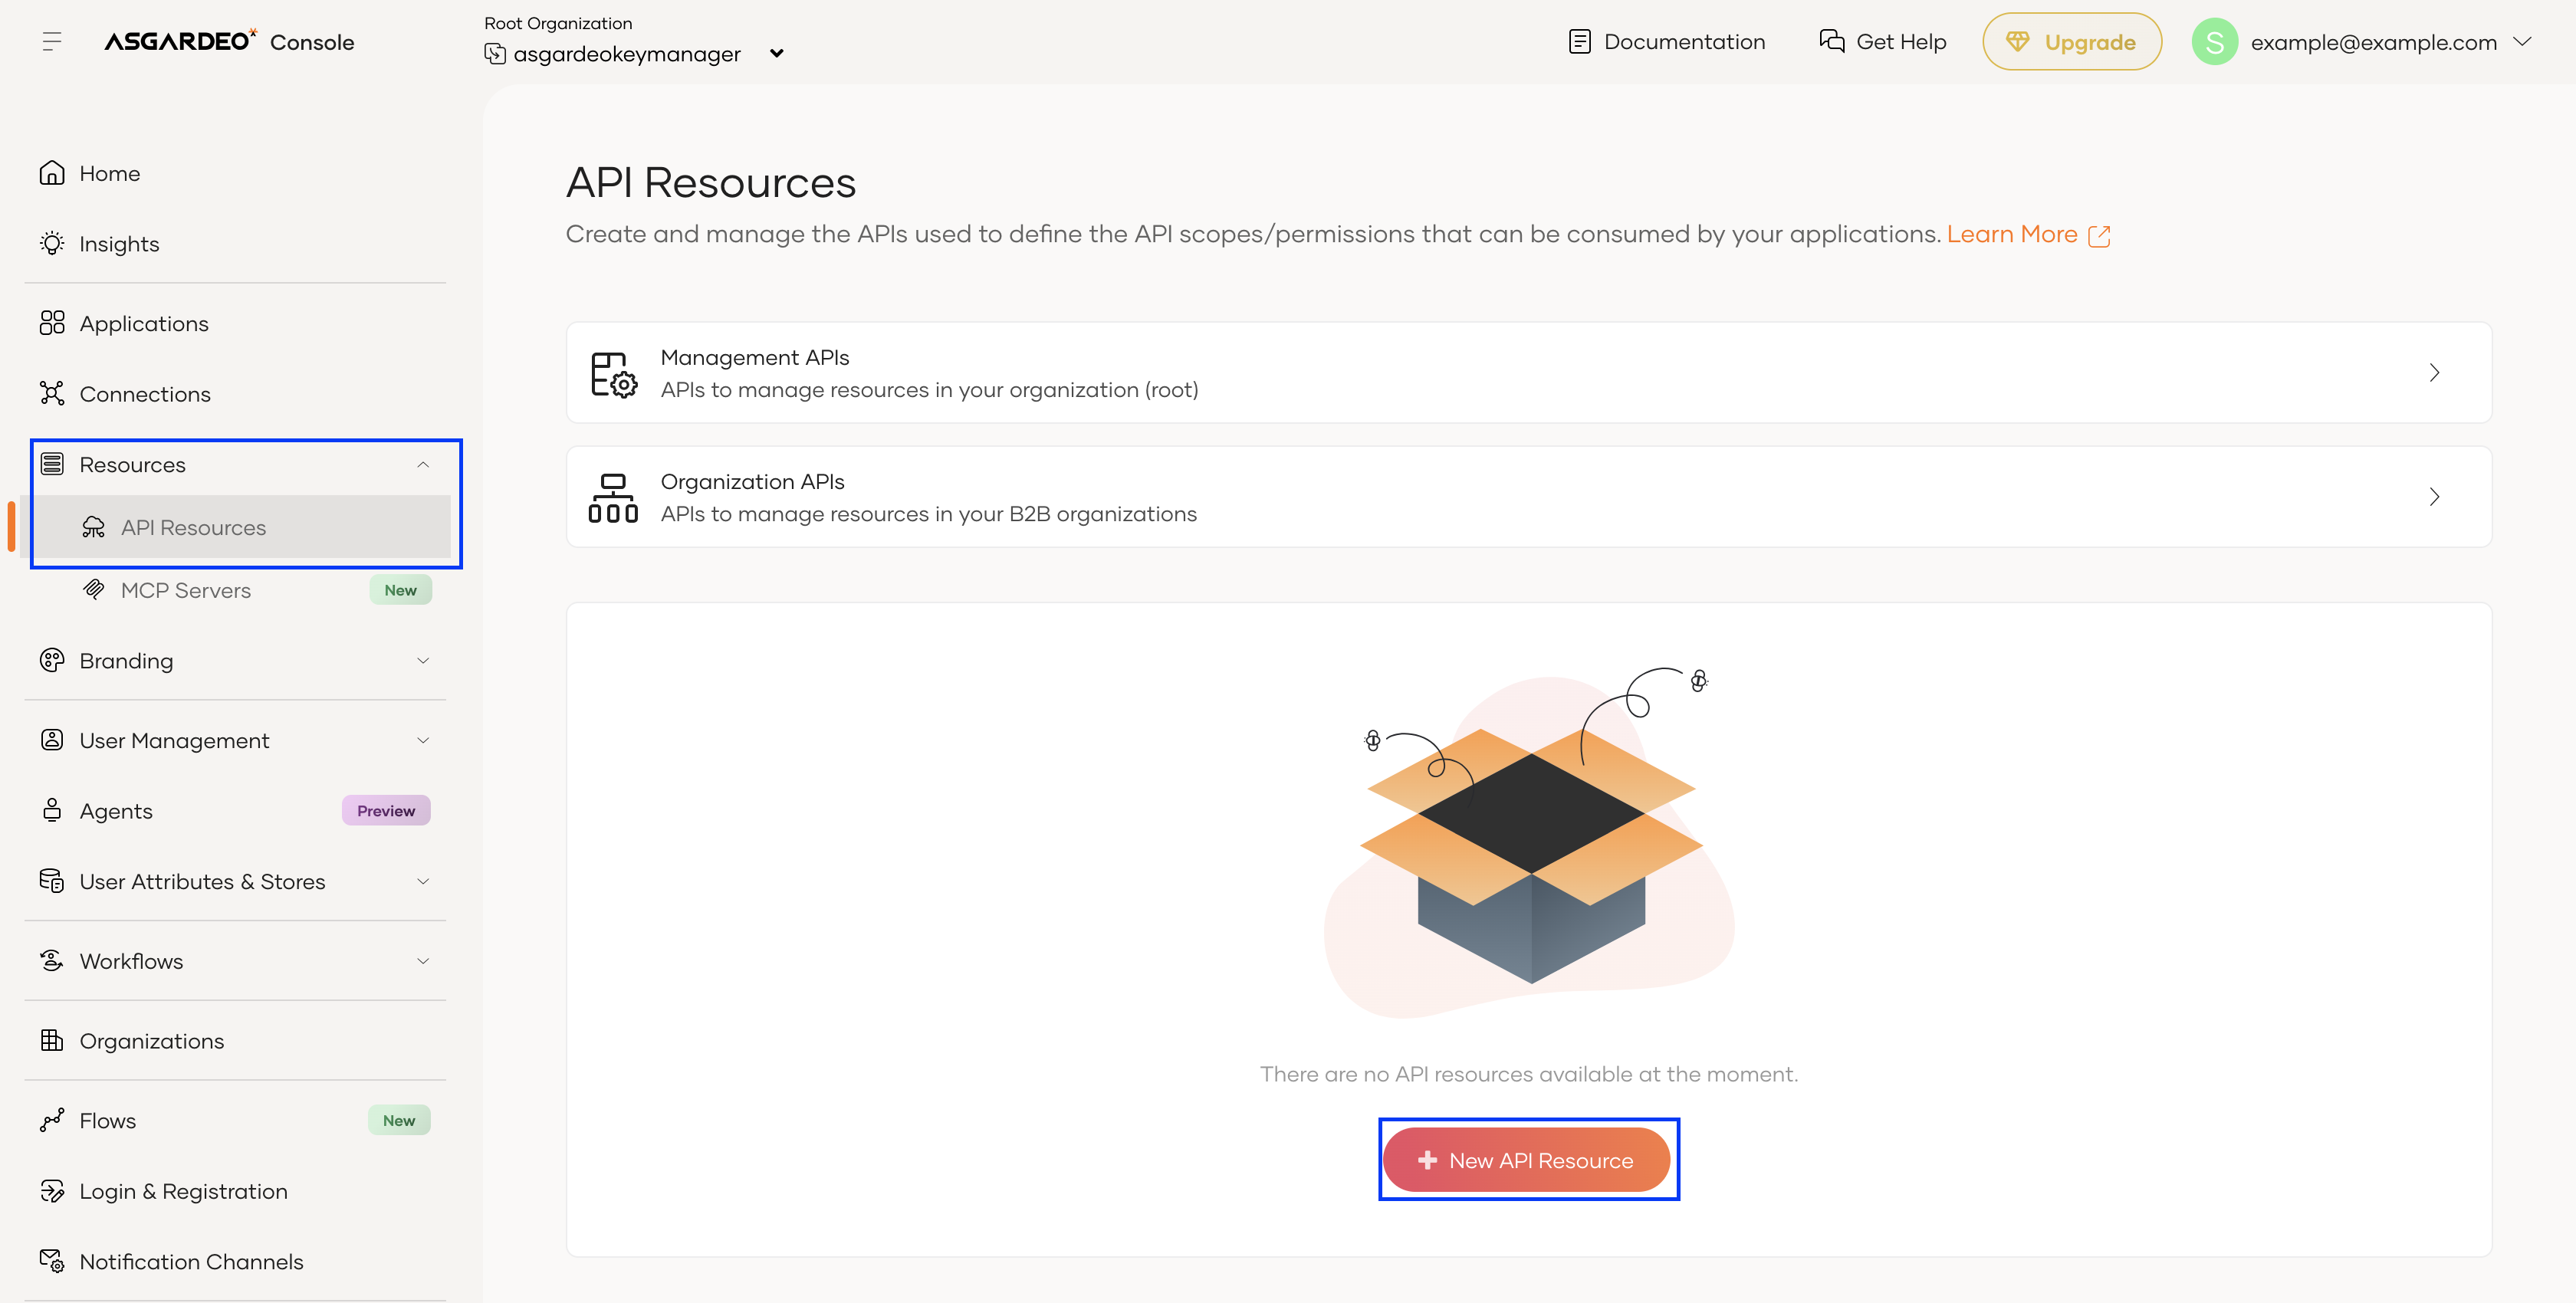
-
Enter a unique Identifier and Display Name (Example shown below). Click on Next.
Identifier Display Name /api/server/v1/scope-resource APIM_GLOBAL_SCOPES 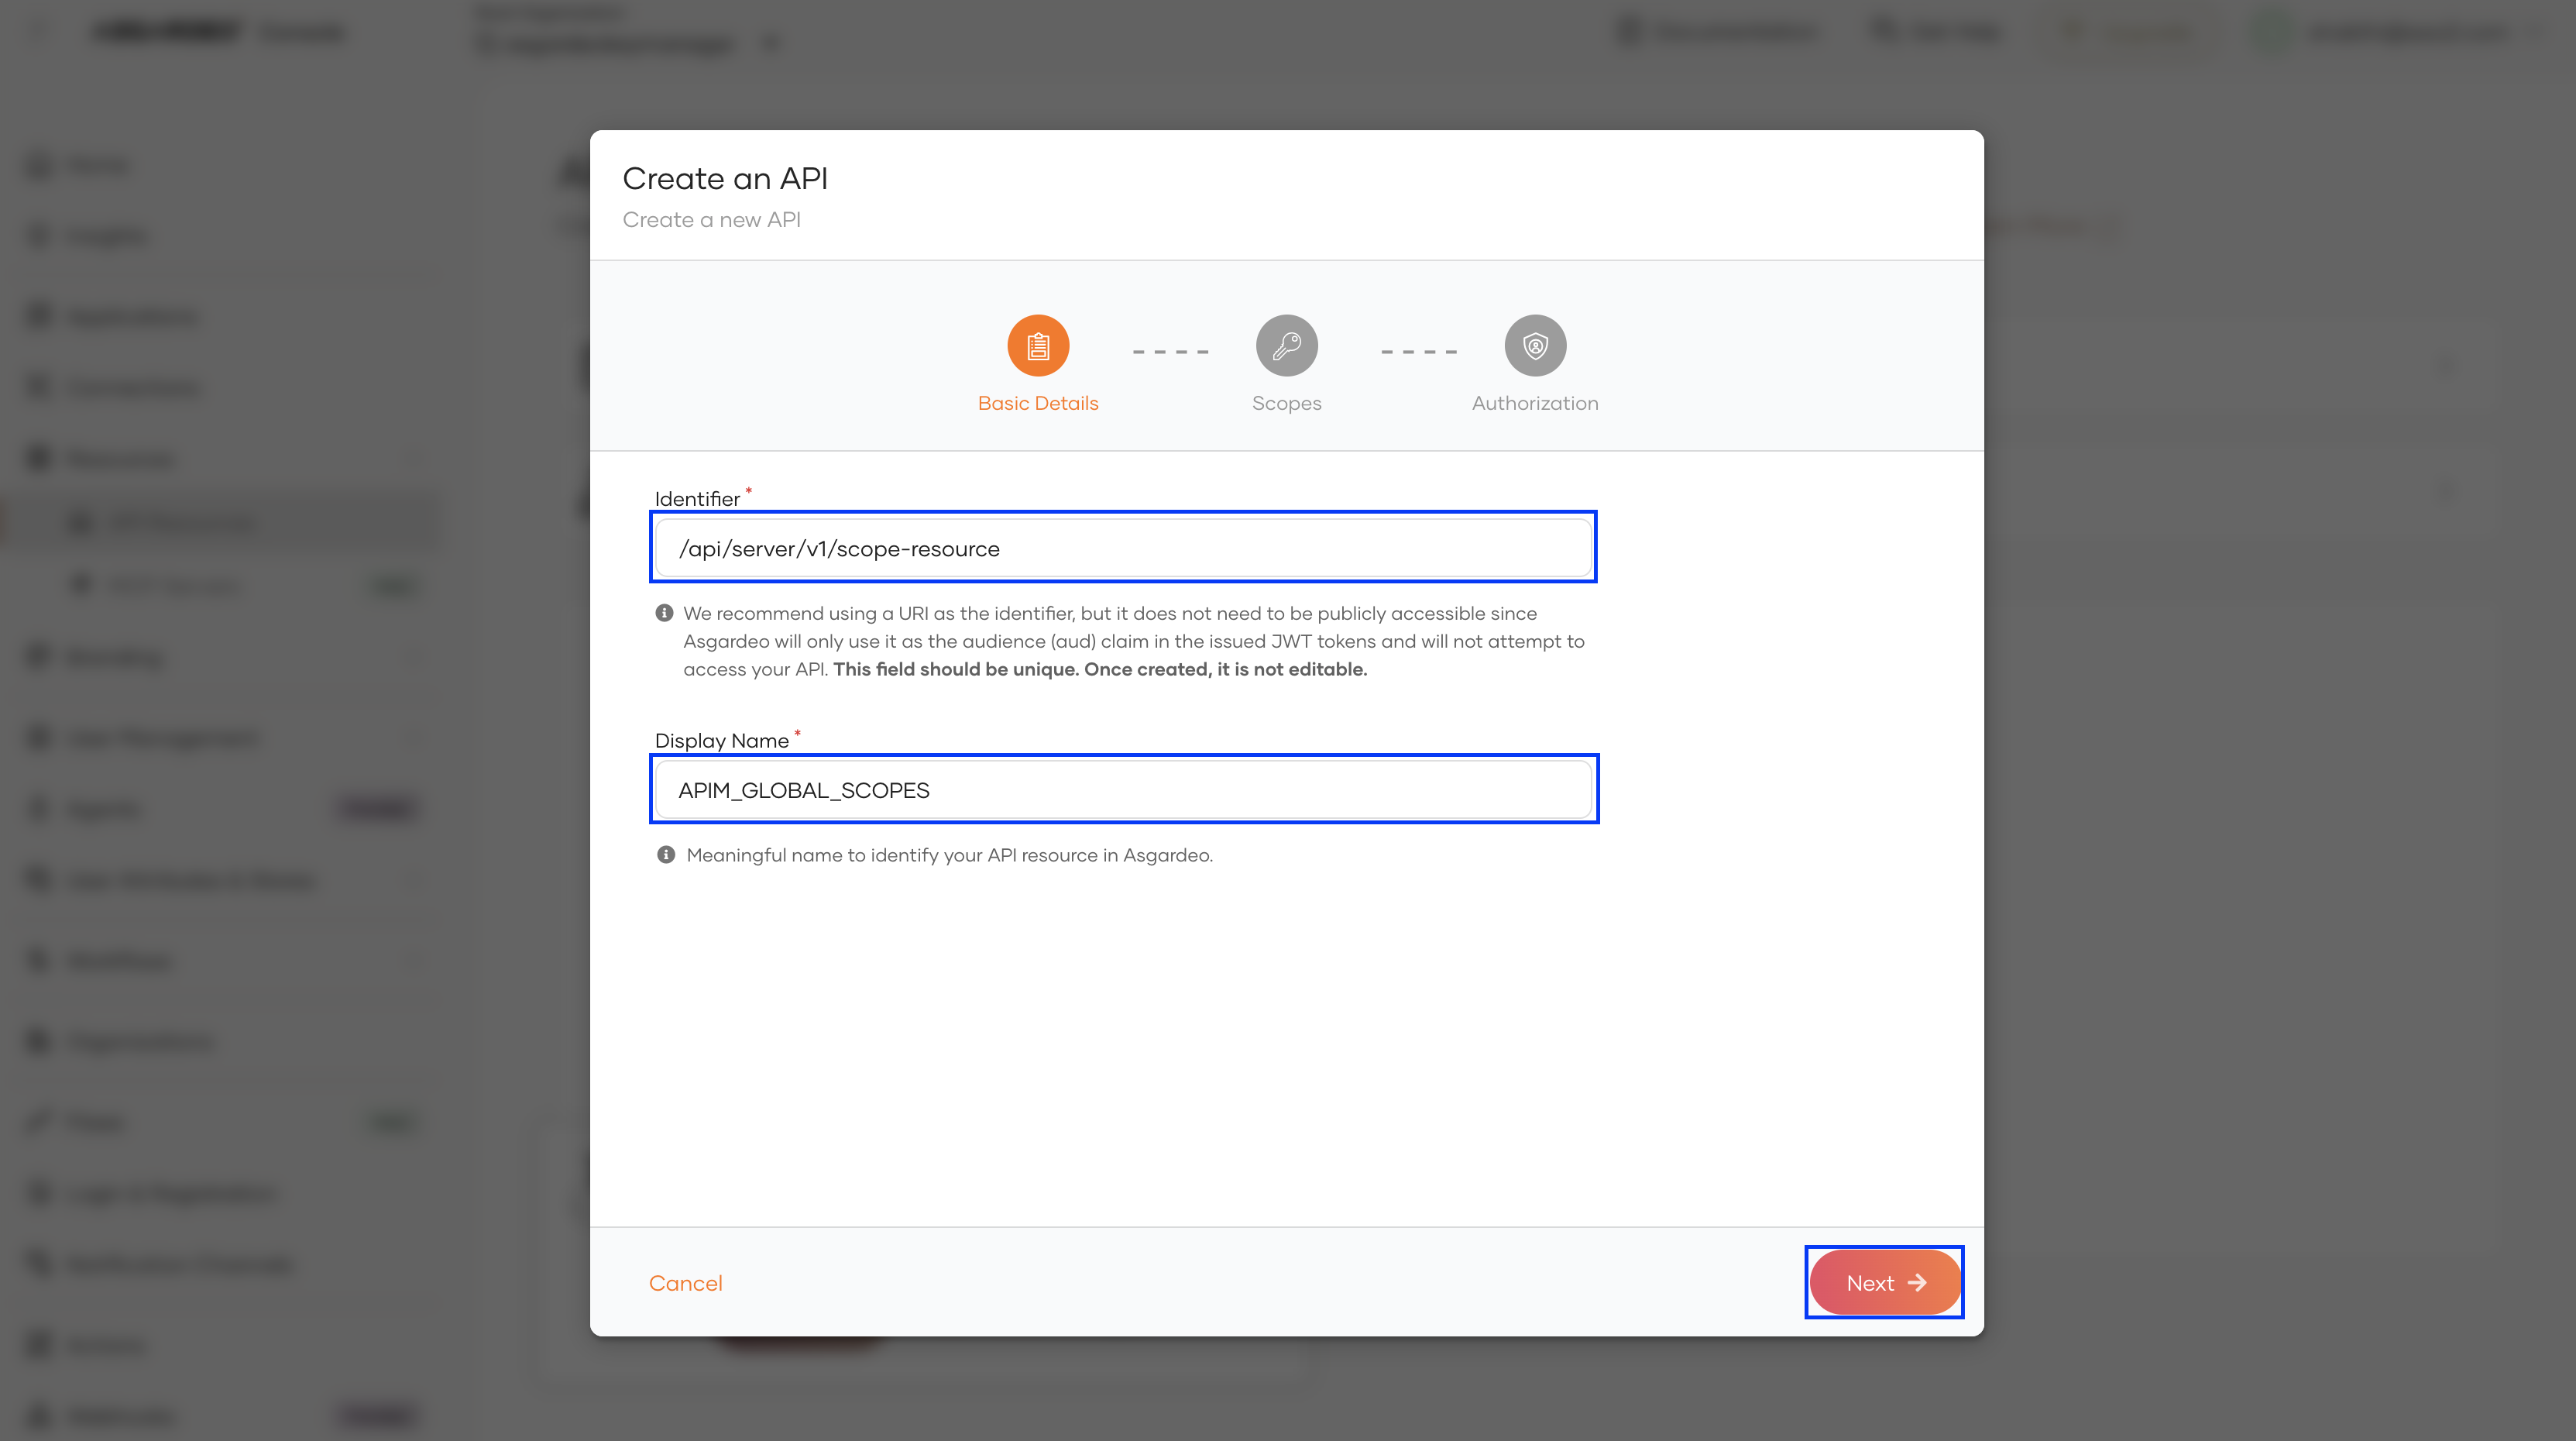
-
On the Scopes page that appears next, click Next. No scopes need to be added.
-
On the Authorization page that appears next, click on Create ensuring that Requires authorization is enabled.

-
Step 2 - Configure WSO2 API Manager
-
Start WSO2 API Manager and log in to the Admin Portal.
https://<APIM_HOST>/admin -
Add Asgardeo as a Key Manager
-
Navigate to Key Managers →
Add Key Manager.
-
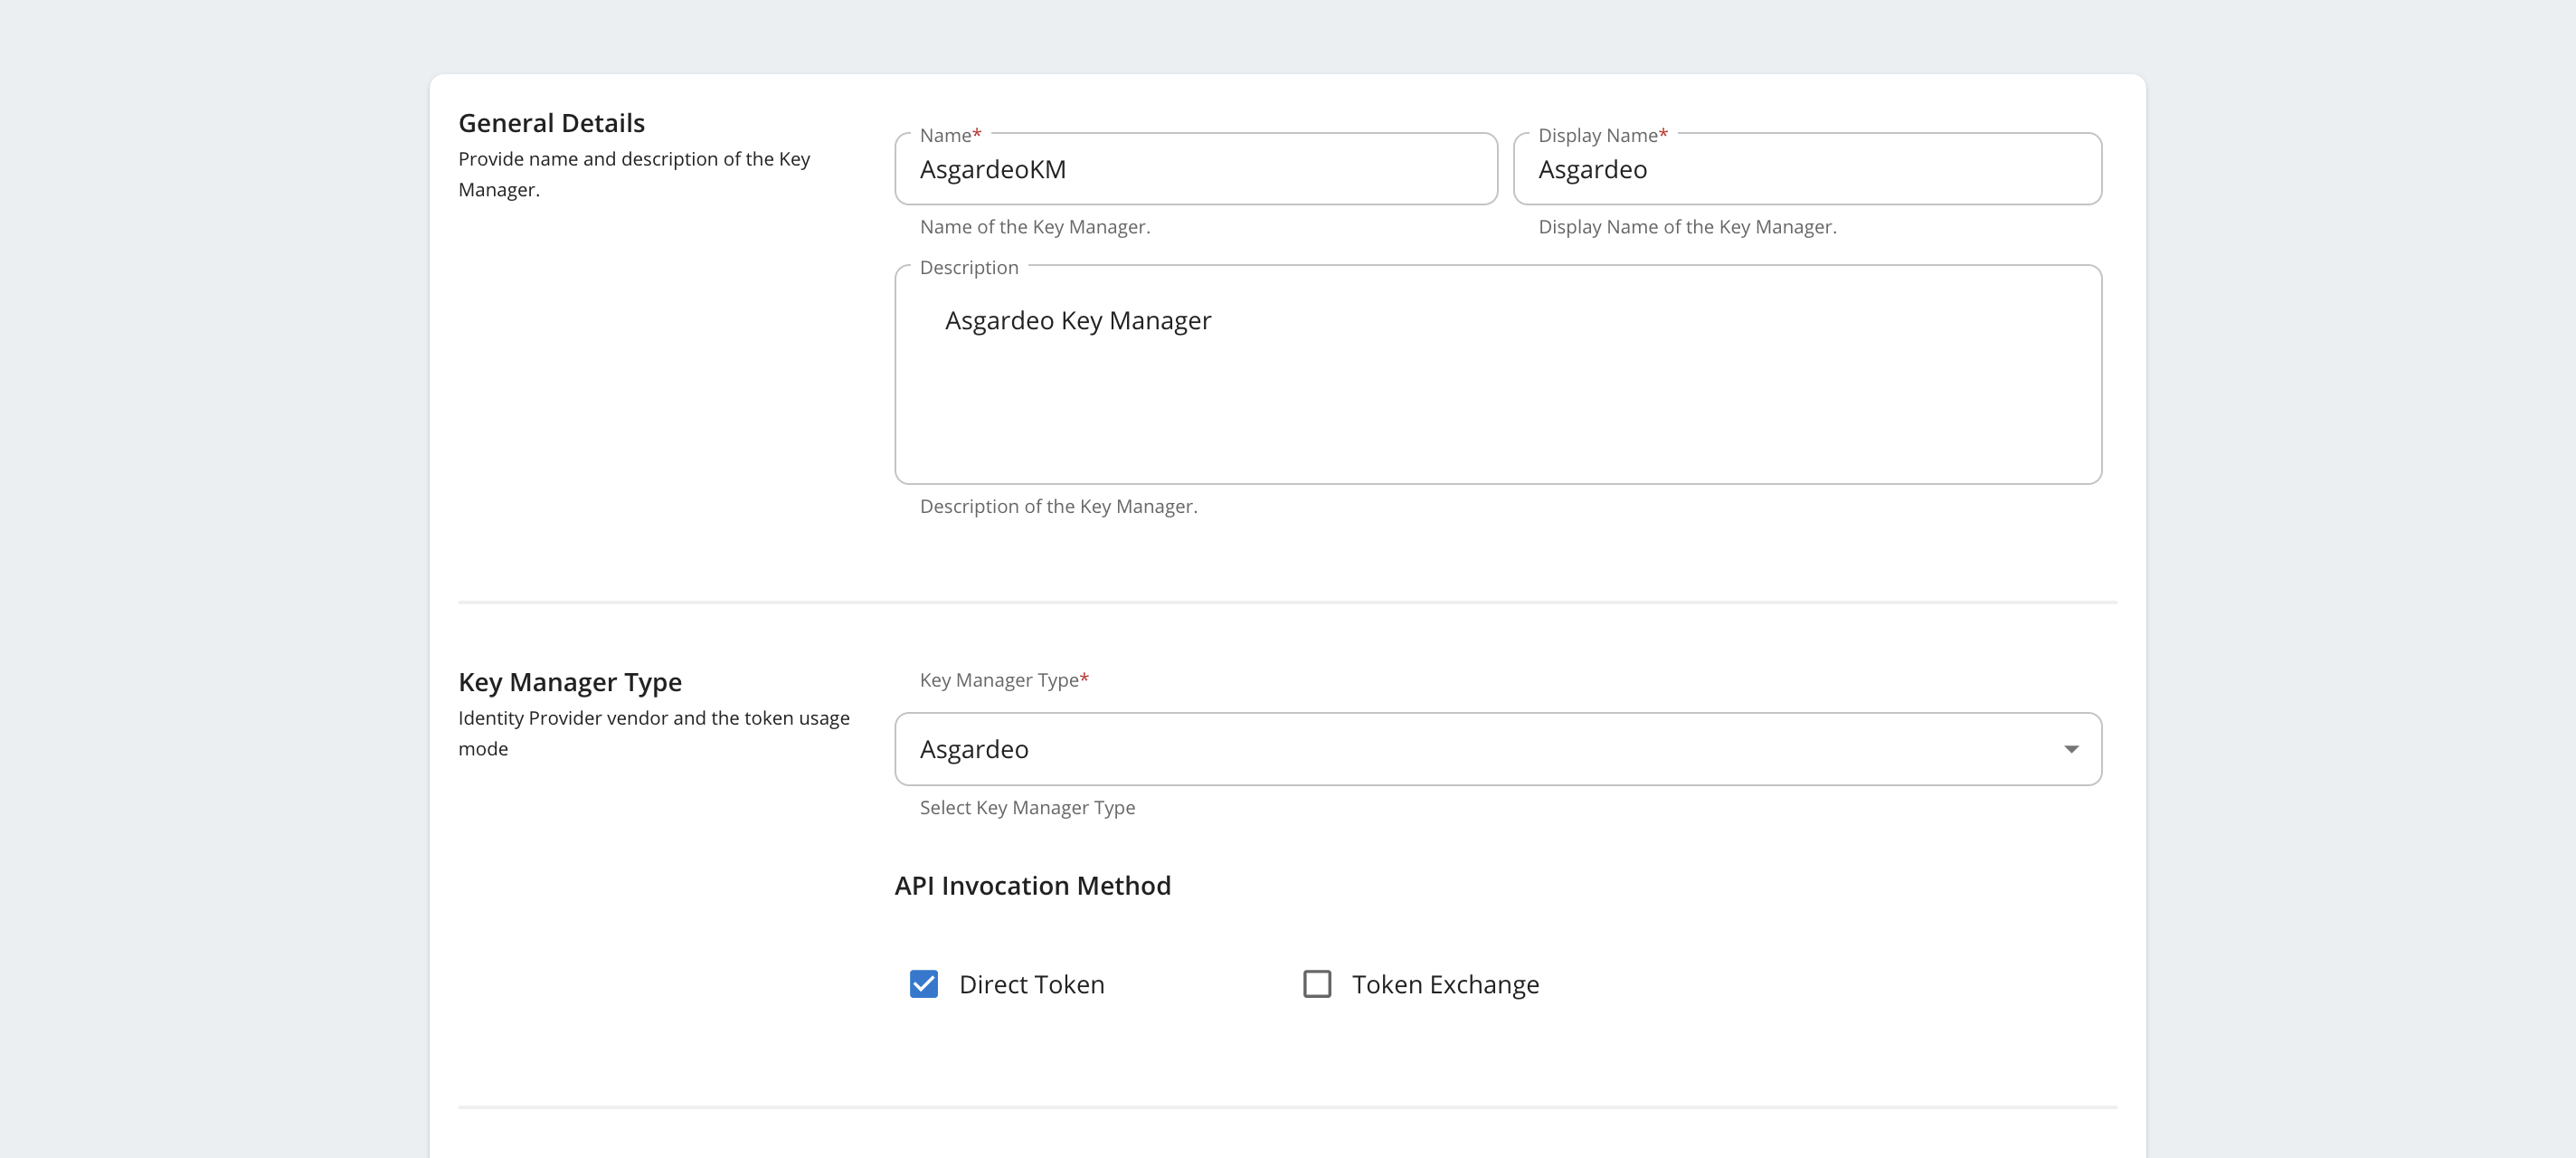
Under General Details and Key Manager Type, provide the following:
- Name: A unique name for the Key Manager (e.g., AsgardeoKM)
- Display Name: A user-friendly name (e.g., Asgardeo)
- Key Manager Type: Asgardeo
-
Under Key Manager Endpoints,
- Provide the Well-Known URL:
https://api.asgardeo.io/t/{ORGANIZATION-NAME}/oauth2/token/.well-known/openid-configuration - Click on the Import button to populate the endpoint fields automatically
- Manually provide Scope Management Endpoint: none
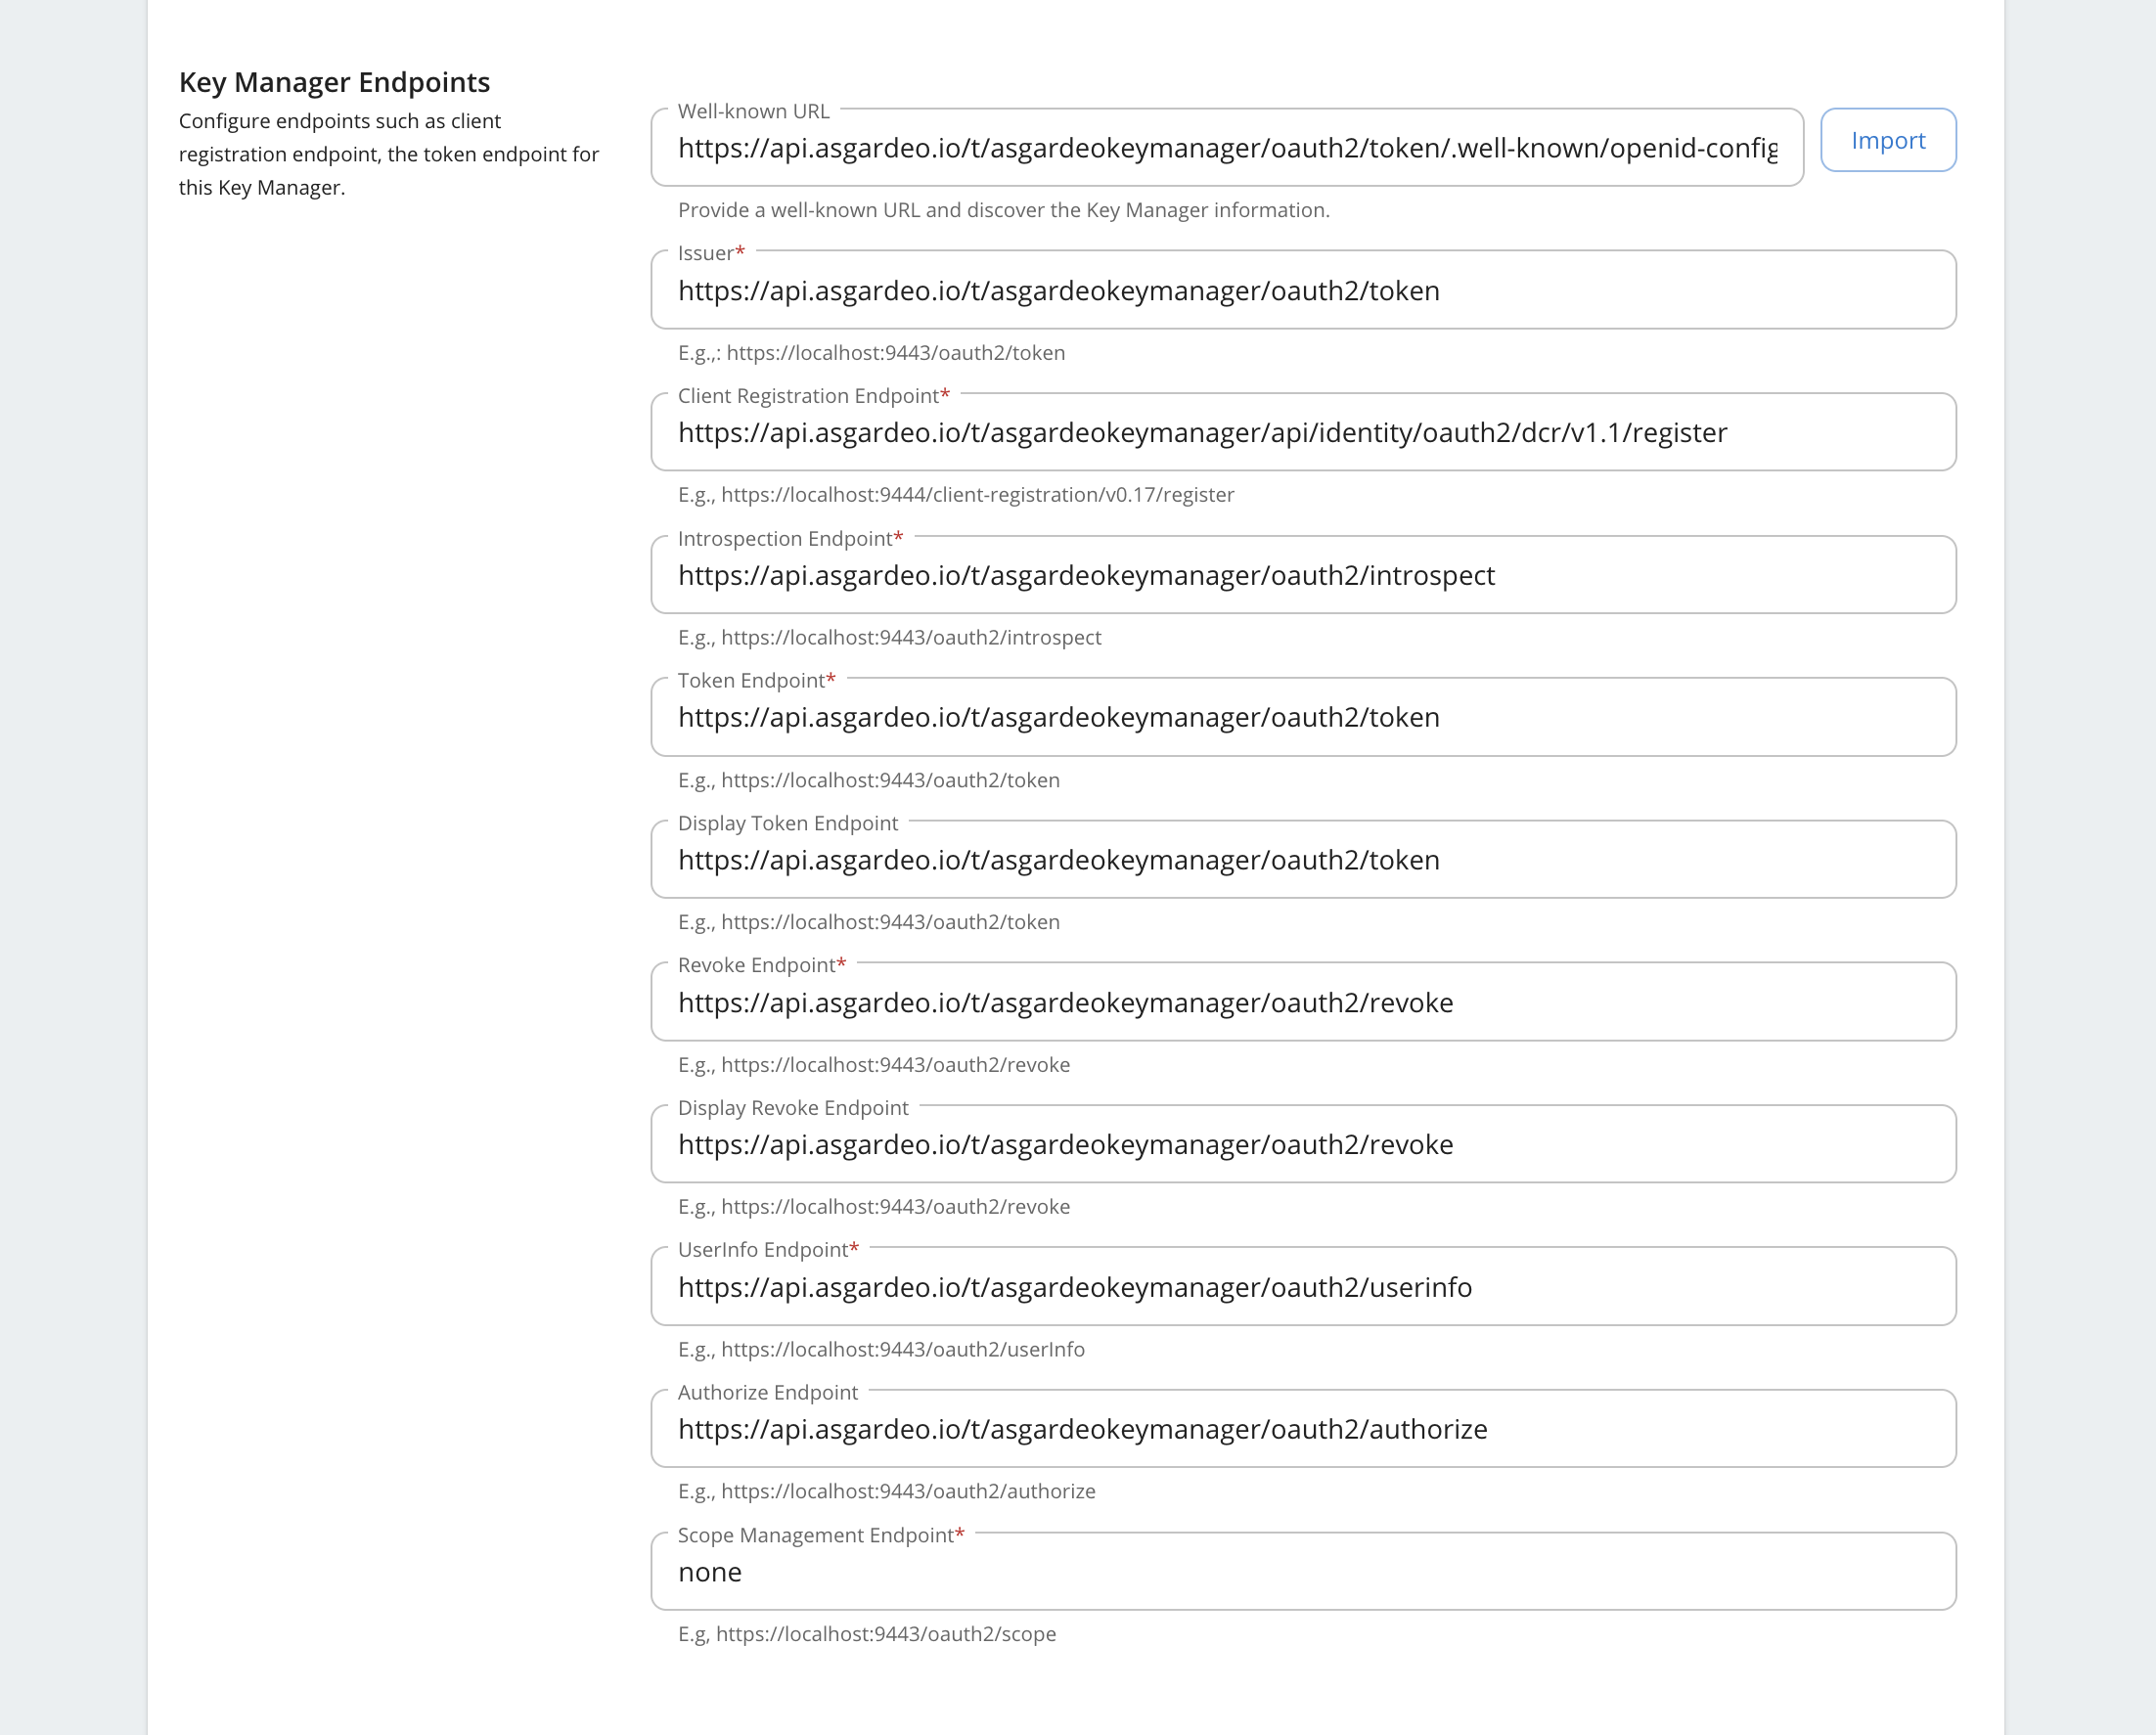
- Provide the Well-Known URL:
-
Under Grant Types, review the auto-populated list and remove any grant types you do not wish to support.
-
Under Certificates, ensure JWKS is selected and
https://api.asgardeo.io/t/{ORGANIZATION-NAME}/oauth2/jwkshas been set as the URL -
Under Connector Configurations, provide the following:
Configuration Value Organization Your chosen organization name Client ID Noted Client ID in Step 1 - 2c Client Secret Noted Client secret in Step 1 - 2c Global Scopes API Resource Name Display Name of Global Scopes API Resource in Step 1 - 4b Asgardeo API Resource Management Endpoint https://api.asgardeo.io/t/{ORGANIZATION-NAME}/api/server/v1/api-resourcesAsgardeo Roles Endpoint https://api.asgardeo.io/t/{ORGANIZATION-NAME}/scim2/v2/Roles -
Click Add to save the Key Manager.
-
Role Creation in Asgardeo
By default, roles are not created in Asgardeo, and it is assumed that the roles will be manually created by the user in Asgardeo.
You can enable automatic role creation in Asgardeo by enabling the Create roles in Asgardeo option in the Connector Configurations section.
When enabled, the following naming conventions are followed when creating/accessing roles in Asgardeo, corresponding to the types of WSO2 API Manager roles.
| Type of role in WSO2 API Manager | Naming convention in Asgardeo |
|---|---|
PRIMARY roles (eg: manager) |
apim_primary_<roleName> (eg: apim_primary_manager) |
Internal roles (eg: Internal/publisher) |
<roleName> (eg: publisher) |
Note
Application roles are not used.
Requesting and Using Scopes with Asgardeo
This section explains how OAuth scopes are created, authorized, and finally requested when using Asgardeo as the Key Manager in WSO2 API Manager.
The process involves three roles:
- API Publisher (creates scopes)
- Asgardeo Administrator (authorizes scopes)
- Application Developer (requests tokens with scopes)
Step 1: Create and Assign Scopes in the Publisher Portal
The scopes required in the API must be mirrored in Asgardeo. The following steps must be completed by the API Publisher.
-
Log in to the Publisher Portal:
https://<APIM_HOST>/publisher -
Open the API that requires scope-based access control.
-
Create a new Scope (or skip this step and select an existing one)
-
Assign the scope to the required API resource:
- Navigate to the Resources section of the API
- Add the scope to the required resource.
- Save the API
Saving the API triggers WSO2 API Manager to propagate the scope to Asgardeo.
Note
The Resources section of an API is equivalent to the Tools section of an MCP Server. The steps to create and assign scopes to a tool of an MCP Server are similar to the steps mentioned above.
Warning
Ensure that no scope name begins with the word internal. For example, internal_order_management is not permitted. Asgardeo does not allow user-defined scope names with this prefix.
Step 2: Authorize Scopes in Asgardeo
Scopes must be explicitly authorized by an Asgardeo Admin for the OAuth application that will request them. The following steps must be completed by an Asgardeo Administrator.
-
Log in to the Asgardeo Console as an admin.
-
Navigate to Applications and open the OAuth application that will request scopes.
-
Navigate to the API Authorization tab, click on
+ Add API Resourceand authorize the global API resource namedAPIM_GLOBAL_SCOPES. -
Select (allow) the specific scopes that the application should be permitted to request
-
Save the changes.
Only scopes explicitly allowed here can be requested in access token requests.
Step 3: Request Access Tokens with Scopes
Once scopes are authorized, the application developer can request access tokens. These steps can be completed by the Application Developer
- Use the OAuth application credentials to request a token. This can be done the Developer Portal or using a cURL command as shown in the Developer Portal.
- Include the required scopes in the request.
If the scope is authorized, Asgardeo issues an access token containing the requested scope