Getting Started with LLM Gateway
The LLM Gateway in WSO2 API Manager simplifies the integration of AI services into applications by providing a seamless way to manage and expose AI APIs. With built-in support for leading AI Service Providers such as Anthropic, AWS Bedrock, Azure AI Foundry, Azure OpenAI, Gemini, Mistral, and OpenAI, as well as the flexibility to configure custom AI providers, LLM Gateway enables organizations to adopt AI securely and efficiently.
LLM Gateway gives you the ability to create AI APIs, which serve as a bridge between your application and AI service providers. These AI APIs allow you to interact with AI models, send requests, and retrieve AI-generated responses.
Note
This Getting Started guide will walk you through creating an OpenAI based AI API.
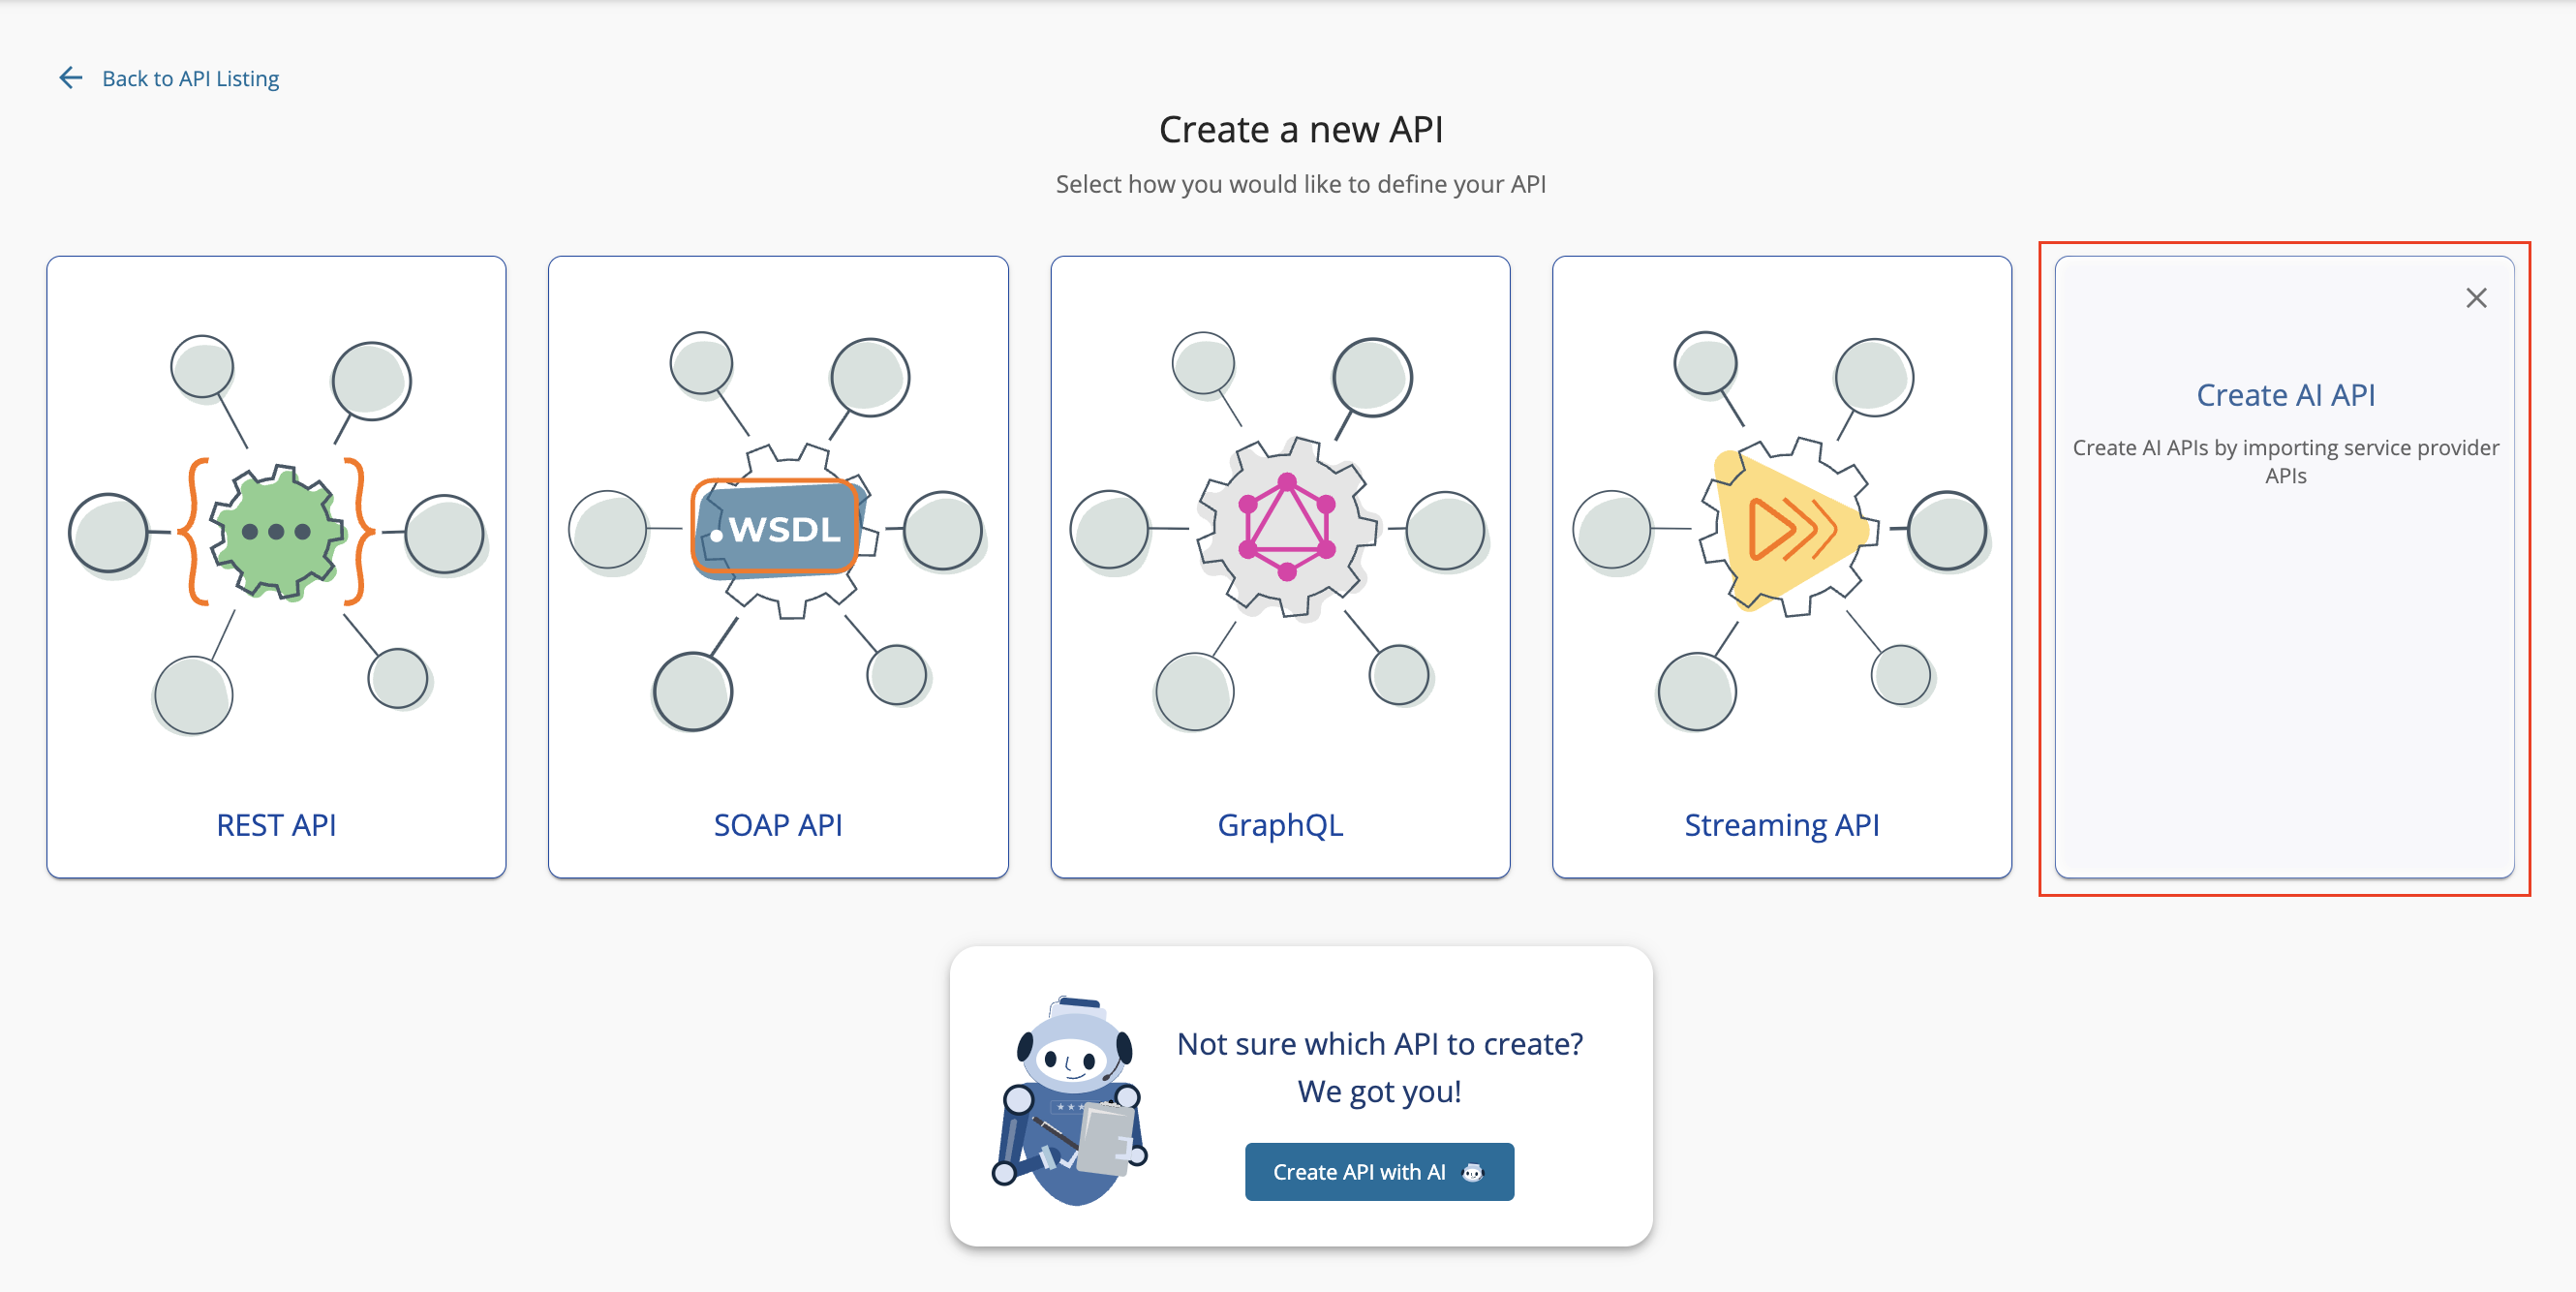
Create an AI API
-
Login to the Publisher Portal (
https://<hostname>:9443/publisher). -
Create an AI API by clicking on Create AI API.
-
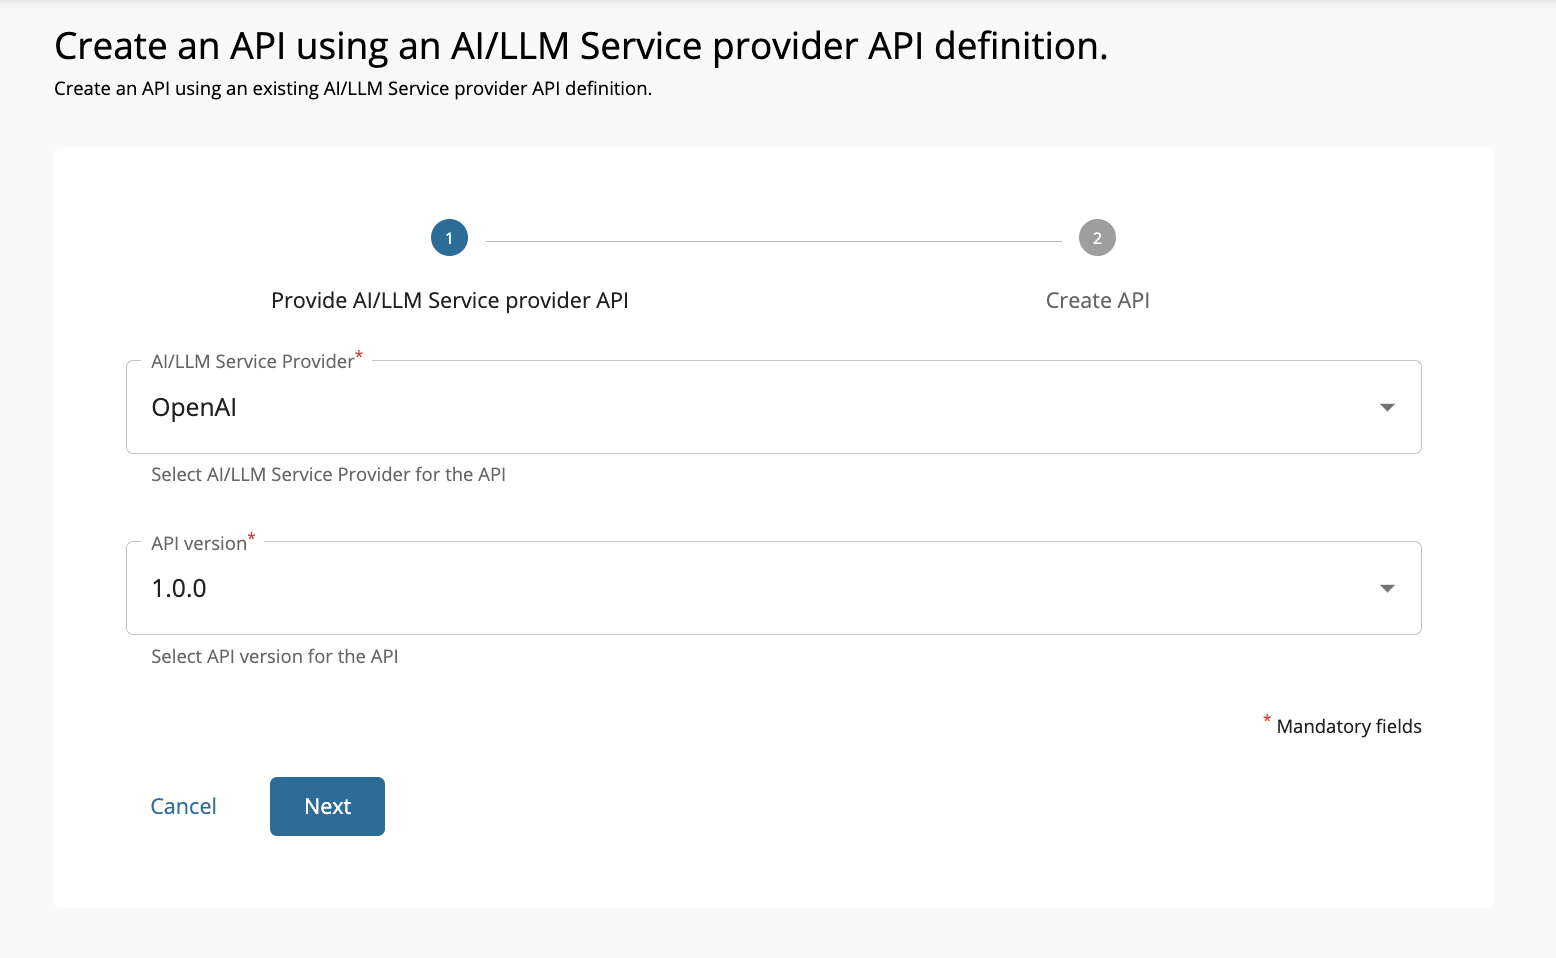
Select the desired provider and version. Then, click Next.
Tip
The built-in AI service providers and versions will appear on relevant dropdowns. In addition to the default Service Providers, you can add custom AI Service Providers by following the custom AI Service Provider integration documentation.
-
Fill in the AI API details and click Create.
Field Sample value Name OpenAIAPI Context openaiapiThe API context is used by the Gateway to identify the API. Therefore, the API context must be unique. This context is the API's root context when invoking the API through the Gateway.
You can define the API's version as a parameter of its context by adding the
{version}into the context. For example,{version}/openaiapi. The API Manager assigns the actual version of the API to the{version}parameter internally. For example,https://localhost:8243/2.3.0/openaiapi. Note that the version appears before the context, allowing you to group your APIs based on the versions.Version 2.3.0 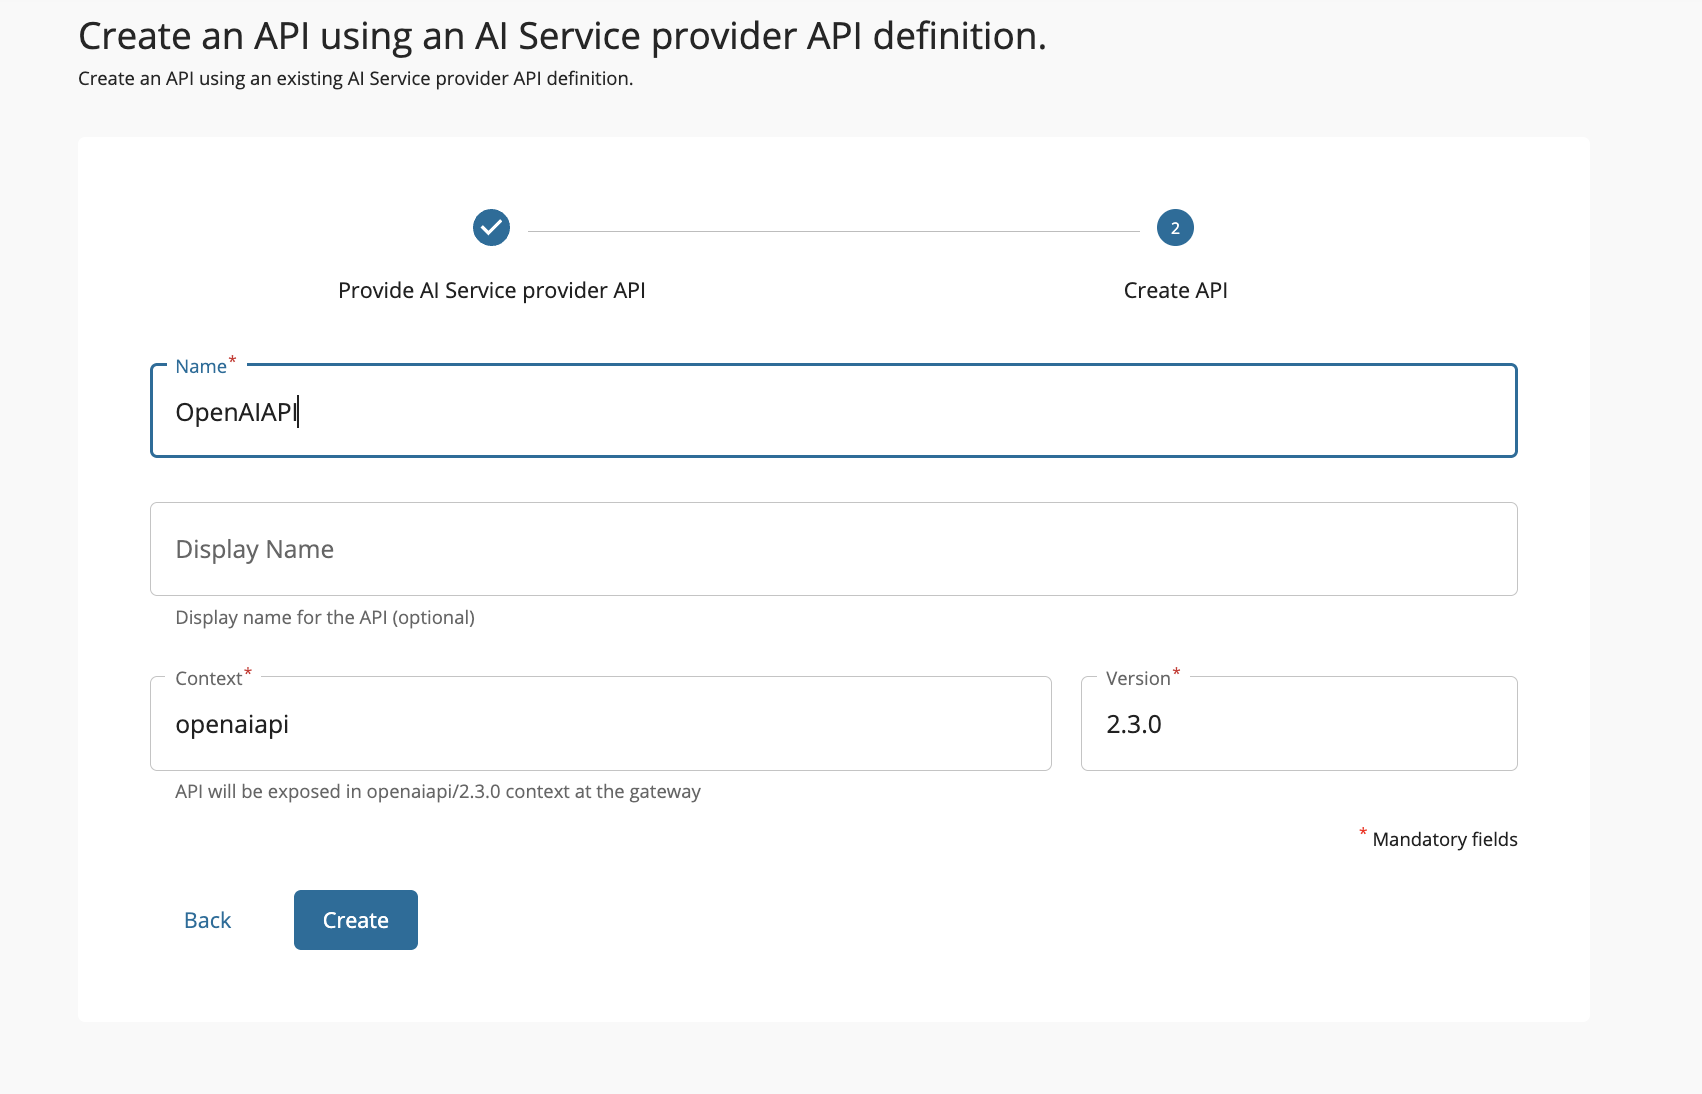
The overview page of the newly created API appears.
Configure Backend Security
Now that the AI API is successfully created, next step is to configure the backend security to ensure AI provider accessibility. You can follow along the steps mentioned below. For detailed steps, see AI Backend Security.
- Create an API key to access the OpenAI API.
- Navigate to API Configurations → Endpoints.
- Edit
Default Production Endpointand add the API key obtained from step 1. Then, click on Update. - Repeat step 3 for
Default Sandbox Endpoint.
Deploy, Test and Publish your AI API
Following the successful AI API creation and backend security configuration, you can proceed to deploy, test, and publish the AI API.
Invoke AI API
- Login to the Developer Portal (
https://<hostname>:9443/devportal) and click on the OpenAIAPI that you just published. - Click Try Out option available under the Overview tab.
- Click on Get Test Key to generate a test key.
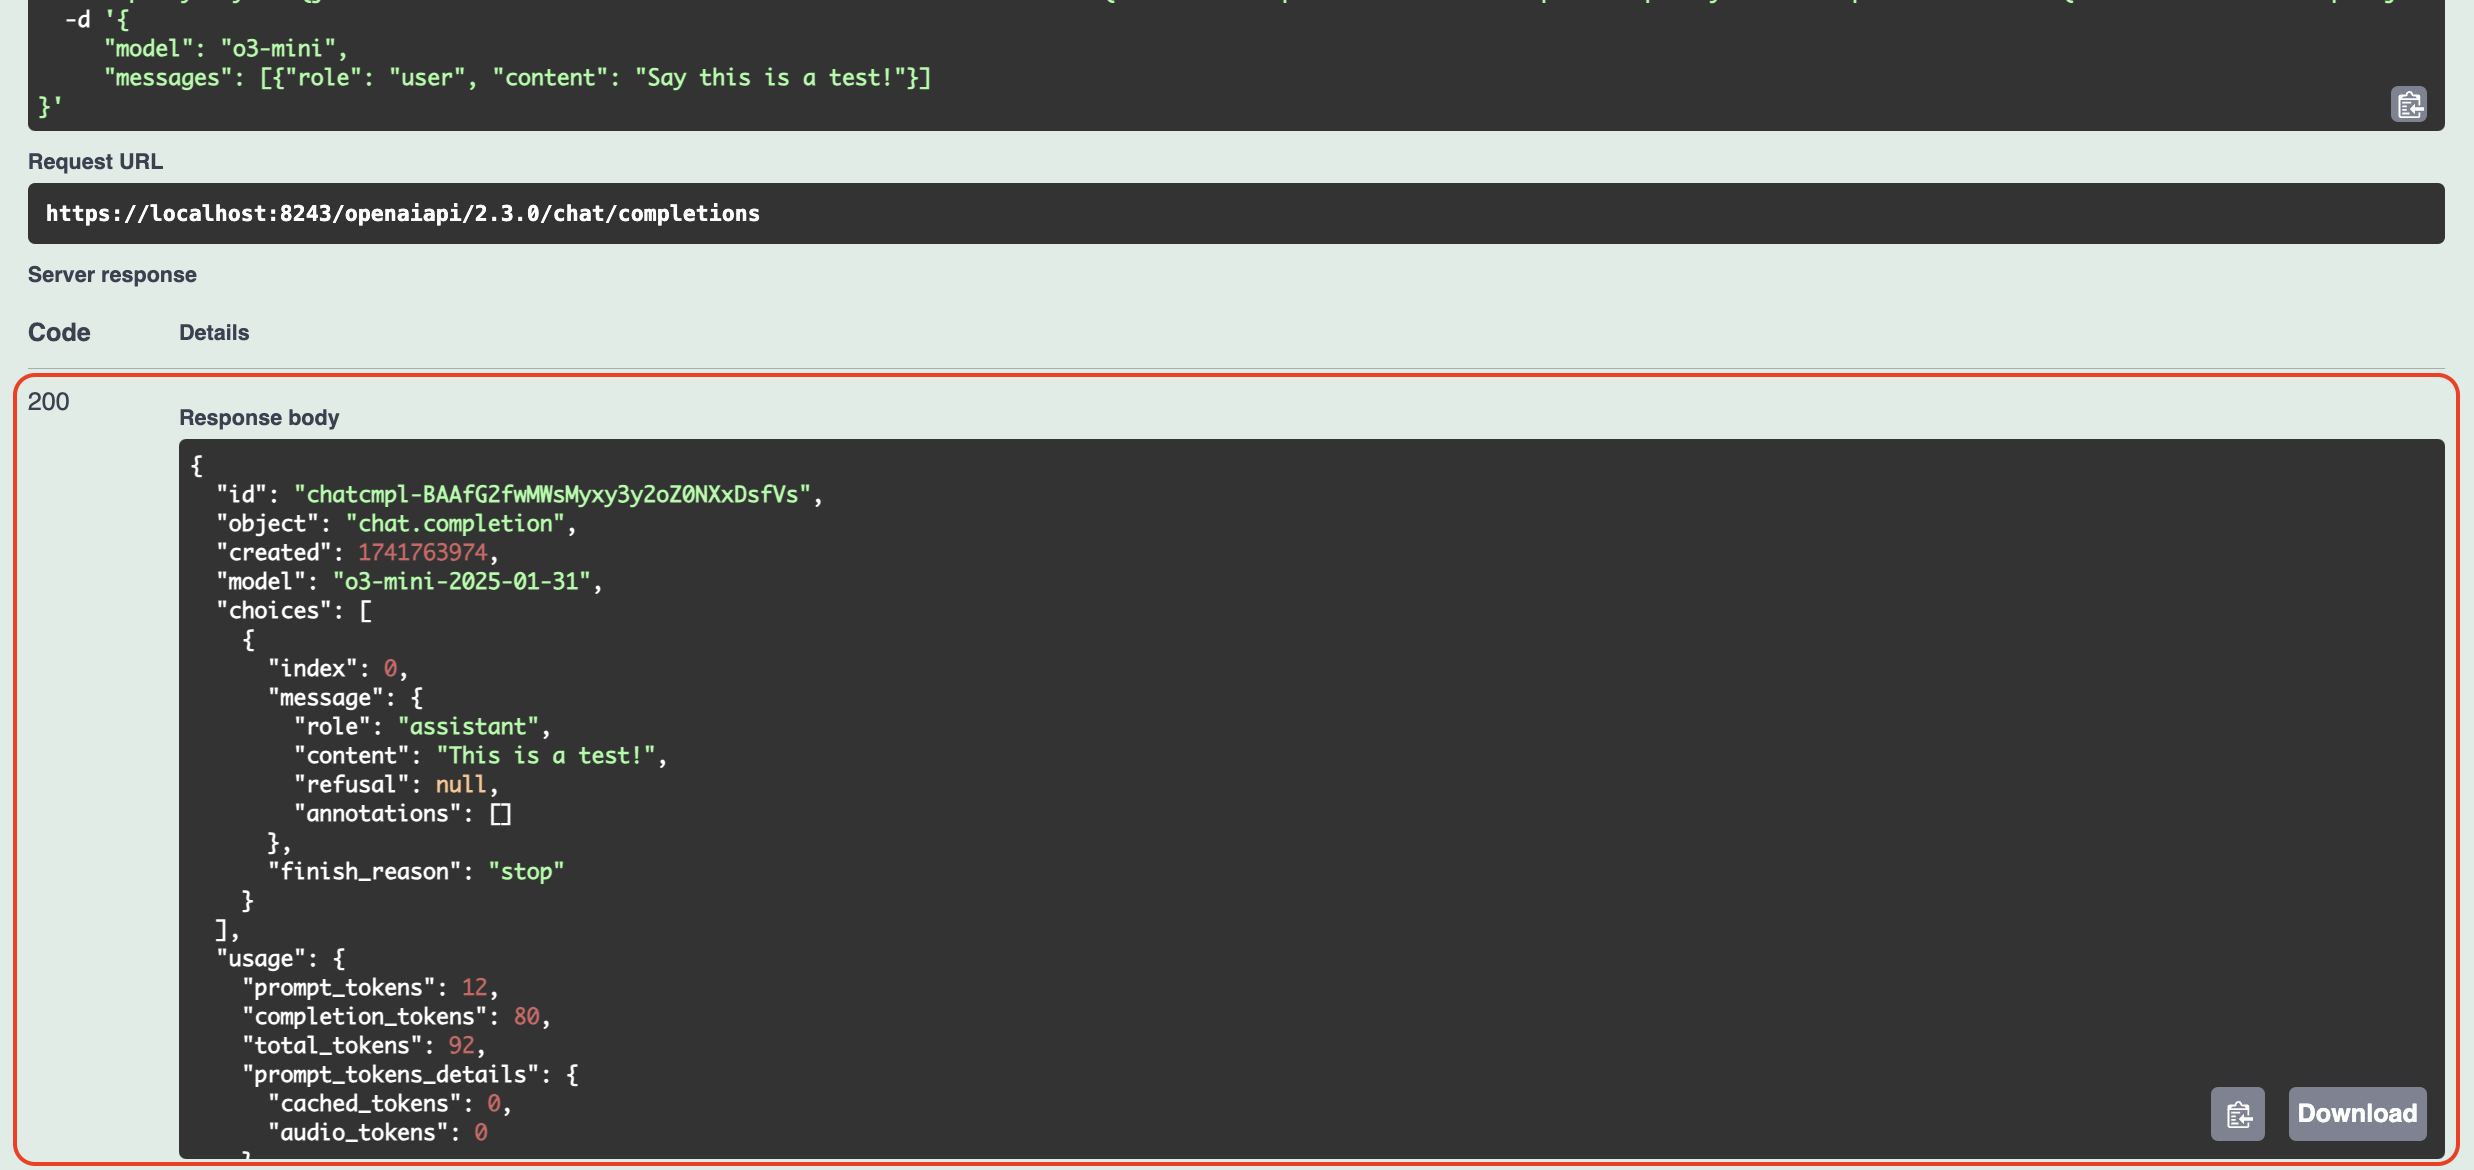
- Expand the
/chat/completionsPOST method and click on Try it out button. -
Replace the request body with the following:
{ "model": "o3-mini", "messages": [{"role": "user", "content": "Say this is a test!"}] } -
Note the successful response for the API invocation.
Now, you have successfully created, deployed, published and invoked an AI API.
Next Steps
Now that you've successfully created your first AI API, explore these advanced capabilities to optimize your AI integration:
Enhance Security and Performance
- AI Backend Security - Implement advanced authentication and security configurations
- Rate Limiting - Control API usage and prevent abuse with token-based limits
Advanced AI Features
- Multi-Model Routing - Route requests across multiple AI models for load balancing and failover
- Prompt Management - Centrally manage and version your AI prompts and templates
- AI Guardrails - Implement content filtering and safety measures
- Semantic Caching - Improve performance and reduce costs with intelligent caching
AI Service Provider Management
- AI Service Provider Management - Configure additional AI providers beyond OpenAI
- Custom AI Service Providers - Integrate your custom AI services
Developer Experience
- AI APIs via SDKs - Generate and use SDKs for your AI APIs
Explore MCP Gateway
- MCP Gateway - Transform your APIs into AI-ready tools for Large Language Models