Configure Gateway visibility
Access to Gateways can be restricted based on user roles either from the Admin Portal or via the <API-M_HOME>/repository/conf/deployment.toml file.
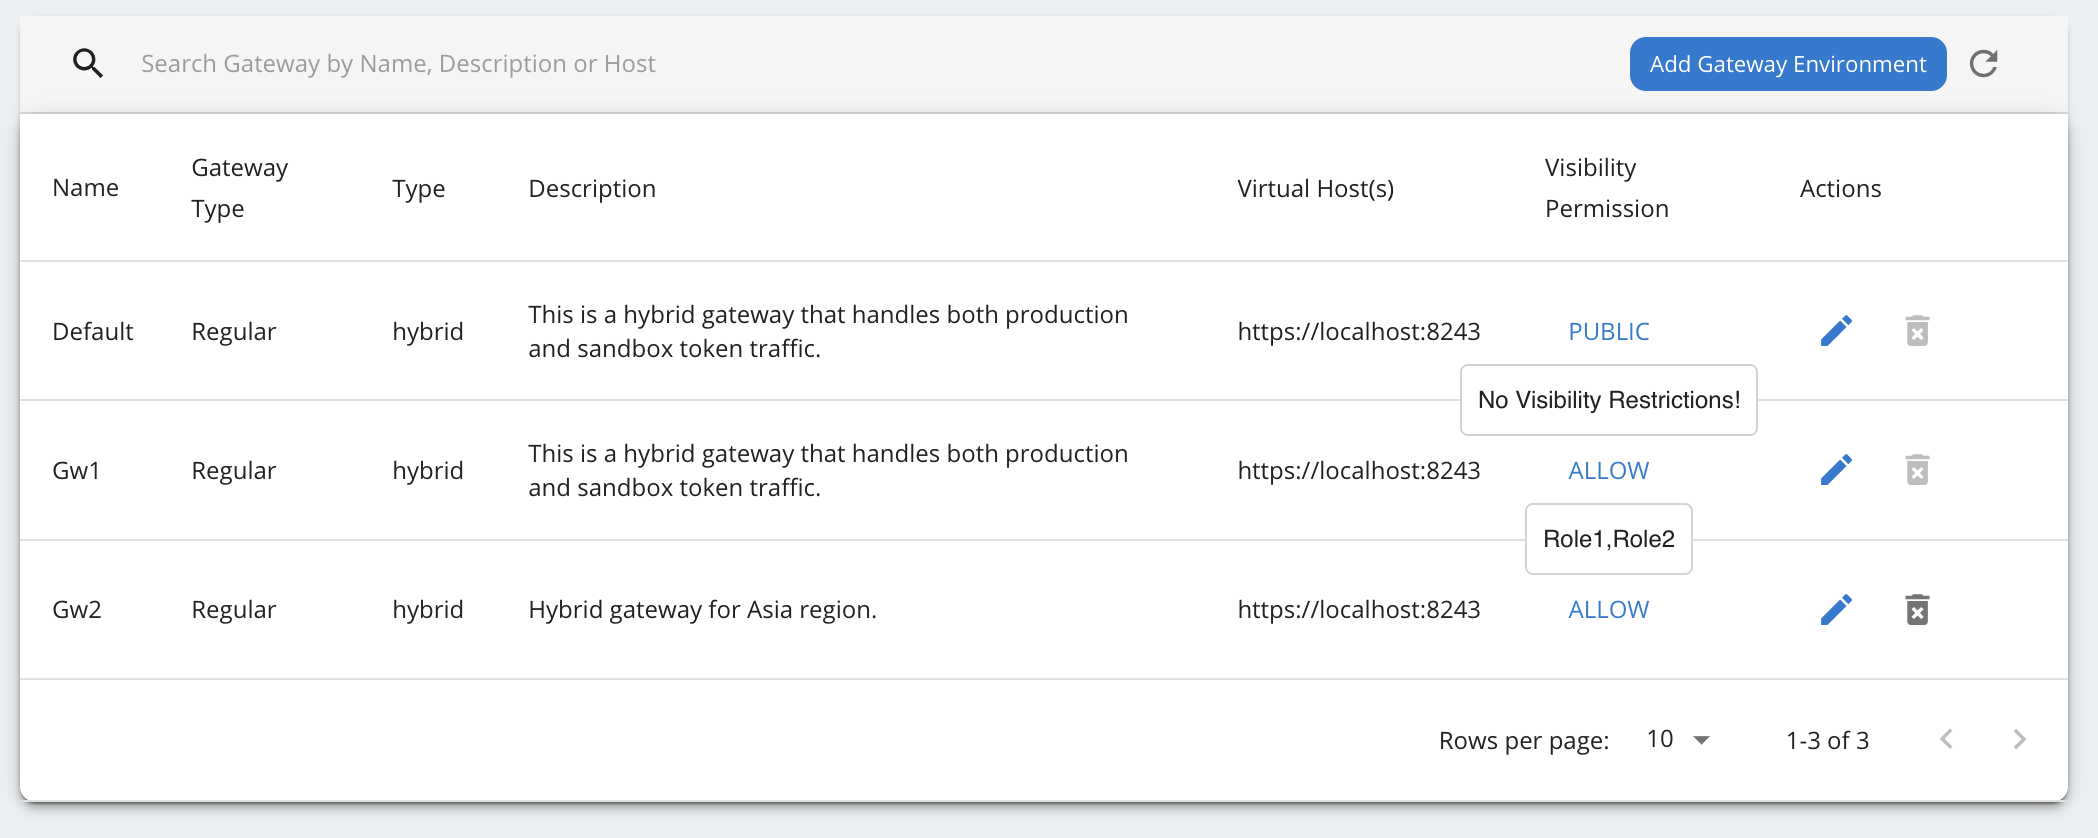
When the permission type for the role-based restriction is set to ALLOW, only users with the specified roles are permitted to use the gateway environment at the Developer Portal.
Similarly, when the permission type for the role-based restriction is set to DENY, users with the specified roles are not allowed to use the gateway environment at the Developer Portal.
Note
- When implementing role-based access restrictions, it is important for administrators to exercise caution and be mindful of potential scenarios where users, may not have visibility or access to gateway environments. Kindly be cautious when restricting gateways.
- A Gateway can possess either a whitelist or a blacklist, but not both simultaneously.
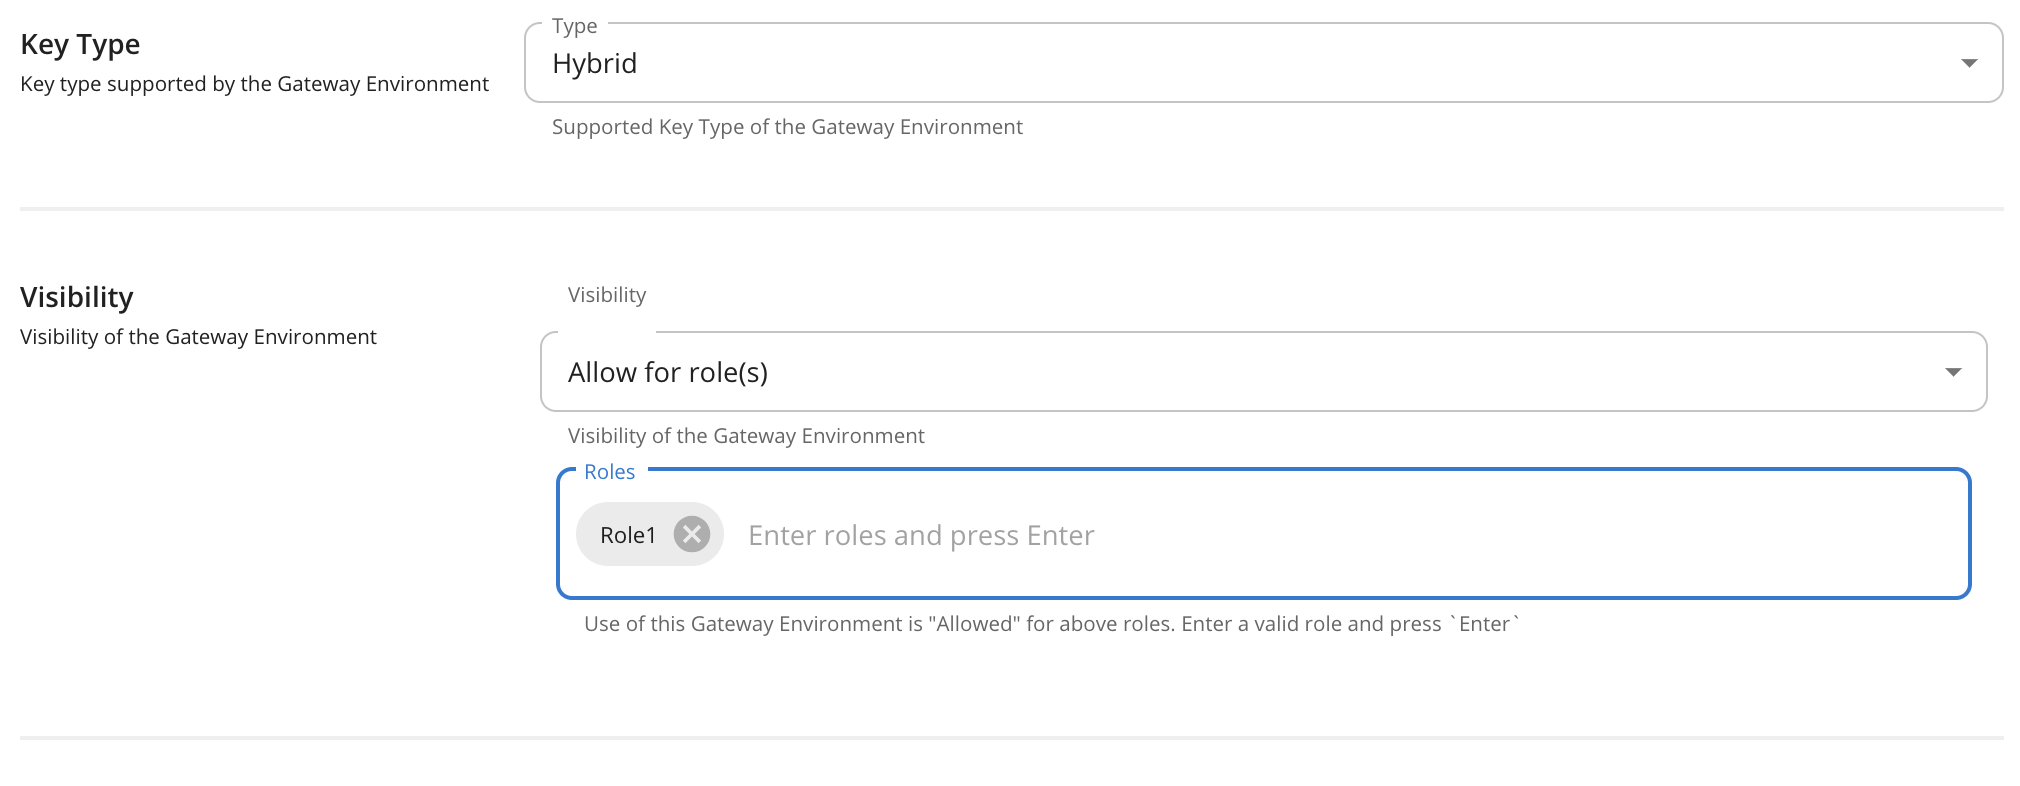
Option 1: Configure visibility for a Gateway environment via the Admin Portal
This will start WSO2 API Manager in the all-in-one mode, which includes the default Gateway as well.
-
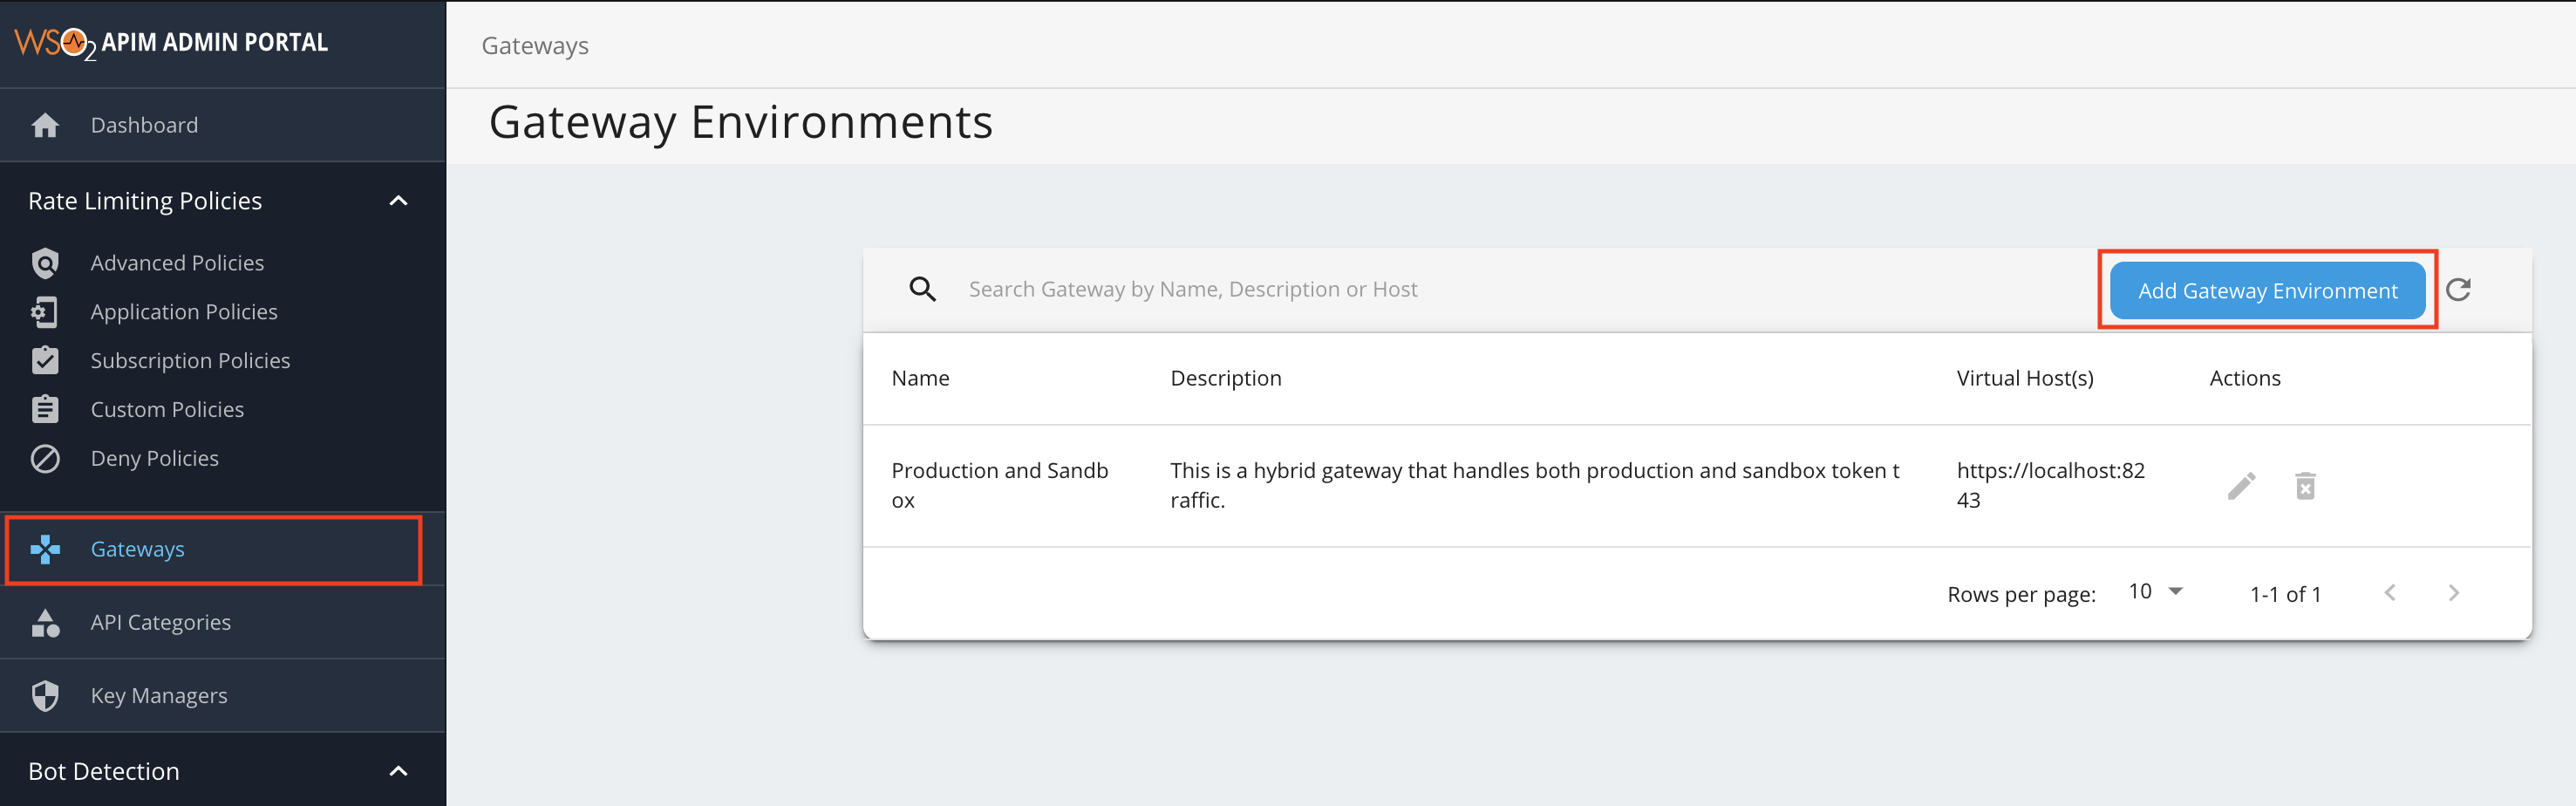
Sign in to the Admin Portal.
https://<hostname>:9443/adminExample:
https://localhost:9443/adminLet's use
adminas your username and password to sign in. -
Add a new Gateway Environment.
-
Click Gateways, and then click Add Gateway Environment.
-
Enter a name, display name, description, visibility and a virtual host as follows.
The virtual hosts will define each of the custom hostnames. It is mandatory to specify a VHost when you create a Gateway environment.
Environment Display Name Description Visibility Virtual Host us-region US Region Gateway environment deployed in the US region. Public us.wso2.com 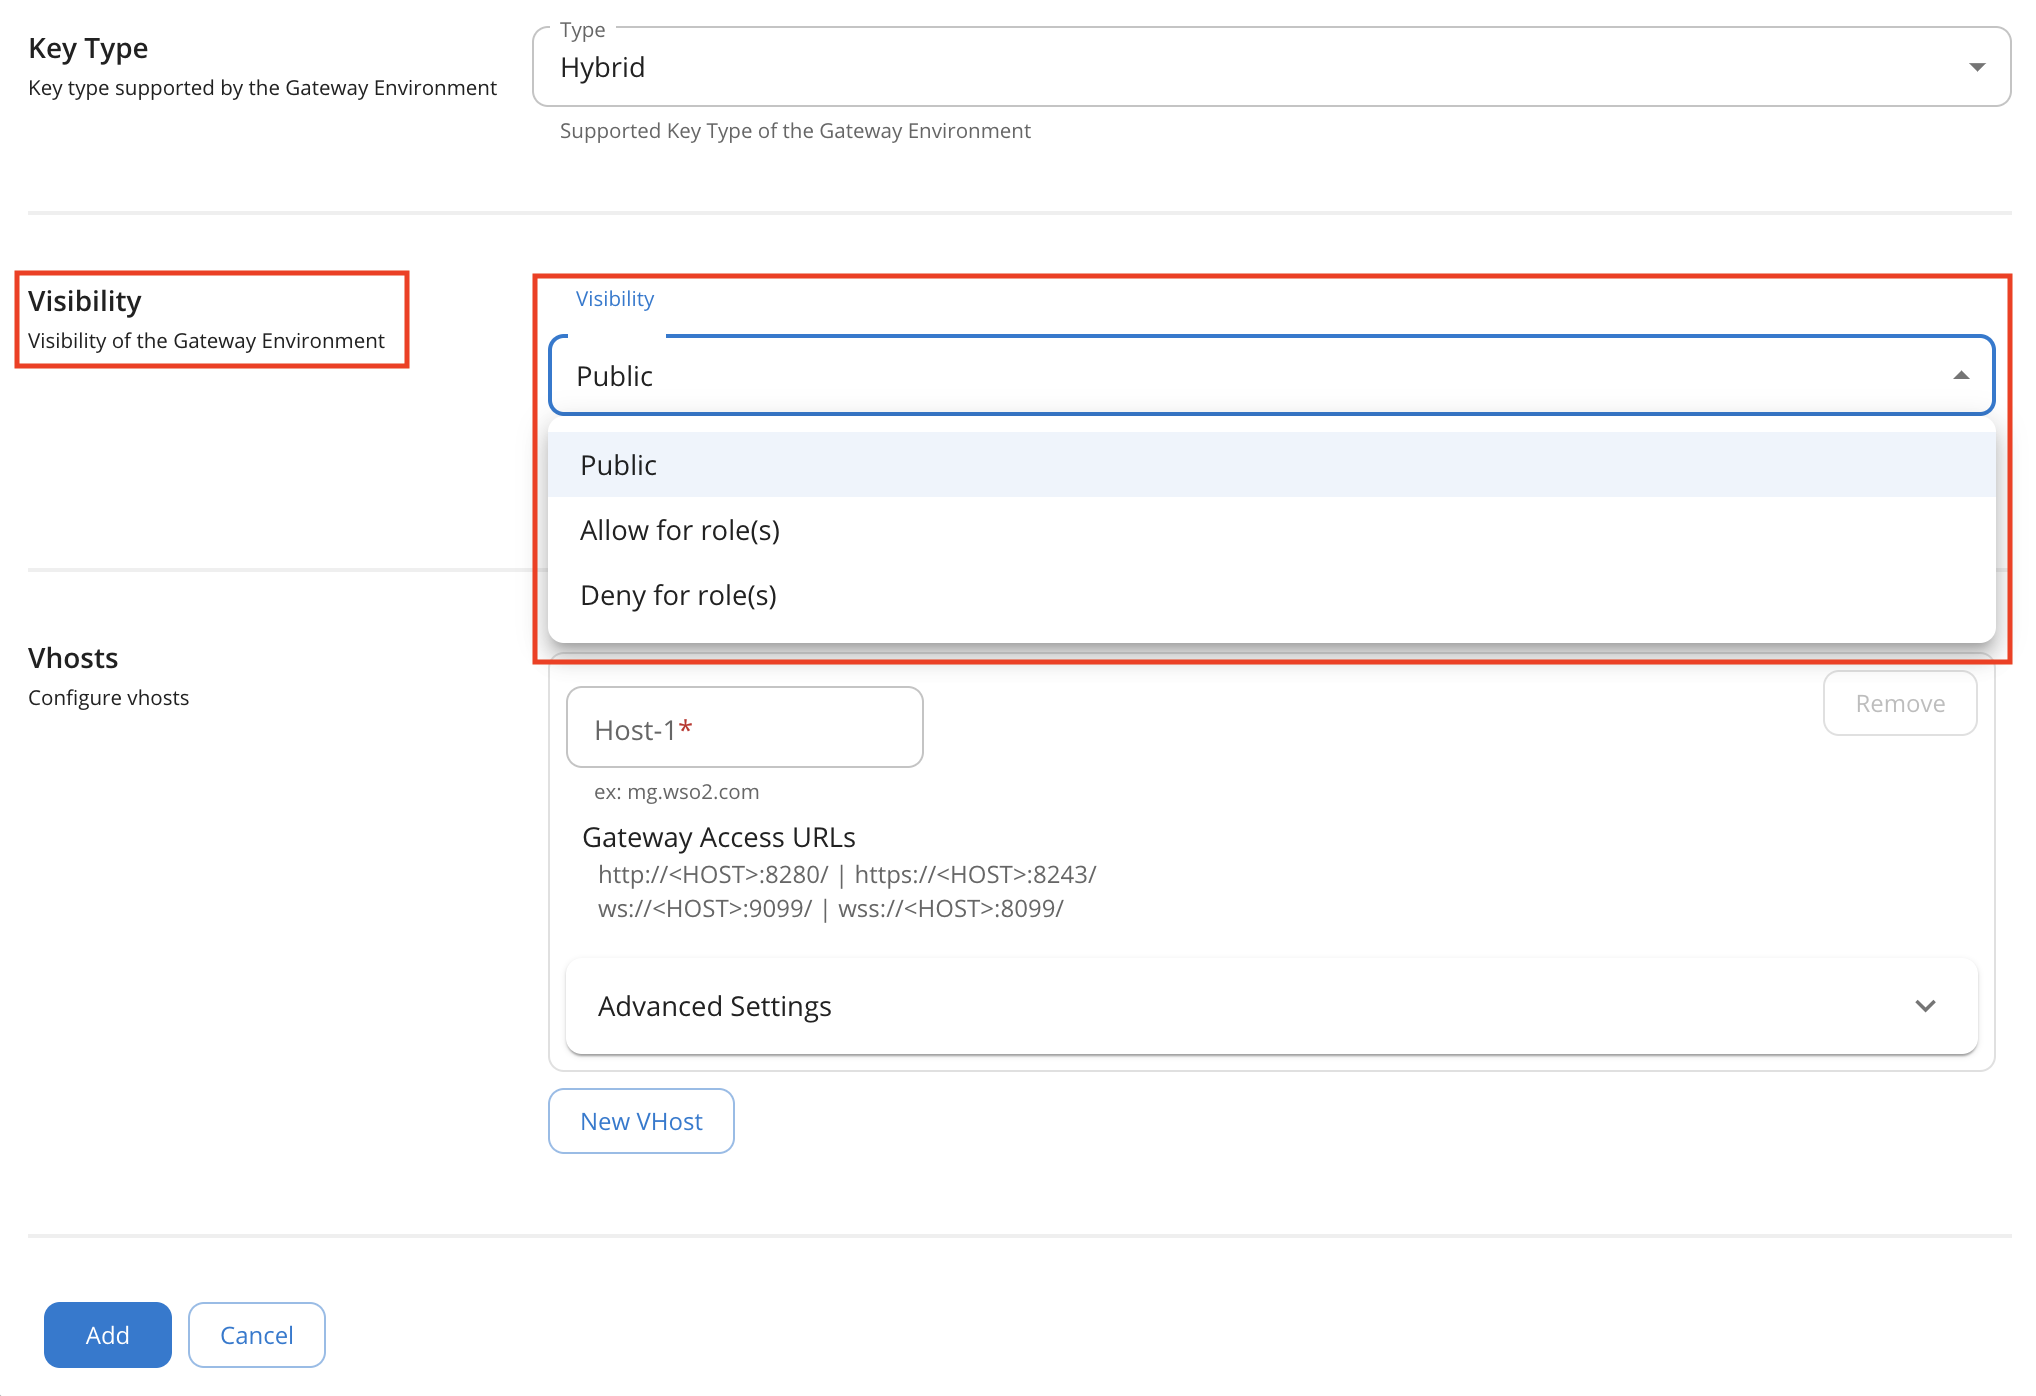
Note
The visibility of a Gateway can be set by selecting the permission type. The list of allowed/denied roles should be provided for the ALLOW of DENY types. The default value is set to Public and it does not have any visibility restrictions.
Option 2: Configure visibility for a Gateway environment using the configuration file
Follow the instructions below to use the deployment.toml file, which is the central configuration file, to configure a Gateway environment that consists visibility:
-
Open to the
<APIM-HOME>/repository/conf/deployment.tomlfile. -
Create a Gateway environment.
Create a Gateway environment with the following Gateway configurations, which include Role1 and Role2 as the visibility allowed roles.
Note
- When the WSO2 API Manager server is running, the Gateway environments, which you added via the
deployment.tomlfile, are displayed in the Gateway environments list page in the Admin Portal in read-only mode.
 [[apim.gateway.environment]]
 name = "us-region"
 display_name = "US Region"
 type = "hybrid"
 visibility = ["Role1","Role2"]
 display_in_api_console = true
 description = "Gateway environment deployed in the US region."
 show_as_token_endpoint_url = true
 service_url = "https://localhost:${mgt.transport.https.port}/services/"
 username= "${admin.username}"
 password= "${admin.password}"
 ws_endpoint = "ws://localhost:9099"
 wss_endpoint = "wss://localhost:8099"
 http_endpoint = "http://localhost:${http.nio.port}"
 https_endpoint = "https://localhost:${https.nio.port}"
 websub_event_receiver_http_endpoint = "http://localhost:9021"
 websub_event_receiver_https_endpoint = "https://localhost:8021"
This will start WSO2 API Manager in the all-in-one mode, which includes the default Gateway as well.
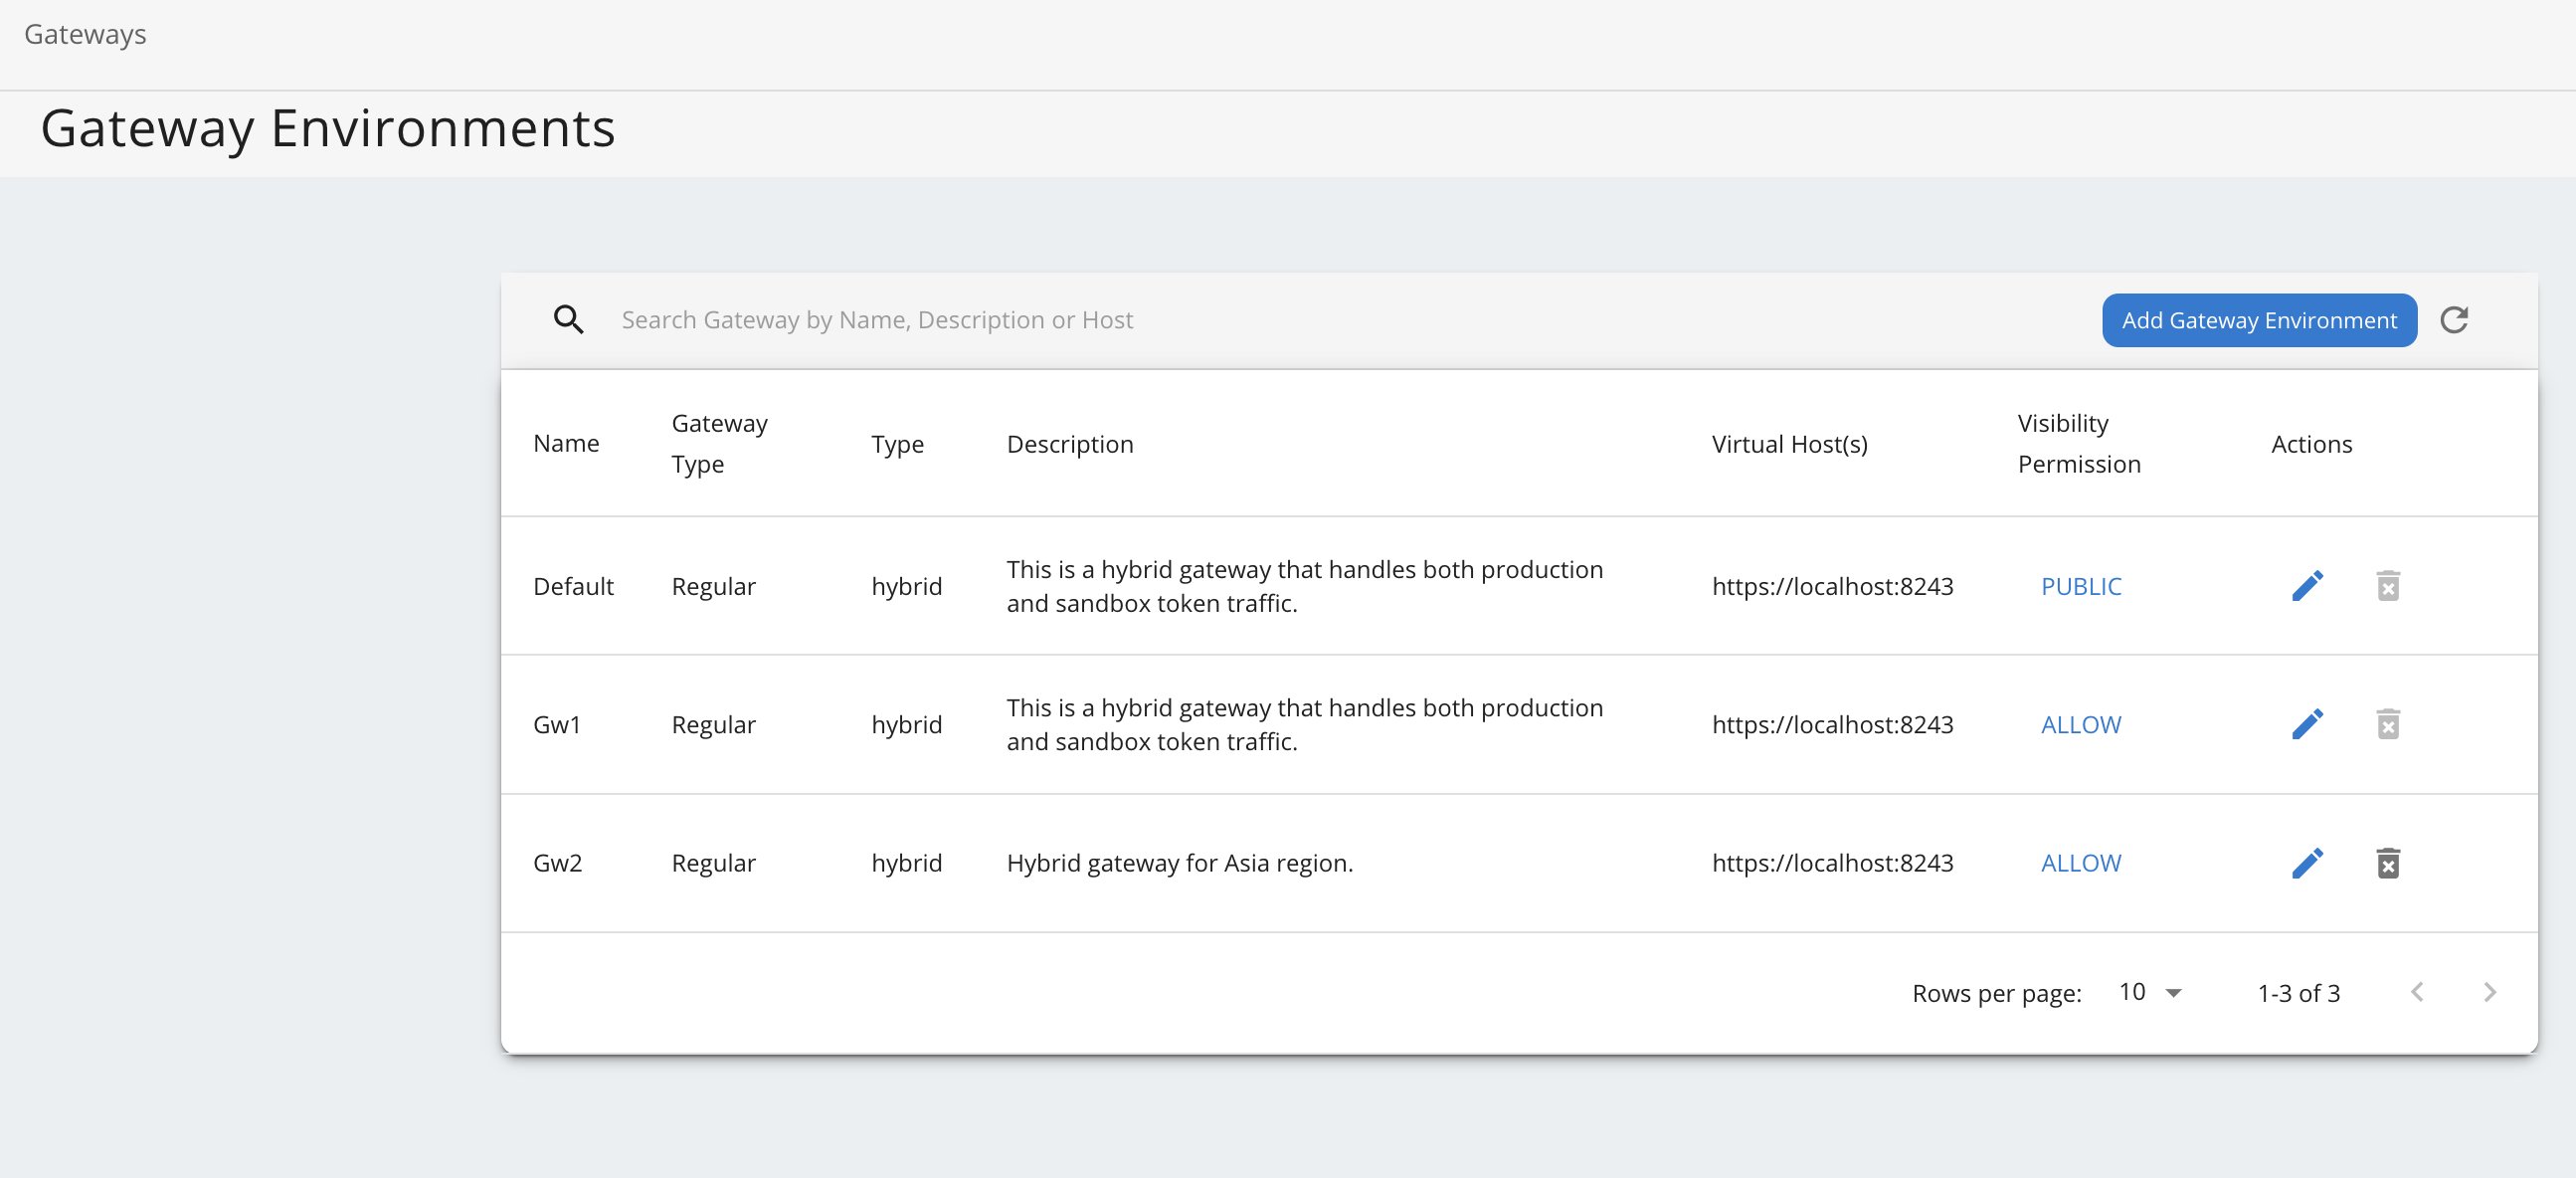
The added Gateway environments with visibility permissions are listed as below with the allowed/denied roles. Click on the permission type to view the allowed/denied roles.