Passing a Custom Authorization Token to the Backend
When you send an API request to the backend, you pass a token in the Authorization header of the request.
The API Gateway uses this token to authorize access, and then drops it from the outgoing message. If you wish to use a
different (or a custom generated) authorization token than the application generated access token, you can use it as a
token exchange mechanism in mediation logic of the API. In this tutorial, we explain how to pass a custom authorization
token that is different to the authorization token generated for the application.
In this tutorial, you have a sample backend that always expects 1234 as the authorization token. In your API
request, you pass the token that is generated in the Authorization header, and 1234 in a Custom header.
The mediation extension you write extracts the value of the Custom header, and sets it as the Authorization header
before sending it to the backend.
Here's a summary:
Client (headers: Authorization, Custom)→ Gateway (drop: Authorization, convert: Custom->Authorization) → Backend
-
Add the following sequence content to a file and save it as
tokenExchange.j2.Example
<sequence xmlns="http://ws.apache.org/ns/synapse" name="TokenExchange"> <property name="Custom" expression="get-property('transport', 'Custom')"/> <property name="Authorization" expression="get-property('Custom')" scope="transport"/> <property name="Custom" scope="transport" action="remove"/> </sequence> -
Start the sample backend server. Let's use the custom authorization token sample backend server as the backend for the API. It accepts any path and method, and authorizes a request only when the
Authorizationheader is exactlyBearer 1234. On success it returns HTTP 200 with "Request Received."; otherwise HTTP 401.-
Clone the WSO2 API Manager Samples repository.
git clone https://github.com/wso2/samples-apim -
Navigate to the
custom-auth-token-backenddirectory.cd samples-apim/custom-auth-token-backend -
Run the server.
python3 server.pyOnce the above steps are done, the backend server will be running on
http://localhost:8080.
Incoming requests and their headers are printed directly to the terminal, so you can verify what the gateway forwarded to the backend.
-
-
Log in to the API Publisher, create a new REST API with the information given in the table below by following the instructions in Create a REST API.
Field Sample Value Name TestCustomHeader Context /testcustomheader Version 1.0.0 Endpoint http://localhost:8080/custom-auth-header/validate-header -
Navigate to the API Configurations → Policies tab. Create a new policy with the information given in the table below by following the instructions in Create a Policy.
Section Field Sample Value General Details Name Custom Authorization Token Version 1.0 Description Passing a custom authorization token to the backend Applicable Flows Request Supported API Types HTTP Gateway Specific Details Policy File tokenExchange.j2file you createdPolicy Attributes N/A N/A -
Next, find the Custom Authorization Token policy that you just created by following Step 4, from the
Requesttab of the policy list. Drag and drop this policy to the desired API operation(s) by following the instructions in Attach Policies.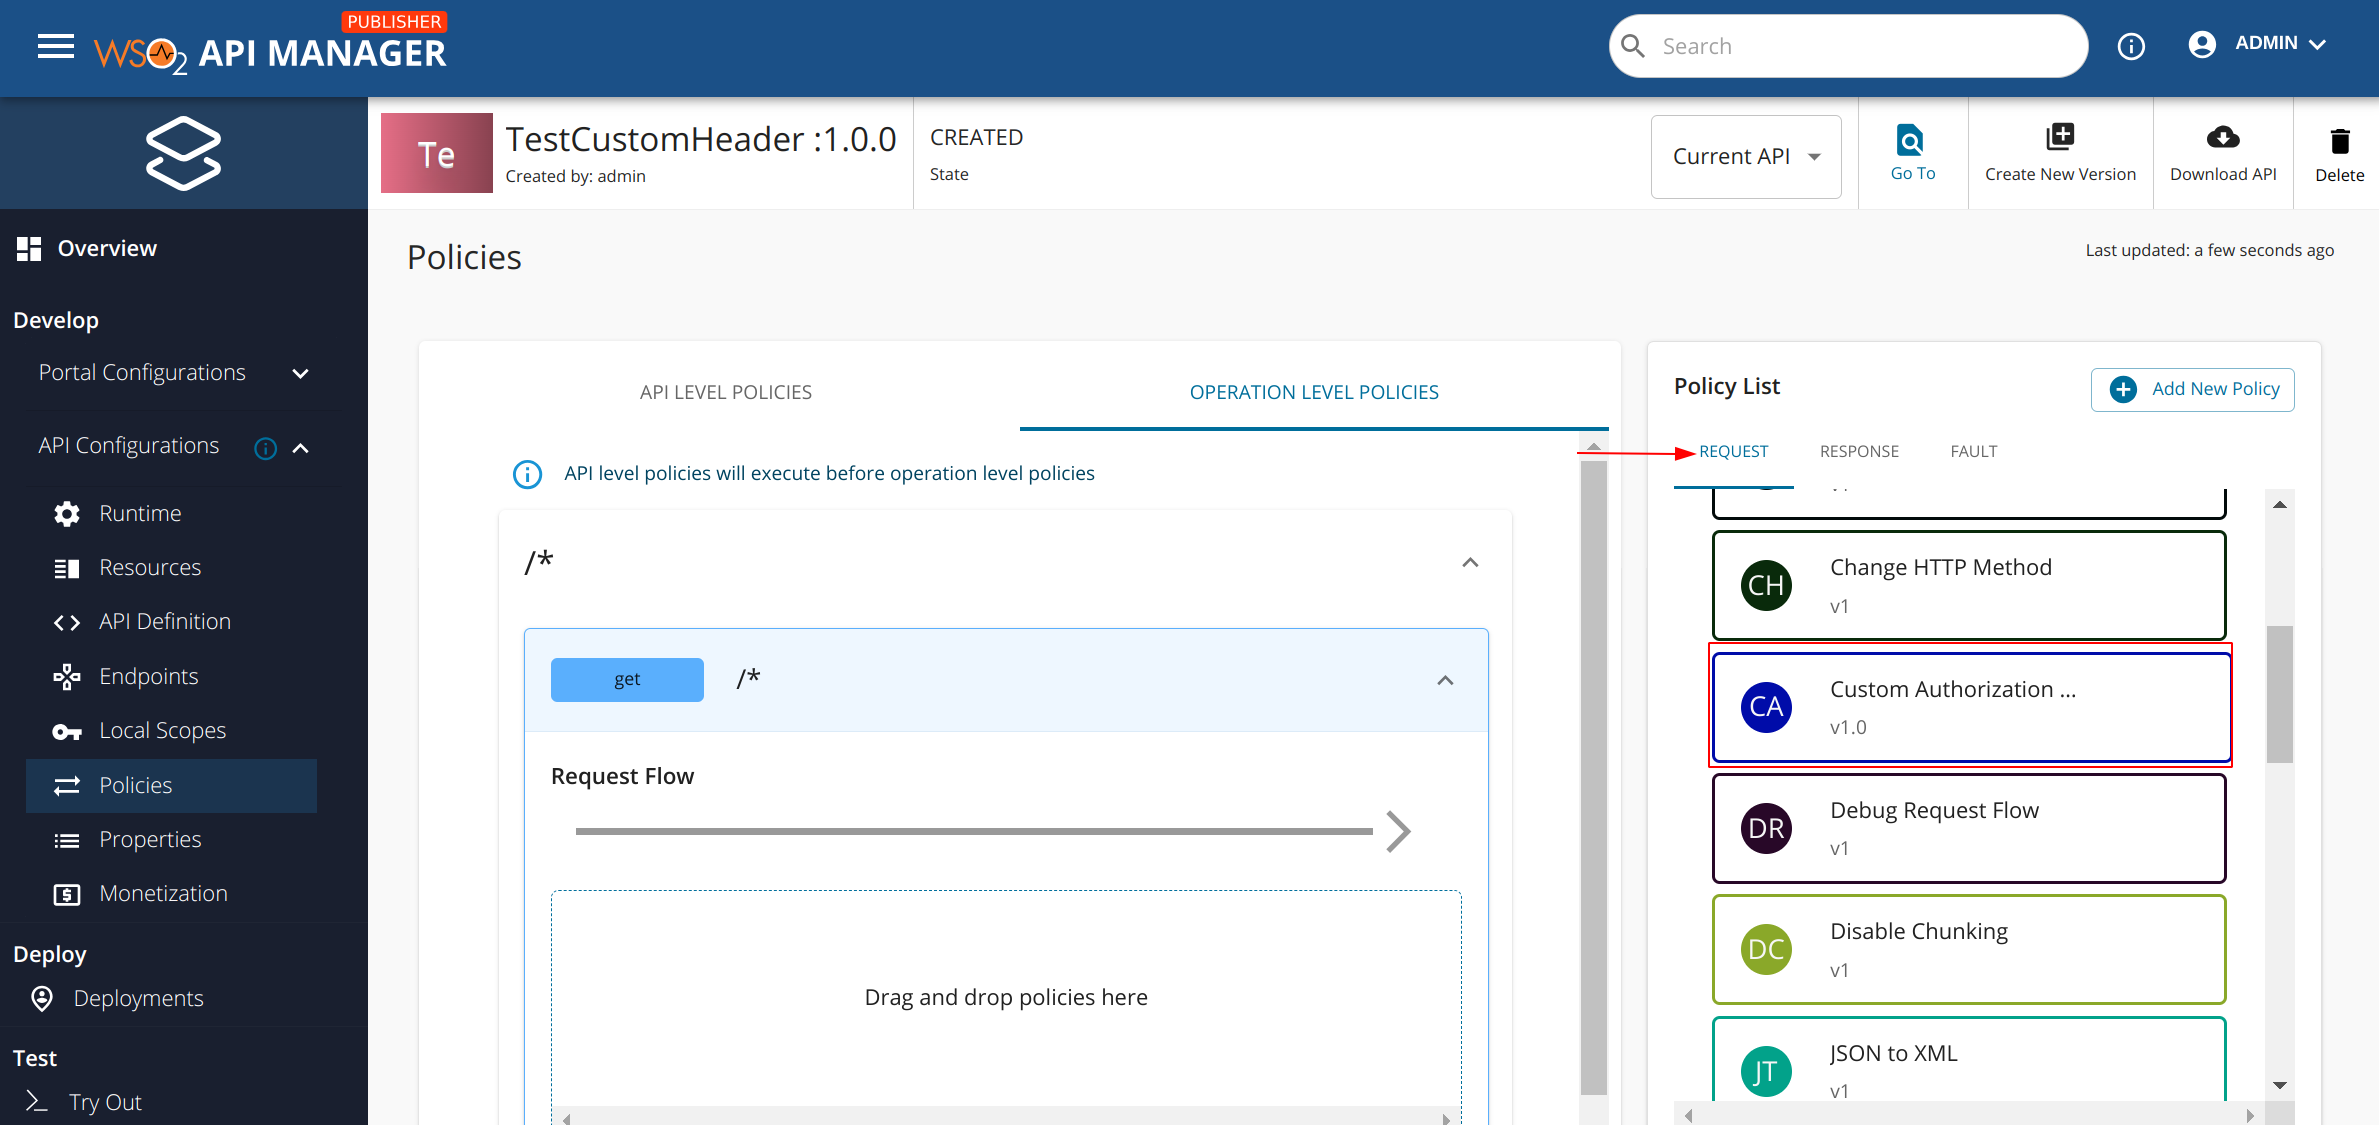
-
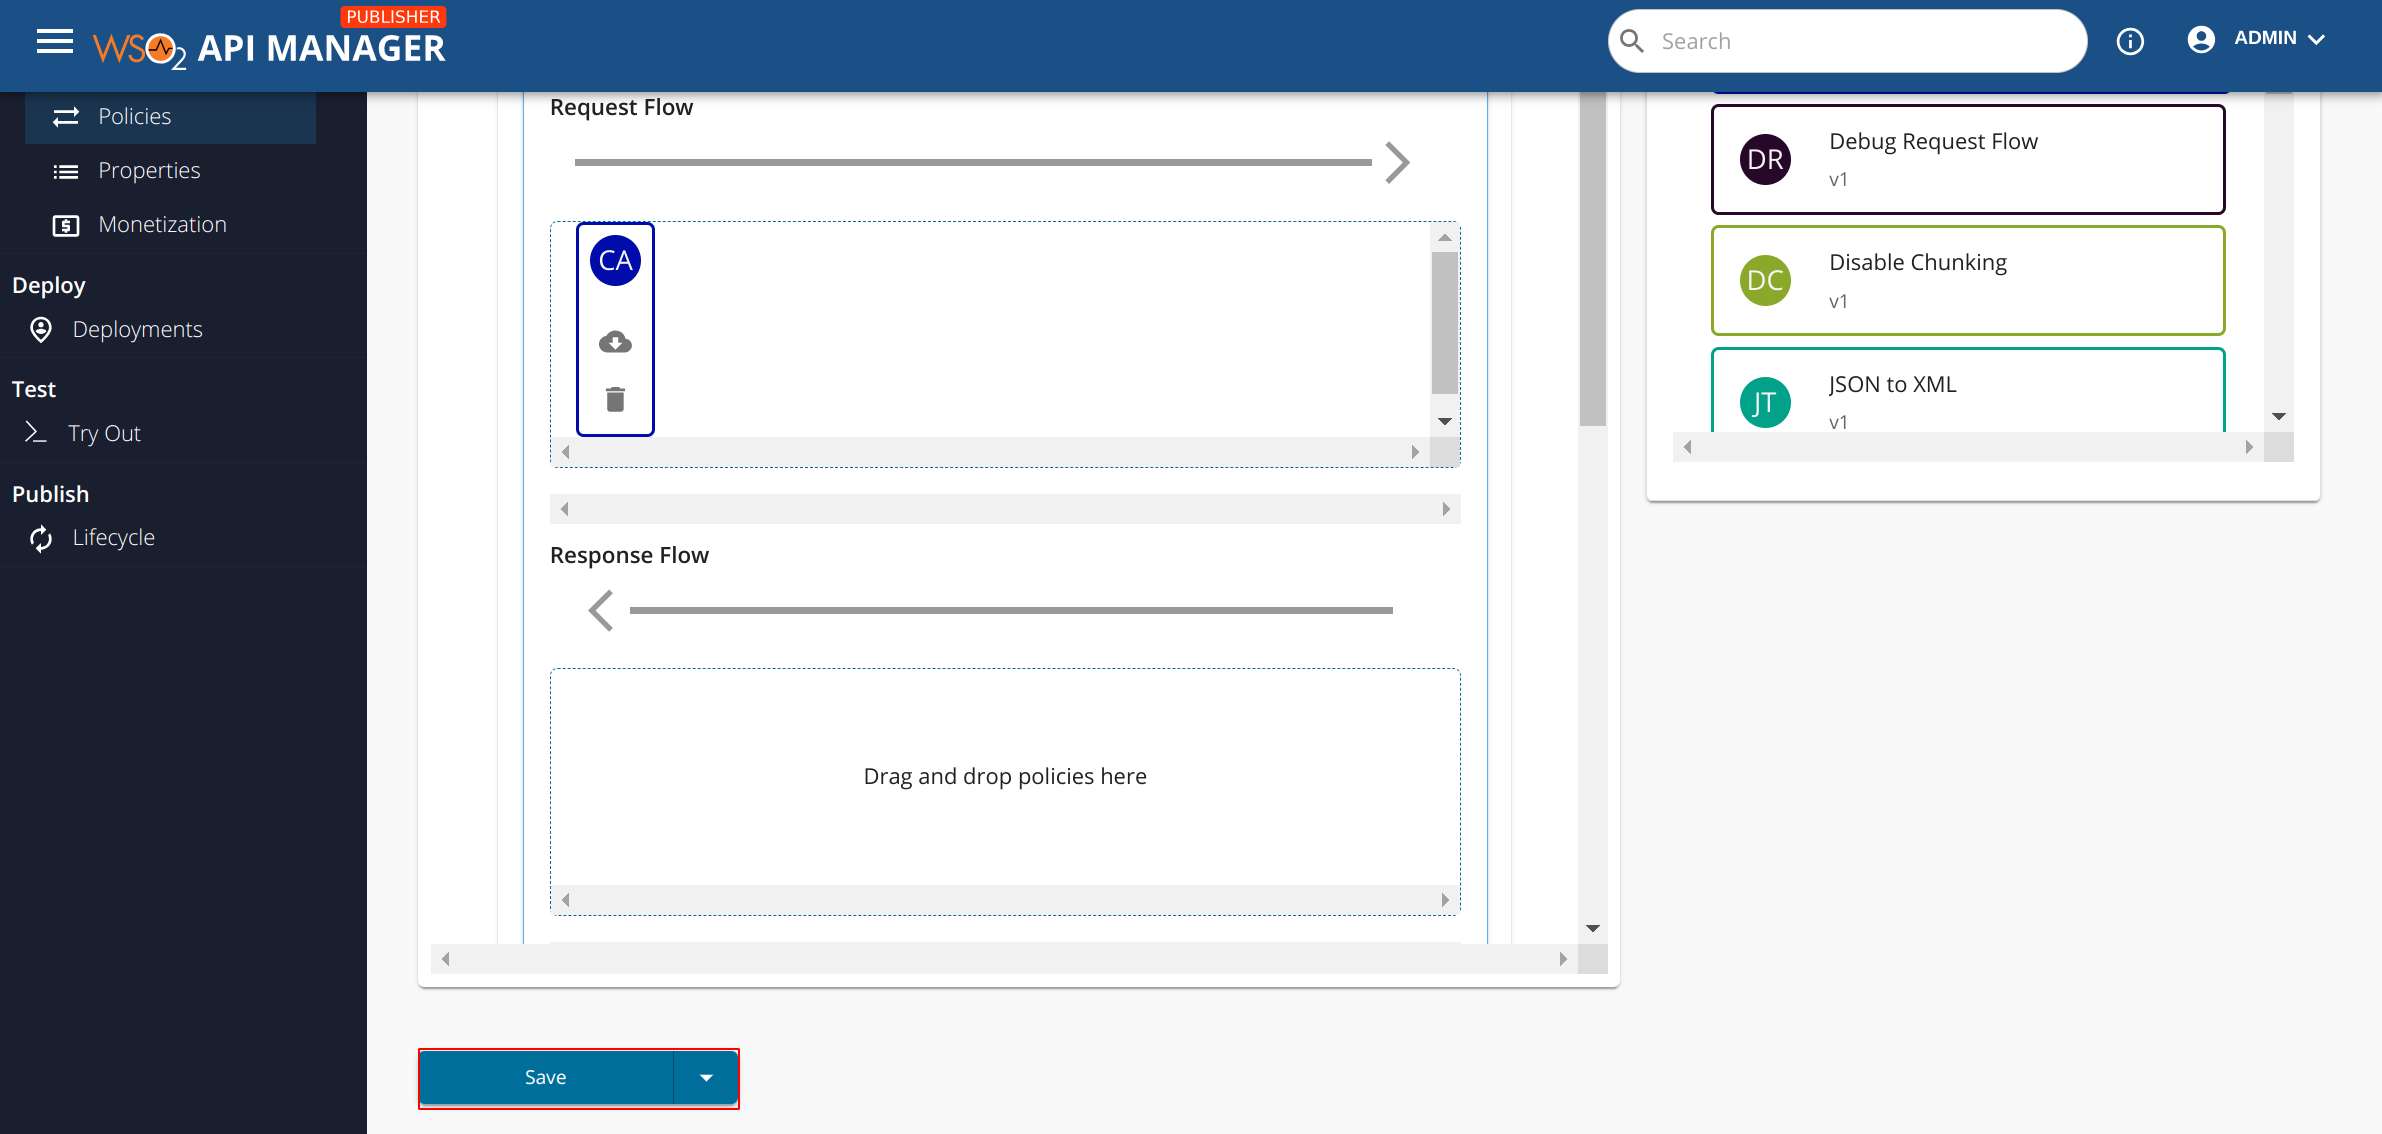
Finally, scroll down and click on the Save button in order to apply the attached policies to the API.
-
Make sure to navigate to the Deployments tab and click on Deploy New Revision button. Also, if the API is not in
PUBLISHEDstate, navigate to the Lifecycle tab and publish your API. -
Go to the Developer Portal, subscribe and obtain a token to invoke the published API.
Tip
Follow the instructions in here to generate an application access token.
-
Install any REST client in your machine. We use cURL here.
-
Go to the command line, and invoke the API using the following cURL command.
In this command, you pass the token that the backend expects, i.e., 1234, in theCustomheader with the authorization token that the system generates in theAuthorizationheader.Example
curl -H "Authorization: Bearer <access token>" -H "Custom: Bearer 1234" <API URL>curl -k -H "Authorization: Bearer 2e25097b2b3fbbfb44f5642fa8a495a1" -H "Custom: Bearer 1234" https://localhost:8243/testcustomheader/1.0.0Info
- <access token> is the token that you got in step 8.
- <API URL> appears on the API's Overview page in the API Developer Portal. Copy the HTTP endpoint. If you select the HTTPs endpoint, be sure to run the cURL command with the -k option.
-
Note the response that you get in the command line. According to the sample backend used in this tutorial, you get the response as "Request Received.". You can also check the backend server's terminal to verify that the
Authorizationheader received by the backend isBearer 1234(swapped in from theCustomheader) and that theCustomheader has been removed.
In this tutorial, you passed a custom token that the backend expects along with the system-generated Authorization token, and invoked an API successfully by swapping the system's token with your custom token.