Creating a Prototype API with Mock Payload Generated Inline Scripts
The prototype implementation in WSO2 API Manager gives users the ability to prototype APIs with inline scripts for testing purposes and as an early promotion. This allows subscribers to try out and test APIs without subscriptions or monetizations, allowing them to provide feedback to improve APIs. Publishers can use this to make changes to the APIs requested by users. The WSO2 API Manager prototype implementation allows you to generate a mock payload based on an API definition. You can prototype an API using the inbuilt JavaScript engine without having to manually write the JavaScript implementation for each resource.
Let's create a prototyped API with mock response payloads, deploy it as a prototype, and invoke it using the API Console, which is integrated into the Developer Portal.
For this let's use the following OpenAPI URL: https://petstore3.swagger.io/api/v3/openapi.json
Step 1 - Create a prototype API with mock response payloads
-
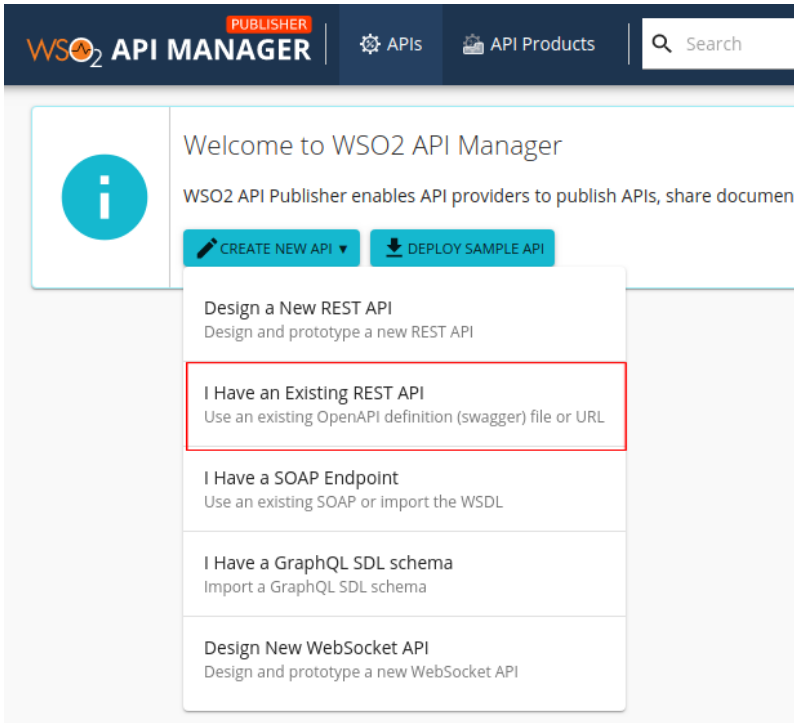
Click CREATE NEW API, and click I Have an Existing REST API.
-
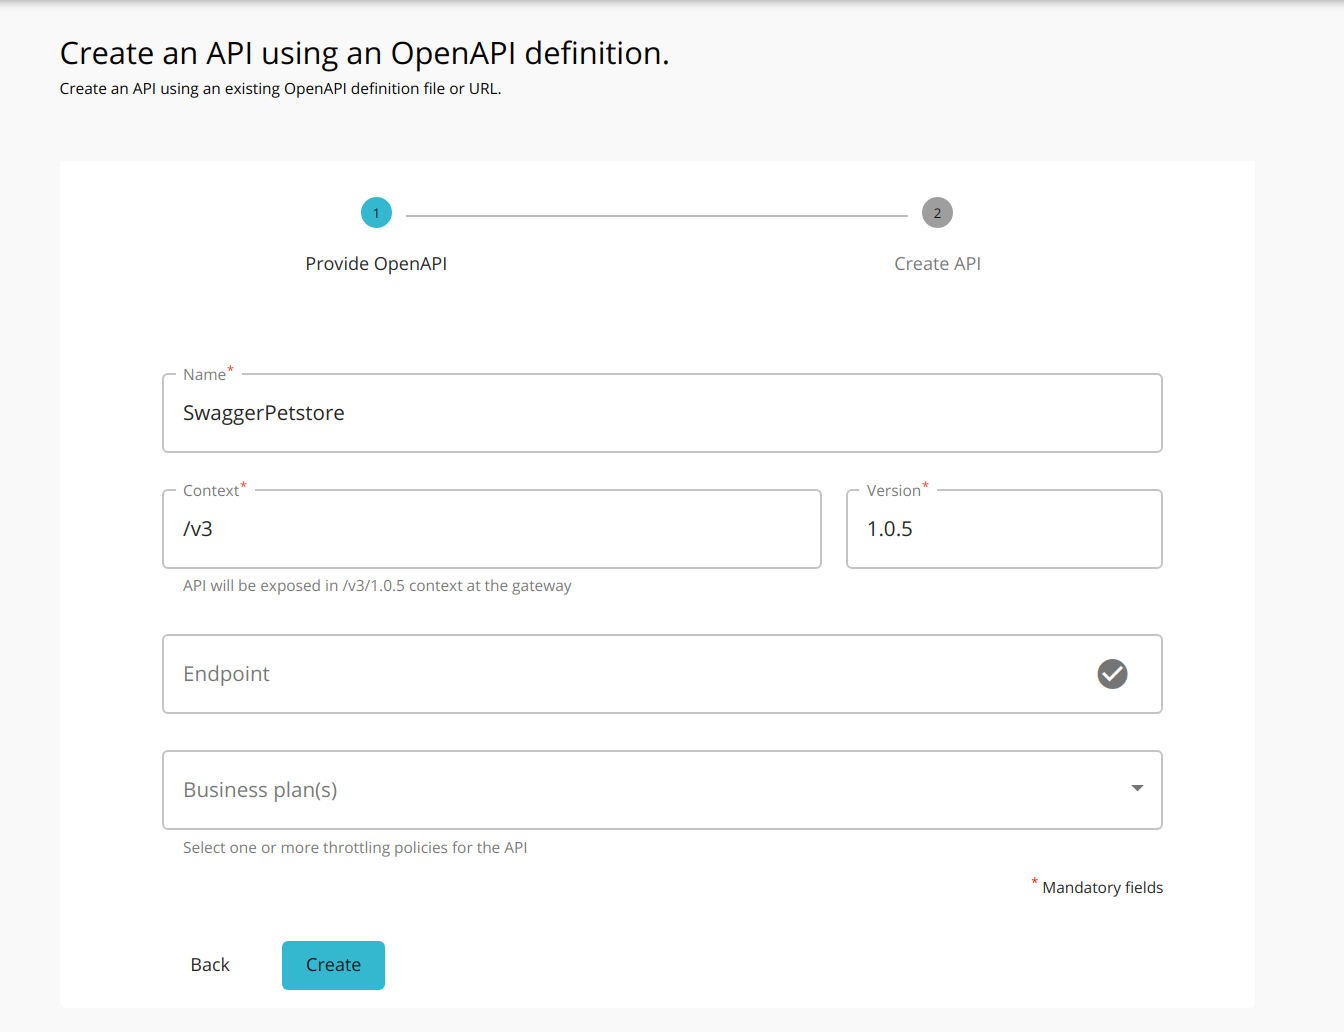
Upload the OpenAPI URL or OpenAPI File and click NEXT.

-
Provide the API name, context, and version. Thereafter, click CREATE.
Now you will be directed to the API overview page.
-
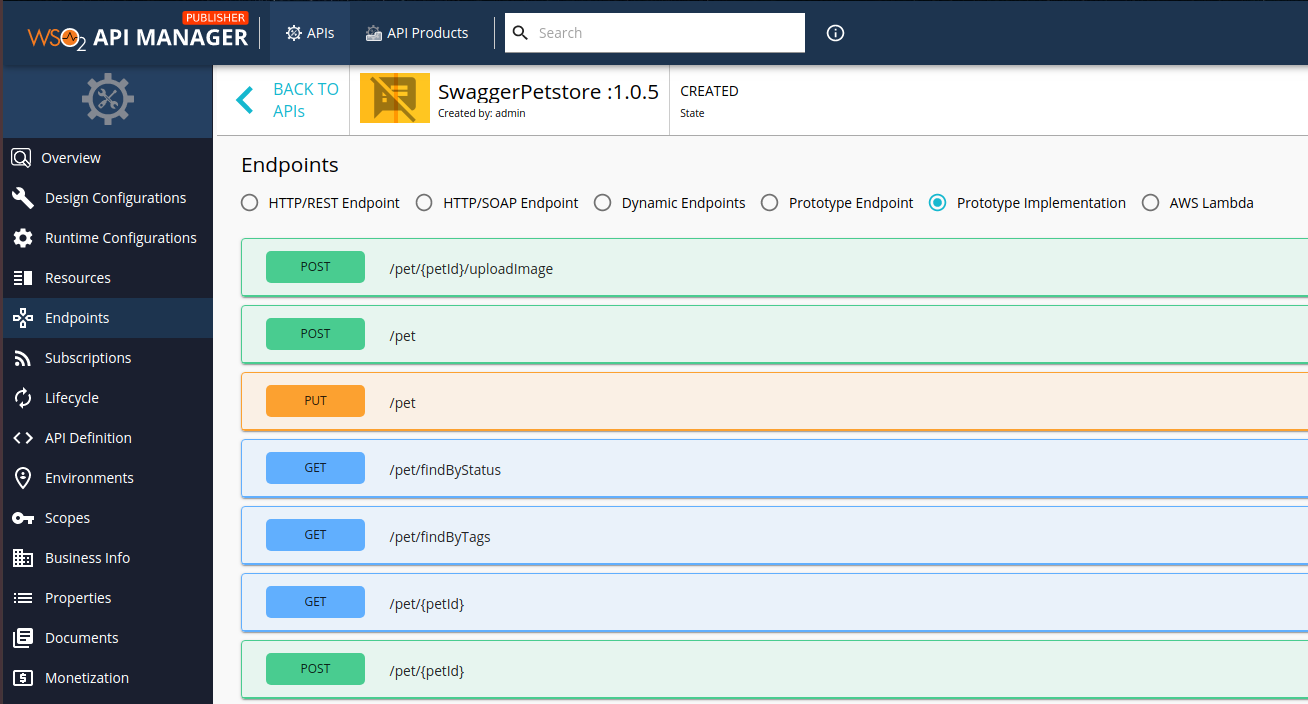
Click Endpoints to navigate to the Endpoints page.
-
Select Prototype Implementation as the endpoint type, and click Proceed.

The Endpoints page appears.
-
Click and expand any of the methods that contain a sample/mock payload to view the inline script that has been generated.
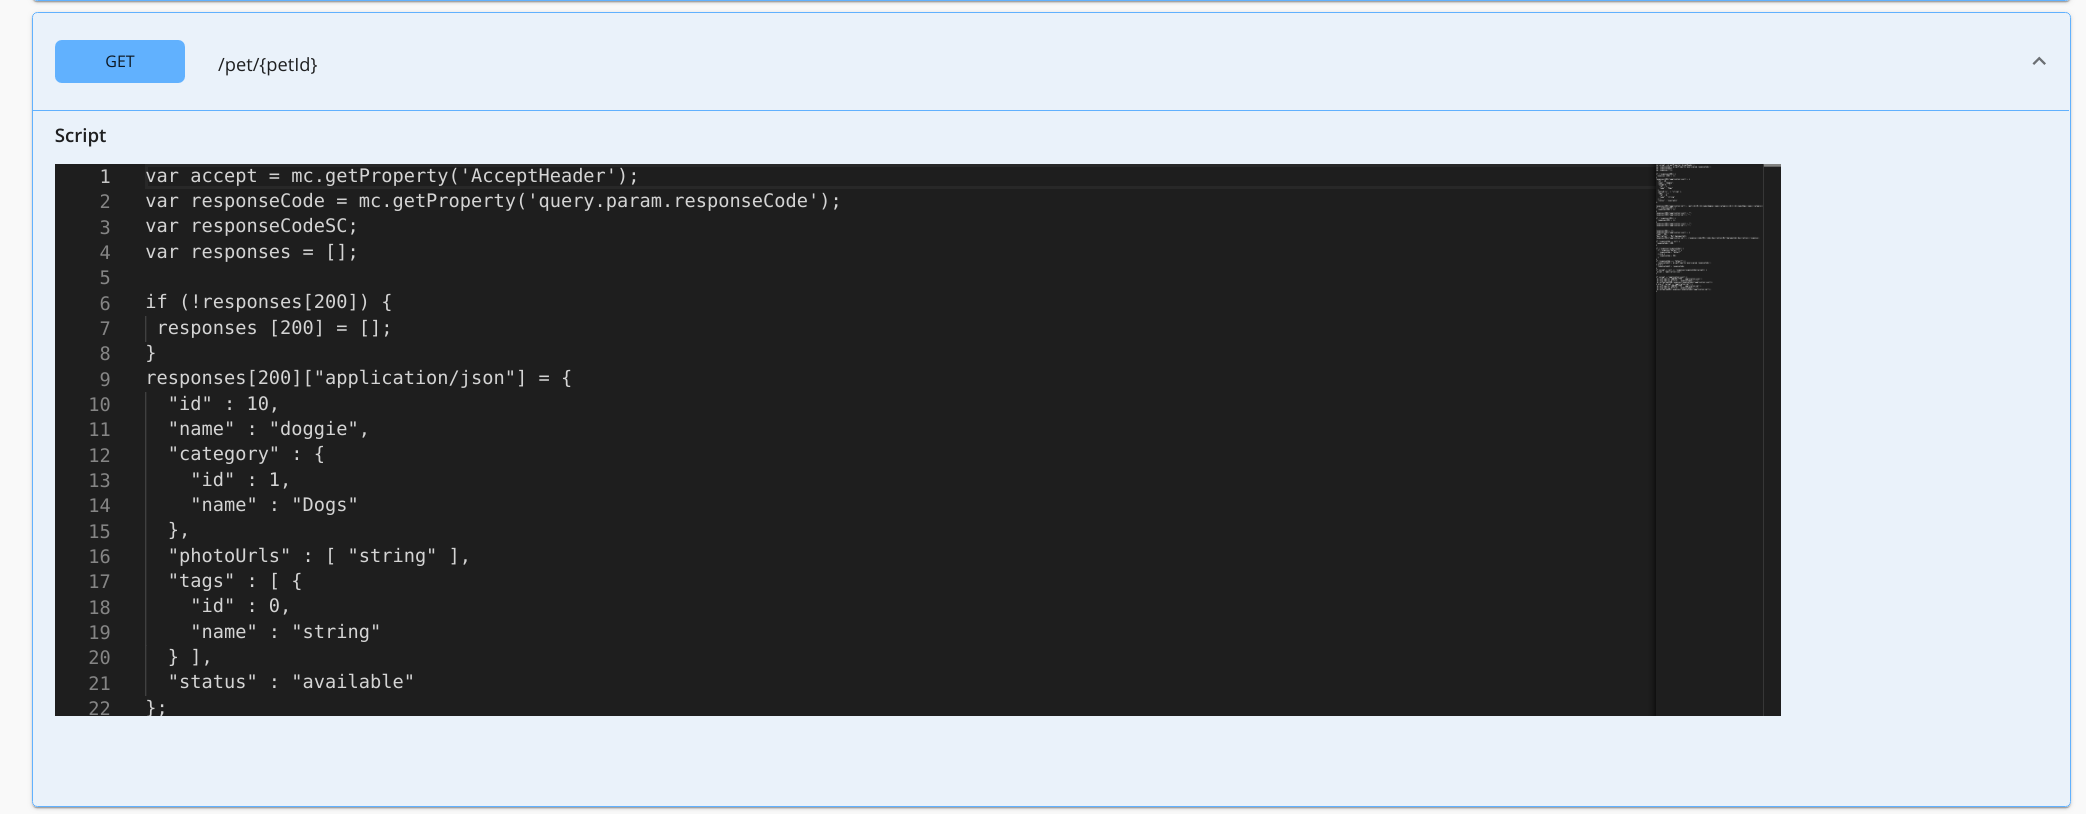
The example response defined in the OpenAPI definition is set as the mock response payload. You can modify the generated inline scripts as required.
-
Modify the inline script for
/pet/{petId}.Set a path parameter entered by the user to a variable that will satisfy a condition and set a response accordingly.
Tip
The RESET button appears after a change is made to the script. When pressed, the script will revert back to the originally generated script.
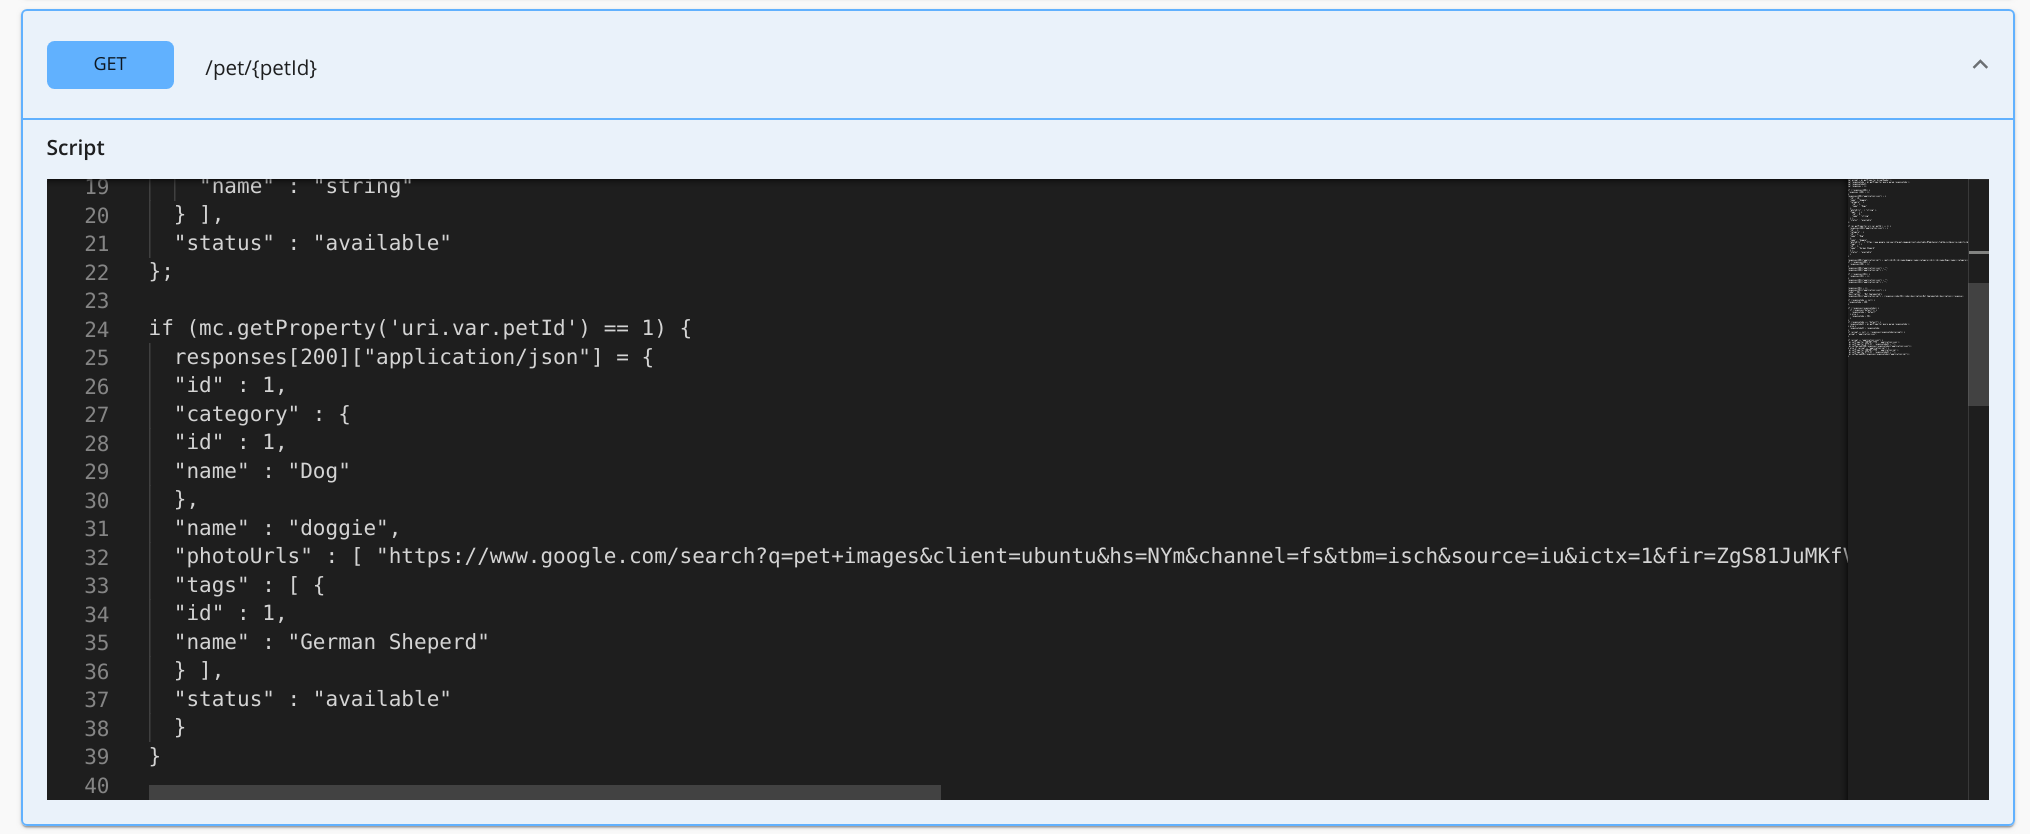
// **GENERATED CODE** // var responses = []; if (!responses[200]) { responses [200] = []; } responses[200]["application/json"] = { // Mock response payload stored as a variable "id" : 10, "name" : "doggie", "category" : { "id" : 1, "name" : "Dogs" }, "photoUrls" : [ "string" ], "tags" : [ { "id" : 0, "name" : "string" } ], "status" : "available" }; // **MANUALLY ADDED CODE** // if (mc.getProperty('uri.var.petId') == 1) { // Get the path parameter 'petID' to check the condition responses[200]["application/json"] = { "id" : 1, "category" : { "id" : 1, "name" : "Dog" }, "name" : "doggie", "photoUrls" : [ "https://images.unsplash.com/photo-1543333232-add7974e52cc?ixid=MXwxMjA3fDB8MHxwaG90by1wYWdlfHx8fGVufDB8fHw%3D&ixlib=rb-1.2.1&auto=format&fit=crop&w=1396&q=80" ], "tags" : [ { "id" : 1, "name" : "German Sheperd" } ], "status" : "available" } responses[200]["application/xml"] = <pet><id>1</id><name>doggie</name><category><id>1</id><name>Dog</name></category><photoUrls><photoUrl>https://images.unsplash.com/photo-1543333232-add7974e52cc?ixid=MXwxMjA3fDB8MHxwaG90by1wYWdlfHx8fGVufDB8fHw%3D&ixlib=rb-1.2.1&auto=format&fit=crop&w=1396&q=80</photoUrl></photoUrls><tags><tag><id>1</id><name>German Sheperd</name></tag></tags><status>available</status></pet>; } // **GENERATED CODE** // if (accept == "application/json") { mc.setProperty('CONTENT_TYPE', 'application/json'); mc.setPayloadJSON(responses[responseCode]["application/json"]); } else if (accept == "application/xml") { mc.setProperty('CONTENT_TYPE', 'application/xml'); mc.setPayloadXML(responses[responseCode]["application/xml"]); }Inline Script Methods
The following table lists down the
mc.methods that you can use to invoke functions in the inline script. You can use these functions to access the Synapse predefined in a script variable namedmc. Themcvariable represents an implementation of theMessageContext, namedScriptMessageContext.java, which contains the following methods, that you can access within the script asmc.methodName.Return? Method Name Description Yes getPayloadXML() This gets an XML representation of SOAP body payload. No setPayloadXML(payload) This sets the SOAP body payload from XML. Yes getEnvelopeXML() This gets the XML representation of the complete SOAP envelope. No setTo(reference) This is used to set the value that specifies the receiver of the message. Yes setFaultTo(reference) This is used to set the value that specifies the receiver of the faults relating to the message. No setFrom(reference) This is used to set the value that specifies the sender of the message. No setReplyTo(reference) This is used to set the value that specifies the receiver of the replies to the message. Yes getPayloadJSON() This gets the JSON representation of a SOAP Body payload. No setPayloadJSON( payload ) This sets the JSON representation of a payload obtained via the getPayloadJSON()method and sets it in the current message context.Yes getProperty(name) This gets a property from the current message context. No setProperty(key, value) This is used to set a property in the current message context. The previously set property values are replaced by this method. -
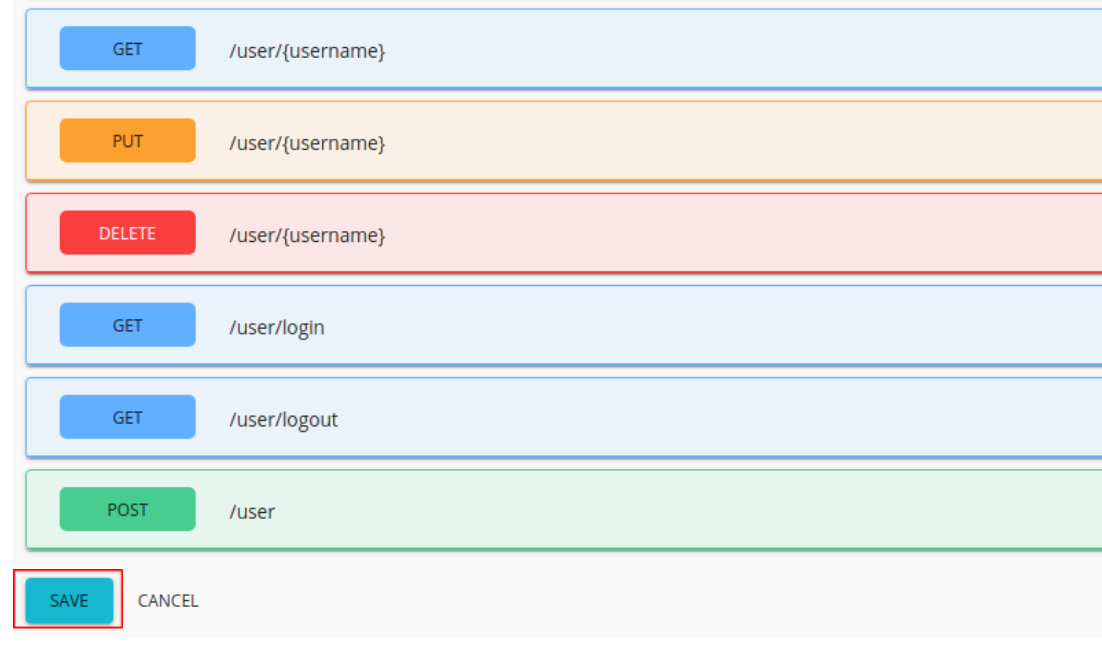
Click SAVE to save the API.
Step 2 - Deploy the API as a prototype
-
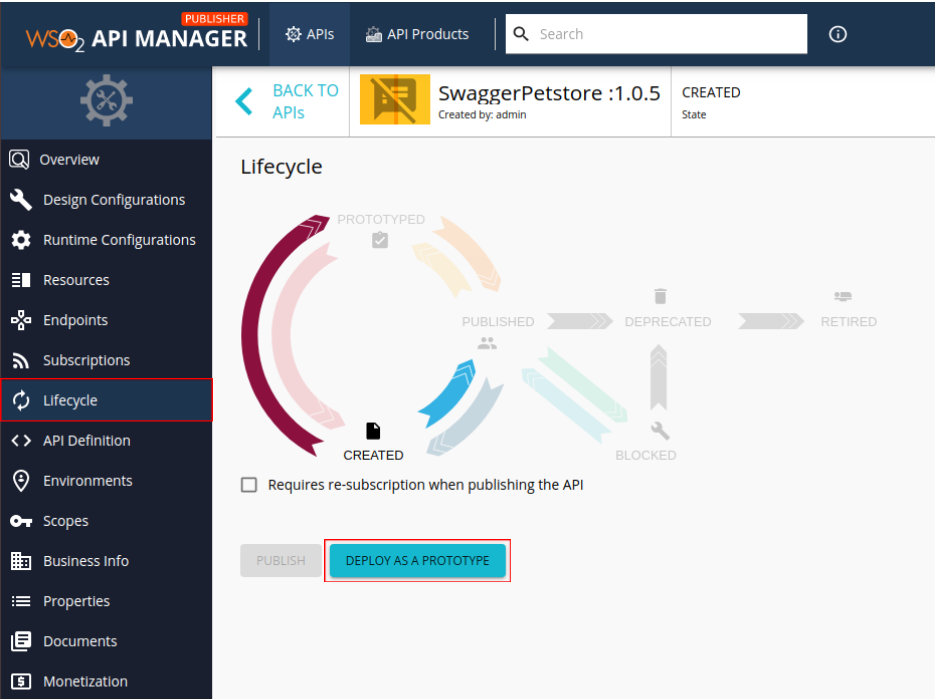
Click Lifecycle to navigate to the Lifecycle page.
-
Click DEPLOY AS A PROTOTYPE to deploy the API as a prototype.
Step 3 - Invoke the API
-
Click View in Dev Portal to navigate to the Developer Portal after the API is deployed.
-
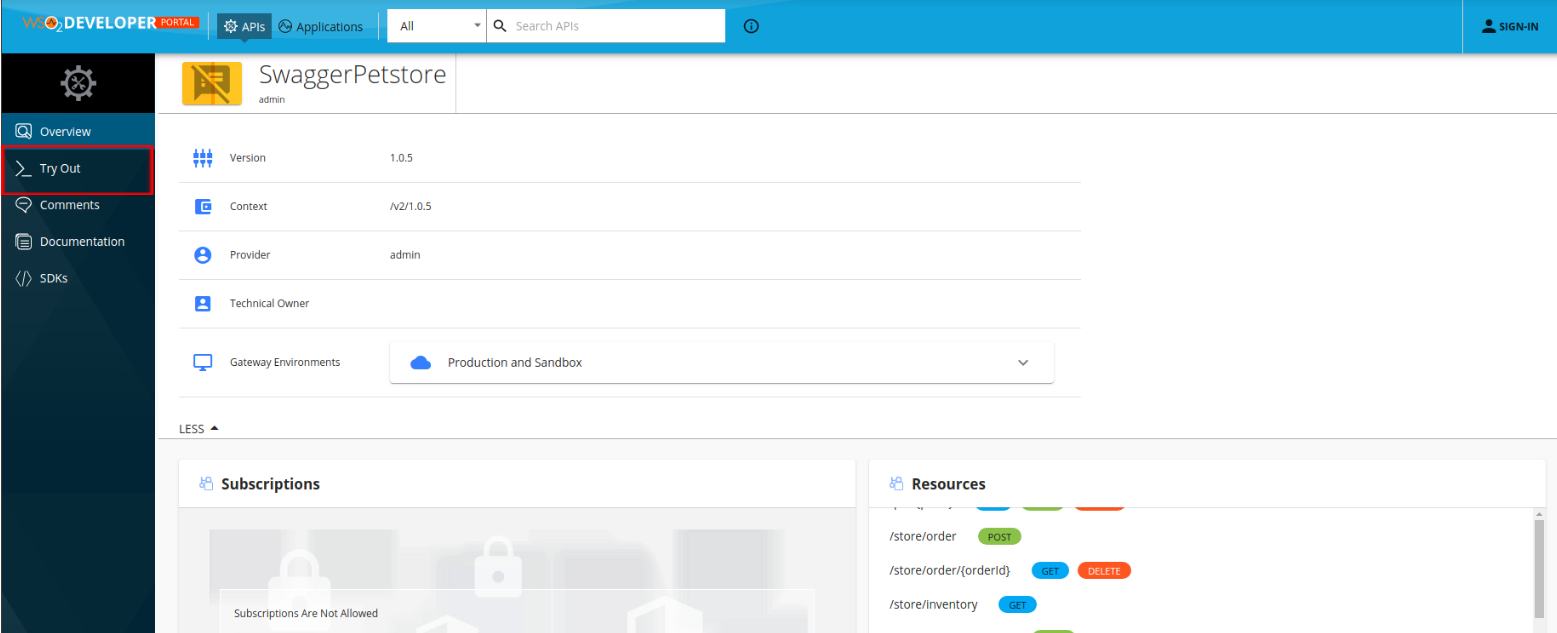
Click Try Out to navigate to the API Console.
-
Expand any method and click Try it out.

-
Enter the value for the parameter and click Execute to invoke the API.
Note
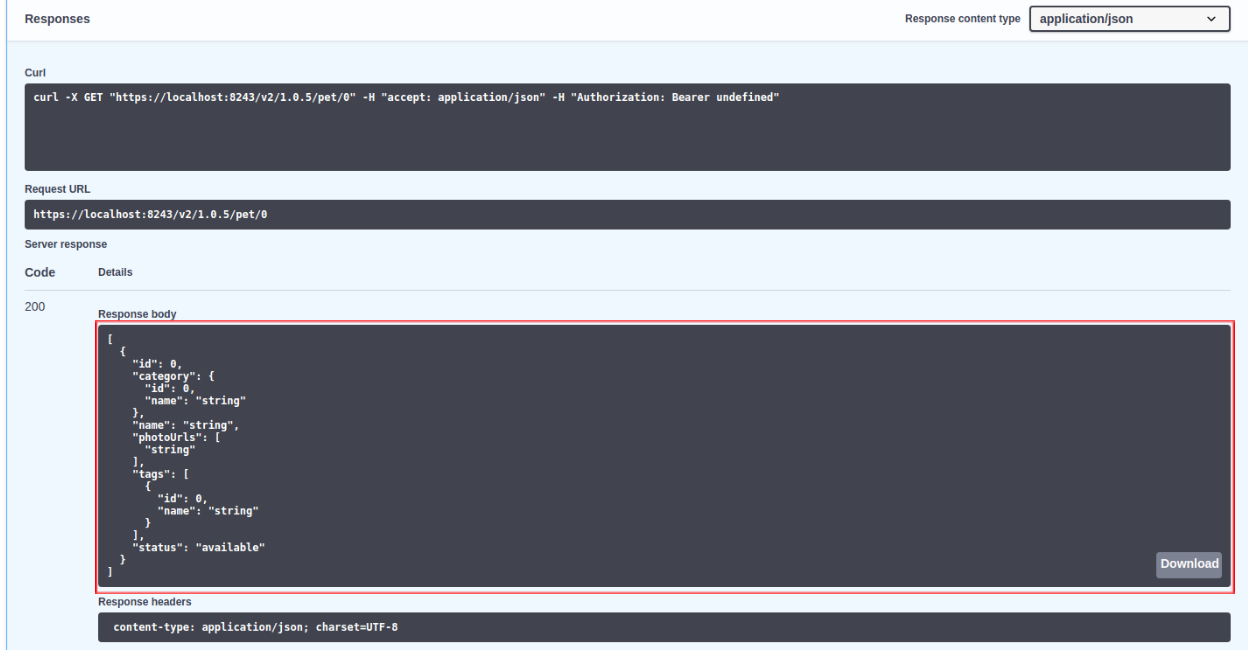
The payload that you gave as a JSON/XML output appears in the response for each respective parameter provided.
-
For
petId : " 0 "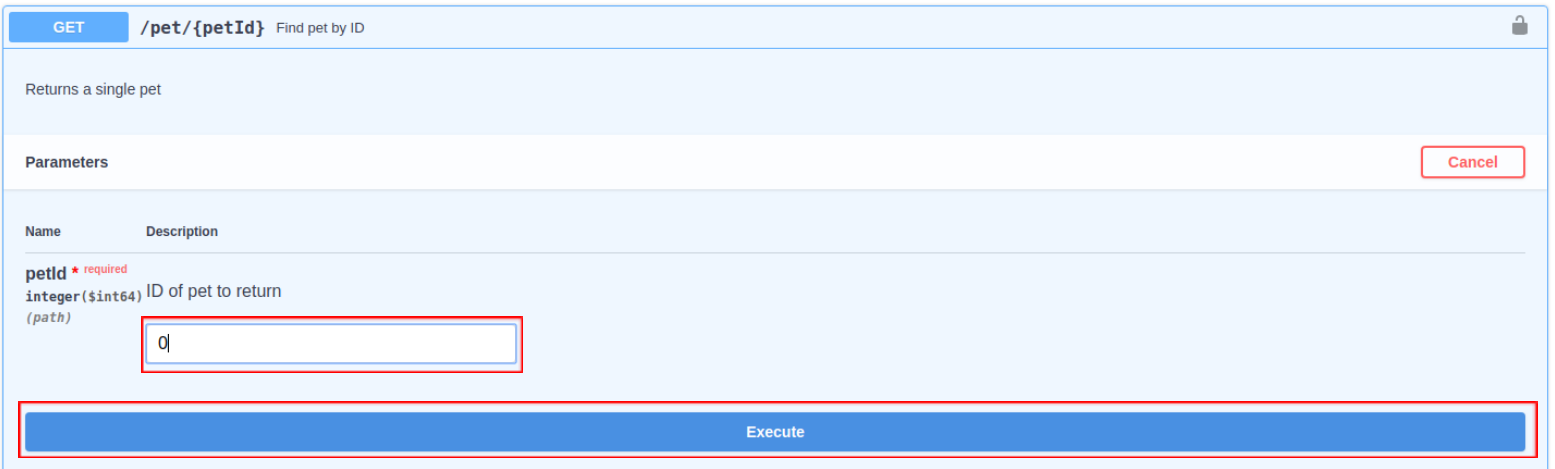
Sample cURL command to invoke the API
curl -X GET "https://localhost:8243/v3/1.0.5/pet/0" -H "accept: application/json"The response payload that is defined in the generated script is returned.
-
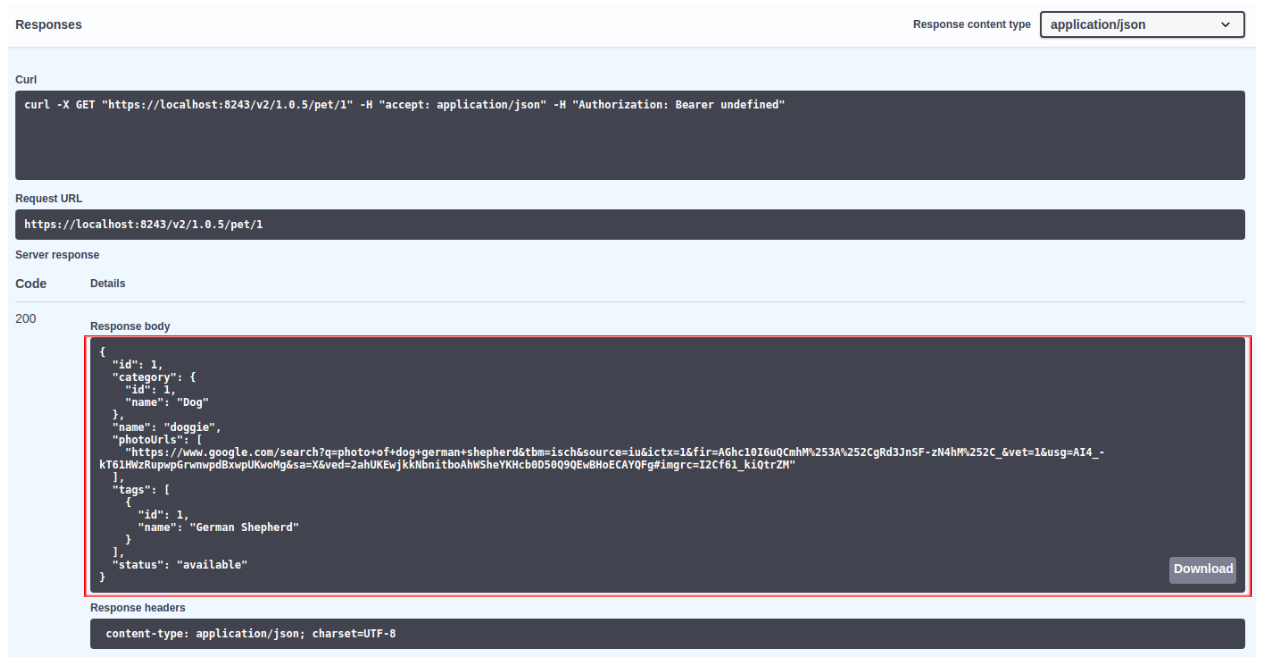
For
petId : " 1 "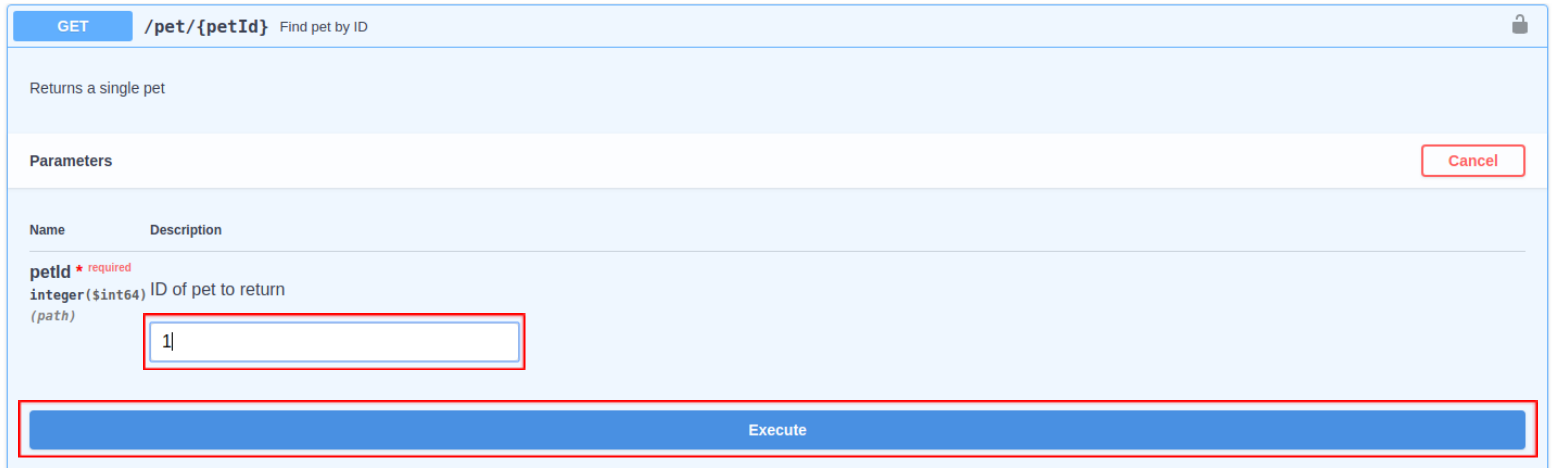
Sample cURL command to invoke the API
curl -X GET "https://localhost:8243/v3/1.0.5/pet/1" -H "accept: application/json"The response payload defined in the manually modified script is returned.
-
You have successfully created an API with an inline script, deployed it as a prototype, and invoked it via the integrated API Console.
An API can also be prototyped by moving the API to the PROTOTYPED state by changing the API lifecycle state and providing the prototype endpoints.
For more information, see the Deploy and Test Prototype APIs tutorial.
Related Guides
- Create and Publish an API
- Create a WebSocket API
- Create an API from an OpenAPI definition
Restricting Access to Java Classes and Methods
Update Level 336
This feature is available only as an update, after Update level 3.2.0.336
Java Classes and Methods are visible to the prototype scripts by default.
For example,
var myArrayList = new java.util.ArrayList();would instantiate a Java Arraylist.var hashmapConstructors = c.getClassLoader().loadClass("java.util.HashMap").getDeclaredConstructors();would get a list of constructors of Java HashMap via reflection.
Usage of classes or methods in such manner can be restricted by using the following configs/system properties.
Limiting Access to Java Classes
Set the limit_java_class_access_in_scripts configurations under synapse_properties in the deployment.toml, following either a BLOCK_LIST approach (selectively blocking) or an ALLOW_LIST approach (selectively allowing).
| Synapse Property | Description | Example Values |
|---|---|---|
limit_java_class_access_in_scripts.enable |
Enable limiting access to Java classes. | truefalse |
limit_java_class_access_in_scripts.class_prefixes |
Prefixes of Java class names, as comma separated values. Java Classes used in the script, having names beginning with these values, will be selectively allowed/blocked, based on the provided limit_java_class_access_in_scripts.list_type. |
java.utiljava.lang |
limit_java_class_access_in_scripts.list_type |
Type of the list. Possible values are: - ALLOW_LIST: Selectively allow- BLOCK_LIST: Selectively block |
ALLOW_LISTBLOCK_LIST |
Example Config:
[synapse_properties]
'limit_java_class_access_in_scripts.enable' = true
'limit_java_class_access_in_scripts.list_type' = "ALLOW_LIST"
'limit_java_class_access_in_scripts.class_prefixes' = "java.util"java.util, within the script. Usage of any other classes would result in an error as shown below:
Script Content:
print(java.lang.Math.pow(3, 2));ERROR - ScriptMediator {api:Mock:v1.0.0} The script engine returned an error executing the inlined js script function mediate
com.sun.phobos.script.util.ExtendedScriptException: org.mozilla.javascript.EcmaError: TypeError: Cannot call property pow in object [JavaPackage java.lang.Math]. It is not a function, it is "object". (<Unknown Source>#3) in <Unknown Source> at line number 3Limiting Access to Java Methods/Native Objects
Set the following system properties at server start up, following either a BLOCK_LIST approach (selectively blocking) or an ALLOW_LIST approach (selectively allowing).
| System Property | Description | Example Values |
|---|---|---|
limitJavaNativeObjectAccessInScripts.enable |
Enable limiting access to Java methods/native objects. | truefalse |
limitJavaNativeObjectAccessInScripts.objectNames |
Names of Java methods/native objects, as comma separated values. Java Methods/native objects used in the script having these names will be selectively allowed/blocked, based on the provided limitJavaNativeObjectAccessInScripts.listType. |
getClassLoadergetClass |
limitJavaNativeObjectAccessInScripts.listType |
Type of the list. Possible values are: - ALLOW_LIST: Selectively allow- BLOCK_LIST: Selectively block |
ALLOW_LISTBLOCK_LIST |
Example Config:
./bin/wso2server.sh -DlimitJavaNativeObjectAccessInScripts.enable=true -DlimitJavaNativeObjectAccessInScripts.listType=BLOCK_LIST -DlimitJavaNativeObjectAccessInScripts.objectNames=getClassLoader,loadClassgetClassLoader() method within the script.
Script Content:
var hashmapConstructors = c.getClassLoader().loadClass("java.util.HashMap").getDeclaredConstructors()Output during API Execution:
ERROR - ScriptMediator {api:Mock:v1.0.0} The script engine returned an error executing the inlined js script function mediate
com.sun.phobos.script.util.ExtendedScriptException: org.mozilla.javascript.EcmaError: TypeError: Cannot find function getClassLoader in object class javax.script.SimpleScriptContext. (<Unknown Source>#21) in <Unknown Source> at line number 21
Recommended Approach for Restricting Access
It is recommended to use an Allow List approach for both class and method access restrictions, as it provides a more secure method of permitting only the required classes and methods to be used in the script, while blocking all others by default. The following ALLOW_LIST configuration is the recommended baseline to enable the API mocking feature. If you have any script mediator-related use cases with classes included in the prefixes list, adjust it according to your requirements.
[synapse_properties]
'limit_java_class_access_in_scripts.enable' = true
'limit_java_class_access_in_scripts.list_type' = "ALLOW_LIST"
'limit_java_class_access_in_scripts.class_prefixes' = "org.apache.synapse.mediators.bsf.CommonScriptMessageContext,java.lang.String"