Managing Endpoint Certificates
If your API backend is secured with a self-signed certificate (or a certificate which is not signed by a CA) you need to import the backend certificate to the API manager (Gateway) client-truststore and restart the server. This feature enables you to upload the backend certificate through API Publisher while creating or editing your API without restarting the server.
Follow the steps below to add a certificate to an endpoint:
Note
Note that this feature supports only HTTP/REST and HTTP/SOAP endpoints.
Configurations (Optional)
-
Modify default certificate loading time by adding the following configuration to
<API-M_HOME>/repository/conf/deployment.tomlfile.[transport.passthru_https.sender.ssl_profile] interval = "<time in milliseconds>"[transport.passthru_https.sender.ssl_profile] interval = 600000Configuration Parameter Description interval The time taken to load the newly added certificate in milliseconds. Default 10 mins. (600000ms) Minimum interval : 60000ms (1 min) -
If you are using a different default truststore/keystore configuration and defined it in the
[transport.passthru_https.sender]or[keystore.primary]sections within thedeployment.tomlfile, make sure to modify the keystore and truststore configurations for default ssl profile in<API-M_HOME>/repository/conf/deployment.tomlas follows.[keystore.tls] file_name = "<Keystore file location>" type = "<Keystore type>" password = "<Keystore password>" key_password = "<Private Key password>" [truststore] file_name = "<Truststore file location>" type = "<Truststore type>" password = "<Truststore password>"[keystore.tls] file_name = "wso2carbon.jks" type = "JKS" password = "wso2carbon" key_password = "wso2carbon" [truststore] file_name = "client-truststore.jks" type = "JKS" password = "wso2carbon" -
If you are using a separate keystore and truststore pair (per custom ssl profile) for each endpoint domain, add the configuration for each custom ssl profile in
<API-M_HOME>/repository/conf/deployment.tomlas follows.[[keystore.ssl_profile.custom]] servers = "<Endpoint hostname>" [keystore.ssl_profile.custom.keystore] location = "<Keystore file location>" type = "<Keystore type>" password = "<Keystore password>" key_password = "<Private Key password>" [keystore.ssl_profile.custom.truststore] location = "<Truststore file location>" type = "<Truststore type>" password = "<Truststore password>"[[keystore.ssl_profile.custom]] servers = "localhost:8000" keystore.location = "/home/user/custom.jks" keystore.type = "JKS" keystore.password = "wso2carbon" keystore.key_password = "wso2carbon" truststore.location = "/home/user/custom-truststore.jks" truststore.type = "JKS" truststore.password = "wso2carbon" [[keystore.ssl_profile.custom]] servers = "foo.com" keystore.location = "/home/user/foo.jks" keystore.type = "JKS" keystore.password = "password" keystore.key_password = "password" truststore.location = "/home/user/customfoo-truststore.jks" truststore.type = "JKS" truststore.password = "password"Note
This feature currently supports only the following keystore and certificate types.
- Keystore :
.jks - Certificate :
.crt
If you need to use a certificate in any other format, you can convert it to
.crt/ .certusing a standard tool before uploading.Info
The certificate will be added to the Gateway nodes which are defined under the
[[apim.gateway.environment]]section in thedeployment.tomlfile.In a clustered setup, as the Gateway configurations are identical, sync the
<API-M_HOME>/repository/resources/security/sslprofiles.xmlfile and the<API-M_HOME>/repository/resources/security/client-truststore.jksfile among the Gateway nodes in the cluster. After the configured interval, the Synapse transport will be reloaded in all the Gateway nodes. - Keystore :
Adding a Certificate for an Endpoint
-
Sign in to the API Publisher.
-
Create a new API or click on an existing API.
-
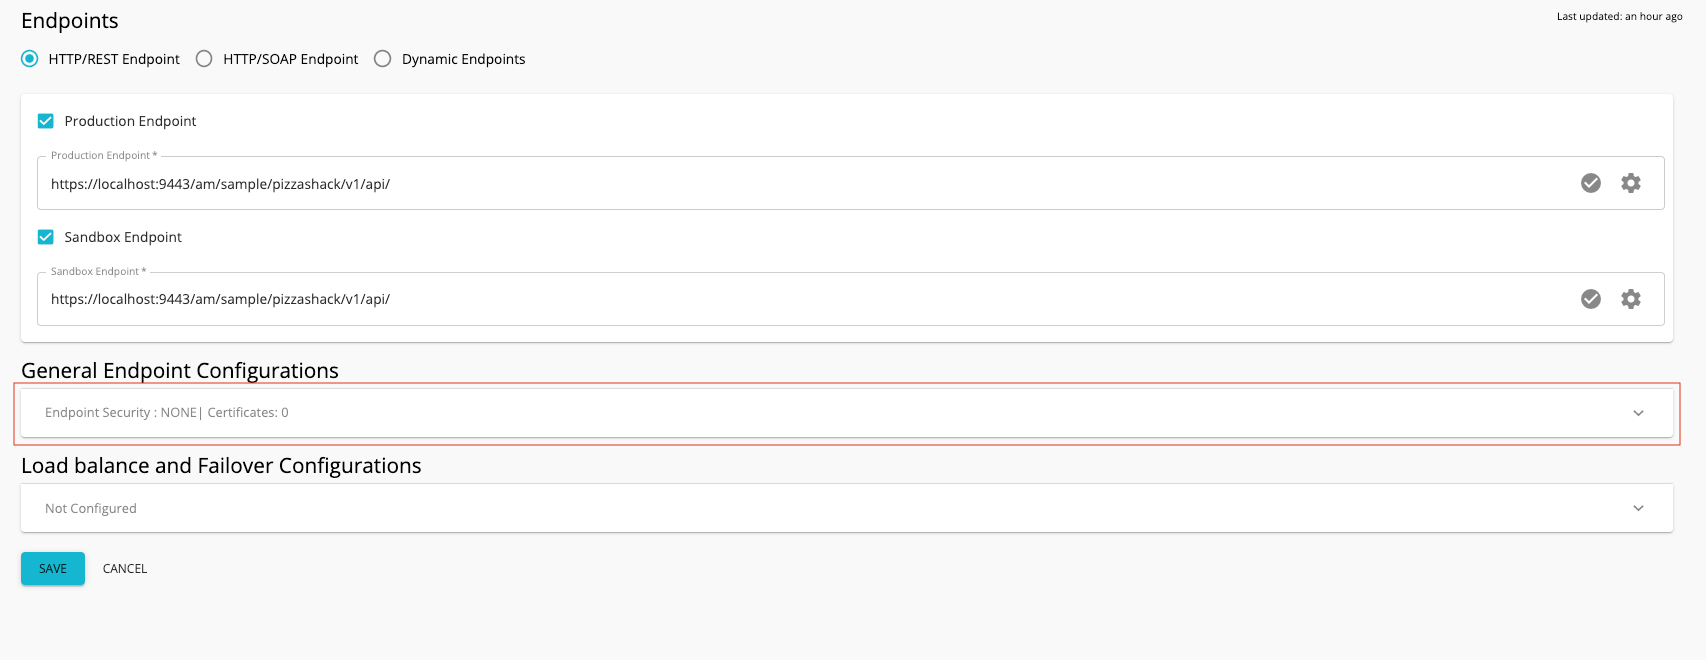
Click Endpoints and click General Endpoint Configuration to expand that section.
-
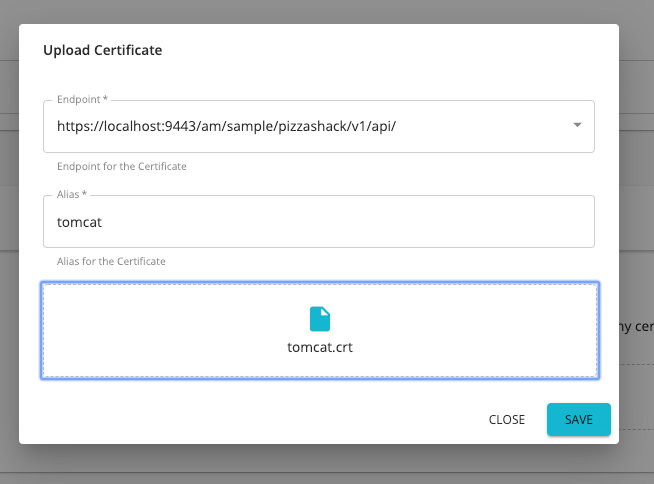
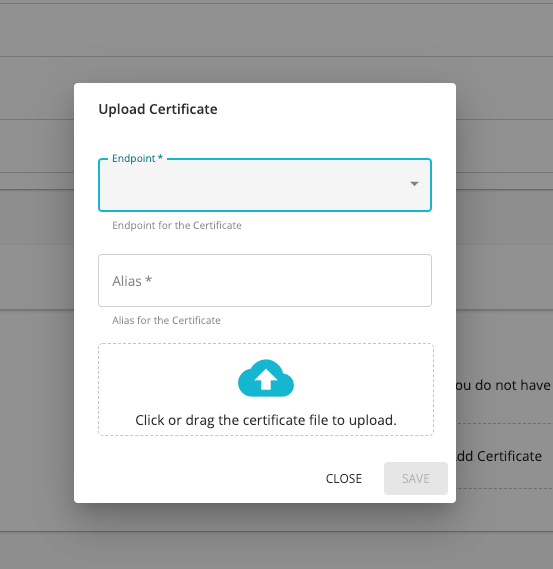
Click + Add Certificate in the Certificates section.

The Upload Certificate dialog box appears.
-
Enter the following information and click Save.
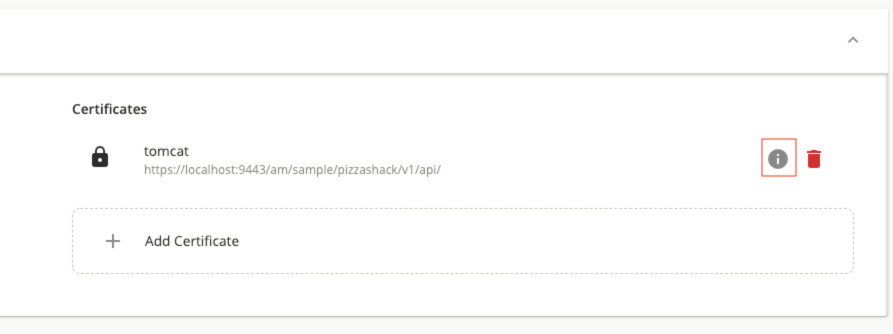
Name Description Alias Enter a name for your certificate. Endpoint Select an endpoint from the dropdown list. Certificate Drag and drop the certificate file or click on the drop zone to select the certificate via the UI The uploaded certificate will be displayed.
-
-
If required, repeat step 3 onwards to add certificates to the other endpoints.
Check Certificate Information
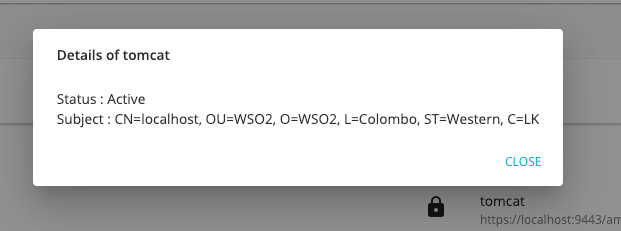
You can check the information of the certificate, (i.e., Status and subject DN).
Click on the info icon that corresponds to the respective certificate to view the certificate information.
The selected certificate details appear.
Deleting a certificate
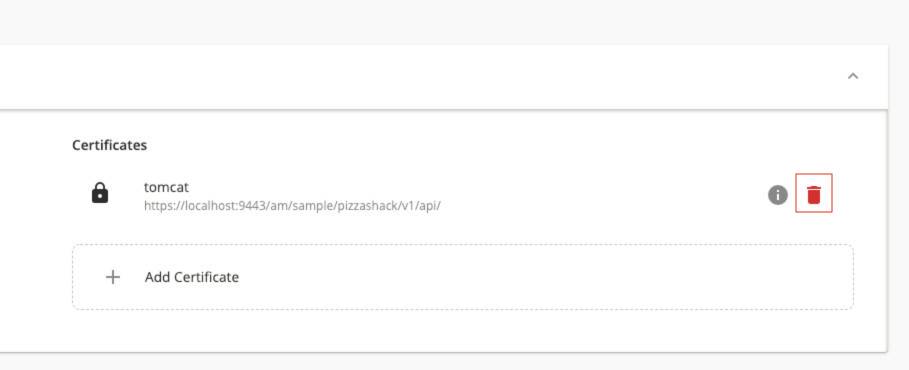
Click on the delete icon that corresponds to the respective certificate to delete a certificate.
Top