Adding an Application Creation Workflow
This section explains as to how you can attach a custom workflow to the application creation operation in WSO2 API Manager (WSO2 API-M).
Attaching a custom workflow to application creation allows you to control the creation of applications within the Developer Portal. An application is the entity that holds a set of subscribed API's that would be accessed by a authorization key specified for that particular application. Therefore, controlling the creation of these applications would be a decision based on the organization's requirements.
Example usecase:
- Review the information that corresponds to an application by a specific reviewer before the application is created.
- The application creation would be offered as a paid service.
- The application creation should be allowed only to users who are in a specific role.
Tip
Before you begin, if you have changed the API Manager's default user and role, make sure you do the following changes:
- Change the credentials of the workflow configurations in the following registry resource:
_system/governance/apimgt/applicationdata/workflow-extensions.xmlfile. - Point the database that has the API Manager user permissions to BPS.
- Share any LDAPs, if any exist.
- Unzip the
<API-M_HOME>/business-processes/application-creation/HumanTask/ApplicationsApprovalTask-1.0.0.zipfile, update the role as follows in theApplicationsApprovalTask.htfile, and ZIP theApplicationsApprovalTask-1.0.0folder.
Format
<htd:argument name="role">
    [new-role-name]
</htd:argument>
Step 1 - Configure the Business Process Server
- Download WSO2 Enterprise Integrator.
-
Set an offset of 2 to the default BPS port in the
<EI_HOME>/wso2/business-process/conf/carbon.xmlfile.This prevents port conflicts that occur when you start more than one WSO2 product on the same server. For more information, see Changing the Default Ports with Offset.
<Offset>2</Offset>Tip
- If you run WSO2 API-M and WSO2 EI on different machines, set the
hostnameto a different value thanlocalhost. - If you change the BPS port offset to a value other than 2 or run WSO2 API-M and WSO2 EI on different machines, you need to search and replace the value 9765 in all the files (
.epr) inside the<API-M_HOME>/business-processesdirectory with the new port (i.e., the value of 9763 +<port-offset>).
- If you run WSO2 API-M and WSO2 EI on different machines, set the
-
Open the
<EI_HOME>/wso2/business-process/conf/humantask.xmlfile and<EI_HOME>/wso2/business-process/conf/b4p-coordination-config.xmlfile and set theTaskCoordinationEnabledproperty to true.<TaskCoordinationEnabled>true</TaskCoordinationEnabled> -
Copy the following from the
<API-M_HOME>/business-processes/eprdirectory to the<EI_HOME>/wso2/business-process/repository/conf/eprdirectory.Note
- If the
<EI_HOME>/wso2/business-process/repository/conf/eprdirectory does not exist, create it. -
Make sure to give the correct credentials in the
<EI_HOME>/wso2/business-process/repository/conf/eprfiles. -
Update the
<EI_HOME>/business-processes/epr/ApplicationCallbackService.eprfile based on WSO2 API Manager.<wsa:Address>https://localhost:8243/services/WorkflowCallbackService</wsa:Address> -
Update the
<EI_HOME>/business-processes/epr/ApplicationService.eprfile according to EI.<wsa:Address>http://localhost:9765/services/ApplicationService</wsa:Address>
- If the
-
Start the EI server and sign in to the Management Console (
https://<Server Host>:9443+<port-offset>/carbon).Warning
If you are using Mac OS with High Sierra, you may encounter the following warning when logging in to the Management Console due to a compression issue that exists in the High Sierra SDK.
WARN {org.owasp.csrfguard.log.JavaLogger} - potential cross-site request forgery (CSRF) attack thwarted (user:<anonymous>, ip:xxx.xxx.xx.xx, method:POST, uri:/carbon/admin/login_action.jsp, error:required token is missing from the request)To avoid this issue, open the
<EI_HOME>/wso2/business-process/conf/tomcat/catalina-server.xmlfile and change thecompression="on"tocompression="off"in the Connector configuration, and restart the EI server. -
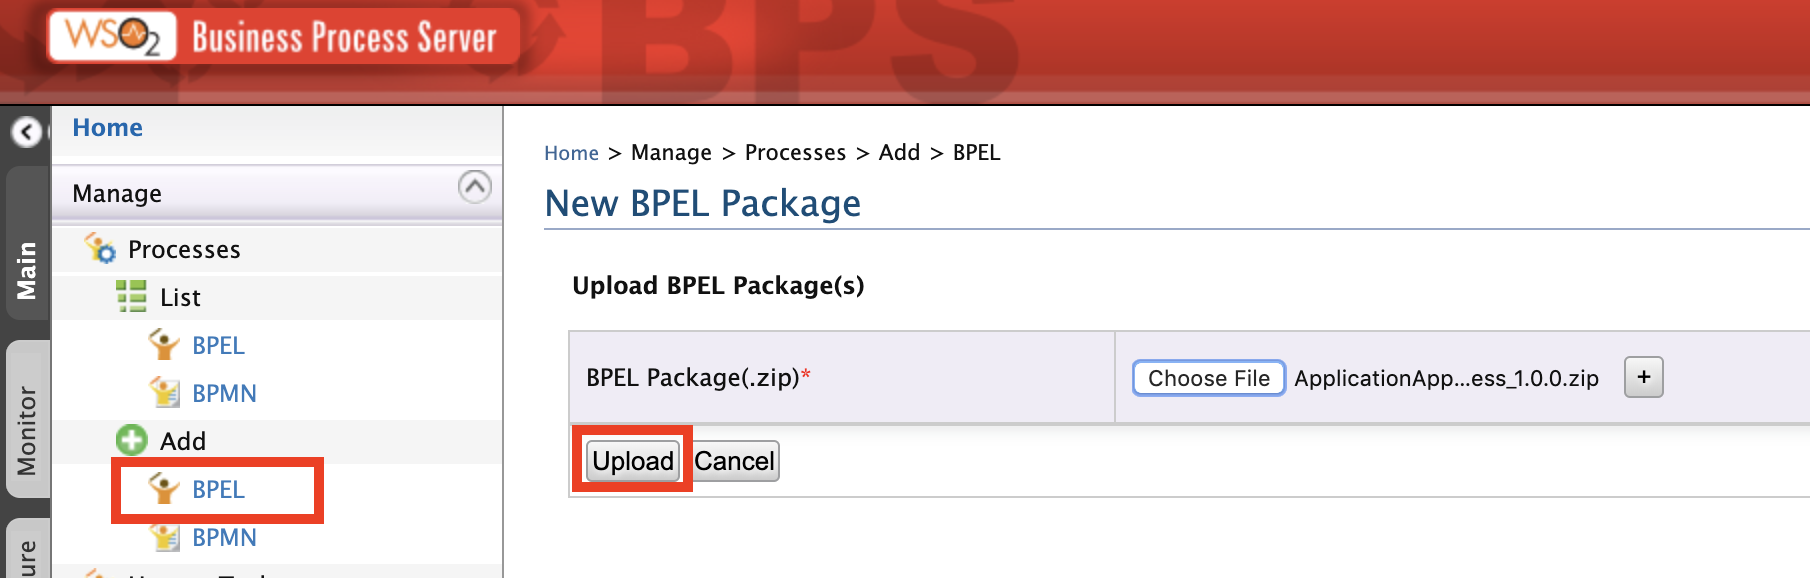
Add a workflow.
- Click BPEL under Processes.
-
Upload the
<API-M_HOME>/business-processes/application-creation/BPEL/ApplicationApprovalWorkFlowProcess_1.0.0.zipfile to EI.This is the business process archive file.
-
Click Main → Human Tasks → Add and upload the
<API-M_HOME>/business-processes/application-creation/HumanTask/ApplicationsApprovalTask-1.0.0.zipfile to EI.This is the human task archived file.

Tip
Before you begin, if you have changed the API Manager's default user and role, make sure you do the following changes:
- Change the credentials of the workflow configurations in the following registry resource:
_system/governance/apimgt/applicationdata/workflow-extensions.xml. - Point the database that has the API Manager user permissions to BPS.
- Share any LDAPs, if any exist.
-
Unzip the
<API-M>/business-processes/application-creation/HumanTask/ApplicationsApprovalTask-1.0.0.zipfile, update the role as follows in theApplicationsApprovalTask.htfile, and ZIP the ApplicationsApprovalTask-1.0.0 folder.Format
<htd:argument name="role">
    [new-role-name]
</htd:argument>
Step 2 - Configure WSO2 API Manager
Open the <API-M_HOME>/repository/deployment/server/jaggeryapps/admin/site/conf/site.json file and configure workFlowServerURL under workflows to point to the BPS server.
Example
"workFlowServerURL": "https://localhost:9445/services/"Note
When enabling the workflow, make sure to import the certificate of WSO2 API Manager into the client-truststore of the EI server and also import the certificate of EI into the client-truststore of API Manager.
Paths to the directory containing the client-truststore of each product are as follows:
1. API-M - '<API-M_HOME>/repository/resources/security'
2. EI - '<EI_HOME>/wso2/business-process/repository/resources/security'
Step 3 - Engage the WS Workflow Executor in the API Manager
First, enable the application creation workflow.
-
Sign in to WSO2 API-M Management Console (
https://<Server-Host>:9443/carbon). -
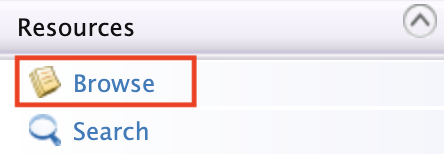
Click Main → Resources → Browse.
-
Go to the
/_system/governance/apimgt/applicationdata/workflow-extensions.xmlresource, disable the Simple Workflow Executor, and enable WS Workflow Executor. In addition, specify the service endpoint where the workflow engine is hosted and the credentials required to access the said service via basic authentication (i.e., username/password based authentication).<WorkFlowExtensions> <ApplicationCreation executor="org.wso2.carbon.apimgt.impl.workflow.ApplicationCreationWSWorkflowExecutor"> <Property name="serviceEndpoint">http://localhost:9765/services/ApplicationApprovalWorkFlowProcess/</Property> <Property name="username">admin</Property> <Property name="password">admin</Property> <Property name="callbackURL">https://localhost:8243/services/WorkflowCallbackService</Property> </ApplicationCreation> </WorkFlowExtensions>Tip
All the workflow process services of the EI run on port 9765 because you changed its default port (9763) with an offset of 2.
The application creation WS Workflow Executor is now engaged.
-
Create an application via the Developer Portal.
-
Sign in to the Developer Portal.
(
https://localhost:9443/devportal) -
Click Applications and create a new application.
This invokes the application creation process and creates a Human Task instance that holds the execution of the BPEL process until some action is performed on it.
Note that the Status field of the application states INACTIVE (Waiting for approval) if the BPEL is invoked correctly, indicating that the request is successfully submitted.

-
-
Sign in to the Admin Portal (
https://localhost:9443/admin), list all the tasks for application creation and approve the task.It resumes the BPEL process and completes the application creation.

-
Go back to the Applications page in the WSO2 Developer Portal and see the created application.
Whenever a user tries to create an application in the Developer Portal, a request is sent to the workflow endpoint. A sample is shown below:
<soapenv:Envelope xmlns:soapenv="http://schemas.xmlsoap.org/soap/envelope/" xmlns:wor="http://workflow.subscription.apimgt.carbon.wso2.org">
   <soapenv:Header />
   <soapenv:Body>
      <wor:createApplication xmlns:wor="http://workflow.application.apimgt.carbon.wso2.org">
         <wor:applicationName>application1</wor:applicationName>
         <wor:applicationTier>Gold</wor:applicationTier>
         <wor:applicationCallbackUrl>http://webapp/url</wor:applicationCallbackUrl>
         <wor:applicationDescription>Application 1</wor:applicationDescription>
         <wor:tenantDomain>wso2.com</wor:tenantDomain>
         <wor:userName>user1</wor:userName>
         <wor:workflowExternalRef>c0aad878-278c-4439-8d7e-712ee71d3f1c</wor:workflowExternalRef>
         <wor:callBackURL>https://localhost:8243/services/WorkflowCallbackService</wor:callBackURL>
      </wor:createApplication>
   </soapenv:Body>
</soapenv:Envelope>
Elements of the above configuration are described below:
Element Description applicationName Name of the application the user creates. applicationTier Throttling tier of the application. applicationCallbackUrl When the OAuth2 Authorization Code grant type is applied, this is the endpoint on which the callback needs to happen after the user is authenticated. This is an attribute of the actual application registered on the Developer Portal. applicationDescription Description of the application tenantDomain Tenant domain associated with the application (domain of the user creating the application). userName Username of the user creating the application. workflowExternalRefThe unique reference against which a workflow is tracked. This needs to be sent back from the workflow engine to the API Manager at the time of workflow completion. callBackURL This property is configured in the <callBackURL>element in theworkflow-extensions.xmlregistry file.