Building a Jenkins CI/CD Pipeline for Dev First Approach
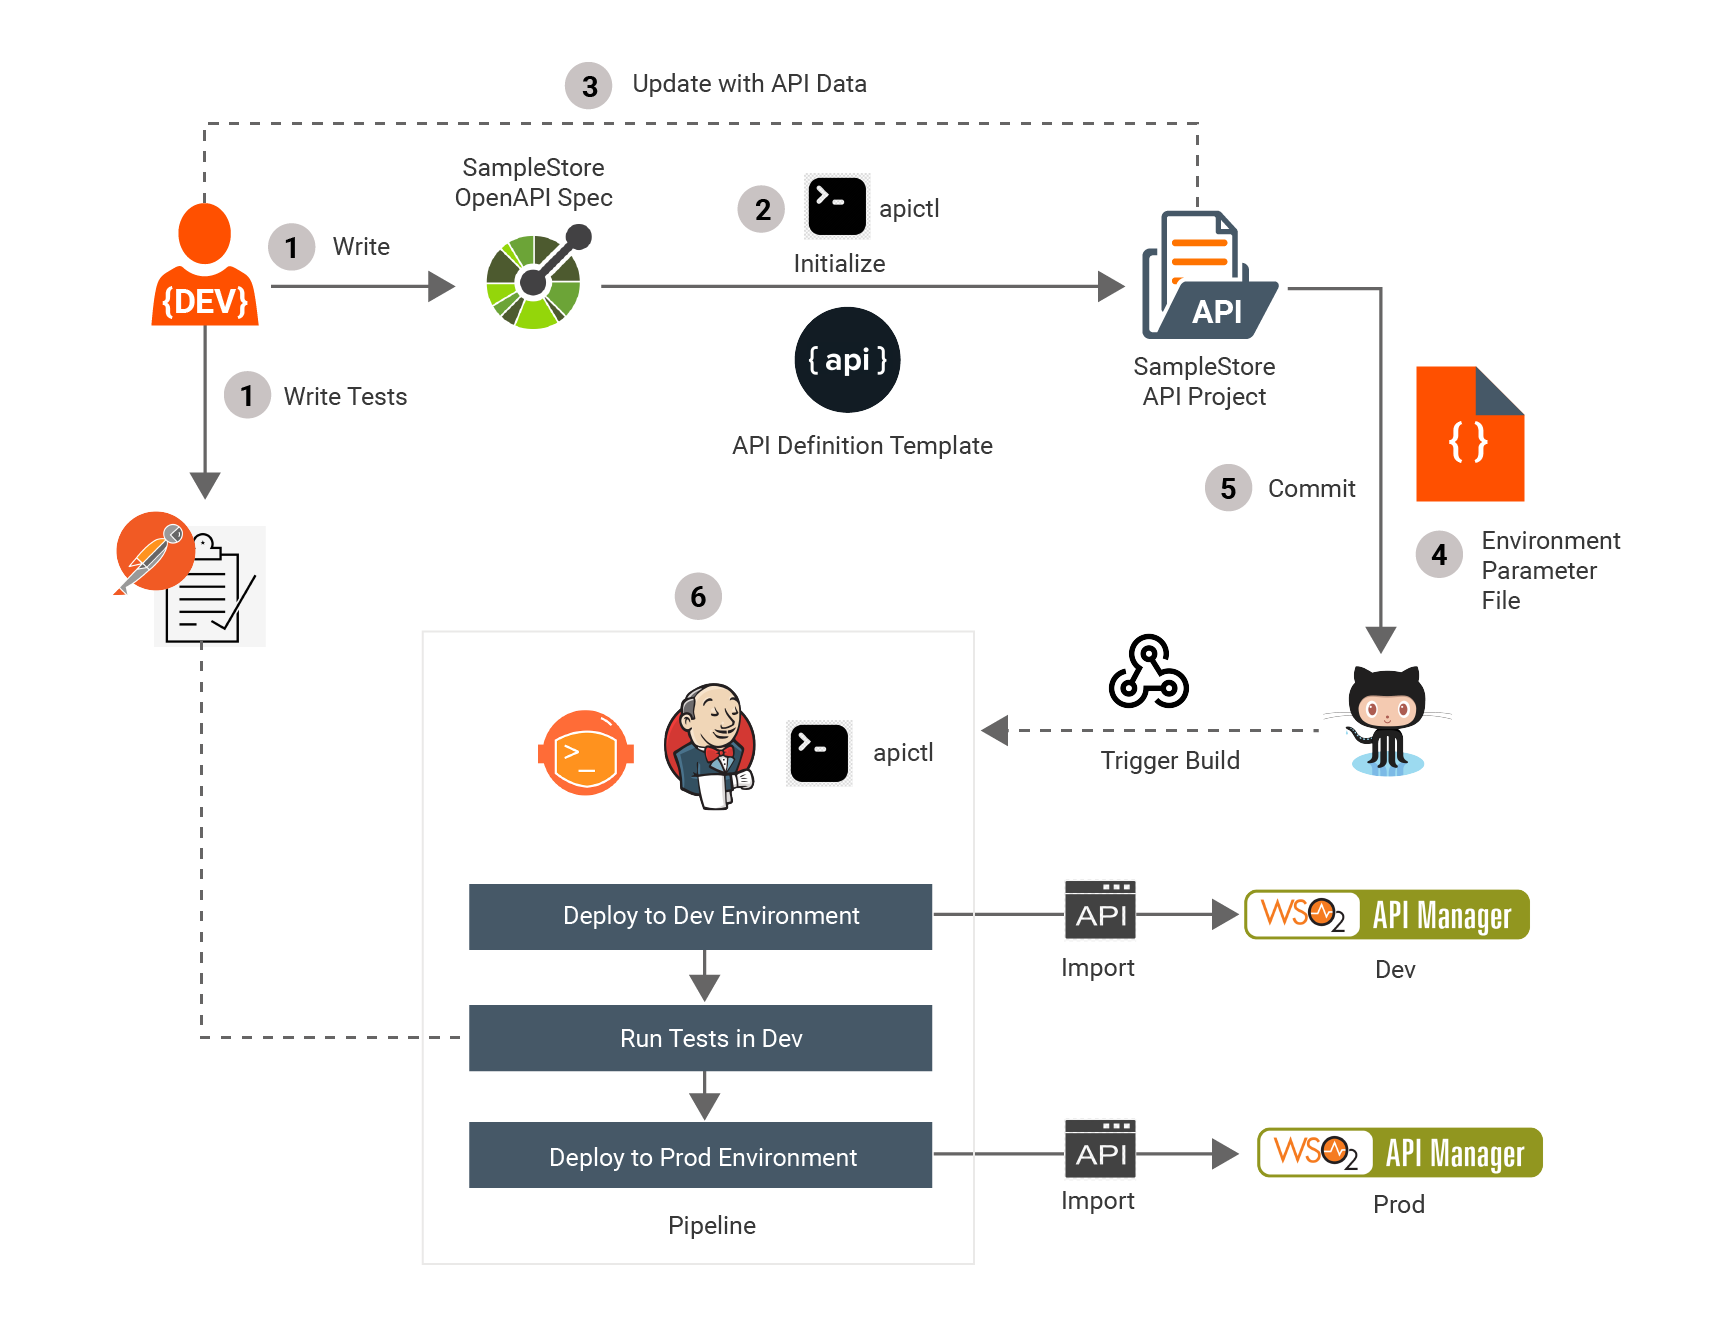
By using a developer-first approach, an organization can adopt to have minimal interaction between the API developer and API Publisher Portal. First, an API developer develops his/her own backend microservice and creates an OpenAPI Specification for it. Thereafter, he/she can create an API using that OpenAPI specification and deploy it to the desired WSO2 API Management environment without accessing the Publisher Portal directly.
Let's create a CI/CD pipeline using Jenkins as the automation tool and Github as the source code management repository. Let's use Postman to write the test scripts in order to test the API that is deployed in WSO2 API Manager.
Prerequisites
-
Install Jenkins from here.
-
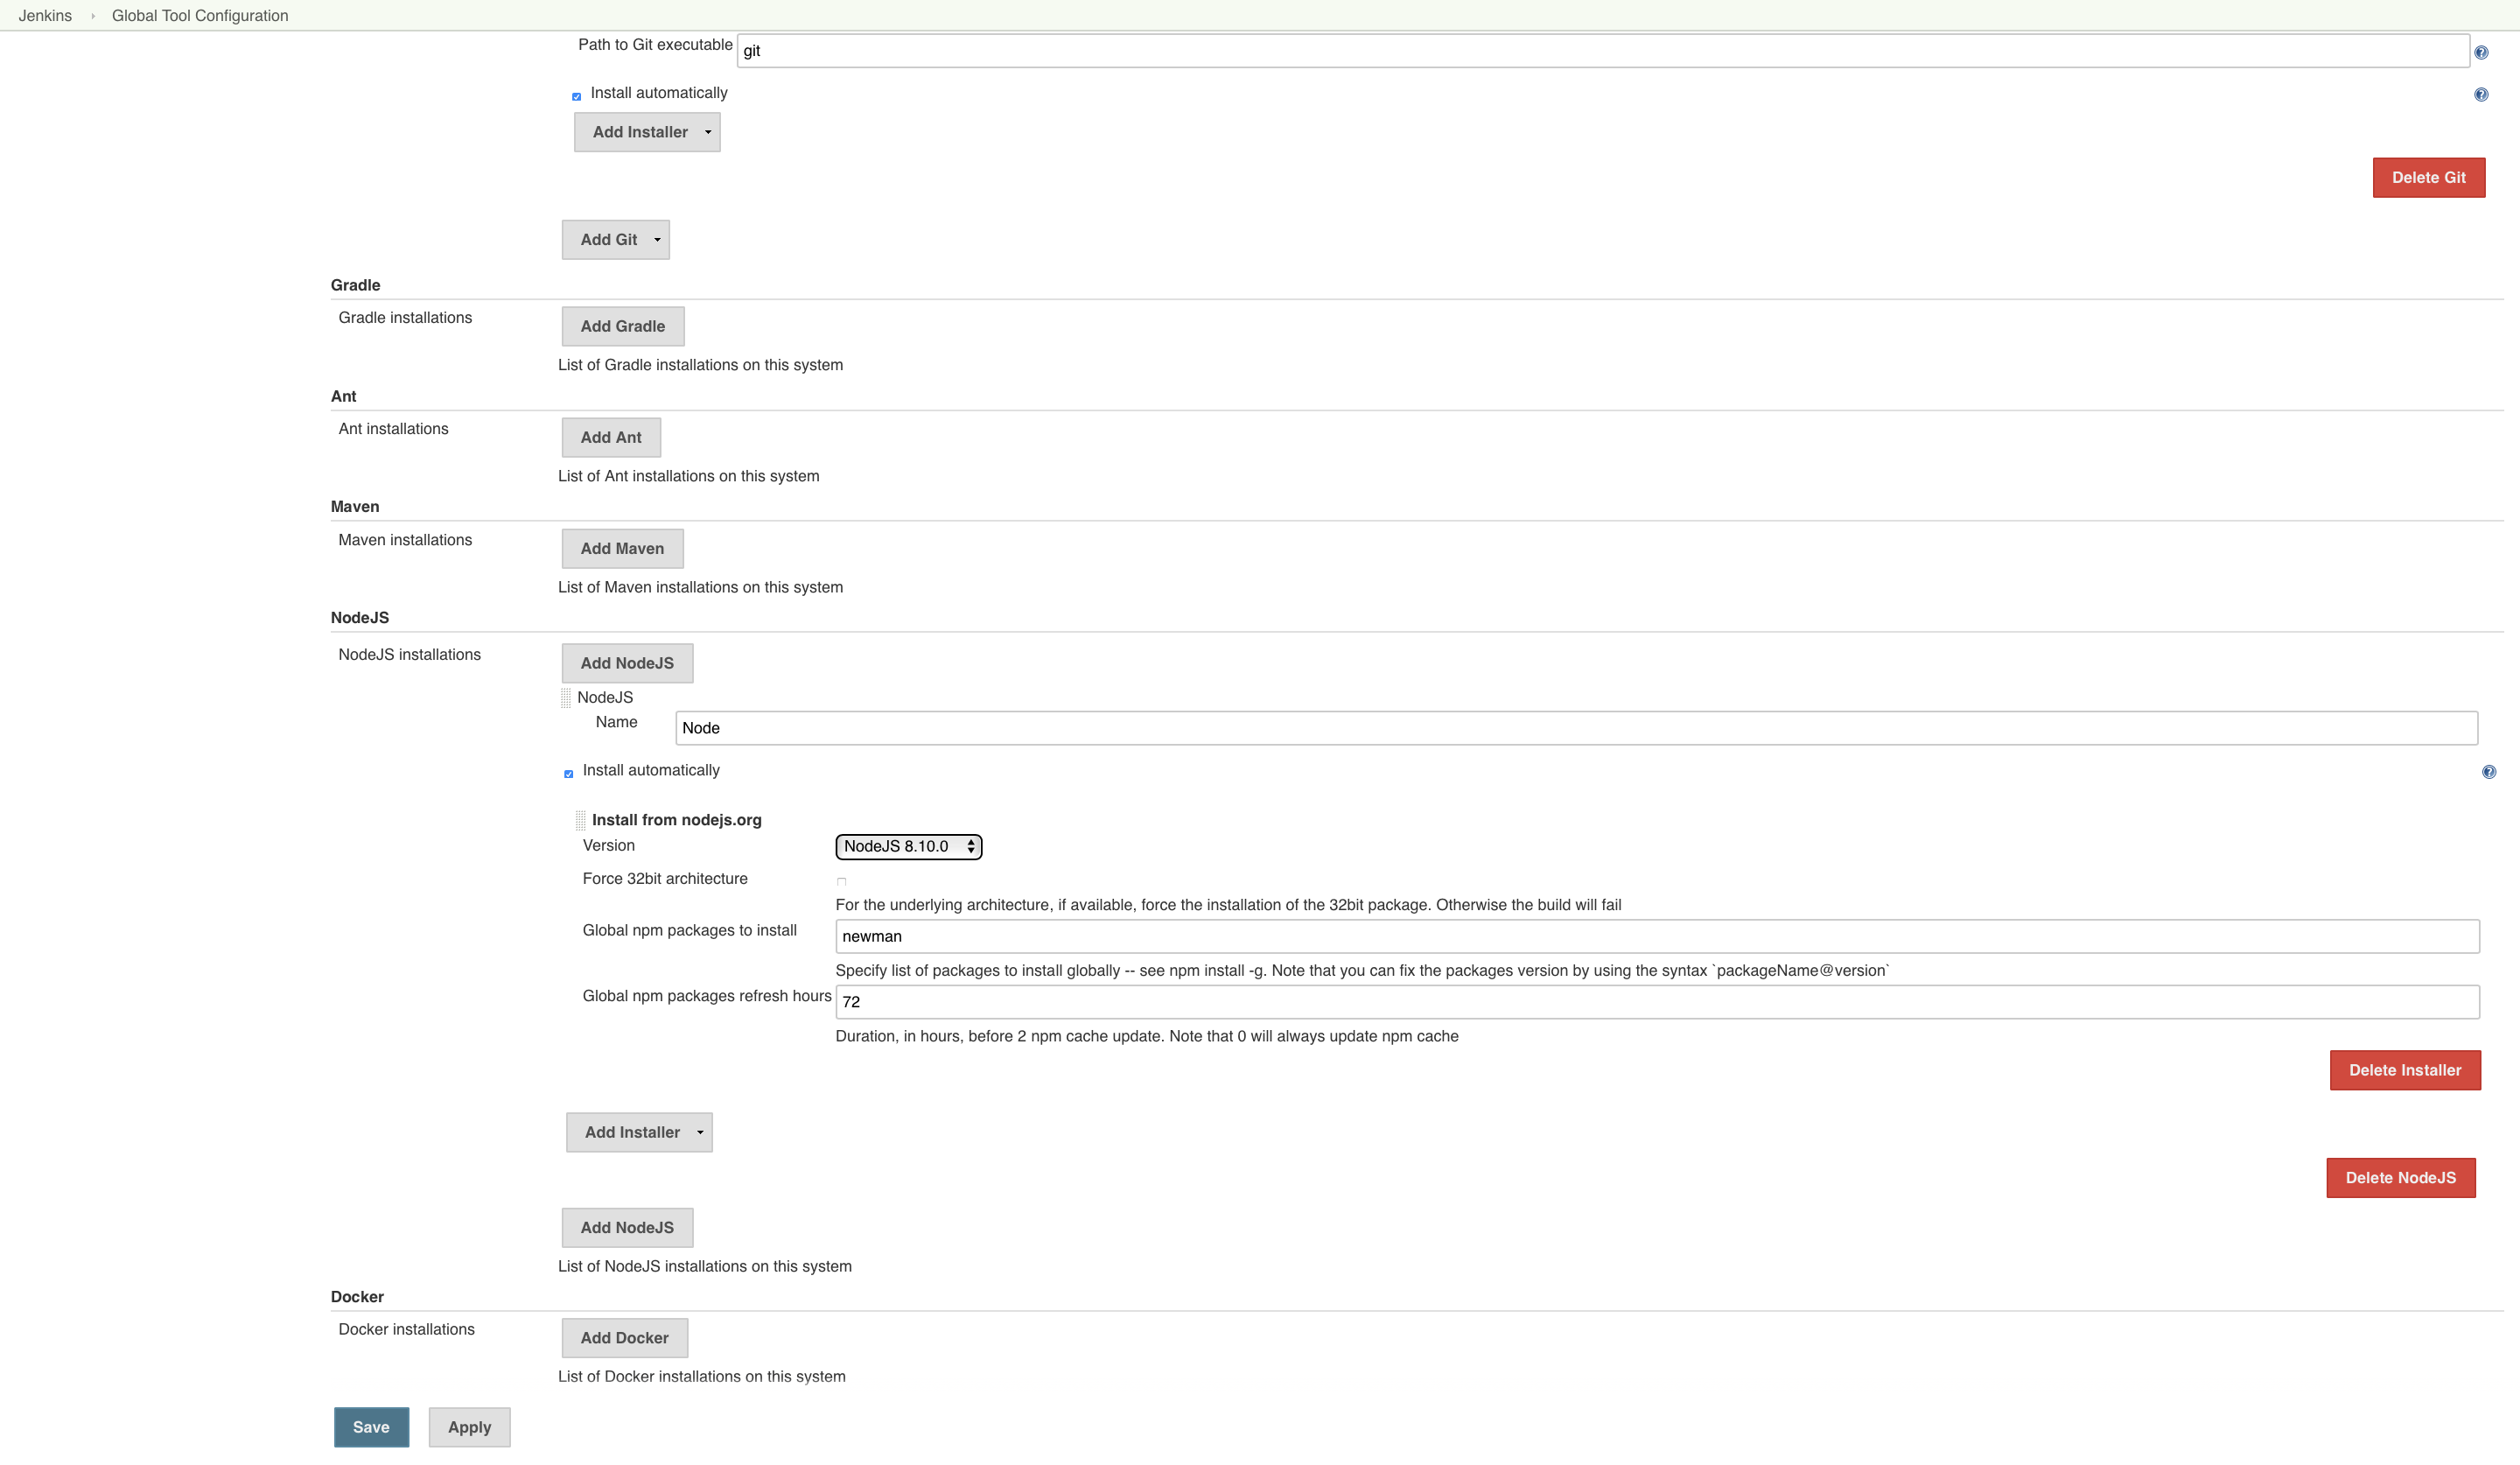
Install npm and nodejs plugins and Newman globally in your Jenkins server.
-
Download and setup WSO2 API-M 3.0 in Development and Production environment servers.
For more information, see installation-prerequisites.
-
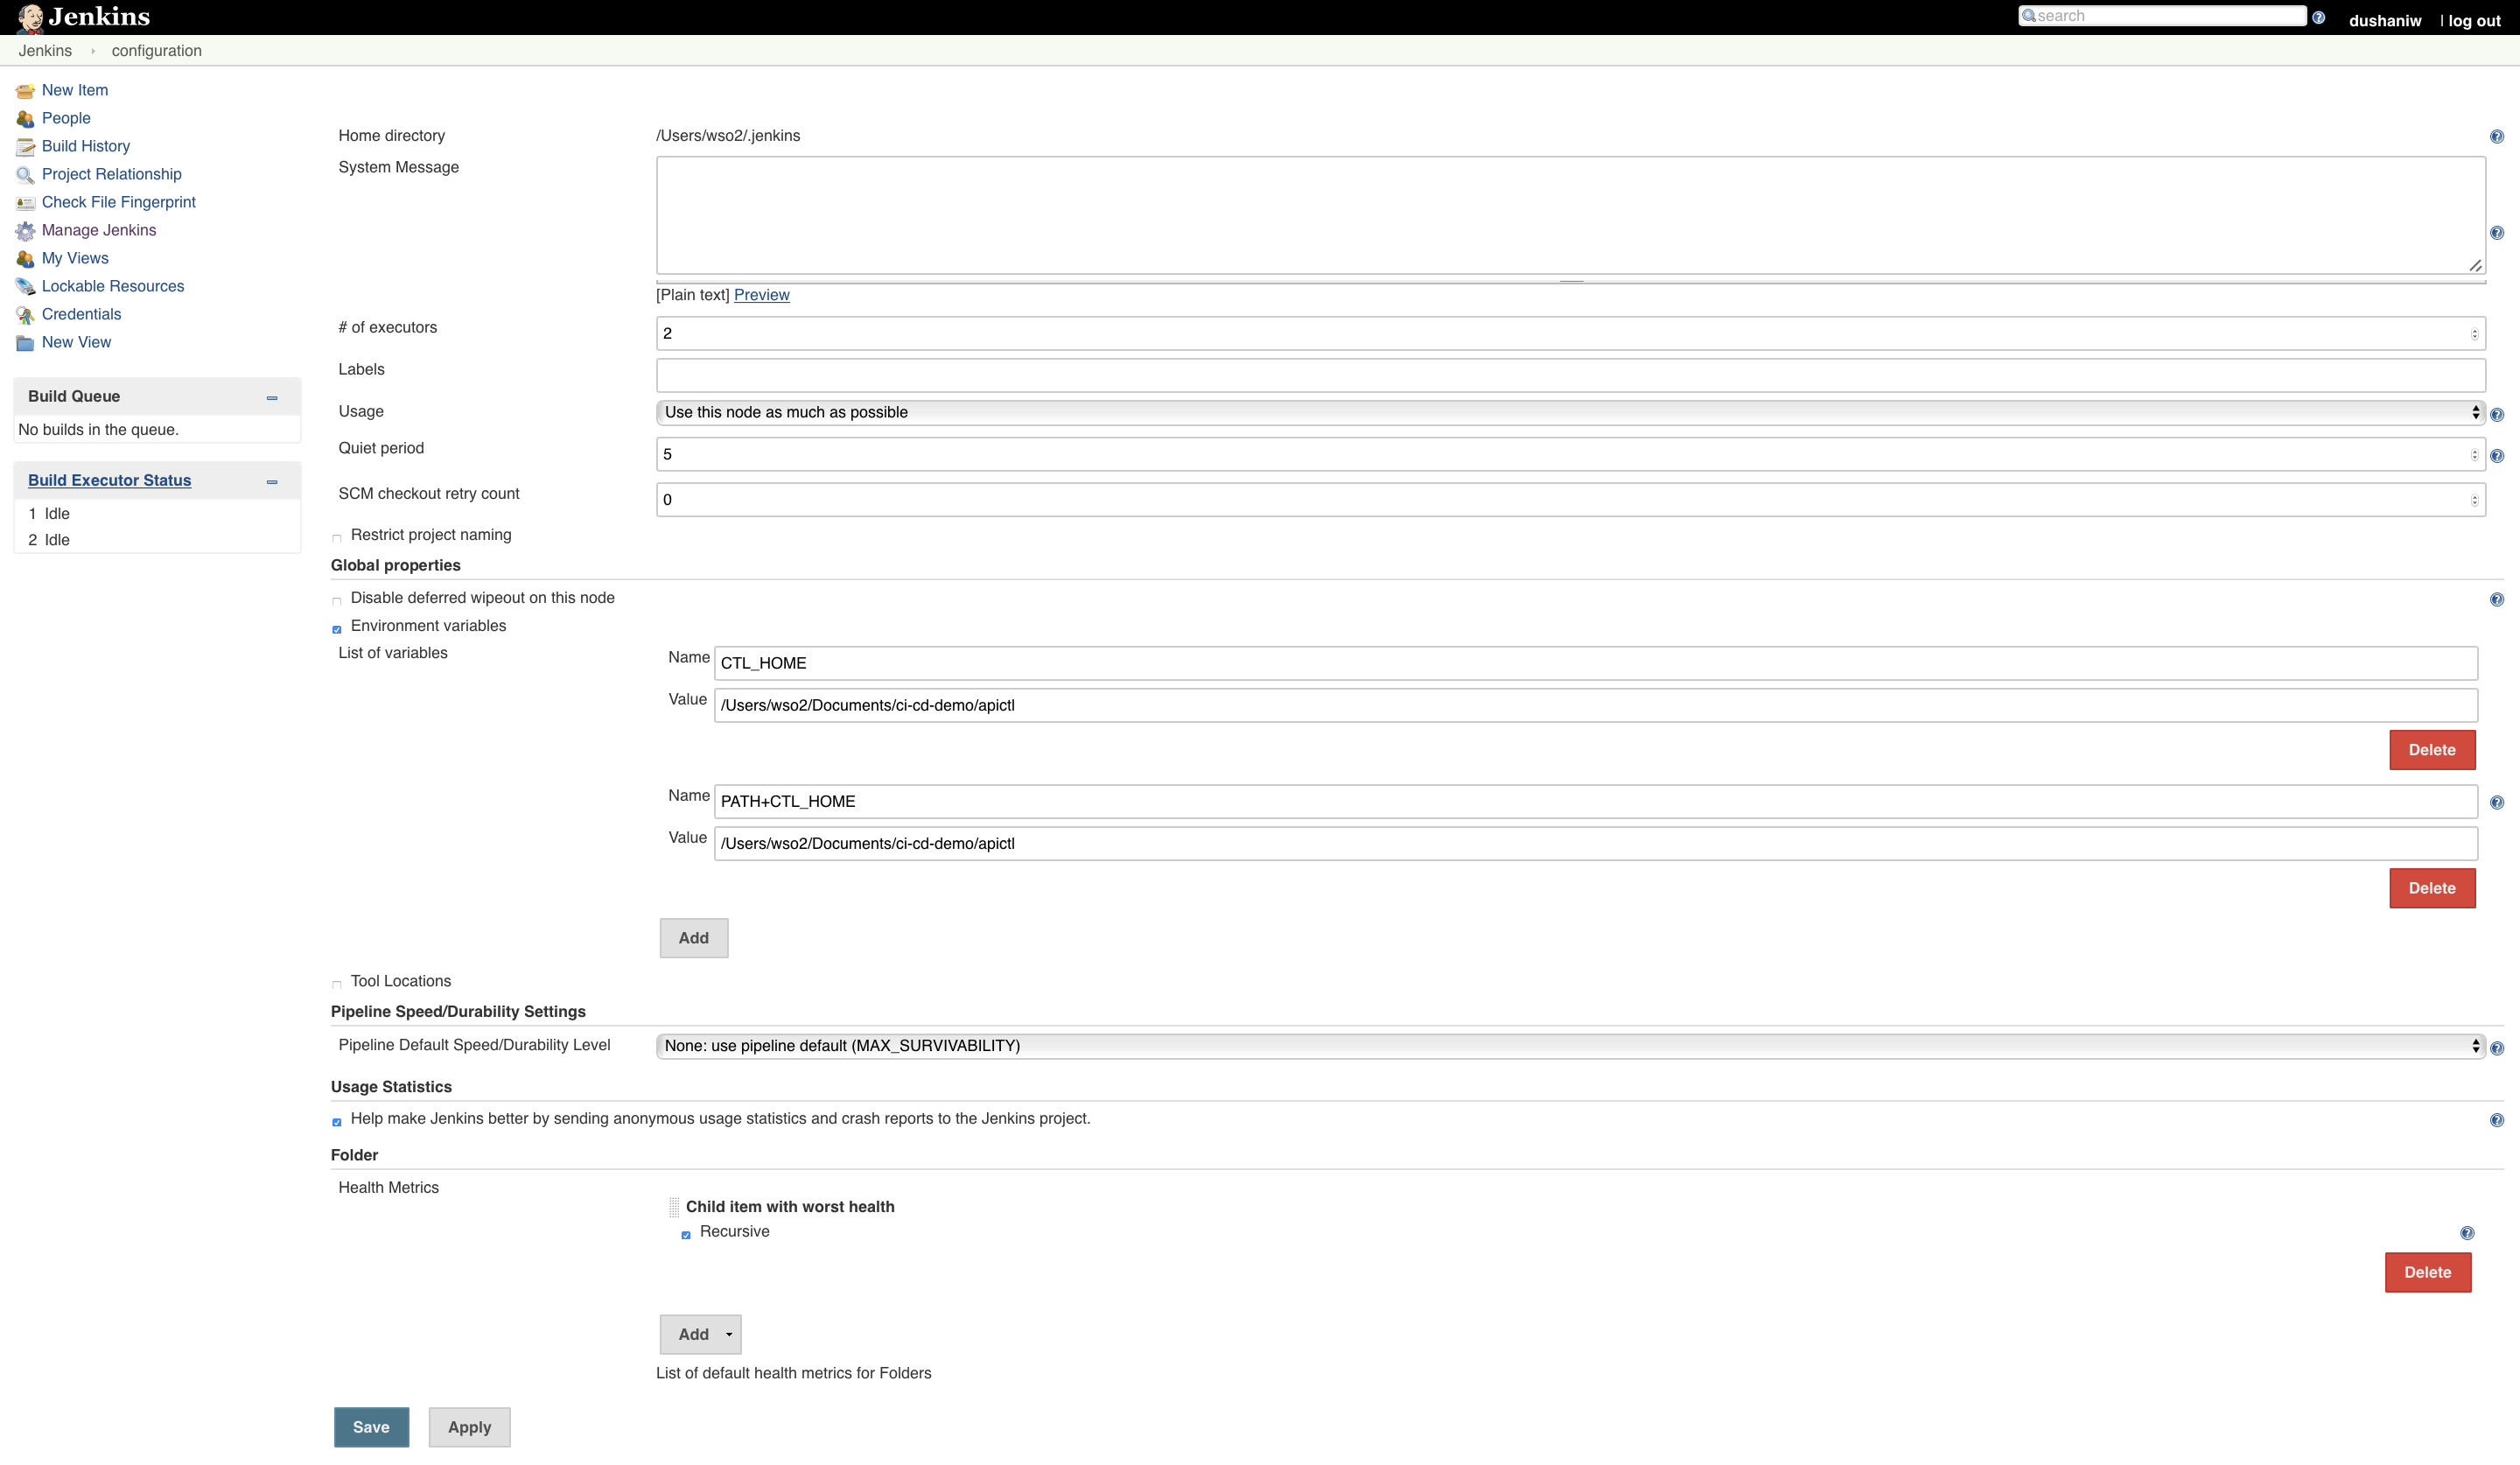
Download and setup WSO2 API Controller to the Jenkins server and the developer machines.
For more information, see Download and Initialize the CTL Tool.
Info
For this tutorial, let's use a sample backend Ballerina service for the SampleStore Application.
There are two environments, namely development and production, and there are dedicated backend services for
these two environments running at http://dev.wso2.com:9090/samplestore and http://prod.wso2.com:9090/samplestore.
Building the Pipeline
Step 1 - Write the OpenAPI Specification and test scripts
As the API Developer, initially write the OpenAPI Specification for the backend API and write the test scripts to test the API in the lower WSO2 API-M environment (i.e., development environment).
Tip
The sample OpenAPI specification for the backend API that is used in this tutorial is available here.
A sample test script to test the API that is going to be deployed in WSO2 API-M development environment is available here.
This sample JS test script was written using Postman by importing the OpenAPI definition and defining environment variables. Our goal is to run the test script within the pipeline using Postman’s CLI Collection Runner, Newman.
Step 2 - Initialize an API Project
Initialize an API Project using the OpenAPI definition, API definition template, and the environment variables.
Warning
Before you begin...
- As the API Developer, make sure WSO2 API Manager CTL Tool is initialized and running in your local machine, if not follow the steps in Download and Initialize the CTL Tool.
Run the following sample command to initialize an API Project using the CTL by providing the OpenAPI specification and API Definition template. For more information, see Initialize an API Project.
Example
apictl init SampleStore --oas store.yaml --definition api_template.yaml -k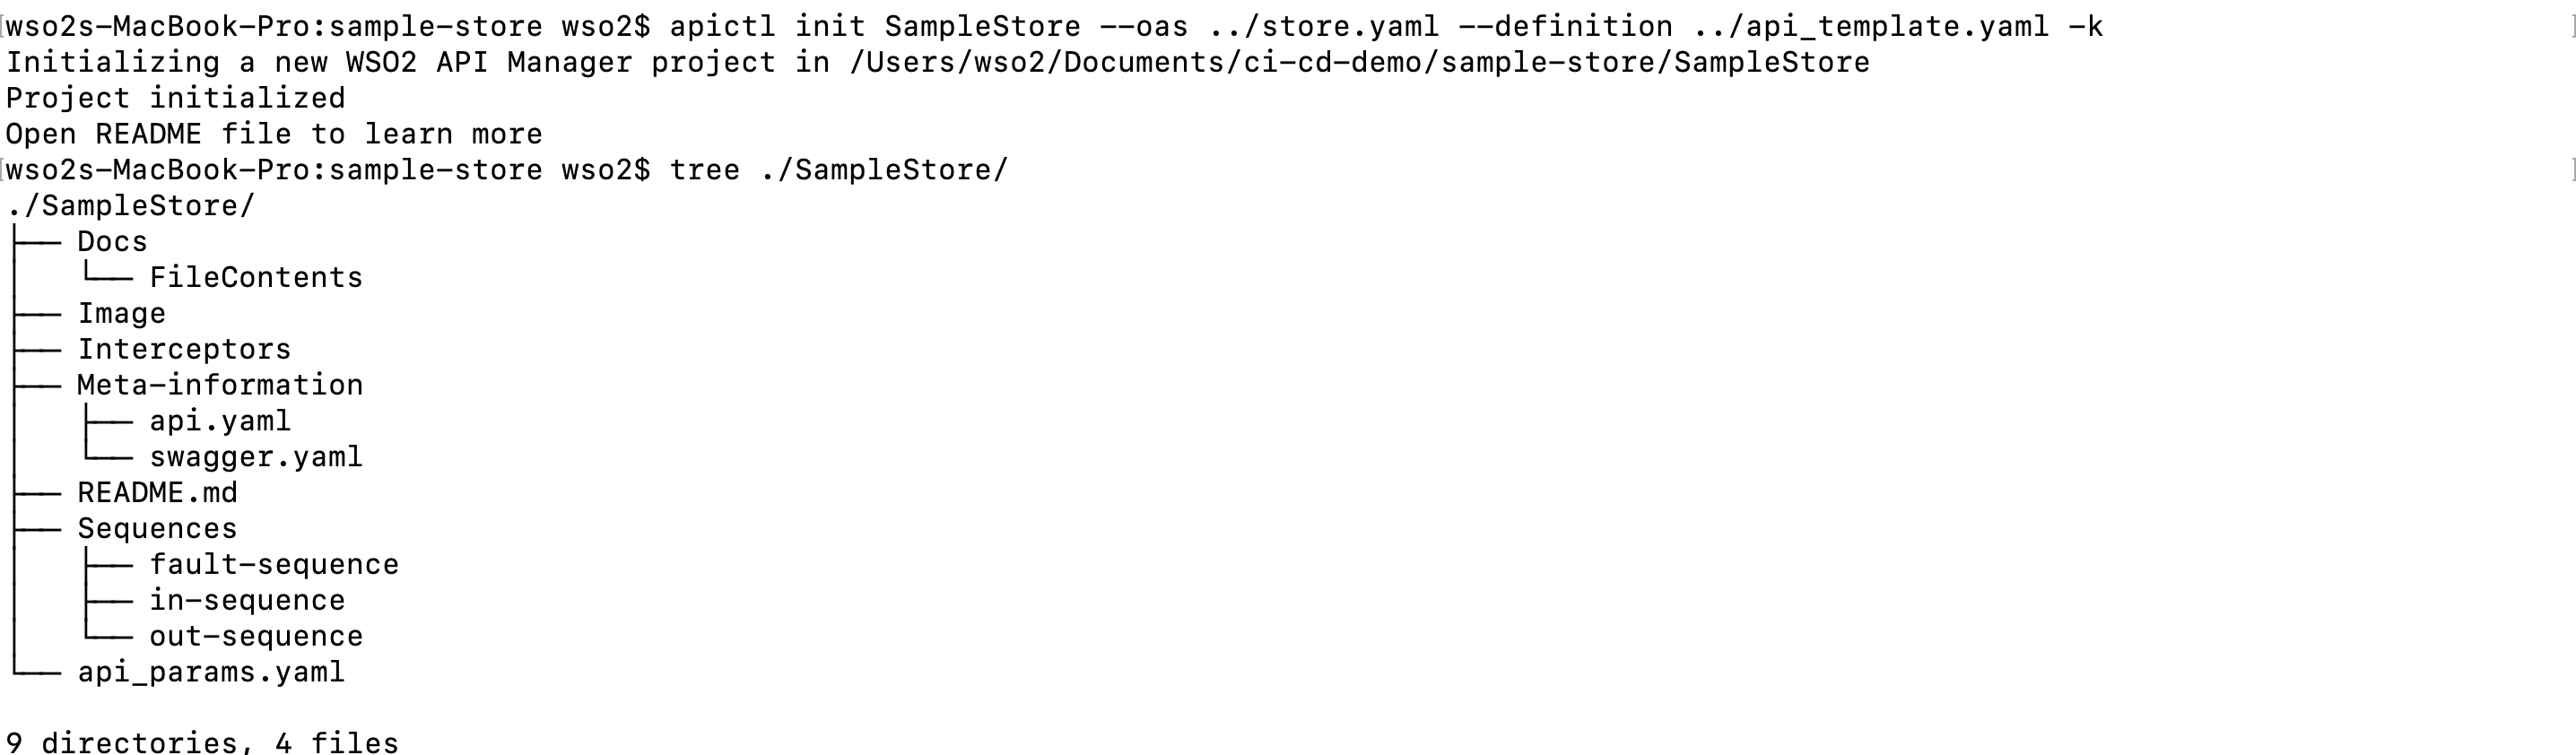
When running the above command, you can inject data into the definition template using environment variables.
Info
- When you create an API Project, APIs are generated using the default template specified in the
<USER_HOME>/.wso2apictl/default_api.yamlthe file. Organization-specific common API related details can be put into this template file and shared across developers. Use a custom API Definition file to further finetune the process of creating the API if required.
Tip
The custom API template used in this tutorial is available here. It includes the minimum information that you need to create the SampleStore API Project including, the API name, version, provider name, context, description, API tiers, backend URLs, etc.
- The context field has been kept blank so that you can automatically derive the context using the API name followed by the API version.
- The API Status value is given as an environment variable,
STATE. Before initializing the API Project, the developer needs to set up the environment variableSTATEin the OS using the following command:
export STATE=PUBLISHED
Step 3 - Update API data in the API Project
Add a thumbnail image of any image file type with the name icon.<img-extension> into the SampleStore/Image directory of the SampleStore API Project.
Info
-
After initializing an API project, the developer can update the created API project files to add an API thumbnail, API documentation, Custom meditations, etc. In this tutorial, let's add a thumbnail for the API.
-
Similarly, developers can add any additional meta information to the
api.yamlfile and also add the required API documentation and the required custom mediations to the respective folders of the same API project. -
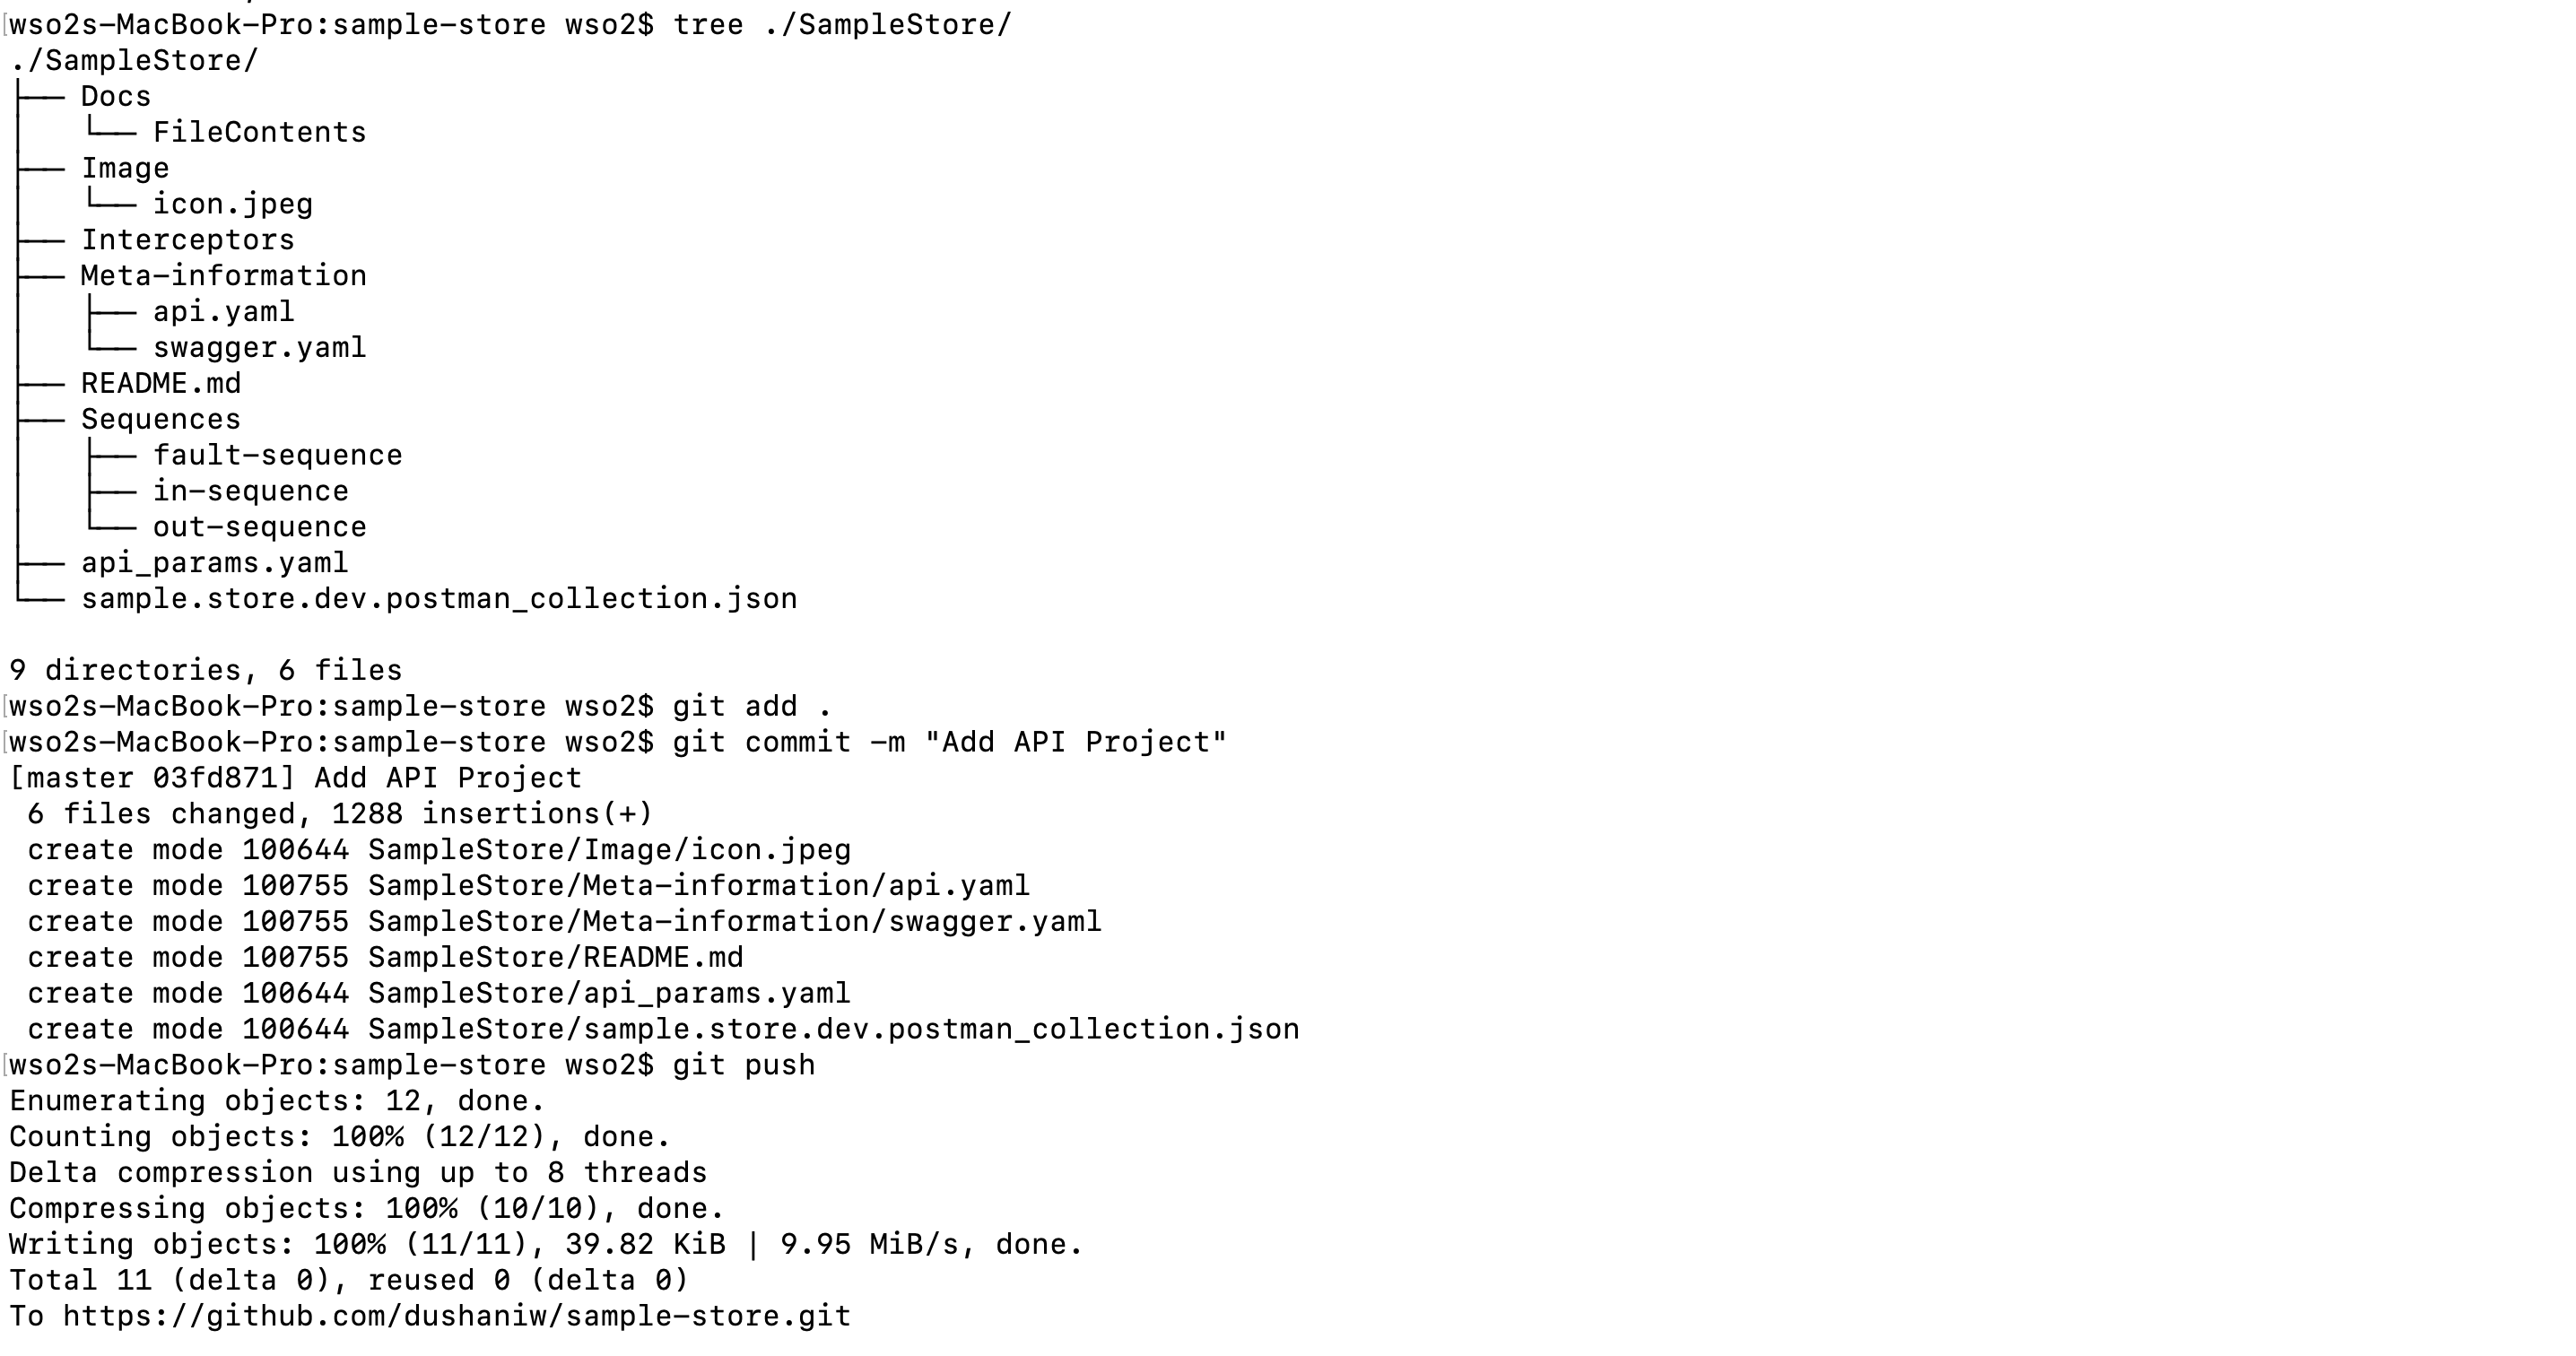
To get an understanding of the directory structure of an API project, see Initialize an API Project.
Step 4 - Define environment specific data
Define environment specific data in API parameter file. In this tutorial as there are two main environments, named dev and prod, create an environment template file that consists of the environment-specific configurations similar to this file.
Info
-
When there are multiple environments, to allow easily configuring environment-specific details,
apictlsupports an additional parameter file. -
Once the file is placed in the project directory, the tool will auto-detect the parameters file upon running the
import-apicommand and create an environment-based artifact for API Manager. -
If the
api_params.yamlis not found in the project directory, the tool will lookup in the project’s base path and the current working directory. -
For more information on using an environment template, see Configuring Environment Specific Parameters.
Tip
The retryTimeOut is defined as an environment variable so that the actual value of it can be controlled using a
single variable based on the environment type.
Step 5 - Commit the API Project
Commit the API project with the required test scripts to the GitHub repository.
Add the test script developed in Step 1, into the same API Project for easy use and commit the API project along with the test scripts to a GitHub source code management repository.
Step 6 - Trigger Jenkins Pipeline
Follow the instructions below to use a GitHub Webhook to trigger the Jenkins Pipeline.
Info
-
A predefined pipeline in the CI tool will automatically trigger a build upon the commit to run tests and deploy it to environments; such a pipeline has the following main steps.
- Check out the source code and deploy the API to a lower environment.
- Run tests against the lower environment.
- Deploy it to the upper environment.
-
The deployment to environments can be done automatically using
apictl.
-
Configure your source code repository in GitHub with a webhook to automatically start a Jenkins pipeline after you commit any changes.
-
Add the two environments using the following sample
apictlcommands.Warning
Make sure you have already installed
apictlto the Jenkins server and set the Path variable. For more information, see Download and Initialize the CTL Tool.Example
apictl add-env -e dev \
--registration https://dev.apim.wso2.com/ client-registration/v0.15/register \
--apim https://dev.apim.wso2.com \
--token https://dev.apim.wso2.com/token \
bash apictl add-env -e prod \ --registration https://prod.apim.wso2.com/client-registration/v0.15/register \ --apim https://prod.apim.wso2.com \ --token https://prod.apim.wso2.com/token \For more information, see Add an Environment.
You can also add an environment manually beforehand or provide the details as a shell script in the same pipeline.
-
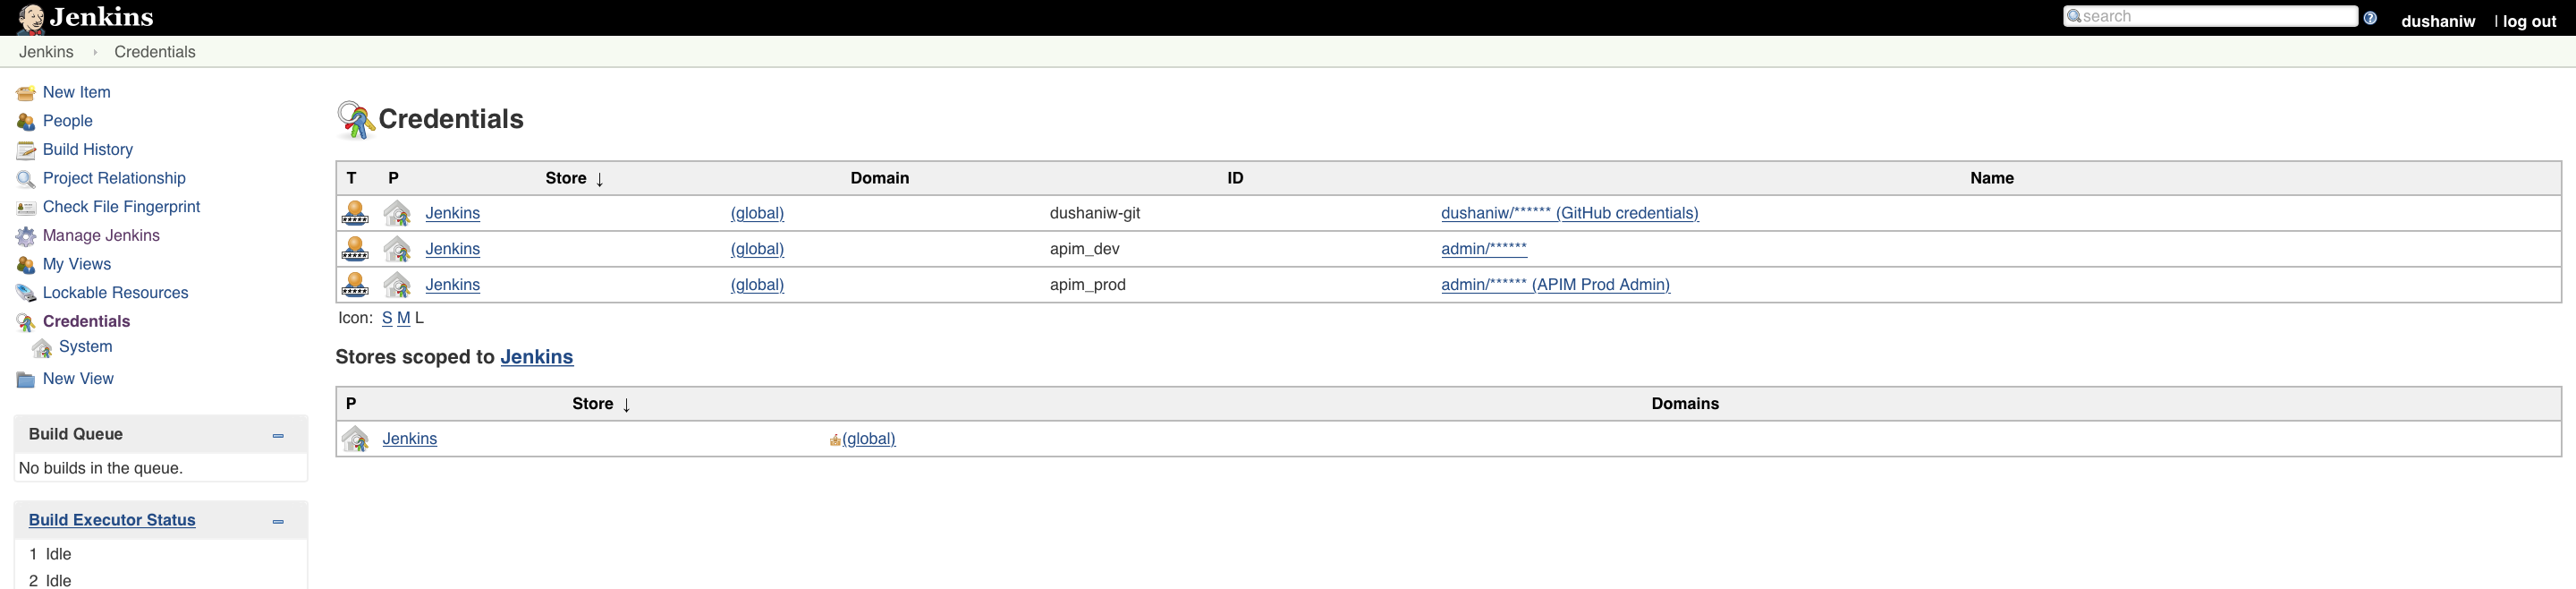
Store the credentials for the two environments as Jenkins credentials.
-
Add the Jenkins pipeline configuration defined in here.
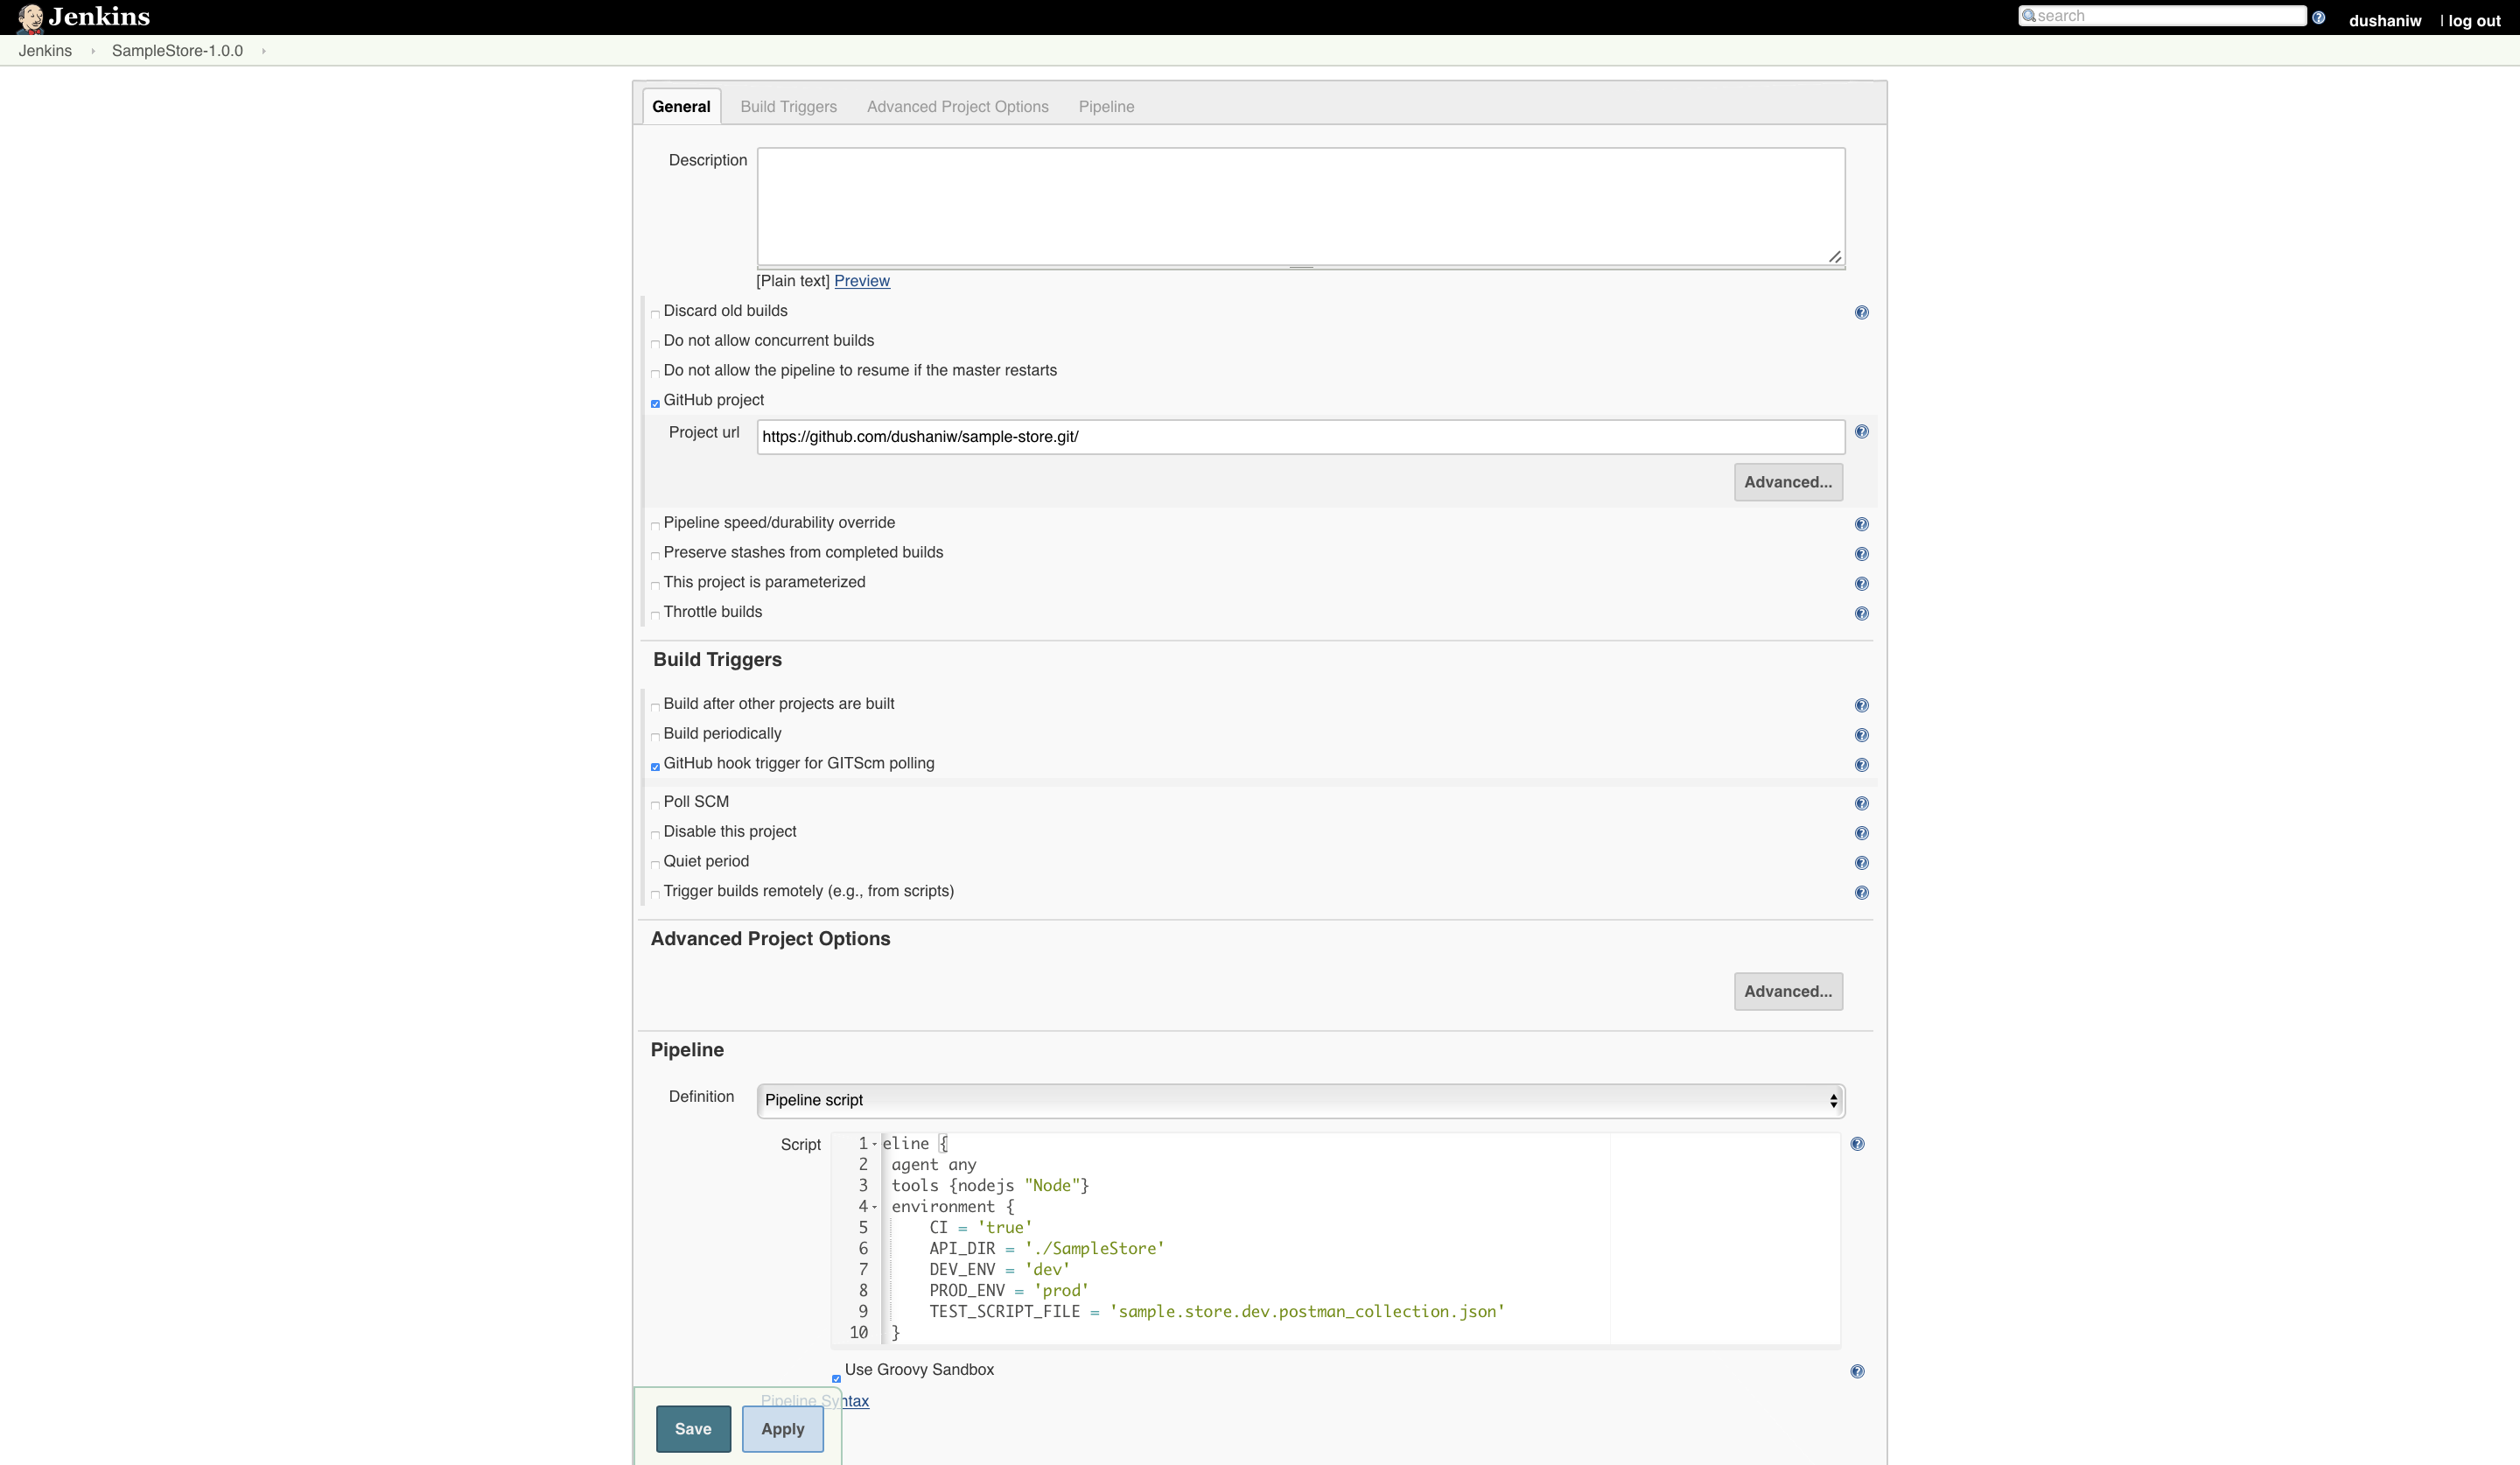
Info
- The
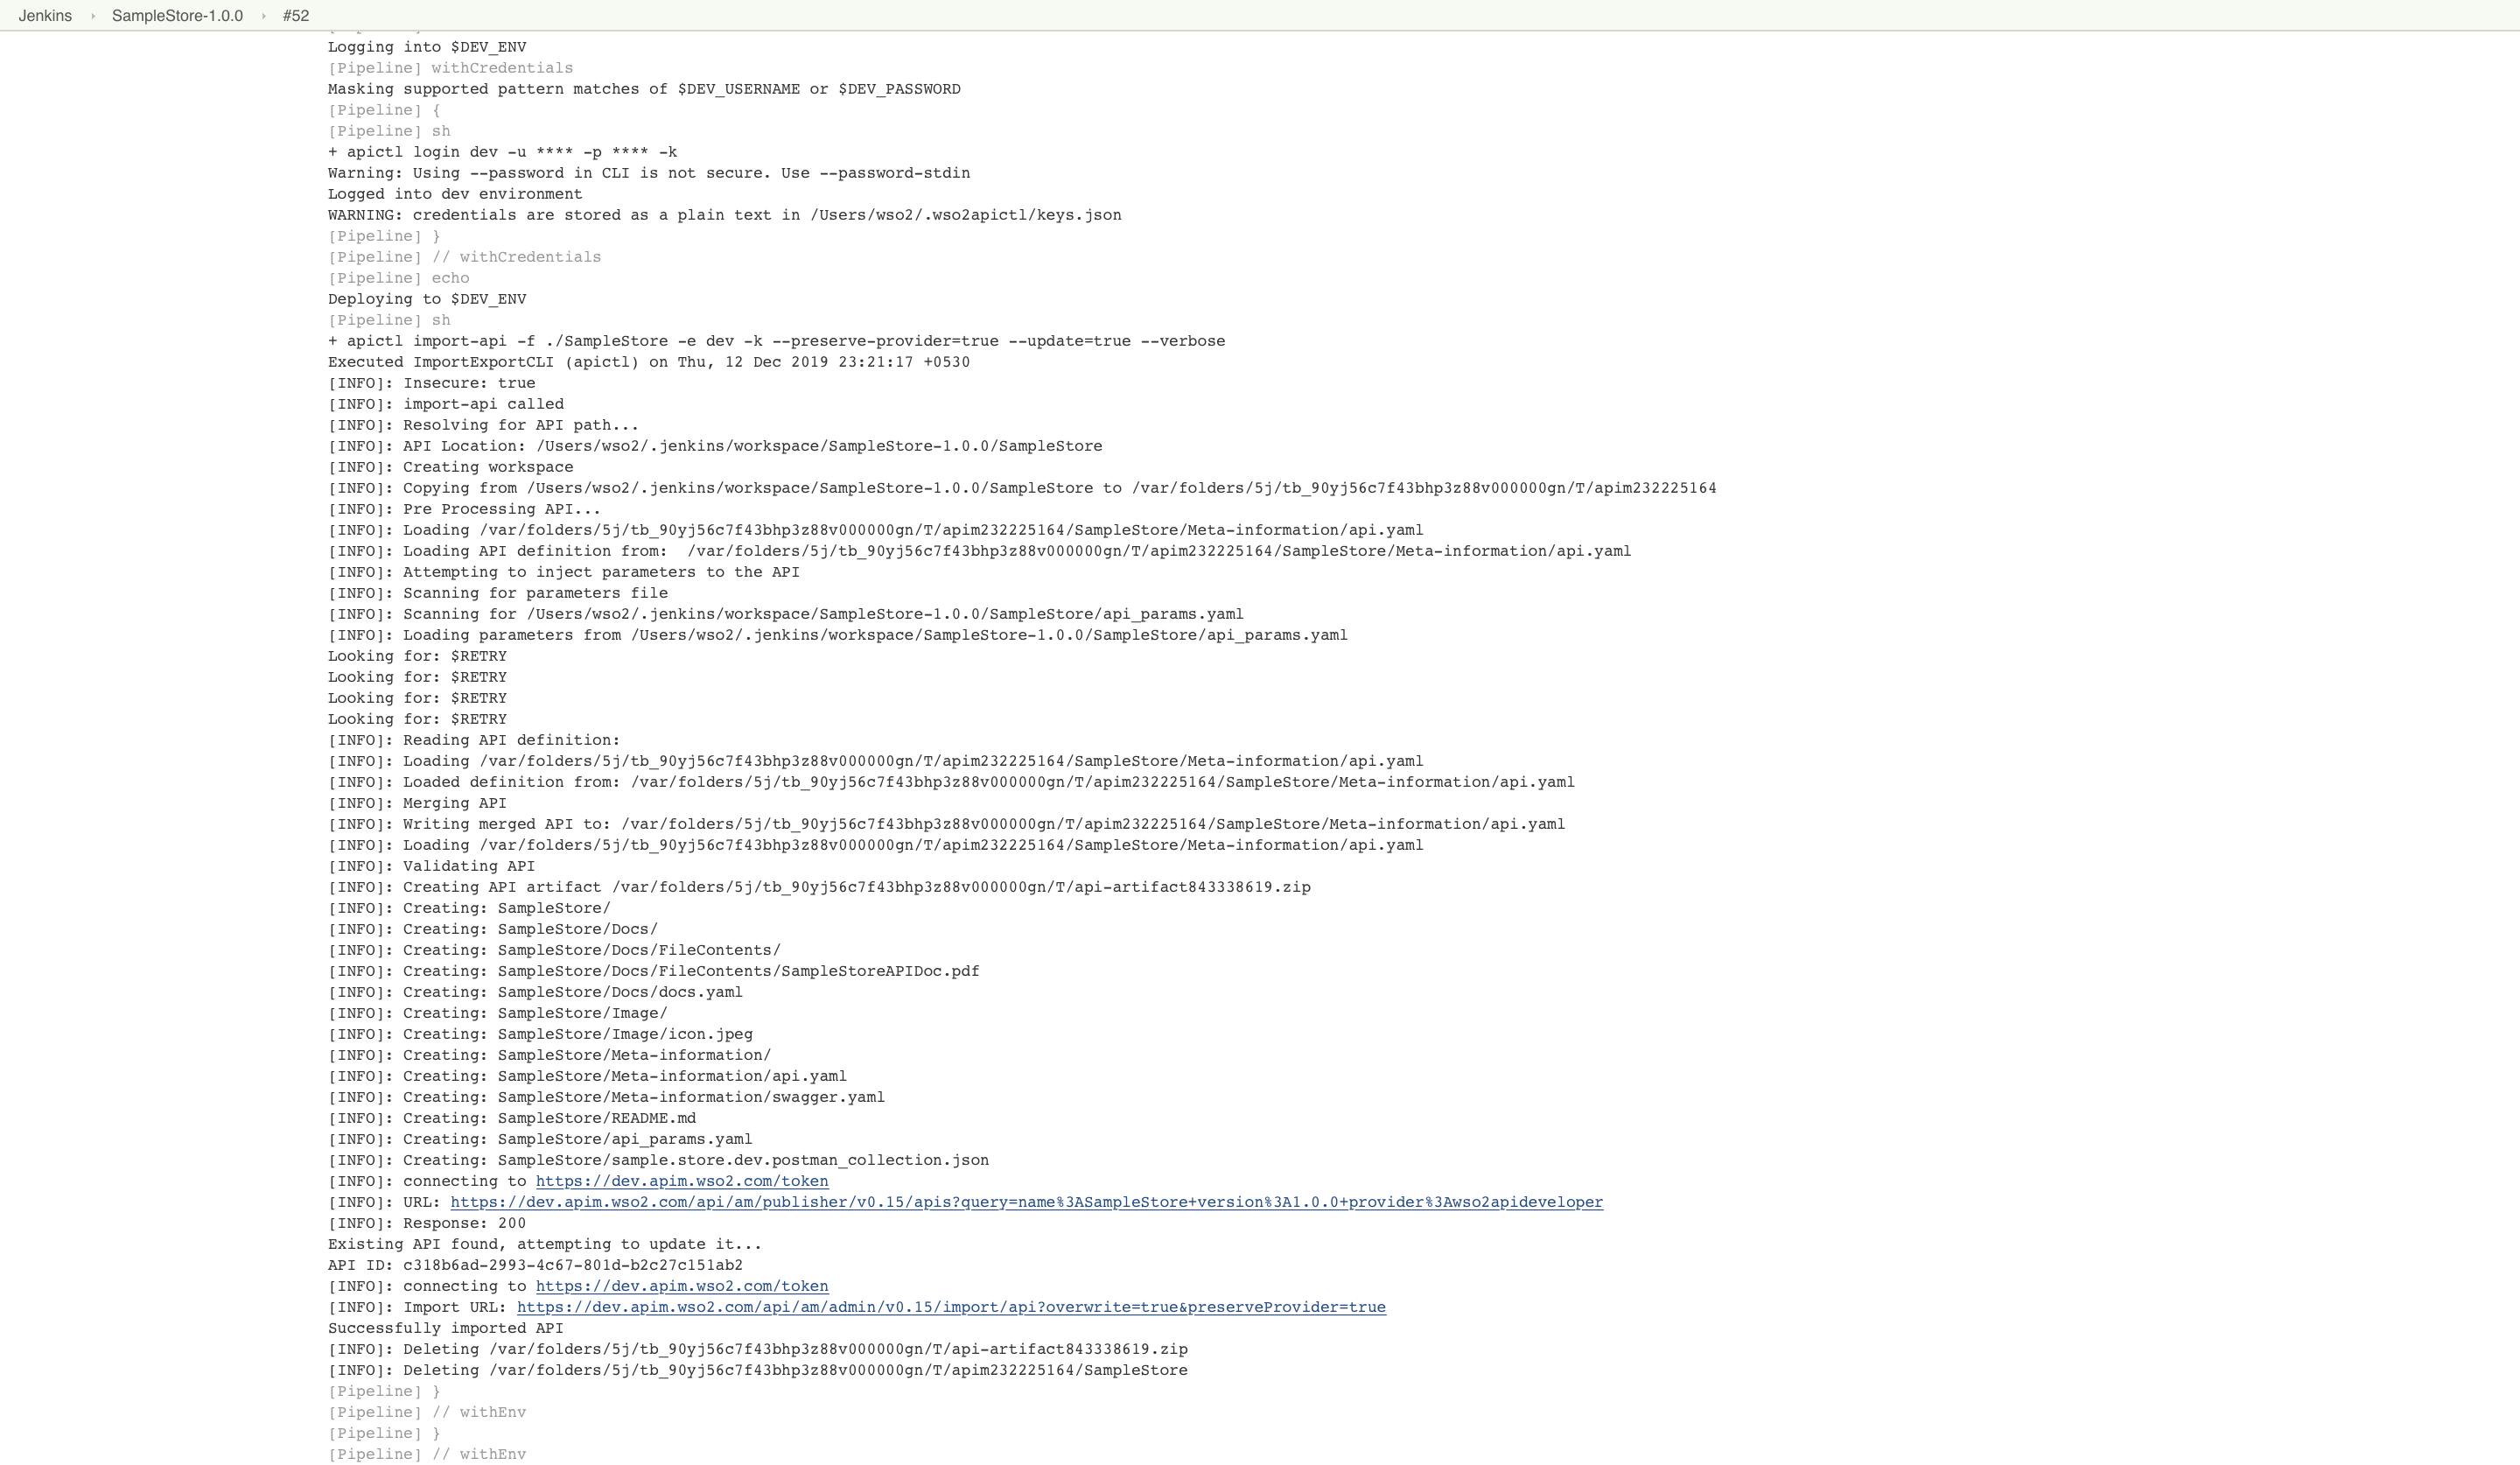
RETRYvariable is defined with 80 milliseconds so that the production and sandbox endpoints of the API deployed in the dev environment has an endpoint retry timeout value of 80 milliseconds. - As the first step, this will log in to the dev environment using the provided Jenkins credentials and
then deploy the API into the dev environment using the
import-apicommand. - The
preserve-providerandupdateflags, will preserve the API provider in the given API project and import the API to the development environment seamlessly. - The next stage
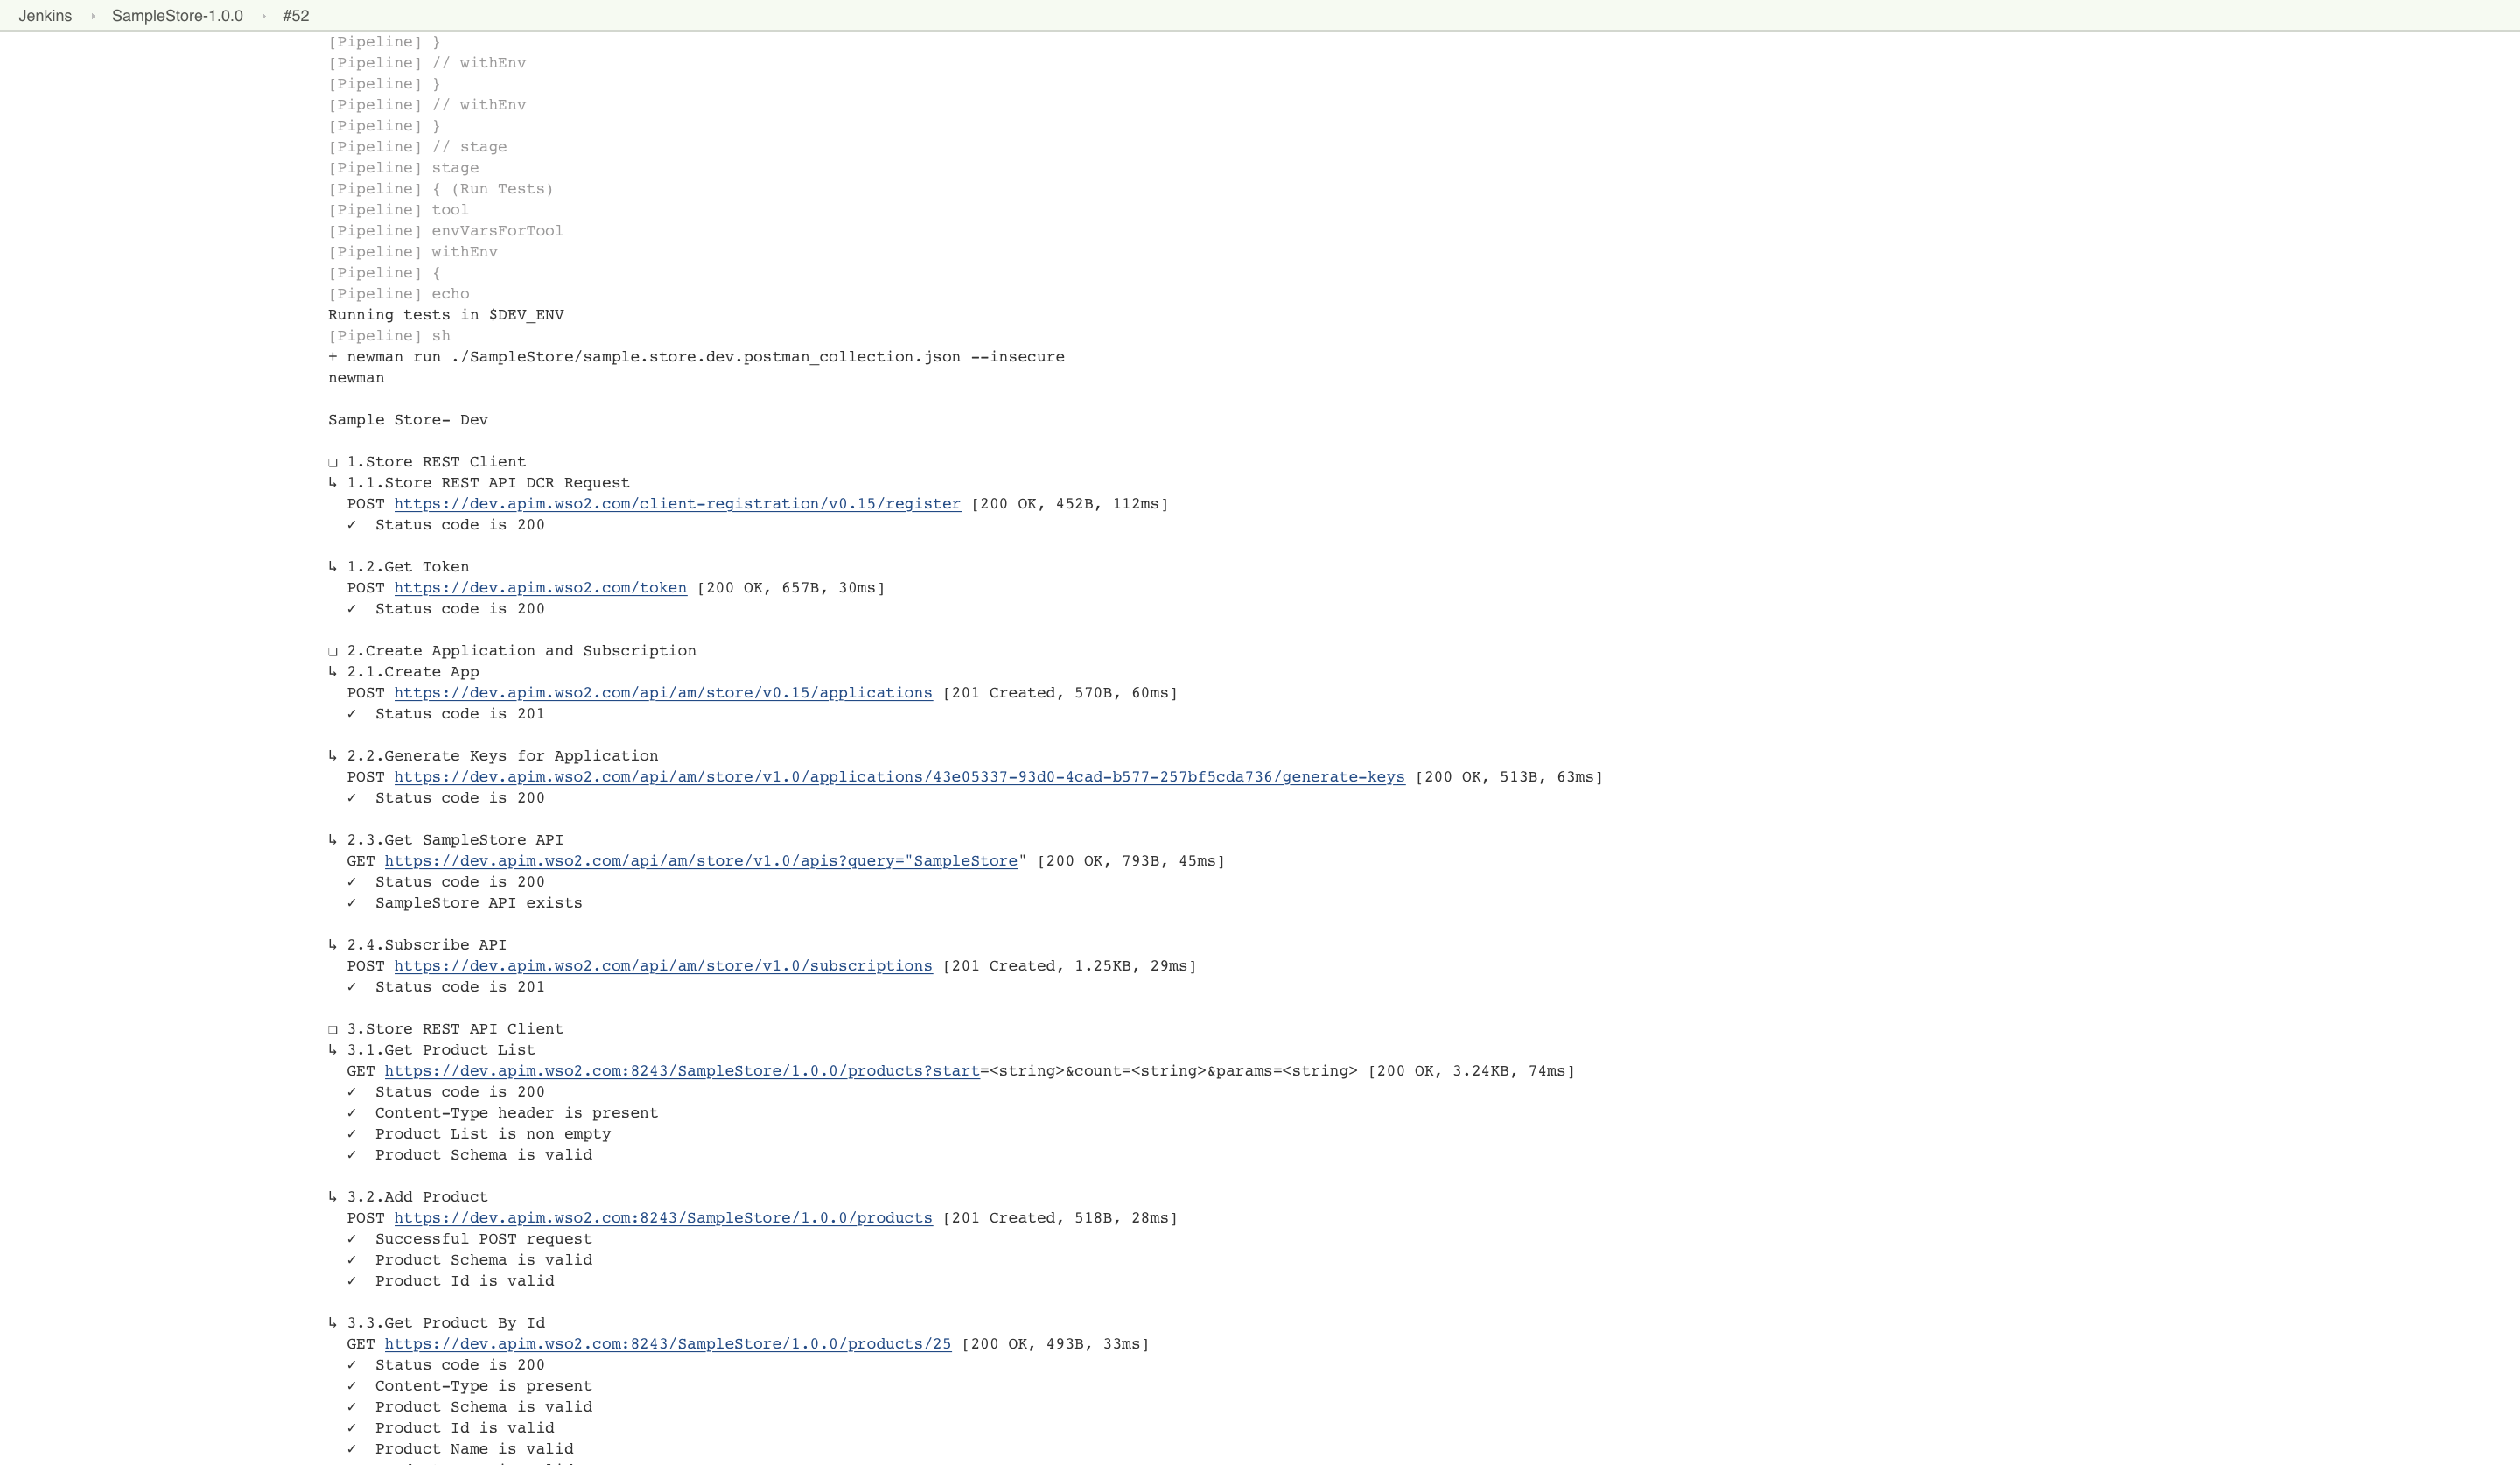
Run Testswill run the test script that you committed to the project in the Git repository usingNewman. - If you need to use the same test script to run it against multiple environments, you can maintain a separate
environment file and provide that as an argument for the
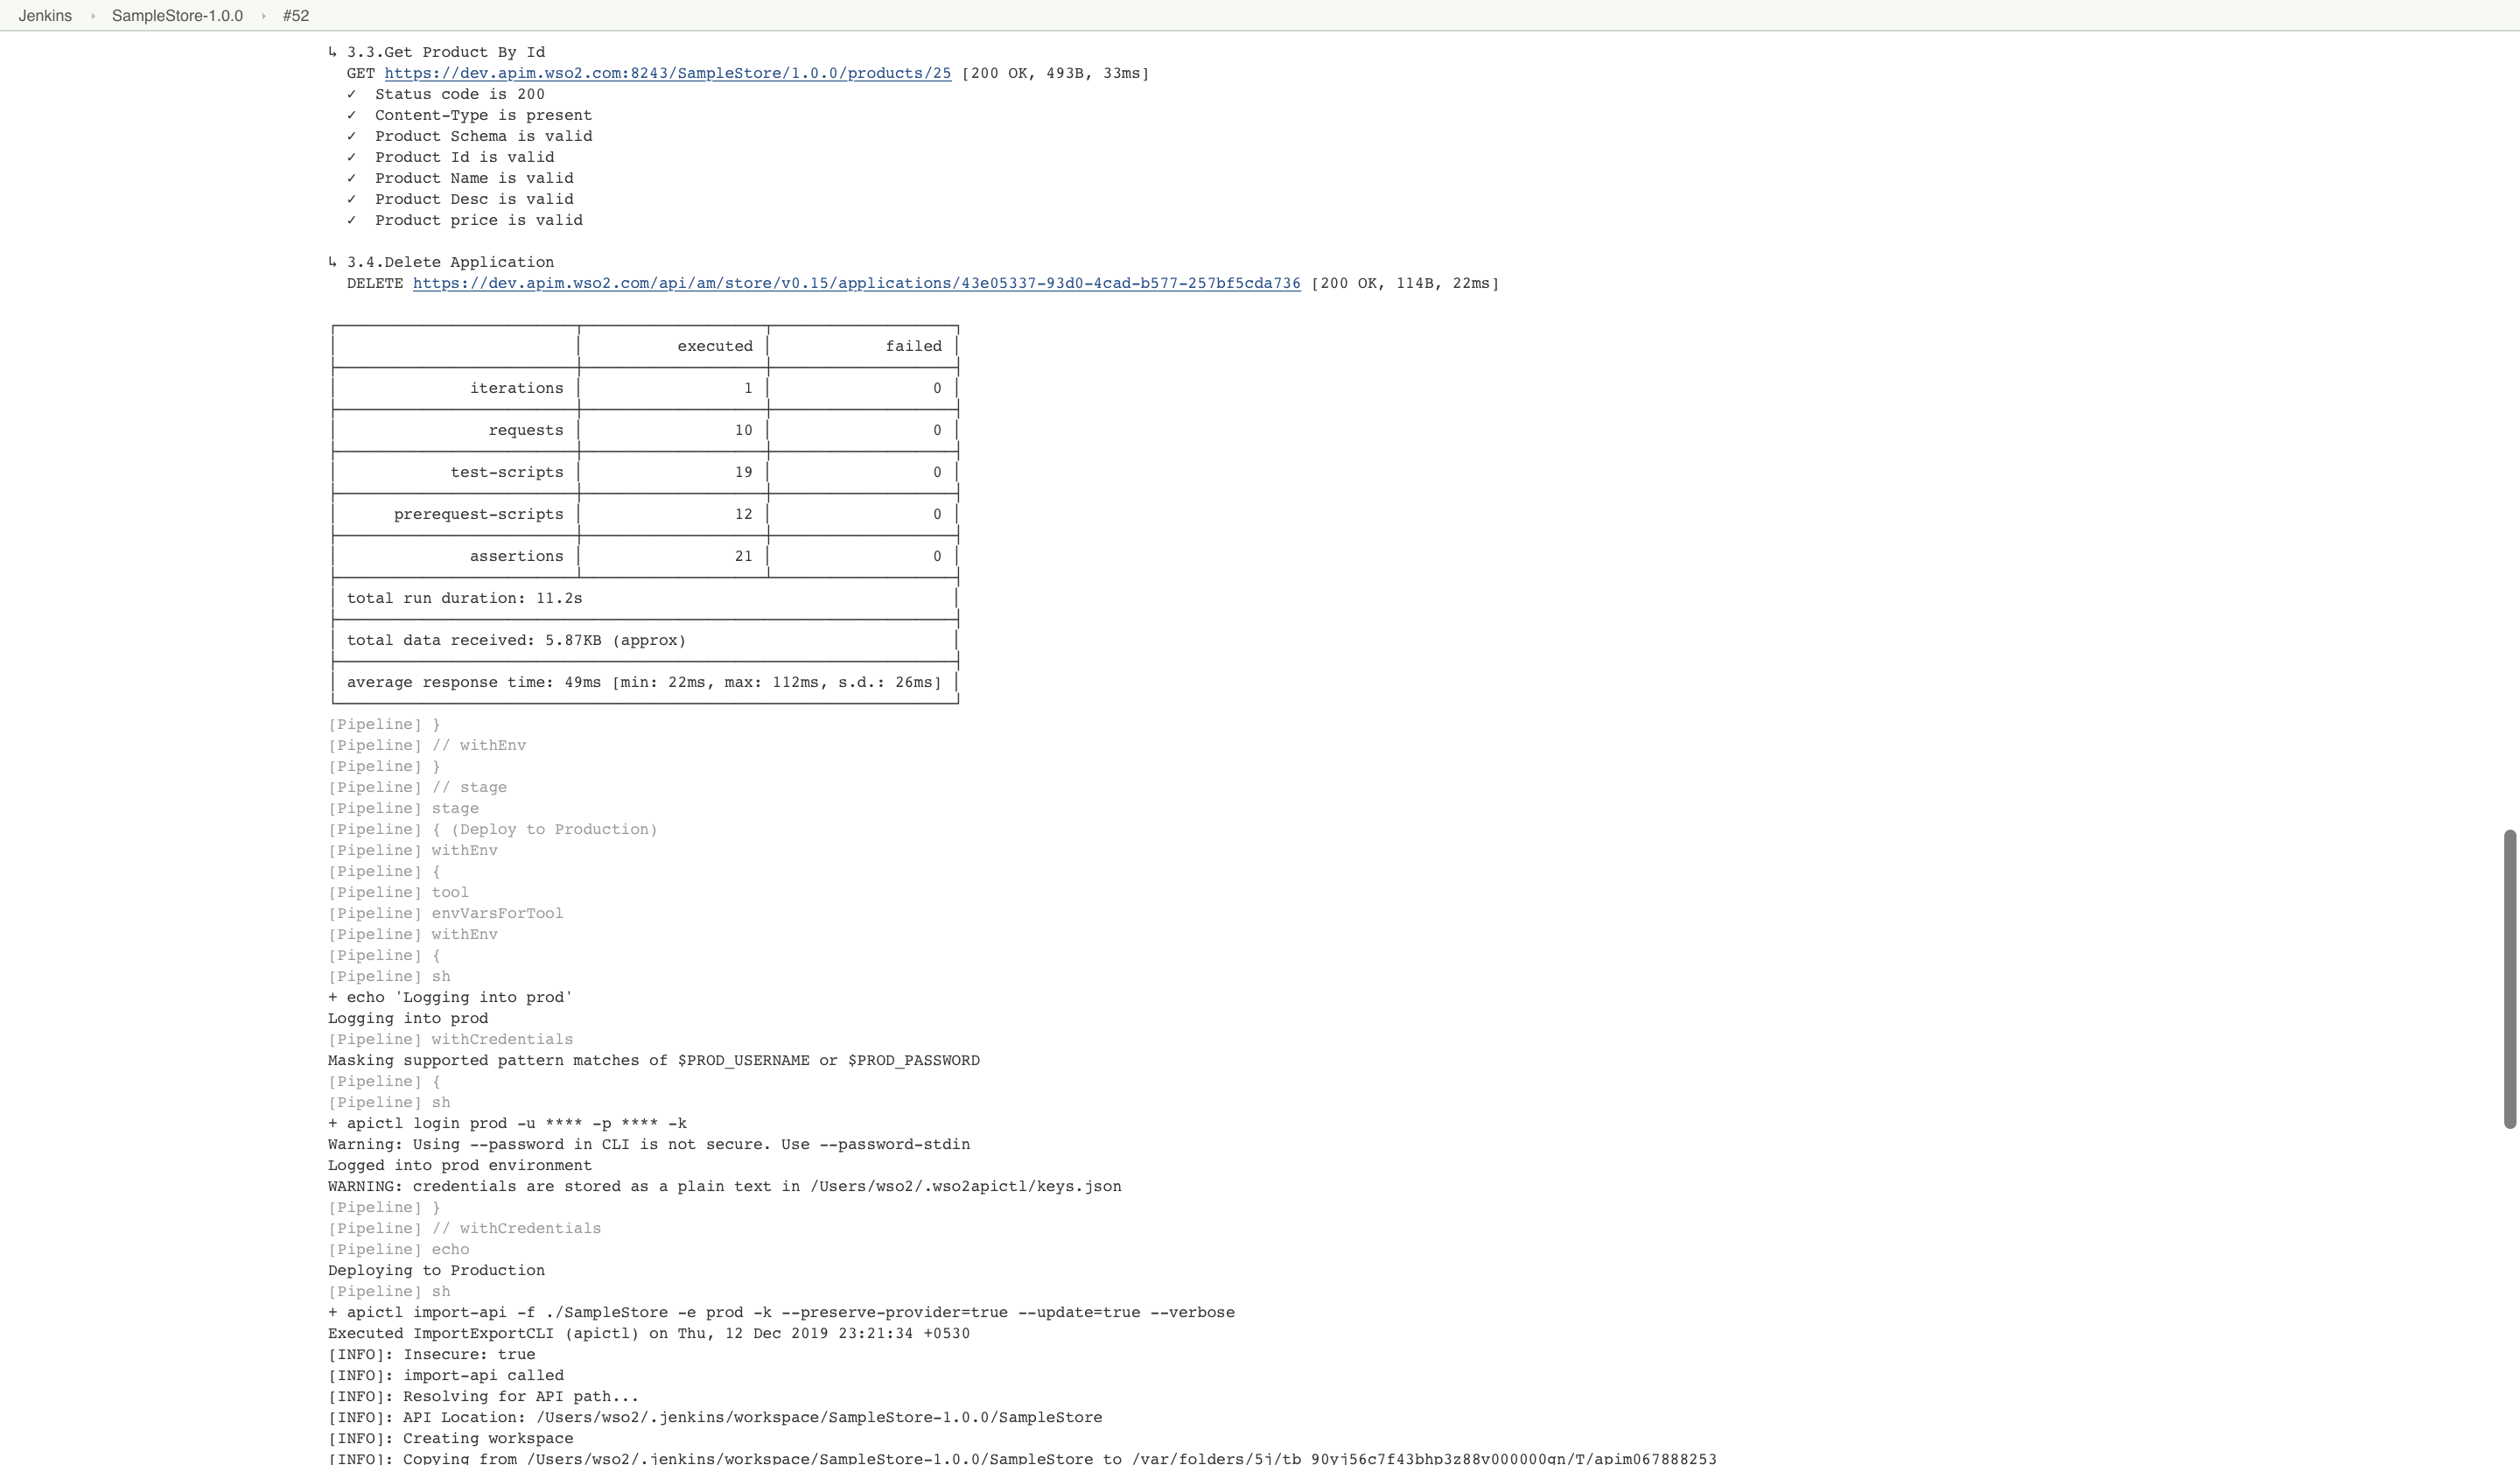
Newmanrun command. For more information, see Using environments in collection runs. - After the tests are passed, the next stage will deploy the API to the prod environment using the
import-apicommand. Similar to the dev environment, you can provide any environment-specific variable values here so that they will be injected into the API during the deployment.
- The
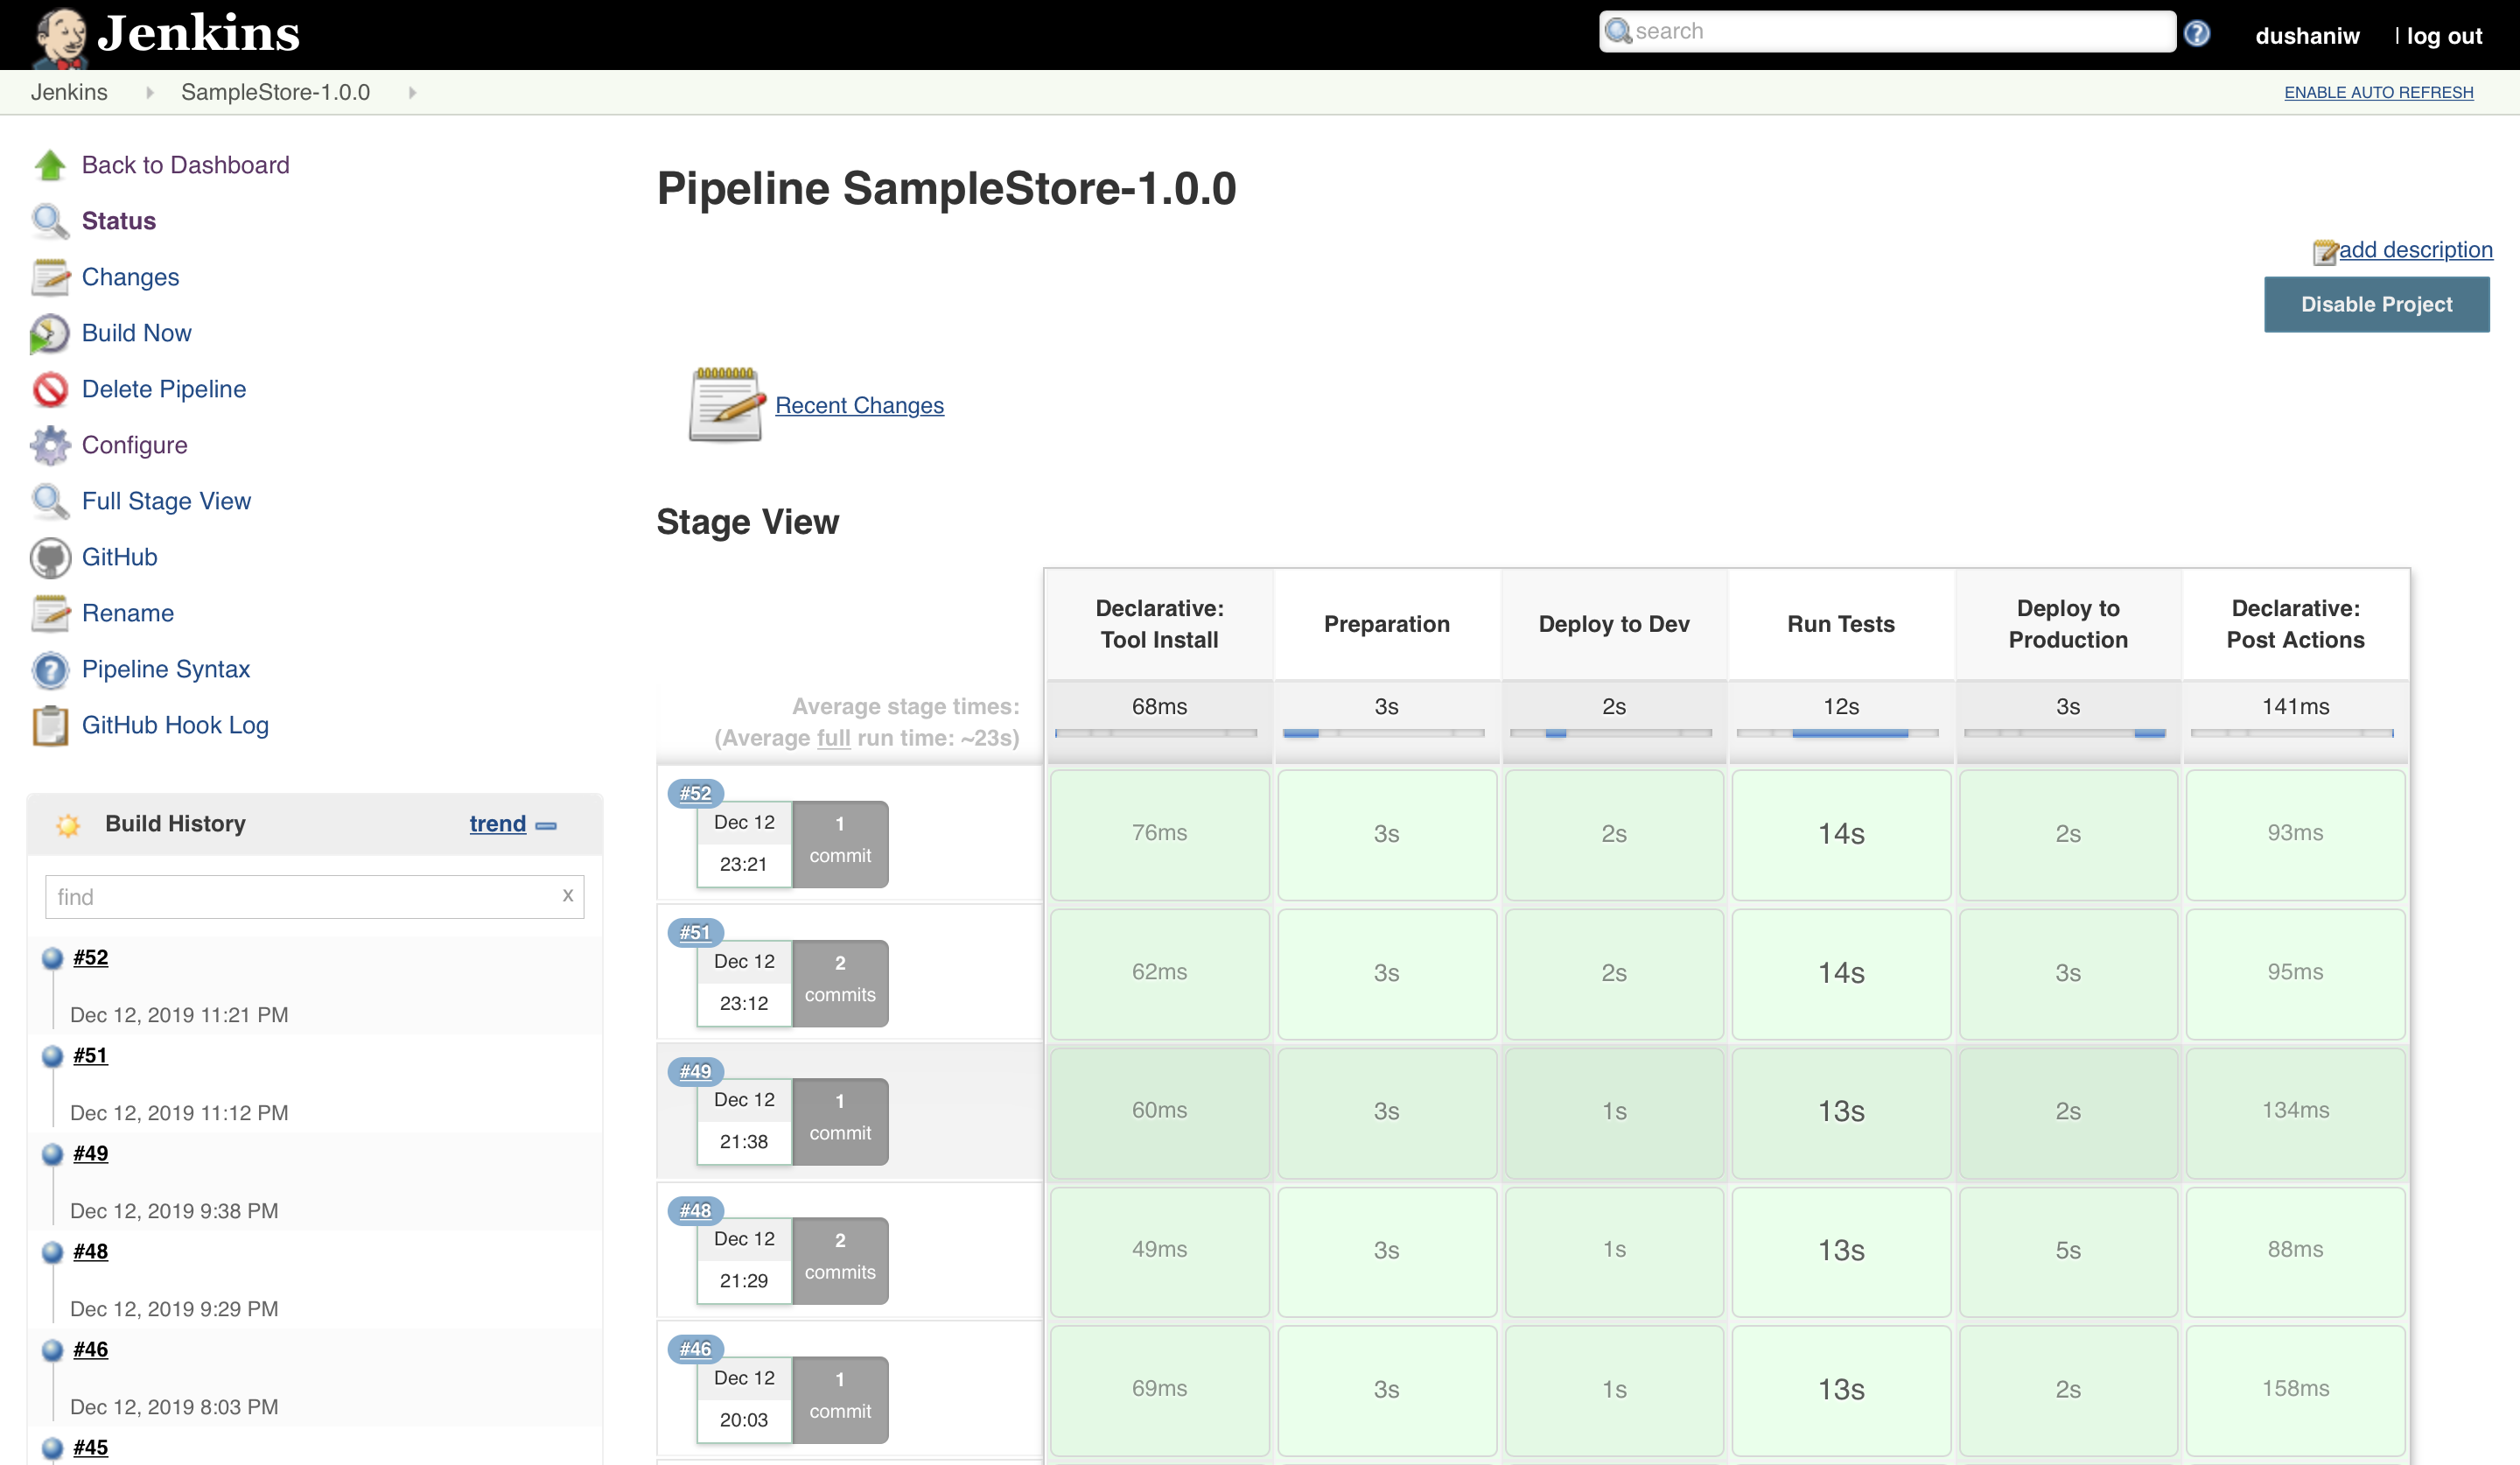
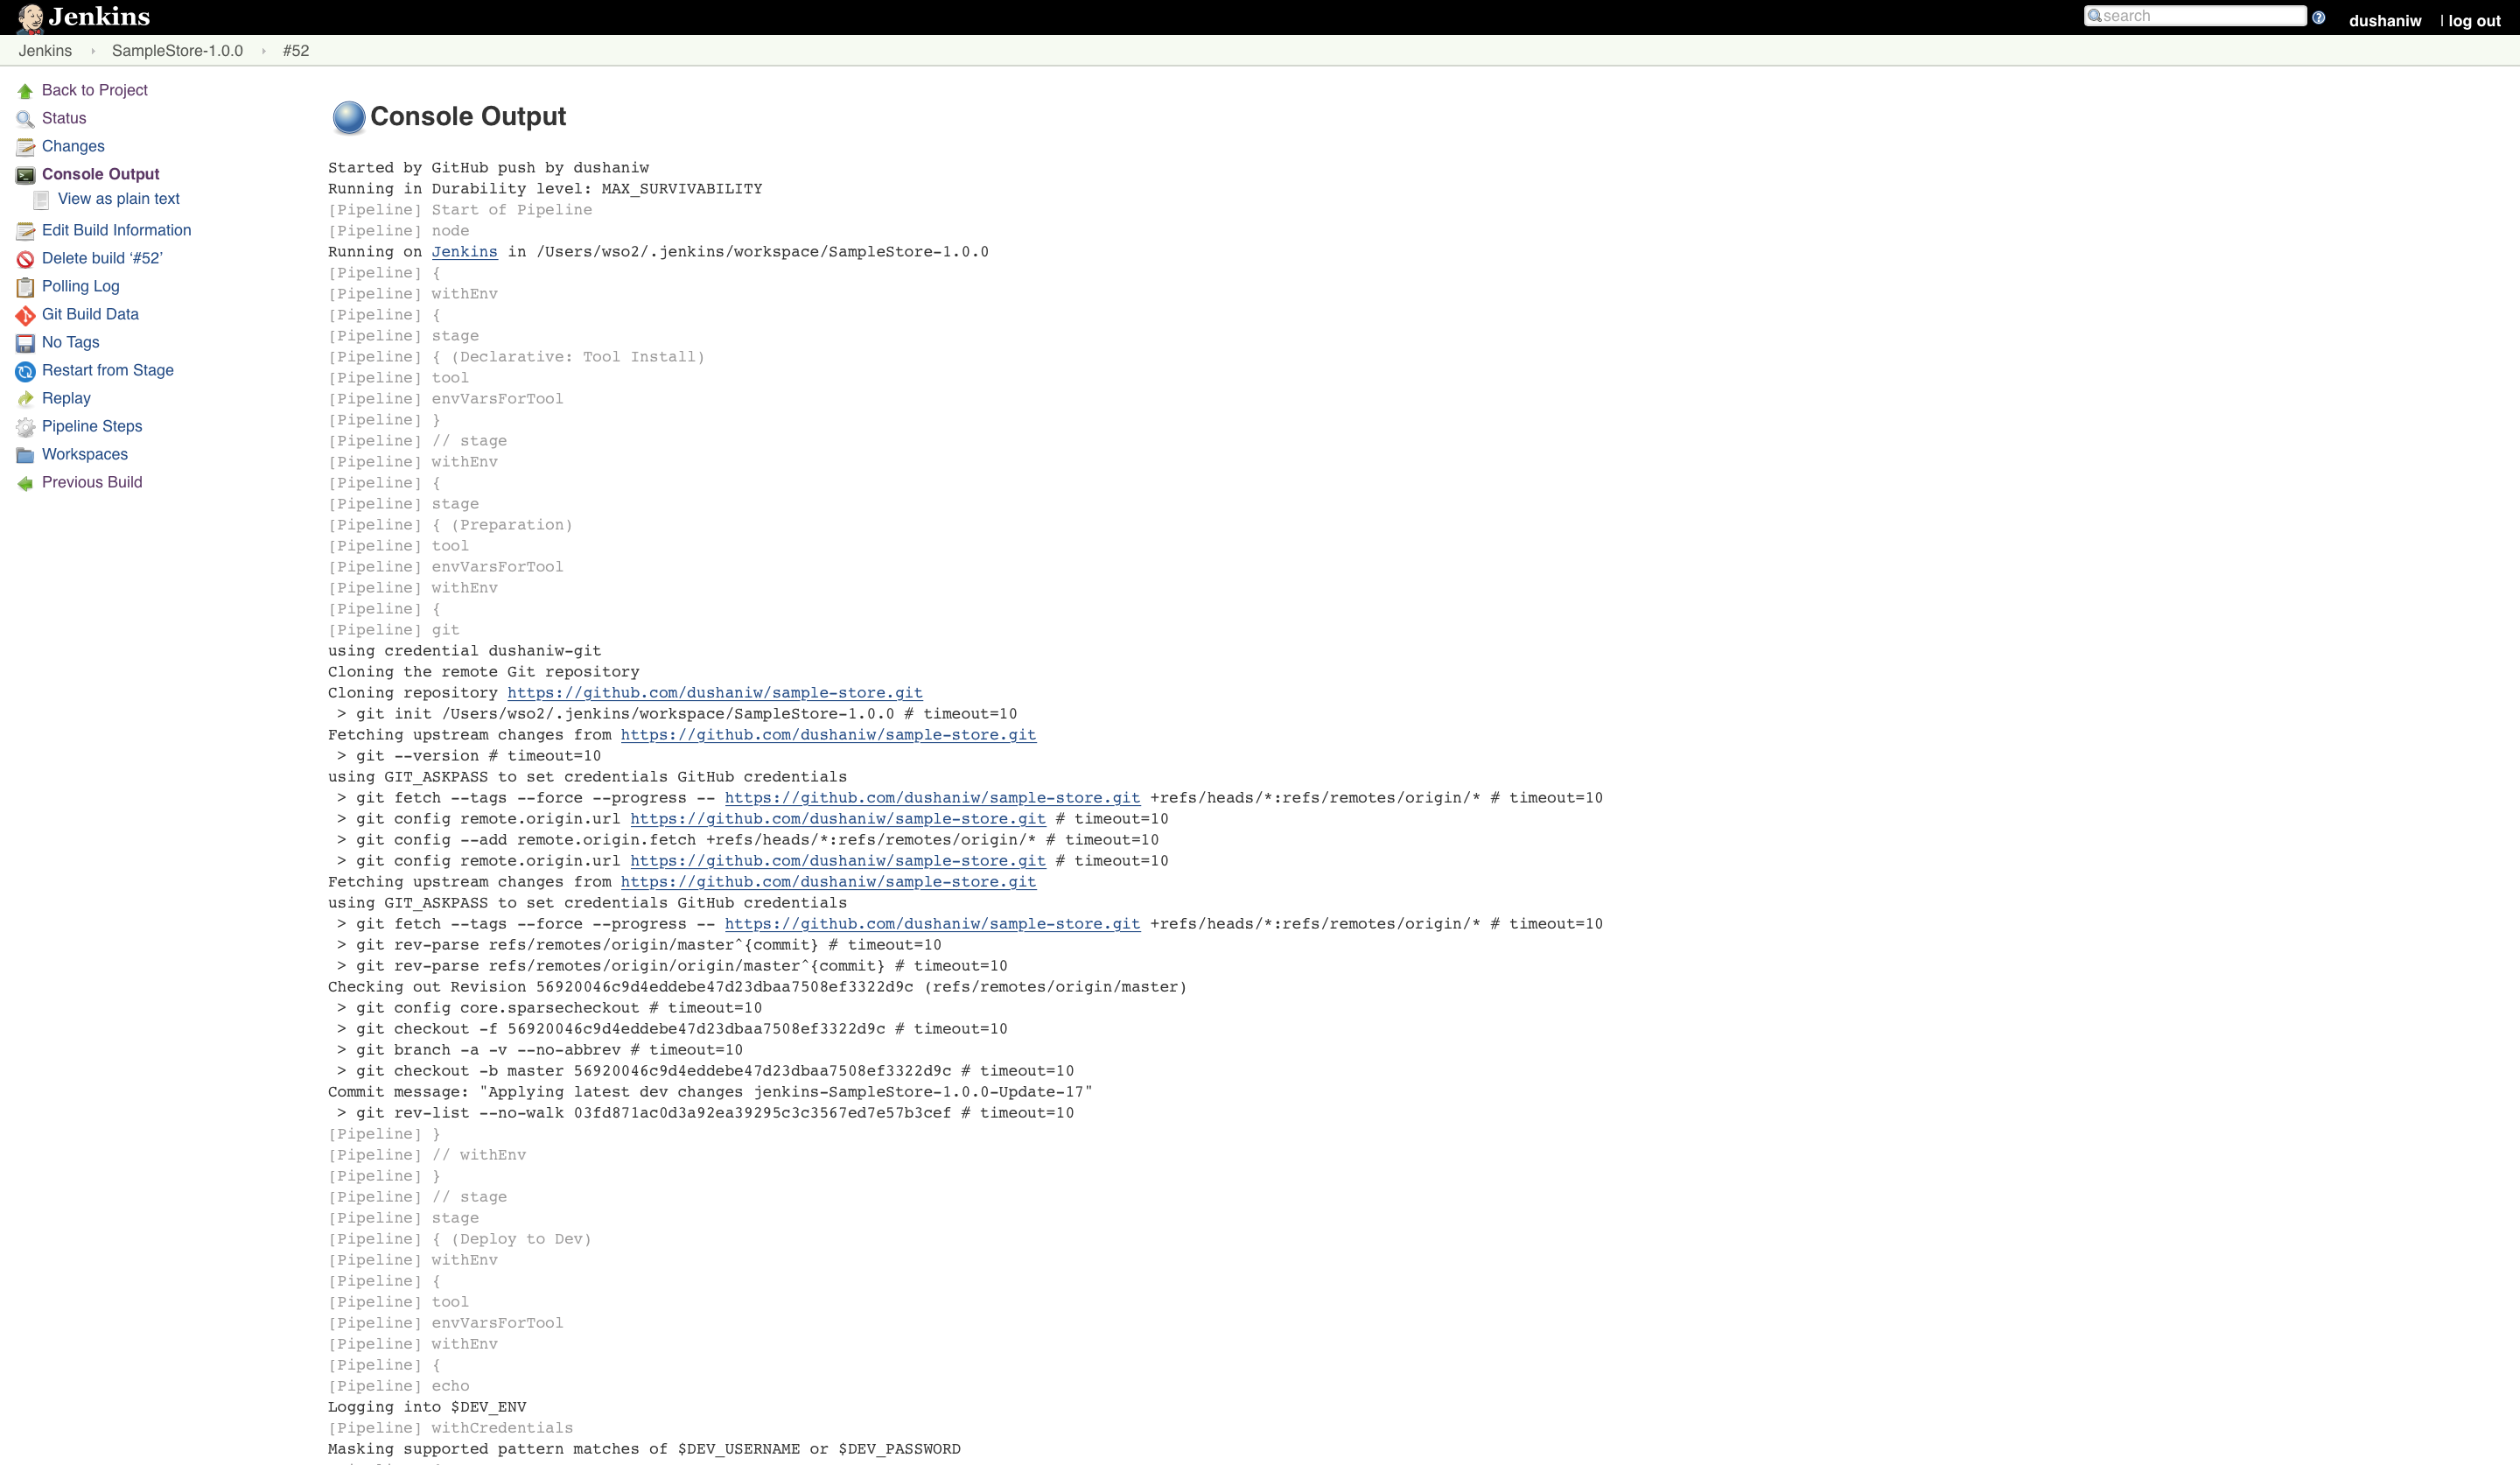
Upon committing and pushing any changes to the remote repository, the webhook will automatically trigger a pipeline build on the Jenkins server.
A successful pipeline build will have a similar console output to the following.
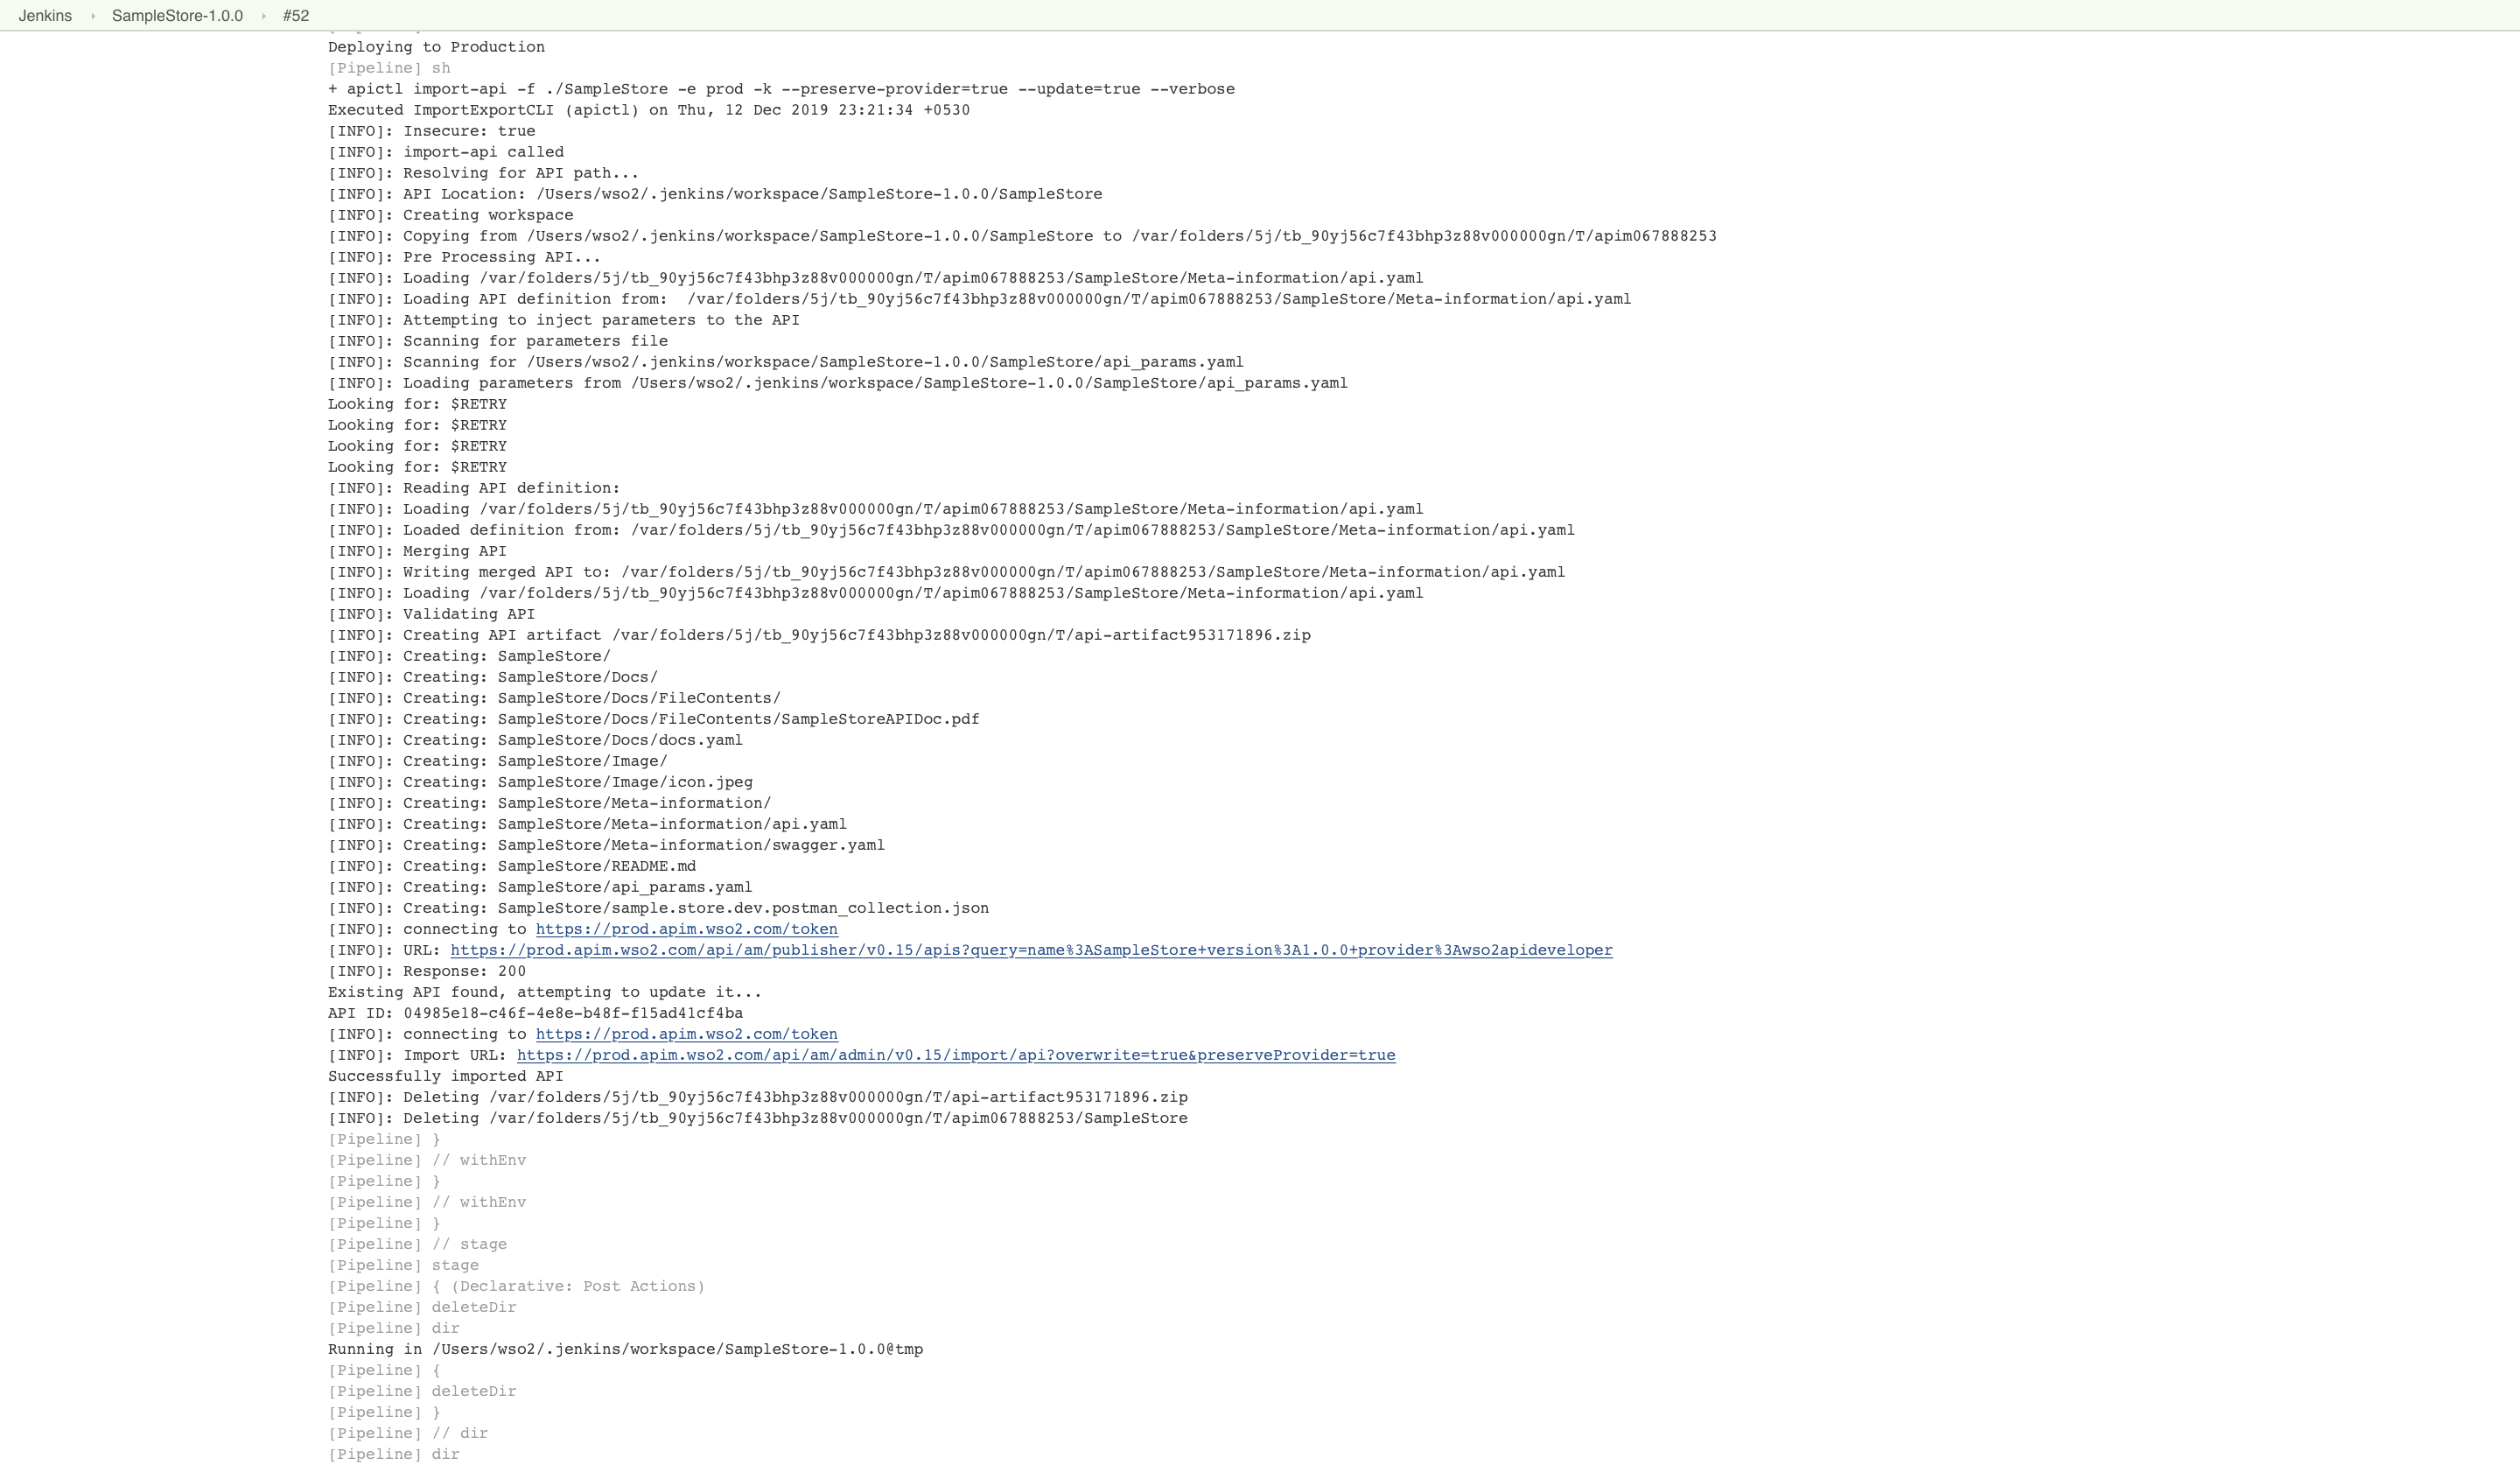
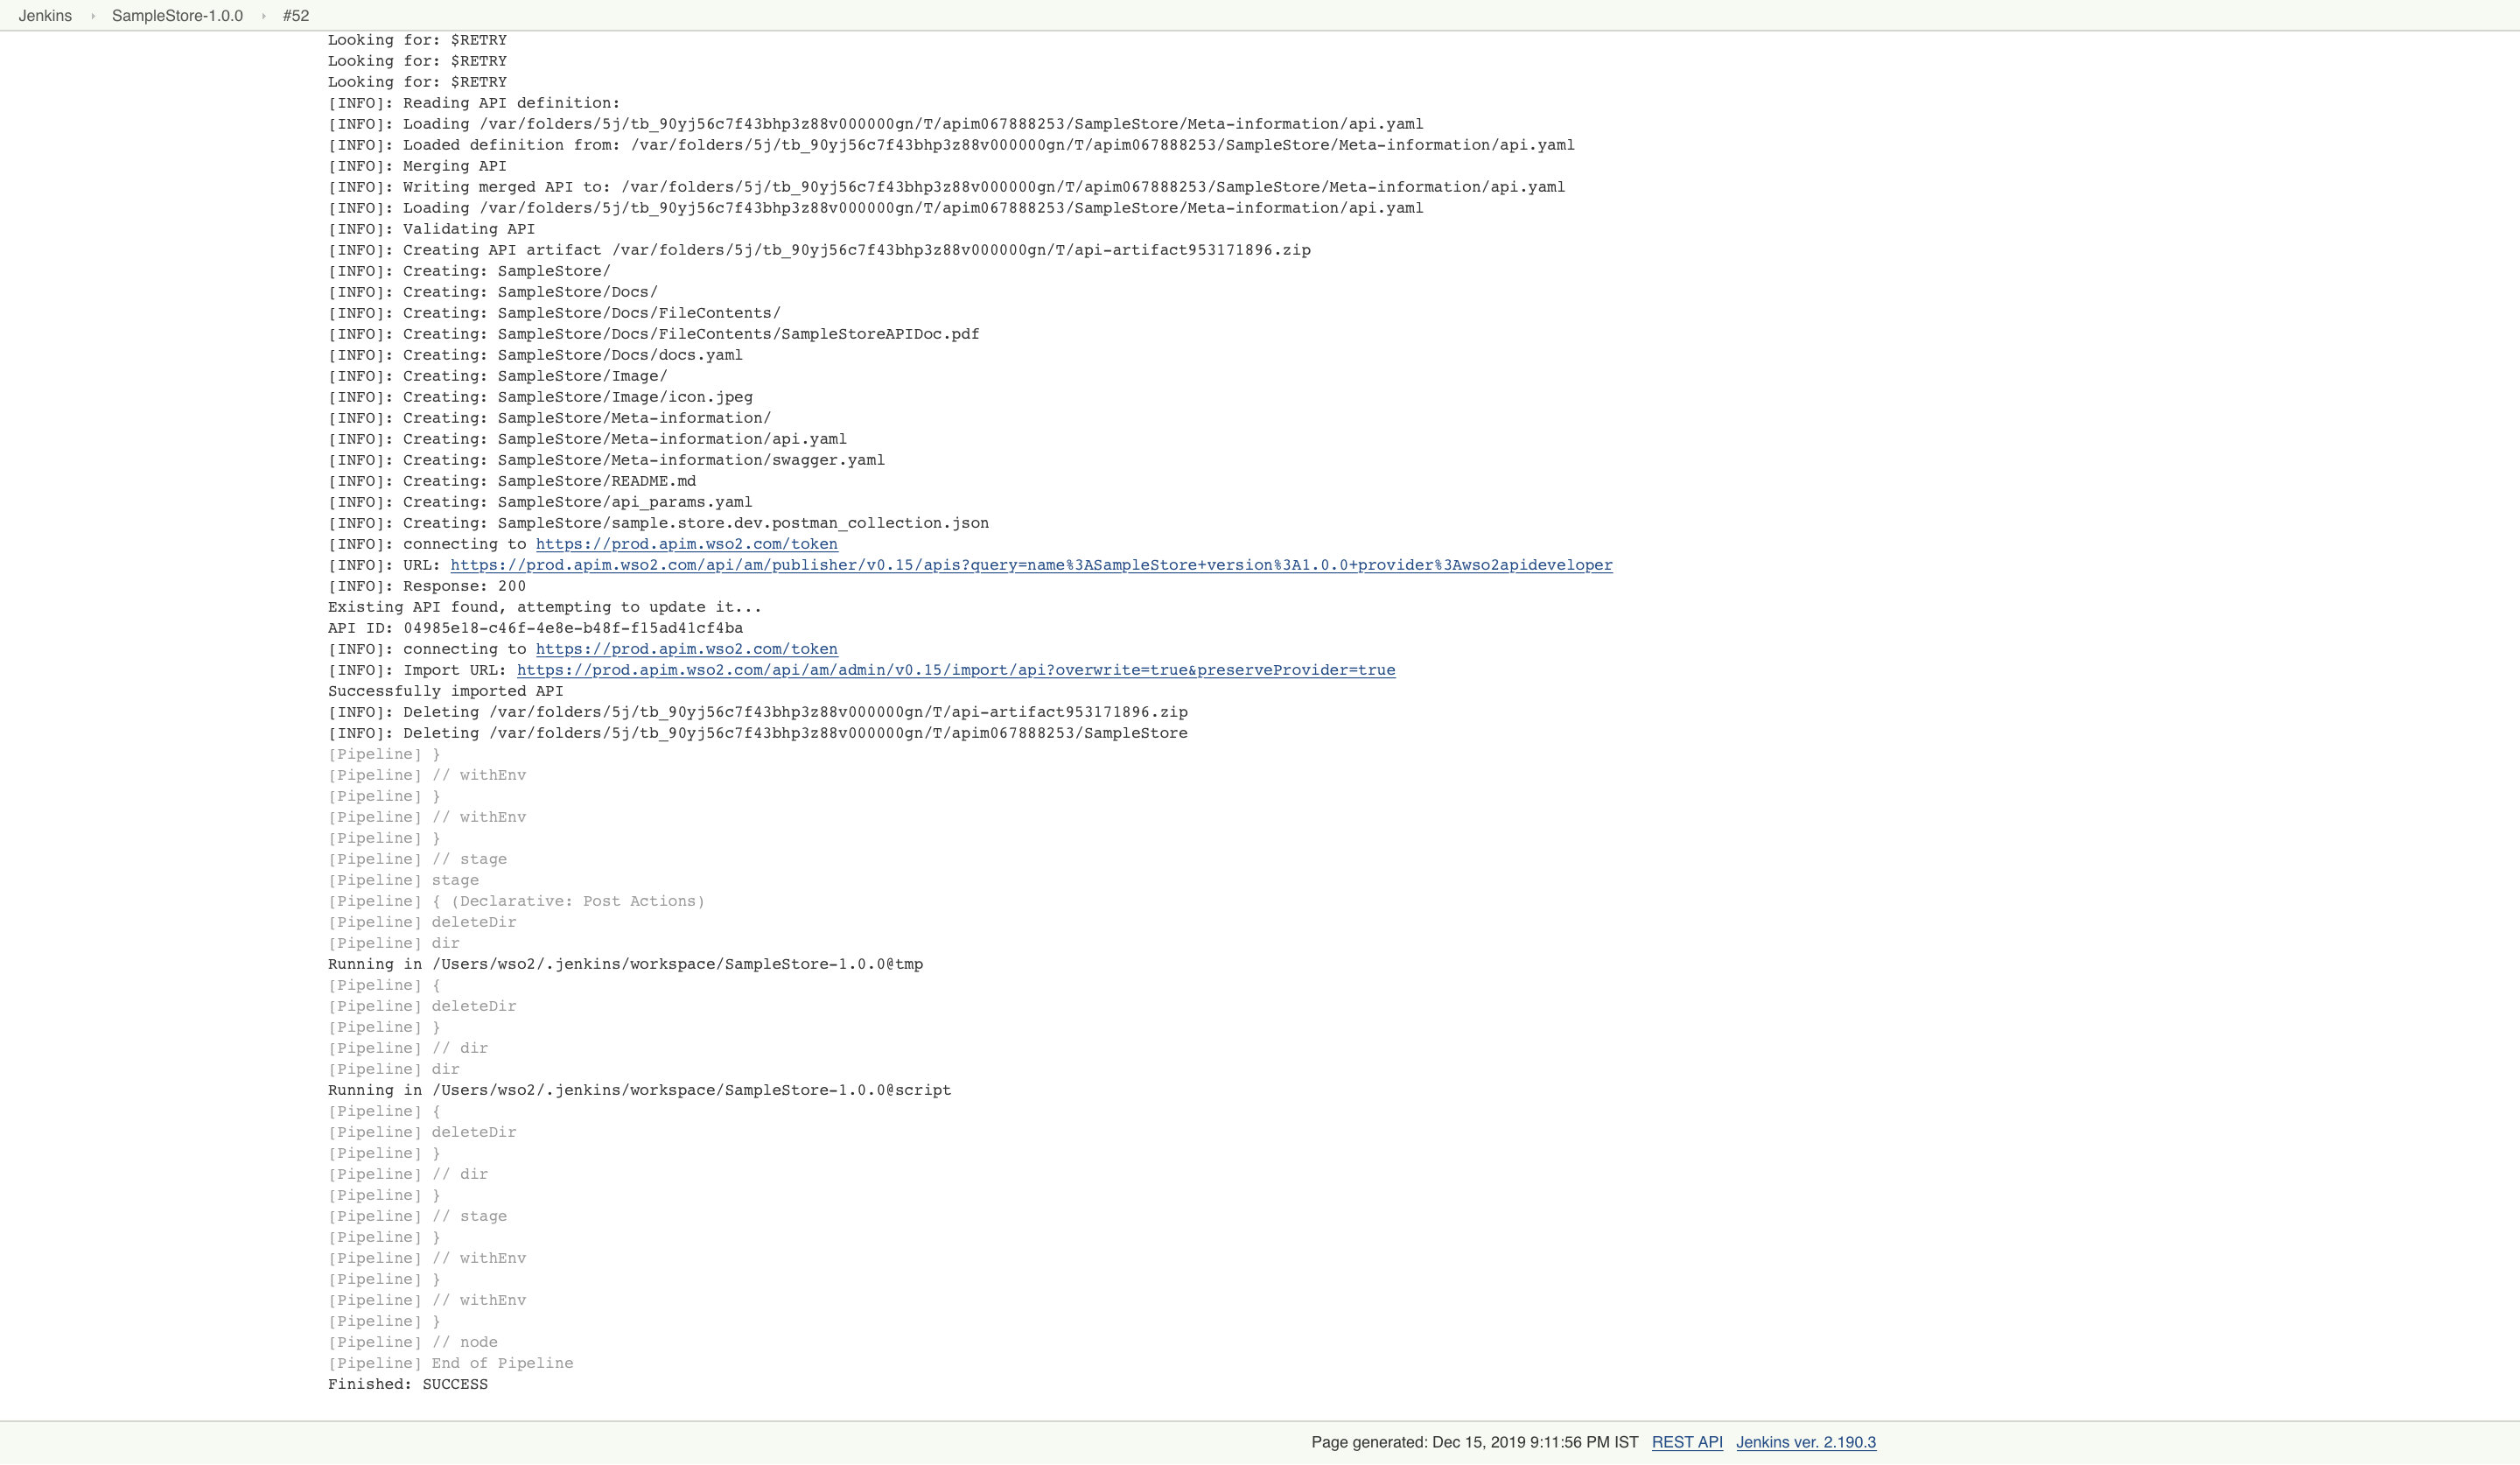
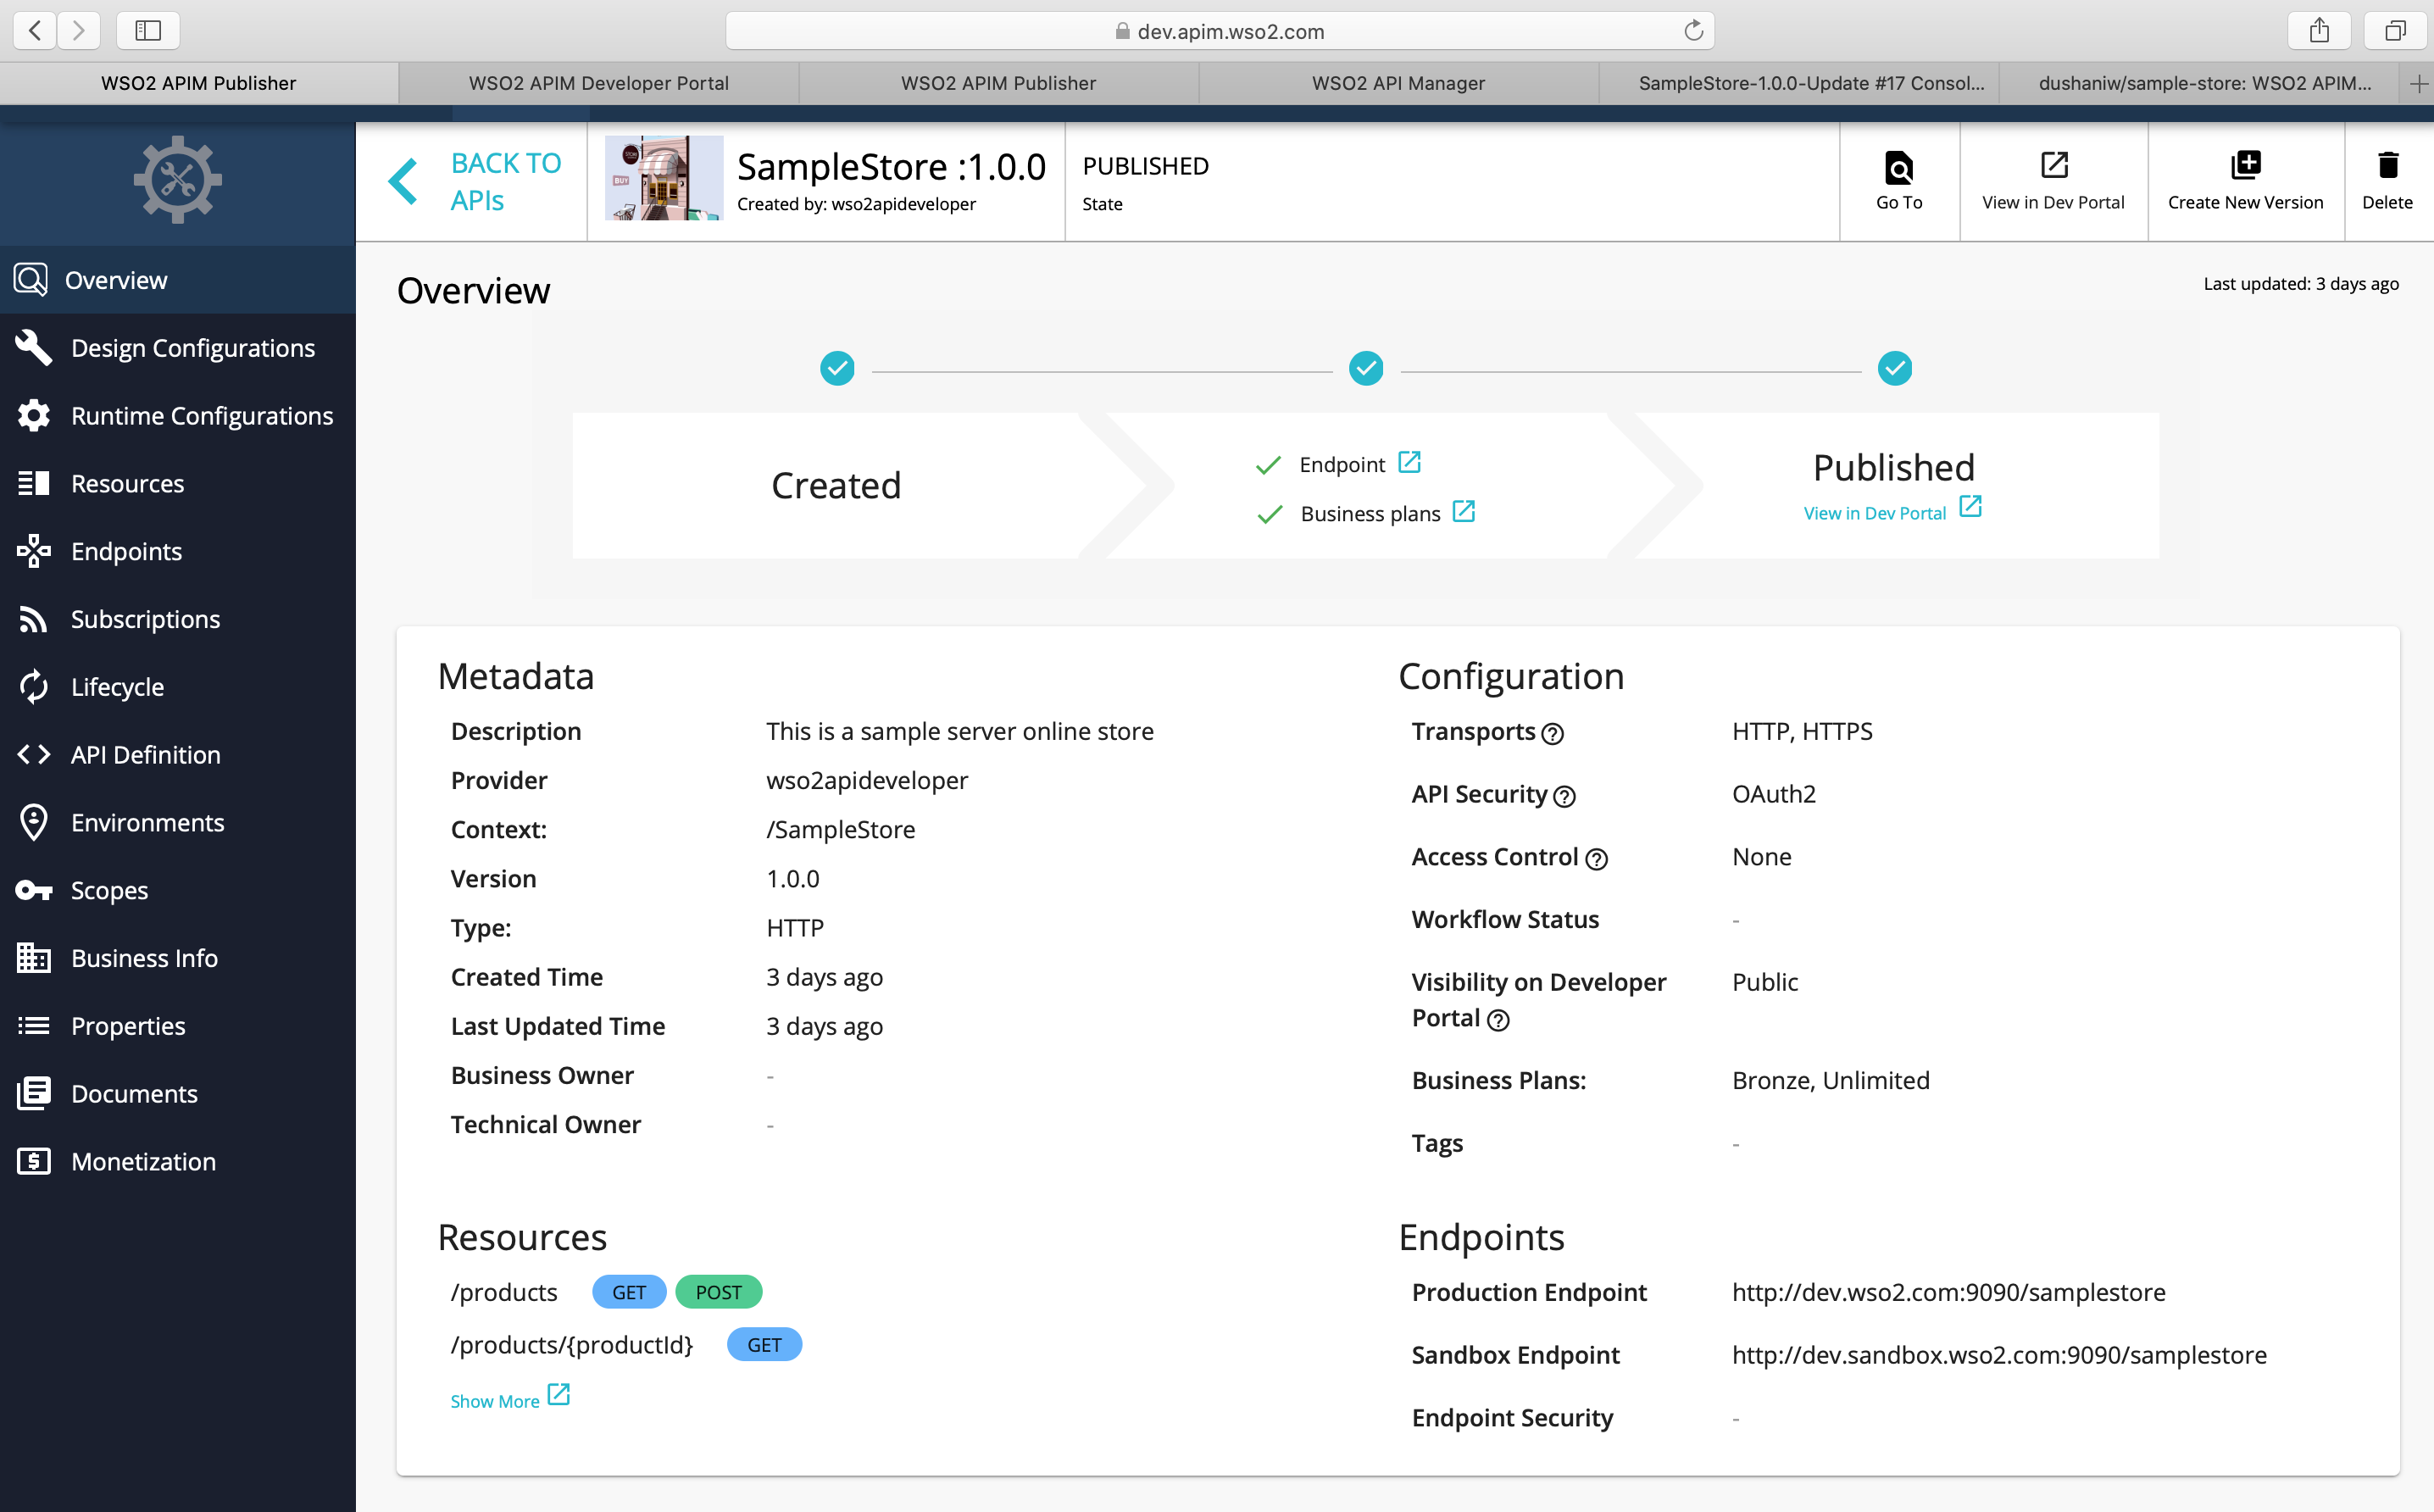
After the pipeline status changes to SUCCESS, when you navigate to the API Publisher in the dev and prod environments, you can see the SampleStore API is in the PUBLISHED state.
If you check the endpoints, you can see the endpoint URLs are updated according to the dev and production environment configs.

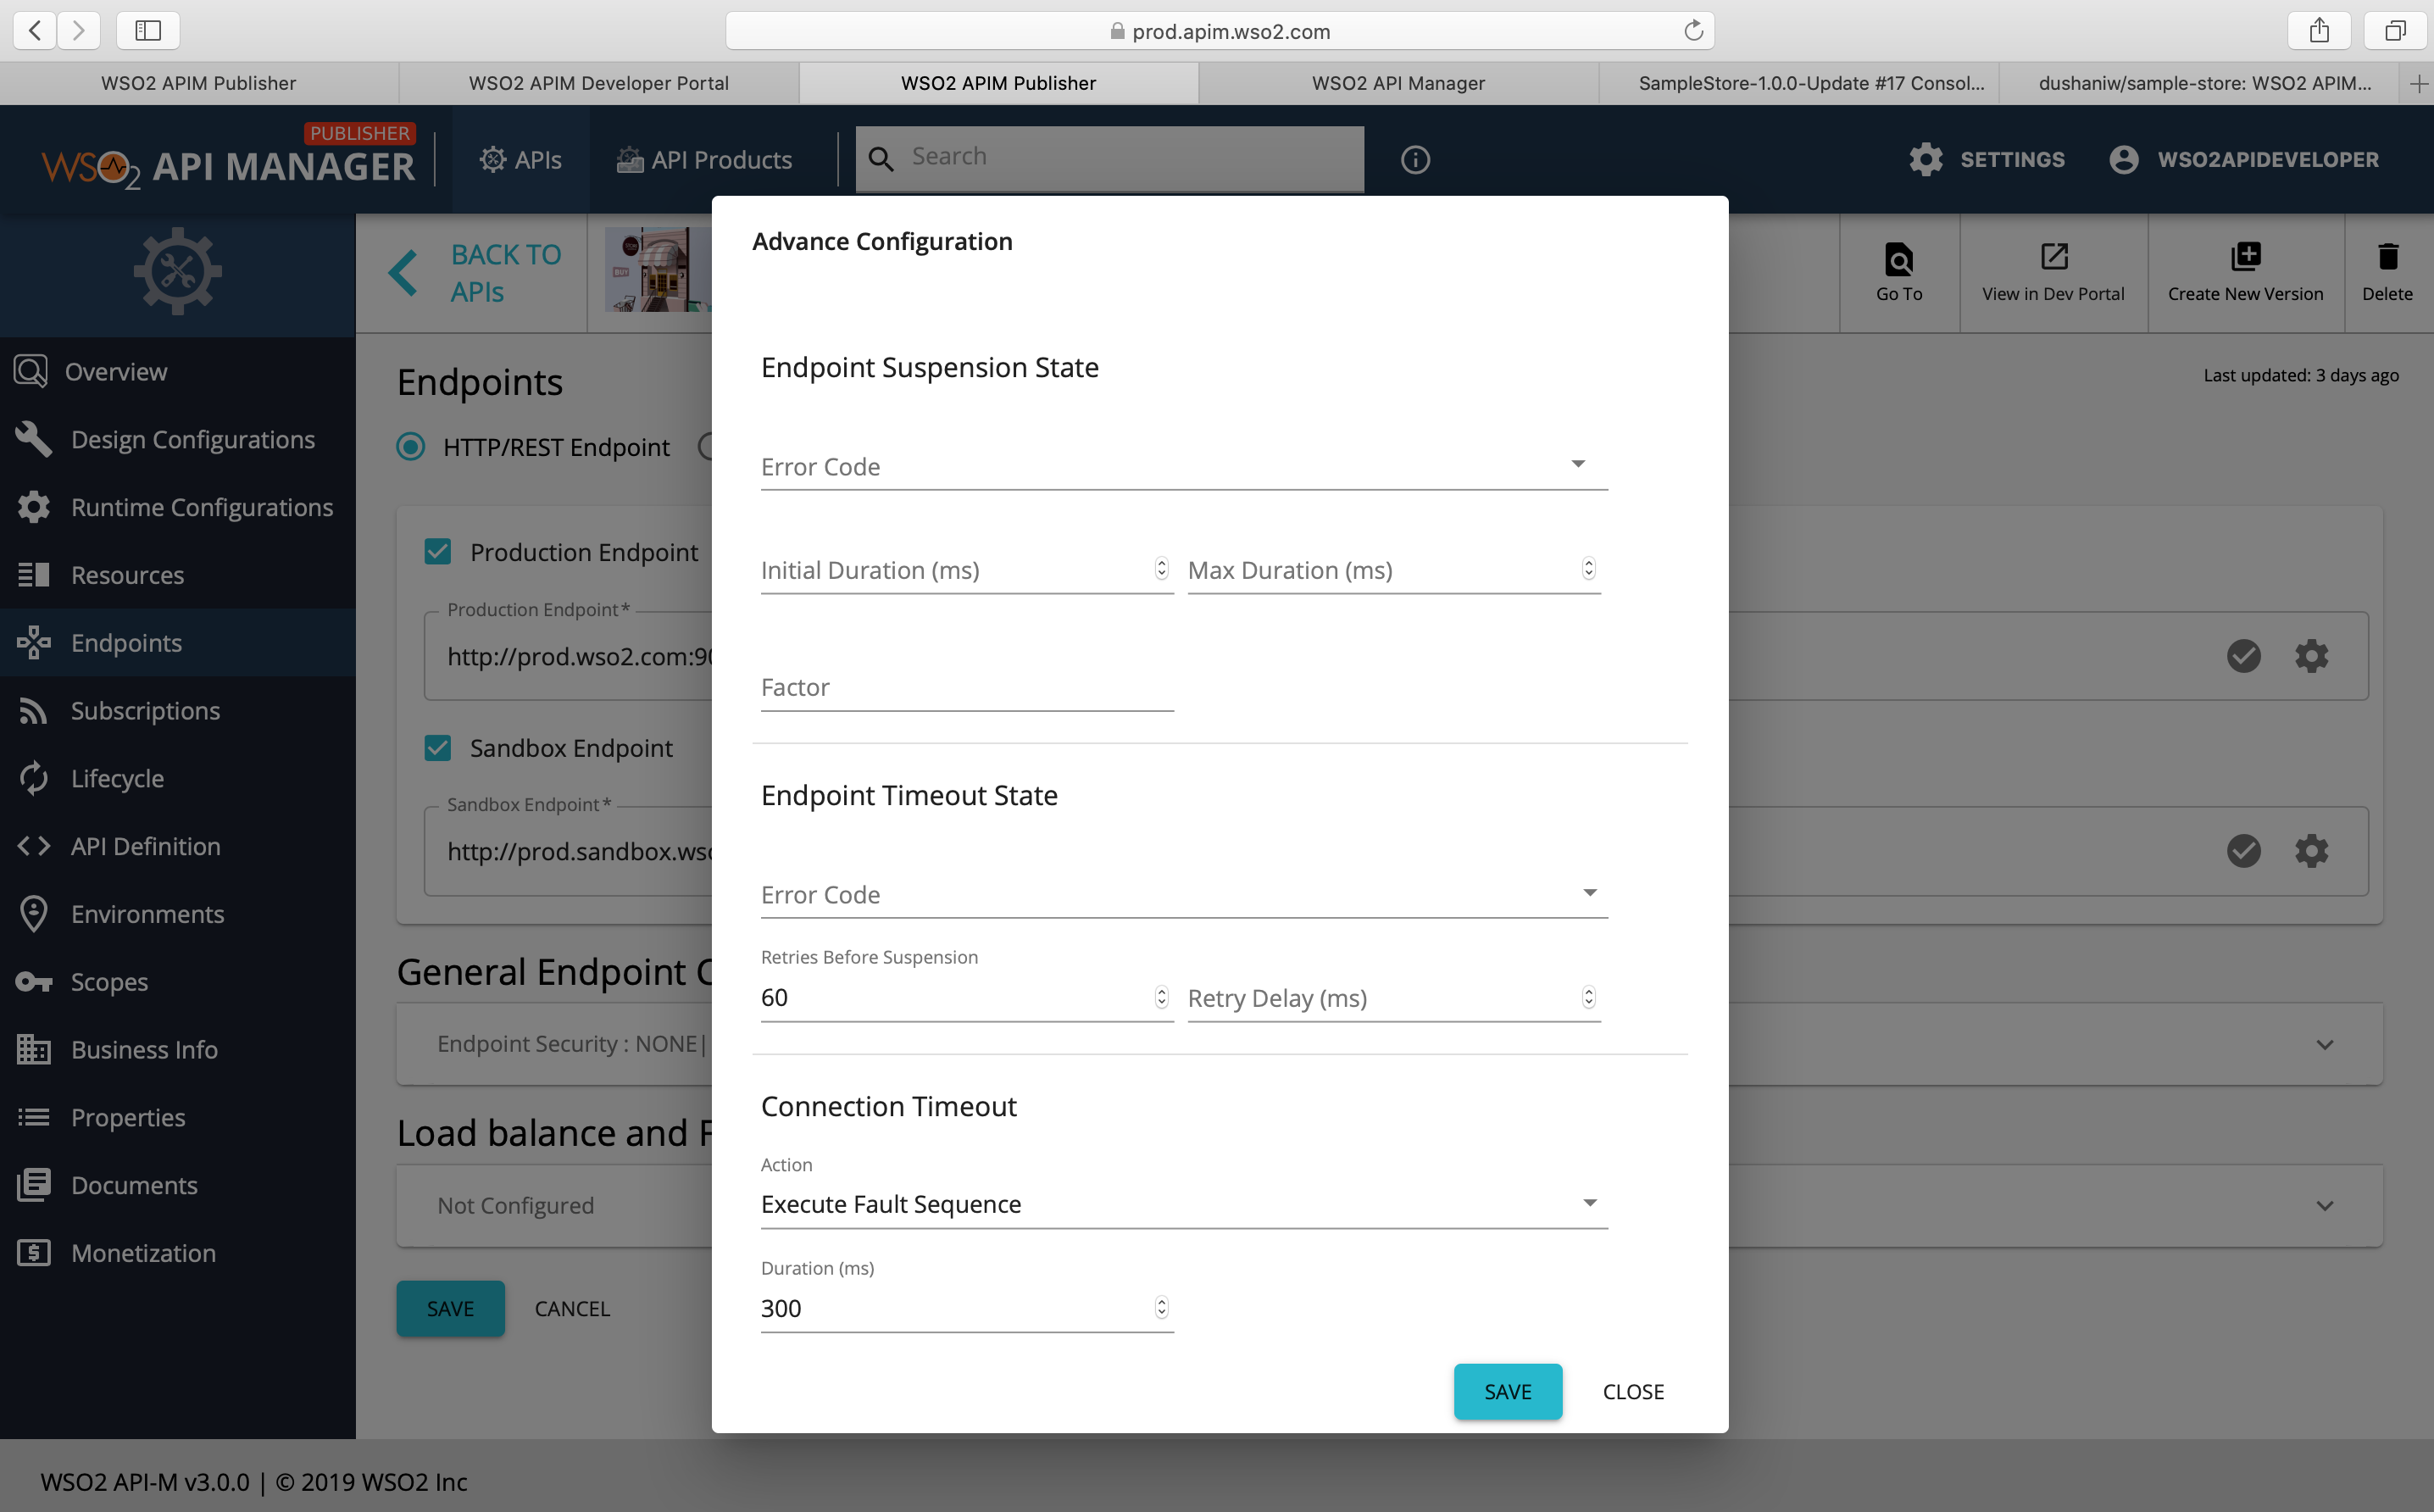
Further, if you go and check the advanced endpoint configurations of the same API, you can see the retry timeout is updated to 80 and 60 milliseconds accordingly.

You have successfully created a basic CI/CD pipeline using Jenkins as the CI tool and GitHub as the SCM tool, to create and deploy an API using the API/Dev first approach with WSO2 API Management.
Top