Creating Custom Widgets
In addition to already available widgets in the analytics dashboards, you can implement your own custom widget and use them across the dashboards.
A widget in the Analytics dashboard is a ReactJS component that can be used to visualize information. A widget can have any static or interactive visualizations such as charts, tables, filters with drill-down and inter widget communication capabilities.
In order to identify a particular ReactJS component as a widget by the dashboard, it needs to register itself as a widget in the portal.
WSO2 API-M Analytics has a widget generator tool to automatically generate the widget skeleton based on the user preferences that are provided via the command-line tool.
Follow the instructions below to create a custom widget:
Let’s assume the following.
- You need to create a custom widget named
APIMApiTraffic. - The widget is a subscriber widget.
- The widget uses
SiddhiDataProviderto retrieve the data.
Step 1 - Create a custom widget
Follow the instructions below to create a custom widget named APIMApiTraffic that can retrieve the published data:
-
Navigate to the
<API-M_ANALYTICS_HOME>/wso2/tools/generator-widgetdirectory and issue the following command to initialize the widget generator.
Hereafter, the above directory will be referred to asnpm run init<TOOL_HOME>. -
Open a new terminal in
<TOOL_HOME>directory and issue the following command to generate the widget template.
You will be asked to provide the widget name and the widget heading.npm run createwidget--widgettype:subscriber--dataprovider:SiddhiDataProvider -
Enter the widget name as
APIMApiTrafficand widget heading asTotal Traffic.Based on the user preferences, the widget skeleton will be created inside the
<TOOL_HOME>/widgetTemplatesdirectory, and the relevant dependencies will be installed in the<TOOL_HOME>/widgetTemplates/APIMApiTrafficdirectory, which will be hereafter referred to as<WIDGET_ROOT>.The following file structure will be created inside the
<WIDGET_ROOT>directory.APIMApiTraffic ├── src │ ├── resources │ │ └──widgetConf.json │ └── APIMApiTrafficWidget.jsx ├── package.json └── webpack.config.jsClick here for descriptions of the files in the Widget directory
The following section describes the files that are available in the
<WIDGET_ROOT>directory.- Package.json Package.json file holds metadata relevant to the widget. This file is used to give information to npm that allows it to identify the widget as well as handle the dependencies.
Dependency Version Description @wso2-dashboards/widget^1.4.0WSO2 Dashboard Component @material-ui/core^3.9.0To use react components from material-ui library @material-ui/icons^3.0.2To use icons from material-ui library React^16.7.0Functionality necessary to define React components react-dom^16.7.0Serves as the entry point to the DOM and server renderers for React react-custom-scrollbars^4.2.1To wrap the content with the custom scroll component rimraf^2.6.3Provides the Unix command rm -rfvictory^31.0.2Components for modular charting and data visualization -
widgetConf.json
This contains the meta information of the widget such as widget ID, widget name and configurations. Following are the main configurations included in the
widgetConf.jsonfile.-
pubsub- To declare whether the widget is a publisher or subscriber in the publisher-subscriber concept.Note
The analytics dashboard allows inter-widget communication via publisher/subscriber model. In the publisher/subscriber approach the publisher or the sender sends messages without specifically targeting a subscriber or a receiver. The receiver individually declares the interest in one or more messages published by a particular publisher or set of publishers.
-
providerConfig- To declare the data source and the queries from which the data is fetched. You have the ability to write many queries here and select the specific query in runtime, and also you can use query templates in the default query and assemble it in runtime. -
options- Used to integrate the header removing facility to widgets.
-
-
Webpack.config.js
Webpack.config.jsis basically used to configure the entry point and the output result directory of the widget. By default, it will assume that the entry point of your widget issrc/indexand will output the result indist/main.jsminified and optimized for production. Furthermore, below properties are included in theWebpack.config.jsfile- context : The Base directory to resolve entry points and loaders.
- entry : Application execution starting point.
- output : options related to how webpack emits results.
- module : configuration regarding modules.
- plugins : Used to customize the webpack build process in a variety of ways.
-
Start a node development environment and create a Symlink.
Issue the following commands in the
<WIDGET_ROOT>directory to start a node development environment and create a symlink from<WIDGET_ROOT>directory to<ANALYTICS_HOME>/wso2/dashboard/deployment/web-ui-apps/analytics-dashboard/extensions/widgetsdirectory.npm run devNote
Creating a development environment and Symlink, will instantly update the changes to the UI. You do not need to restart the dashboard profile every time to see the changes.
-
Start the dashboard profile of the Analytics Server.
Note
If you have already started the dashboard profile, restart the dashboard profile to render the new widget to the dashboard.
-
Sign in to the Dashboard Portal and create a new dashboard.
For instructions on creating a new dashboard, see Creating New Dashboards.
-
You can view the newly created
APIMApiTrafficwidget in the widget listing panel of the Dashboard Designer. Drag and drop theAPIMApiTrafficwidget to the dashboard.Note
- The
APIMApiTrafficwidget is a subscriber widget and it retrieves published data. - To configure a publisher widget, drag and drop the
DateTimeRangePickerwidget to the same page.
- The
-
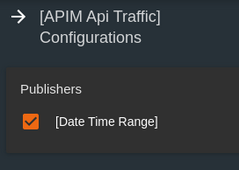
Click on the configuration icon in the top-left of the
APIMApiTrafficwidget.This will open the “Widget configurations” panel which lists all the publishers in the dashboard.
-
Select the Date time Range.
Step 2 - Define the database configurations for the widget
Follow the instructions below to define the database configurations for the APIMApiTraffic widget so that the traffic data will be retrieved from the database and displayed on the widget.
-
Navigate to the
<WIDGET_ROOT>/src/resourcesdirectory and replace the following configurations of thewidgetConf.jsonfile.Note
- Data providers are the sources from which information is fetched to be displayed in widgets, you can use either
SiddhiStoreDataProviderorRDBMSDataProvider. For more information on data providers, see Working with data providers. - In order to retrieve data , you must create a Siddhi app and a Siddhi query. For more information, see Siddhi query guide.
publishingIntervalrefers to the frequency with which you want the data provider to poll data from the Siddhi store. The time interval is specified in seconds.
- Data providers are the sources from which information is fetched to be displayed in widgets, you can use either
-
Navigate to the
<WIDGET_ROOT>directory and update the content of theAPIMApiTrafficWidget.jsxfile as follows to handle the data received from the query.-
Declare a new variable named
usageDataand add it to the state.
2. Modify thethis.state = { usageData: null, };queryNameparameter of theassembleQuerymethod asapiUsageQuery.dataProviderConfigs.configs.config.queryData.queryName = 'apiusagequery'; -
Update the
handleQueryResultsmethod as follows to format the retrieved data.handleQueryResults(message) { const { data } = message; if (data) { const usageData = []; data.forEach((dataUnit) => { usageData.push({ API: dataUnit[0] + '(' + dataUnit[1] + ')', Traffic: dataUnit[2], }); }); this.setState({ usageData }); } }
-
Step 3 - Create a traffic chart to display data
-
Navigate to
<WIDGET_ROOT>directory and create a functional component namedTrafficChart.jsx.Now, the directory structure inside the
<WIDGET_ROOT>directory will be as follows.APIMApiTraffic ├── dist ├── node_modules ├── src │ ├── resources │ ├── APIMApiTrafficWidget.jsx │ └── TrafficChart.jsx ├── package.json └── webpack.config.js -
Update the
TrafficChart.jsxas follows.import React from 'react'; import PropTypes from 'prop-types'; import { VictoryBar, VictoryChart, VictoryAxis } from 'victory'; export default function TrafficChart(props) { const { data } = props; const styles = { victorybar: { display: 'flex', flexWrap: 'wrap', data: { fill: 'rgb(0, 107, 201)', width: 5 }, }, victoryaxis: { axisLabel: { padding: 30, fill: '#fff', fontsize: '8px', }, }, }; const chartTheme = { axis: { style: { tickLabels: { fill: '#fff', fontSize: '8px', angle: 45, }, grid: { stroke: 'none' }, }, }, }; return ( <VictoryChart theme={chartTheme} domainPadding={{ x: 30 }} maxDomain={{ x: 5 }} height={245} > <VictoryBar barWidth={6} cornerRadius={{ topRight: 5 }} style={styles.victorybar} animate={{ duration: 1000, onLoad: { duration: 500 }, }} data={data} x='API' y='Traffic' /> <VictoryAxis label='Api Name' style={styles.victoryaxis} /> <VictoryAxis dependentAxis label='Total Traffic' style={styles.victoryaxis} /> </VictoryChart> ); } TrafficChart.propTypes = { data: PropTypes.instanceOf(Object).isRequired, themeName: PropTypes.string.isRequired, };Note
Victory JSis a React JS library for modular charting and data visualization. You can find the required information about Victory JS in the official Victory JS](https://formidable.com/open-source/victory/) documentation. In order to create charts usingVictory JSyou need to install theVictory JSas a dependency to the widget.Follow the steps mentioned below to install
Victory JSas a dependency:- Navigate to
<WIDGET_ROOT>directory and addVictory JSas a dependency to thepackage.jsonfile.
"dependencies": { "victory": "^31.0.2" }, - Issue the following command to install the dependency.
npm install
- Navigate to
-
Modify the
APIMApiTrafficWidget.jsxfile as shown below to pass the Traffic data to theTrafficChart.jsxfile.import TrafficChart from './TrafficChart'; class APIMApiTrafficWidget extends Widget { render() { const { usageData } = this.state; return ( <TrafficChart data={usageData} /> ); } } -
Build the newly created widget.
This will permanently deploy the widget.
npm run build -
Add the newly created widget to the Analytics Dashboard by selecting it from the widget listings.
-
Refresh the dashboard to view the changes.
The widget will appear on the dashboard.