Configuring Identity Server as External IDP using OIDC
WSO2 API Manager uses the OpenID Connect Single Sign-On (OIDC SSO) feature by default. This document explains how to connect WSO2 Identity Server (or WSO2 IS-KM) as a third party Identity Provider to API-Manager.
Prerequisites
-
Download the API Manager 3.1.0 distribution.
- Access the previous WSO2 API Manager related releases.
- Select version 3.1.0.
- Download the API Manager.
-
Download the Identity Server 5.10.0 distribution from https://wso2.com/identity-and-access-management/.
Tip
For testing purposes if you want to run both the WSO2 API Manager and WSO2 Identity Server on the same server, then you can go to the
<IS_HOME>/repository/conf/deployment.tomlfile and offset the port by 1 by adding the following configuration:[server] offset=1 -
Start the servers using the following commands:
wso2server.bat --runsh wso2server.sh
Step 1 - Configure the Identity Server
Step 1.1 - Configure the Service Provider
-
Sign in to the Management Console of IS server by browsing the following URL:
https://{is-ip}:9444/carbon -
Navigate to the Service Providers section under Main → Identity and create a new Service Provider.
-
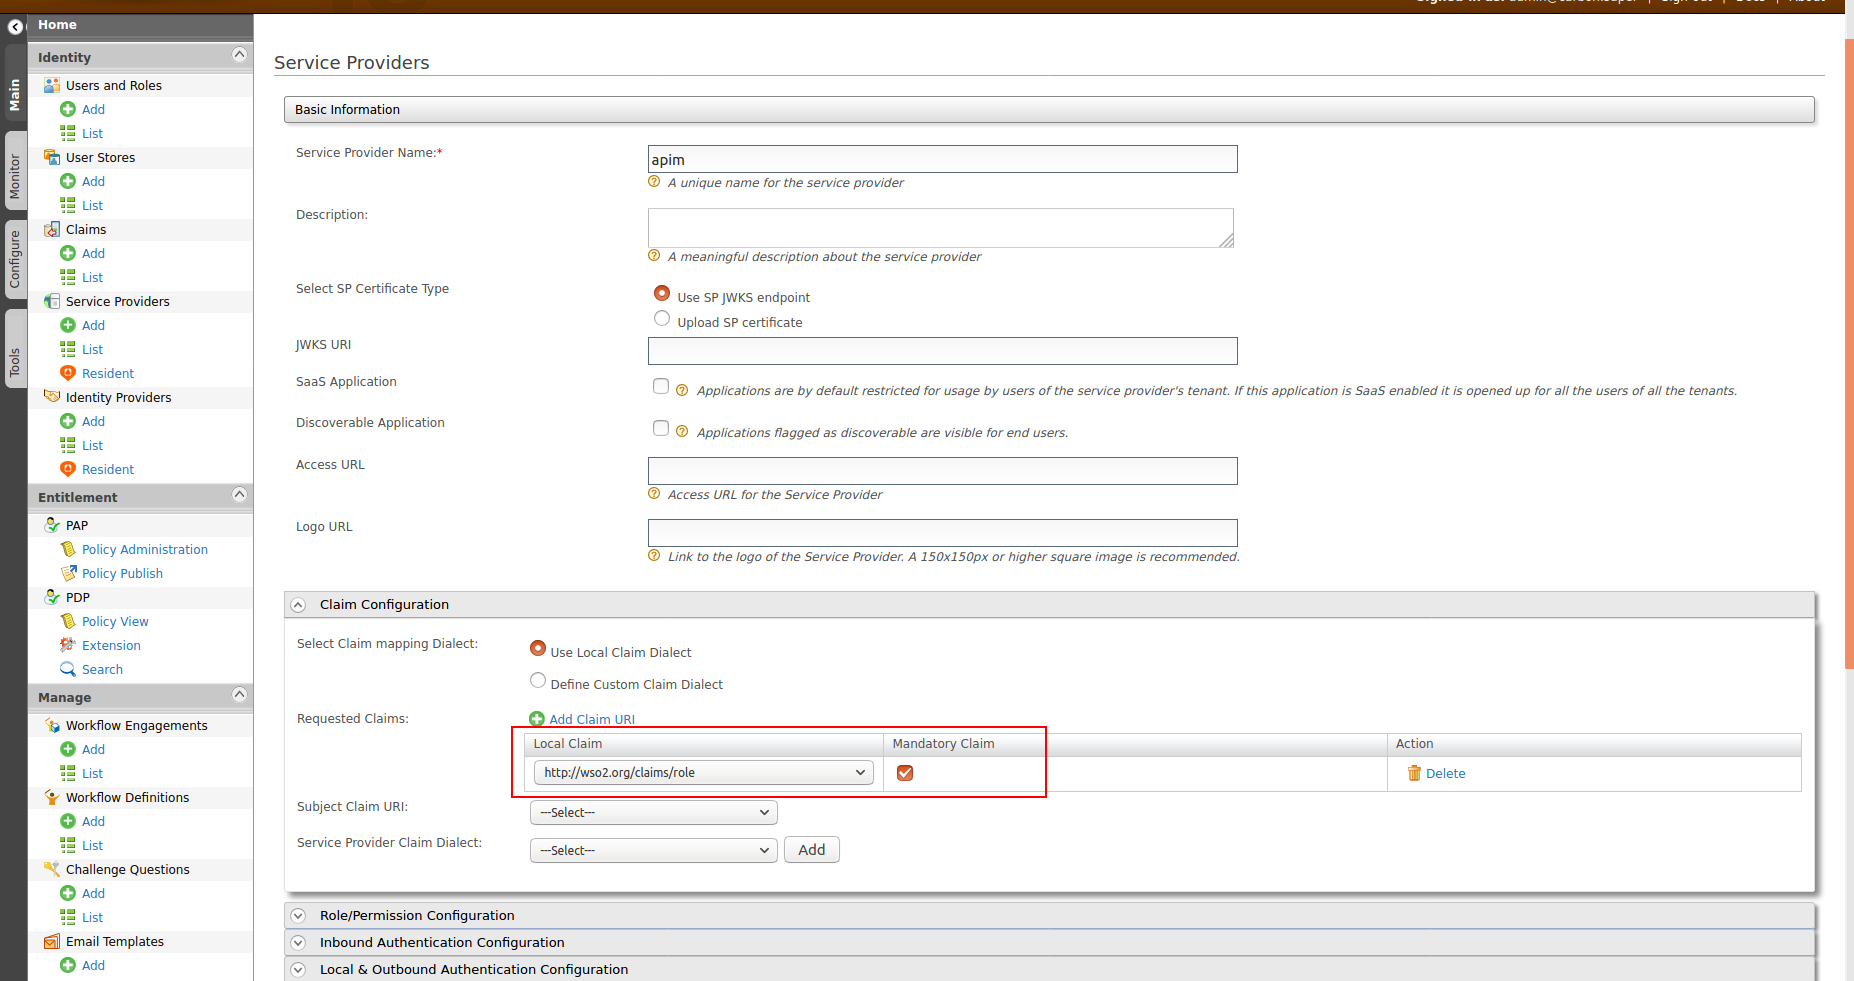
Edit the created Service Provider:
-
Expand the Claim Configuration section and add http://wso2.org/claims/role as a mandatory claim.
-
Expand the Inbound Authentication Configuration section and configure the OAuth/OpenID Connect Configuration with the callback URL -
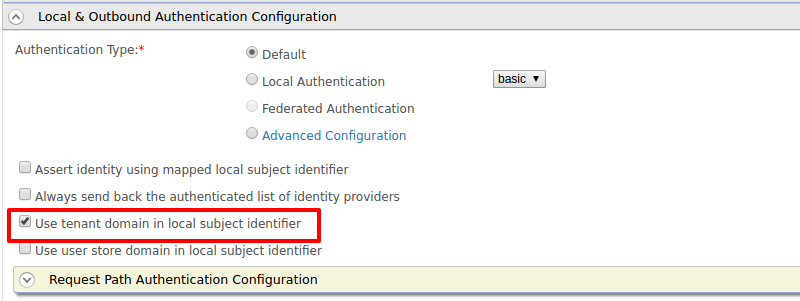
https://{apim-ip}:9443/commonauthEnable a tenant-specific SSO for the Publisher and Developer Portal
To enable a tenant-specific SSO with IS 5.10.0 for Publisher and the Developer Portal, enable the Use tenant domain in local subject identifier option under the Local & Outbound Authentication Configuration section.
-
Update the Service Provider configurations.
In Multi-tenanted environments
Carry out the instruction given below for all the tenants to be able to sign in to the API-M Web applications in a multi-tenanted environment.
- Click the SaaS Application option that appears after registering the Service Provider.
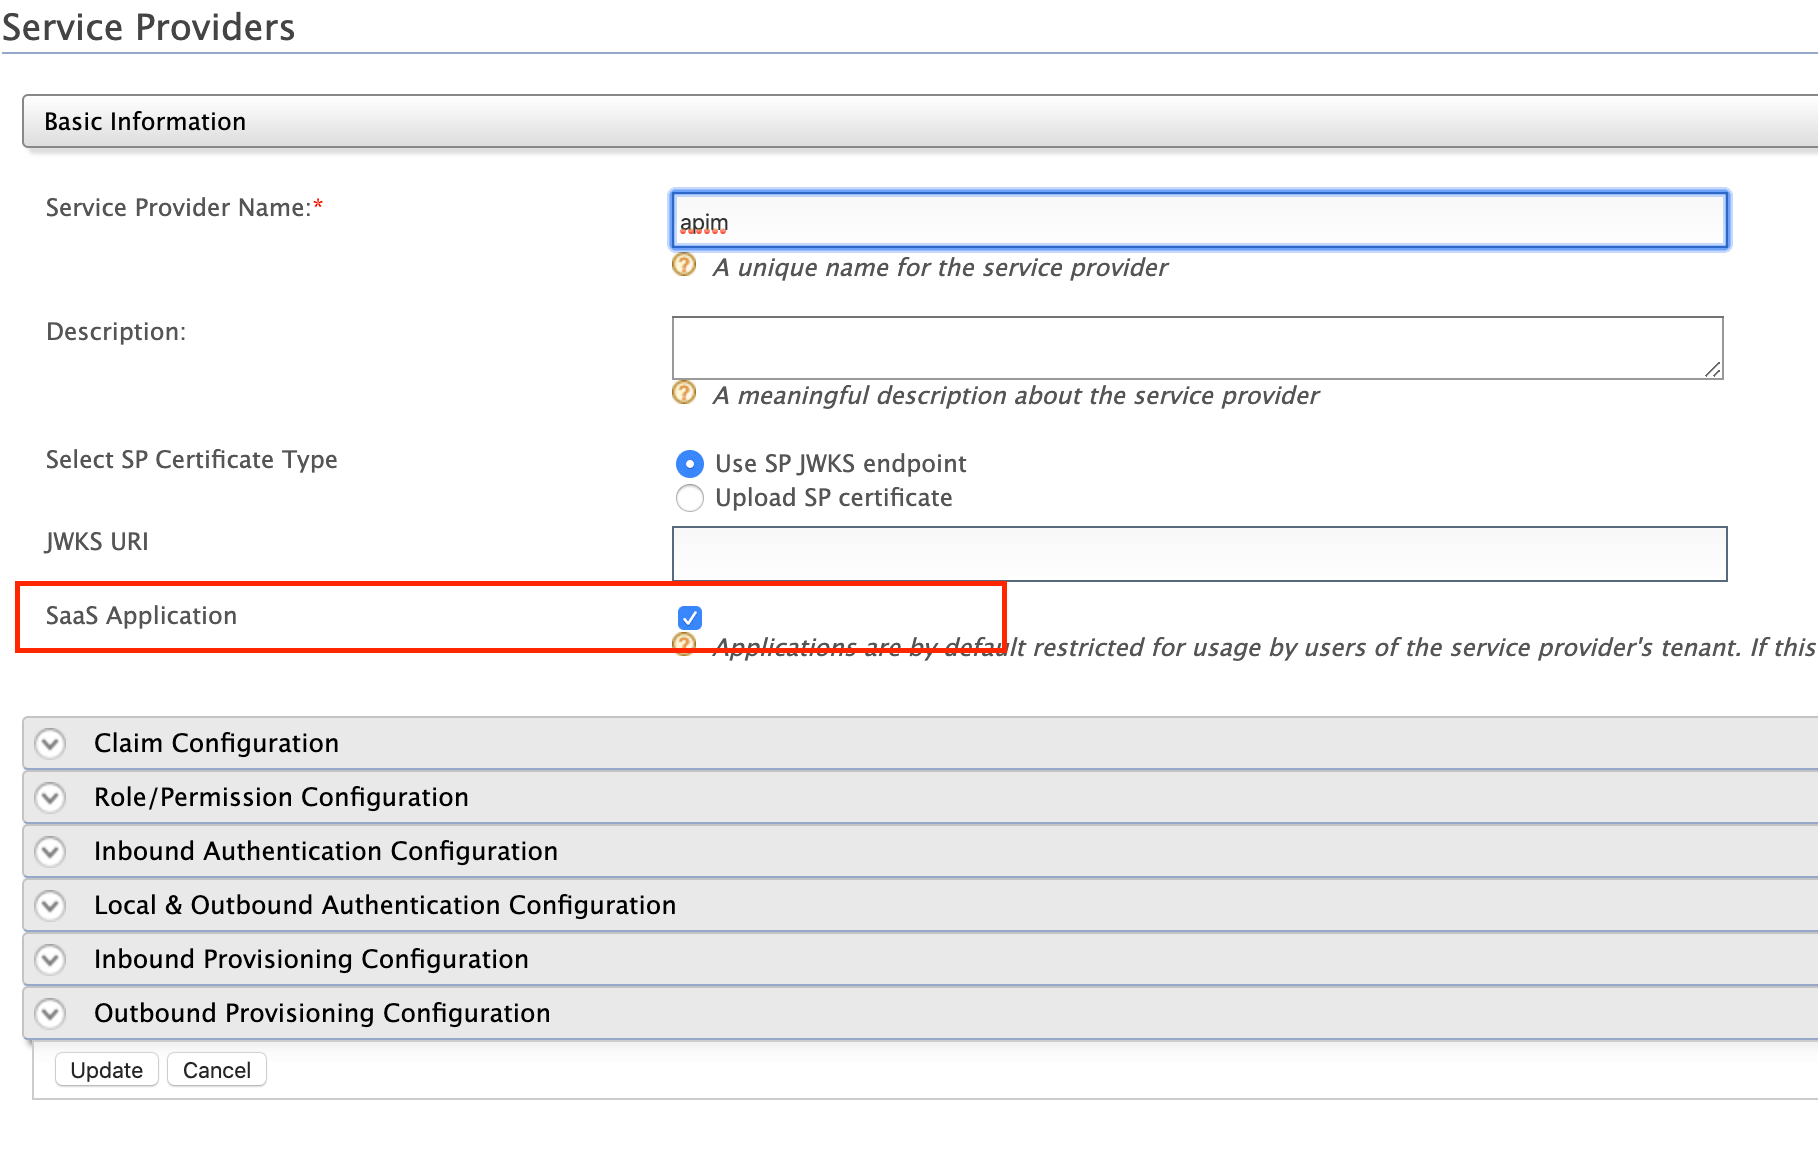
If you do not select the SaaS Application option, only users in the current tenant domain will be allowed to sign in to the portals. You will need to register separate Service Providers for portals from each tenant.
-
Step 1.2 - Create users and roles
-
Create the required users and roles in Identity Server. Assume that the following users are created in the Identity Servers with the given roles.
User Role api_publisher publisher_role api_user user_role
Step 2 - Configure the API Manager
Step 2.1 - Configure the Identity Provider
-
Sign in to the Management Console of API Manager.
https://{apim-ip}:9443/carbon -
Navigate to the Identity Providers section under Main → Identity and create a new Identity Provider.
-
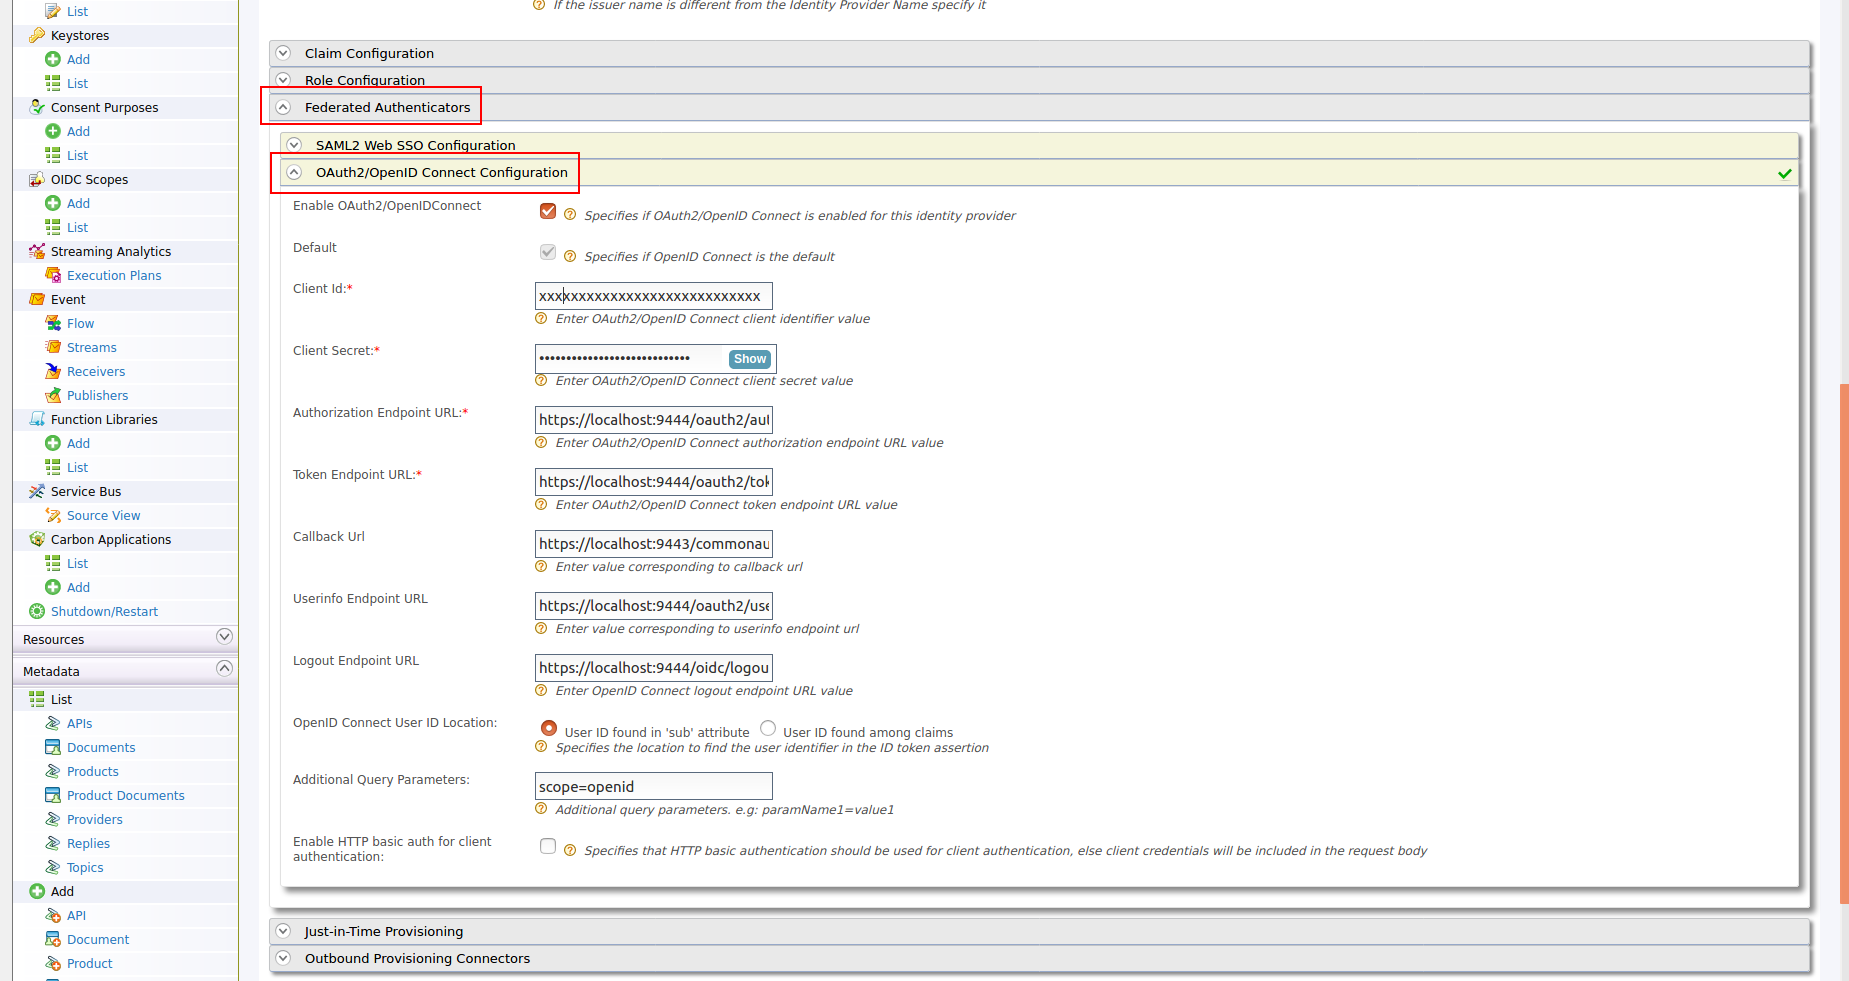
Expand the Federated Authenticators section and add the following configurations under the OAuth2/OpenIDConnect Configuration section:
Enable OAuth2/OpenIDConnect True Client Id Client ID of the Service Provider created in the Identity Server. Client Secret Client Secret of the Service Provider created in the Identity Server. Authorization Endpoint URL https://is.wso2.com:9444/oauth2/authorizeToken Endpoint URL https://is.wso2.com:9444/oauth2/tokenCallback Url https://apim.wso2.com:9443/commonauthUserinfo Endpoint URL https://is.wso2.com:9444/oauth2/userinfoLogout Endpoint URL https://is.wso2.com:9444/oidc/logoutThe following image shows the sample values for the OAuth2/OpenIDConnect Configurations:
-
Enable Just-in-Time Provisioning to provision the users in API Manager:
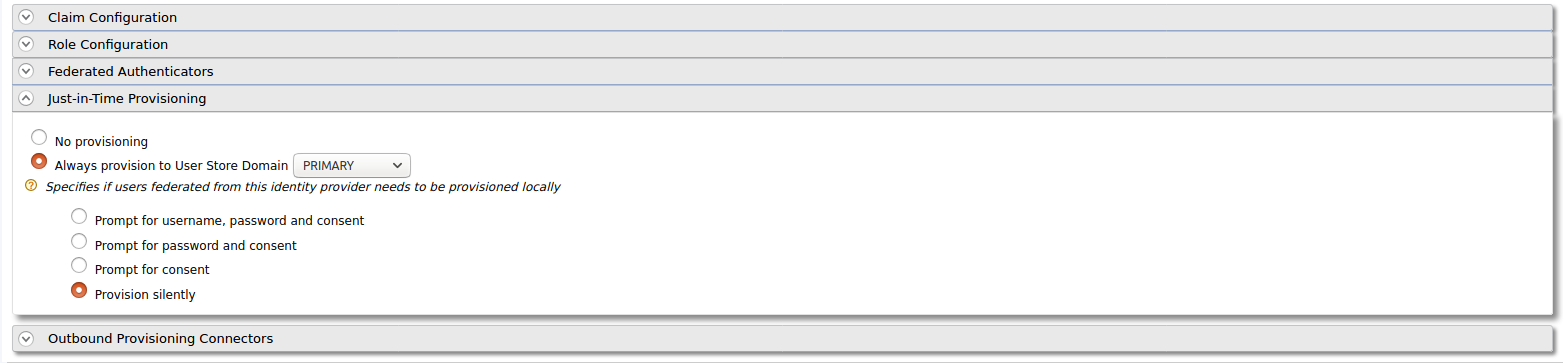
-
Add the following role mapping under the Role Configuration section:
Identity Server Roles Roles Mapped in API Manager user_role Internal/Subscriber publisher_role Internal/publisher 
Tip
Instead of using the default internal roles, you can also create new roles in API Manager and map it to the provisioned users.
-
Step 2.2 - Configure the Service Provider
-
Navigate to the Service Providers section and list the Service Providers.
There are two Service Providers created for the Publisher Portal and Developer Portal that are named as
apim_publisherandapim_devportal. Edit theapim_publisherService Provider.Attention
You need to sign in to the Developer Portal and Publisher at least once for the two Service Providers to appear because it is created during the first login.
-
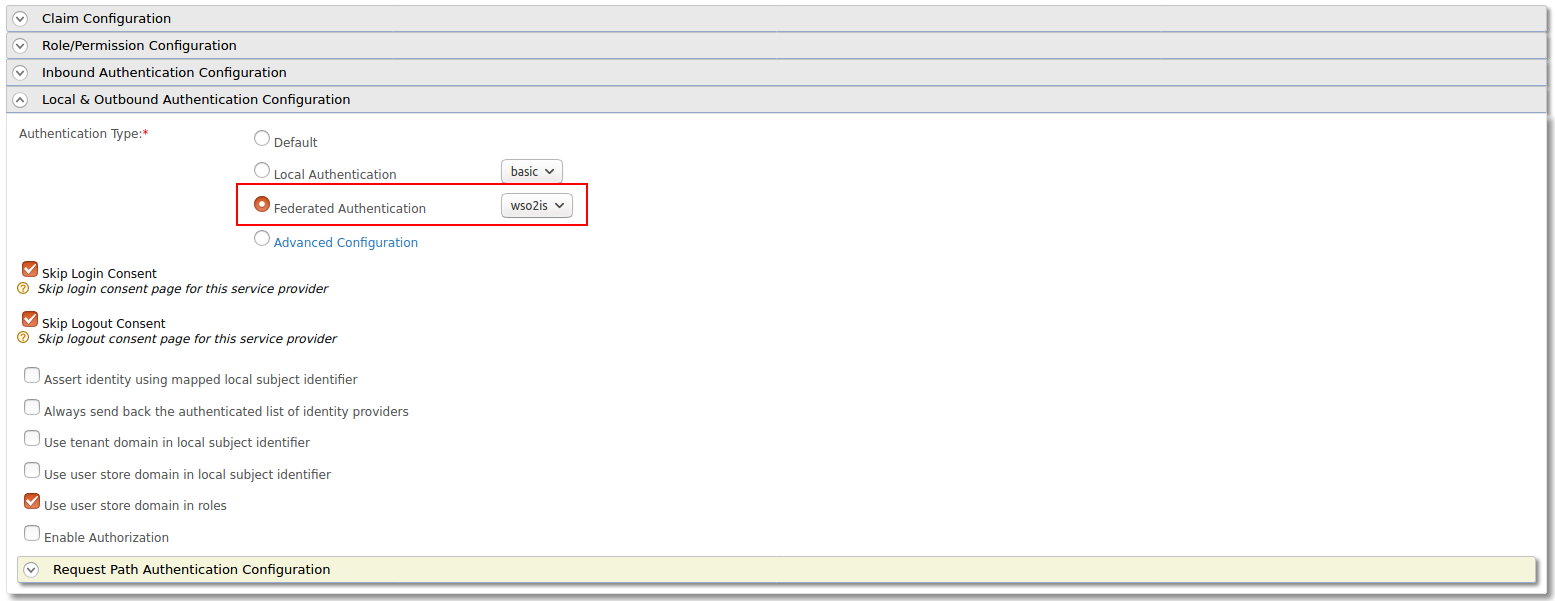
Expand the Local & Outbound Authentication Configuration section, select Federated Authentication as Authentication Type, select the name of the Identity Provider you created in Step 2.1, and click Update.
-
Repeat the same step for the
apim_devportalService Provider as well.
Now you will be able to sign in to Publisher and Developer Portal using the users in WSO2 Identity Server.
Troubleshooting
When using the Identity Server as an external IdP, the following error can be observed in API Manager, when signing in to the Portals.
invalid_request, The client MUST NOT use more than one authentication method in eachThis is because the MutualTLS authenticator is enabled by default from IS 5.8.0 onwards. As the OIDC specification does not allow the use of more than one authentication, the login fails with the above error. In order to resolve this issue, add the following configuration in the deployment.toml resides in <IS_HOME>/repository/conf directory to disable the MutualTLS authenticator in IS.
[[event_listener]]
id = "mutual_tls_authenticator"
type = "org.wso2.carbon.identity.core.handler.AbstractIdentityHandler"
name = "org.wso2.carbon.identity.oauth2.token.handler.clientauth.mutualtls.MutualTLSClientAuthenticator"
order = "158"
enable = false