Configuring SSO for Admin Portal using SAML
This document explains how to connect WSO2 Identity Server as a third-party Identity Provider to WSO2 API Manager using SAML 2.0. Using this feature, you can configure SSO with SAML 2.0 for Admin Portal.
Pre-requisites
-
Download the API Manager distribution from https://wso2.com/api-management/.
-
Download the Identity Server distribution from https://wso2.com/identity-and-access-management/.
Info
To use WSO2 IS as the Key Manager, download the WSO2 Identity Server 5.10.0 as a Key Manager pack, with pre-packaged Key Manager features as follows:
- Access the previous WSO2 API Manager related releases.
- Select version 3.1.0.
- Click on the Identity Server as a Key Manager download option.
Step 1 - Configure the userstore
-
Configure the user store(s) (if you have not done so already).
Follow the instructions in Configuring User Stores.
Let's use JDBC userstore (MySQL) and share it between WSO2 Identity Server and WSO2 API Manager.
-
Create a MySQL database (e.g.,
user_db) and run the<API-M_HOME>/dbscripts/mysql.sqlscript on it to create the required tables. -
Change the userstore type as
database_unique_idin the Identity Server by adding the following configuration in thedeployment.tomlfile, which is in the<IS-HOME>/repository/confdirectory.[user_store] type = "database_unique_id" -
Configure the primary userstore.
Add the following configuration in the
deployment.tomlfile.[database.user] type = "mysql" url = "jdbc:mysql://localhost:3306/user_db" username = "${username}" password = "${password}" -
Share the userstore with API Manager by adding the same configuration, which was defined in Step C) in the
deployment.tomlfile, which is in the<API-M_HOME>/repository/confdirectory. -
Copy the JDBC driver JAR file into the
<PRODUCT_HOME>/repository/components/libdirectory of both servers. -
Start the servers using the following commands:
wso2server.bat --runsh wso2server.sh
-
Step 2 - Configure the Identity Server
Step 2.1 - Configure the Service Provider
-
Sign in to the WSO2 IS Management Console.
https://{is-ip}:9444/carbon -
Navigate to the Service Providers section under Main → Identity and create a new Service Provider.
-
Edit the created Service Provider:
-
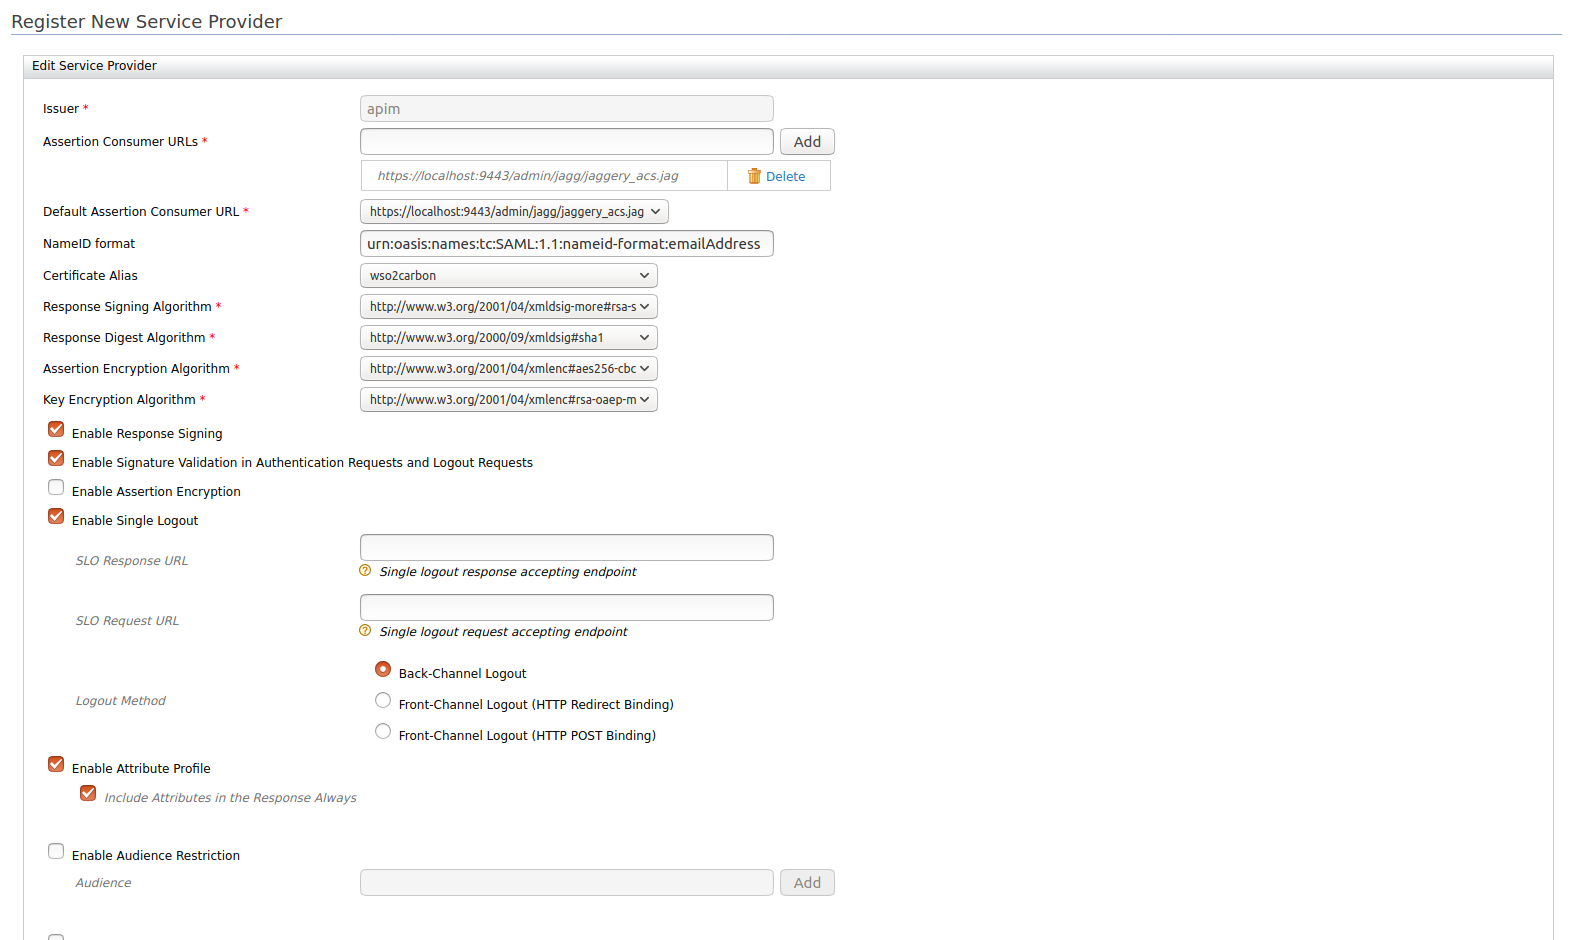
Expand the Inbound Authentication Configuration section and define the SAML2 Web SSO Configuration by providing the following information:
Issuer Specify the Issuer Assertion Consumer URLs https://{apim-ip}:9443/admin/jagg/jaggery_acs.jagResponse Signing Algorithm http://www.w3.org/2001/04/xmldsig-more#rsa-sha256Enable Response Signing true Enable Signature Validation in Authentication Requests and Logout Requests true Enable Single Logout true Enable Attribute Profile true Include Attributes in the Response Always true The following image shows the sample values for SAML2 Web SSO Configuration:
In multi-tenanted environments
Carry out the instruction given below for all the tenants to be able to sign in to the Admin Portal in a multi-tenanted environment.
- Click the SaaS Application option that appears after registering the service provider.
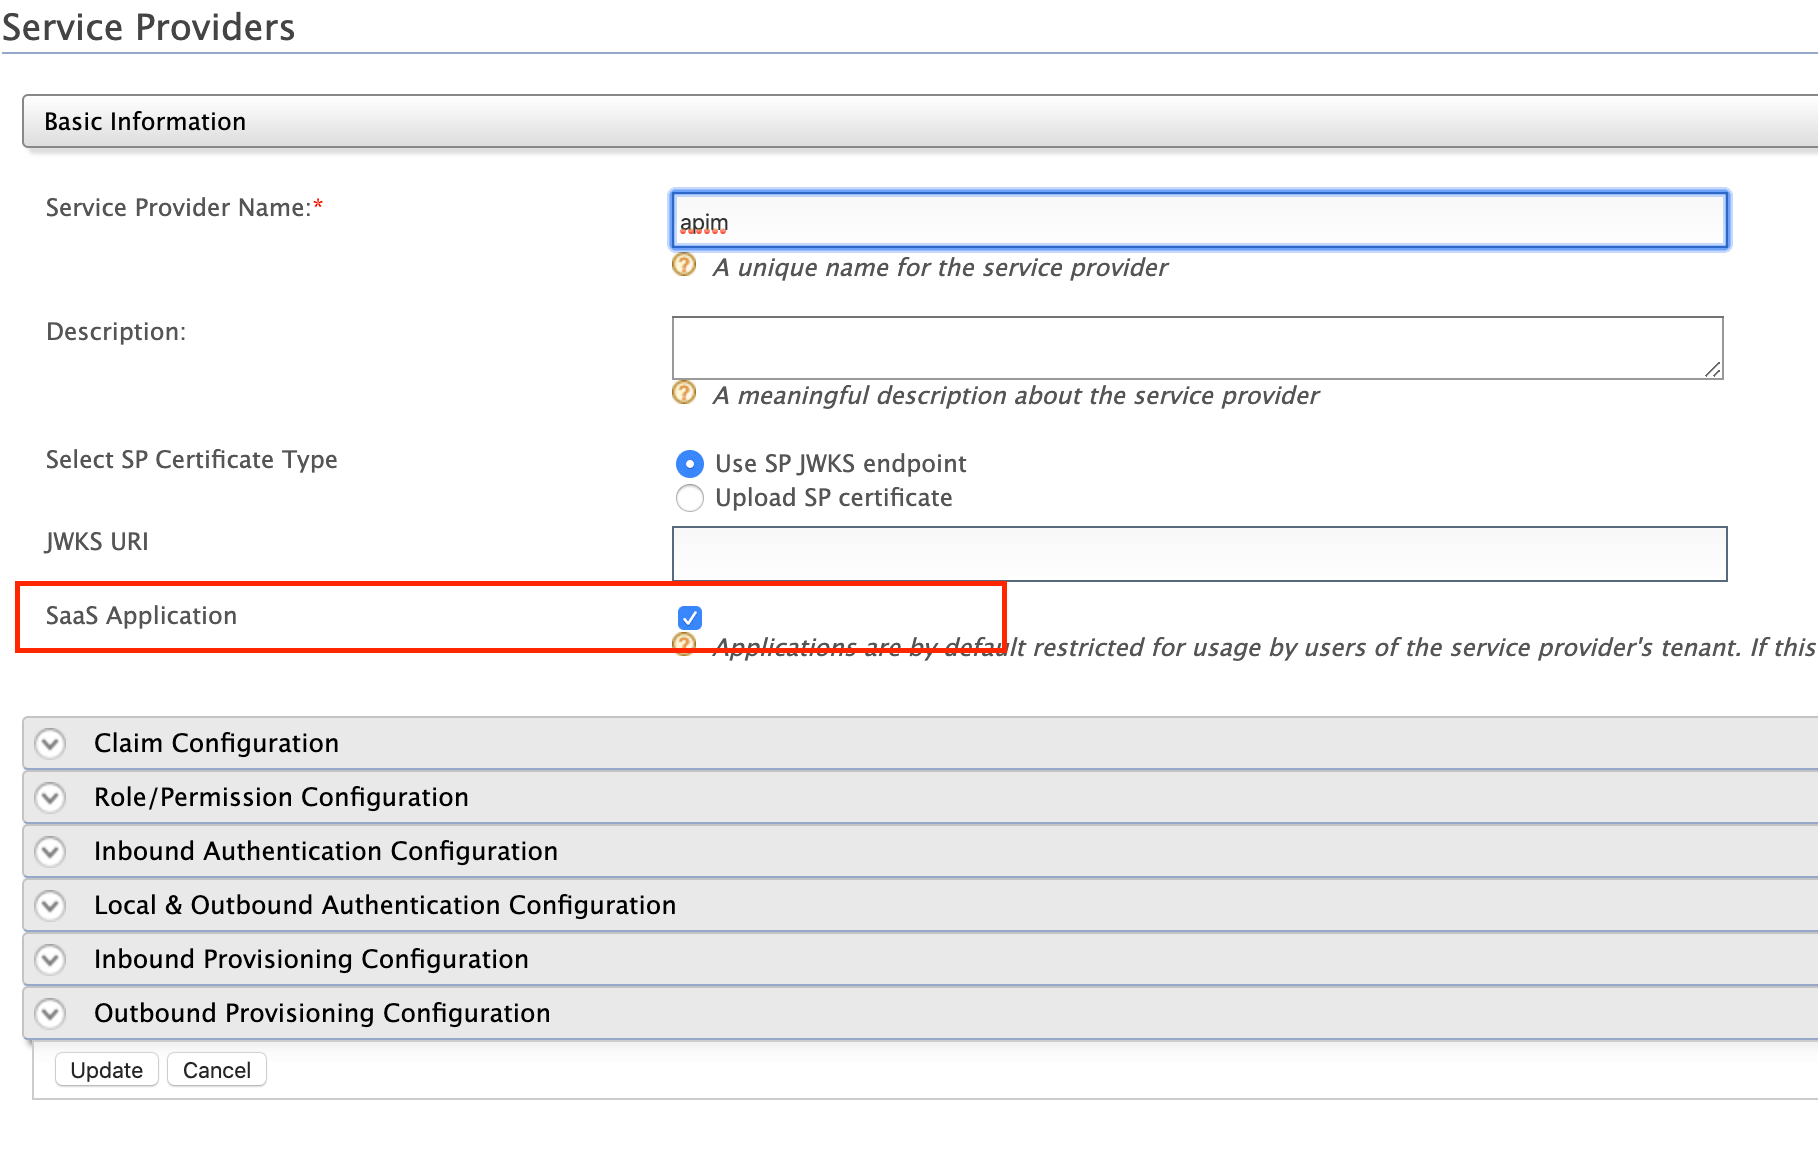
If you do not select the SaaS Application option, only users in the current tenant domain will be allowed to sign in to the portal. You will need to register separate service providers for portals from each tenant.
-
Register the Service Provider.
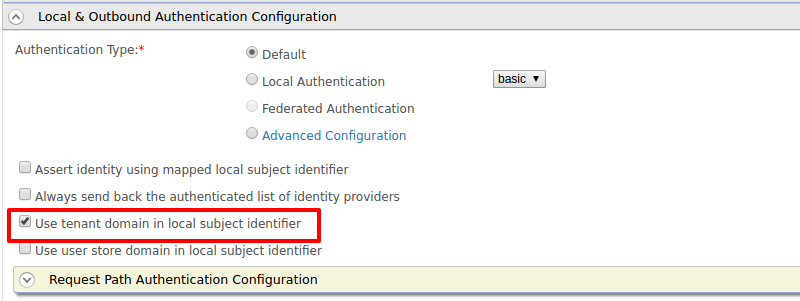
Enable a tenant-specific SSO for the Publisher and Developer Portal
To enable a tenant-specific SSO with IS 5.10.0, enable the Use tenant domain in local subject identifier option under the Local & Outbound Authentication Configuration section.
-
-
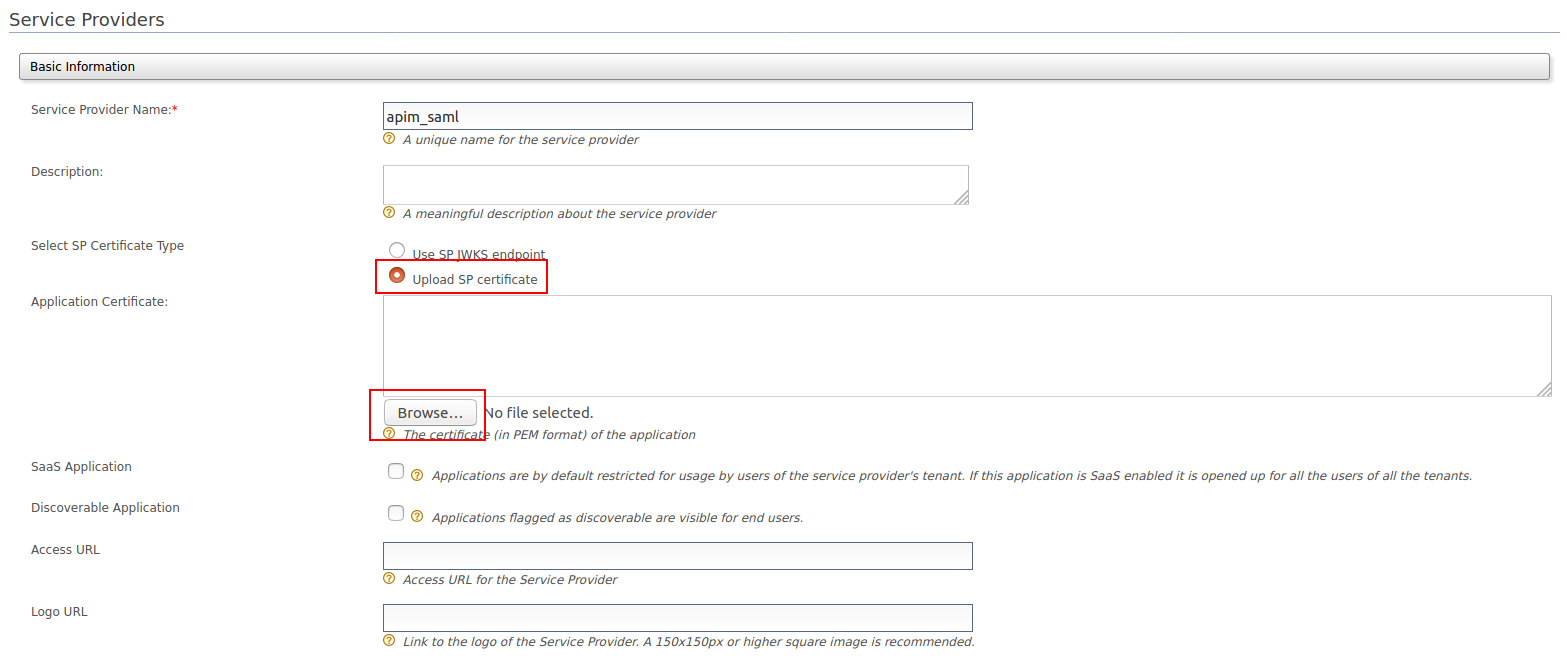
Upload the public certificate of the API Manager by selecting Select SP Certificate Type.
Step 3 - Configure the API Manager
Step 3.1 - Configure the Admin Portal as SAML 2.0 SSO Service Provider
Open the site.json file, which is in <API-M_HOME>/repository/deployment/server/jaggeryapps/admin/site/conf directory, and modify the following configurations found under the ssoConfiguration section.
| Parameter | Description |
|---|---|
| enabled | Set this value to true to enable SSO for the Admin app. |
| issuer | Specify the issuer value. It depends on the Issuer value defined in the Service Provider, which you created in the WSO2 Identity Server. |
| identityProviderURL | `https://{is-ip}:9444/samlsso` |
| keyStoreName | The keystore of the running IDP. As you use a remote instance of WSO2 IS here, you can import the public certificate of the IS keystore to WSO2 API-M and then point to the API-M keystore. |
| keyStorePassword | The password for the above keystore. |
| identityAlias | The alias that is given to the Identity Server's certificate. The default alias is wso2carbon |
Info
To configure an IDP initiated SSO, you have to include the following additional parameters in the ssoConfiguration section.
| Parameter | Description |
|---|---|
| idpInit | true |
| idpInitSSOURL | https://{is-ip}:9444/samlsso?spEntityID=${service-provider-name} |
| externalLogoutPage | https://{is-ip}:9444/samlsso?slo=true |
Sample configuration is given below:
"ssoConfiguration": {
    "enabled": "true",
    "issuer": "apim",
    "identityProviderURL": "https://localhost:9444/samlsso",
    "keyStorePassword": "xxxxxxxx",
    "identityAlias": "wso2carbon",
    "keyStoreName": "wso2carbon.jks",
    "verifyAssertionValidityPeriod": "true",
    "audienceRestrictionsEnabled": "true",
    "responseSigningEnabled": "true",
    "assertionSigningEnabled": "true",
    "assertionEncryptionEnabled": "false",
    "signRequests" : "true",
    "idpInit" : "false",
    "idpInitSSOURL" : "https://localhost:9444/samlsso?spEntityID=apim",
    "externalLogoutPage" : "https://localhost:9444/samlsso?slo=true",
    "loginUserNameAttribute" : ""
}
Attention
Even with SSO is enabled, if the users do not have sufficient privileges to access the Admin Portal, they will not be authorized to access the Admin Portal.
Info
To learn more about Single Sign-On with WSO2 Identity Server, see SAML 2.0 Web SSO in the WSO2 Identity Server documentation.