Configuring external IdP using OIDC for Multi Tenancy
WSO2 API Manager uses the OIDC Single Sign-On feature by default. This document explains how to connect WSO2 Identity Server (or WSO2 Identity Server as a Keymanager) as a third party Identity provider to API-Manager for multi tenant work flows.
Info
To use the multi-tenant SSO feature, you need to update your WSO2 API Manager pack to update level 4.5.0.63 or later.
Note
If do not require multi tenancy, you can follow this document: Configuring Identity Server as External IdP using OIDC
Prerequisites
- Download the API Manager distribution from https://wso2.com/api-management/.
-
Download the Identity Server distribution from https://wso2.com/identity-and-access-management/.
-
Start the servers using the following commands:
Configure the Identity Server
Step 1: Create new Organization
-
Sign in to the Management Console of WSO2 IS by browsing the following URL:
-
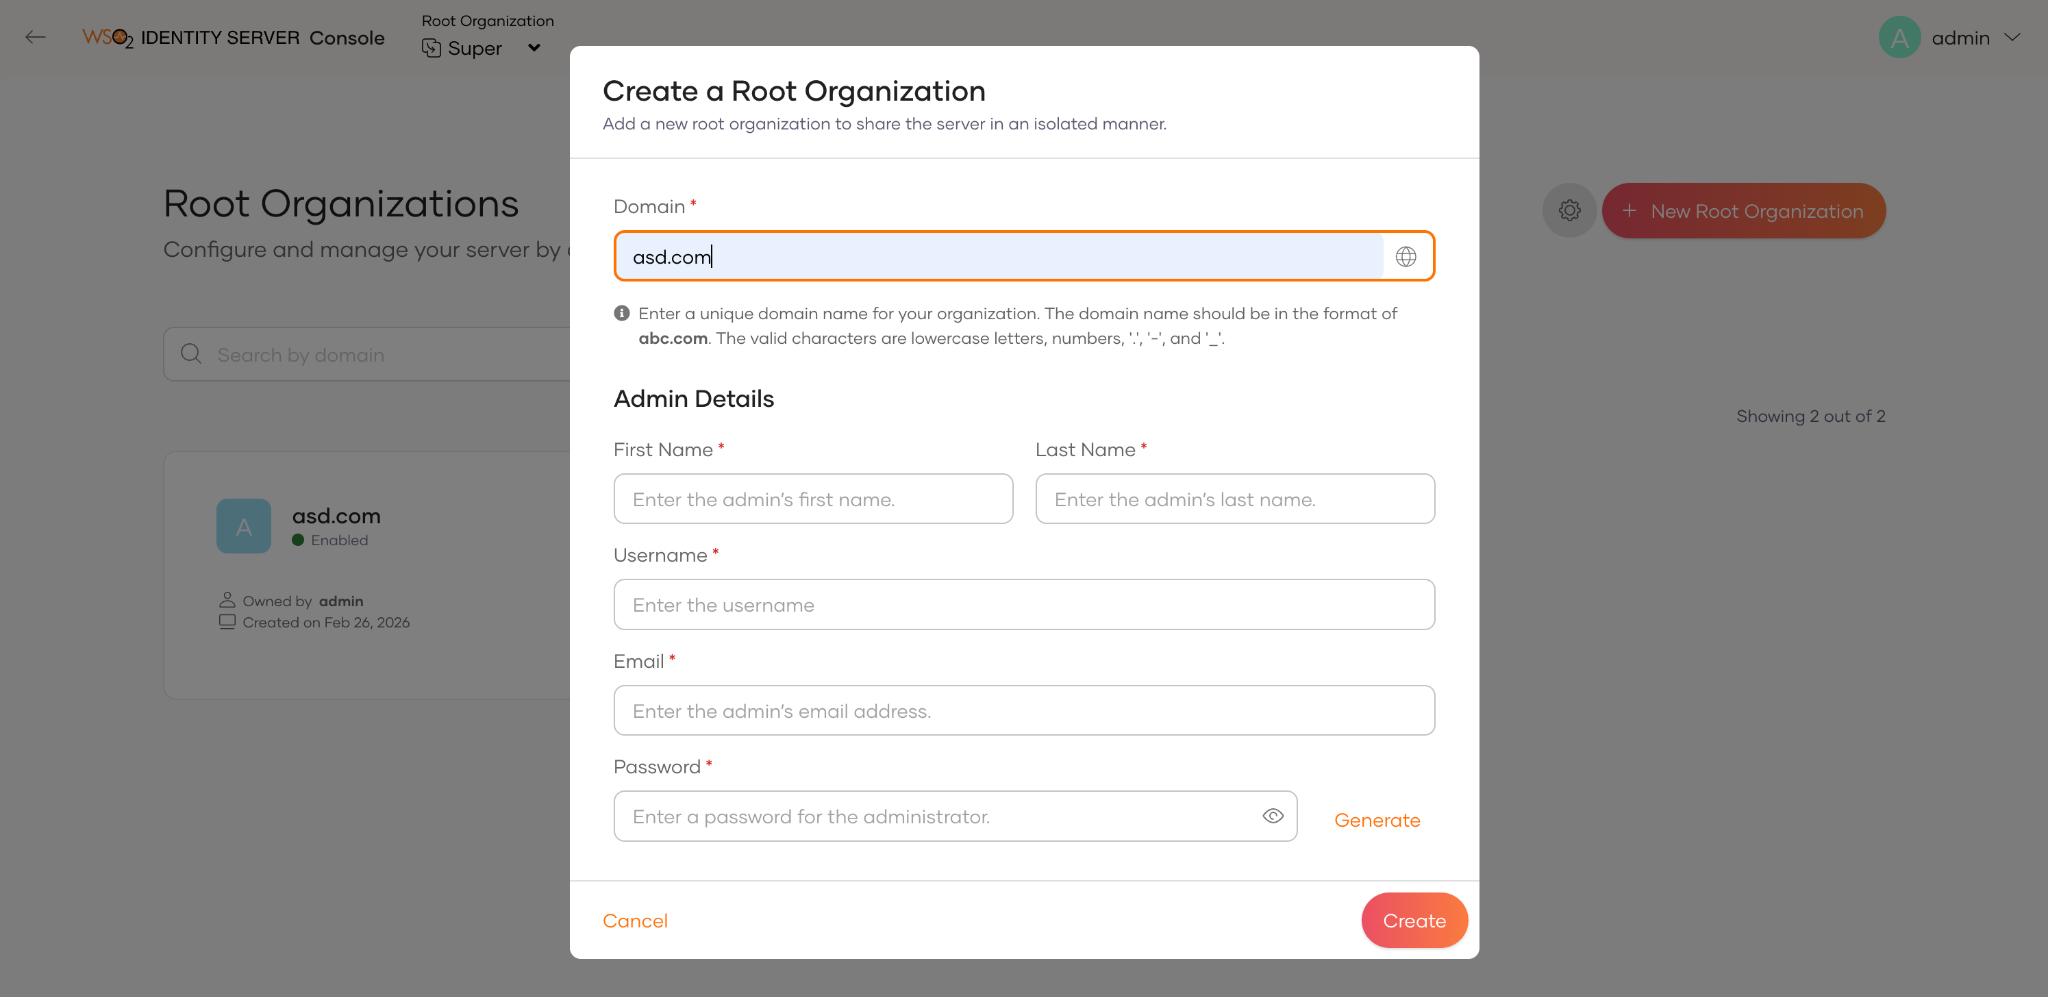
Click on Root Organization and click Manage Root Organization

-
Then click New Root Organization button and fill this form to create new organization
-
Log into the new organization. (https://localhost:9444/t/TENANT_DOMAIN/console)
Note
In this example, go to
https://localhost:9444/t/asd.com/console, whereasd.comis a sample tenant domain name. Replace it with your actual tenant domain.
Step 2: Configure the Service Provider
-
Create a Service Provider:
a. Go to Applications → New Application and select Traditional Web Application.
b. In the popup, provide the following details and click Create:
Protocol OpenID Connect Authorized Redirect URL https://localhost:9443/t/asd.com/commonauth 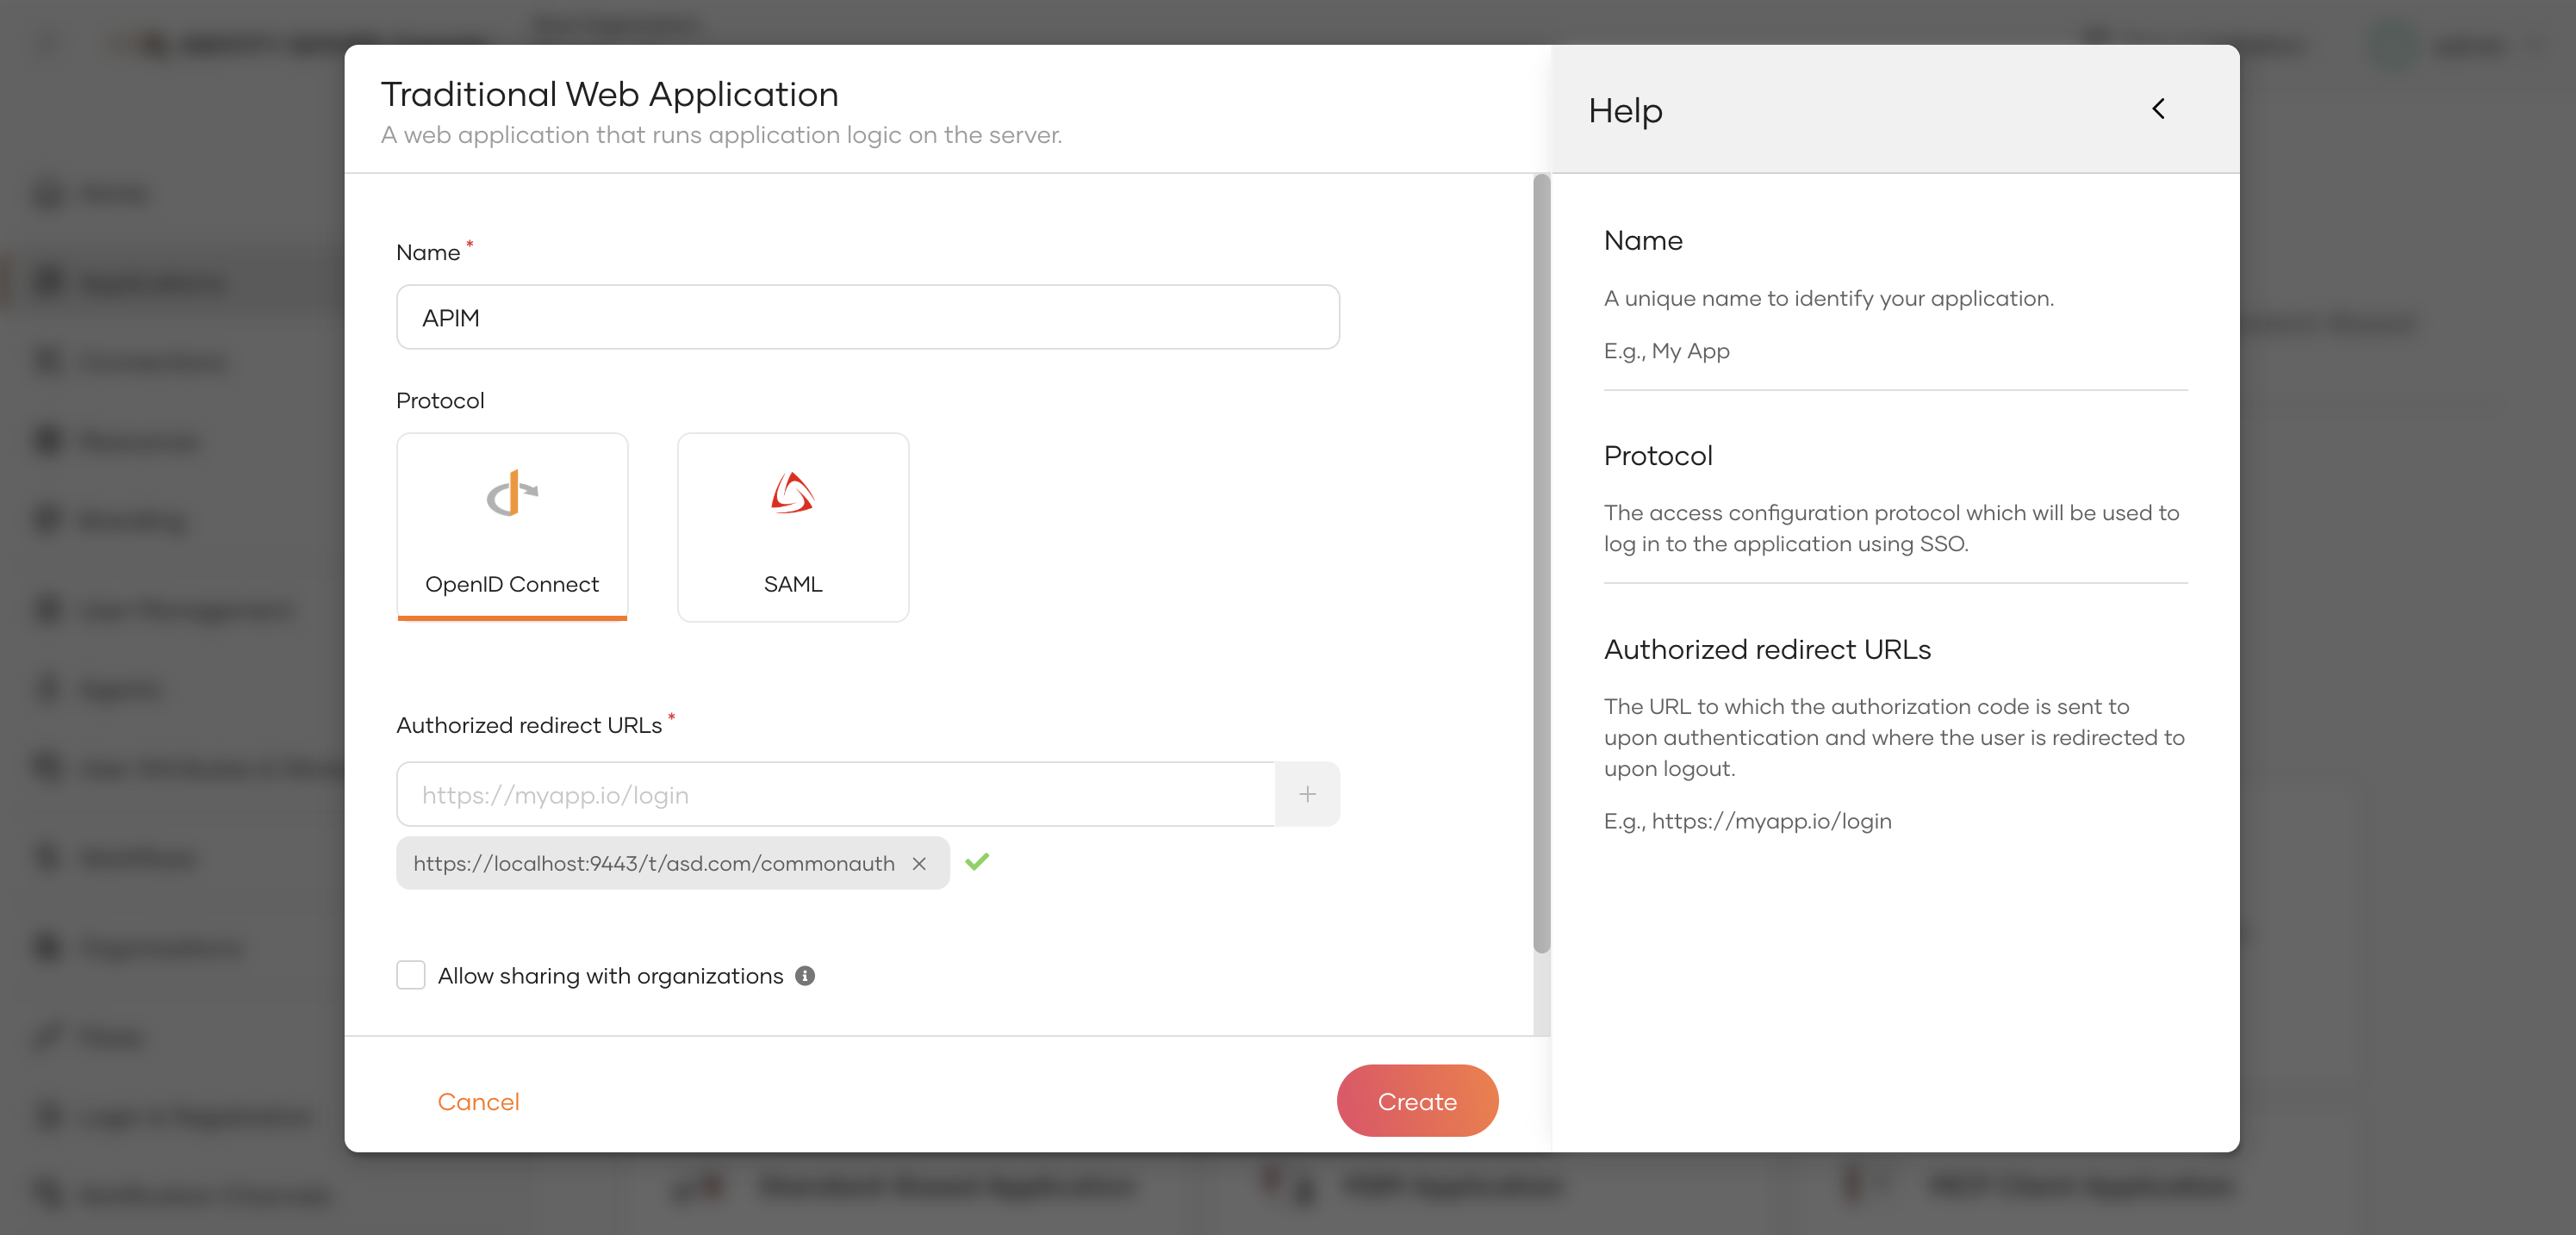
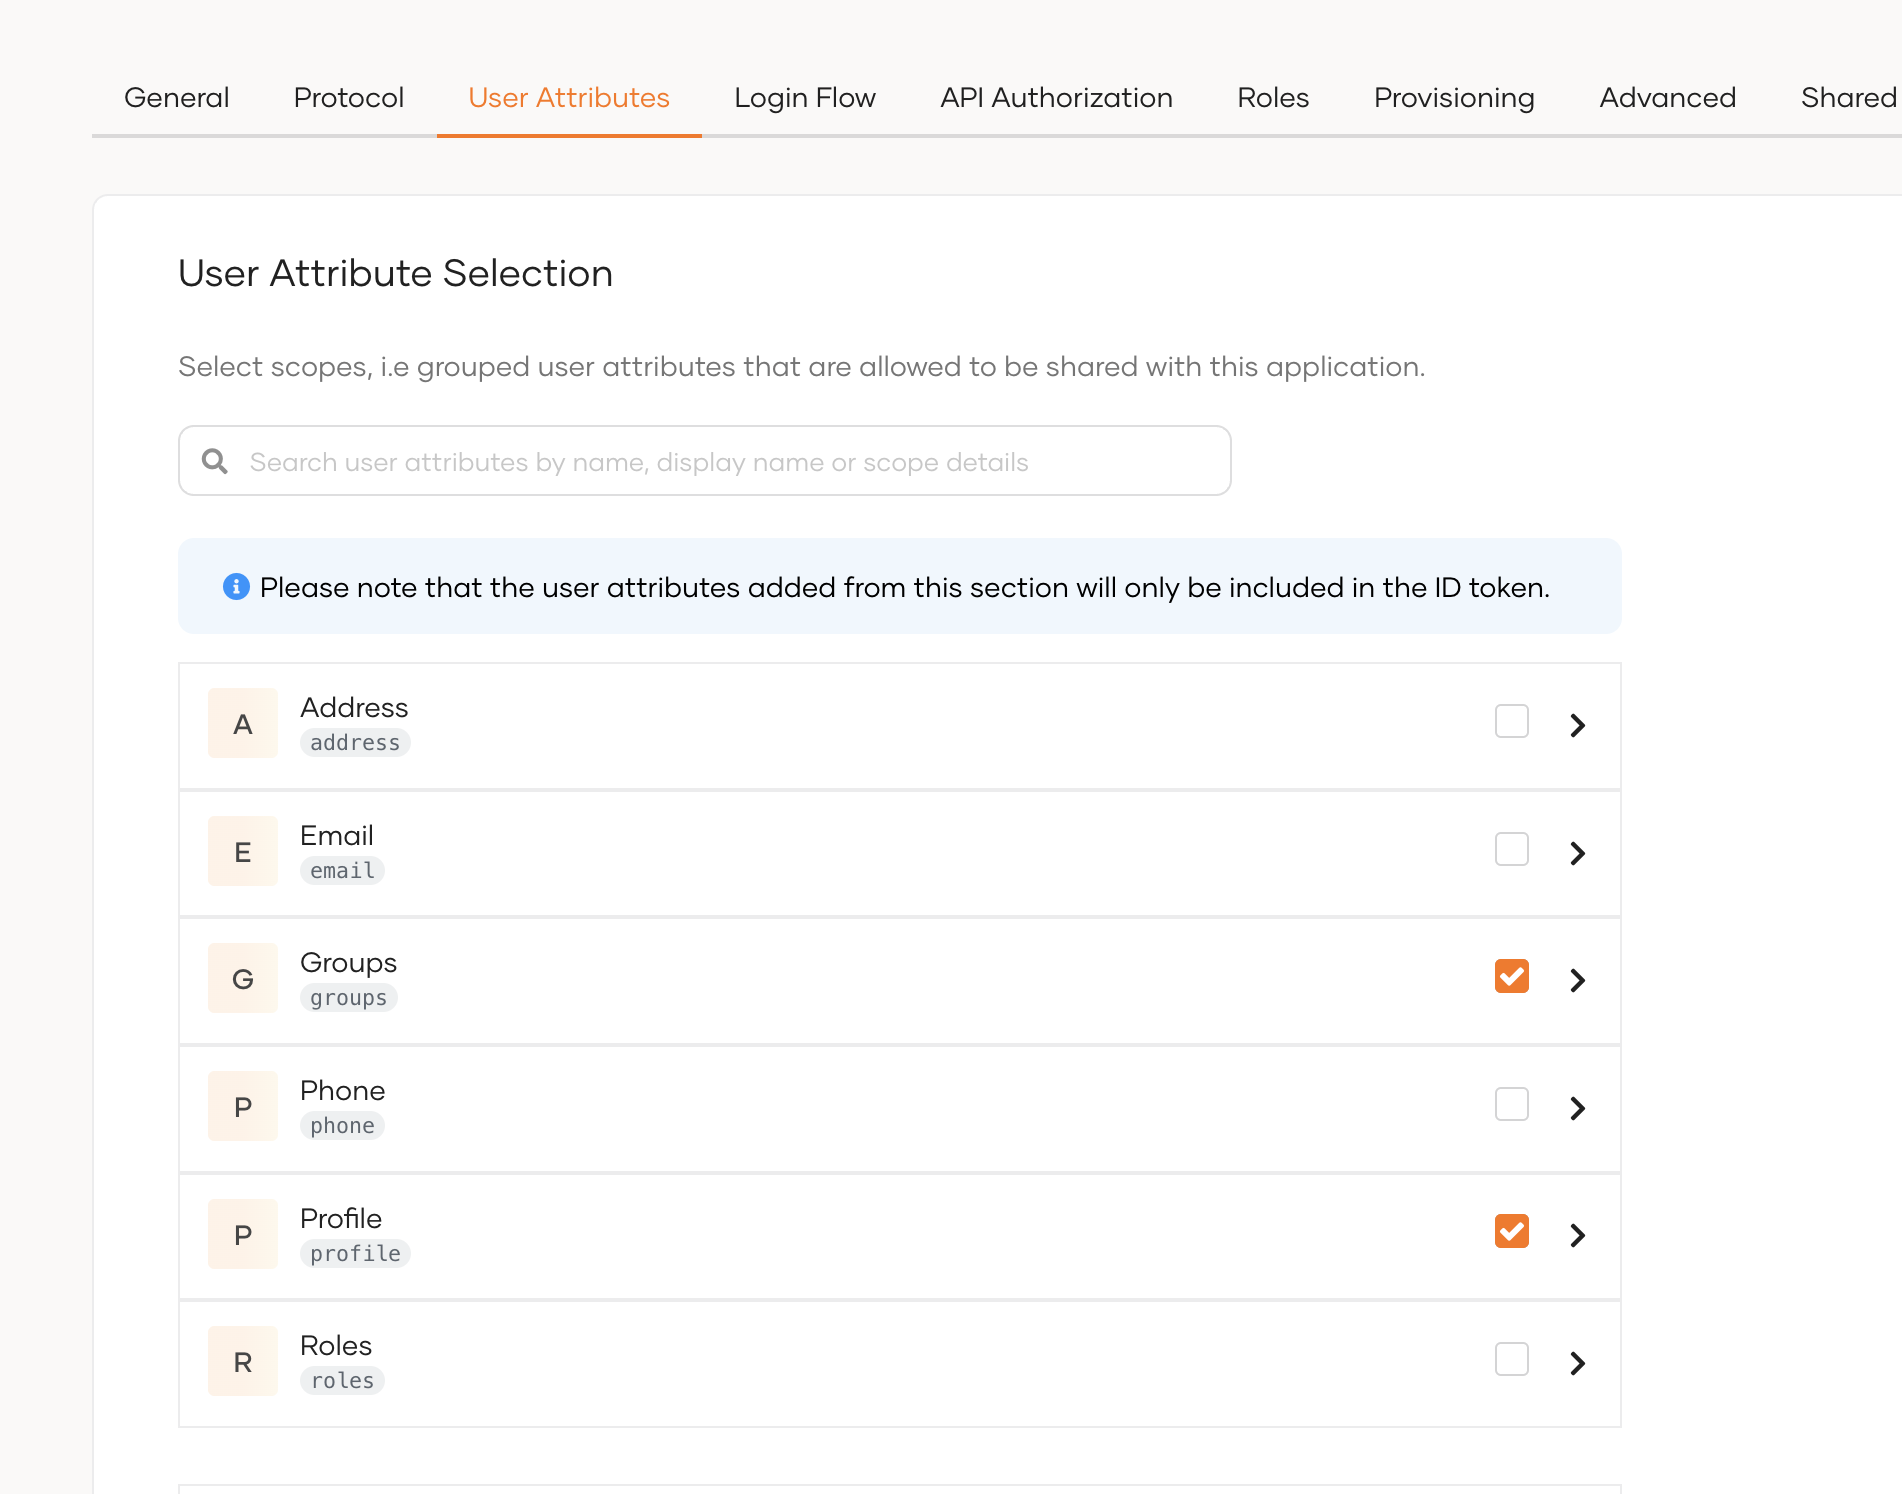
c. In the configuration page, select User Attributes and enable the Groups attribute.
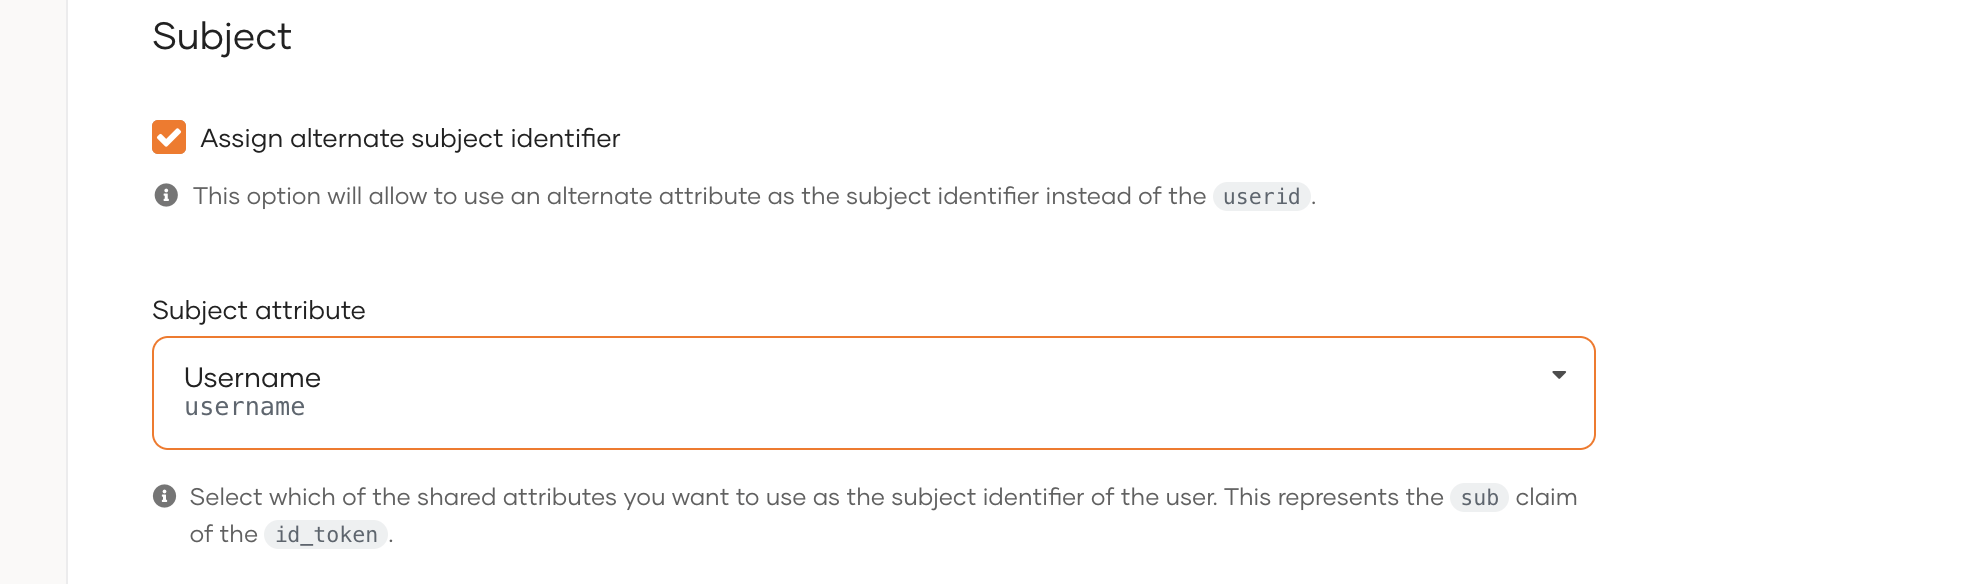
d. In the same tab, under the Subject section, select Assign alternate subject identifier and from the dropdown list select Username.
e. Under the Protocol tab, copy the Client ID and Client Secret.
Info
For each tenant, you must create a new application. For the super tenant, the Authorized Redirect URL is
https://localhost:9443/commonauth.
Step 3: Create users and roles
-
Create the required users and groups in Identity Server. Assume, following users are created in Identity Servers with the given groups.
User Groups Sam publisher Karen devportal
Configure the API Manager
Note
You need to enable tenant synchronization to create IS tenants on the APIM side. Refer to the linked guide for details on tenant synchronization setup.
Step 1: Import the Identity Server Certificate to WSO2 API Manager
Import the Keymanager certificate to the WSO2 API Manager client-truststore.jks using the following steps.
-
Export the WSO2 IS certificate.
-
Import this certificate to the
client-truststore.jkslocated in<AM_HOME>/repository/resources/security/.
Step 2: Additional deployment.toml changes
[tenant_context]
enable_tenant_qualified_urls = true
enable_tenanted_sessions = true
skip_tenant_validation_for_oauth_endpoints = true
session_manager= "org.apache.catalina.session.StandardManager"

[event.default_listener.jit_provisioning_handler]
enable = false

[[event_listener]]
id = "org_jit_provisioning_handler"
type="org.wso2.carbon.identity.core.handler.AbstractIdentityHandler"
name = "org.wso2.carbon.identity.outbound.organization.auth.OrganizationJITProvisioningHandler"
# Same value as "event.default_listener.jit_provisioning_handler.priority": "20",
order = 20
<table>
    <thead>
        <tr>
            <th>Config</th>
            <th>Description</th>
        </tr>
    </thead>
    <tbody>
        <tr>
            <td>tenant_context.enable_tenant_qualified_urls</td>
            <td>Enable tenant qualified URLs.</td>
        </tr>
        <tr>
            <td>tenant_context.enable_tenanted_sessions</td>
            <td>Enable tenanted sessions</td>
        </tr>
        <tr>
            <td>tenant_context.skip_tenant_validation_for_oauth_endpoints</td>
            <td>Enable this if you are using resident key manager</td>
        </tr>
        <tr>
            <td>tenant_context.session_manager</td>
            <td>You can skip this if you are using external key manager</td>
        </tr>
        <tr>
            <td>event.default_listener.jit_provisioning_handler.enable</td>
            <td>To disable default JIT provisioning handler</td>
        </tr>
        <tr>
            <td>event_listener</td>
            <td>This adds custom JIT provisioning handler</td>
        </tr>
    </tbody>
</table>
Step 3: Configure Federated Authenticators
-
Configure Super Tenant IdP
- Purpose: Capture tenant details and proxy tenant-specific users to the appropriate service providers within their respective tenants, while also handling users from the carbon.super tenant.
- First log in to the carbon portal (https://{apim-ip}:9443/carbon) using the admin account.
- Then, from the left navigation menu, go to the Identity Providers section and click the Add button.
-
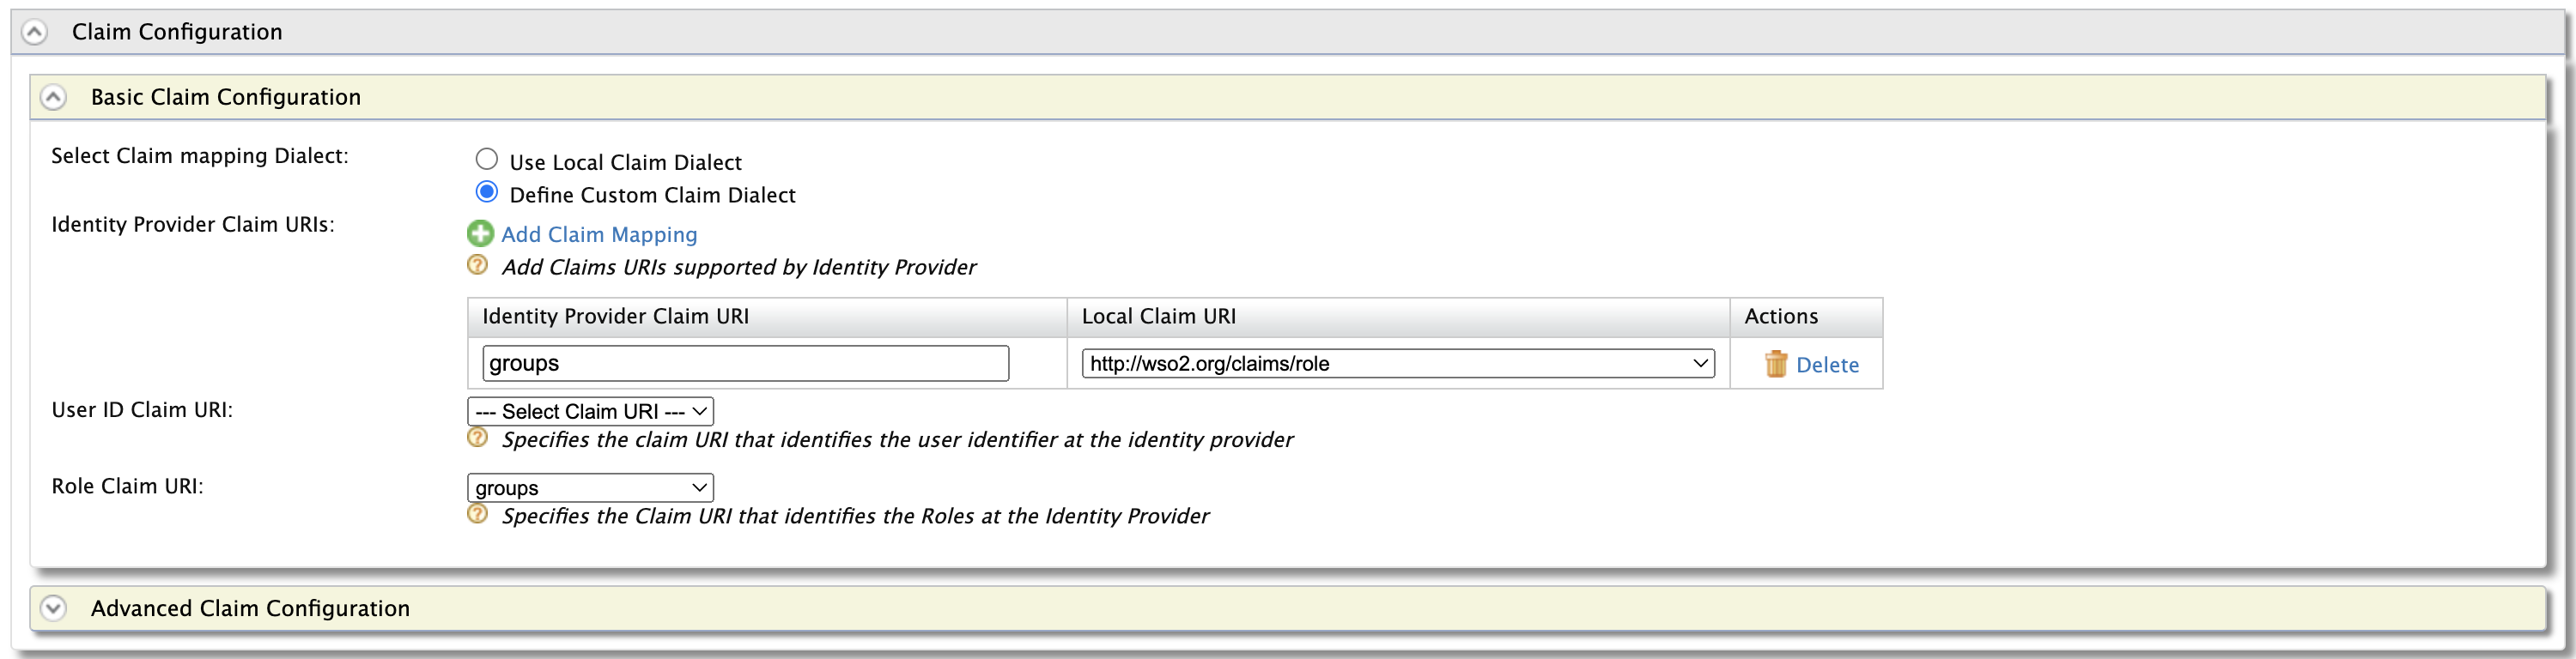
Add the following claim mapping under the Claim Configuration section.
Identity Provider Claim URI Local Claim URI groups http://wso2.org/claims/role Also select groups as the Role Claim URI.
-
Add the following role mapping under the Role Configuration section:
Identity Server Roles Roles Mapped in API Manager devportal Internal/Subscriber publisher Internal/publisher 
Tip
Instead of using the default internal roles, you can also create new roles in API Manager and map it to the provisioned users.
-
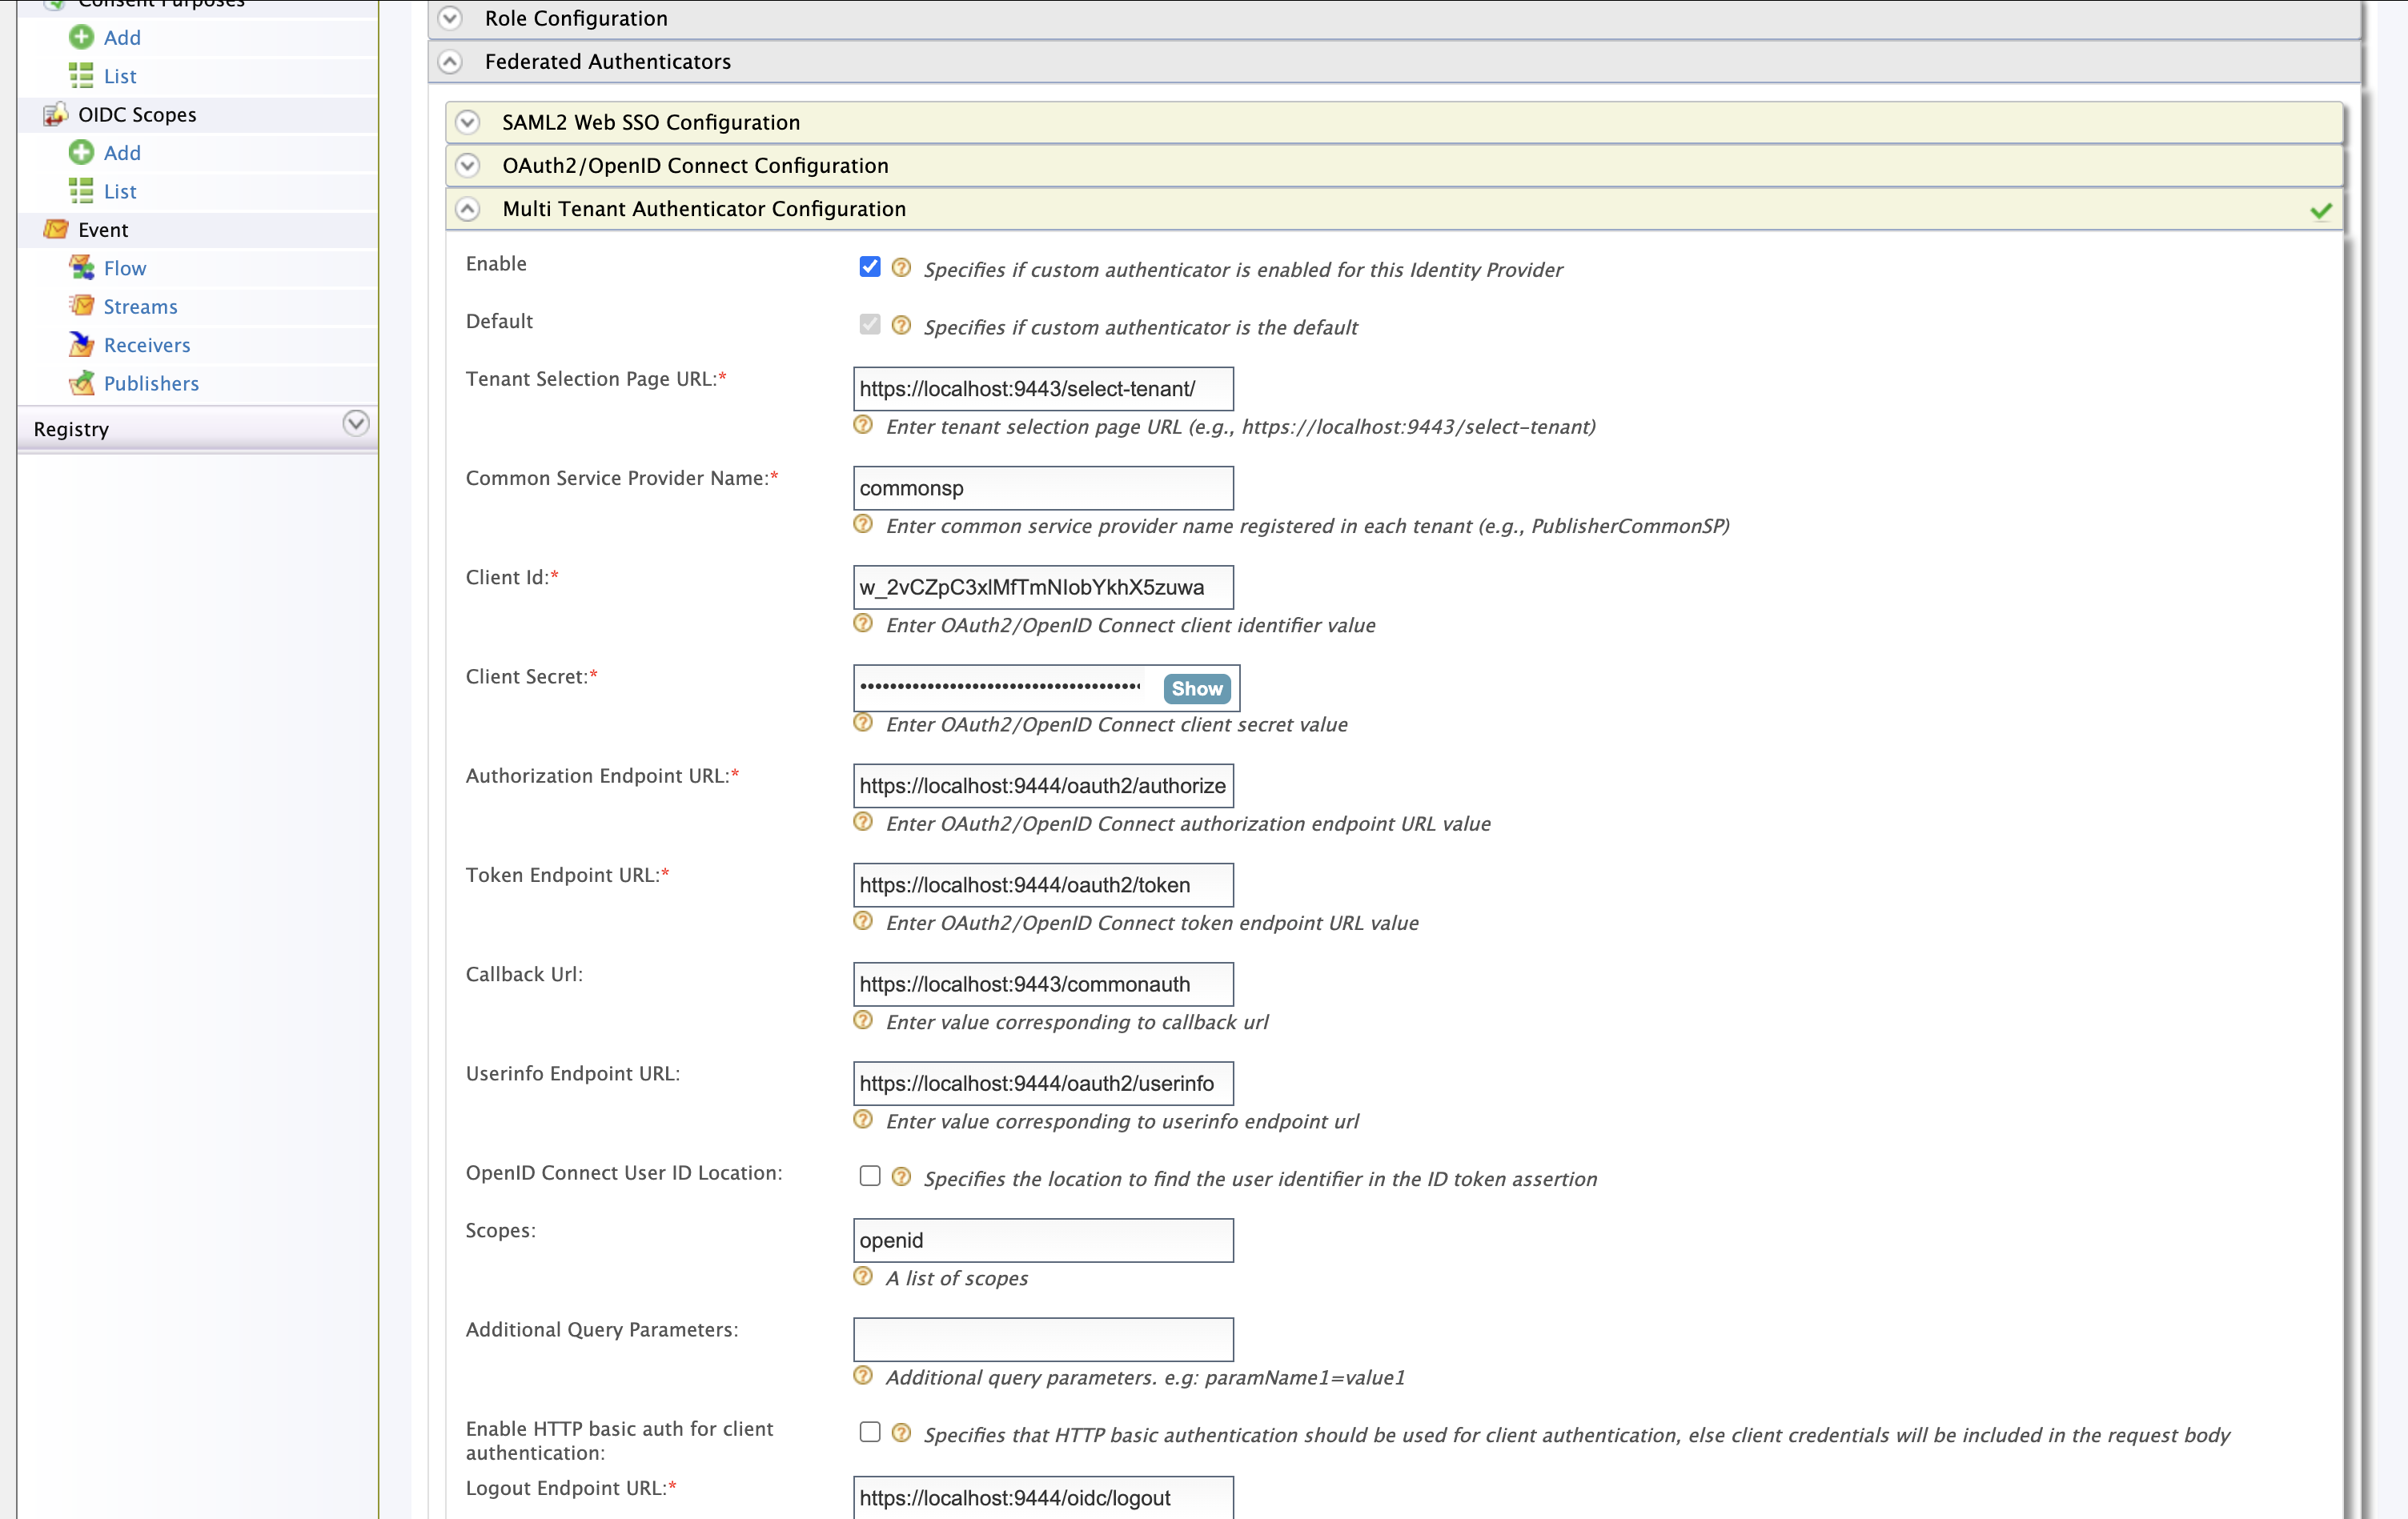
Select Multi Tenant Authenticator Configuration under the Federated Authenticators section:
Configuration Value Description Enable true Set true to enable the authenticator Tenant Selection Page URL https://{apim-ip}:9443/select-tenant/You can customize this page as required, default page will be available on the above location Common Service Provider Name commonspIn each tenant (including super tenant), you have to create a service provider from this name Scopes openid groups Other fields are self explanatory. Refer the image below if you need more clarity.
-
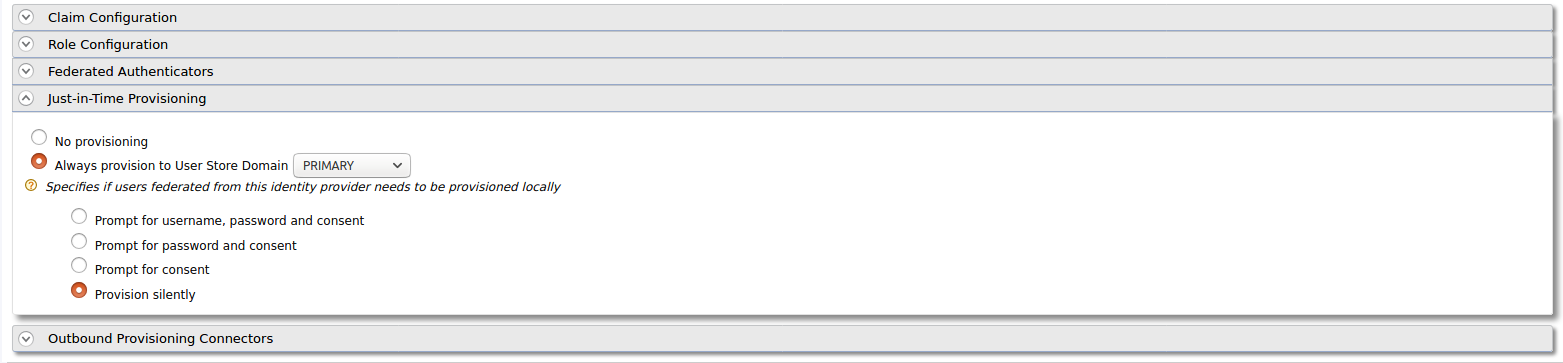
Enable Just-in-Time Provisioning to provision the users in API Manager:
-
Finally click Register to save the changes
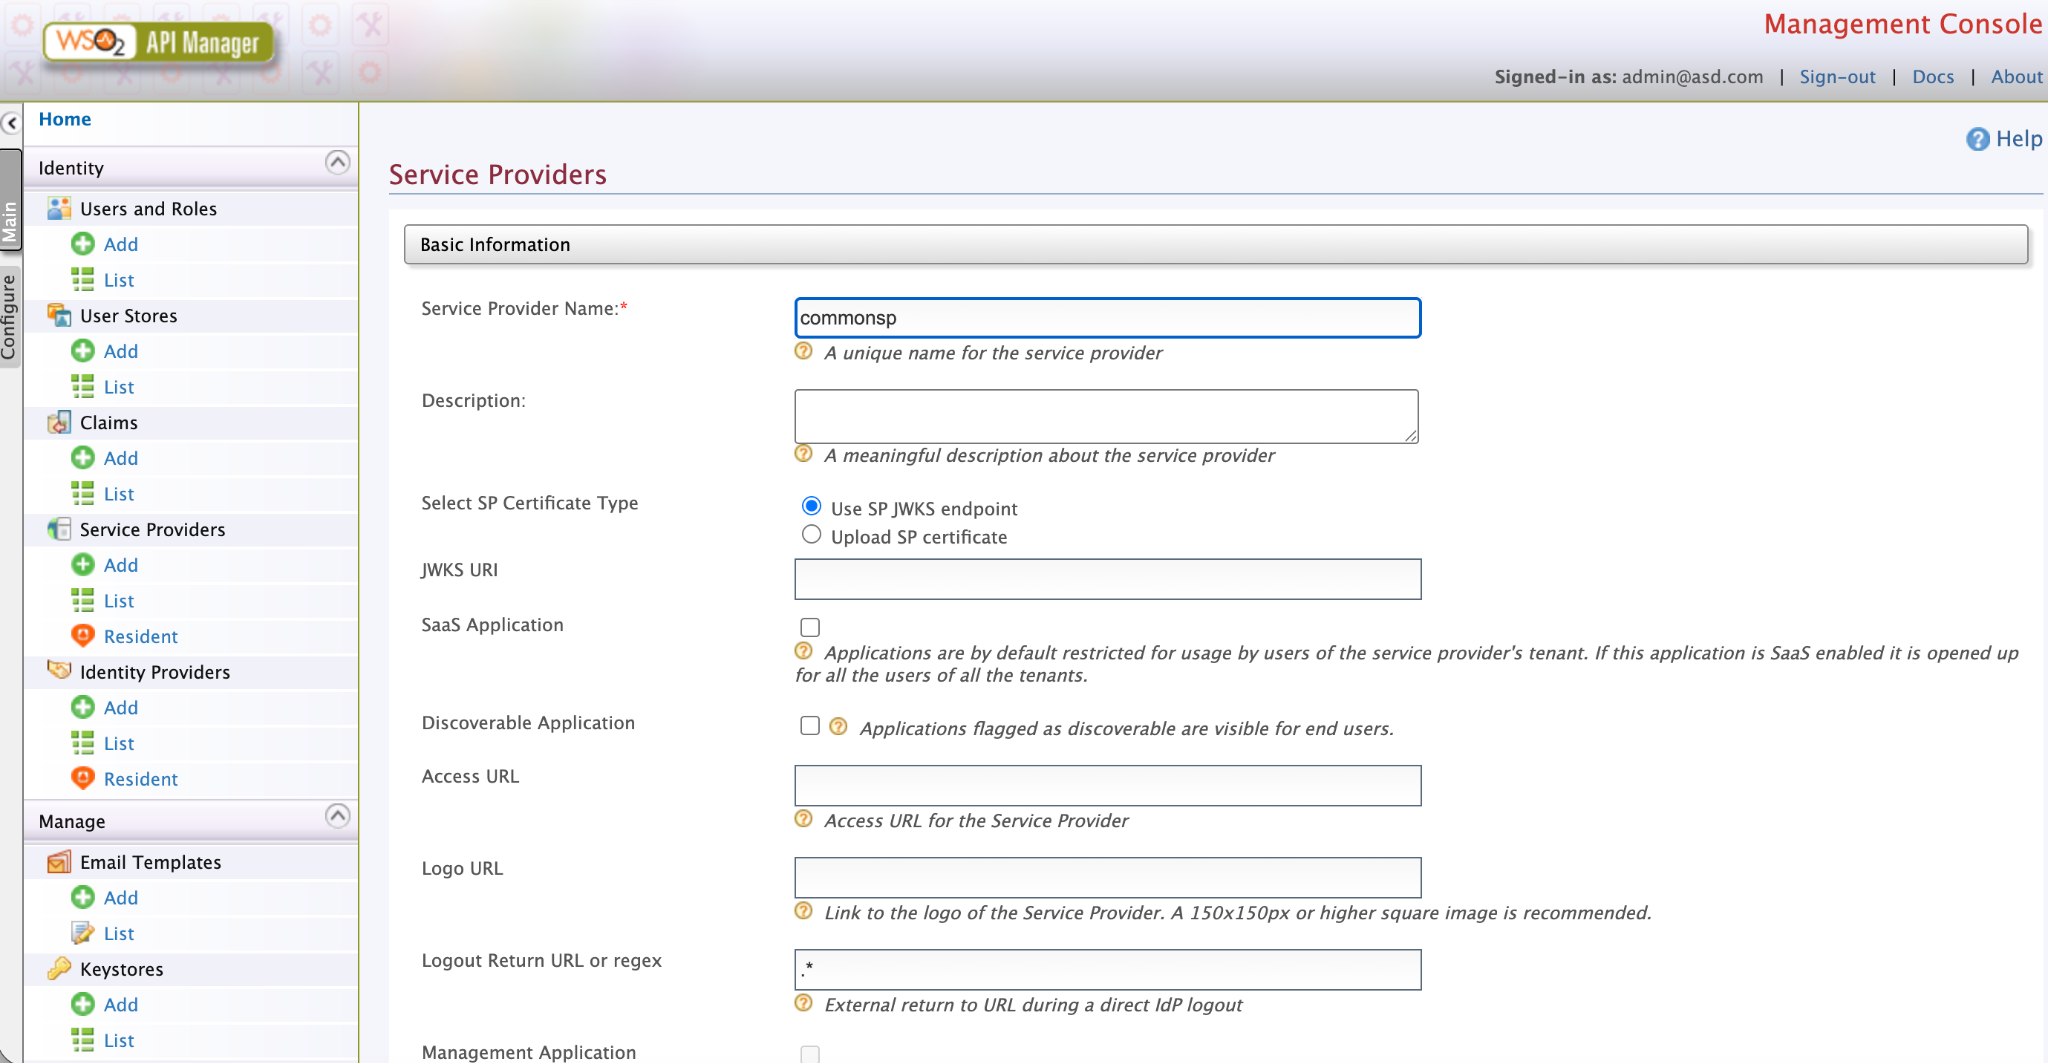
Step 4: Configure Common Service Provider
- From the left navigation menu, go to the Service Providers section and click the Add button.
-
The SP name should match the one you define in the super tenant IdP, under 'Common Service Provider Name'.
-
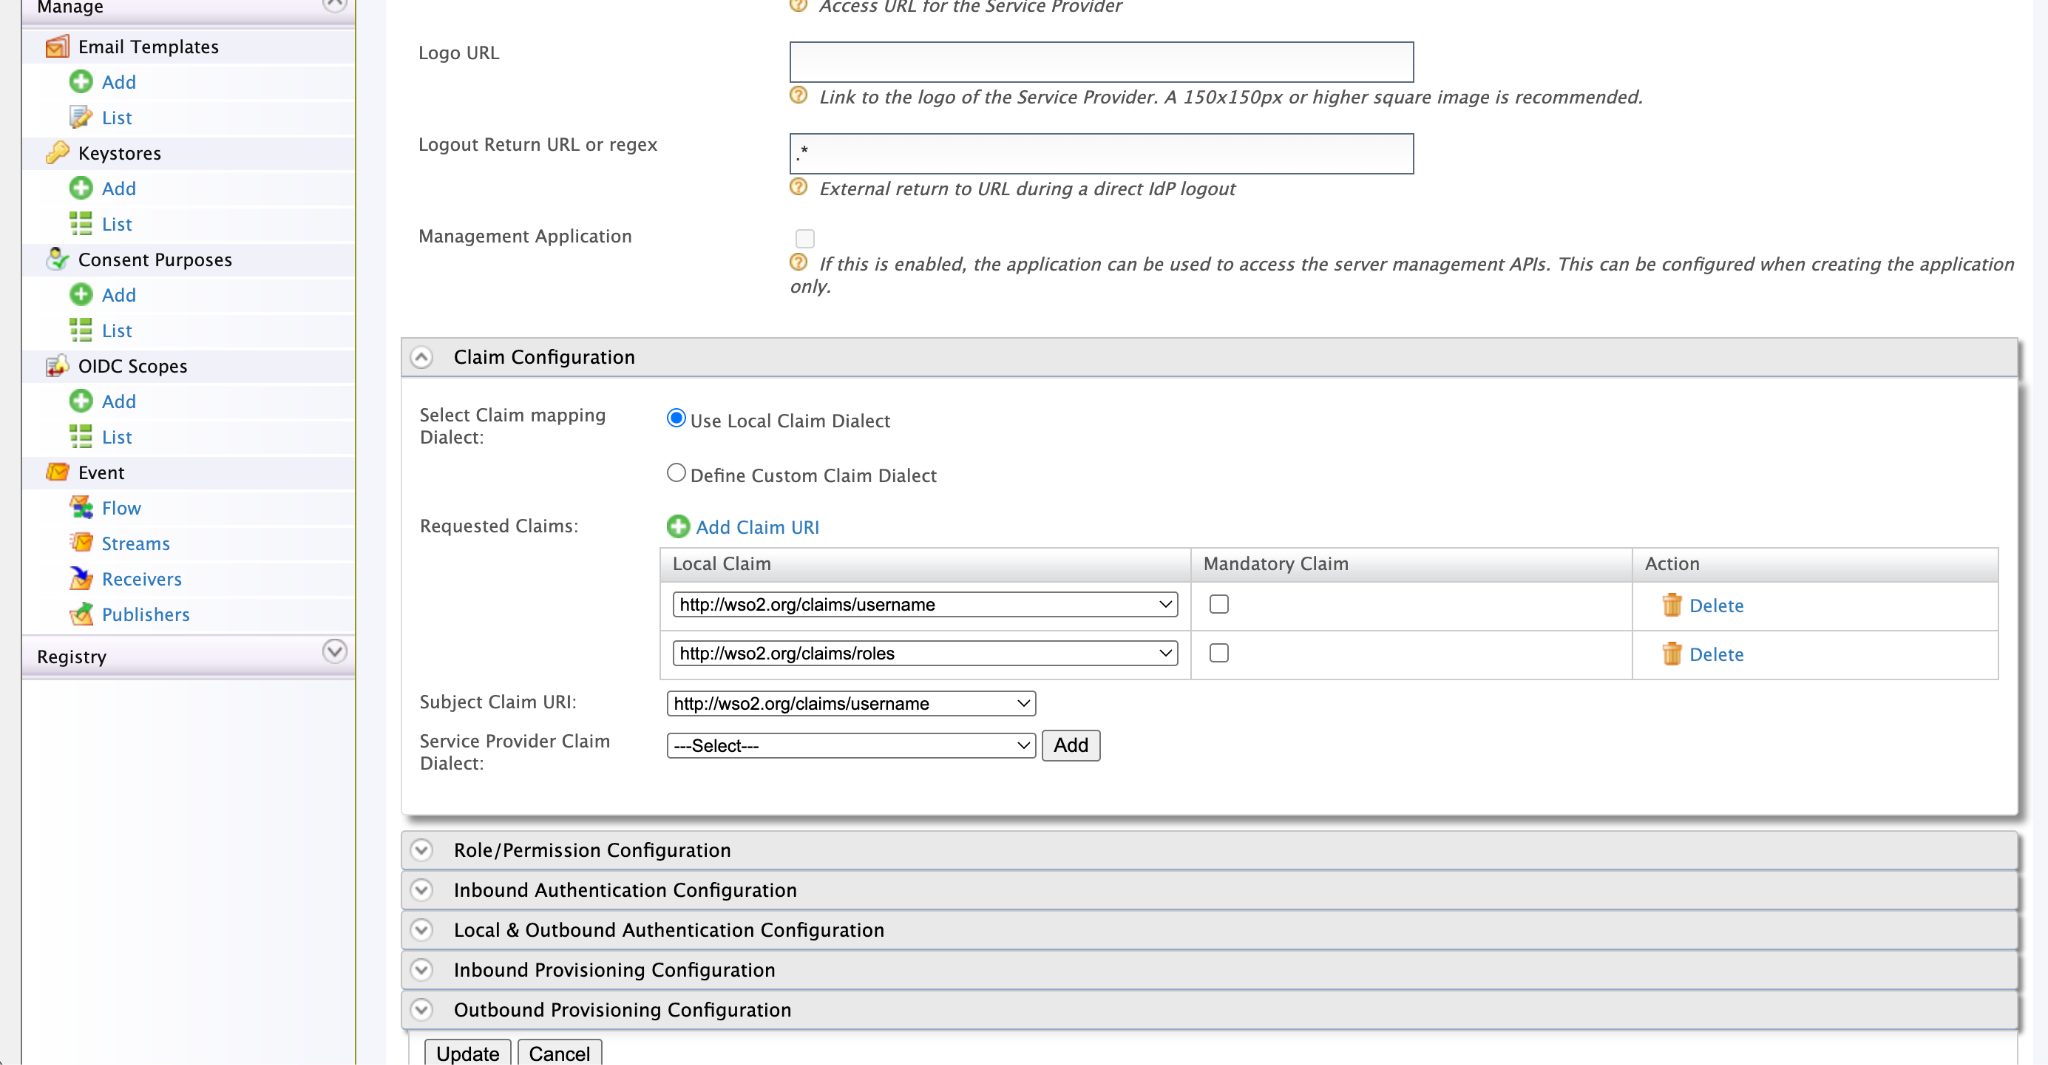
Next, you need to configure the claim settings to pass user details to the super tenant custom authenticator.
- Expand the Claim Configuration and expand the Basic Claim Configuration section.
- In the 'Requested Claims' section, click 'Add Claim URI' and add the following claims.
http://wso2.org/claims/usernamehttp://wso2.org/claims/roles
- Then, select
http://wso2.org/claims/usernameas the Subject Claim URI.
-
Next, expand the Inbound Authentication Configurations, and expand Oauth/OpenID connect configuration and click configure. Then set the Callback Url to
https://localhost:9443/commonauthand click update.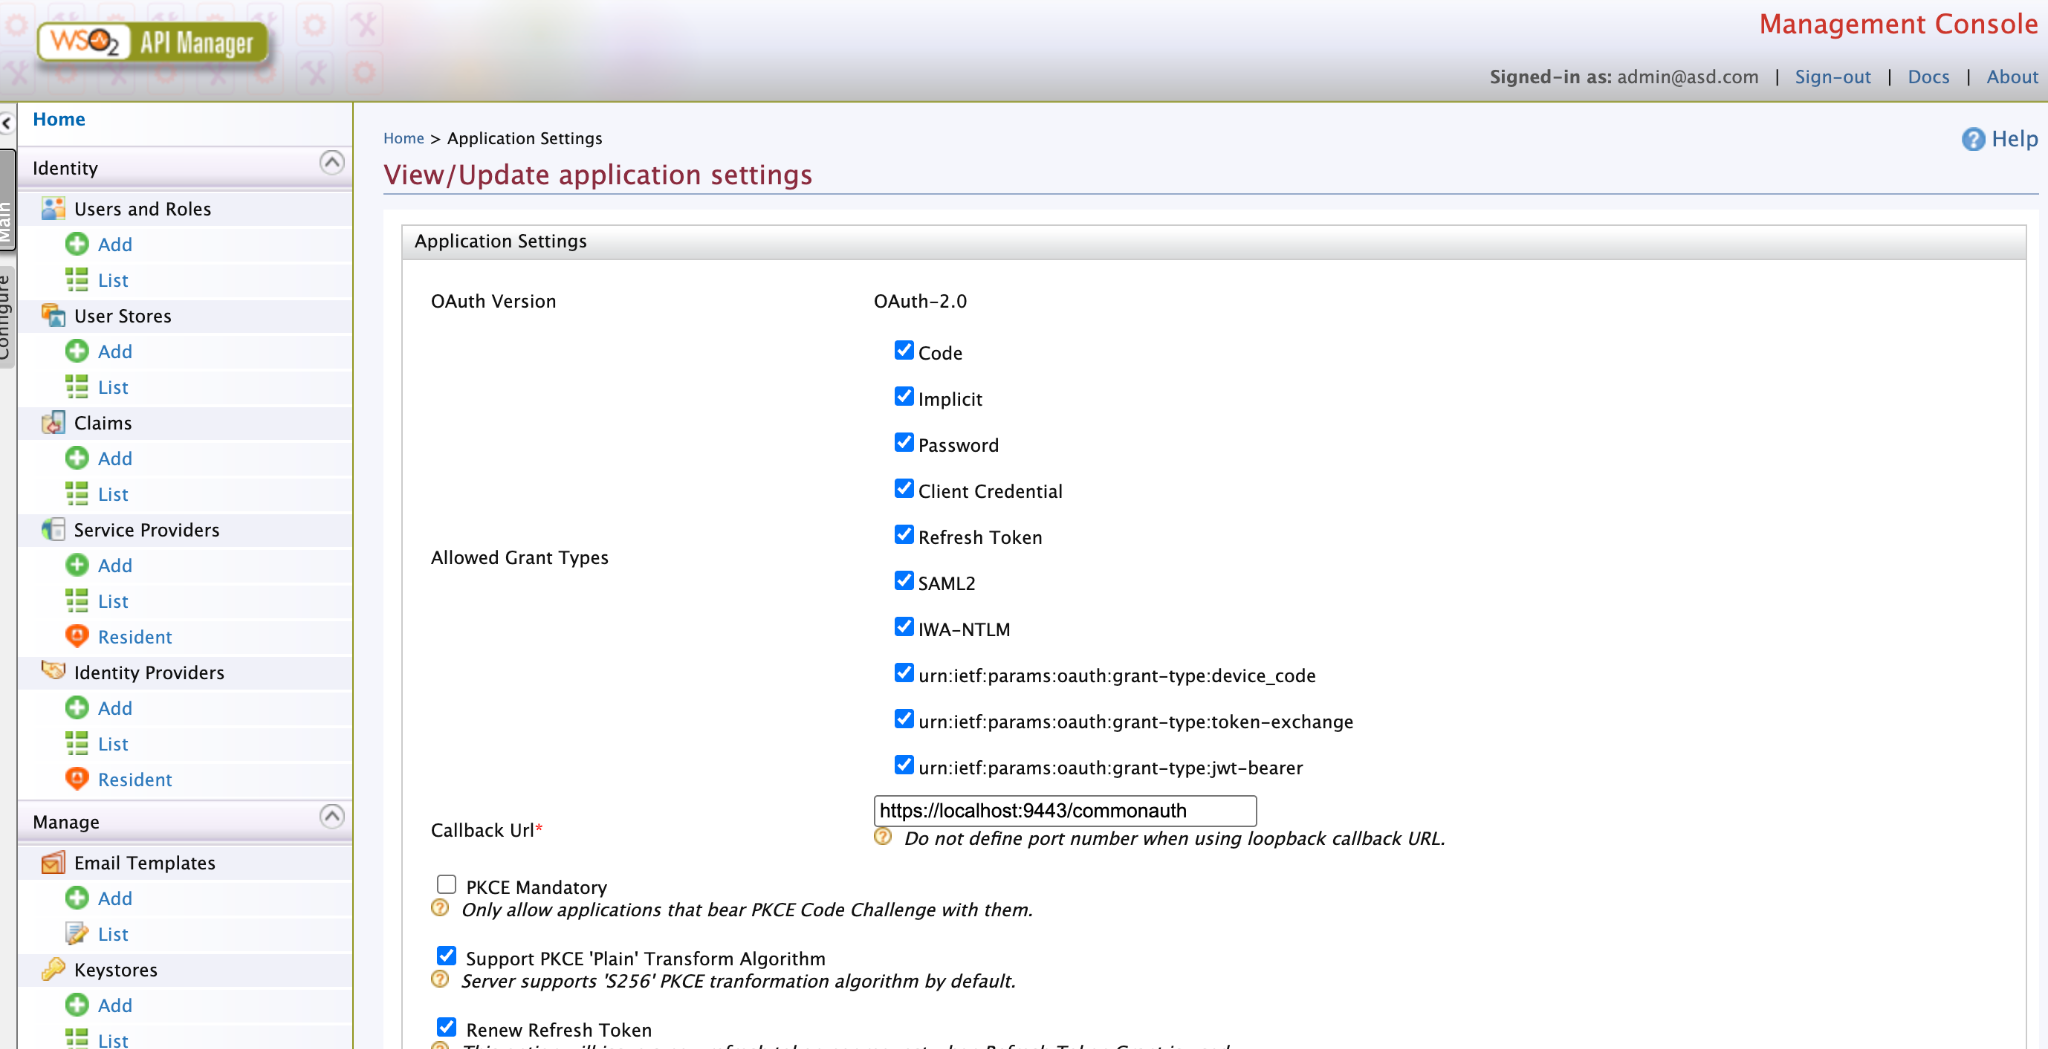
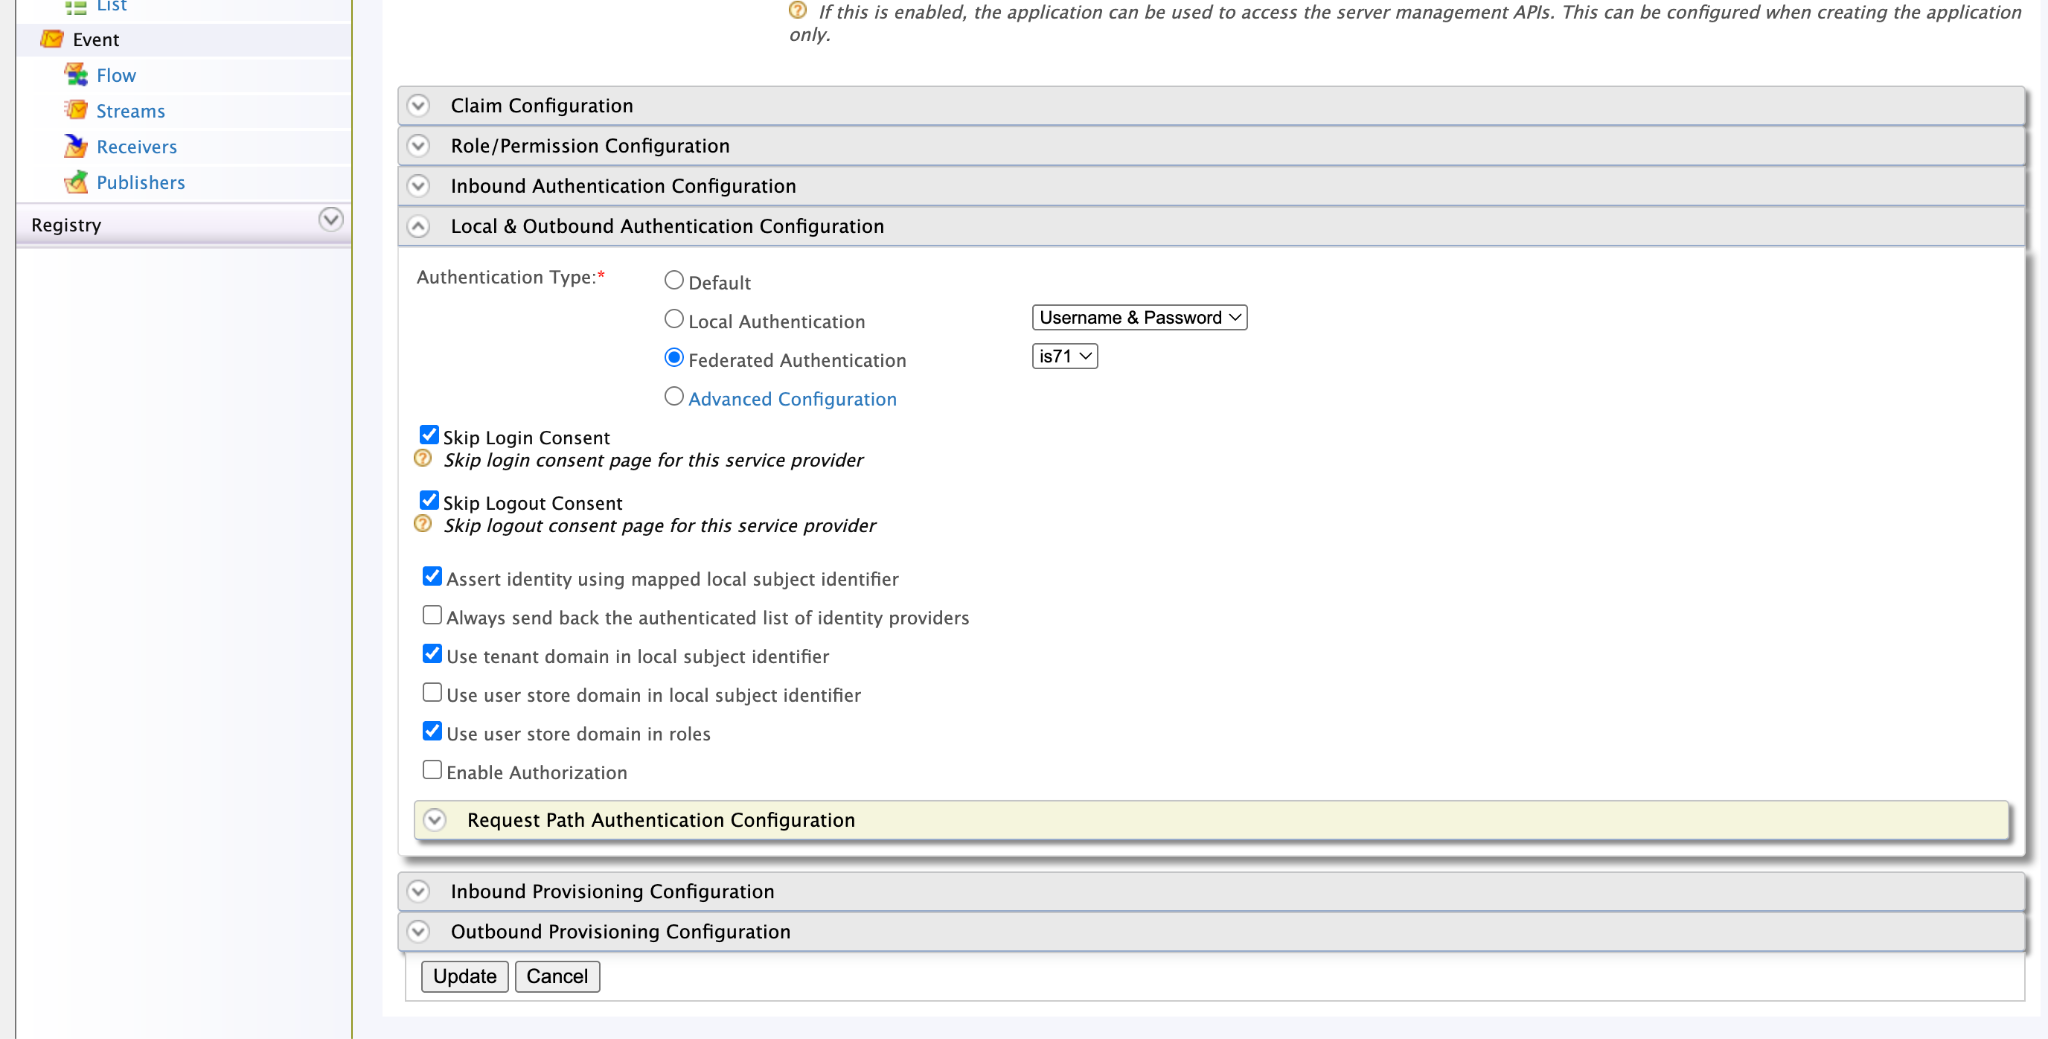
-
Next, expand the Local & Outbound Authentication Configurations, Select the previously created IdP as the Federated Authenticator, and check the following configurations:
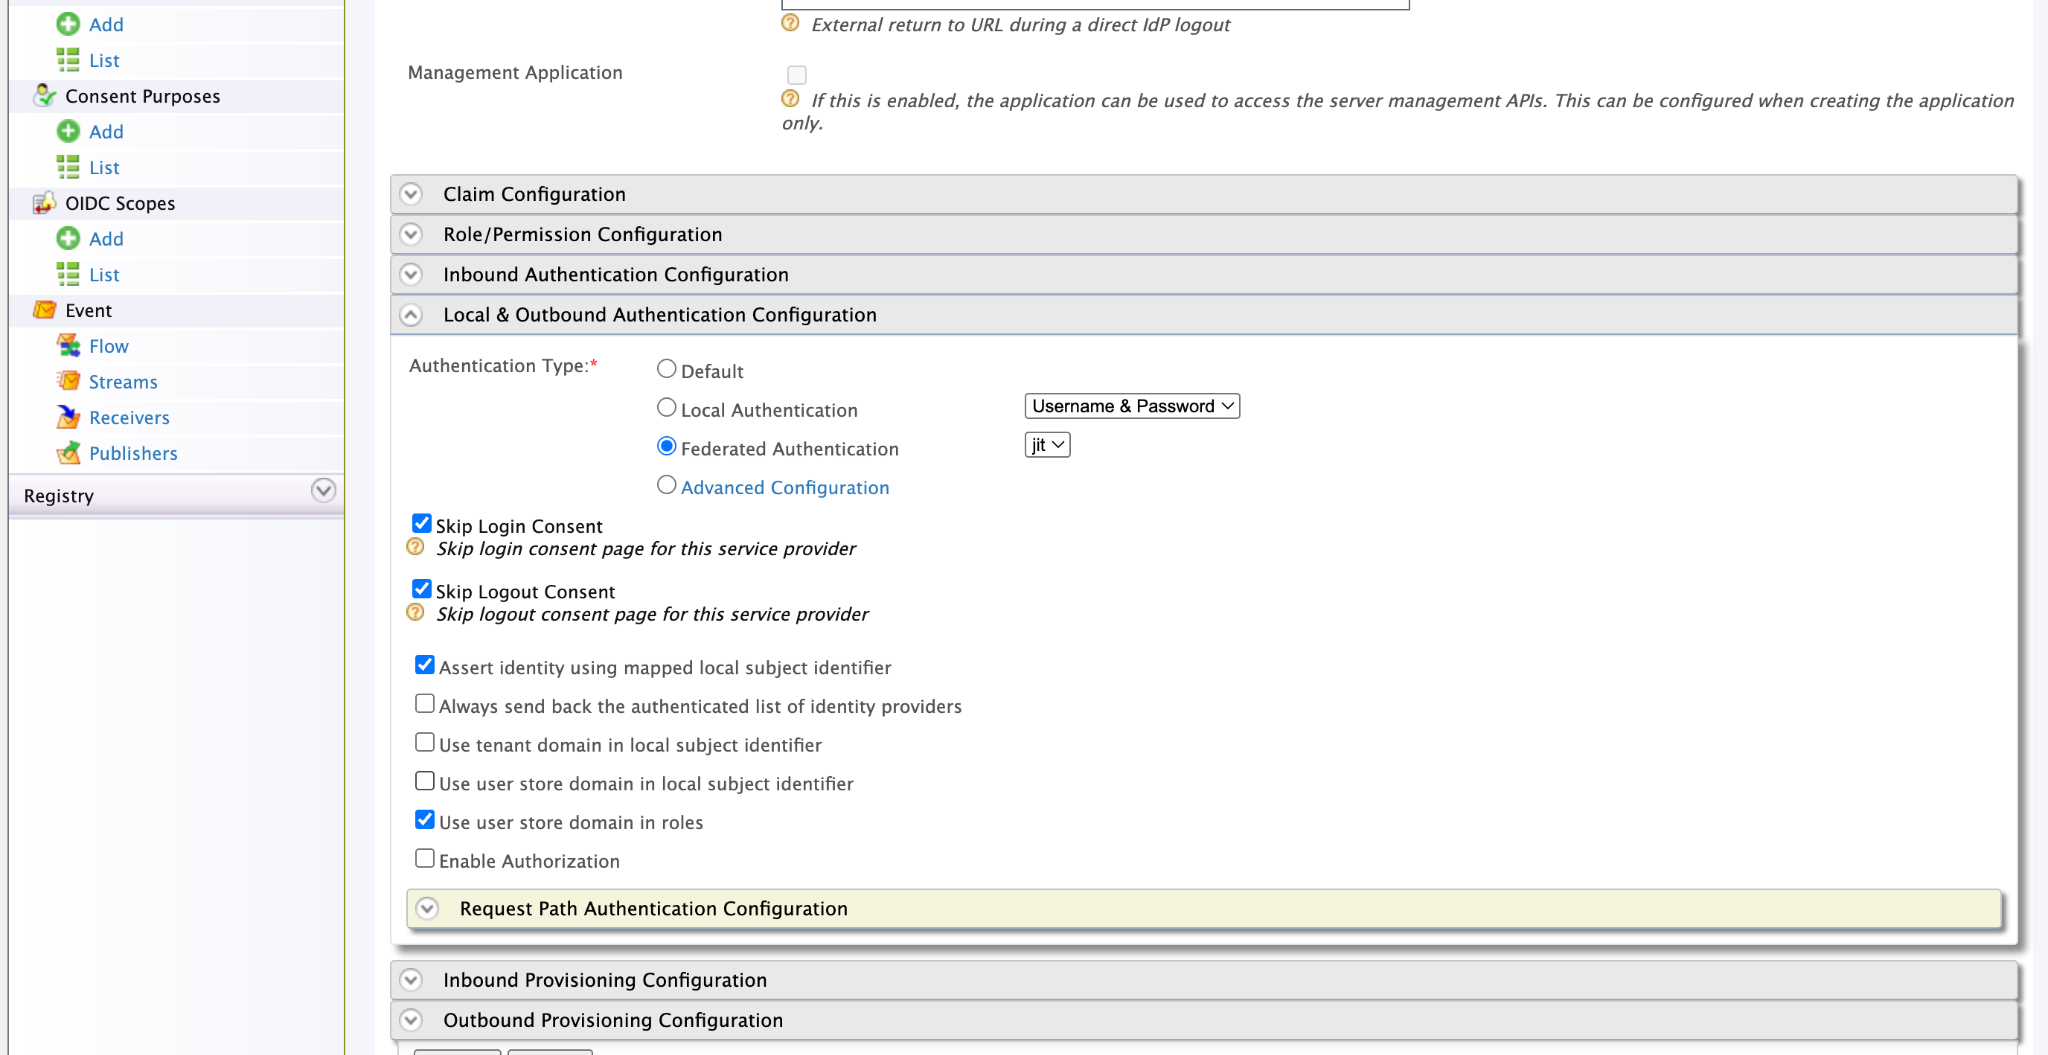
Step 5: Configure Tenanted IdP
- Log into carbon portal as a tenanted admin
-
Follow the same steps in step - 3, But this time instead of Multi Tenant Authenticator Configuration select OAuth2/OpenID Connect Configuration
Info
Here you need to connect to the IS tenanted Application you created in the first section
Step 6: Configure Tenanted Common Service Provider
- Log into carbon portal as a tenanted admin
- Follow the same steps in step - 4
Step 7: Configure the IdP for the Portals
- Now, In carbon portal, again log as super admin.
- Click on the List under the Service Providers section.
- We can see the apim_devportal, apim_publisher and apim_admin_portal service providers as below.
- Click on the Edit button of one of the service providers and then expand the Local & Outbound Authentication Configuration section.
- Select Federated Authentication option under the Authentication Type section and select the created IdP (WSO2_IS7)
-
Put a tick to Assert identity using mapped local subject identifier option. Please note that this is a mandatory one to perform the role mapping properly.
Verifying
-
Now you are good to go, go the publisher portal
https://{apim-ip}:9443/publisheryou will see a tenant selection page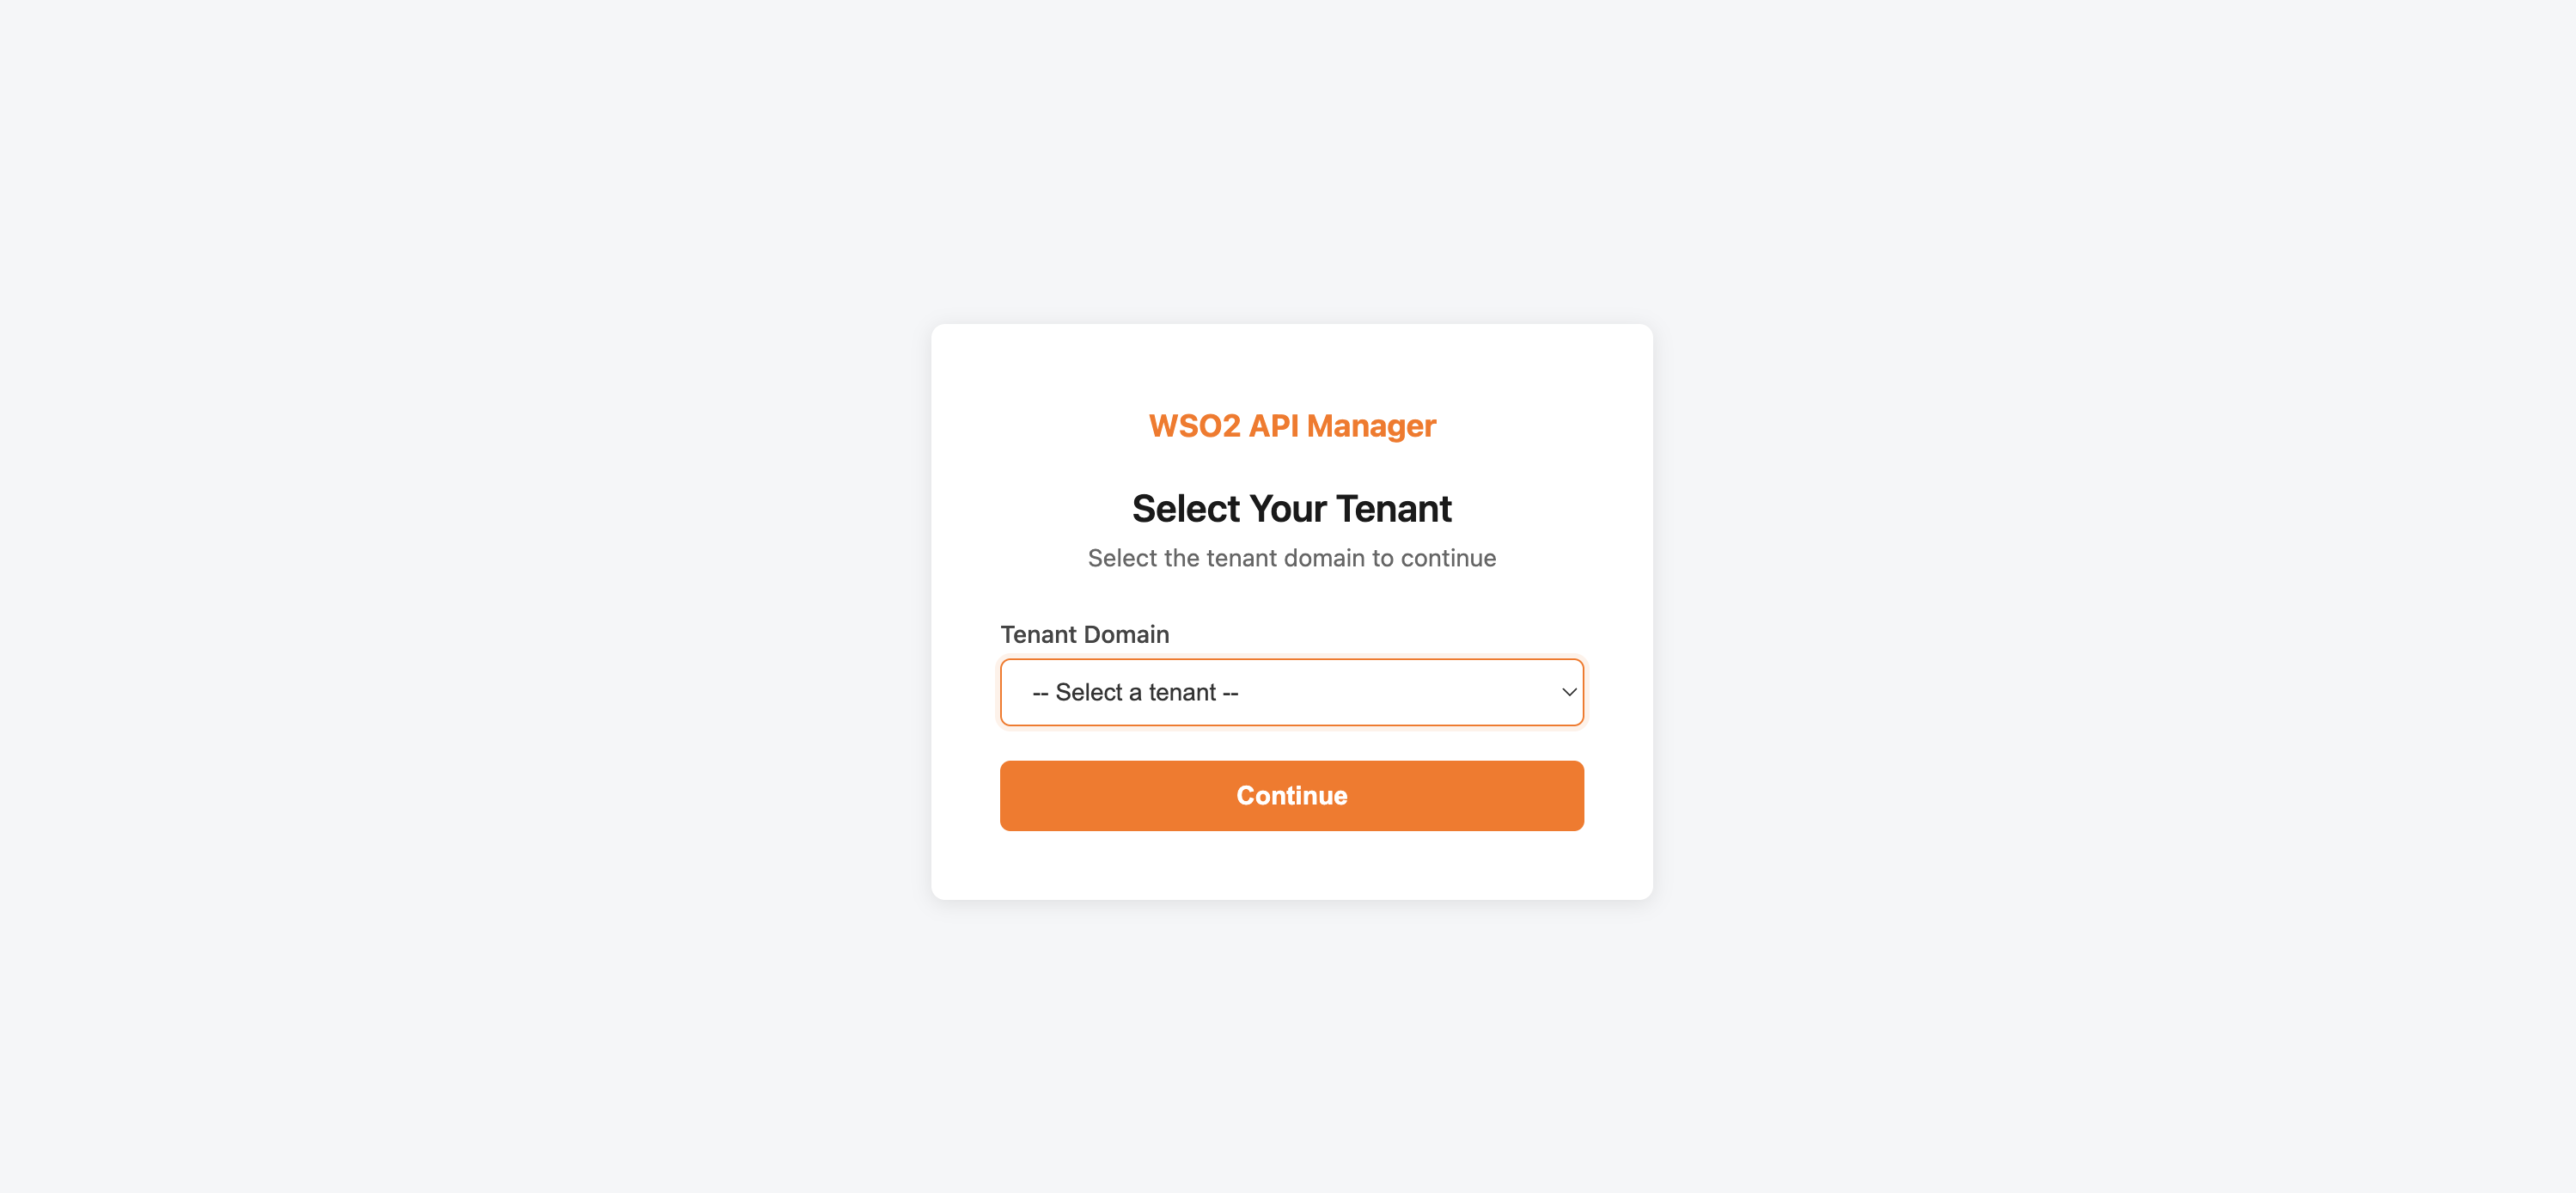
Note
If your Identity Provider has multiple secondary user stores (such as LDAP) and you want to include the user domain in the subject identifier (LDAP_DOMAIN/username), you must also connect the same user stores to the API Manager in read-only mode. This is required when the secondary user stores contain users with the same name and you cannot provision those users to the API Manager primary user store.
Tips
This approach is not limited to WSO2 IS 7.x, you can connect any third party identity provider using this method