Pattern 5: Simple Scalable Setup with Key Manager
This pattern extends Pattern 2 by adding a dedicated Key Manager alongside the All-in-One and Universal Gateway. It is suitable for production environments where token issuance and validation need to be isolated from the Control Plane, without the overhead of a fully distributed setup.
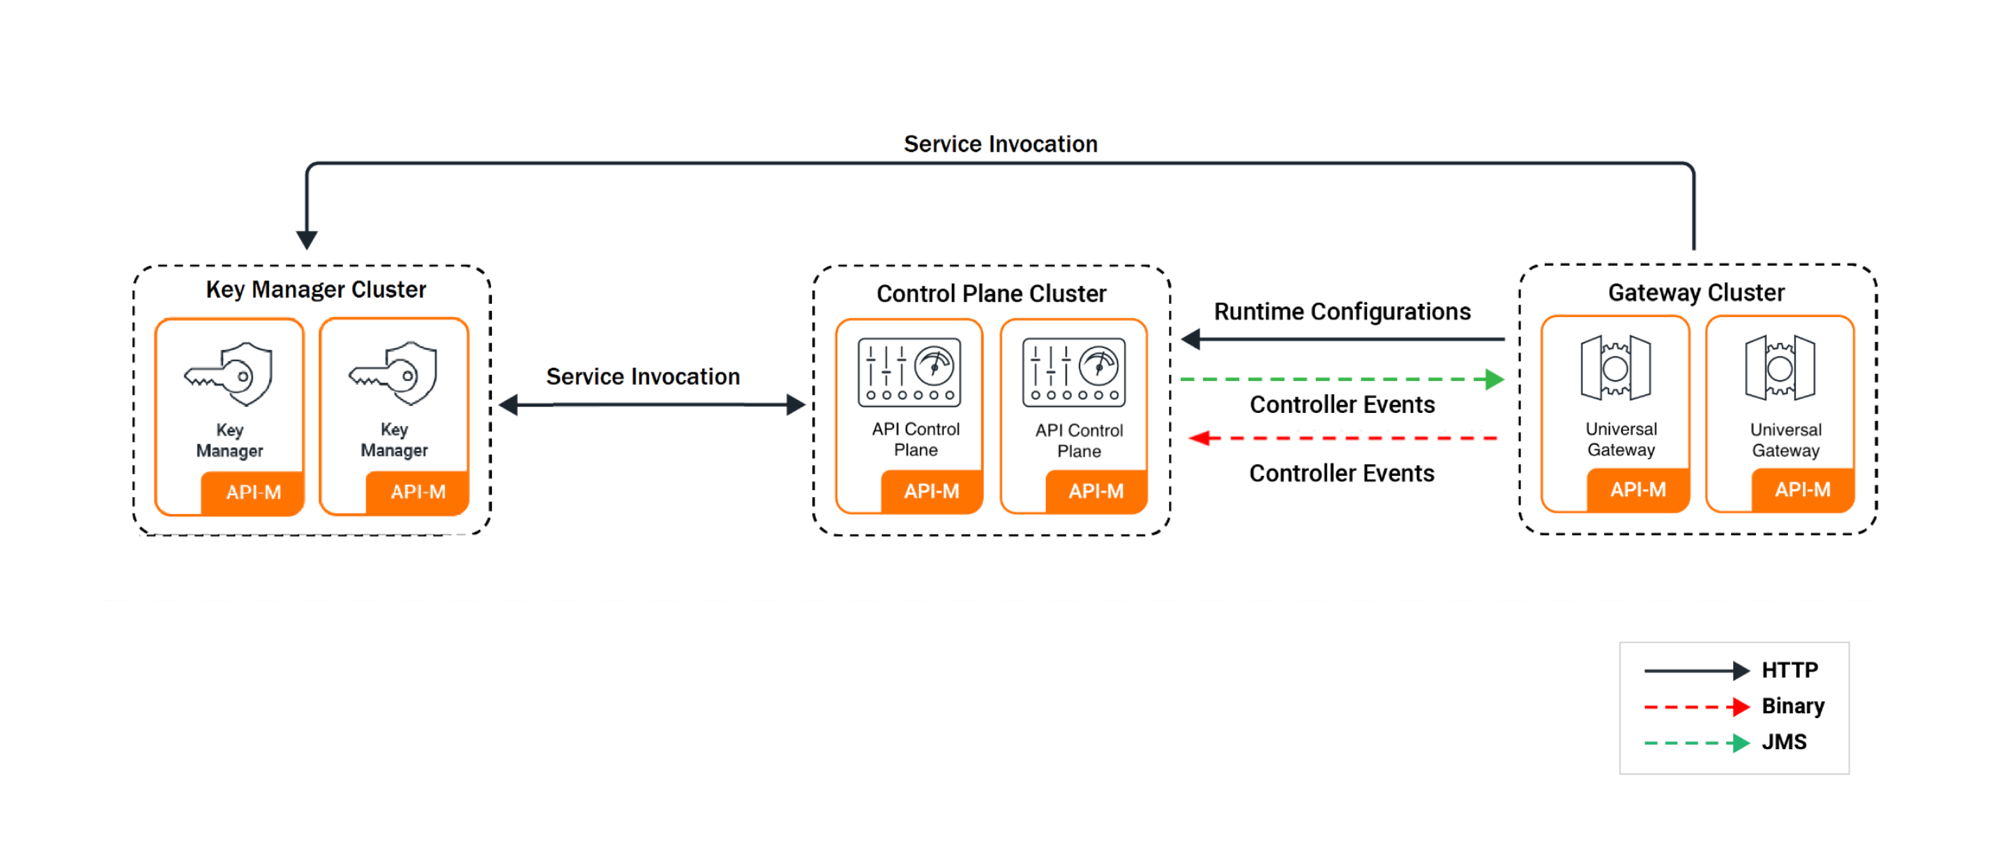
How Pattern 5 Differs from Earlier Patterns
| Pattern 2 | Pattern 4 | Pattern 5 | |
|---|---|---|---|
| Key Manager | Embedded in All-in-One | Dedicated KM | Dedicated KM |
| Control Plane | Embedded in All-in-One | Dedicated ACP | Embedded in All-in-One |
| Traffic Manager | Embedded in All-in-One | Dedicated TM | Embedded in All-in-One |
| Custom images | Required (All-in-One + Gateway) | Required (ACP + TM + Gateway); KM reuses ACP image | Required (All-in-One + Gateway + ACP); KM uses ACP image |
| High availability | Gateway: Yes; All-in-One: Optional | Yes (all components) | Gateway: Yes; KM: Yes; All-in-One: Optional |
Note
The Key Manager uses the same Docker image as the ACP (API Control Plane). The ACP image ships profileSetup.sh and key-manager.sh, which the KM chart's entrypoint requires at startup.
Pattern 5 requires the following before deploying:
- An external database — H2 is not supported. Set up an external database before deploying.
- Three custom Docker images — for the All-in-One, the Universal Gateway, and the ACP (shared with the Key Manager), all with the JDBC driver for your database.
- Database schema initialised — run the WSO2 schema scripts against both databases before the pods start.
Quick Start
Step 1 — Install Required Tools
-
Ensure the following tools are installed on your machine:
Tool Purpose Install Guide kubectlKubernetes CLI for managing cluster resources Install helm(v3)Package manager for deploying WSO2 Helm charts Install dockerRequired to build and push custom WSO2 images Install -
Verify all tools are installed and check their versions:
kubectl version --client
helm version
docker info
Version Compatibility
Ensure your tool versions are within the supported ranges listed in the Prerequisites page before proceeding.
Step 2 — Verify Your Cluster is Running
-
Ensure your Kubernetes cluster is up and running:
kubectl cluster-info
kubectl get nodes
All nodes should show a
Readystatus.
Step 3 — Add the WSO2 Helm Repository
-
Add the WSO2 Helm repository and update it:
helm repo add wso2 https://helm.wso2.com && helm repo update
Step 4 — Install a Routing Controller
Install the NGINX Ingress Controller into your cluster:
helm upgrade --install ingress-nginx ingress-nginx \
  --repo https://kubernetes.github.io/ingress-nginx \
  --namespace ingress-nginx --create-namespace
helm upgrade --install ingress-nginx ingress-nginx \
  --repo https://kubernetes.github.io/ingress-nginx \
  --namespace ingress-nginx --create-namespace \
  --set controller.service.externalTrafficPolicy=Local
Note
externalTrafficPolicy=Local is required on managed Kubernetes services. Without it, the cloud load balancer health probes fail and traffic never reaches the ingress controller.
Verify the controller is running:
kubectl get pods -n ingress-nginx
The NGINX pod should show 1/1 Running before proceeding.
Step 5 — Build and Push Custom Docker Images
Pattern 5 requires custom Docker images for the All-in-One node, the Universal Gateway, and the API Control Plane (shared with the Key Manager), all with the JDBC driver for your database.
Choosing a base image
- DockerHub (
wso2/wso2am:4.6.0,wso2/wso2am-acp:4.6.0,wso2/wso2am-universal-gw:4.6.0) — packages the GA release. Suitable for evaluation and development. - WSO2 Private Registry (
docker.wso2.com/wso2am:4.6.0.0,docker.wso2.com/wso2am-acp:4.6.0.0,docker.wso2.com/wso2am-universal-gw:4.6.0.0) — includes WSO2 Updates and is recommended for production. Requires an active WSO2 Subscription.
-
Create a directory for the custom images:
mkdir wso2am-custom && cd wso2am-custom -
Create a
Dockerfile.aiofor the All-in-One image:FROM wso2/wso2am:4.6.0 ADD --chown=wso2carbon:wso2 \ https://repo1.maven.org/maven2/mysql/mysql-connector-java/8.0.28/mysql-connector-java-8.0.28.jar \ /home/wso2carbon/wso2am-4.6.0/repository/components/lib/ -
Create a
Dockerfile.acpfor the ACP image (also used for the Key Manager):FROM wso2/wso2am-acp:4.6.0 ADD --chown=wso2carbon:wso2 \ https://repo1.maven.org/maven2/mysql/mysql-connector-java/8.0.28/mysql-connector-java-8.0.28.jar \ /home/wso2carbon/wso2am-acp-4.6.0/repository/components/lib/ -
Create a
Dockerfile.gwfor the Universal Gateway image:FROM wso2/wso2am-universal-gw:4.6.0 ADD --chown=wso2carbon:wso2 \ https://repo1.maven.org/maven2/mysql/mysql-connector-java/8.0.28/mysql-connector-java-8.0.28.jar \ /home/wso2carbon/wso2am-universal-gw-4.6.0/repository/components/lib/ -
Build all three images, replacing
<REGISTRY>and<TAG>with your values:docker buildx build --platform linux/amd64 -f Dockerfile.aio -t <REGISTRY>/wso2am-mysql:<TAG> . docker buildx build --platform linux/amd64 -f Dockerfile.acp -t <REGISTRY>/wso2am-acp-mysql:<TAG> . docker buildx build --platform linux/amd64 -f Dockerfile.gw -t <REGISTRY>/wso2am-gw-mysql:<TAG> .Matching your cluster architecture
The
--platformflag ensures the image is built for the architecture your cluster nodes run on. Most managed clusters (AKS, GKE) and Linux servers uselinux/amd64. If you are building on Apple Silicon (M1/M2/M3/M4) without this flag, the image will be built forlinux/arm64and the pod will fail to start withno match for platform in manifest.To check your cluster node architecture:
kubectl get nodes -o jsonpath='{.items[*].status.nodeInfo.architecture}' -
Push all three images to your container registry:
docker push <REGISTRY>/wso2am-mysql:<TAG> docker push <REGISTRY>/wso2am-acp-mysql:<TAG> docker push <REGISTRY>/wso2am-gw-mysql:<TAG> -
Get the image digests — you will need them when configuring your values files:
docker inspect <REGISTRY>/wso2am-mysql:<TAG> \
  --format='{{index .RepoDigests 0}}'

docker inspect <REGISTRY>/wso2am-acp-mysql:<TAG> \
  --format='{{index .RepoDigests 0}}'

docker inspect <REGISTRY>/wso2am-gw-mysql:<TAG> \
  --format='{{index .RepoDigests 0}}'
Step 6 — Set Up the Database
Pattern 5 requires two databases: apim_db and shared_db. Both must be reachable from inside the Kubernetes cluster before the pods start.
Follow the Setting Up Databases guide to:
- Set up a database instance accessible from your cluster
- Obtain the schema scripts for your database type
- Run the scripts to initialise both databases
Note
The JDBC driver for your database is already included in the custom Docker image you built in Step 5. You do not need to follow the JDBC driver steps in the VM-oriented sections of that guide.
Once the scripts have been run, verify that both databases are set up correctly before proceeding:
- Connect to your database instance and confirm that
apim_dbandshared_dbboth exist - Check that tables have been created in each database (the
shared_dbscript createsUM_*andREG_*tables; theapim_dbscript createsAM_*tables)
Step 7 — Create the Keystore Secret
The Helm chart mounts a Kubernetes secret named apim-keystore-secret as a volume into the pods. The pods will not start if this secret does not exist.
-
Create the
wso2namespace:kubectl create namespace wso2 -
Extract the default keystores from your All-in-One image and create the secret:
mkdir -p keystores docker run --rm -v "$(pwd)/keystores:/keystores" --entrypoint bash <REGISTRY>/wso2am-mysql:<TAG> -c "cp /home/wso2carbon/wso2am-4.6.0/repository/resources/security/wso2carbon.jks /home/wso2carbon/wso2am-4.6.0/repository/resources/security/client-truststore.jks /keystores/" kubectl create secret generic apim-keystore-secret \ --from-file=wso2carbon.jks=keystores/wso2carbon.jks \ --from-file=client-truststore.jks=keystores/client-truststore.jks \ -n wso2 -
Verify the secret was created:
kubectl get secret apim-keystore-secret -n wso2
Note
The commands above use the default WSO2 keystores which are suitable for evaluation only. For production-level keystore setup, refer to Configuring Keystores in WSO2 API Manager.
Step 8 — Deploy the All-in-One
-
Download the default values file for the All-in-One:
curl -L https://raw.githubusercontent.com/wso2/helm-apim/4.6.x/docs/am-pattern-5-all-in-one_GW_KM/default_values.yaml \ -o values-aio.yaml -
Open
values-aio.yamland update the sections below before deploying.Disable AIO ingresses for gateway traffic — the dedicated Universal Gateway owns the gateway, websocket, and websub ingresses. Disable them on the AIO to prevent conflicts:
kubernetes:
  ingress:
    gateway:
      enabled: false
    websocket:
      enabled: false
    websub:
      enabled: false
Warning
On managed clusters (AKS, GKE), the NGINX admission webhook enforces that no two Ingress resources can claim the same hostname. If these are left enabled, the
helm install apim-gwcommand will fail. The AIOmanagementingress (am.wso2.com) remains enabled — only the gateway-related ingresses are disabled here.Custom image — point to the All-in-One image you built in Step 5:
wso2:
  deployment:
    image:
      registry: "docker.io"
      repository: "<your-username>/wso2am-mysql"
      tag: "<TAG>"
      digest: "sha256:abcdef..."
Database connection — point to the database you set up in Step 6:
  apim:
    configurations:
      databases:
        apim_db:
          url: "<JDBC_URL_FOR_APIM_DB>"
          username: "<DB_USERNAME>"
          password: "<DB_PASSWORD>"
        shared_db:
          url: "<JDBC_URL_FOR_SHARED_DB>"
          username: "<DB_USERNAME>"
          password: "<DB_PASSWORD>"
Replace
<JDBC_URL_FOR_APIM_DB>and<JDBC_URL_FOR_SHARED_DB>with the JDBC connection URL for your database. For URL formats per database type, see Setting Up Databases. -
Deploy the All-in-One:
helm install apim wso2/wso2am-all-in-one \ --version 4.6.0-1 \ --namespace wso2 --create-namespace \ --dependency-update \ -f values-aio.yaml -
Wait for the All-in-One pod to be ready:
kubectl get pods -n wso2 -wThe All-in-One pod should show
1/1 Runningbefore deploying the Key Manager.
Step 9 — Deploy the Key Manager
-
Download the default values file for the Key Manager:
curl -L https://raw.githubusercontent.com/wso2/helm-apim/4.6.x/docs/am-pattern-5-all-in-one_GW_KM/default_km_values.yaml \ -o values-km.yaml -
Open
values-km.yamland update the following sections.Custom image — the Key Manager uses the ACP image:
wso2:
  deployment:
    image:
      registry: "docker.io"
      repository: "<your-username>/wso2am-acp-mysql"
      tag: "<TAG>"
      digest: "sha256:abcdef..."
Note
The default values file pre-configures the service URLs assuming the All-in-One was deployed with release name
apim. If you used a different release name, runkubectl get svc -n wso2to find the correct service name and updateeventhub.serviceUrlandeventhub.urlsin the values file.Database connection — the Key Manager needs access to both databases:
  apim:
    configurations:
      databases:
        apim_db:
          url: "<JDBC_URL_FOR_APIM_DB>"
          username: "<DB_USERNAME>"
          password: "<DB_PASSWORD>"
        shared_db:
          url: "<JDBC_URL_FOR_SHARED_DB>"
          username: "<DB_USERNAME>"
          password: "<DB_PASSWORD>"
Replace
<JDBC_URL_FOR_APIM_DB>and<JDBC_URL_FOR_SHARED_DB>with the JDBC connection URL for your database. For URL formats per database type, see Setting Up Databases. -
Deploy the Key Manager:
helm install apim-km wso2/wso2am-km \ --version 4.6.0-1 \ --namespace wso2 \ --dependency-update \ -f values-km.yaml -
Wait for the Key Manager pod to be ready:
kubectl get pods -n wso2 -wThe Key Manager pod should show
1/1 Runningbefore deploying the Universal Gateway.
Step 10 — Deploy the Universal Gateway
Deploy the Universal Gateway using the default values:
helm install apim-gw wso2/wso2am-universal-gw \
  --version 4.6.0-1 \
  --namespace wso2 \
  --dependency-update \
  -f https://raw.githubusercontent.com/wso2/helm-apim/4.6.x/docs/am-pattern-5-all-in-one_GW_KM/default_gw_values.yaml
To customise before deploying
If you used different release names than apim-km and apim, or want to make other changes, download the values file first, edit it, then replace the -f <url> above with -f values-gw.yaml:
curl -L https://raw.githubusercontent.com/wso2/helm-apim/4.6.x/docs/am-pattern-5-all-in-one_GW_KM/default_gw_values.yaml \
  -o values-gw.yaml
Step 11 — Configure DNS
-
Run the following command in a separate terminal and keep it running:
minikube tunnelNote
minikube tunnelrequires sudo privileges to expose ports 80 and 443. You will be prompted for your system password. Once entered, the tunnel will stay running silently — this is expected. Do not close this terminal. Open a new terminal for the next steps. -
Get the external IP assigned to the ingress:
kubectl get ing -n wso2The ADDRESS column should now show
127.0.0.1. -
Add the following entry to your
/etc/hostsfile:127.0.0.1 am.wso2.com gw.wso2.com websocket.wso2.com websub.wso2.com
-
Get the external IP assigned to the ingress:
kubectl get ing -n wso2 -
Add the following entry to your
/etc/hostsfile, replacing<EXTERNAL-IP>with the value from the output above:<EXTERNAL-IP> am.wso2.com gw.wso2.com websocket.wso2.com websub.wso2.com
-
Get the external IP assigned to the ingress:
kubectl get ing -n wso2 -
For quick testing, add the
ADDRESSvalue to your/etc/hosts:<EXTERNAL-IP> am.wso2.com gw.wso2.com websocket.wso2.com websub.wso2.comFor a production setup, create a DNS record in your DNS provider (e.g. Route 53, Azure DNS, Cloud DNS) mapping the hostnames to the external IP instead of using
/etc/hosts.
Note
These are the default hostnames. If you customised ingress.controlPlane.hostname, ingress.gateway.hostname, ingress.websocket.hostname, or ingress.websub.hostname in your values files, use those values here instead.
Step 12 — Access the Portals
Once DNS is configured, open the following URLs in your browser.
| Portal | URL |
|---|---|
| Publisher | https://<kubernetes.ingress.management.hostname>/publisher |
| Developer Portal | https://<kubernetes.ingress.management.hostname>/devportal |
| Carbon Console | https://<kubernetes.ingress.management.hostname>/carbon |
| Gateway | https://<kubernetes.ingress.gateway.hostname> |
Chrome may block access
Chrome enforces HSTS preloading for *.wso2.com domains, which removes the option to bypass the self-signed certificate warning entirely. Use Firefox or Safari instead, and click through the certificate warning when prompted.
Replace the hostname placeholders with the actual values from your values files. Default credentials: admin / admin
Additional Configuration
All configurations in this section are made by editing your values-aio.yaml, values-km.yaml, or values-gw.yaml files. Once all changes are in place, deploy using the commands in Step 8, Step 9, and Step 10.
The Helm charts for WSO2 API Manager are available in the WSO2 Helm Chart Repository.
Resource Naming Convention
Kubernetes resources created by the Helm charts follow this naming pattern:
<RELEASE_NAME>-<CHART_NAME>-<RESOURCE_NAME>
1. Image and Registry
1.1 Private Registry Authentication
If your registry is private and requires authentication, enable imagePullSecrets in all values files:
wso2:
  deployment:
    image:
      imagePullSecrets:
        enabled: true
        username: ""
        password: ""
2. Database and Credentials
2.1 Configure Admin Credentials
The default admin credentials are admin/admin. Change these before deploying to any shared or production environment to prevent unauthorised access.
wso2:
  apim:
    configurations:
      adminUsername: ""
      adminPassword: ""
2.2 Update Keystore Passwords
If you are mounting custom keystores (see section 3.1), update the passwords here to match. If left as defaults while using custom keystores, WSO2 API-M will fail to start due to password mismatch.
wso2:
  apim:
    configurations:
      security:
        keystores:
          primary:
            password: ""
            keyPassword: ""
          internal:
            password: ""
            keyPassword: ""
          tls:
            password: ""
            keyPassword: ""
        truststore:
          password: ""
Note
keyPassword must equal password for each keystore. WSO2 API Manager requires these to be identical due to a limitation in internal third-party components — setting them to different values will cause startup failures.
2.3 Configure the Internal Encryption Key
In a distributed deployment, all API Manager nodes must use the same internal encryption key to encrypt and decrypt shared data. Set this before the first startup — changing it afterwards will cause decryption failures for any data already encrypted.
-
Generate a unique 256-bit key:
openssl rand -hex 32 -
Add the key to all your values files:
wso2:
  apim:
    configurations:
      encryption:
        key: "<generated-64-char-hex-key>"
Warning
All nodes in the deployment must use the exact same key. A mismatch will cause decryption failures across the cluster.
2.4 Component Configuration References
All available configuration options for each Helm chart are documented in their respective component guides:
3. Security
3.1 Mount Keystore and Truststore
In Step 7, you created apim-keystore-secret using the default WSO2 keystores. Those are self-signed certificates suitable for evaluation only.
For production-level keystore setup, refer to Configuring Keystores in WSO2 API Manager. Then recreate the secret with your own certificates:
kubectl create secret generic apim-keystore-secret \
  --from-file=wso2carbon.jks \
  --from-file=client-truststore.jks \
  -n wso2
Keep the following in mind:
- The secret must be created in the same namespace as the deployment (e.g.
wso2). - Use the same secret name in both the
kubectlcommand above and in your values files. - If you are using different keystore filenames or aliases, update the helm chart configurations accordingly.
For more details on configuring keystores, see Configuring Keystores in WSO2 API Manager.
3.2 Encrypt Secrets
By default, database passwords and other sensitive values are stored as plain text in the values files. This is acceptable for local testing but a security risk in production. Use apictl to encrypt these values before deploying.
-
Initialize
apictlusing the trust store:apictl secret initExample:
apictl secret init Enter Key Store location: /home/wso2carbon/wso2am-4.6.0/repository/resources/security/wso2carbon.jks Enter Key Store password: Enter Key alias: wso2carbon Enter Key password: Key Store initialization completed -
Encrypt each of the following values using
apictl secret create:admin_passwordkeystore_passwordkeystore_key_passwordssl_keystore_passwordssl_key_passwordinternal_keystore_passwordinternal_keystore_key_passwordtruststore_passwordapim_db_passwordshared_db_password
Example:
apictl secret create Enter plain alias for secret: db_password Enter plain text secret: Repeat plain text secret: db_password : eKALmLVA+HFVl7vxxxxxxxxxxxxxxxxxxxxxxxxxxxjakhHN -
Replace the plain text values in your values files with the encrypted values.
-
Enable secure vault:
# -- Secure vault enabled secureVaultEnabled: true -
If you are using a cloud provider secret manager, enable it and reference the internal keystore password:
aws:
  # -- If AWS is used as the cloud provider
  enabled: true

internalKeystorePassword:
  # -- Secret name in the cloud provider's secret manager
  secretName: ""
  # -- Secret key in the cloud provider's secret manager
  secretKey: ""
Note
Currently, AWS, Azure, and GCP Secrets Managers are supported.
3.3 Configure SSL
For WSO2 recommended SSL best practices when exposing services outside the cluster, refer to the WSO2 container guide.
3.4 Configure JWKS URL
Important for Pattern 5 deployments
In Pattern 5, the Key Manager handles token issuance. Use the KM Kubernetes service name for the JWKS URL so all components can resolve it via cluster DNS:
wso2:
  apim:
    configurations:
      oauth_config:
        oauth2JWKSUrl: "https://<KM_SERVICE_NAME>:9443/oauth2/jwks"
4. Routing Controller
4.1 Configure NGINX Ingress Controller
Configure Ingress Annotations
ingressClass: "nginx"
ingress:
  tlsSecret: ""
  ratelimit:
    enabled: false
    zoneName: ""
    burstLimit: ""
  controlPlane:
    hostname: "am.wso2.com"
    annotations:
      nginx.ingress.kubernetes.io/backend-protocol: "HTTPS"
      nginx.ingress.kubernetes.io/affinity: "cookie"
      nginx.ingress.kubernetes.io/session-cookie-name: "route"
      nginx.ingress.kubernetes.io/session-cookie-hash: "sha1"
Refer to the NGINX ingress annotations documentation for the full list of supported options.
Configure TLS for Ingress
kubectl create secret tls my-tls-secret \
  --key <private-key-file> \
  --cert <certificate-file> \
  -n wso2
Then set the secret name in your values file under ingress.tlsSecret. Refer to the Kubernetes ingress TLS documentation for more details.
5. Gateway and High Availability
5.1 Configure Key Manager, EventHub, and Throttling
In Pattern 5, the Gateway connects to the dedicated KM for token validation, and to the All-in-One for event subscriptions and throttling:
km:
  serviceUrl: "<KM_SERVICE_NAME>"

eventhub:
  serviceUrl: "<AIO_SERVICE_NAME>"
  urls:
    - "<AIO_SERVICE_NAME>"

throttling:
  serviceUrl: "<AIO_SERVICE_NAME>"
  servicePort: 9443
  urls:
    - "<AIO_SERVICE_NAME>"
  unlimitedTier: true
  headerBasedThrottling: false
  jwtClaimBasedThrottling: false
  queryParamBasedThrottling: false
km:
  serviceUrl: "<KM_SERVICE_NAME>"

eventhub:
  serviceUrl: "<AIO_SERVICE_NAME>"
  urls:
    - "<AIO_POD_1_SERVICE_NAME>"
    - "<AIO_POD_2_SERVICE_NAME>"

throttling:
  serviceUrl: "<AIO_SERVICE_NAME>"
  servicePort: 9443
  urls:
    - "<AIO_POD_1_SERVICE_NAME>"
    - "<AIO_POD_2_SERVICE_NAME>"
  unlimitedTier: true
  headerBasedThrottling: false
  jwtClaimBasedThrottling: false
  queryParamBasedThrottling: false
5.2 Configure Gateway Replicas
wso2:
  deployment:
    replicas: 2
    minReplicas: 1
    maxReplicas: 3
5.3 Configure Multiple Gateways
gateway:
  environments:
    - name: "Default"
      type: "hybrid"
      gatewayType: "Regular"
      provider: "wso2"
      displayInApiConsole: true
      description: "Handles both production and sandbox token traffic."
      showAsTokenEndpointUrl: true
      serviceName: "apim-gw-wso2am-gateway-service"
      servicePort: 9443
      wsHostname: "websocket.wso2.com"
      httpHostname: "gw.wso2.com"
      websubHostname: "websub.wso2.com"
See Deploy through multiple API Gateways for more details.
5.4 Configure User Store Properties
userStore:
  type: "database_unique_id"
  properties:
    ReadGroups: true
Warning
If you do not need to set any custom properties, remove the properties block entirely. An empty properties block will cause the deployment to fail.
See Working with user store properties for the full list of options.
5.5 Enable High Availability for the All-in-One
By default, Pattern 5 deploys a single All-in-One pod. To run two pods in an active-active configuration, set:
wso2:
  deployment:
    highAvailability: true
When enabling HA, also update the EventHub and throttling URLs in values-gw.yaml to include both pod service names — see section 5.1.
6. Deploy with Custom Values
Once your values files are configured, deploy all three components in order:
helm install apim wso2/wso2am-all-in-one \
  --version 4.6.0-1 \
  --namespace wso2 --create-namespace \
  --dependency-update \
  -f values-aio.yaml

helm install apim-km wso2/wso2am-km \
  --version 4.6.0-1 \
  --namespace wso2 \
  --dependency-update \
  -f values-km.yaml

helm install apim-gw wso2/wso2am-universal-gw \
  --version 4.6.0-1 \
  --namespace wso2 \
  --dependency-update \
  -f values-gw.yaml
Deployment Parameters
- Release names:
apim,apim-km,apim-gw <namespace>— Kubernetes namespace to deploy into (e.g.wso2)- Helm chart paths:
wso2/wso2am-all-in-one,wso2/wso2am-km,wso2/wso2am-universal-gw(or local clones)