Configuring Identity Server 7.x as External IDP using OIDC
WSO2 API Manager uses the OIDC Single Sign-On feature by default. This document explains how to connect WSO2 Identity Server 7.x (or WSO2 Identity Server as a Key Manager) as a third party Identity provider to API-Manager.
Prerequisites
- Download the API Manager distribution from https://wso2.com/api-manager/.
-
Download the Identity Server 7.x distribution from https://wso2.com/identity-server/.
-
Start the APIM server using the following command:
-
Start the IS server using the following command:
Configure the Identity Server 7.x
Step - 1 Configure the Service Provider
-
Sign in to the Management Console of WSO2 IS by browsing the following URL:
-
Create a Standard-Based application by navigating to the Applications section from the left panel.
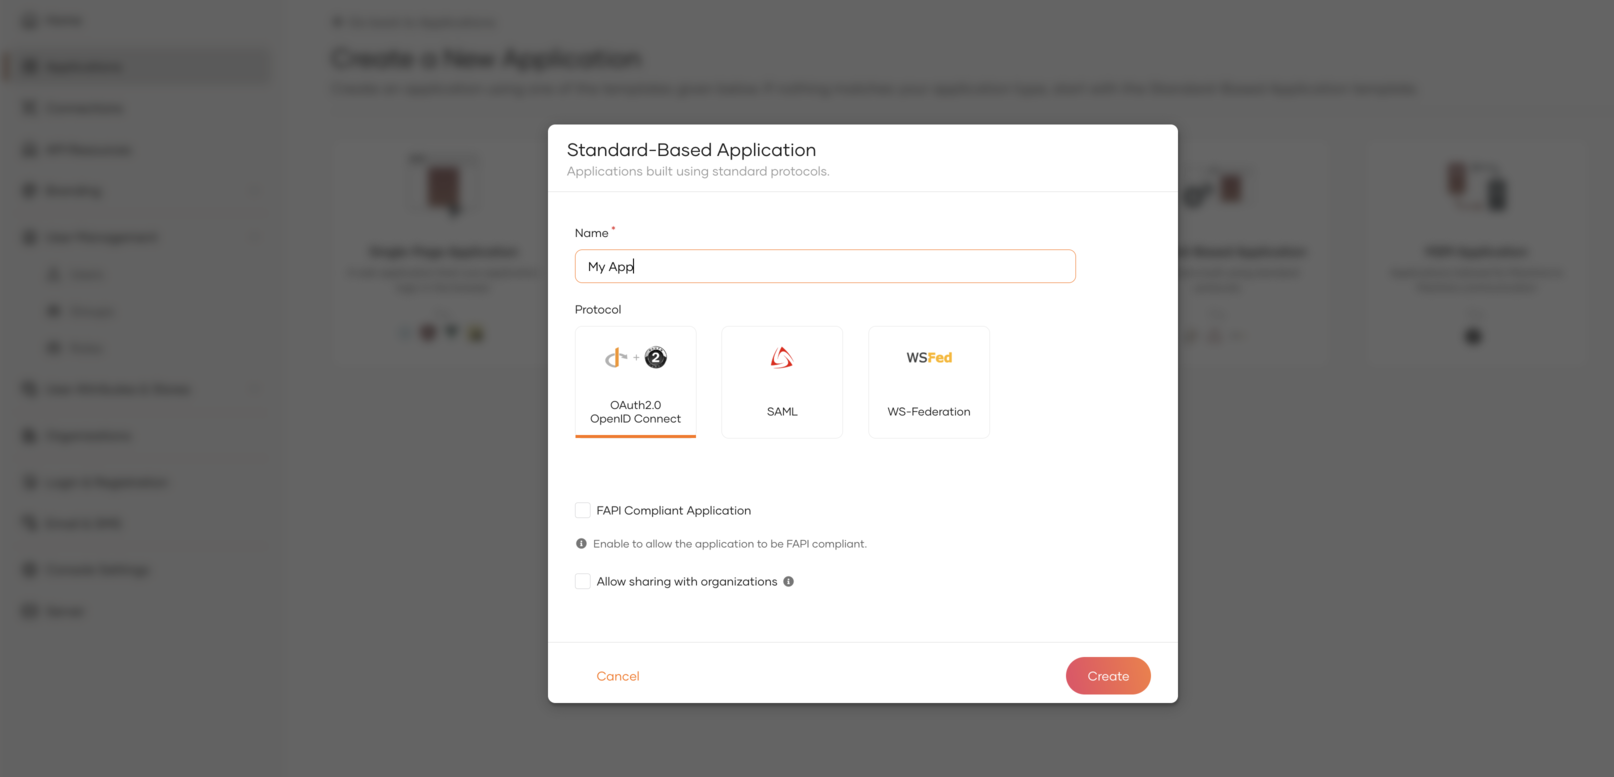
-
Edit the created Application:
-
In the Protocol section do the following and update.
- Enable code, client credential and password grant types.
- Add
https://localhost:9444/commonauthas the Authorized redirect URLs. - Add
https://localhost:9444as Allowed origins. - Make Access Token type as JWT.
-
In the User Attributes section do the following and update.
- Select Groups and Profile as requested attributes and Update.
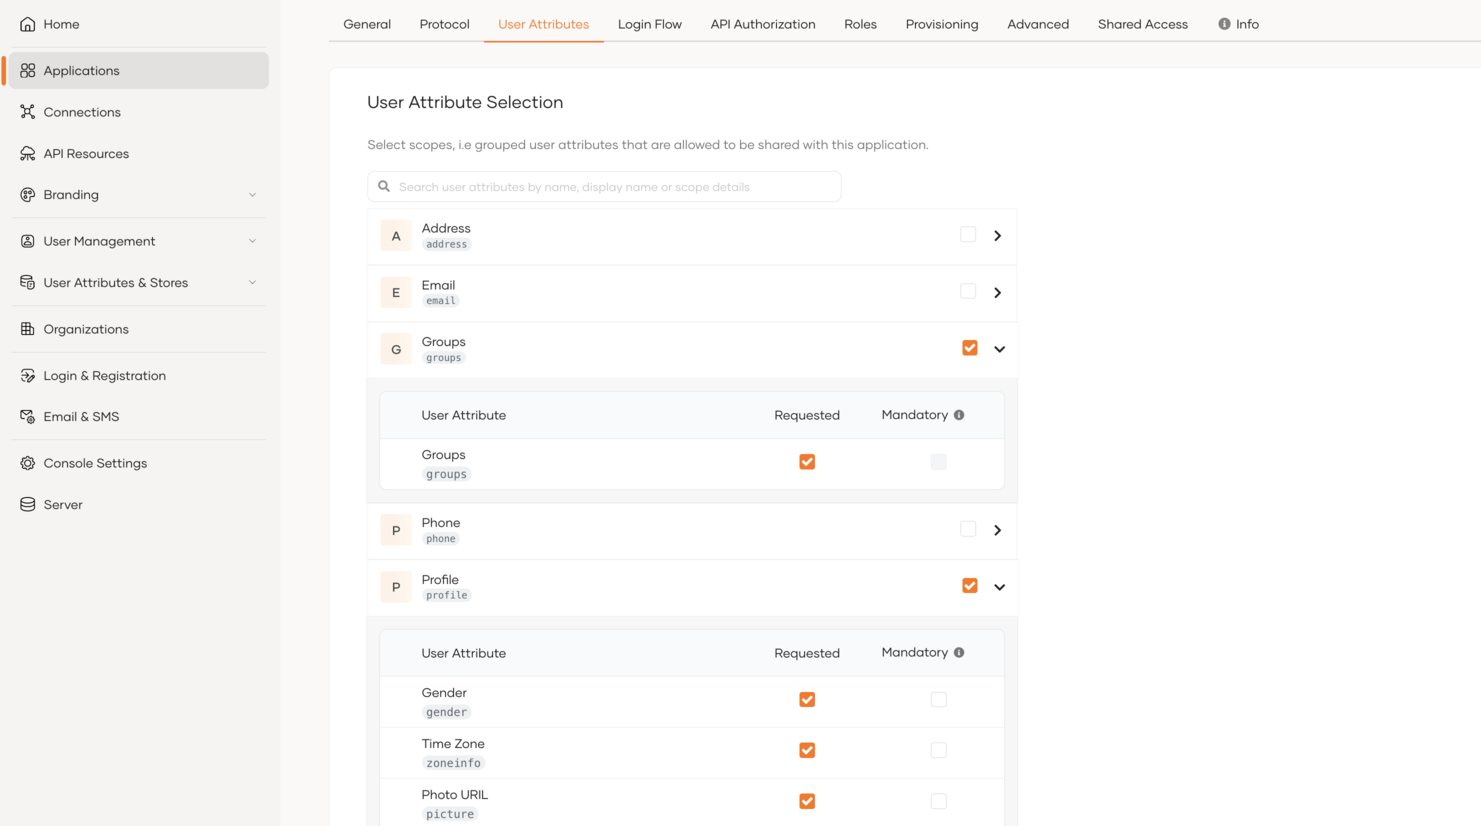
- Enable 'Assign alternatice subject identifier', select the Username as Subject attribute and Update.
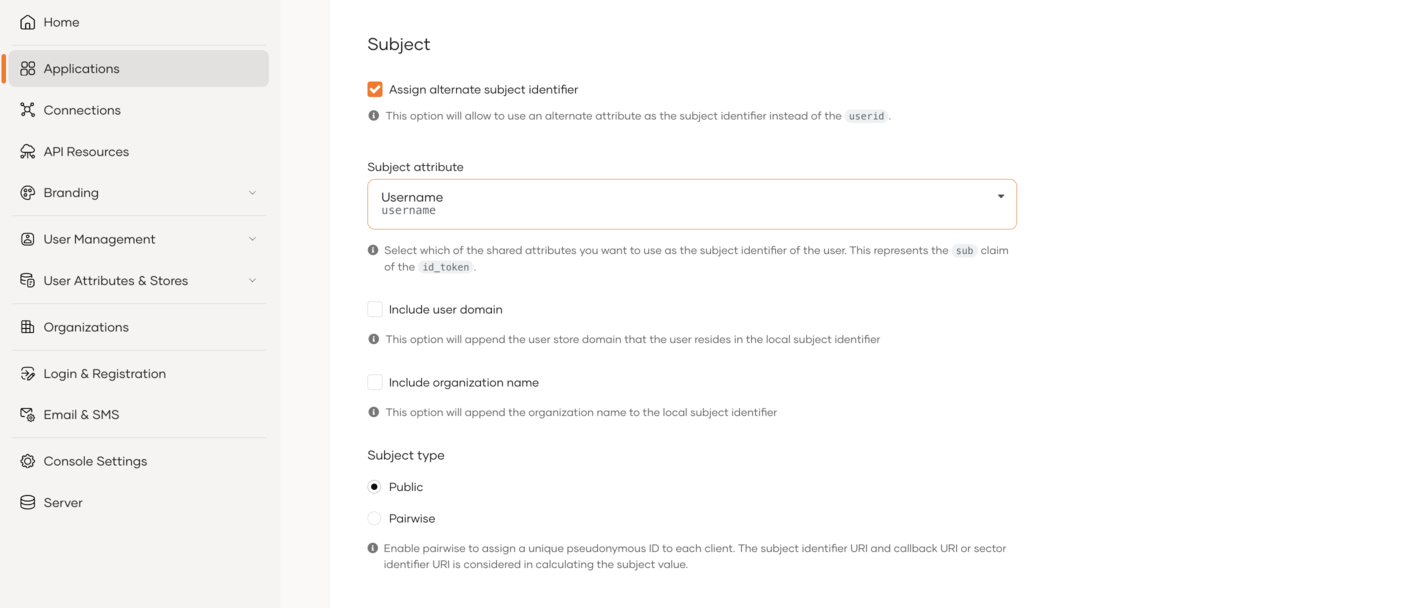
-
Step - 2 Create groups and users
-
Navigate to User Management → Groups → New Group and create a new group
publisher_groupwithout assigning users.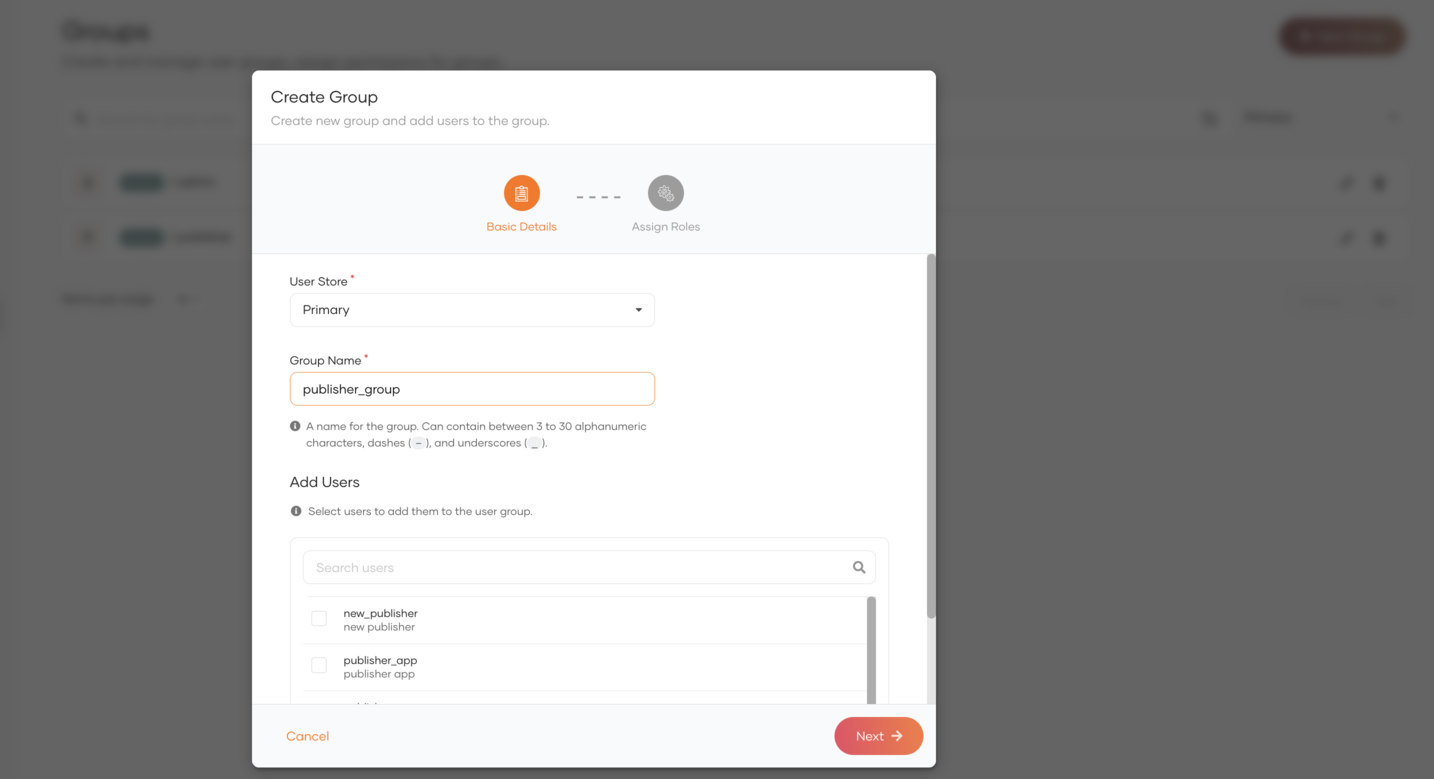
-
Navigate to User Management → Users → Add User and create a user
new_publisherproviding required details.
-
Assign
publisher_groupgroup to thenew_publisher.
Repeat the same steps to create a group for Api Users and assign users to it. Now the following users are created in Identity Server with the given groups.
| User | Group |
|---|---|
| new_publisher | publisher_group |
| new_user | user_group |
Configure the API Manager
Step - 1 Configure the Identity Provider
-
Sign in to the Management Console of API Manager by browsing the following URL:
-
Navigate to the Identity Providers section under Main → Identity and create a new Identity Provider.
-
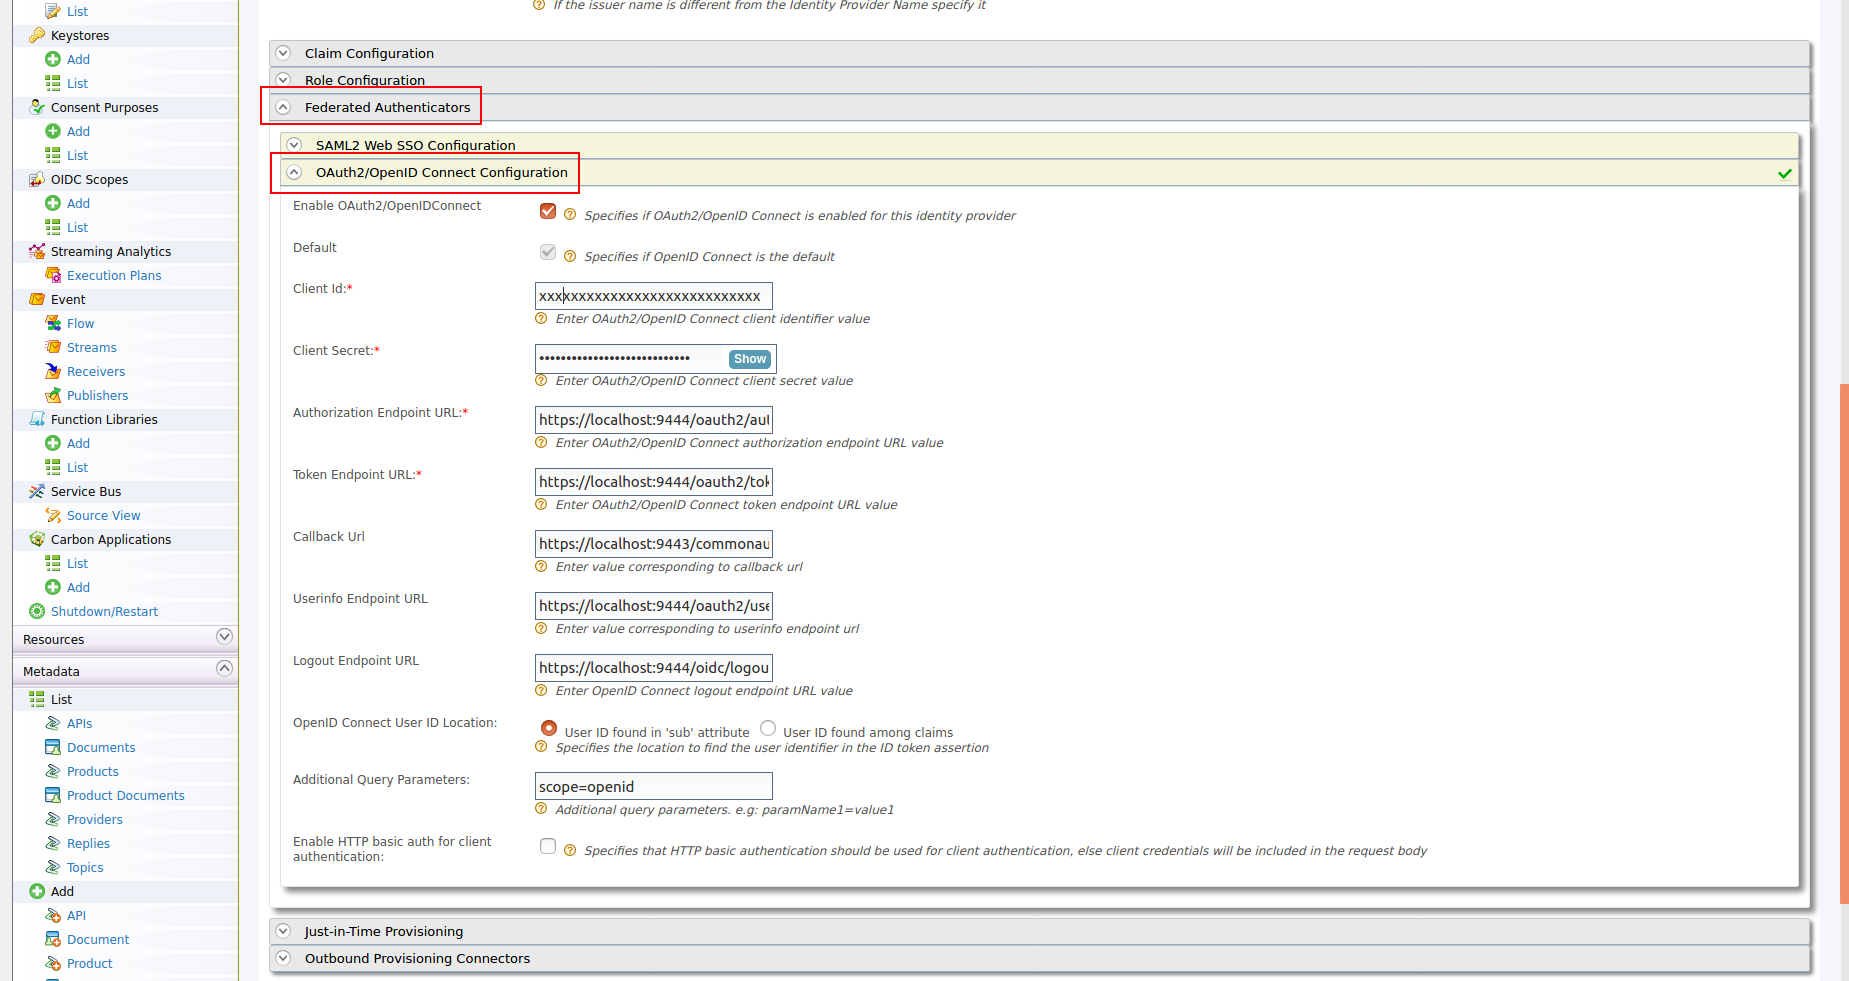
Expand the Federated Authenticators section and add the following configurations under OAuth2/OpenIDConnect Configuration:
Enable OAuth2/OpenIDConnect True Client Id Client Id of the Service Provider created in Identity Server Client Secret Client Secret of the Service Provider created in Identity Server Authorization Endpoint URL https://is.wso2.com:9444/oauth2/authorize Token Endpoint URL https://is.wso2.com:9444/oauth2/token Callback Url https://apim.wso2.com:9443/commonauth Userinfo Endpoint URL https://is.wso2.com:9444/oauth2/userinfo Logout Endpoint URL https://is.wso2.com:9444/oidc/logout The following image shows the sample values for OAuth2/OpenIDConnect Configurations:
-
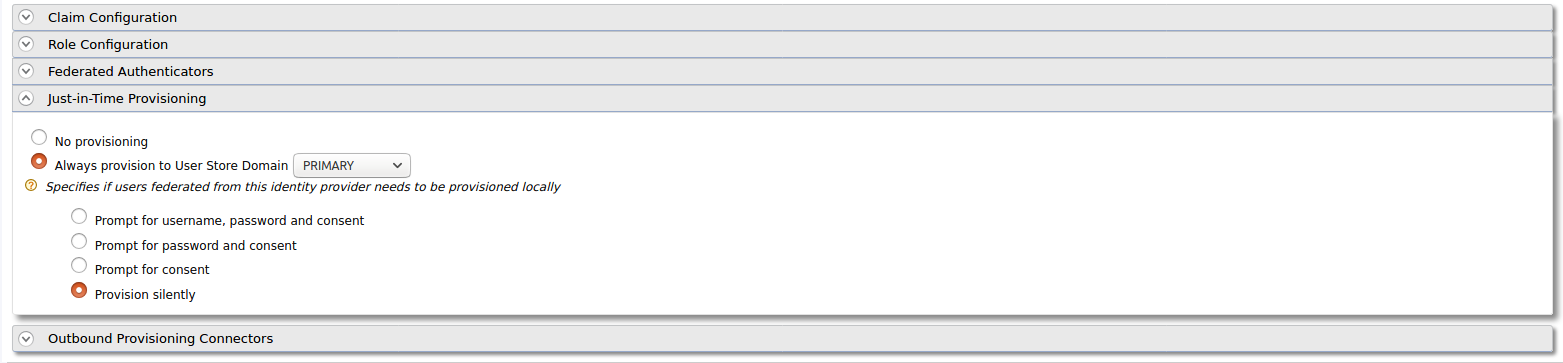
Enable Just-in-Time Provisioning to provision the users in API Manager:
-
Add the following role mapping under the Role Configuration section:
Identity Server Group Roles Mapped in API Manager user_group Internal/Subscriber publisher_group Internal/publisher 
Tip
Instead of using the default internal roles, you can also create new roles in API Manager and map it to the provisioned users.
-
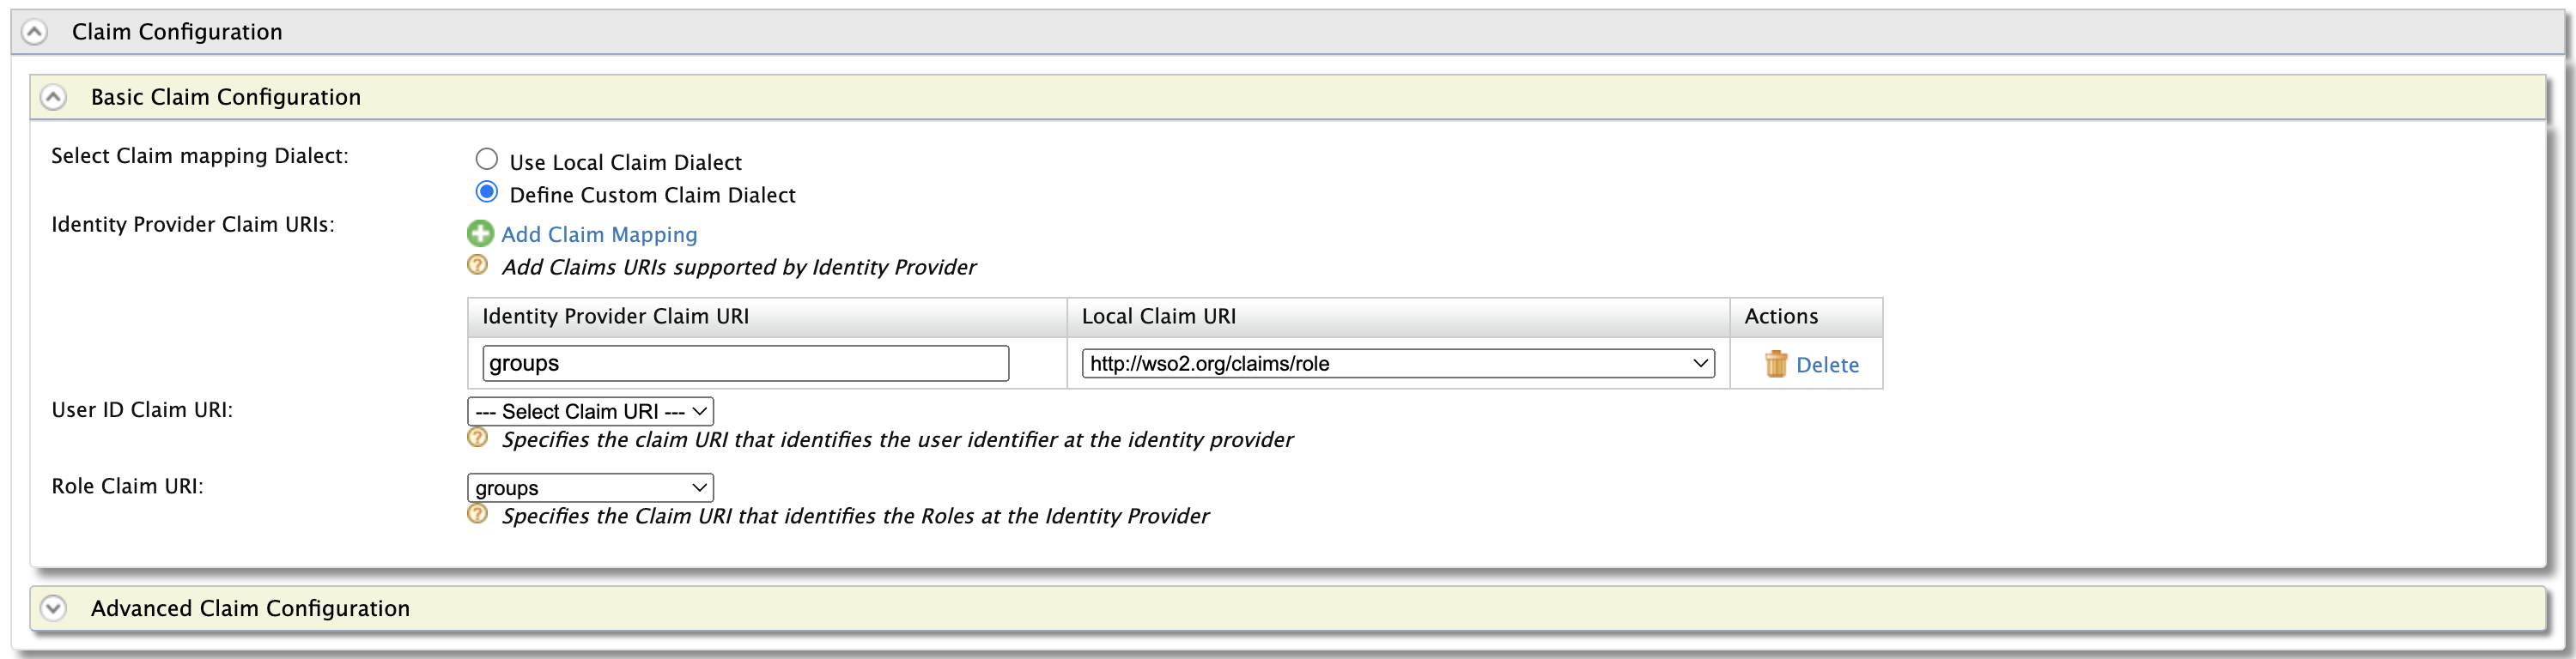
Add the following claim mapping under the Claim Configuration section.
Identity Provider Claim URI Local Claim URI groups http://wso2.org/claims/role Also select groups as the Role Claim URI.
-
Step - 2 Configure the Service Provider
-
Navigate to Service Providers section and list the Service Providers. There are two service providers created for Publisher portal and Developer portal named as
apim_publisherandapim_devportal. Edit theapim_publisherservice provider.Attention
You will have to log into the Developer Portal and Publisher at least once for the two service providers to appear as it is created during first login.
-
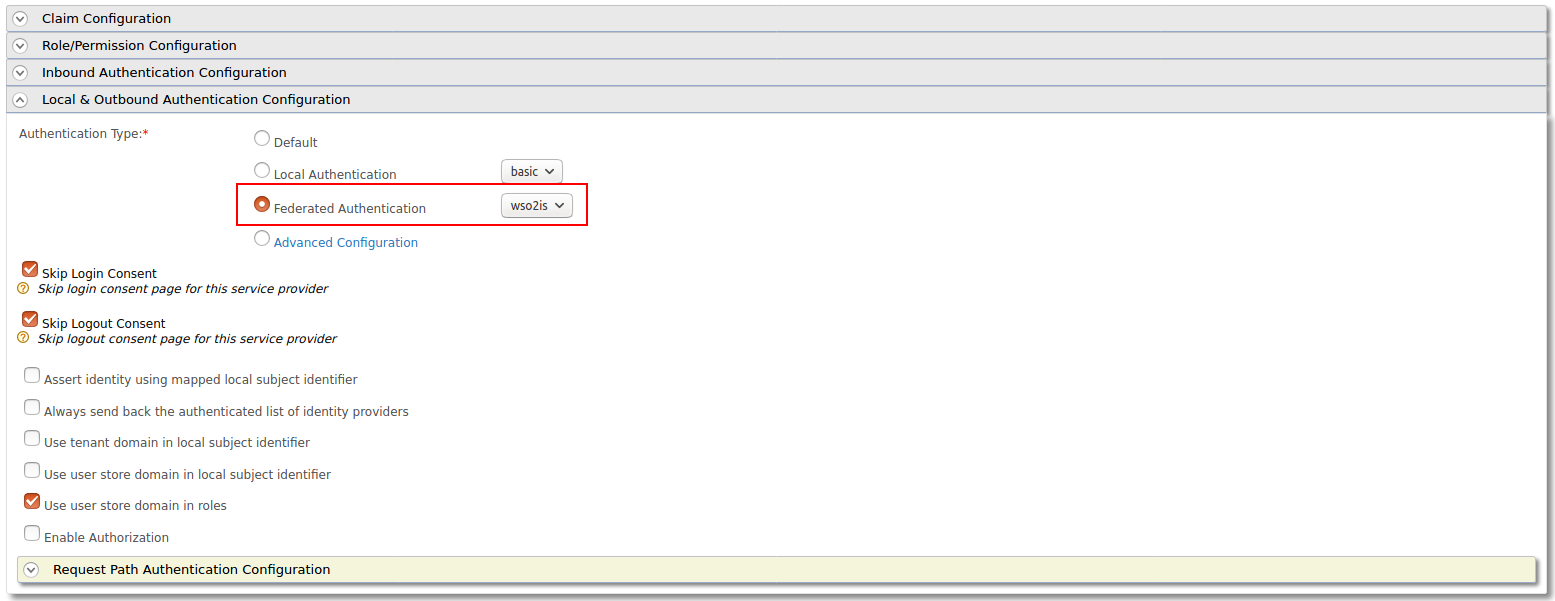
Expand the Local & Outbound Authentication Configuration section and select Federated Authentication as Authentication Type and select the name of the Identity Provider you created in previous step and update.
-
Repeat the same step for
apim_devportalService Provider as well.
Now you will be able to login to Publisher and Devportal using the users in WSO2 Identity Server.