Configuring APIM Analytics
WSO2 API Manager Analytics provides reports, statistics, and graphs on the APIs deployed in WSO2 API Manager. You can configure alerts to monitor these APIs and detect unusual activity, manage locations via Geo-location statistics, and carry out a detailed analysis of the logs. WSO2 API Manager has an enhanced distribution of Analytics to cater to the API Manager specific scenarios that are used here to configure API-M Analytics.
To set up analytics for quick demos and try-out scenarios, see the Quick Setup section, or to set up analytics for a production environment, see the Standard Setup section.
Note
- It is not recommended to configure the Gateway node as an analytics server.
Quick Setup
Follow the instructions below if you wish to set up API-M Analytics for quick demos and to try-out scenarios.
-
Download and install WSO2 API-M.
WSO2 API-M via the WSO2 API Manager page. For more information on installing WSO2 API-M, see the Installation Guide.
-
Download and install WSO2 API-M Analytics.
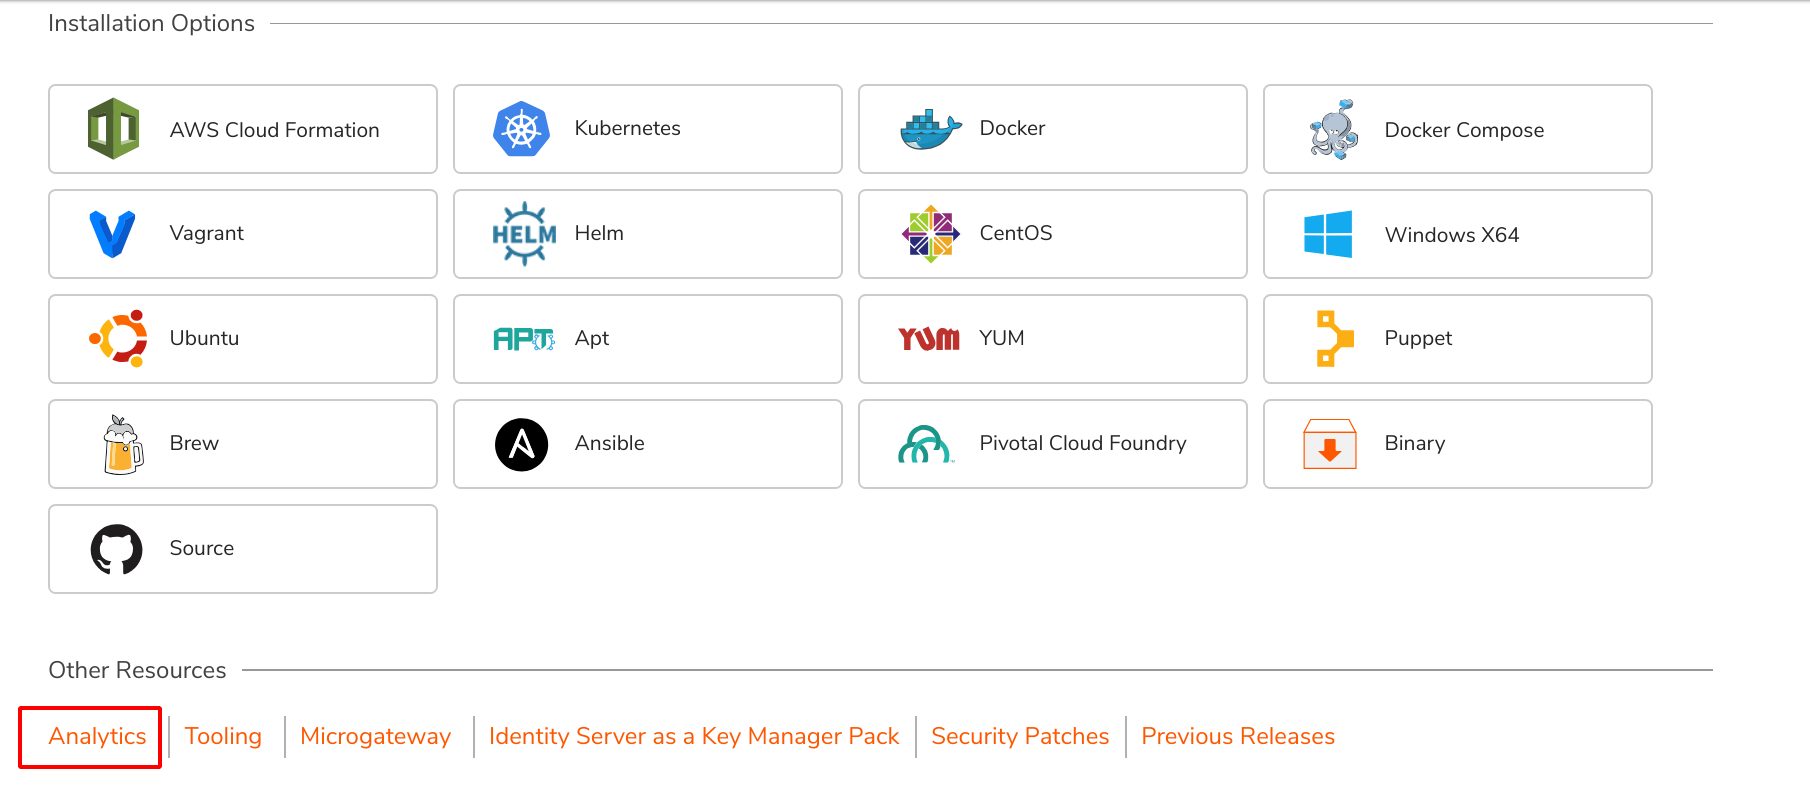
To download WSO2 API-M Analytics go to the WSO2 API Manager page, click Download to expand the installation options. Navigate to the Other Resources section, and click Analytics.
Note
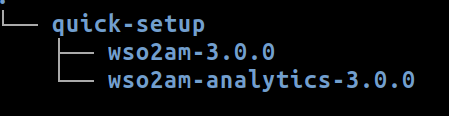
If you are following the quick setup make sure both the binaries ( unzipped API-M pack and unzipped Analytics pack) are inside the same directory. Because the default configurations such as database connection URLs etc are configured assuming that both the packs are inside the same folder.
-
To enable Analytics, open the
<API-M_HOME>/repository/conf/deployment.tomlfile and uncomment the analytics enabling section as shown below. Save this change.toml [apim.analytics] enable = trueNote
If you are working on a distributed (clustered) setup of WSO2 API Manager, do the configurations instructed to be done in API Manager in the Publisher, Store, and Gateway nodes as well.
-
Start the Worker profile of the Analytics Server.
Navigate to the
<API-M_ANALYTICS_HOME>/bindirectory in your console and execute one of the following scripts based on your OS. - On Windows:worker.bat --run- On Linux/Mac OS:sh worker.sh -
Start the API Manager server.
Navigate to the
<API-M_HOME>/bindirectory in your console and execute one of the following scripts based on your OS. - On Windows:wso2server.bat --run- On Linux/Mac OS:sh wso2server.shInfo
If API-M Analytics is properly configured in WSO2 API Manager, when you start up the API Manager server, which is after the WSO2 API-M Analytics server, you will see the following log message in the terminal which is running the API-M Analytics server.
INFO {org.wso2.carbon.databridge.core.DataBridge} - user admin connected -
Start the Dashboard profile of the Analytics Server.
Navigate to the
<API-M_ANALYTICS_HOME>/bindirectory in your console and execute one of the following scripts based on your OS. - On Windows:dashboard.bat --run
- On Linux/Mac OS:sh dashboard.sh -
Optionally, if you wish to access the business rules via the Dashboard node, you can use the dashboard profile that we started in the previous step.
You can now start using the WSO2 API Manager for its usual operations and the required Analytics functionality.
Standard Setup
Follow the instructions below if you wish to set up API-M Analytics for a production environment.
- Step 1 - Download and install WSO2 API-M
- Step 2 - Download and install WSO2 API-M Analytics
- Step 3 - Configure WSO2 API Manager to publish statistics
- Step 4 - Configure databases
- Step 5 - Configure APIM IdP Client
- Step 6 - Configure keystores
Step 1 - Download and install WSO2 API-M
Download and install WSO2 API-M via the WSO2 API Manager page. Click DOWNLOAD and go to INSTALLATION OPTIONS.
For more information on installing WSO2 API-M, see the Installation Guide.
Step 2 - Download and install WSO2 API-M Analytics
To download WSO2 API-M Analytics go to the WSO2 API Manager page, click Download to expand the installation options. Navigate to the Other Resources section, and click Analytics.
As the process of installing API-M Analytics is identical to installing WSO2 Streaming Integrator (WSO2 SI), which is part of WSO2 Enterprise Integrator 7.0.x, for more information, go to the WSO2 SI documentation.
Step 3 - Configure WSO2 API Manager to publish statistics
Follow the instructions below to do the required configurations for WSO2 API-M to publish statistics in the WSO2 API-M Analytics server.
Warning
If you are working on a distributed (clustered) setup of API Manager, carryout the instructed configurations in the Publisher, Store and Gateway nodes of the API Manager.
Open the <API-M_HOME>/repository/conf/deployment.toml file and uncomment the following section as shown below. Save this change.
[apim.analytics]
enable = true[apim.analytics] section if required.
| Parameter | Value | Description |
|---|---|---|
receiver_urls |
<protocol>://<hostname>:<port>/
|
The server URL of the remote WSO2 API-M Analytics server used to collect statistics from WSO2 API Manager. Use this configuration if there is only one group with either one or many receivers.
e.g., Three receivers within a single group can be specified as follows.
From DAS to SI
Previously, when WSO2 API-M Analytics was powered by WSO2 Data Analytics Server 3.1.0, you had to add a comma to separate the DAS URLs so that the analytics events were published to both nodes.
However, when using WSO2 API-M Analytics 3.0.0. and when publishing to a minimum HA setup of APIM analytics, you need to separate the Receiver URLs by using the pipe symbol (|) because the analytics events are published in a failover manner where only one node handles the processing at any given time.
Note If you are setting up APIM analytics on an Active-active HA setup, you need to define the URLs with comma separations, as the setup is configured with load-balanced configurations.
Note If the |
[[apim.analytics.url_group]]
|
<protocol>://<hostname>:<port>/ |
An event can also be published to multiple receiver groups, where each group has one or more receivers.
For each receiver groups we need to repeat the above section, whereas receivers are delimited by commas.
e.g., Two receiver groups with two load balanced receivers in each can be specified as follows.
Note If the |
receiver_username |
A valid administrator username | The administrator user name to log into the remote WSO2 API-M Analytics server that collects statistics from WSO2 API Manager. If you enable email user, you need to configure Note If the username and password of the API-M Analytics node is same as that of API-M node, you can uncomment
username and password parameters
username and password are uncommented, then those values will be assigned to all the usernames and passwords that are under the [apim.analytics] section.
|
receiver_password |
The password of the username specified. | The administrator password to log into the remote WSO2 API-M Analytics server that collects statistics from WSO2 API Manager. |
store_api_url |
https://<host>:<port> |
The WSO2 API-M Analytics REST API URL. The WSO2 API-M Analytics REST API connection information, which are included under the REST API-M connection information, are defined as global properties, as they are common to all the WSO2 API-M analytics. |
store_api_username |
A valid administrator username | The administrator username to log into the remote WSO2 API-M Analytics server. |
store_api_password |
The password of the username specified. | The administrator password to log into the remote WSO2 API-M Analytics server. |
Save the changes.
Step 4 - Configure databases
Configuring databases allow you to persist data relating to APIs, process them and analyze. Follow the procedure below to configure databases.
Warning
When configuring API-M Analytics, change only the required properties(which are mentioned in the respective documentation) of the deployment.yaml file of either worker or dashboard runtime. Do not change other default values as it may result in an erroneous state.
Note
If you are configuring APIM Analytics related databases in Oracle, apart from the below mentioned configurations,
you need to add the alter session set NLS_DATE_FORMAT='YYYY-MM-DD HH24:MI:SS' section to each analytics related
database(either in worker or dashboard) you configure with Oracle.
In the following example APIM_ANALYTICS_DB is configured with Oracle.
- name: APIM_ANALYTICS_DB
  description: "The datasource used for APIM statistics aggregated data."
  jndiConfig:
    name: jdbc/APIM_ANALYTICS_DB
    definition:
      type: RDBMS
      configuration:
        jdbcUrl: 'jdbc:oracle:thin:@localhost:1521:XE'
        username: 'root'
        password: '123'
        driverClassName: oracle.jdbc.OracleDriver
        minIdle: 5
        maxPoolSize: 50
        idleTimeout: 60000
        connectionTestQuery: SELECT 1 FROM DUAL
        connectionInitSql: alter session set NLS_DATE_FORMAT='YYYY-MM-DD HH24:MI:SS'
        validationTimeout: 30000
        isAutoCommit: false
Configure Analytics
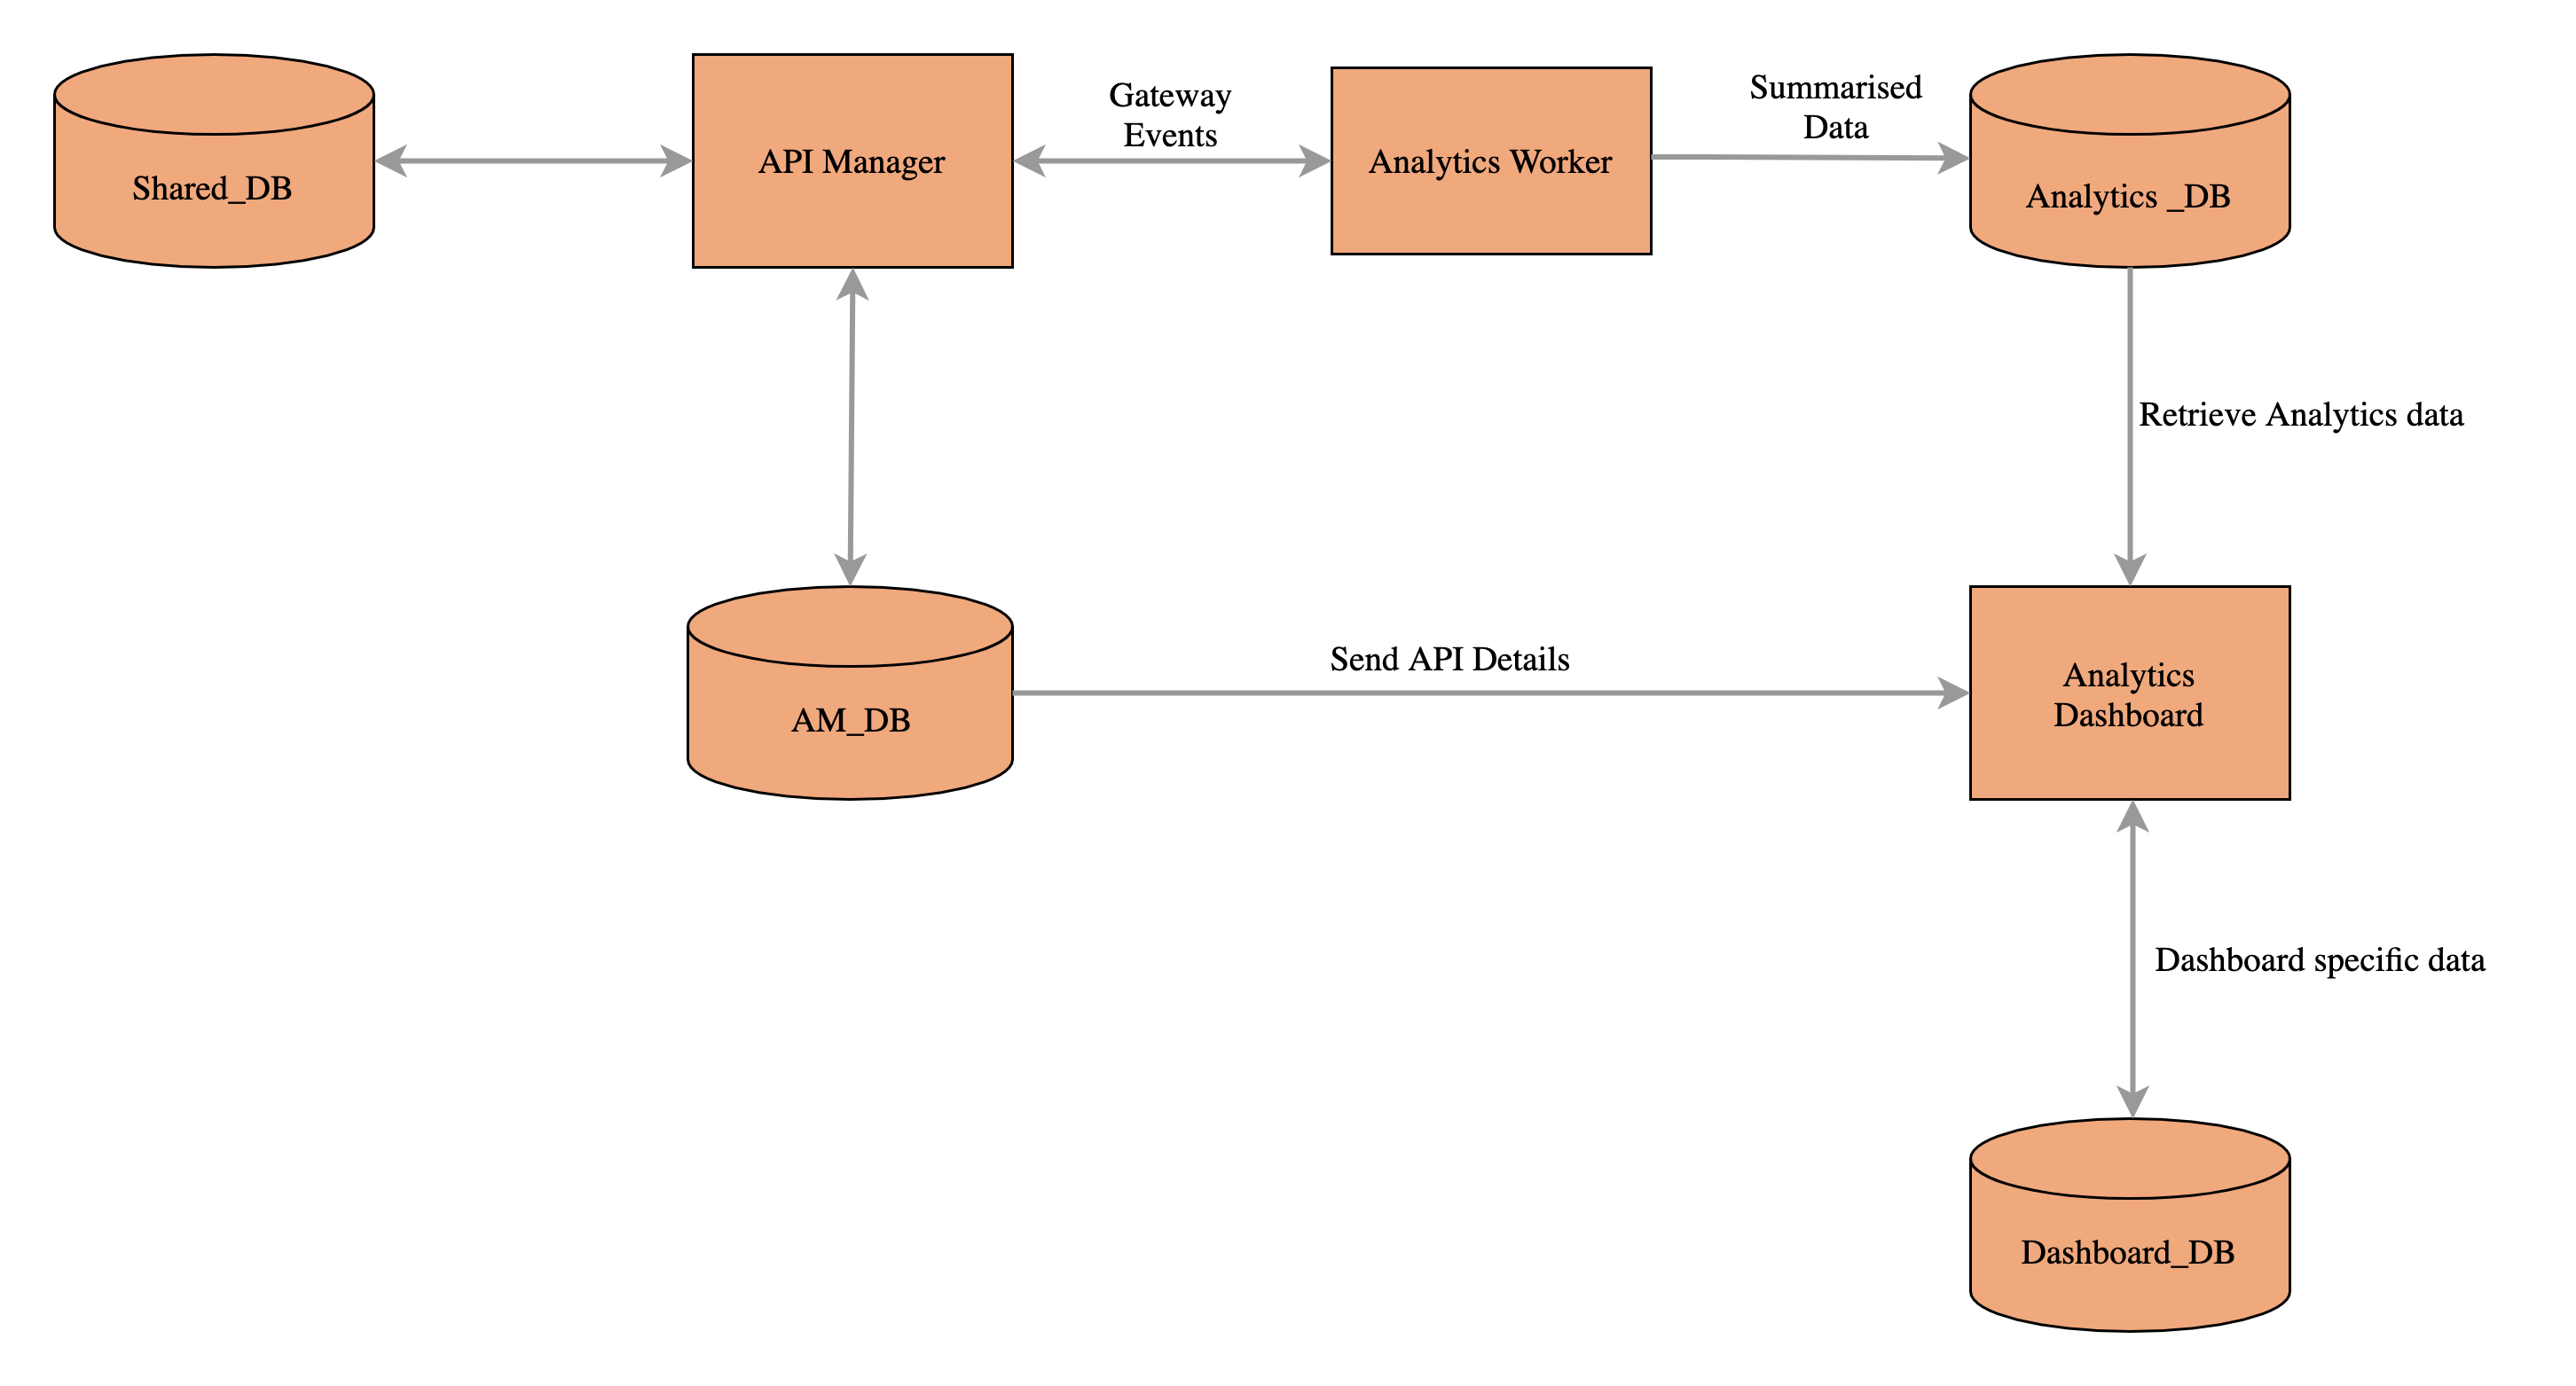
API-M Analytics contains two runtime, namely worker and dashboard. The worker is responsible for the summarization of the collected data and the dashboard is responsible to represent the summarised data in the dashboards. Therefore, two separate JVMs are required. As a best practice, the worker and dashboard runtime can have the same analytics binary. This helps when managing the deployment and when applying WUM updates. However, it is up to the dev-ops engineer to decide whether to use the same binary (pack) or two binaries for the two runtime.
The Worker supports an Active-Active deployment and an Active-Passive deployment.
As the dashboard is used only to render the data there is no Active-Active or Active-Passive concept. However, based on the High Availability (HA) requirement it can be configured as Active-Active or Active-Passive by defining the load balancer related configurations.
Info
Sometimes due to case insensitivity of primary keys in aggregation tables, primary key violation errors are thrown when you try to insert a new record with the same value as an existing record. To overcome this, you need to add encoding and collation to database when the Analytics DB is created (i.e., before the tables are created). For more information on collation, see MySQL or MS SQL based on the database that you are using. Sample commands are provided below.
Example
ALTER DATABASE <DB-NAME> COLLATE latin1_general_cs ;ALTER DATABASE <DB-NAME> COLLATE SQL_Latin1_General_CP1_CS_AS ;- Stop the WSO2 API-M Analytics server if it is running already.
-
Configure the dashboard profile.
- Open the
<API-M_ANALYTICS_HOME>/conf/dashboard/deployment.yamlfile. -
Edit the
APIM_ANALYTICS_DBandAM_DBsections and point to your desired type of database.
A sample for MySQL is shown below.Note
In the below configuration, the database defined as
am_dbis the same database which is defined under[database.apim_db]configuration in the deployment.toml file of the WSO2 API Manager.- name: AM_DB description: Main datasource used by API Manager jndiConfig: name: jdbc/AM_DB definition: type: RDBMS configuration: jdbcUrl: "jdbc:mysql://localhost:3306/am_db" username: wso2carbon password: wso2carbon driverClassName: com.mysql.jdbc.Driver maxPoolSize: 10 idleTimeout: 60000 connectionTestQuery: SELECT 1 validationTimeout: 30000 isAutoCommit: false
- Open the
-
Configure the worker profile.
- Open the
<API-M_ANALYTICS_HOME>/conf/worker/deployment.yamlfile -
Edit the
APIM_ANALYTICS_DBsection.
A sample for MySQL is shown below.- name: APIM_ANALYTICS_DB description: "The datasource used for APIM statistics aggregated data." jndiConfig: name: jdbc/APIM_ANALYTICS_DB definition: type: RDBMS configuration: jdbcUrl: 'jdbc:mysql://localhost:3306/stats_db' username: 'root' password: '123' driverClassName: com.mysql.jdbc.Driver minIdle: 5 maxPoolSize: 50 idleTimeout: 60000 connectionTestQuery: SELECT 1 validationTimeout: 30000 isAutoCommit: false
Info
If your deployment does not consist of any Microgateways, you do not need to configure the WSO2AM_MGW_ANALYTICS_DB to an external database as you can use the default embedded H2 database.
-
Configure
WSO2AM_MGW_ANALYTICS_DBto the same database asAPIM_ANALYTICS_DBin the<API-M_ANALYTICS_HOME>/conf/worker/deployment.yamlfile.- name: WSO2AM_MGW_ANALYTICS_DB description: "The datasource used for APIM MGW analytics data." jndiConfig: name: jdbc/WSO2AM_MGW_ANALYTICS_DB definition: type: RDBMS configuration: jdbcUrl: 'jdbc:mysql://localhost:3306/stats_db' username: 'root' password: '123' driverClassName: com.mysql.jdbc.Driver maxPoolSize: 50 idleTimeout: 60000 connectionTestQuery: SELECT 1 validationTimeout: 30000 isAutoCommit: false -
Create the AM_USAGE_UPLOADED_FILES table in the APIM_ANALYTICS_DB database.
CREATE TABLE IF NOT EXISTS AM_USAGE_UPLOADED_FILES ( FILE_NAME varchar(255) NOT NULL, FILE_TIMESTAMP TIMESTAMP DEFAULT CURRENT_TIMESTAMP, FILE_PROCESSED tinyint(1) DEFAULT 0, FILE_CONTENT MEDIUMBLOB DEFAULT NULL, PRIMARY KEY (FILE_NAME, FILE_TIMESTAMP) );CREATE TABLE AM_USAGE_UPLOADED_FILES ( FILE_NAME varchar(255) NOT NULL, FILE_TIMESTAMP DATETIME2(0) DEFAULT GETDATE(), FILE_PROCESSED smallint DEFAULT 0, FILE_CONTENT VARBINARY(max) DEFAULT NULL, PRIMARY KEY (FILE_NAME, FILE_TIMESTAMP) );CREATE TABLE AM_USAGE_UPLOADED_FILES ( FILE_NAME varchar2(255) NOT NULL, FILE_TIMESTAMP TIMESTAMP(0) DEFAULT SYSTIMESTAMP, FILE_PROCESSED number(3) DEFAULT 0, FILE_CONTENT BLOB DEFAULT NULL, PRIMARY KEY (FILE_NAME, FILE_TIMESTAMP) );CREATE TABLE IF NOT EXISTS AM_USAGE_UPLOADED_FILES ( FILE_NAME varchar(255) NOT NULL, FILE_TIMESTAMP TIMESTAMP(0) DEFAULT CURRENT_TIMESTAMP, FILE_PROCESSED smallint DEFAULT 0, FILE_CONTENT BYTEA DEFAULT NULL, PRIMARY KEY (FILE_NAME, FILE_TIMESTAMP) );CREATE TABLE IF NOT EXISTS AM_USAGE_UPLOADED_FILES ( FILE_NAME varchar(255) NOT NULL, FILE_TIMESTAMP TIMESTAMP DEFAULT CURRENT_TIMESTAMP NOT NULL, FILE_PROCESSED SMALLINT DEFAULT 0, FILE_CONTENT BLOB(16777215) DEFAULT NULL, PRIMARY KEY (FILE_NAME, FILE_TIMESTAMP) );CREATE TABLE IF NOT EXISTS AM_USAGE_UPLOADED_FILES ( FILE_NAME varchar(255) NOT NULL, FILE_TIMESTAMP TIMESTAMP(0) DEFAULT CURRENT_TIMESTAMP, FILE_PROCESSED tinyint DEFAULT 0, FILE_CONTENT MEDIUMBLOB DEFAULT NULL, PRIMARY KEY (FILE_NAME, FILE_TIMESTAMP) );
- Open the
-
Point the following data sources to external databases. None of the following databases need DB scripts. The tables will be automatically created.
- WSO2_DASHBOARD_DB (dashboard profile)
- BUSINESS_RULES_DB (dashboard profile)
- WSO2_PERMISSIONS_DB (worker + dashboard)
- GEO_LOCATION_DATA (Only if you need geo-location based statistics.)
- Start the WSO2 API-M Analytics server.
Info
Do the following to integrate third party products when configuring databases.
WSO2 API Manager Analytics is a OSGi-based product. Therefore, when you integrate third party products such as Oracle with WSO2 API-M Analytics, you need to check whether the libraries you need to add are OSGi based. If they are not, you need to convert them to OSGi bundles before adding them to the <API-M_ANALYTICS_HOME>/lib directory.
For detailed instructions, see Adding Third Party Non OSGi Libraries.
Step 5 - Configure APIM IdP Client
APIM IdP Client authenticates users by interacting with the identity provider of API Manager via OAuth2. The APIM Manager user store is used to provide access to APIM Analytics as well. WSO2 APIM Analytics server authenticates by requesting an access token from the identity provider in API Manager using the authentication code grant type. This APIM IdP client enables SSO(Single Sign On).
Furthermore, APIM IdP client functionality can be controlled via the properties defined in the
auth.configs:
  type: apim
  ssoEnabled: true
  properties:
    adminScope: apim_analytics:admin_carbon.super
    allScopes: apim_analytics:admin apim_analytics:product_manager apim_analytics:api_developer apim_analytics:app_developer apim_analytics:devops_engineer apim_analytics:analytics_viewer apim_analytics:everyone openid apim:api_view apim:subscribe
    adminServiceBaseUrl: https://localhost:9443
    adminUsername: admin
    adminPassword: admin
    kmDcrUrl: https://localhost:9443/client-registration/v0.15/register
    kmTokenUrlForRedirection: https://localhost:9443/oauth2
    kmTokenUrl: https://localhost:9443/oauth2
    kmUsername: admin
    kmPassword: admin
    portalAppContext: analytics-dashboard
    businessRulesAppContext : business-rules
    cacheTimeout: 900
    baseUrl: https://localhost:9643
    grantType: authorization_code
    publisherUrl: https://localhost:9443
    #storeUrl: https://localhost:9443
    externalLogoutUrl: https://localhost:9443/oidc/logout
Details of the properties in APIM IdP Client
| Property | Default Value | Description |
|---|---|---|
adminScope |
apim_analytics:admin_carbon.super | Admin scope which is used for permissions in dashboards. |
allScopes |
apim_analytics:admin apim_analytics:product_manager apim_analytics:api_developer apim_analytics:app_developer apim_analytics:devops_engineer apim_analytics:analytics_viewer apim_analytics:everyone openid apim:api_view apim:subscribe | All the scopes used for permissions in the dashboards. |
adminServiceBaseUrl |
https://localhost:9443 | Url which the WSO2 admin services are running. This should be pointed to API Manager node URL in the all in one deployment. In a distributed deployment, this needs to be pointed to the API Manager Publisher node url. |
adminUsername |
admin | The username for the admin services that corresponds to the credentials defined under the super tenant in the API Manager's deployment.toml file. |
adminPassword |
admin | The password for the admin services that corresponds to the credentials defined under the super tenant in the API Manager's deployment.toml file. |
kmDcrUrl |
https://localhost:9443/client-registration/v0.15/register | The Dynamic Client Registration (DCR) endpoint of the key manager in the IdP. The https://localhost:9443 section should be replaced with the API Manager node URL in the all in one deployment. In a distributed deployment, https://localhost:9443 section should be replaced with the API Manager Publisher node url. |
kmTokenUrlForRedirection |
https://localhost:9443/oauth2 | The token endpoint of the key manager in the IdP which is used for browser redirections. The https://localhost:9443 section should be replaced with the API Manager node URL in the all in one deployment. In a distributed deployment, https://localhost:9443 section should be replaced with the API Manager Publisher node url. |
kmTokenUrl |
https://localhost:9443/oauth2 | The token endpoint of the key manager in the IdP. The https://localhost:9443 section should be replaced with the API Manager node URL in the all in one deployment. In a distributed deployment, https://localhost:9443 section should be replaced with the API Manager Publisher node url. |
kmUsername |
admin | The username for the key manager in the IdP. |
kmPassword |
admin | The password for the key manager in the IdP. |
portalAppContext |
analytics-dashboard | The application context of the Analytics Dashboard application. |
businessRulesAppContext |
business-rules | The application context of the Business Rules application. |
cacheTimeout |
900 | The cache timeout for the validity period of the token in seconds. |
baseUrl |
https://localhost:9643 | The base URL to which the token should be redirected after the code returned from the Authorization Code grant type is used to get the token. |
grantType |
authorization_code | The grant type used in the OAuth application token request. |
publisherUrl |
https://localhost:9443 | URL which the API Manager publisher is running. |
storeUrl |
https://localhost:9443 | URL which the API Manager Developer Portal is running. Add this config if the Developer Portal and Publisher are running in two separate nodes. |
externalLogoutUrl |
https://localhost:9443/oidc/logout | The URL via which you can log out from the external IDP provider(API Manager) side in the SSO. The https://localhost:9443 section should be replaced with the API Manager node URL in the all in one deployment. In a distributed deployment, https://localhost:9443 section should be replaced with the API Manager Publisher node URL. |
Step 6 - Configure keystores
In the SSL handshake between the API Manager and API Manager Analytics servers, the client (i.e. API Manager) needs to verify the certificate presented by the server (i.e., API Manager Analytics). For this purpose, the client stores the trusted certificate of the server in the client-truststore.jks keystore.
If you use a custom keystore in API Manager and/or API Manager Analytics, import the public key certificate of API Manager Analytics into the client-truststore.jks file of the API Manager. To export the public key from the server and import it into the client's trust store, follow the steps given in Adding CA-signed certificates to keystores.