Create and Publish a WebSub/WebHook API
This tutorial will guide you to create a WebHook API which will listen to the issues created in GitHub and send you a notification upon creation. Follow the instructions in this tutorial to design and publish a WebSub/WebHook API, and register a WebHook for it.
The tutorial demonstrates a simple WebSub/WebHook API that monitors your GitHub repository for new issues, and receives events when an issue is created.
Step 1 - Design a WebSub/WebHook API
-
Sign in to the Publisher.
https://<hostname>:9443/publisherFor testing purposes, you can use
https://localhost:9443/publisherandadminas the username and password. -
Click CREATE API, go to Streaming API, and Click WebHook API.
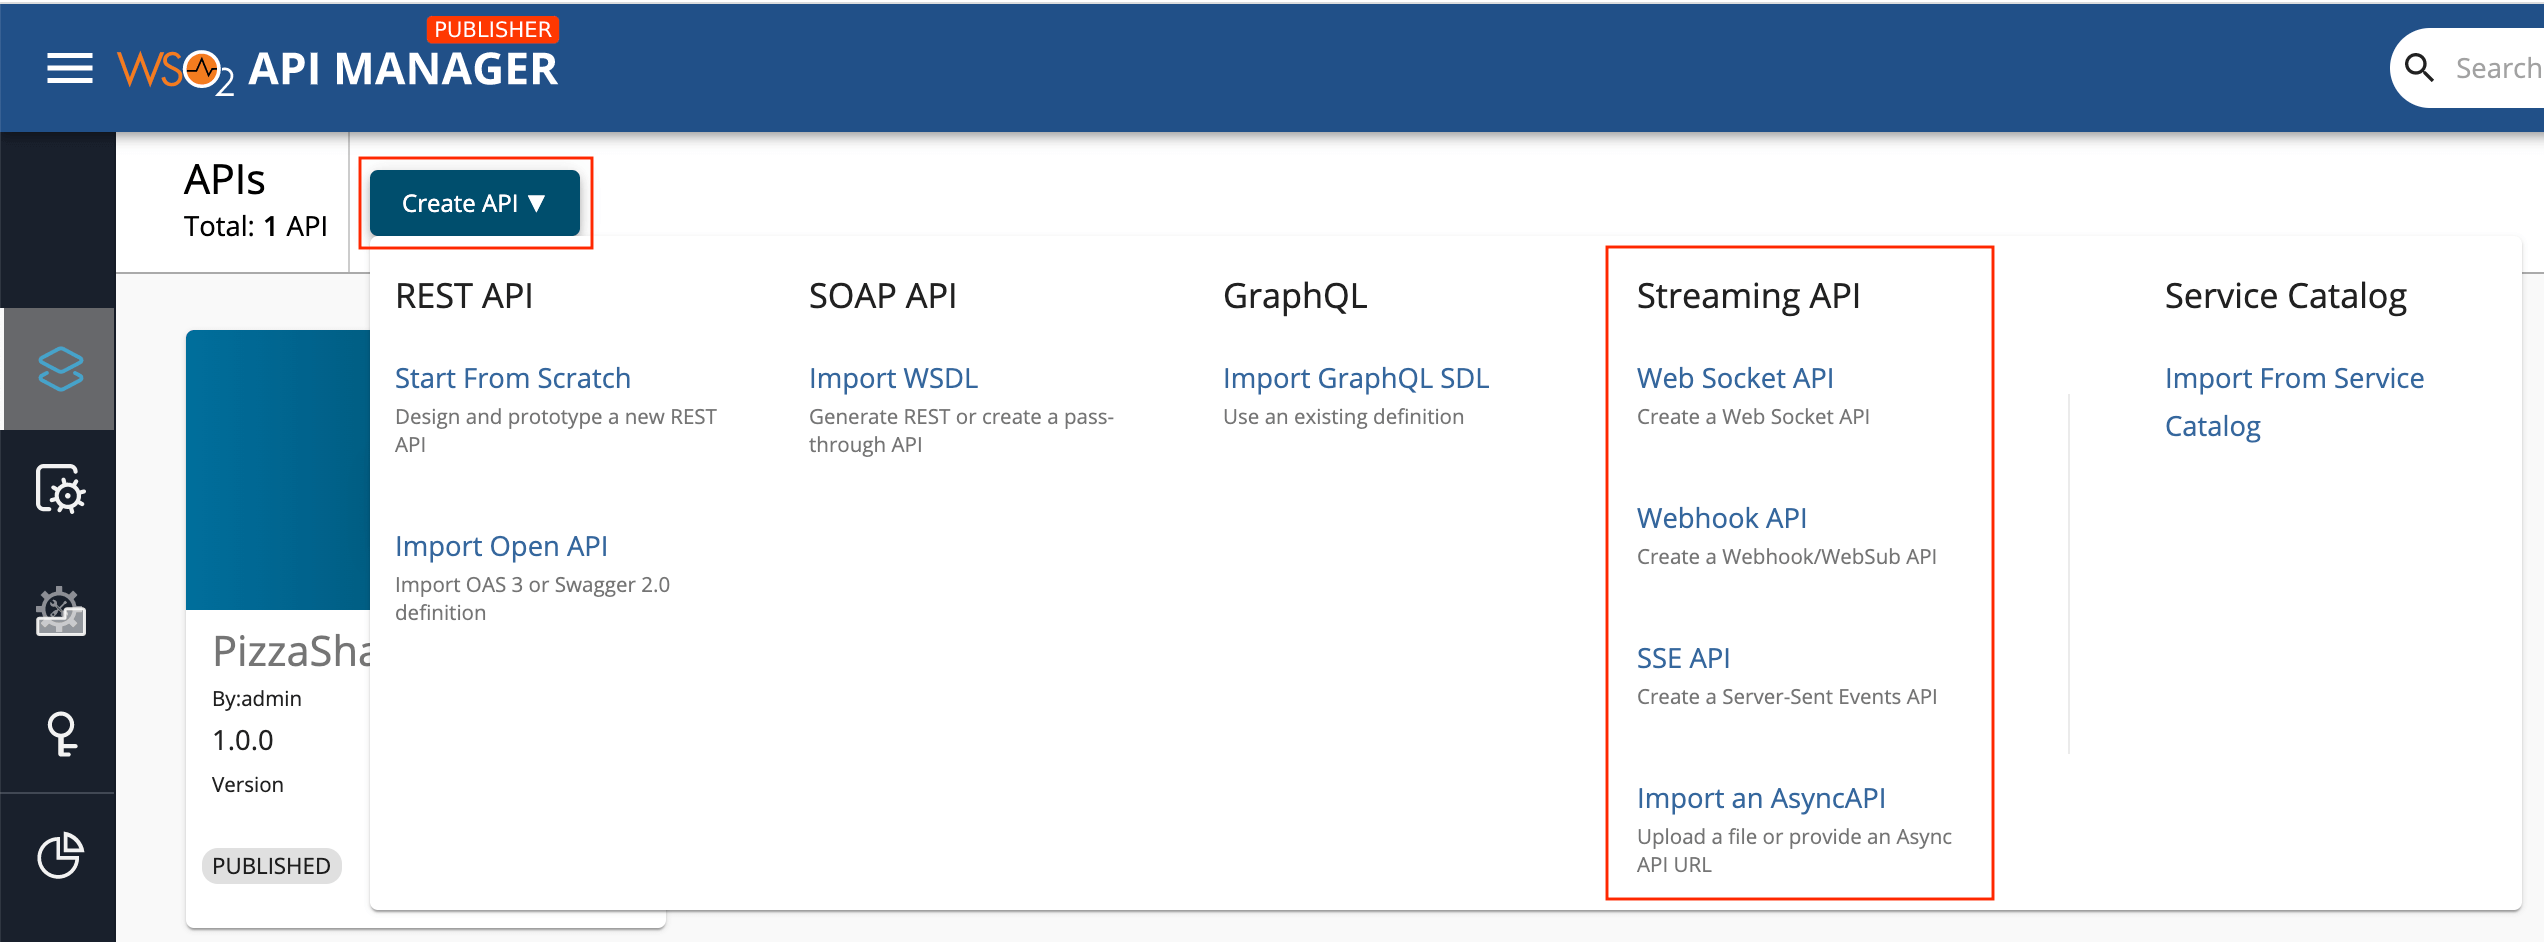
Note
The CREATE button will only appear for a user who has the
creatorrole permission. -
Enter the details of the new WebSub/WebHook API.
Field Sample value Name RepoWatcher Context /repo-watcher Version 1.0.0 Protocol WebSub -
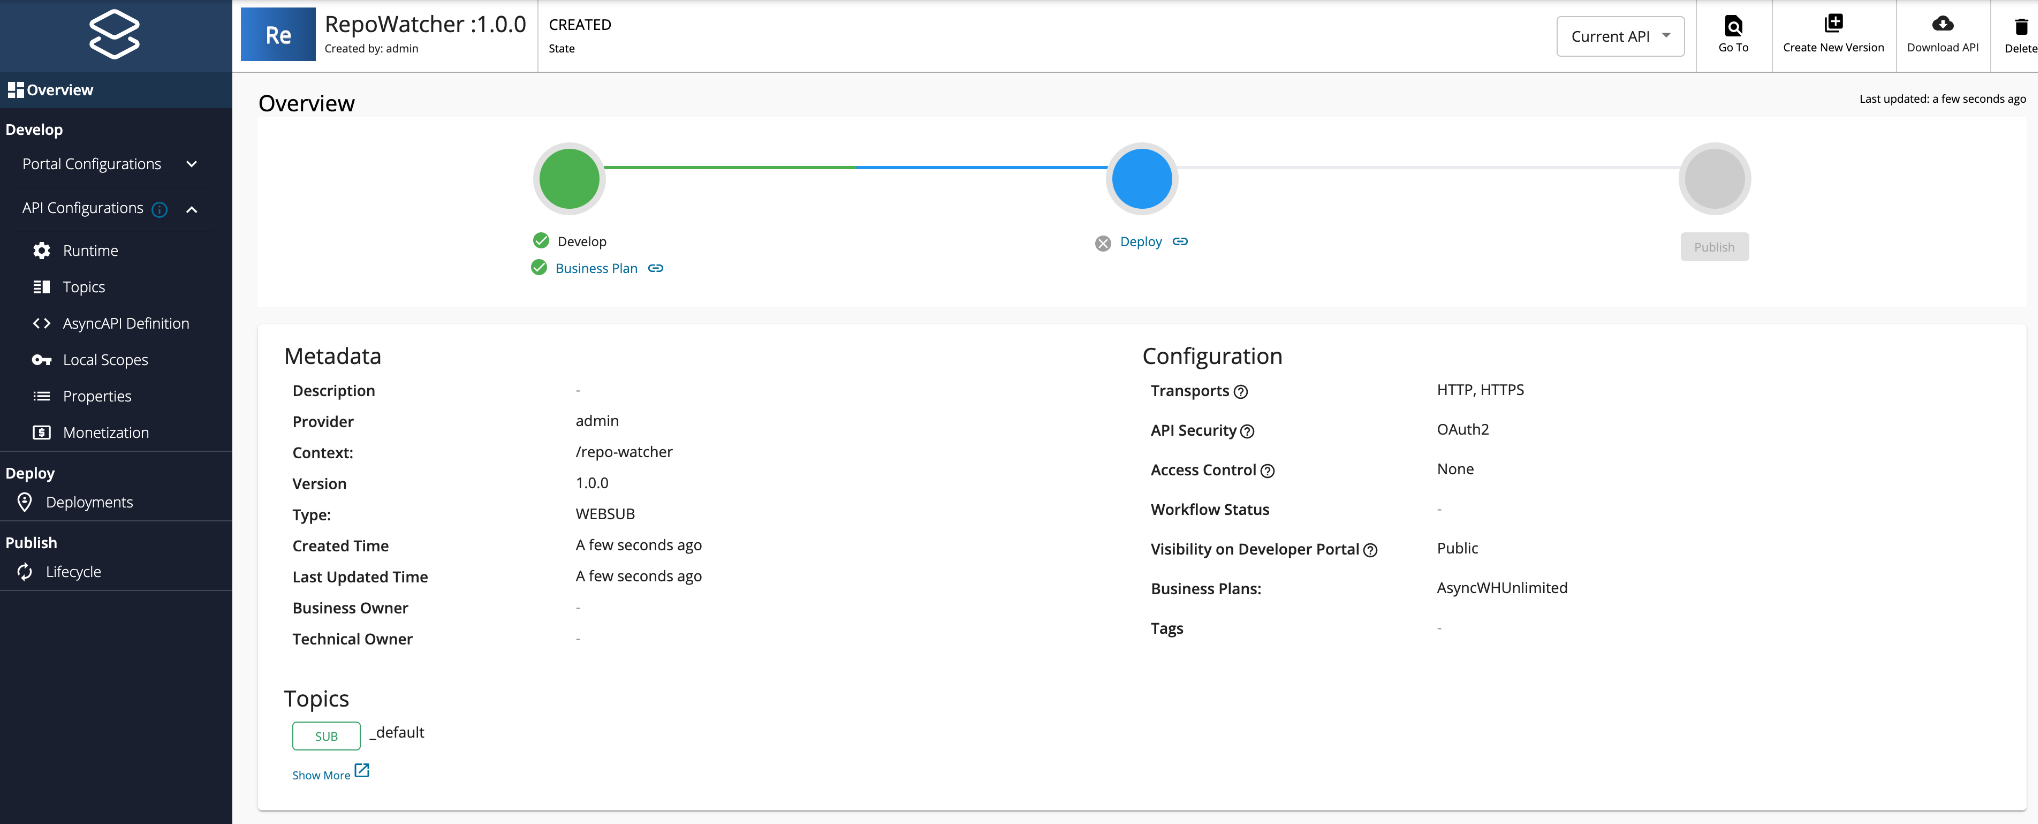
Click CREATE.
The overview page of the created WebSub/WebHook API appears.
-
Add a topic to the WebSub/WebHook API.
-
Click Topics and navigate to the Topics page.
-
Click Add Topic, add a topic with the name /issues, click Add, and finally click Save.

-
-
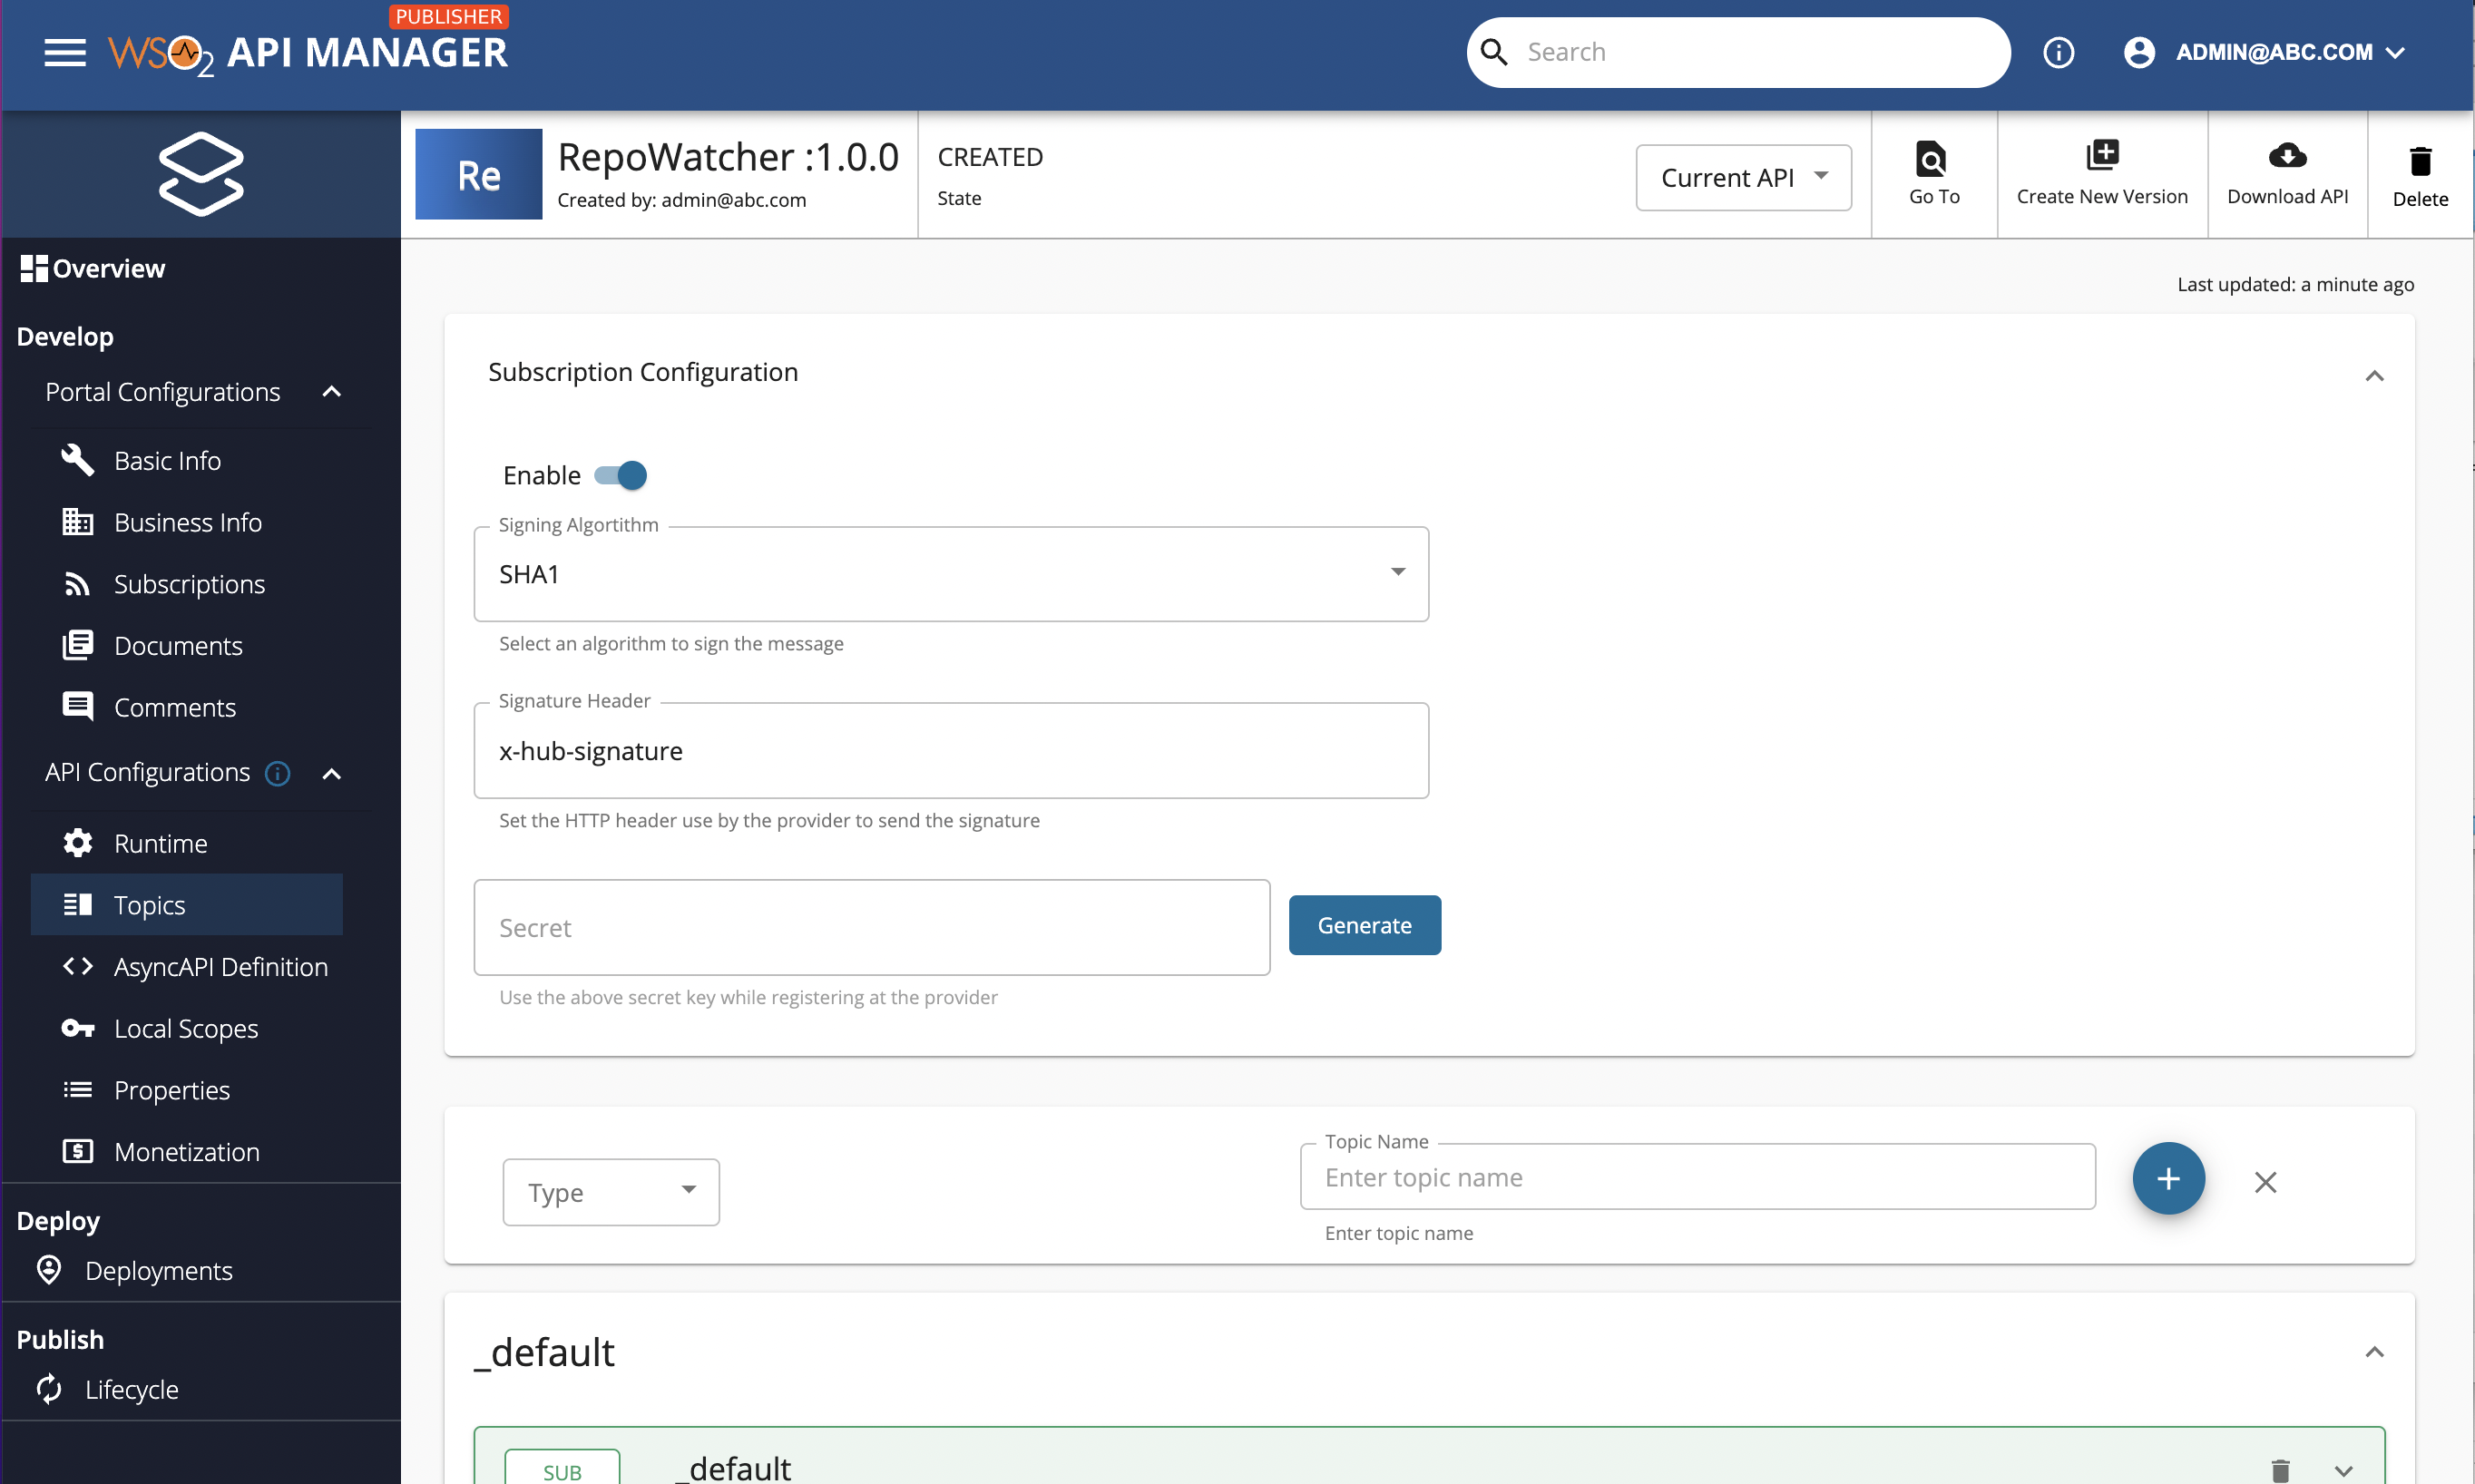
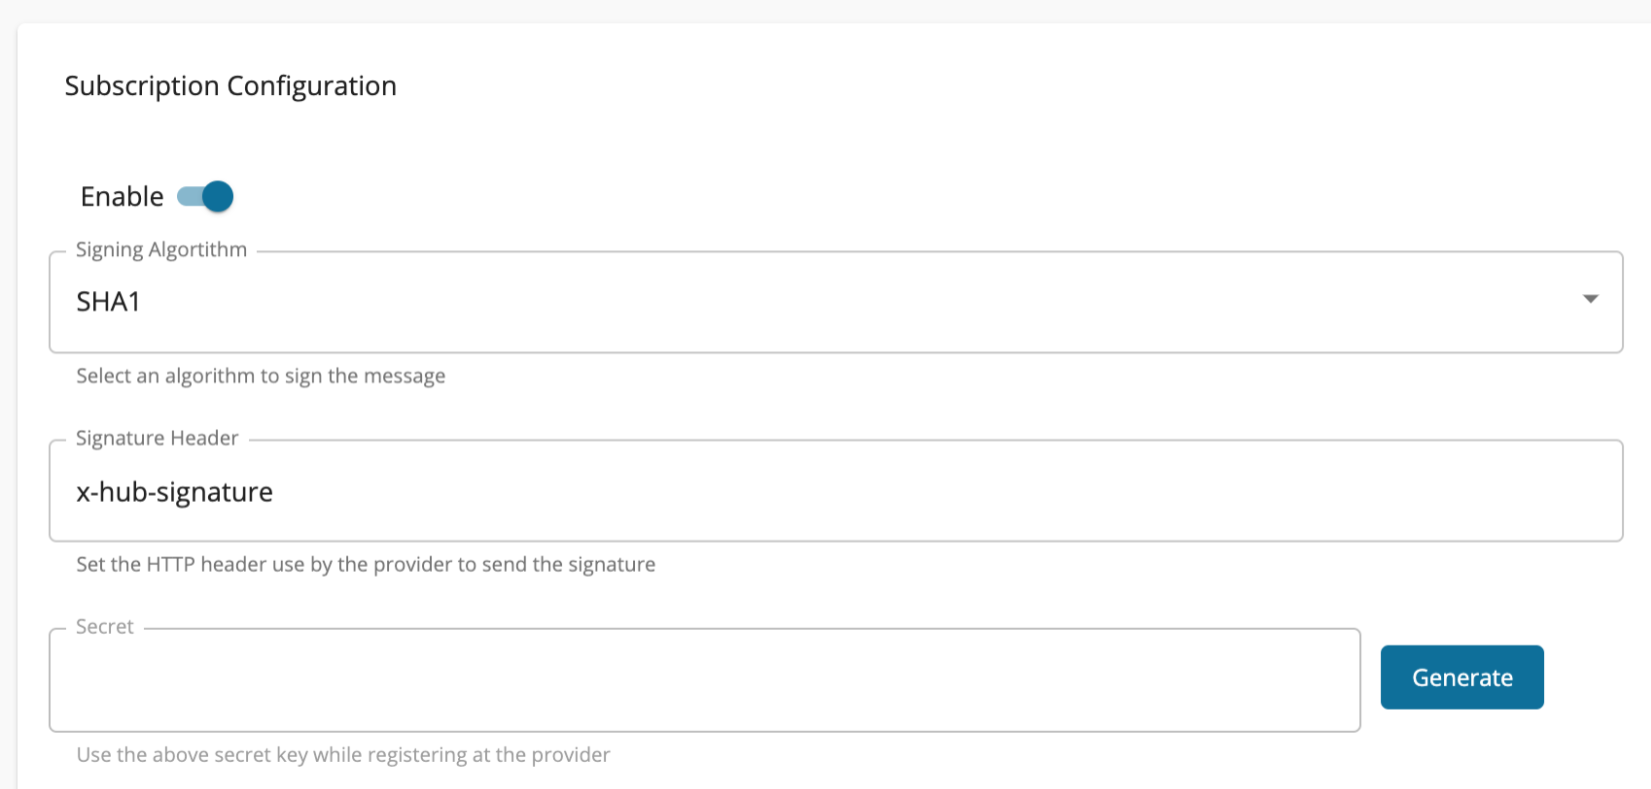
Generate a secret.
-
Expand the Subscription Configuration section in the Topics page.
-
Click Enable to enable secret generation.
-
Select SHA1 as the Signing Algorithm.
-
Click Generate to generate a secret.
-
Copy the generated secret.
Let's refer to the generated secret as
[generated_secret]. -
Click Save.
-
-
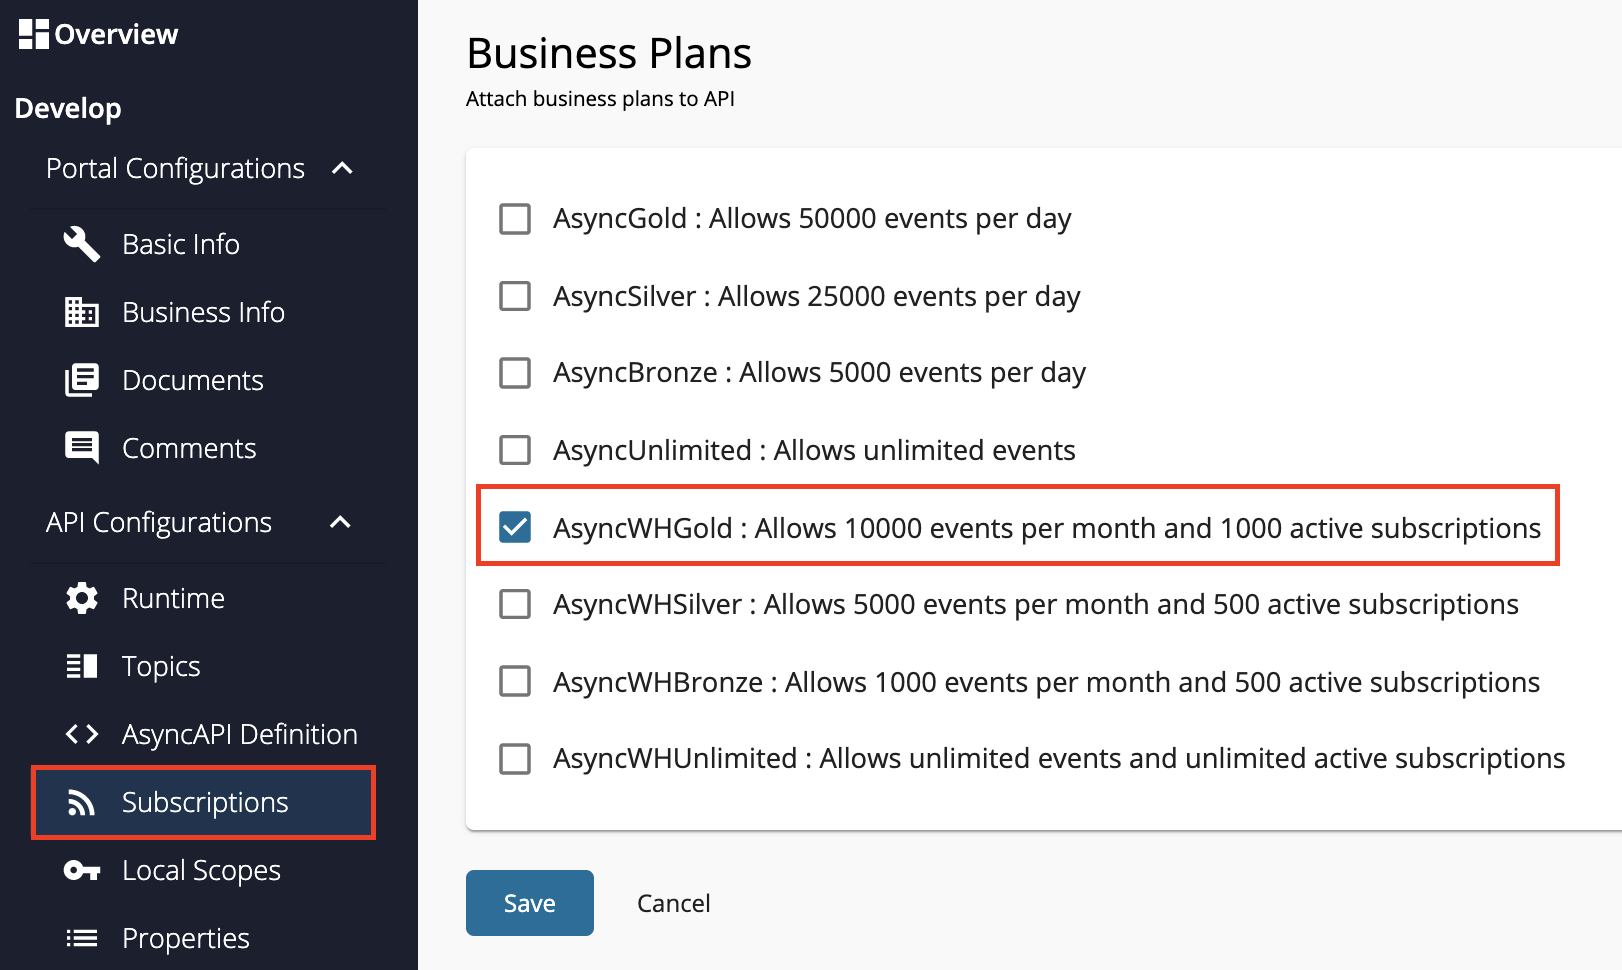
Attach business plans to the WebSub/WebHook API.
-
Click Subscriptions and navigate to the Business Plans page.
-
Select AsyncWHGold and click on Save.
-
Now, you have created and configured the WebSub API (WebHook API) successfully.
Step 2 - Forward a Public URL
A public URL should be forwarded to localhost:9021, so that your local server can be accessible to the WebHook provider (GitHub). ngrok can be used for this purpose.
-
Download ngrok, and start it.
This will forward a public URL to
localhost:9021. -
Copy the HTTP URL that is forwarded to
http://localhost:9021, as shown in ngrok's terminal.In the following example, it is
http://3b1*******c9.ngrok.io.
Step 3 - Add a WebHook to your GitHub Repository
Note
You can use an existing GitHub repository of yours, or create a new one for this purpose.
-
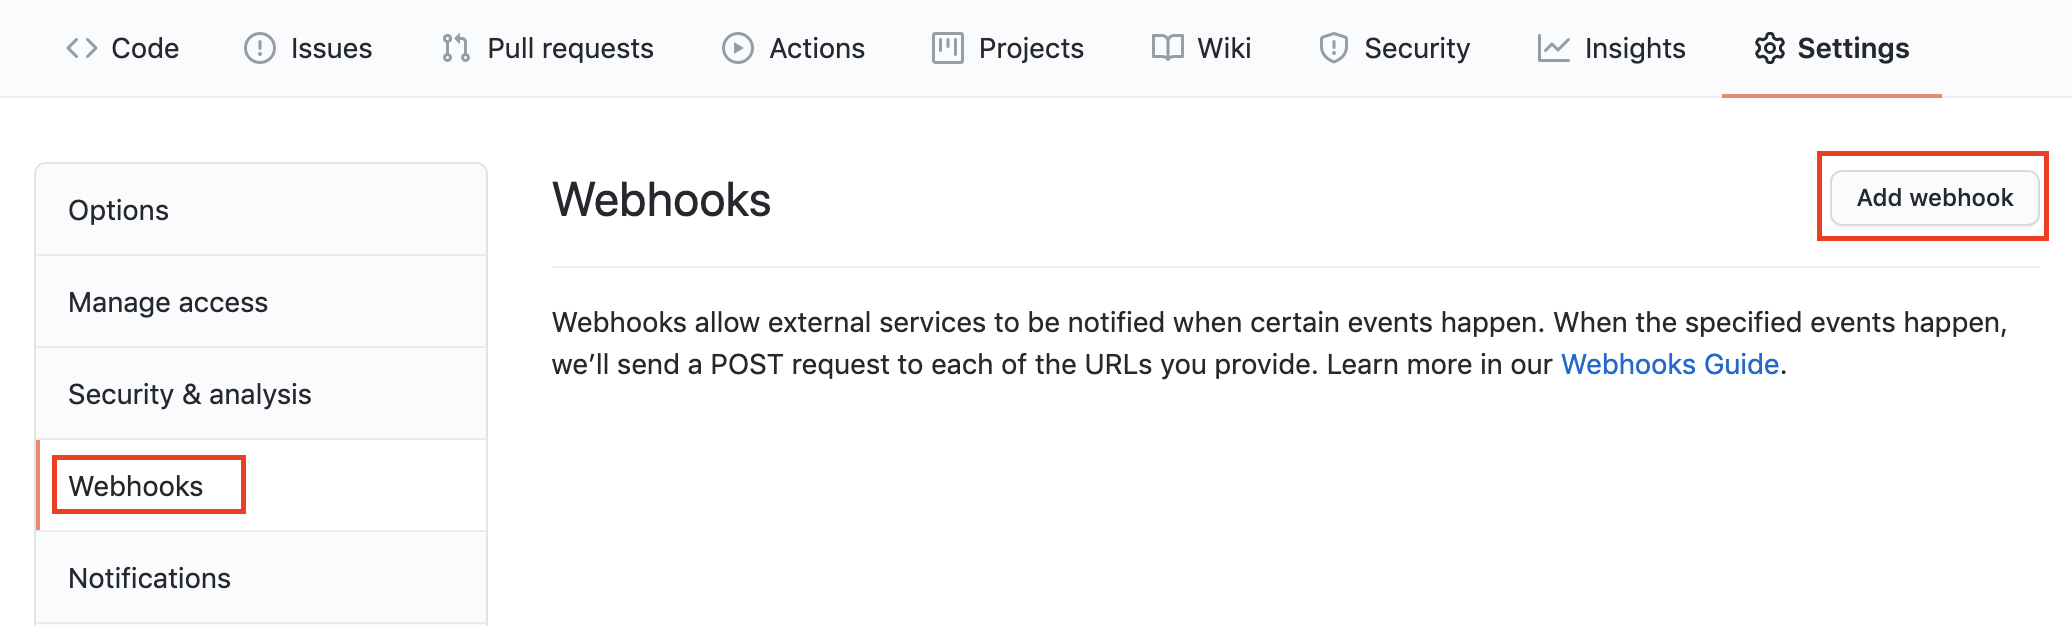
Go to Settings of your GitHub repository.
-
Click WebHooks, navigate to the WebHooks page, and click Add WebHook.
-
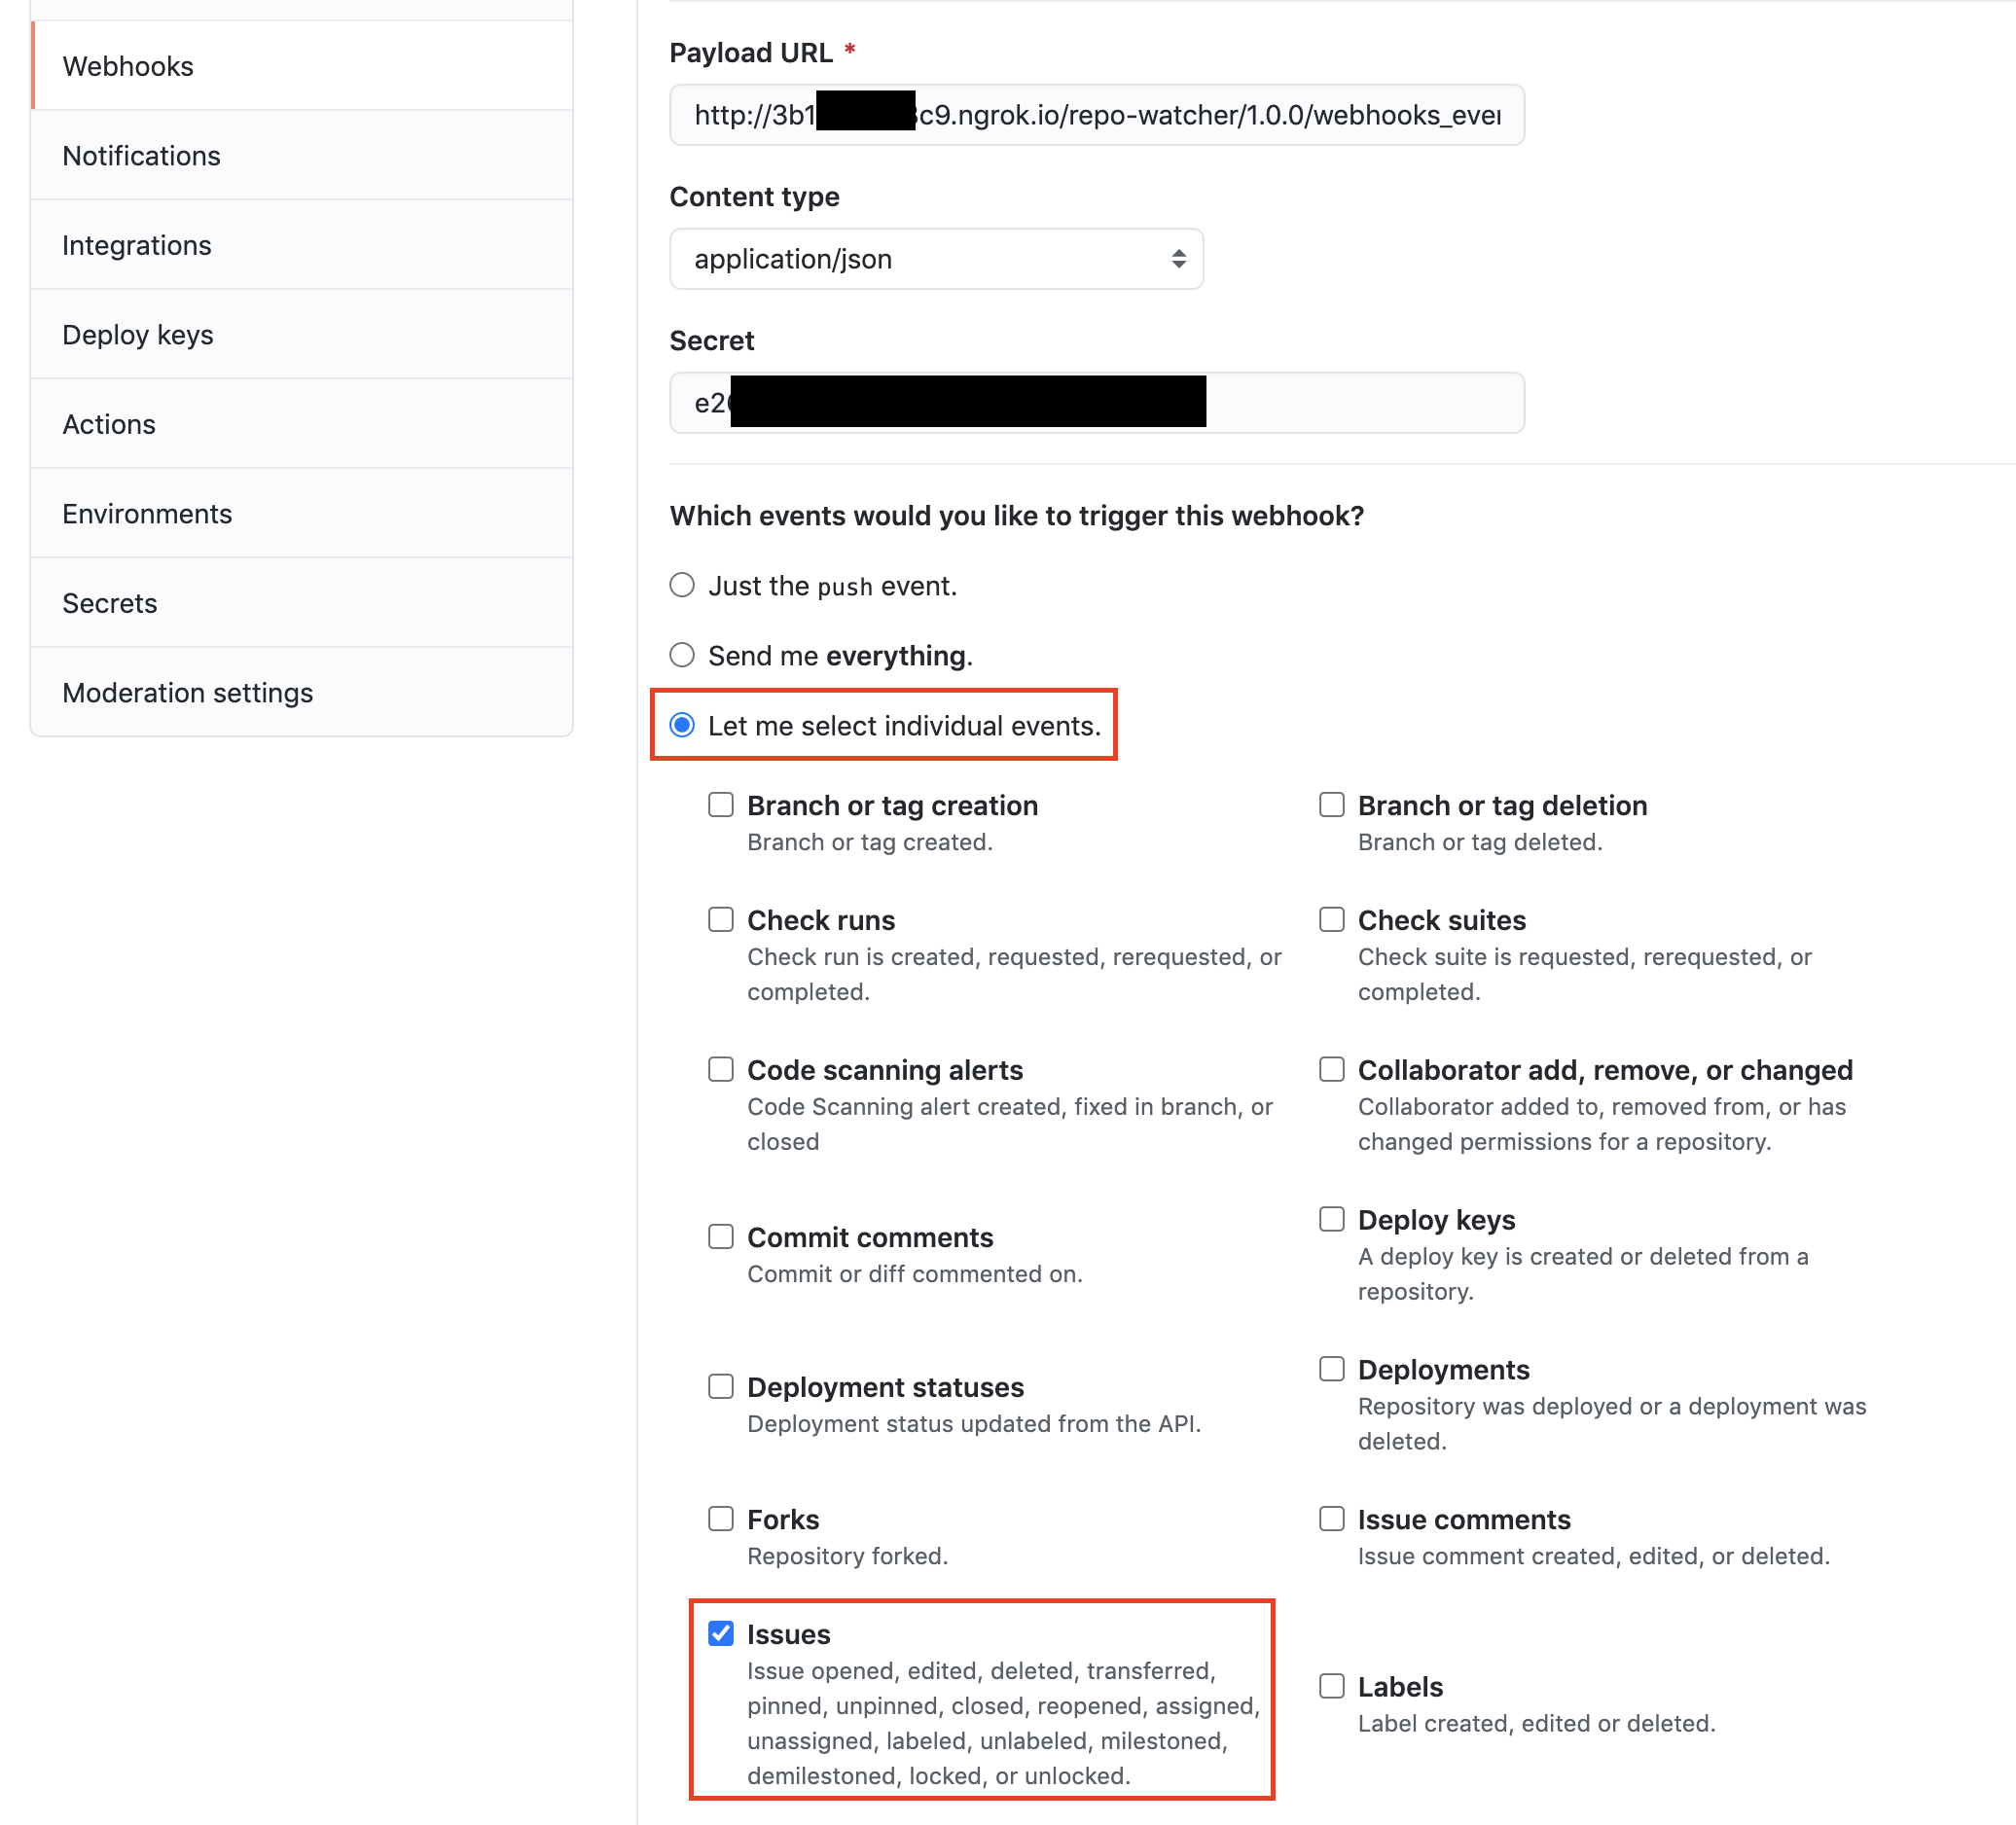
Configure the WebHook.
-
Go back to the WSO2 API Publisher, click Topics to navigate to the Topics page, and expand the /issues topic.
-
Copy the Callback URL.
-
Go back to your GitHub repository's WebHooks page.
Provide the following values.
Field Value Payload URL http://3b1*******c9.ngrok.io/repo-watcher/1.0.0/webhooks_events_receiver_resource?topic=/issuesThis is obtained by replacing
https://{GATEWAY_HOST}:9021part of the /issues topic's Callback URL, with the forwarding HTTP URL from ngrock (For example,http://3b1*******c9.ngrok.io).Content type application/json Secret [generated_secret]This is the secret you obtained from the Subscription Configuration section of the WebSub/WebHook API's Topics.
Which events would you like to trigger this WebHook? Select Let me select individual events, and check Issues.
-
Click Add WebHook.
-
Step 4 - Publish the WebSub/WebHook API
-
Go to WSO2 API Publisher.
-
Click Lifecycle to navigate to the API lifecycle.
-
Click PUBLISH to publish the API to the API Developer Portal.
-
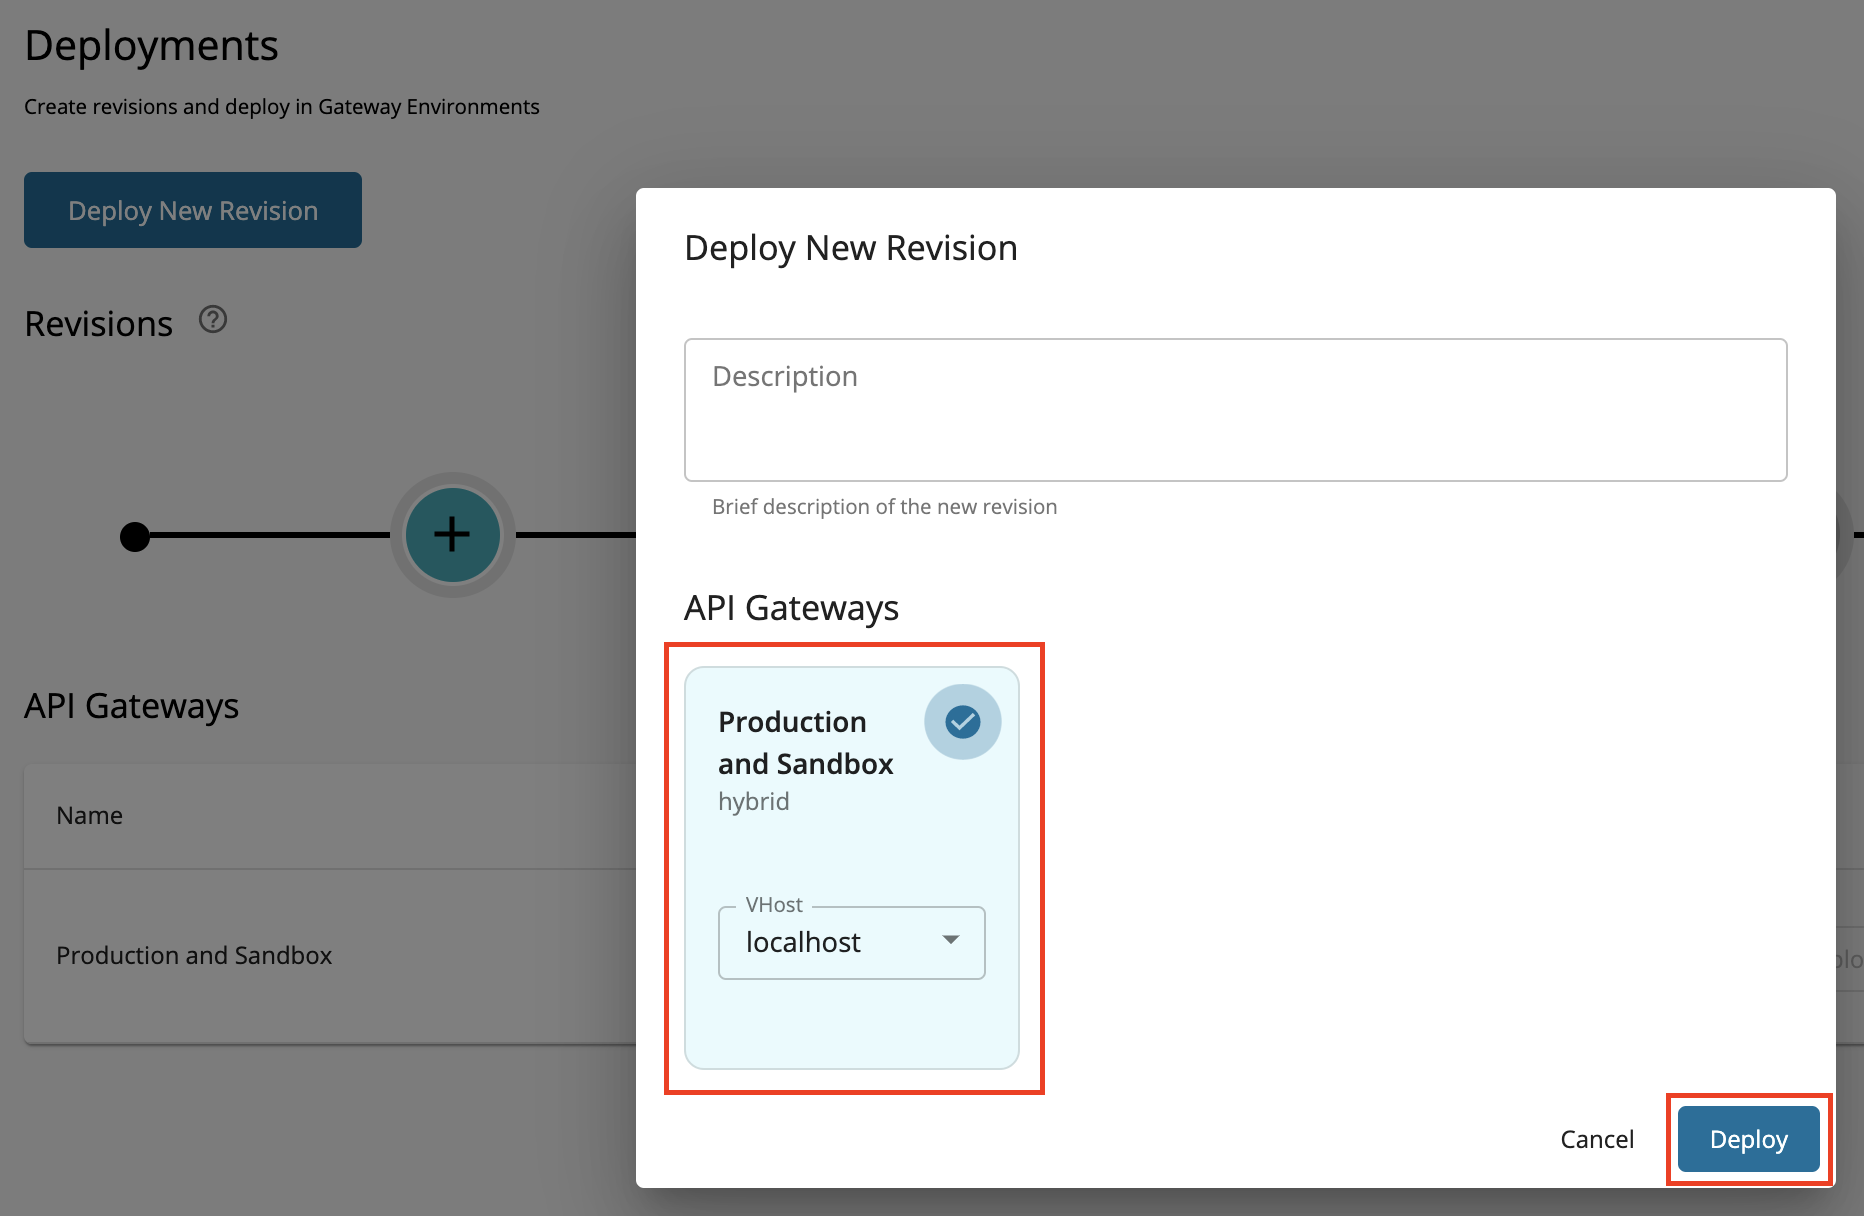
Click Deployments to navigate to the Deployments page.
-
Click Deploy New Revision.
-
Select Production and Sandbox, choose localhost as the VHost, and click on Deploy.
Step 5 - Create a Callback URL
-
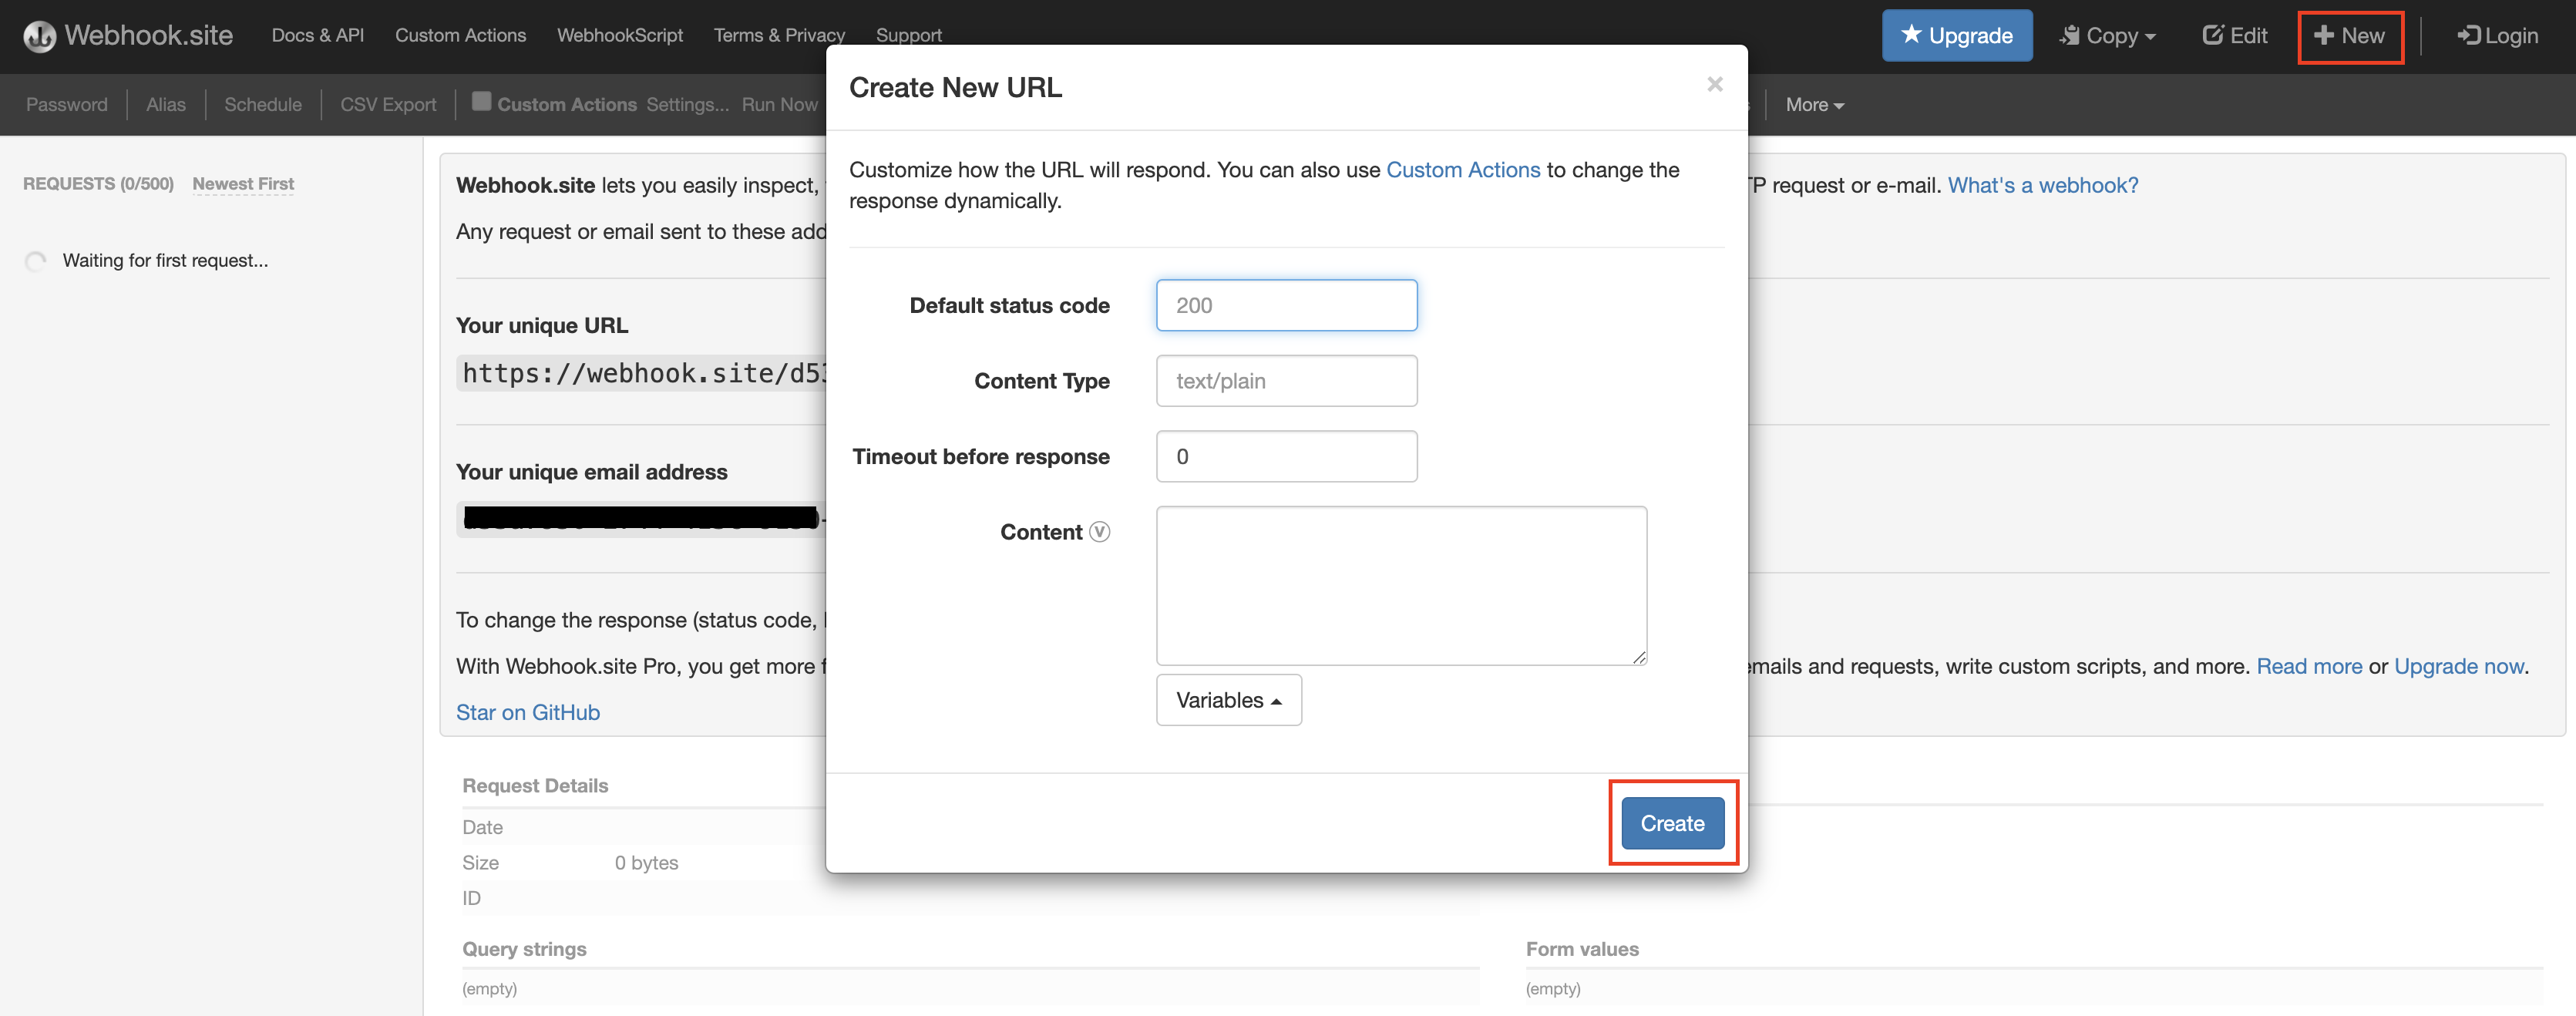
Go to https://webhook.site.org.
-
Click New, leave the default values, and click Create.
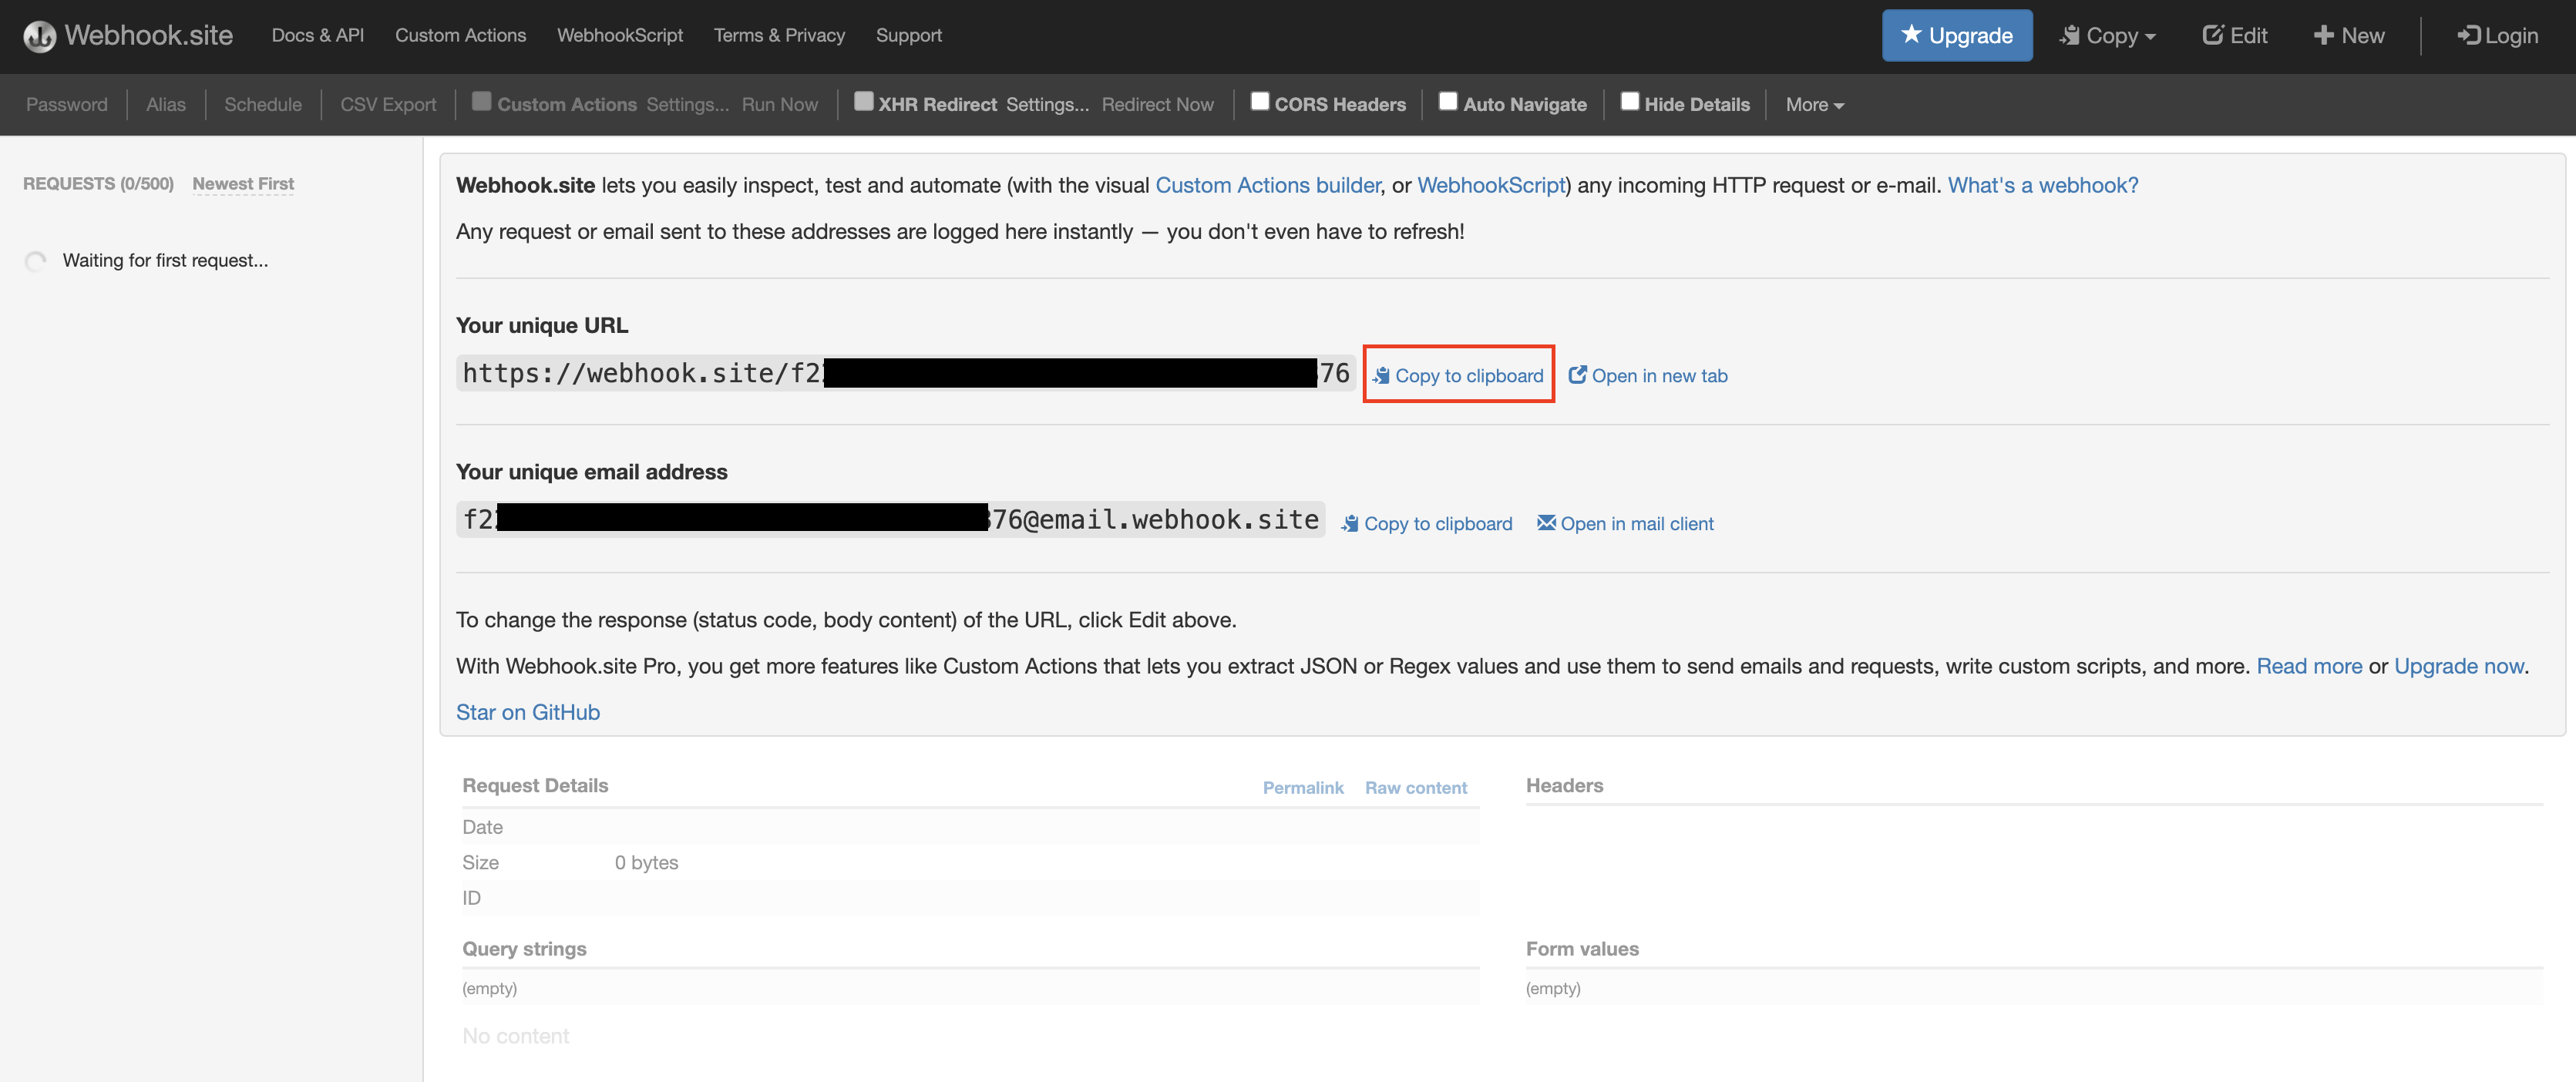
A unique URL will be created for you.
-
Click Copy to clipboard which is next to Your unique URL.
-
URL-encode the unique URL that you copied.
Let's refer to the URL-encode unique URL as
[encoded_hub_callback]. -
Leave the webpage open as you will need to come back to it again.
Step 6 - Invoke the WebSub/WebHook API
-
Sign in to the Developer Portal.
https://<hostname>:9443/devportalFor testing purposes, you can use
https://localhost:9443/devportalandadminas the username and password. -
Click on the WebSub/WebHook API.
The API overview appears.
-
Subscribe to the API.
-
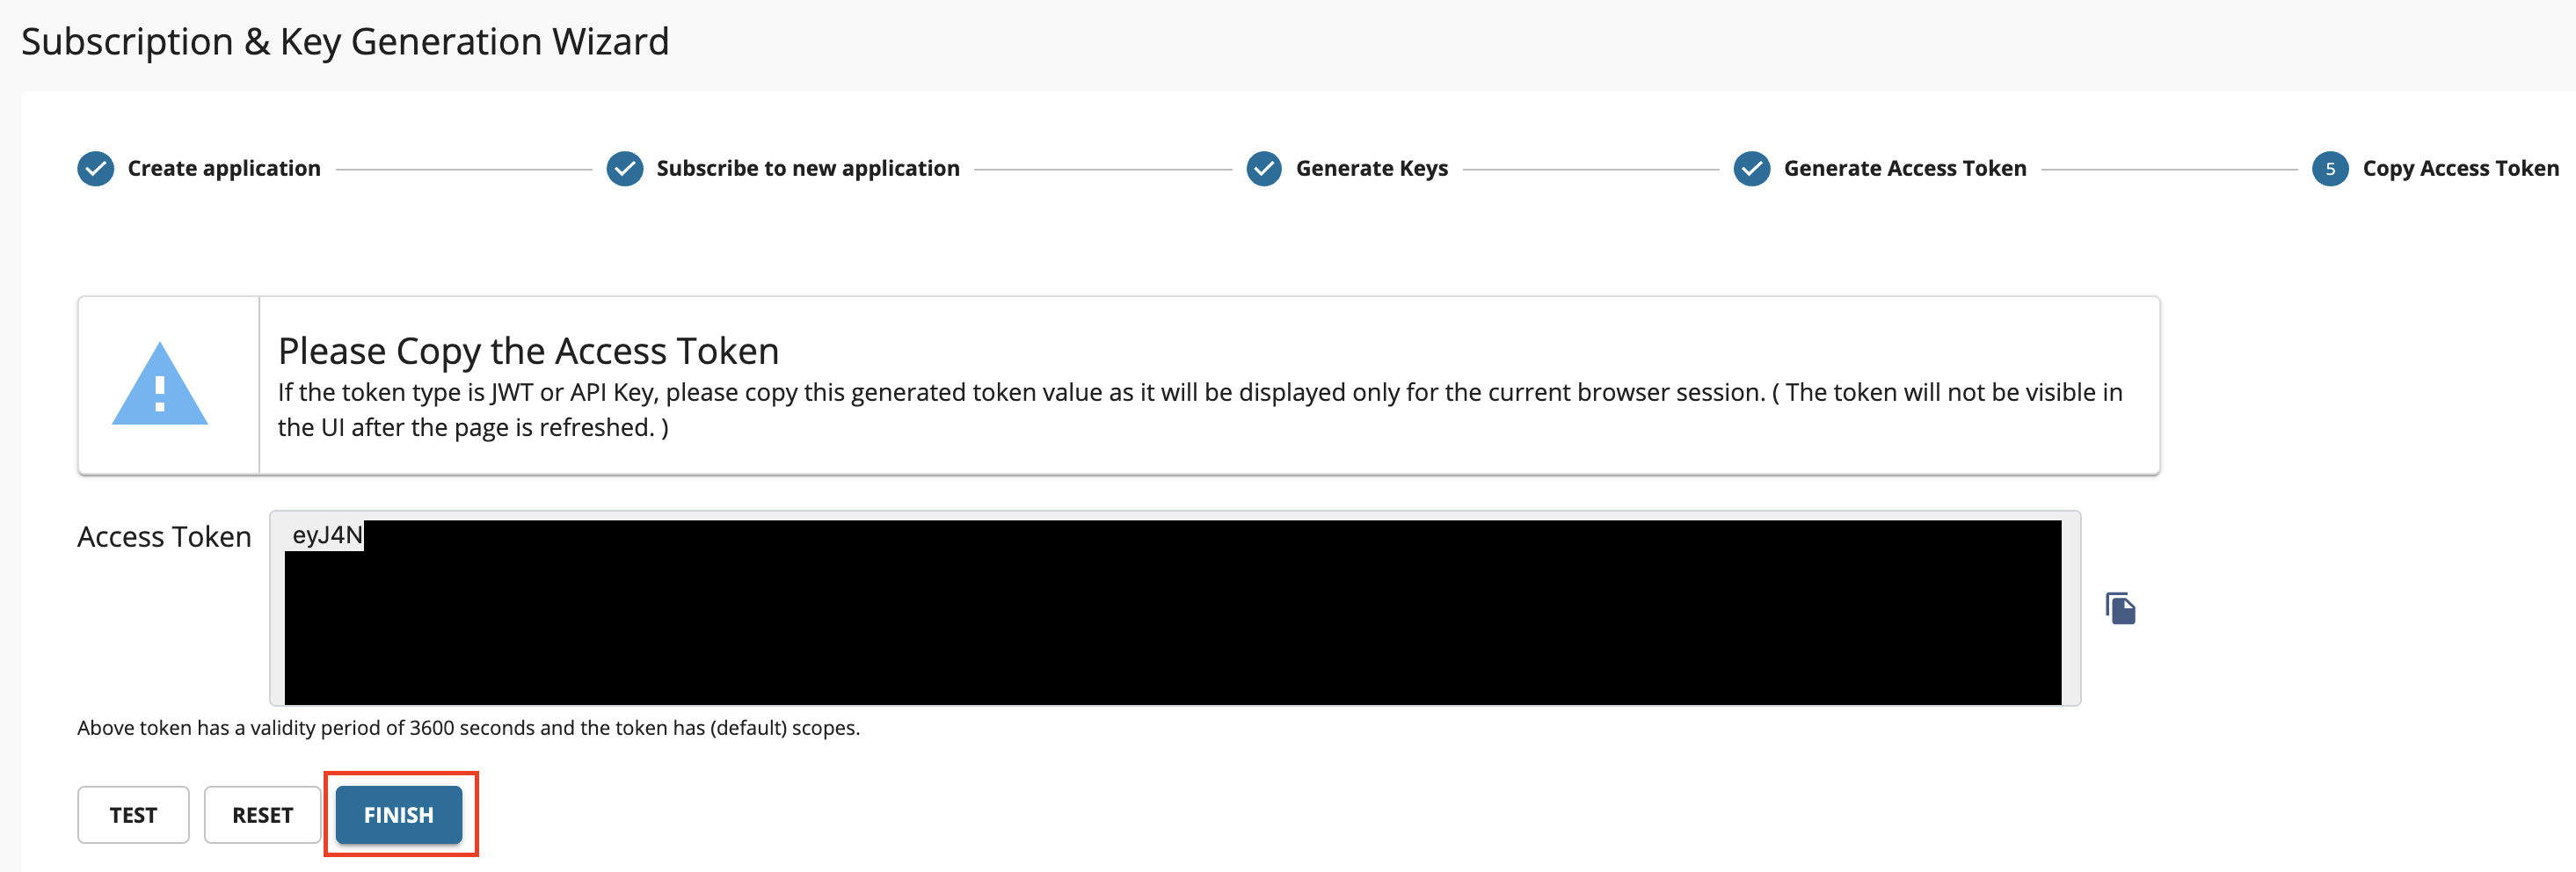
Click Subscriptions to go to the Subscriptions page and click SUBSCRIPTION & KEY GENERATION WIZARD.
This wizard takes you through the steps of creating a new application, subscribing, generating keys, and generating an access token to invoke the API.
Note
You can use any application (e.g., JWT or OAuth) to subscribe to the API.

-
Copy the authorization token that appears, and click FINISH.
-
-
Try out the operations.
-
Subscribe to the /issues topic.
-
Subscribe the callback URL with the /issues topic by executing the following cURL command. Replace
[encoded_hub_callback]andaccesstokenwith the values you have obtained. -
Click Subscriptions to go to the Subscriptions page of your application in the Developer Portal.
-
Click the WebSub API's subscription entry. This will list down the subscription that you just made.
-
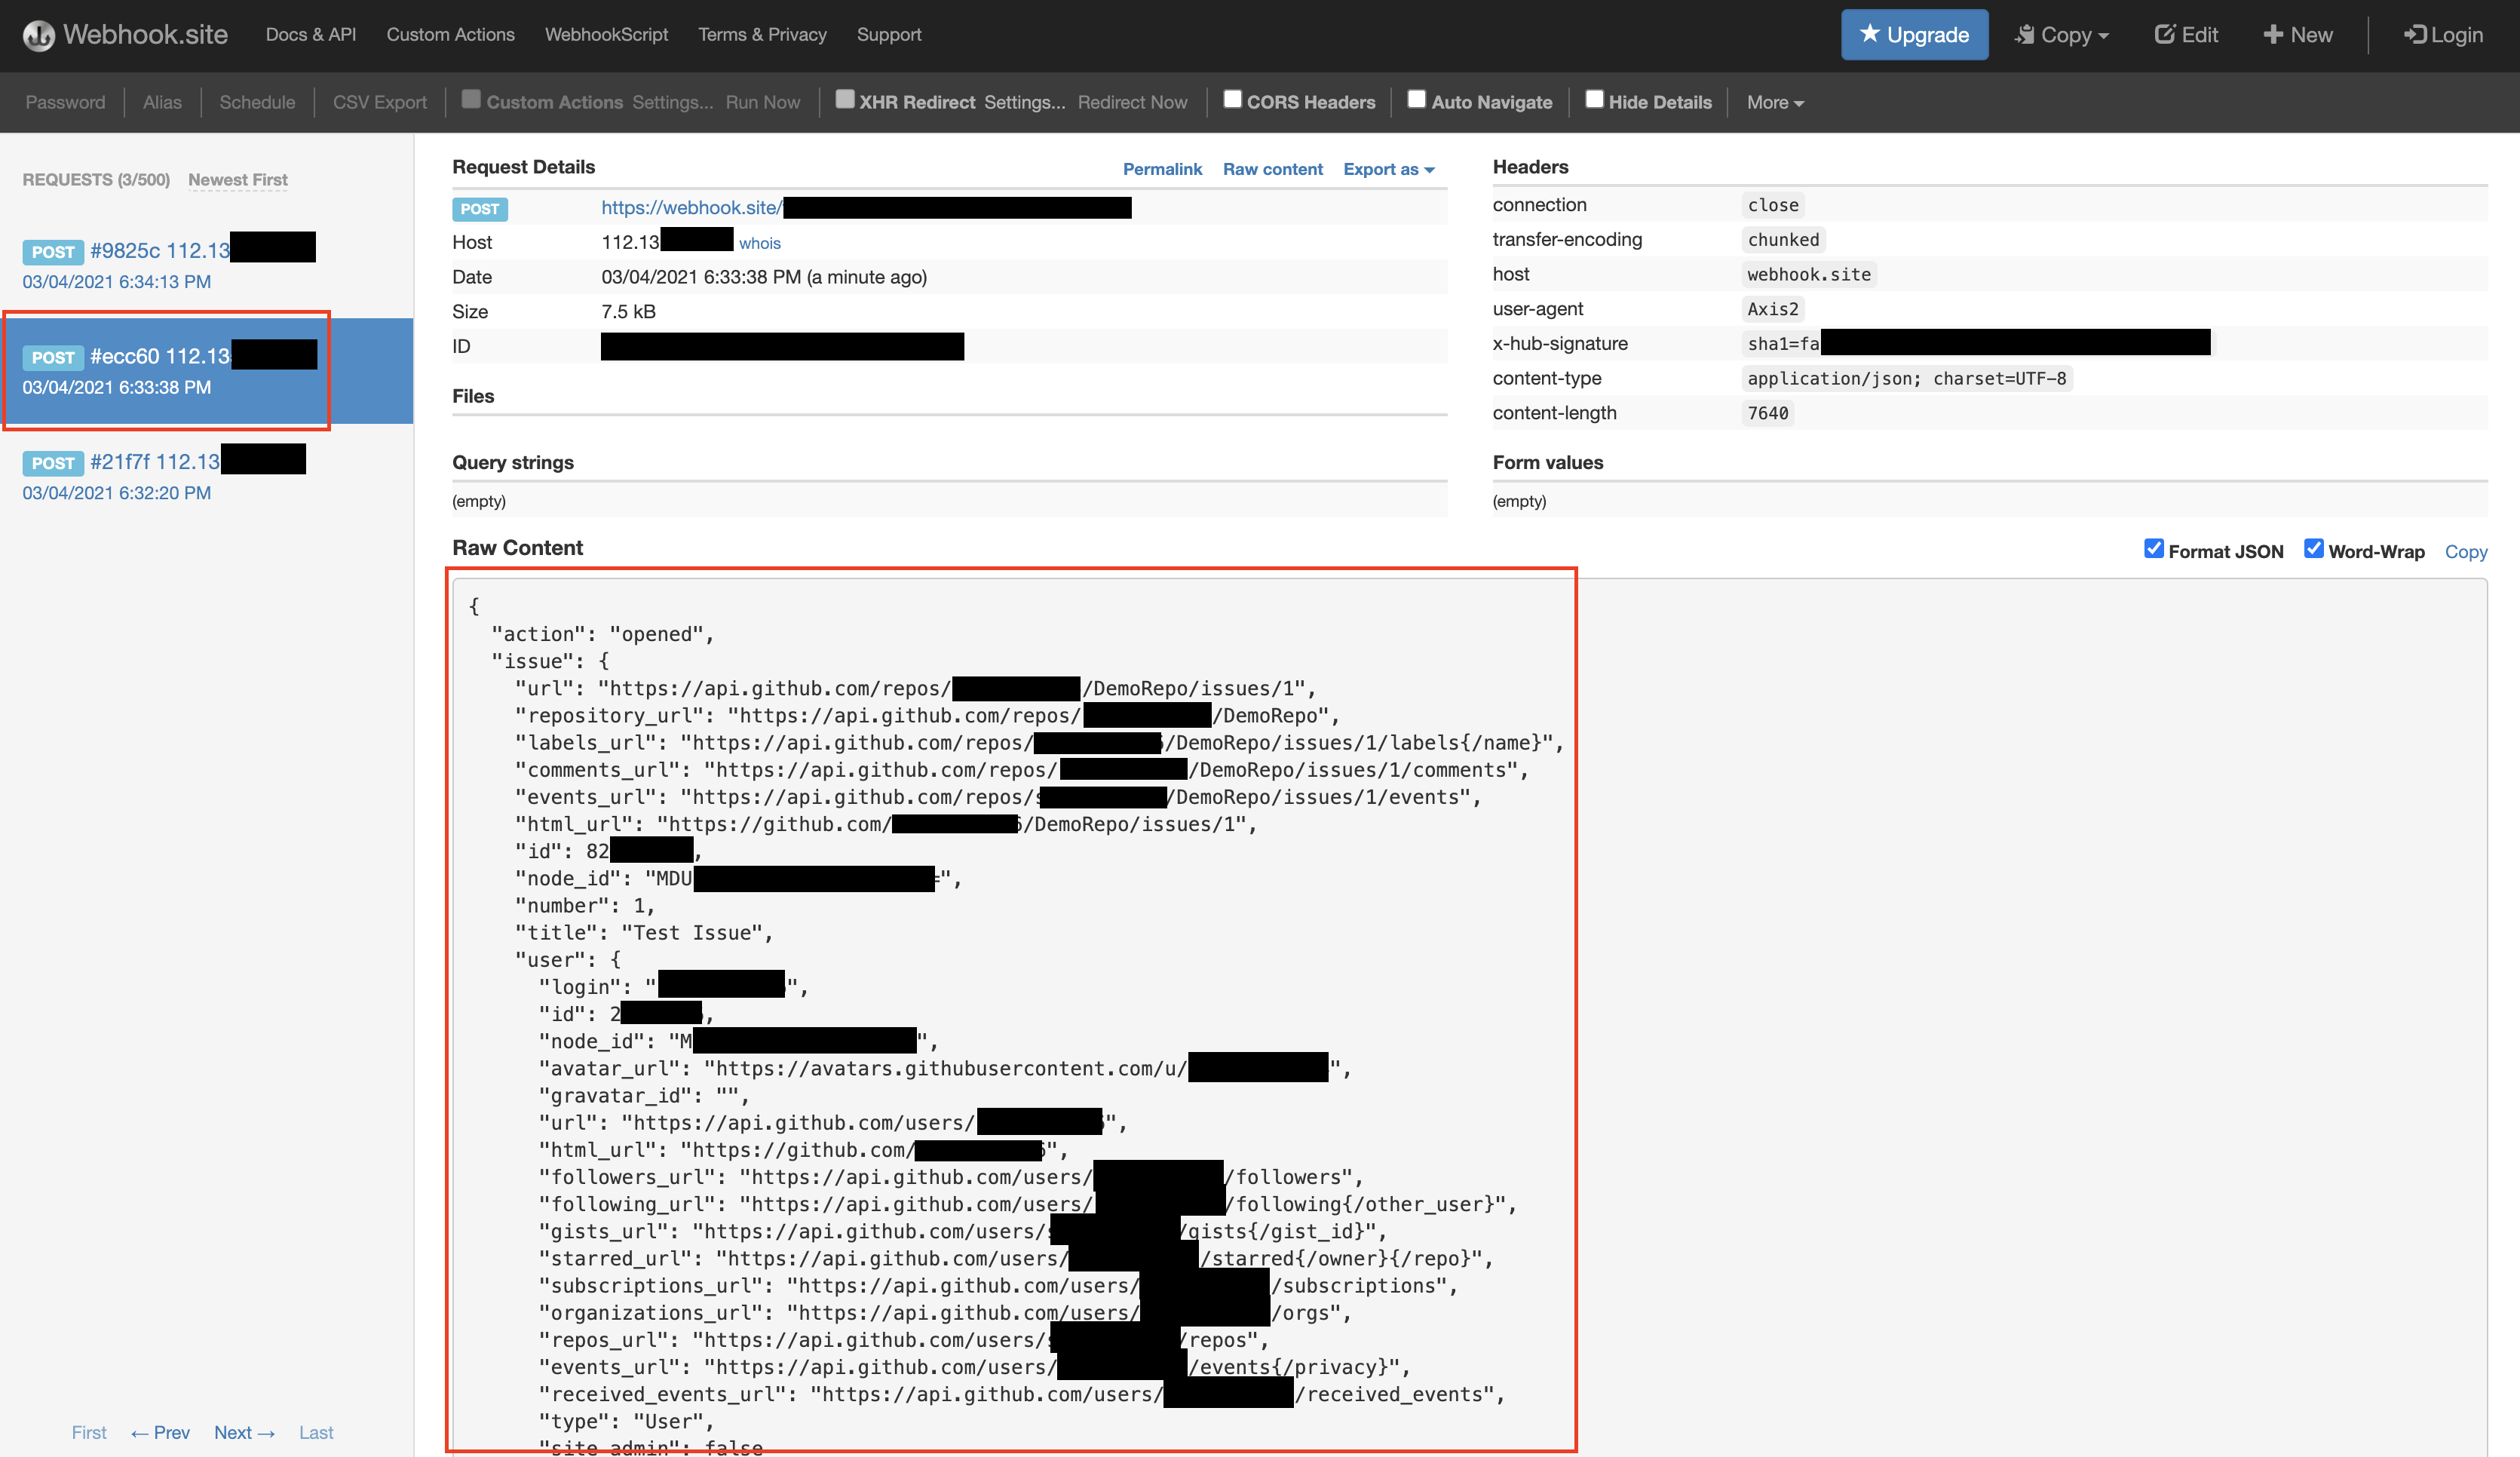
Go to your GitHub repo and create a new issue. This will trigger the GitHub WebHook you have created.
-
Go back to the webpage at https://webhook.site.org, where you created the callback URL. A new request which denotes the issue creation would have appeared.
-
-
Unsubscribe from the /issues topic.
Unsubscribe the callback URL from the /issues topic by executing the following cURL command.
Replace
[encoded_hub_callback]andaccesstokenwith the values you have obtained.
-
You have successfully created and published your first WebSub/WebHook API, subscribed to it, obtained an access token for testing, created a subscription to a WebHook, and tested your API with the access token.
Note
WSO2 API Manager also supports subscription requests with application/x-www-form-urlencoded content type, which adheres to the standards specified by W3C. This allows you to pass the hub parameters in the request body by passing them as form data. API Manager also supports optional subscriber verification of intent for this type of requests. This can be enabled by adding the property enableSubscriberVerification with the value set to true at the Publisher Portal. The default value is set to false. In later versions, this can be directly enabled by changing the WebSub Configurations in the API Configurations panel.