Authorization Code Grant
Instead of requesting authorization directly from the resource owner (resource owner's credentials), in this grant type, the client directs the resource owner to an authorization server. The authorization server works as an intermediary between the client and resource owner to issues an authorization code, authenticate the resource owner and obtain authorization. As this is a redirection-based flow, the client must be capable of interacting with the resource owner's user-agent (typically a Web browser) and receiving incoming requests (via redirection) from the authorization server.
Flow
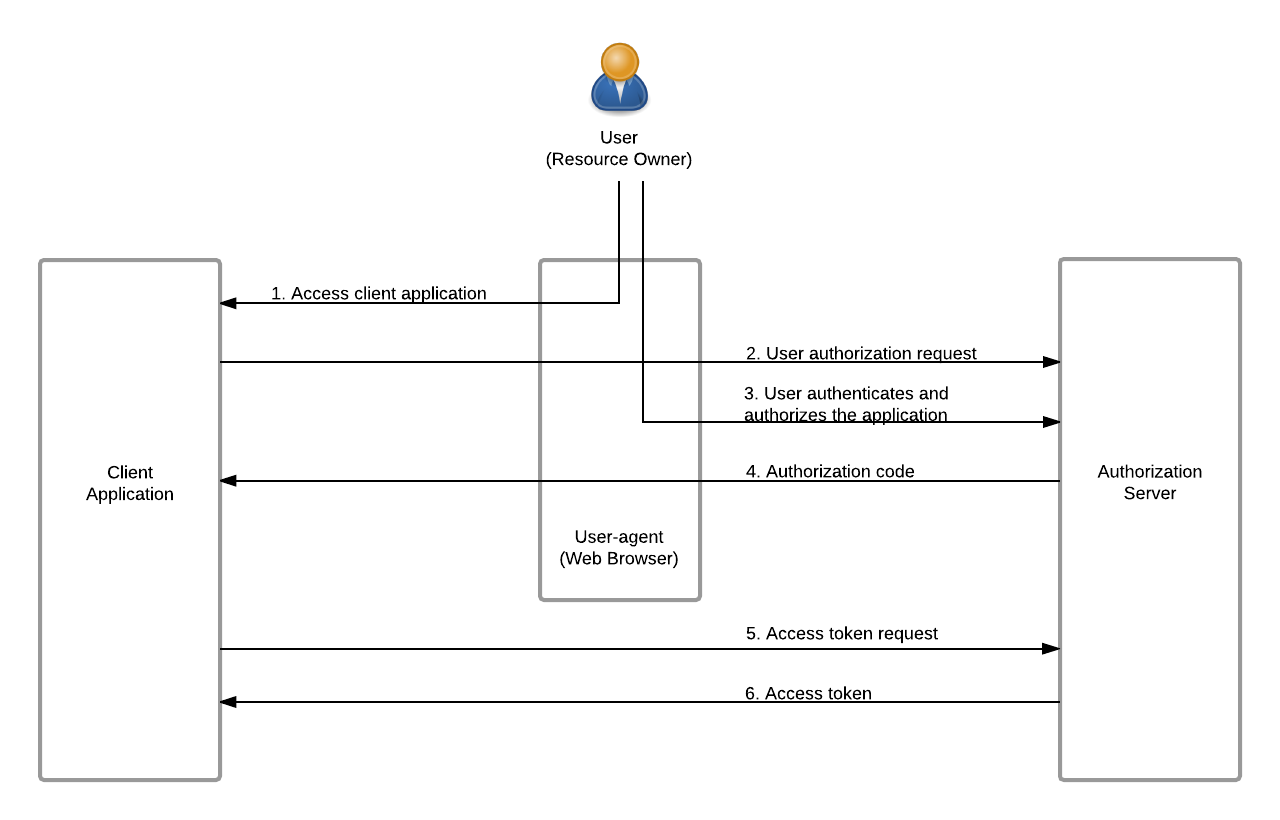
The client initiates the flow by directing the resource owner's user-agent to the authorization endpoint (you can use the /authorize endpoint for the authorization code grant type of OAuth 2.0). It includes the client identifier, response_type, requested scope, and a redirection URI to which the authorization server sends the user-agent back after granting access. The authorization server authenticates the resource owner (via the user-agent) and establishes whether the resource owner granted or denied the client's access request. Assuming the resource owner grants access, the authorization server then redirects the user-agent back to the client using the redirection URI provided earlier. The redirection URI includes an authorization code.
The client then requests an access token from the authorization server's /token endpoint by including the authorization code received in the previous step. When making the request, the client authenticates with the authorization server. It then includes the redirection URI used to obtain the authorization code for verification. The authorization server authenticates the client, validates the authorization code, and ensures that the redirection URI matches the URI used to redirect the client from the /authorize endpoint in the previous response. If valid, the authorization server responds back with an access token and, optionally, a refresh token.
The diagram below depicts the flow of Authorization Code Grant :
Invoking the Token API to generate tokens
Assuming that both the client and the API Gateway are run on the same server, the Authorization API URL is http://wso2is.local:8080/authorize.
- Query component:
- Headers:
For example, the client directs the user-agent to make the following HTTP request using TLS.
GET
/authorize?response_type=code&client_id=wU62DjlyDBnq87GlBwplfqvmAbAa&scope=PRODUCTION&redirect_uri=https%3A%2F%2Fclient%2Eexample%2Ecom%2Fcb
HTTP/1.1
Host: server.example.com
Content-Type:application/x-www-form-urlencoded
The authorization server redirects the user-agent by sending the following HTTP response:
Now the client makes the following HTTP request using TLS to the /token endpoint.
POST /token HTTP/1.1
Host: server.example.com
Authorization: Basic SVpzSWk2SERiQjVlOFZLZFpBblVpX2ZaM2Y4YTpHbTBiSjZvV1Y4ZkM1T1FMTGxDNmpzbEFDVzhh
Content-Type:application/x-www-form-urlencoded
grant_type=authorization_code&code=SplxlOBeZQQYbYS6WxSbIA&redirect_uri=https%3A%2F%2Fclient%2Eexample%2Ecom%2Fcb
The /token endpoint responds in the same way like in password grant type.
Note that if you are using a separate server for authentication (e.g., a distributed API Manager setup or an instance of WSO2 Identity Server as the authentication server), be sure to give the full URL of the authentication server as given below, in the <API-M_HOME>/repository/conf/deployment.toml file. The default configuration has a relative path, which works in a standalone API Manager setup:
[authentication.endpoints]
login_url="/authenticationendpoint/login.do"
retry_url="/authenticationendpoint/retry.do"
Try Authorization Code Grant
The steps below show how access tokens are generated for the authorization code grant type.
Note
Before you begin
The following instructions use the sample playground webapp. For instructions on how to set up the sample webapp, see Setting up the Sample Webapp.
-
Open a terminal window and add the following entry to the
/etc/hostsfile of your machine to configure the hostname.Why is this step needed?
Some browsers do not allow you to create cookies for a naked hostname, such as
localhost. Cookies are required when working with SSO. Therefore, to ensure that the SSO capabilities work as expected in this tutorial, you need to configure the/etc/hostsfile as explained in this step.The
/etc/hostsfile is a read-only file. Therefore, you won't be able to edit it by opening the file via a text editor. Instead, edit the file using the terminal commands. For example, use the following command if you are working on a Mac/Linux environment. -
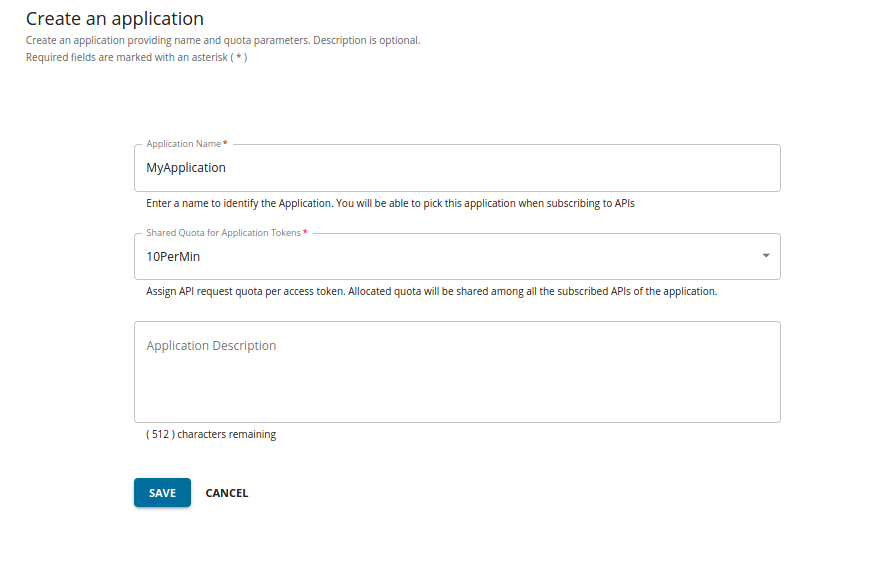
Log in to the API Developer Portal and create a new application.
-
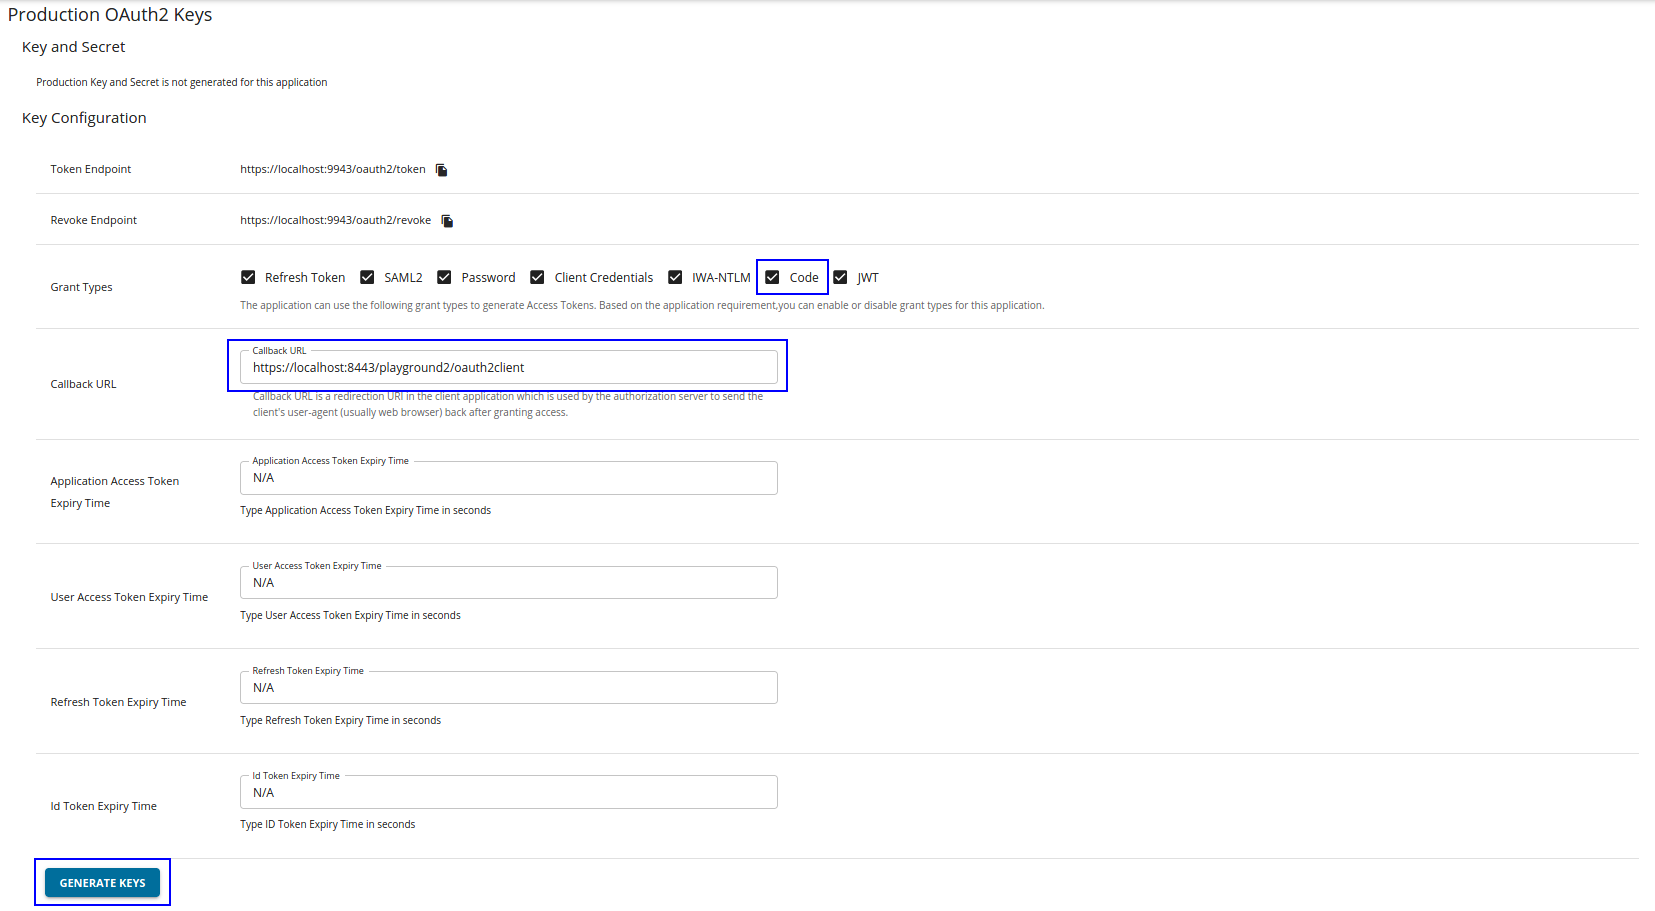
Go to the Production Keys tab.
-
Add the Callback URL of your playground app, select Code Grant type click GENERATE KEYS.
Note
By default the implicit and code grant type selection checkboxes are disabled in the UI. You need to enter the callback URL first to enable selecting the code grant type.
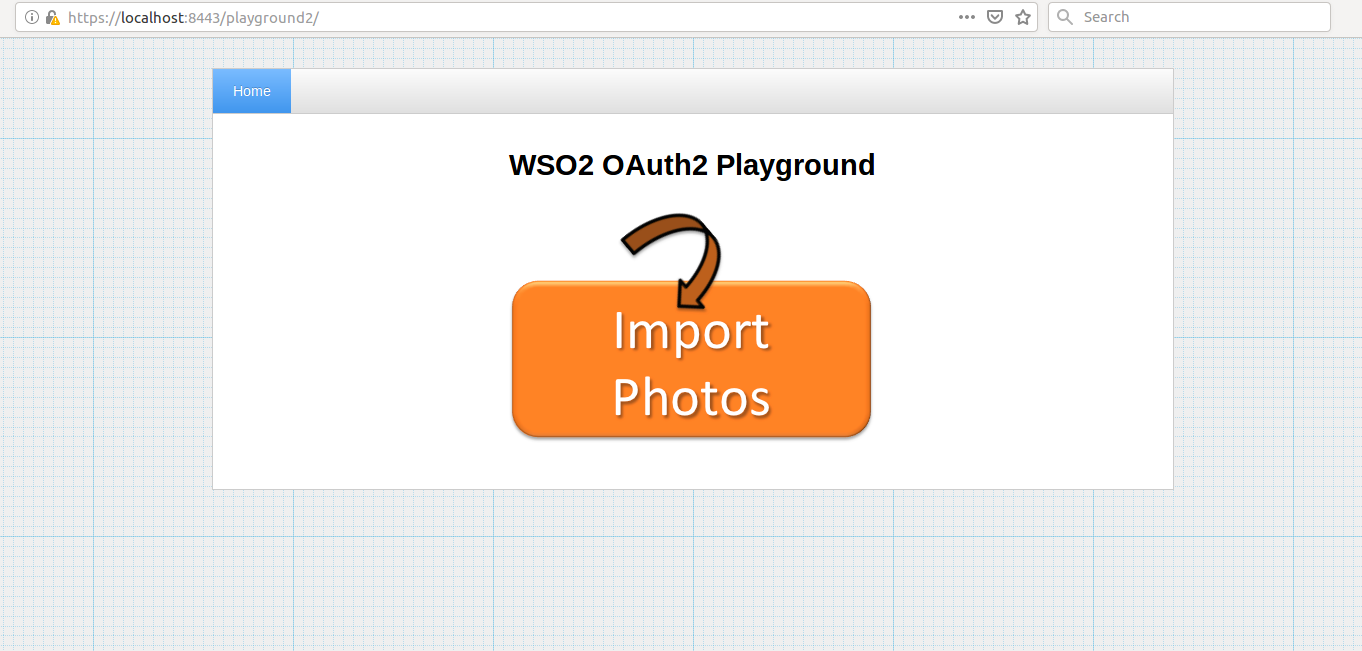
-
Go to the playground app and click Import Photos.
-
Give the information in the table below and click Authorize.
Field Sample Value Authorization Grant Type Authorization Code Client Id Consumer Key obtained for your application Scope The scope you have selected for you application Callback URL The callback URL of your application Authorize Endpoint https://localhost:9443/oauth2/authorize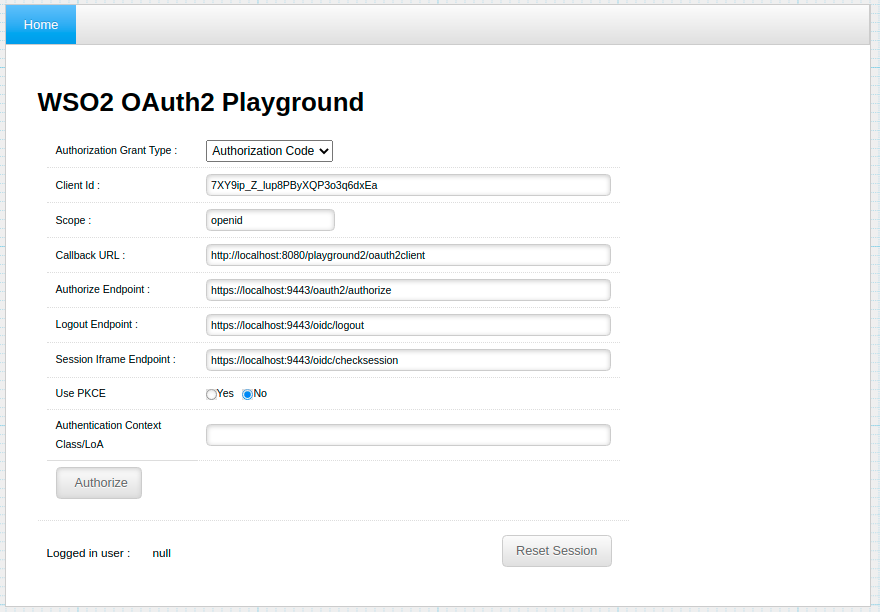
-
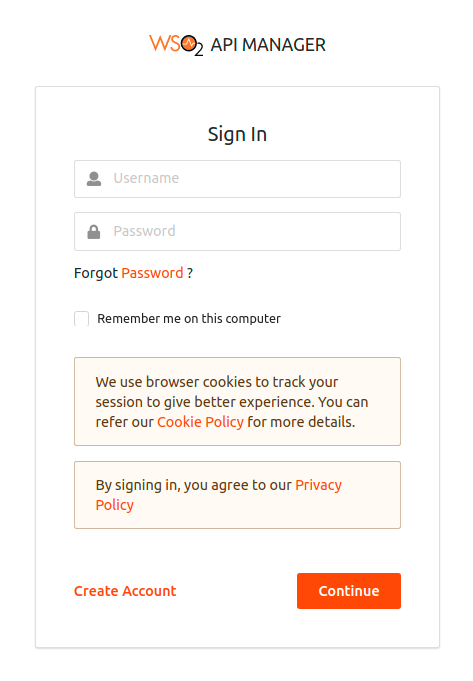
The playground application redirects to the login page. Enter you username and password and click Sign In.
-
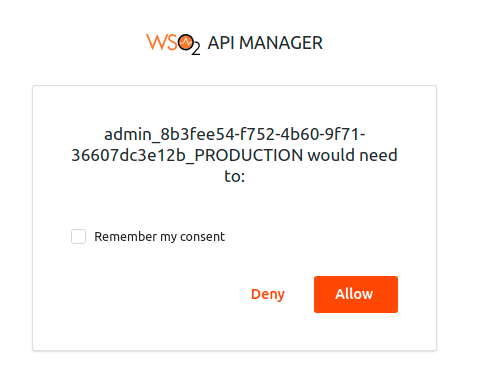
Select Remember my consent to remember the access to your profile information.
-
Provide following information in the redirected page and click on Get Access token.
Callback URL http://wso2is.local:8080/playground2/oauth2client Access Token Endpoint https://localhost:9443/oauth2/token Client Secret Client secret obtained for the application 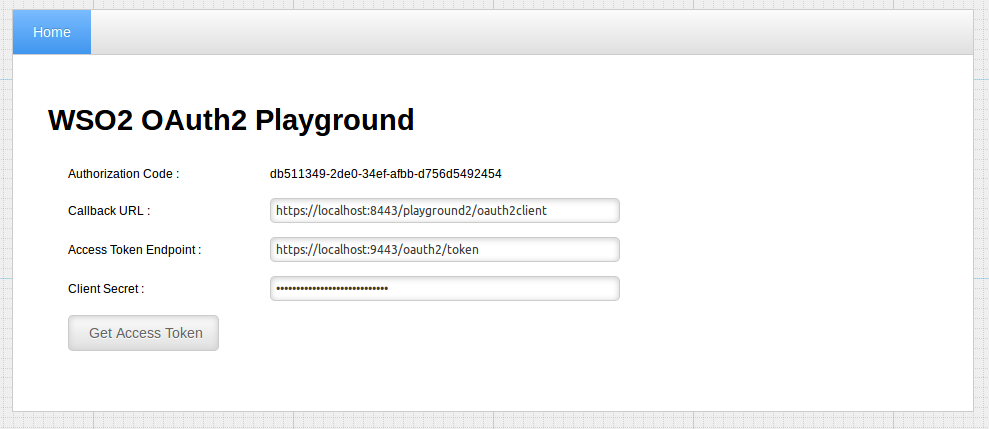
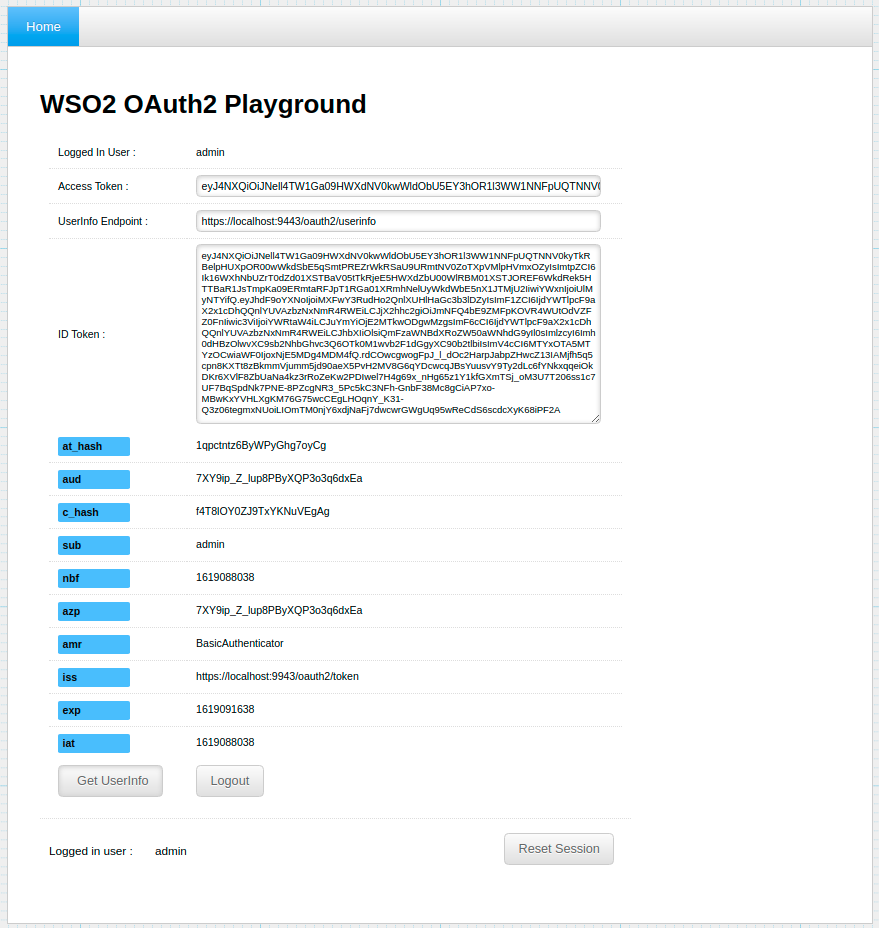
You will receive the access token as follows: