Configuring Identity Server as External IDP using SAML
The Single Sign-On with the SAML 2.0 feature in WSO2 API Manager is implemented according to the SAML 2.0 browser-based SSO support facilitated by WSO2 Identity Server(WSO2 IS). This feature is available in all WSO2 IS packs from 4.1.0 onwards. The version used in this guide is WSO2 IS 7.x
WSO2 Identity Server acts as an identity service provider of systems enabled with single sign-on, while the Web applications act as SSO service providers. Using this feature, you can configure SSO with SAML 2.0 across the API Publisher and Developer Portal. After configuring, you can access the Developer Portal or the API Publisher with a single authentication attempt.
prerequisites
-
Download the API Manager distribution from https://wso2.com/api-management/.
-
Download the Identity Server distribution from https://wso2.com/identity-and-access-management/.
Tip
For testing purposes, if you want to run both the WSO2 API Manager and WSO2 IS server on the same server, go to the
<IS-Home>/repository/conf/deployment.tomlfile and offset the port by 1 to Identity Server, by adding following configuration:[server] offset=1 -
Start the servers using the following commands:
wso2server.bat --runsh wso2server.sh
Configure the Identity Server
Step - 1 Configure the Service Provider
-
Login to the Management Console of the Identity server by accessing the following URL:
https://{is-ip}:9444/console -
Create a Service Provider:
a. Go to Applications → New Application and select Traditional Web Application.
b. In the popup, provide the following details and click Create:
Protocol SAML Issuer apim Assertion consumer service https://localhost:9443/commonauth 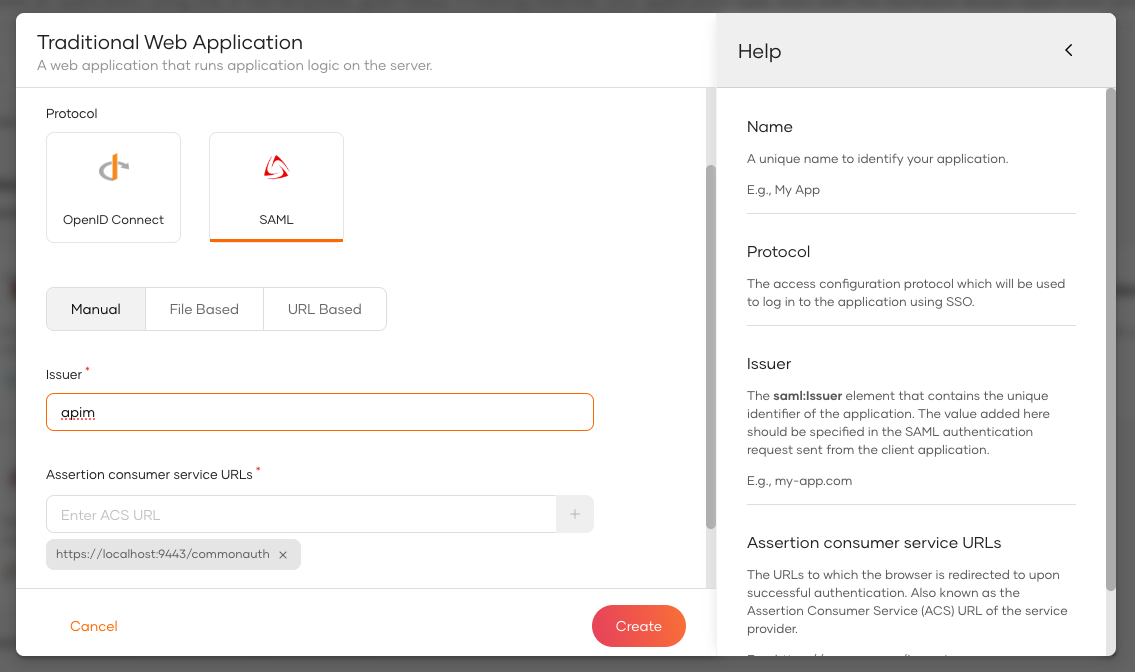
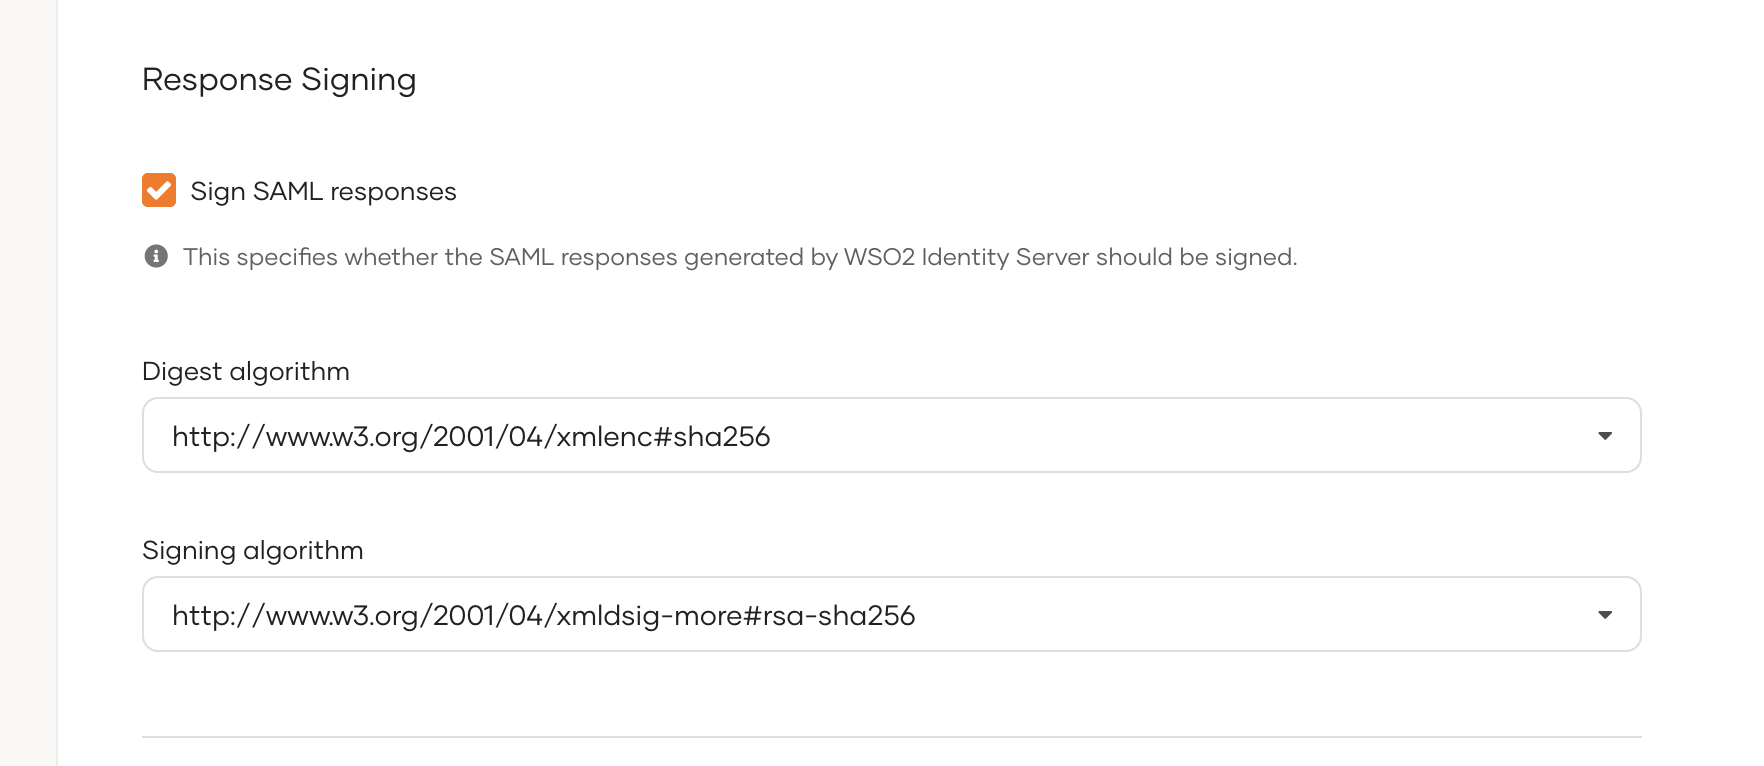
c. Under the Protocol tab, go to Response Signing, select Sign SAML Responses, and click Update.
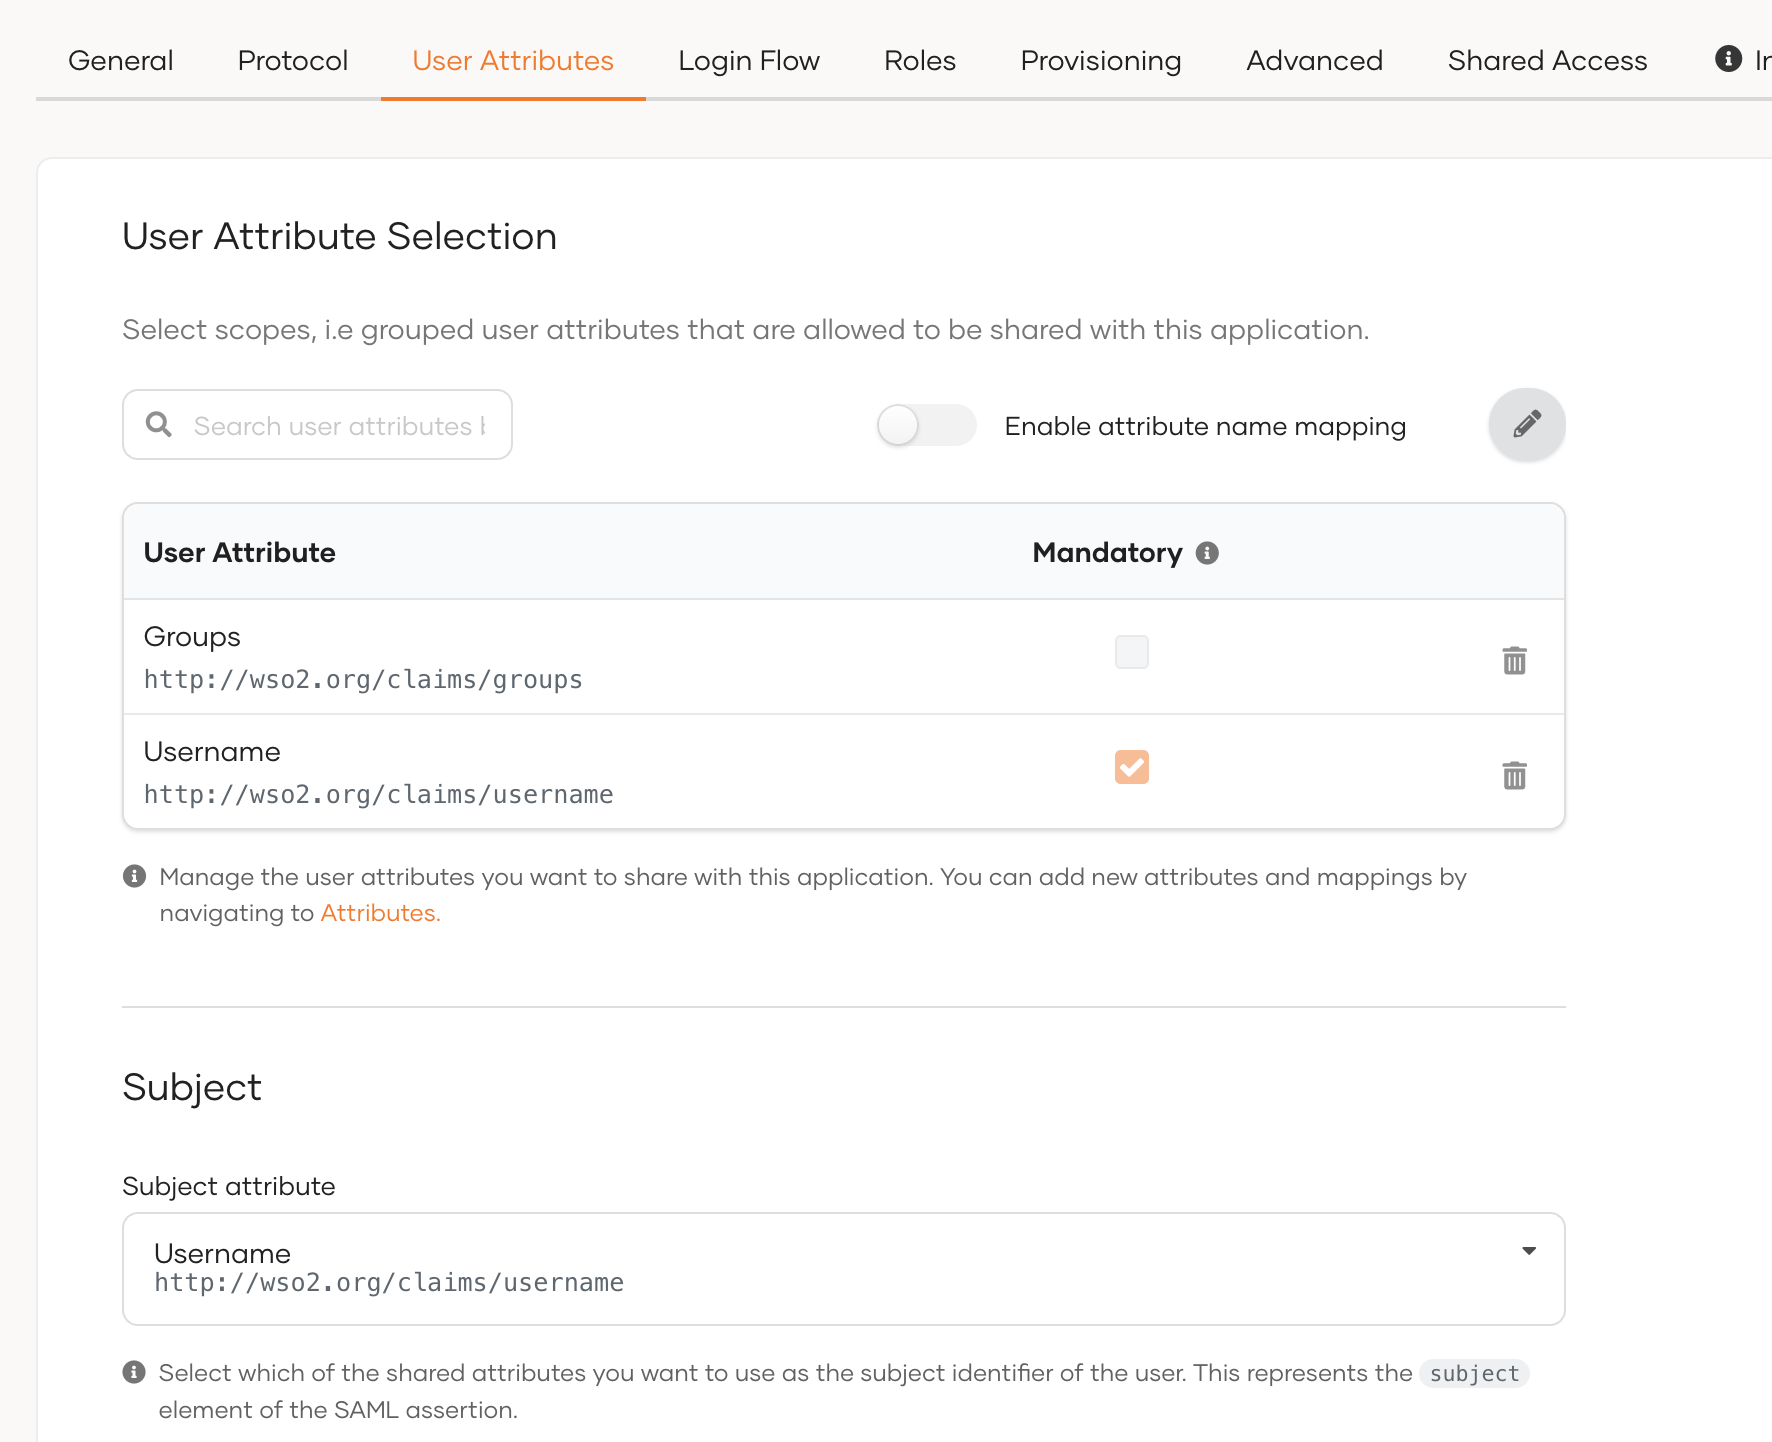
d. Go to the User Attribute Selection section in User Attributes tab, click Add user attributes, and add the Username and Groups attributes.
e. Under the Subject section, select Username as the subject attribute.
f. Go to the Info tab and download the IdP Metadata file using the Download IdP Metadata option.
Step - 2 Create users and roles
-
Create the required users and groups in Identity Server. Assume, following users are created in Identity Servers with the given groups.
User Groups Sam publisher Karen devportal
Configure the API Manager
Step - 1 Import the Identity Server Certificate to WSO2 API Manager
Import the Keymanager certificate to the WSO2 API Manager client-truststore.jks using the following steps.
-
Export the WSO2 IS certificate.
echo -n | openssl s_client -connect localhost:9444 -servername wso2is7 | openssl x509 > is7.certopenssl s_client -connect localhost:9444 -servername wso2is7 < NUL | openssl x509 > is7.cert -
Import this certificate to the
client-truststore.jkslocated in<AM_HOME>/repository/resources/security/.keytool -import -alias wso2is7cert -file is7.cert -keystore client-truststore.jks -storepass wso2carbon
Step - 2 Configure the Identity Provider
-
Login to the Management Console of API Manager by browsing the following URL:
https://{apim-ip}:9443/carbon -
Navigate to the Identity Providers section under Main → Identity and create new Identity Provider.
-
Expand the Federated Authenticators section and add following configurations under SAML2 Web SSO Configurations:
Enable SAML2 Web SSO true Service Provider Entity ID It depends on the Issuer value defined in the Service Provider configured in Identity Server above. (Ex: apim) Select Mode Metadata File Configurationoption and upload the IdP Metadata file.Following image shows the sample values for SAML2 Web SSO Configurations:

Note
If you configure manually, make sure your service provider configurations in the Identity Server and the identity provider configurations in API Manager are similarly reflected to each other.
Example:
- If the Response Signing Algorithm in Identity Server is rsa-sha256, then the Signature Algorithm in API Manager should be RSA with SHA256.
- If you have enabled Enable Single Logout in the Service Provider created in the Identity Server, then you have to enable Single Logout Profile in the Identity Provider created in API Manager.
-
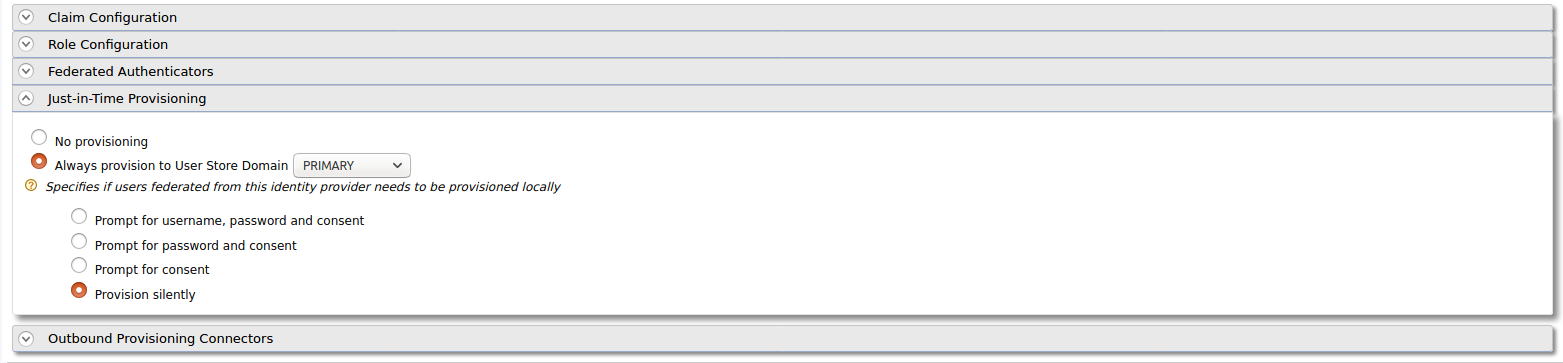
Enable Just-in-Time Provisioning to provision the users in API Manager.
-
Add the following role mapping under Role Configuration section:
Identity Server Roles Roles Mapped in API Manager devportal Internal/Subscriber publisher Internal/publisher 
Tip
Instead of using the default internal roles, you can also create new roles in API Manager and map it to the provisioned users.
-
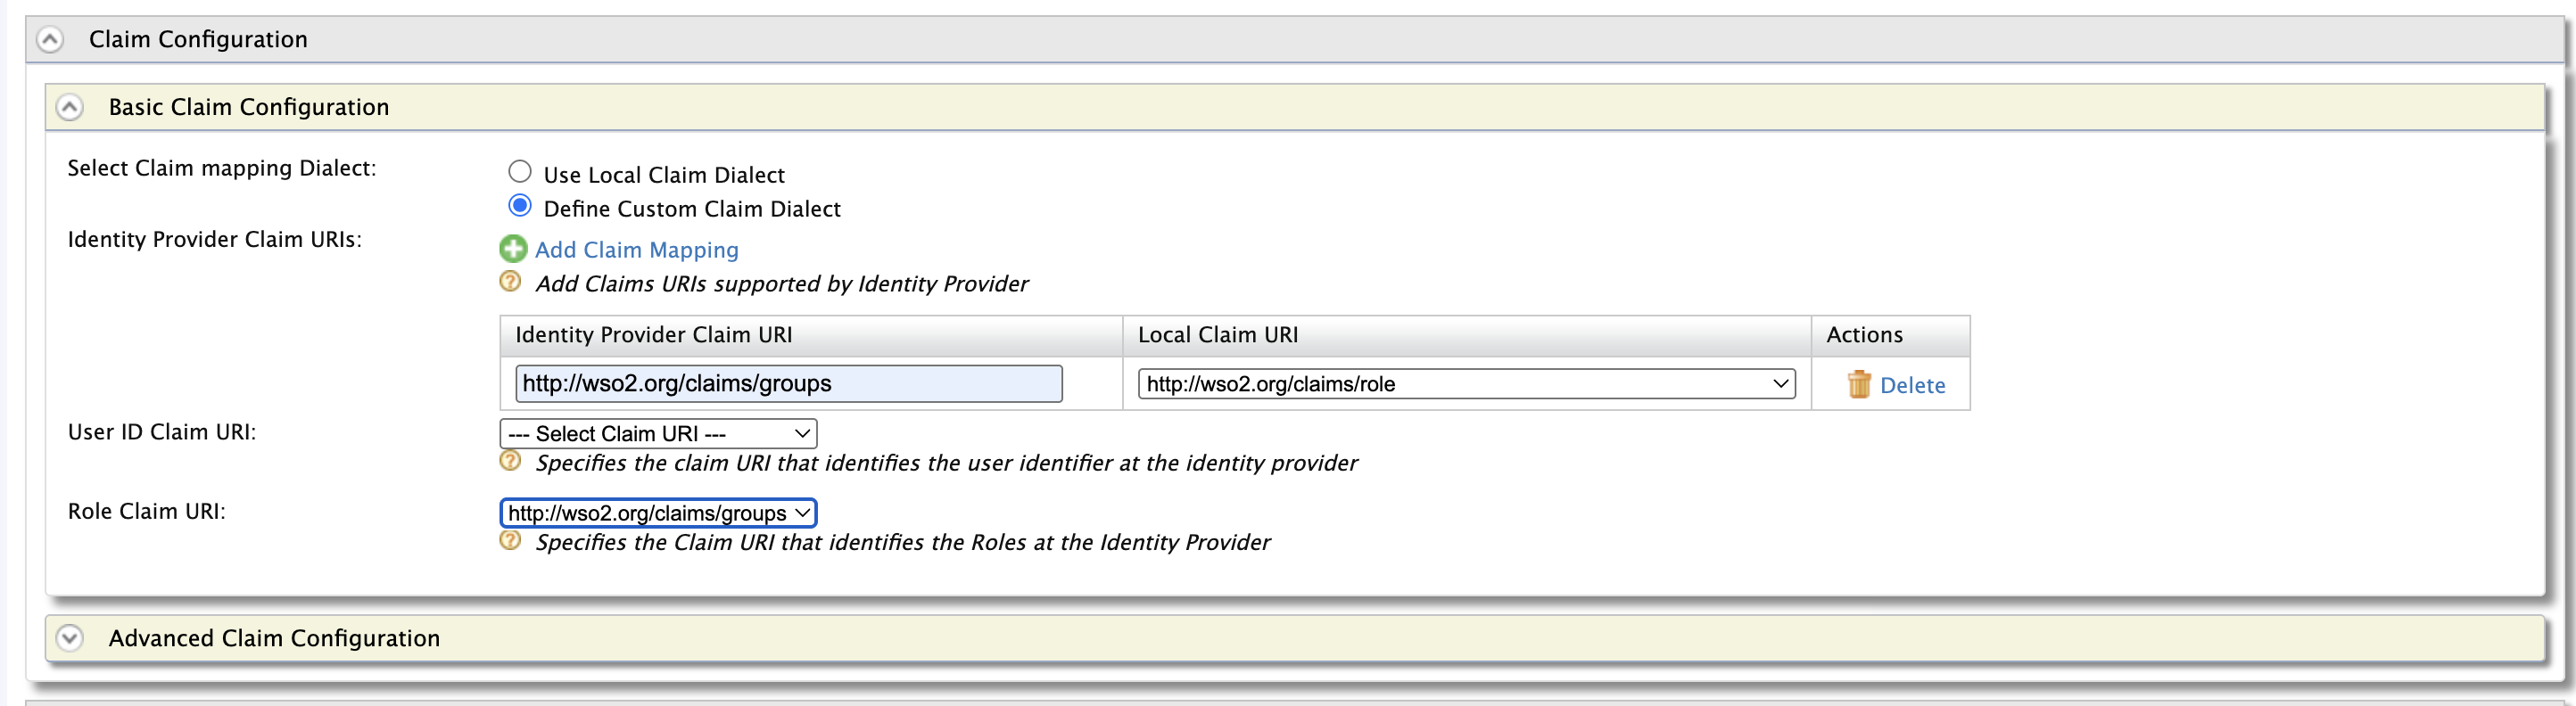
Add the following claim mapping under the Claim Configuration section.
Identity Provider Claim URI Local Claim URI http://wso2.org/claims/groups http://wso2.org/claims/role Also select groups as the Role Claim URI.
-
Step - 3 Configure the Service Provider
-
Navigate to the Service Providers section and list the Service Providers. There are two service providers created for Publisher portal and Developer portal named as
apim_publisherandapim_devportal. Edit theapim_publisherservice provider.Attention
The service providers are created during the first login. Therefore, you will have to log into the Developer Portal and Publisher at least once for the two service providers to appear.
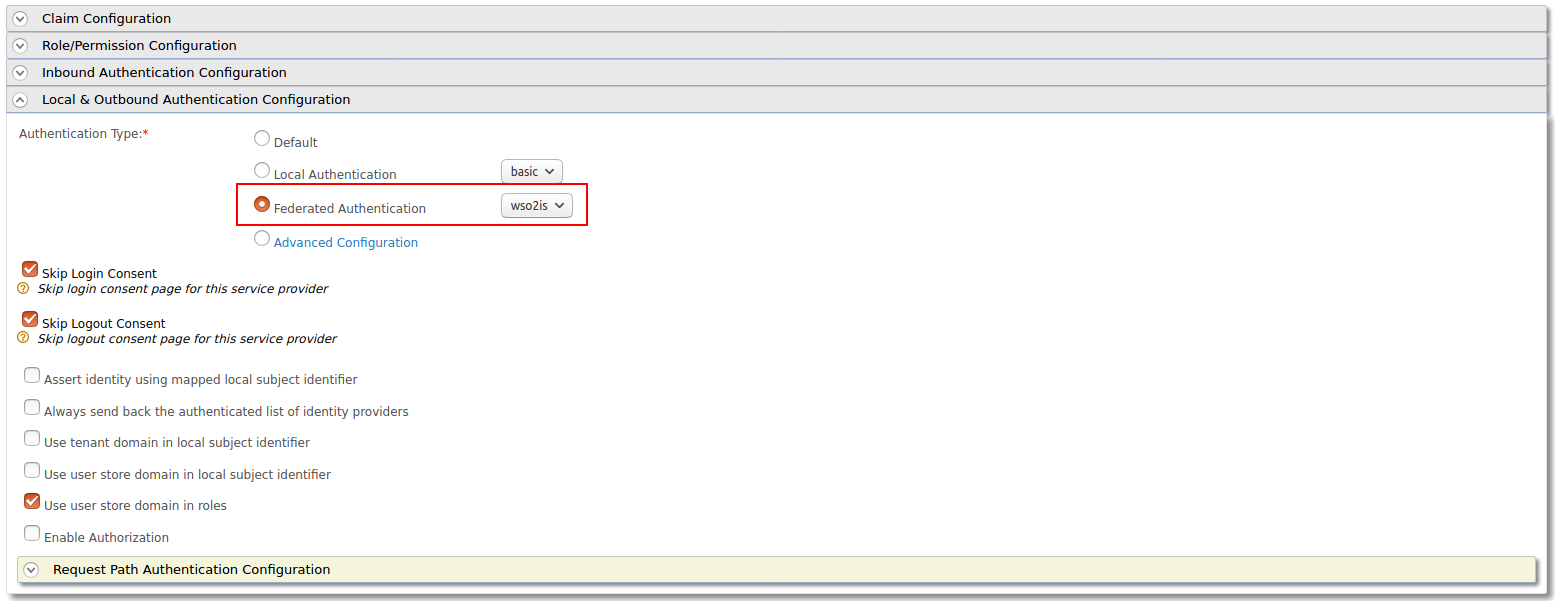
-
Expand the Local & Outbound Authentication Configuration section and select Federated Authentication as the Authentication Type and select the name of the Identity Provider you created. Update the configurations with your selection.
-
Repeat the same step for the apim_devportal Service Provider as well.
Now you will be able to login to Publisher and Devportal using the users in WSO2 Identity Server.
Info
To learn more about Single Sign-On with WSO2 Identity Server, see SAML 2.0 Web SSO in the WSO2 Identity Server documentation.