Scenario 4 - Signing up a New User
This is a tutorial that is part of a series and can be used as a standalone tutorial on how to sign up a new user. For more details on the scenario and general prerequisites, please see the scenario overview page.
Time to Complete : 3 minutes
User Story
Quantis allows external users to access their APIs. To take the full benefit out of these APIs, they have decided to open the registration to outside users since it can be a burden to enter all the details for every single user/consumer. Therefore, they request an approval workflow for user registration in such a way that the users will be registered to the system when a user with administrative privileges approves their registration after a manual validation of the user. By allowing external parties to register to their system under a supervision, Quantis expects higher revenue in future.

Step 1: Set up the self-signup workflow
WSO2 API Manager provides extension points to trigger workflow tasks for many operations such as Application creation, subscription creation, user signup, etc. By default, WSO2 API Manager comes with a simple approval workflow.
This demo setup already comes with self-signup and signup workflow enabled for the Qantis tenant domain. If you need to check how to configure this check enabling self-signup and enabling signup workflow documentation.
Note
You could see UserSignUpApprovalWorkflowExecutor is now engaged if you login to the https://localhost:9443/carbon using Qantis admin credentials ([email protected]:admin) and navigate to /_system/governance/apimgt/applicationdata/workflow-extensions.xml location.

Step 2: Test the flow
To try this out, do the following.
- Go to the Developer Portal
https://localhost:9443/devportal/and select Qantis tenant domain. - Select Sign In button on the top right corner. This will show a signup page.
- Select Create Account Link.
-
Add the desired username (with the tenant domain) and proceed to self register. Let's say
[email protected].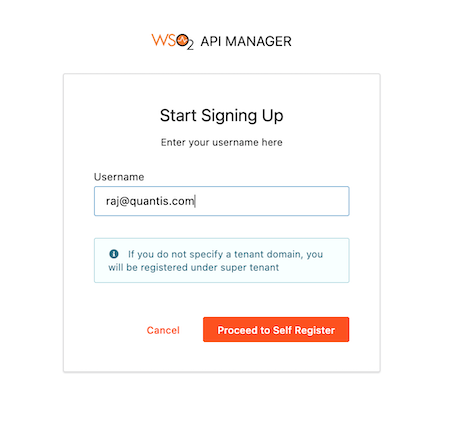
-
Fill the required fields and proceed with the registration.
-
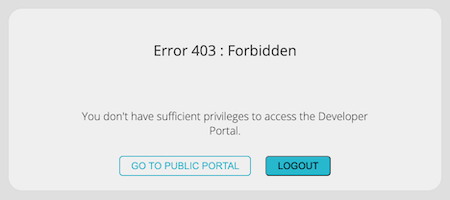
If you try to login using this credentials, you will be shown an unauthorized-access page.
Step 3: Approve the signup request
To approve the signup request, do the following.
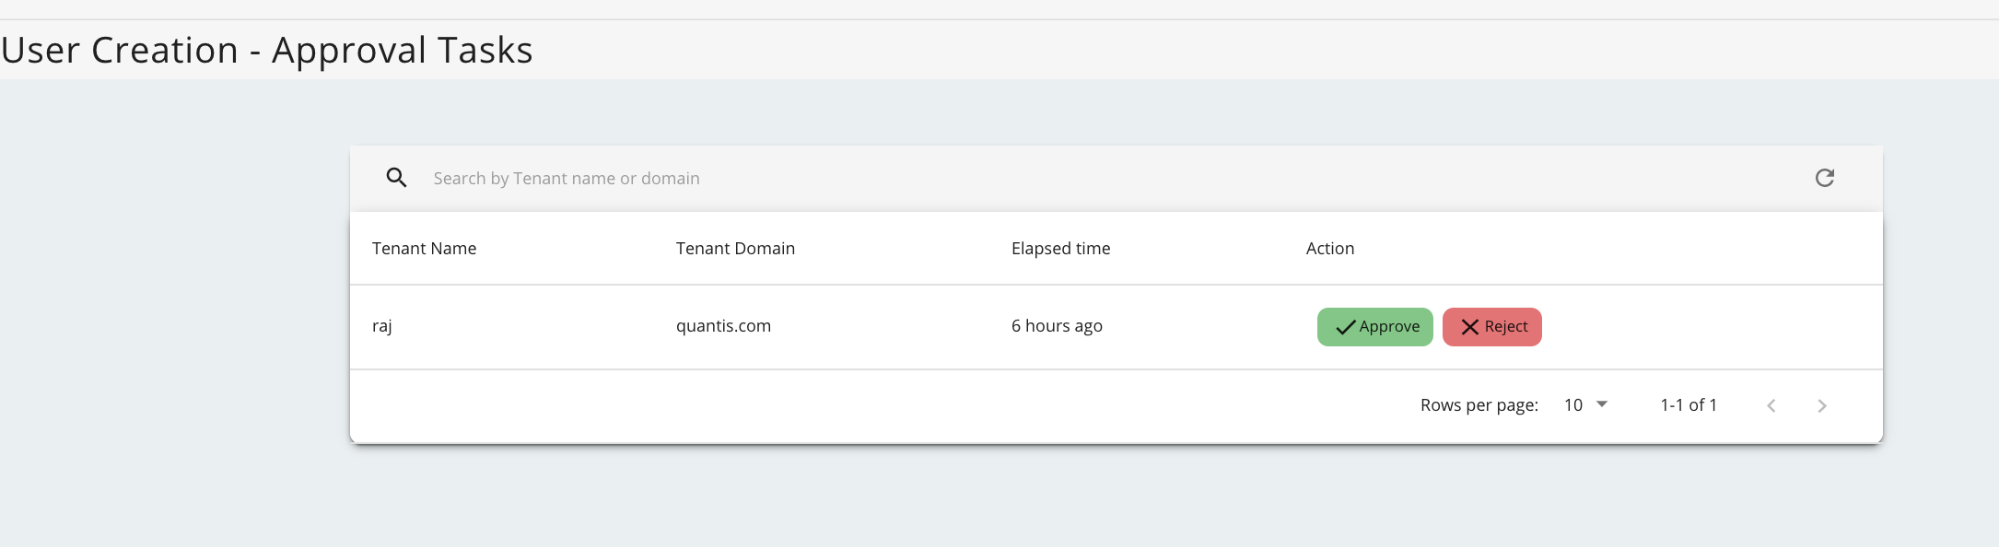
- Log on to the
https://localhost:9443/admin/Admin Portal using[email protected]and passwordadmin. -
Under the Task → User Creation you will notice a pending task. Approve it.
 3. Now you will be able to log on to the Developer Portal using
 [email protected]user and his password.
What's next
Try out the next scenario in the series, Getting the Developer Community Involved.