Edit an API by modifying the API Definition
WSO2 API Manager has an integrated Swagger Editor, which is part of the Swagger project.
Swagger is a 100% open source, standard, language-agnostic specification and a complete framework for describing, producing, consuming, and visualizing RESTful APIs, without the need of a proxy or third-party services. Swagger allows consumers to understand the capabilities of a remote service without accessing its source code, and interact with the service with a minimal amount of implementation logic. Swagger helps describe a service in the same way that interfaces describe lower-level programming code.
The Swagger Editor is a dependency-free collection of HTML, JavaScript, and CSS that dynamically generate documentation from a Swagger-compliant API. Swagger-compliant APIs give you interactive documentation, client SDK generation, and more discoverability. The Swagger Editor has JSON code and its UI facilitates easier code indentation, keyword highlighting and shows syntax errors on the fly. You can add resource parameters, summaries and descriptions to your APIs using the Swagger Editor.
API Manager supports Open API 3.0 and Open API 2.0 specifications and you can simply create, import, edit and consume the APIs defined in both specifications.
In this tutorial, let's see how you can add interactive documentation to an API by directly editing the Swagger code via the API Publisher UI.
Note
This tutorial uses the PizzaShack API created in Create a REST API section and Published in the Publish an API section.
-
Sign in to the API Publisher and choose to design a new REST API.
https://<hostname>:9443/publisher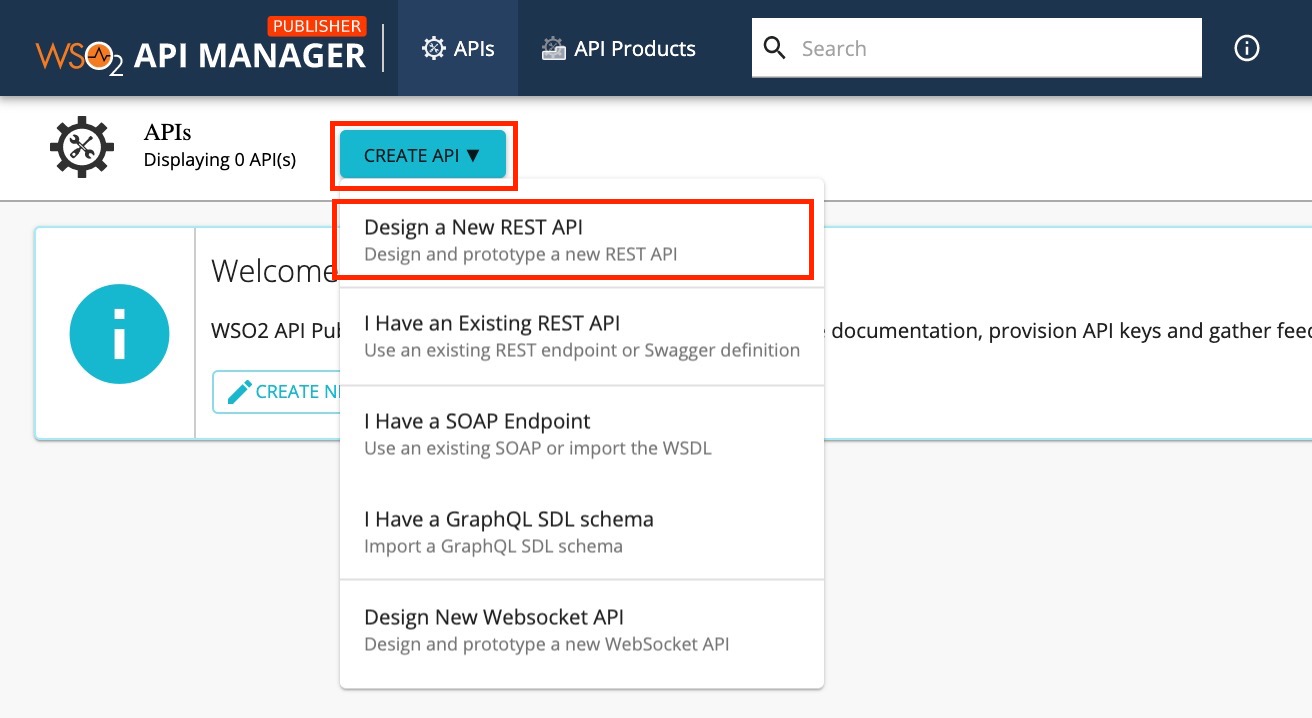
-
Click Design a New REST API.
-
In the Create an API page, give an API name, a context a version and the endpoint as follows and click Create.
Field Sample value Name PizzaShack Version 1.0.0 Context /pizzashackEndpoint https://localhost:9443/am/sample/pizzashack/v1/apiThe endpoint that you add is automatically added as the production and sandbox endpoints.

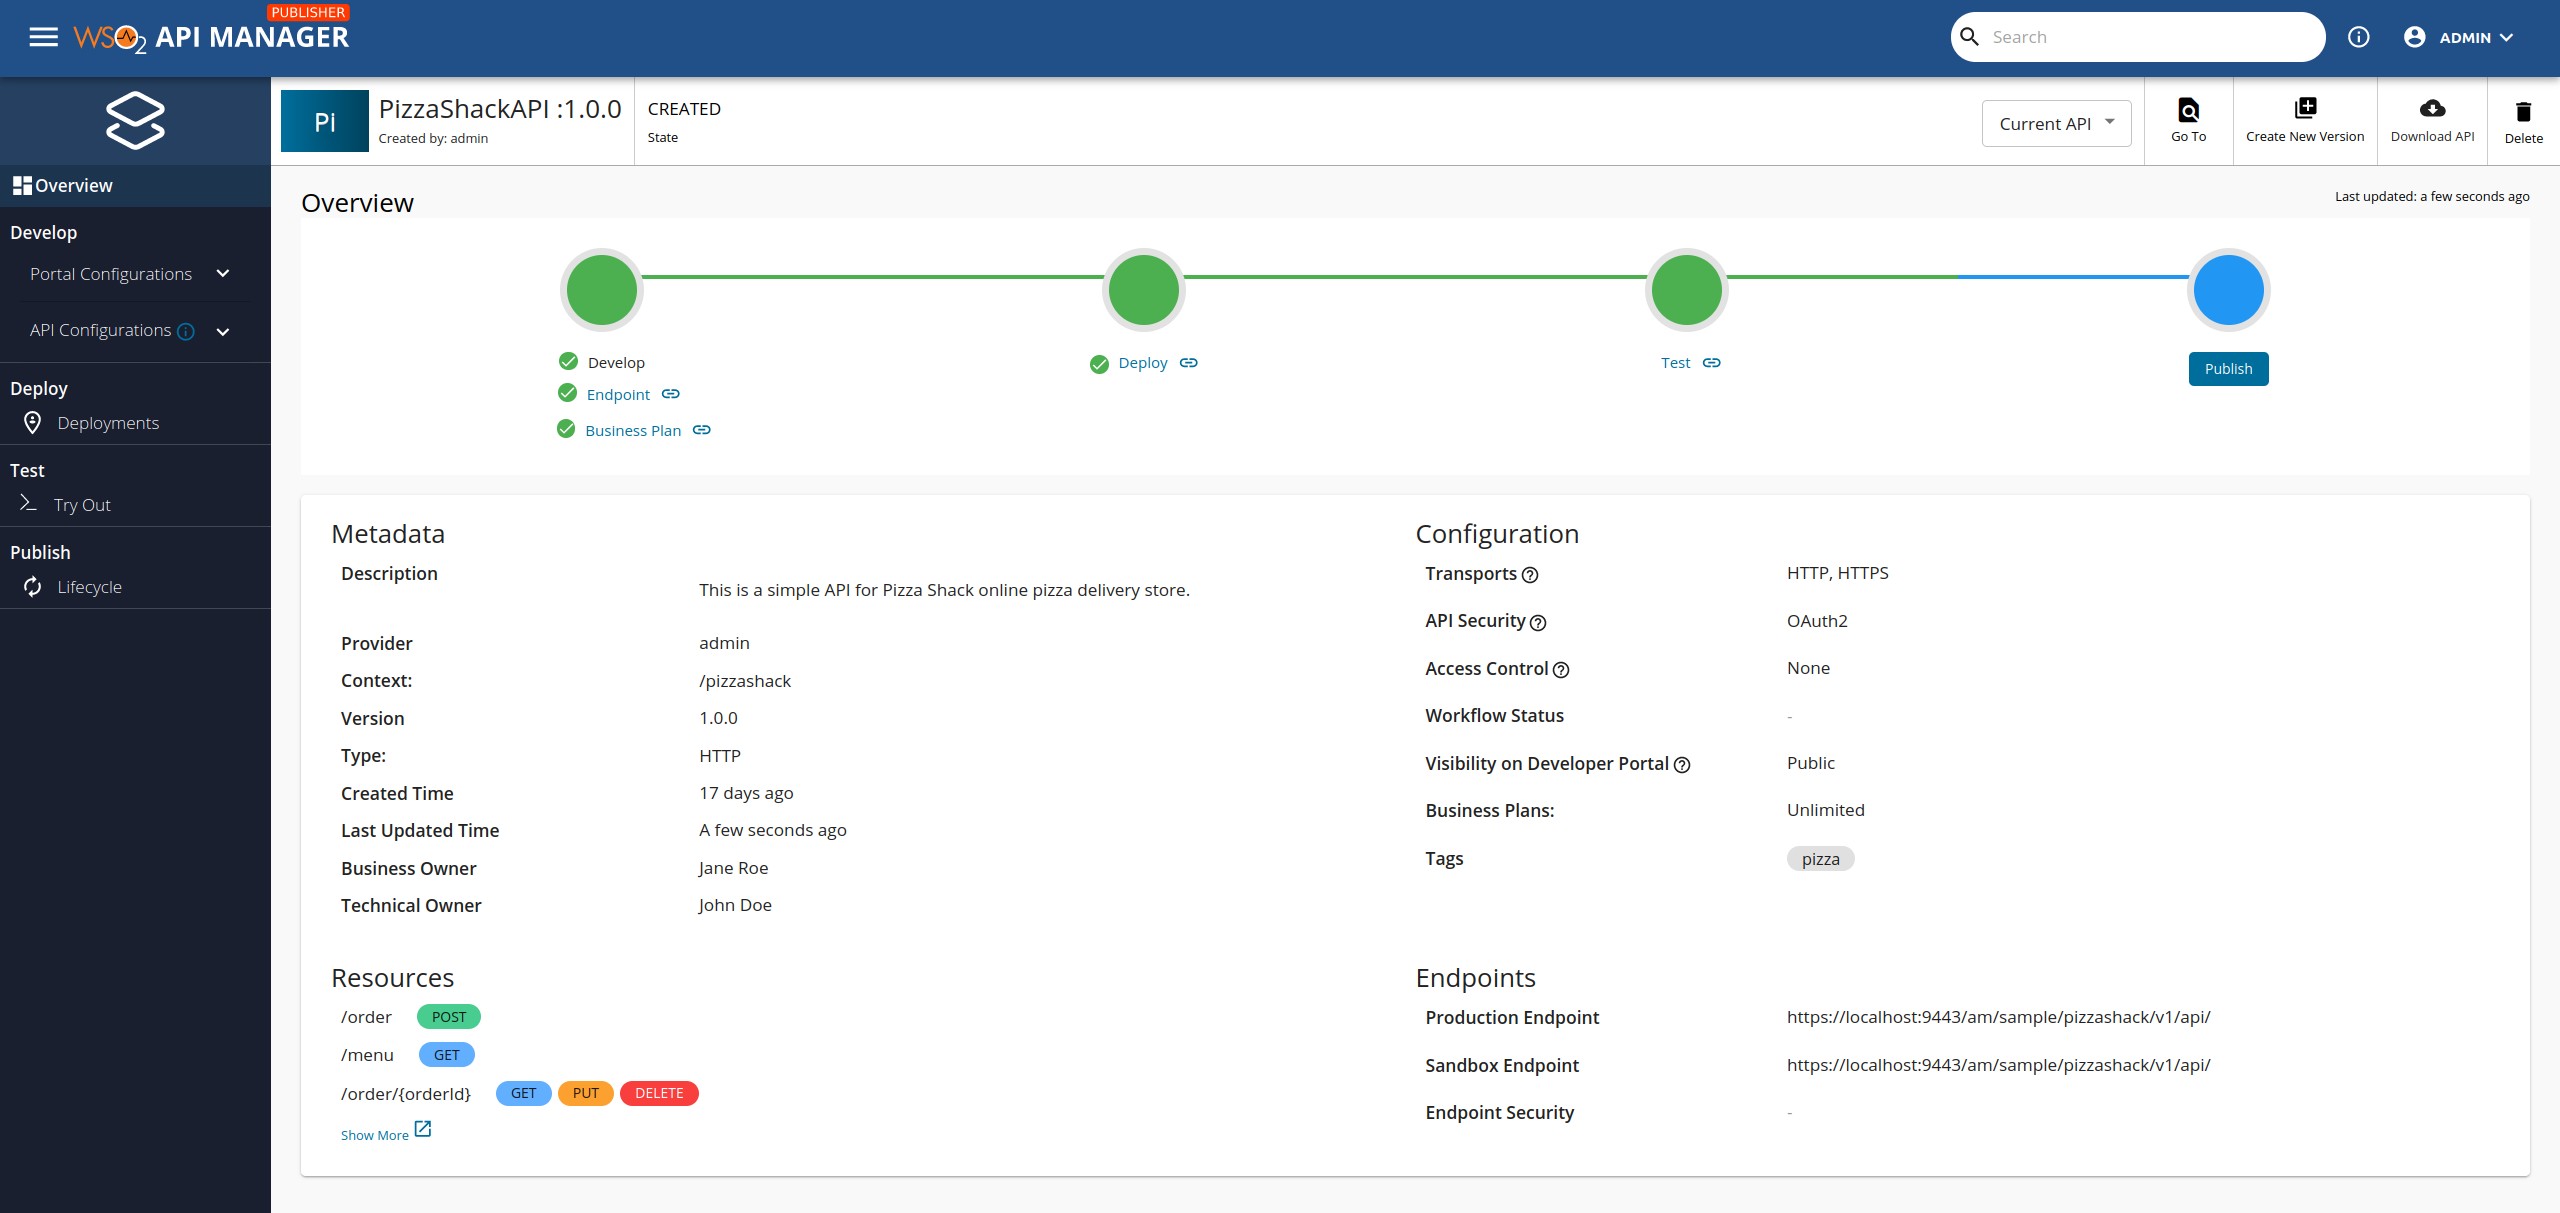
The Overview of the created API will be displayed.
-
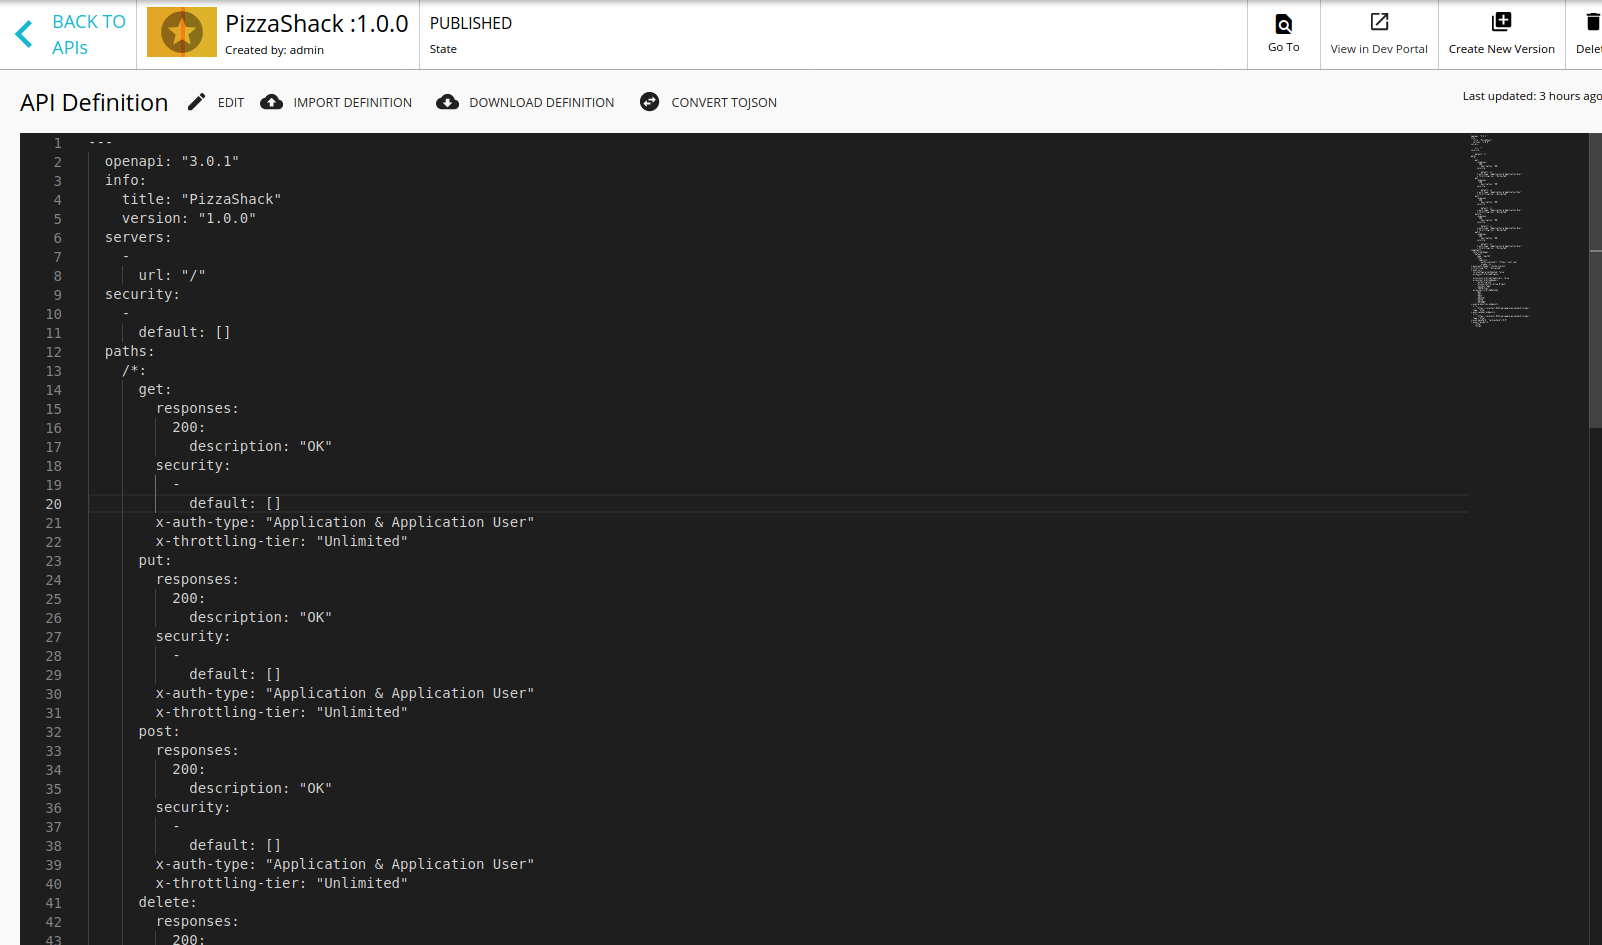
Click on API definition to view the API Definition in the swagger UI. The Swagger UI opens.
-
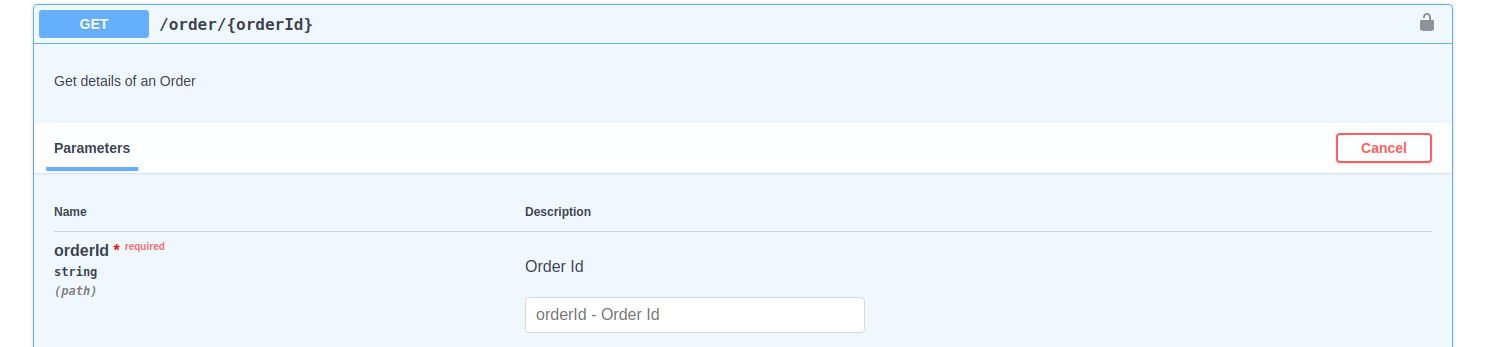
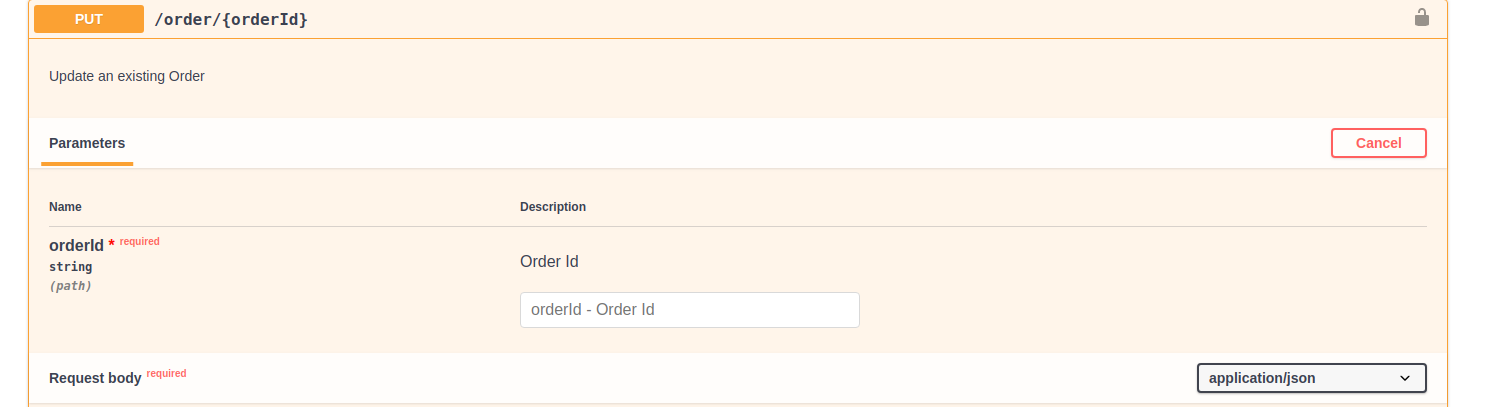
Add the following GET and PUT method for the API.
-
Under the
pathsobject, remove the{}and add the following code, as shown in the screenshot below.Tip
In the code below, note that you have a resource defined with the URL pattern
/order/{orderId}under thepathsobject. This is followed by the HTTP methods GET and PUT. For each HTTP method, the following parameters are defined.- responses: An object to hold responses that can be used across operations. See the Swagger specification for details.
- x-auth-type : WSO2-specific object to define the authentication type of the method.
- x-throttling-tier : WSO2-specific object to define the throttling tier of the method.
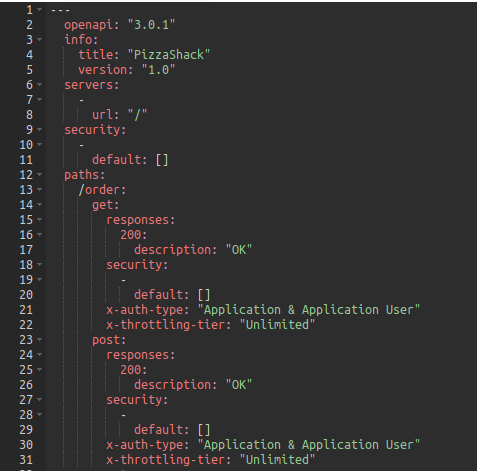
/order/{orderId}: get: description: Get details of an Order parameters: - name: orderId in: path description: Order Id required: true schema: type: string format: string responses: 200: description: OK Requested Order will be returned content: application/json: schema: $ref: '#/components/schemas/Order' security: - default: [] x-auth-type: Application & Application User x-throttling-tier: Unlimited put: description: Update an existing Order parameters: - name: orderId in: path description: Order Id required: true schema: type: string format: string requestBody: description: Order object that needs to be added content: application/json: schema: $ref: '#/components/schemas/Order' required: true responses: 200: description: OK. Successful response with updated Order headers: Location: description: The URL of the newly created resource. schema: type: string Content-Type: description: The content type of the body. schema: type: string content: application/json: schema: $ref: '#/components/schemas/Order' security: - default: [] x-auth-type: "Application & Application User" x-throttling-tier: "Unlimited" -
Define the Order schema. Add the following code to the API Definition below the Paths section.
definitions:
       Order:
      required:
        - "orderId"
      properties:
        customerName:
          type: "string"
        delivered:
          type: "boolean"
        address:
          type: "string"
        pizzaType:
          type: "string"
        creditCardNumber:
          type: "string"
        quantity:
          type: "number"
        orderId:
          type: "string"
      title: "Pizza Order"
Note
The PUT method has a path parameter defined with reference to the schema "Order".
parameters: - name: "orderId" in: "path" description: "Order Id" required: true type: "string" format: "string" - in: "body" name: "body" description: "Order object that needs to be added" required: true schema: $ref: "#/definitions/Order" -
Click Update Content. This adds a resource with two HTTP methods into the API, which is visible in the API Publisher Resources tab along with the parameters defined.

Let's assume that the backend of this API sends the response in XML format. Let's document this under the GET method in the resource that we just added.
Info
Troubleshooting: If you get an error after adding the API definition in the Swagger UI, first check the indentation of the code that you added, which defines the API, because Swagger throw errors if the indention is not correct.
-
-
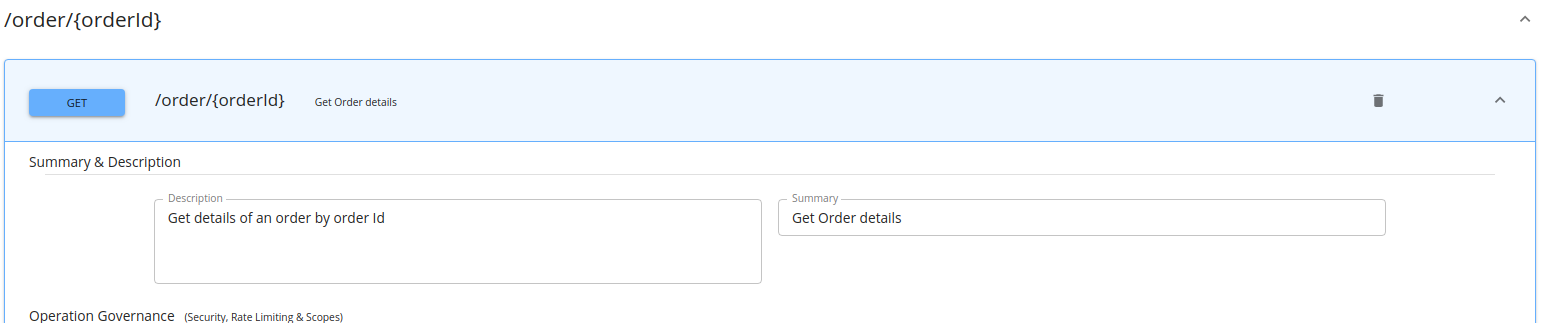
Add a summary and description for the GET method.
-
Click Edit Source and add the following code, which defines a summary and description, to the GET method.
summary: "Get Order details"
description: "Get details of an order by order Id"
-
Click Apply Changes. The summary and description of the GET method that you added is visible when you expand the GET method in the API Publisher.
-
-
Change the title of the API.
-
Click Edit Source, and add the following code in the Swagger UI. This is the title that is visible to the consumers in the Developer Portal after the API is published.
info:
    title: PizzaShackAPI
You can see how this change is reflected in the Developer Portal in step 12.
 -
Click Apply Changes and complete the API creation process.
-
-
Complete the rest of the API creation process. For more information, see step 7 onwards under Create a REST API section and Published in the Publish an API section.
-
Click View in Developer Portal and the API you just published appears.
- Click Try Out.
Note that the changes that you made earlier now appear in the Developer Portal for consumers.
In this tutorial, you have seen how the integrated Swagger Editor can be used to design, describe, and document your API, so that the API consumers get a better understanding of the API's functionality.