Enabling Logs for a Component
Follow the instructions given below to enable logs for a specific component in the Micro Integrator.
Enabling Logs
There are two ways to enable logs for a component: using the Micro Integrator dashboard or using the CLI.
Info
Alternatively, you can directly update the log configurations in the log4j2.properties file (stored in the <MI_HOME>/conf directory).
Using the Dashboard
- Sign in to the Micro Integrator dashboard.
- Click Log Configs on the left-hand navigator to open the Logging Management window.
-
Go to the Add Loggers tab and define the new logger.
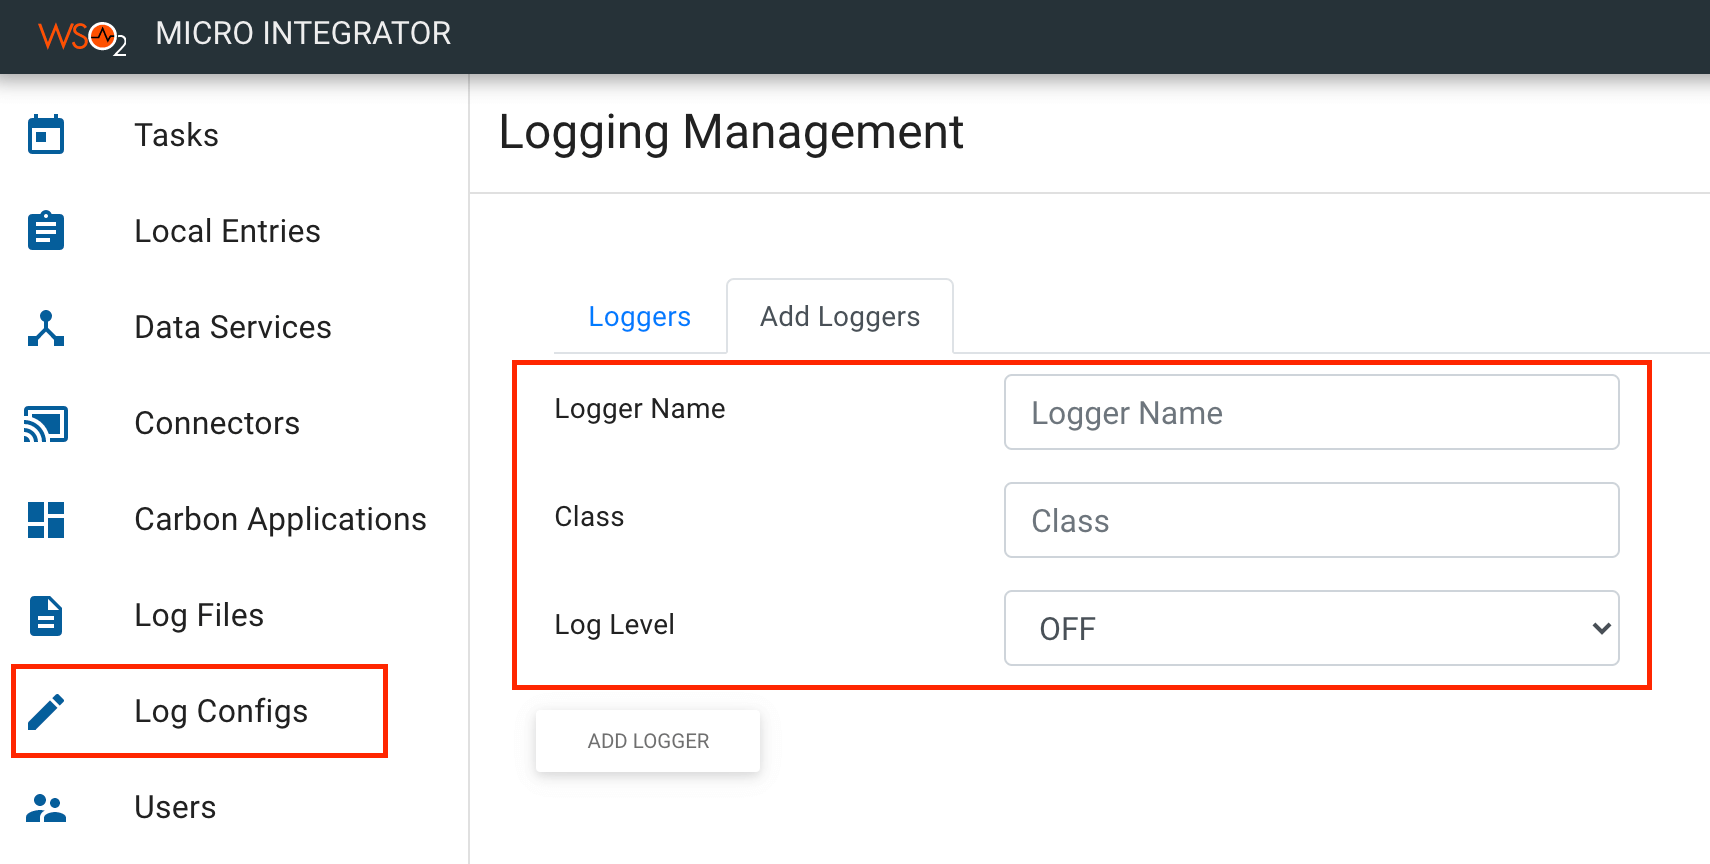
Logger Name Give a name for the logger. Class Specify the class implementation of the component for which the logger is defined. Log Level Specify the log level.
Using the CLI
-
Download and set up the API Controller.
-
Use the commands for adding a new logger to the Micro Integrator.
Printing Logs
By default, when you enable logs for a component, the logs get printed to the server console and the carbon log file. When there are error logs, these are also printed to the error log file. These log files are stored in the <MI_HOME/repository/logs/ directory.
By default, all loggers print logs to the destinations configured for the root logger. If you want to print logs to new destinations, you can define new appenders.
For example, you will define new appenders when you want to have per-service log files or per-api log files.
What's Next?
Once you have defined the new logger: