Applying Security to a Data Service
WSO2 supports WS-Security, WS-Policy, and WS-Security Policy specifications. These specifications define a behavioral model for Web services. To enable a security policy for a data service, you need to first create a security policy file, and then add it to the data service.
Prerequisites
Be sure to configure a user store for the Micro Integrator and add the required users and roles.
Step 1: Creating a registry resource module
Registry artifacts (such as security policy files) should be stored in a Registry Resource module. Follow the steps given below to create a module:
-
Right click on the Integration project and go to New → Registry Resource.
Tip
Alternatively, you can go to File → New → Others and select Registry Resources from the opening wizard.
-
Enter a name for the module and click Next .
- Enter the Maven information about the module and click Finish .
- The new module will be listed in the project explorer.
Step 2: Creating a security policy as a registry resource
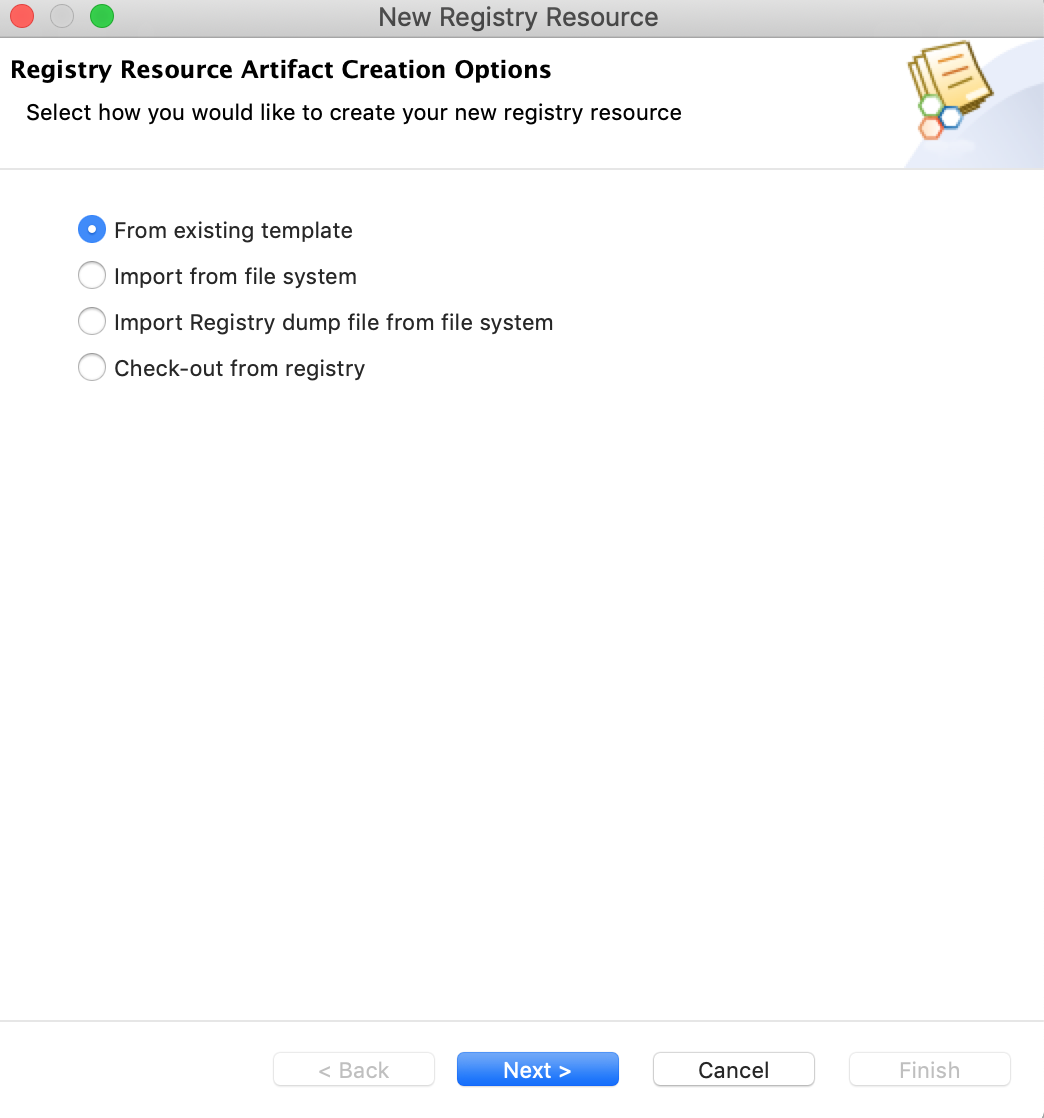
- Right-click the registry resource module in the left navigation panel, click New, and then click Registry Resource. This will open the New Registry Resource window.
- Select the From existing template option as shown below and
click Next .
-
Enter the following details:
Property Value Resource Name Sample_Policy Artifact Name Sample_Policy Template WS-Policy Registry gov Registry path ws-policy/ -
Click Finish and the policy file will be listed in the navigator.
-
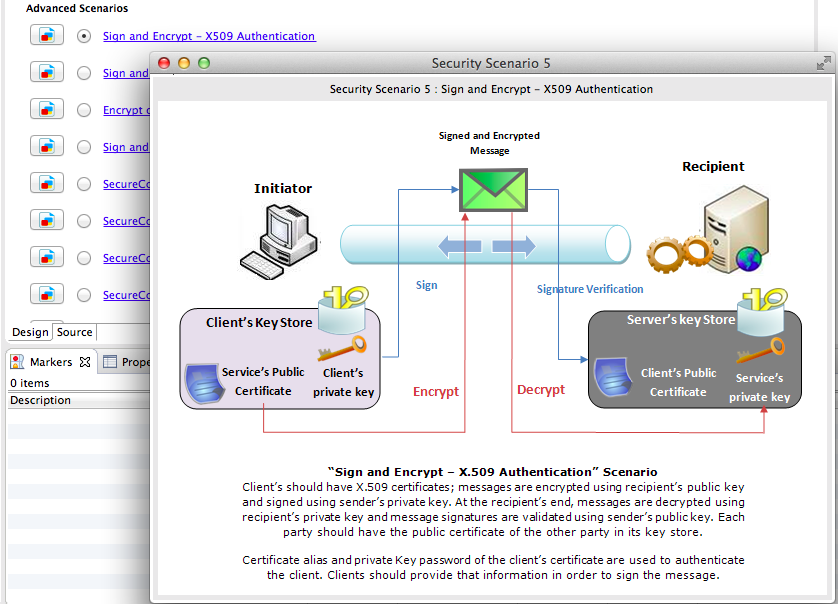
Let's use the Design View to enable the required security scenario. For example, enable the Sign and Encrypt security scenario.
Tip
Click the icon next to the scenario to get details of the scenario.
-
You can also provide encryption properties, signature properties, and advanced rampart configurations.
Info
Using role-based permissions?
For certain scenarios, you can specify user roles. After you select the scenario, scroll to the right to see the User Roles button. Either define the user roles inline or retrieve the user roles from the server.
Info
Switch to source view of the policy file and make sure the tokenStoreClass in the policy file is 'org.wso2.micro.integrator.security.extensions.SecurityTokenStore'. In addition, replace the ServerCrypto class with 'org.wso2.micro.integrator.security.util.ServerCrypto' if present.
-
-
Save the policy file.
Step 2: Adding the security policy to the data service
Once you have configured the policy file, you can add the security policy to the data service as explained below.
-
If you have already created a data service using WSO2 Integration Studio, select the file from the Project Explorer.
Tip
Be sure to update your database credentials in the dataservice file.
-
Once you have opened the data service file, switch to the Source View to see the source of the data service.
-
Add the following elements inside the
<data>element and save the file.<policy key="gov:ws-policy/Sample_Policy.xml" /> <enableSec />
Step 3: Package the artifacts
See the instructions on packaging the artifacts into a composite exporter.
Step 4: Build and run the artifacts
See the instructions deploying the artifacts.
Step 5: Testing the service
Create a Soap UI project with the relevant security settings and then send the request to the hosted service.
For guidelines on using SoapUI, see general guidelines on testing with SOAP UI.
Using an encrypted datasource password
When you create a data service for an RDBMS datasource, you have the option of encrypting the datasource connection password. This ensures that the password is encrypted in the configuration file (.dbs file) of the data service.
See the instructions on encrypting plain-text passwords
Once you have encrypted the datasource password, you can update the data service as explained below.
- Open the data service and click Data Sources to expand the section.
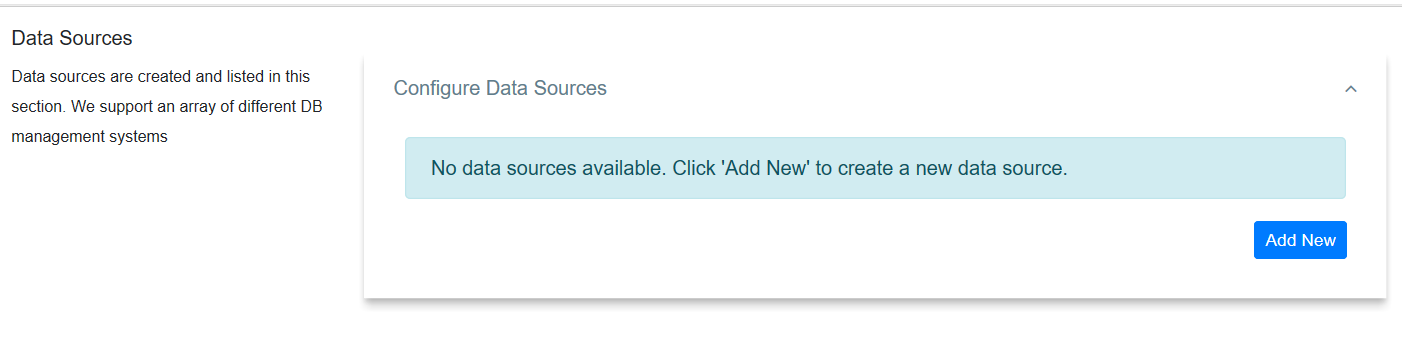
- Click on the Edit icon of the respective Datasource to open
Edit Datasource page.
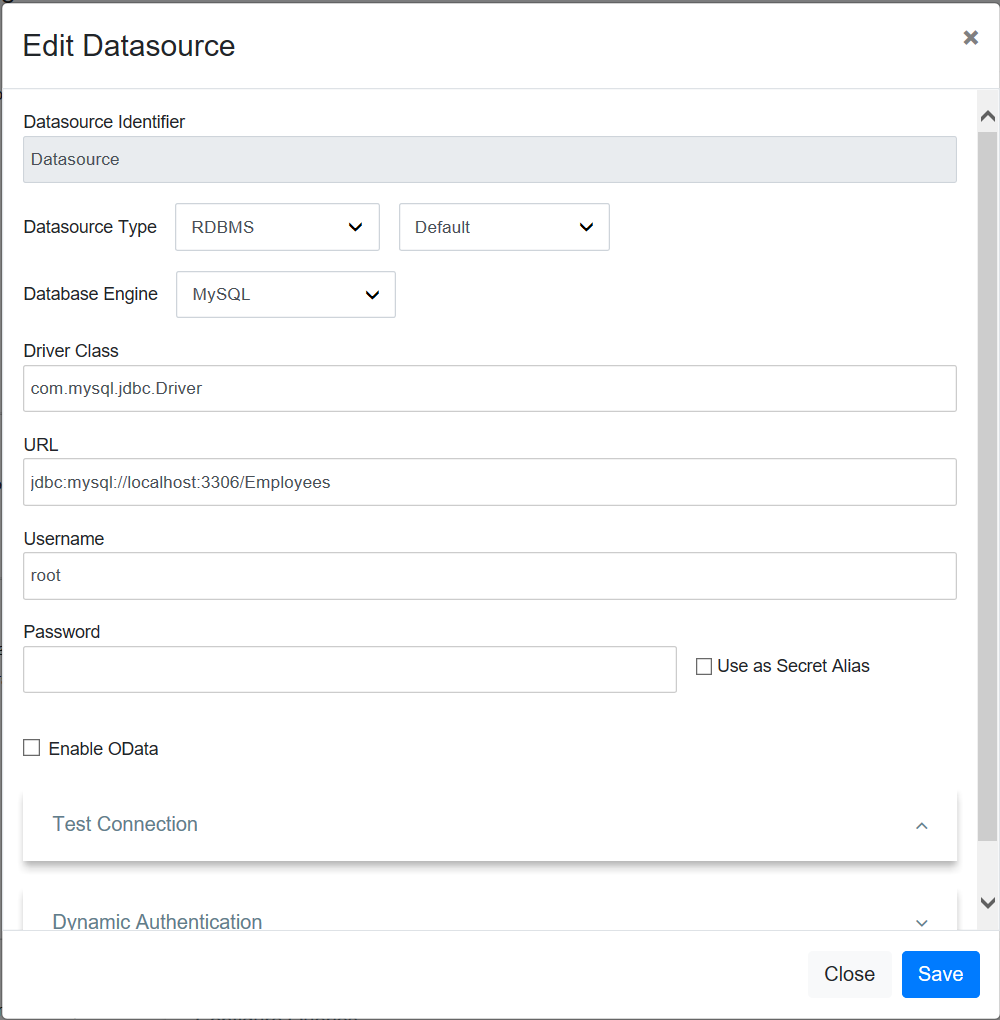
- Make sure to check Use as a Secret Alias.
- Update the Secret Alias and click on Save.