Expose a Kafka Stream as a Managed WebSocket API
The Streaming Integrator (SI) component in WSO2 API Manager (WSO2 API-M) can consume events from a third-party streaming provider topic (e.g., Kafka topic) and publish those events to a Streaming Backend (e.g., WebSocket Streaming Backend) in a streaming manner. When a stream of events are received by the third-party streaming provider source (e.g., Kafka source), they are published to the Streaming Backend simultaneously.
Streaming integrator is one of the WSO2 API-M components that has the capability to connect with multiple external sources/sinks. Streaming Integration Tooling is another component that provides developer friendly tools. In this tutorial, Streaming integrator is used as the integration point with Kafka. Then the events received from Kafka (SweetProductionStream) are exposed via a WebSocket server using a sink in Streaming integrator.
Once you have the relevant sinks defined you can use the AsyncAPI generation functionality in Steaming Integration Tooling to generate the relevant AsyncAPI definition and then finally deploy it as a service in WSO2 API Manager service catalog. You will be able to create an API from the service and you can invoke it as a managed API. Finally, the messages coming to the Kafka topics can be received via the Streaming API.
Follow the instructions below to expose a third-party Service Provider stream as a managed API:
Prerequisites
1. Configure the Streaming Integrator
Follow the steps below to configure the Streaming Integrator to consume the stream from Kafka:
-
Download the Kafka broker, which is available on the Apache site and extract it.
Let's refer to this directory as
<KAFKA_HOME>. -
Install relevant kafka client libraries in SI using extension installer. For instructions to download and install a Siddhi extension, see Downloading and Installing Siddhi Extensions.
-
Configure the basic details needed to publish siddhi application with AsyncAPI definition to the services in API Manager.
-
Open the
<SI_HOME>/conf/server/deployment.yamlfile. -
Update the
service.catalog.configs:section as follows:``` service.catalog.configs: enabled: true hostname: localhost port: 9448 username: admin password: admin ``` In the above configuration - - You are enabling the AsyncAPI generation functionality by setting the `enabled` parameter to `true`. - You are specifying `9448` as the port because you configured a port offset of 5 in the previous step. The default port of the API Manager is `9443`.
-
-
Configure authentication between API-M and SI.
Copy the keyStore and client trustStore related keys from WSO2 API-M to WSO2 SI.
-
Copy the following flies.
-
<API-M_HOME>/repository/resources/security/client-truststore.jks -
<API-M_HOME>/repository/resources/security/wso2carbon.jks
-
-
Add the copied files in to the
<SI_HOME>/resources/security/directory.
-
2. Configure the API Manager port
You have to define the port to which the Streaming Integrator publishes the AsyncAPI definition.
-
Open the
<API-M_HOME>/repository/conf/deployment.tomlfile. -
Uncomment
offsetin the[server]section and set it to5as shown below.[server] offset=5
3. Start Kafka
1.Navigate to the <KAFKA_HOME> directory and start a Zookeeper node.
```
sh bin/zookeeper-server-start.sh config/zookeeper.properties
```-
Navigate to the
<KAFKA_HOME>directory and start the Kafka server node.sh bin/kafka-server-start.sh config/server.properties
4. Install Apache Ant
Download and install Apache Ant.
Step 1 - Start the API Manager
-
Navigate to the
<APIM_HOME>/bindirectory -
The following log appears on the API Manager console when the server is started successfully.
[2021-04-20 15:51:00,036]  INFO - StartupFinalizerServiceComponent Server           :  WSO2 API Manager-4.0.0
[2021-04-20 15:51:00,038]  INFO - StartupFinalizerServiceComponent WSO2 Carbon started in 77 sec
Step 2 - Start the Streaming Integrator
-
Navigate to the
<SI_HOME>/bindirectory -
Start the Streaming Integrator.
The following log appears on the SI console when the server is started successfully.
INFO {org.wso2.carbon.kernel.internal.CarbonStartupHandler} - WSO2 Streaming Integrator started in 4.240 sec
Step 3 - Start and Create a Streaming Backend in Streaming Integrator Tooling
The default Streaming Integrator component is powered by Siddhi. Therefore, you need to create a Siddhi application as the Streaming Backend.
Let's create a basic Siddhi application that can consume messages from a Kafka topic and publish it to the WebSocket-based event sink in XML format.
Follow the instructions below to create a Streaming Backend server:
-
Click New to open a new file.
-
Define your Siddhi application.
@App:name("KafkaToWebSocketSample") @App:description("Description of the plan") @source(type='kafka', topic.list='kafka_sample_topic', partition.no.list='0', threading.option='single.thread', group.id='group', bootstrap.servers='localhost:9092', @map(type='xml')) define stream SweetProductionStream(name string, amount double); @sink(type='websocket-server', host='localhost',port='8025', @map(type='xml')) define stream TotalCountStream (totalCount long); @info(name='query1') from SweetProductionStream select count() as totalCount insert into TotalCountStream; -
Save the file.
If there is no syntax error in the Siddhi application, the following message appears in the console:
Siddhi App KafkaToWebSocketSample.siddhi successfully deployed.
Step 4 - Generate an AsyncAPI Definition
Follow the instructions below to generate an AsyncAPI Definition via the Streaming Integrator Tooling Component:
-
Click Async API View.
The AsyncAPI Generation form appears.

-
Enter the WebSocket Streaming API related details.
The AsyncAPI generation form appears because you did not provide any Streaming API related content for the
@App:asyncAPIannotation when defining the Siddhi application.Let's add the following Streaming API information to create a WebSocket API based AsyncAPI definition.
Field Value Title SweetProdAppVersion 1.0.0Description Consumes events of sweets productionSelect Source or Sink type to Generate Async API Select websocket-server Sources Select TotalCountStream 
-
Click Generate Async API to generate the AsyncAPI definition.

After the Async API is generated as described above, the Async API specifications will be visible in the Async API View.
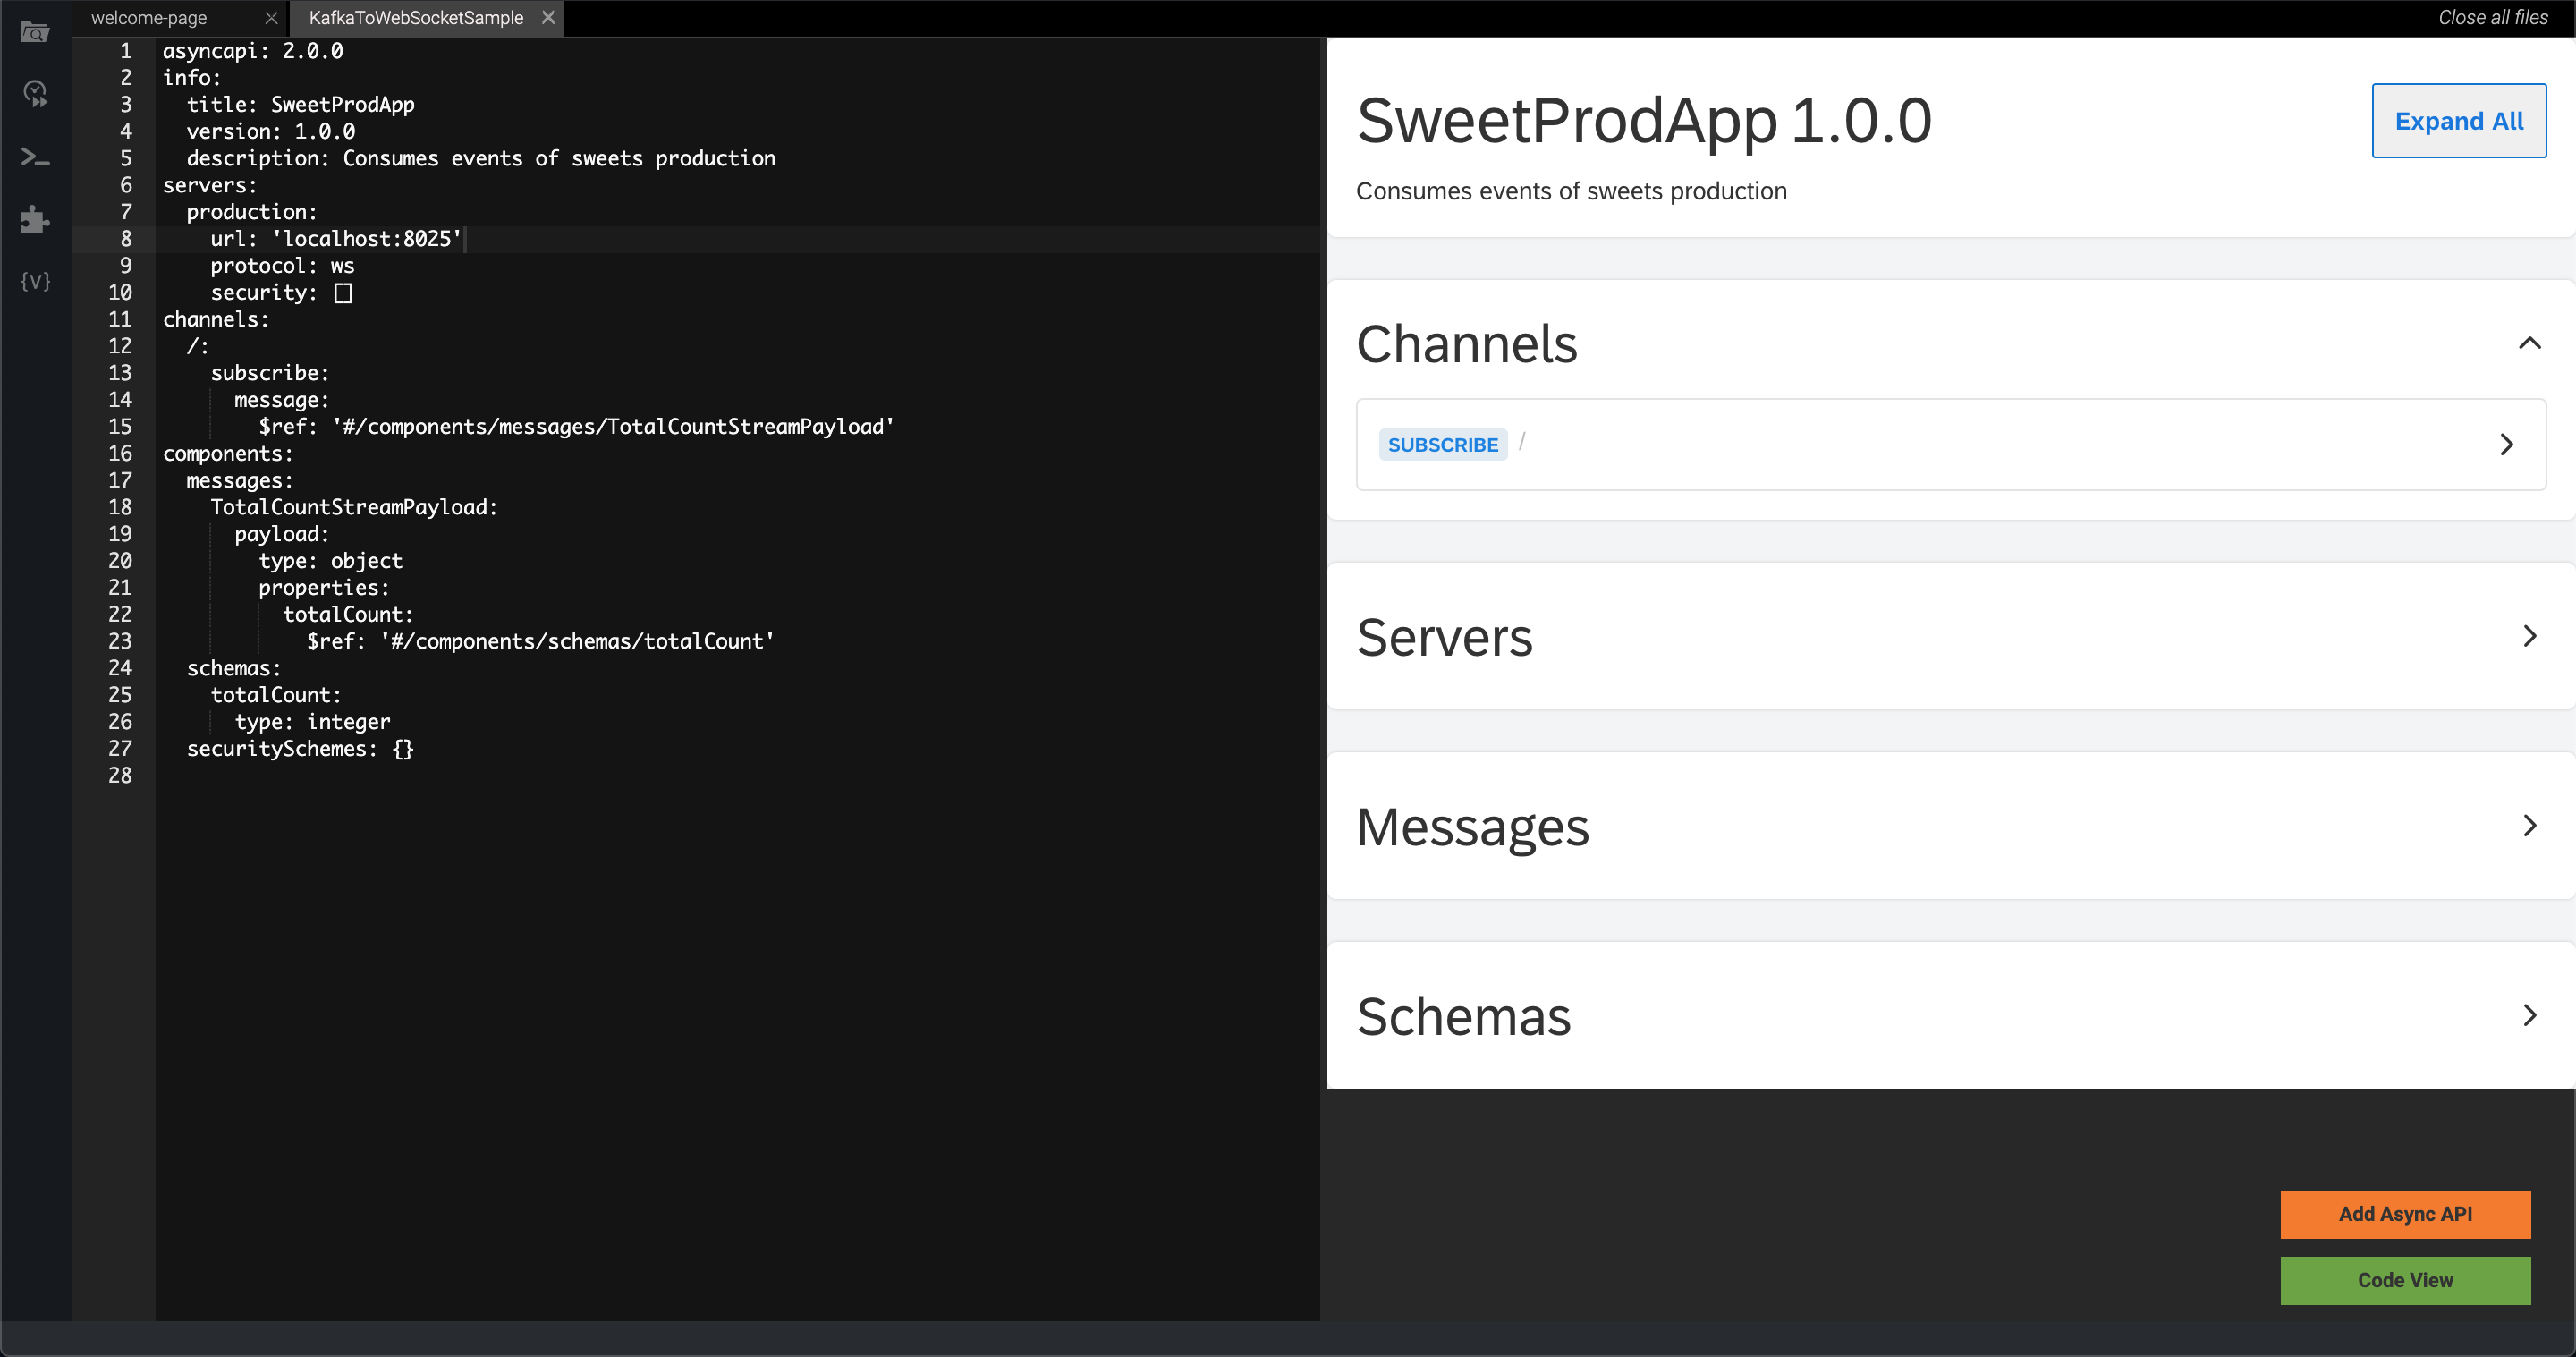
-
Add the generated AsynAPI definition to the Streaming backend.
Click Add Async API to add the generated AsyncAPI definition to the Siddhi application.

-
Click Code View to view the Siddhi application with the AsyncAPI definition that was generated and save it so that it can be deployed on SI server.
Step 5 - Publish the AsyncAPI definition
You need to deploy your Streaming backend, which contains the AsyncAPI definition, to the Streaming Integrator server in order to export the AsyncAPI definition that you generated to the services in WSO2 API Manager.
Follow the instructions below to publish the AsyncAPI definition to the service catalog:
-
Click Deploy, and then click Deploy to Server in Streaming Integrator Tooling.
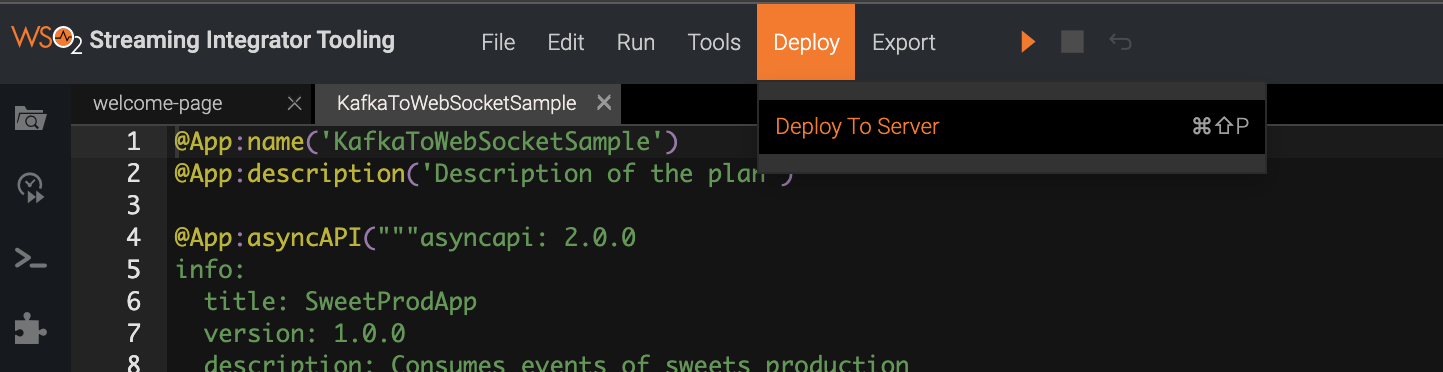
This opens the Deploy Siddhi Apps to Server dialog box.
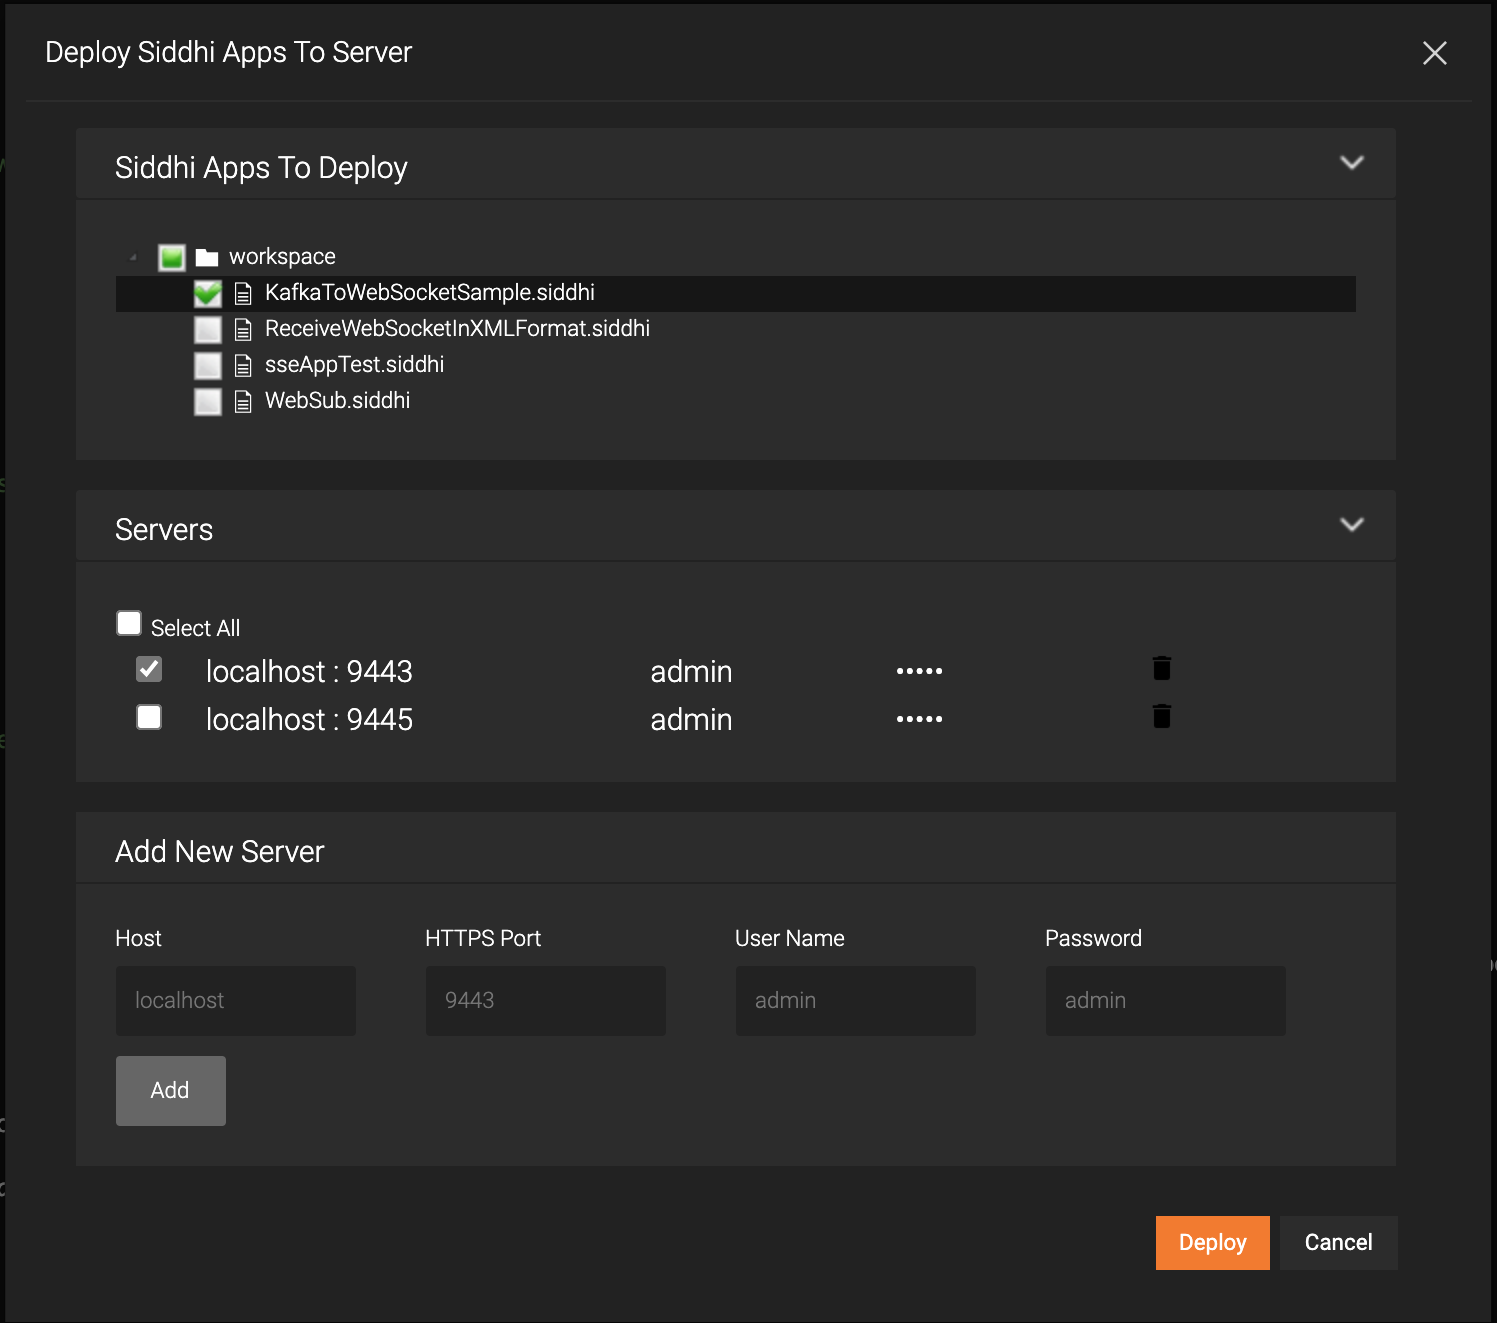
-
Add the SI server host and port(default 9443) and select the relevant check box for your Siddhi application, which contains the AsyncAPI definition, and for the server in which you want to deploy it.
-
Click Deploy.
After the Siddhi application is successfully deployed, the following log messages appear in the Streaming Integrator and API Manager server logs to indicate that the AsyncAPI definition is successfully published in the Service Catalog.
Siddhi App KafkaToWebSocketSample deployed successfully Async API: SweetProdApp-1.0.0 uploaded to the service catalogCommonUtil Creation of folder is successful. Directory Name : SweetProdApp-1.0.0
Step 6 - View the service catalog entry in WSO2 API-M
Follow the instructions below to view the service catalog entry in WSO2 API Manager:
-
Sign in to the Publisher.
https://<hostname>:9448/publisherFor testing purposes, you can use
https://localhost:9448/publisherandadminas the username and password.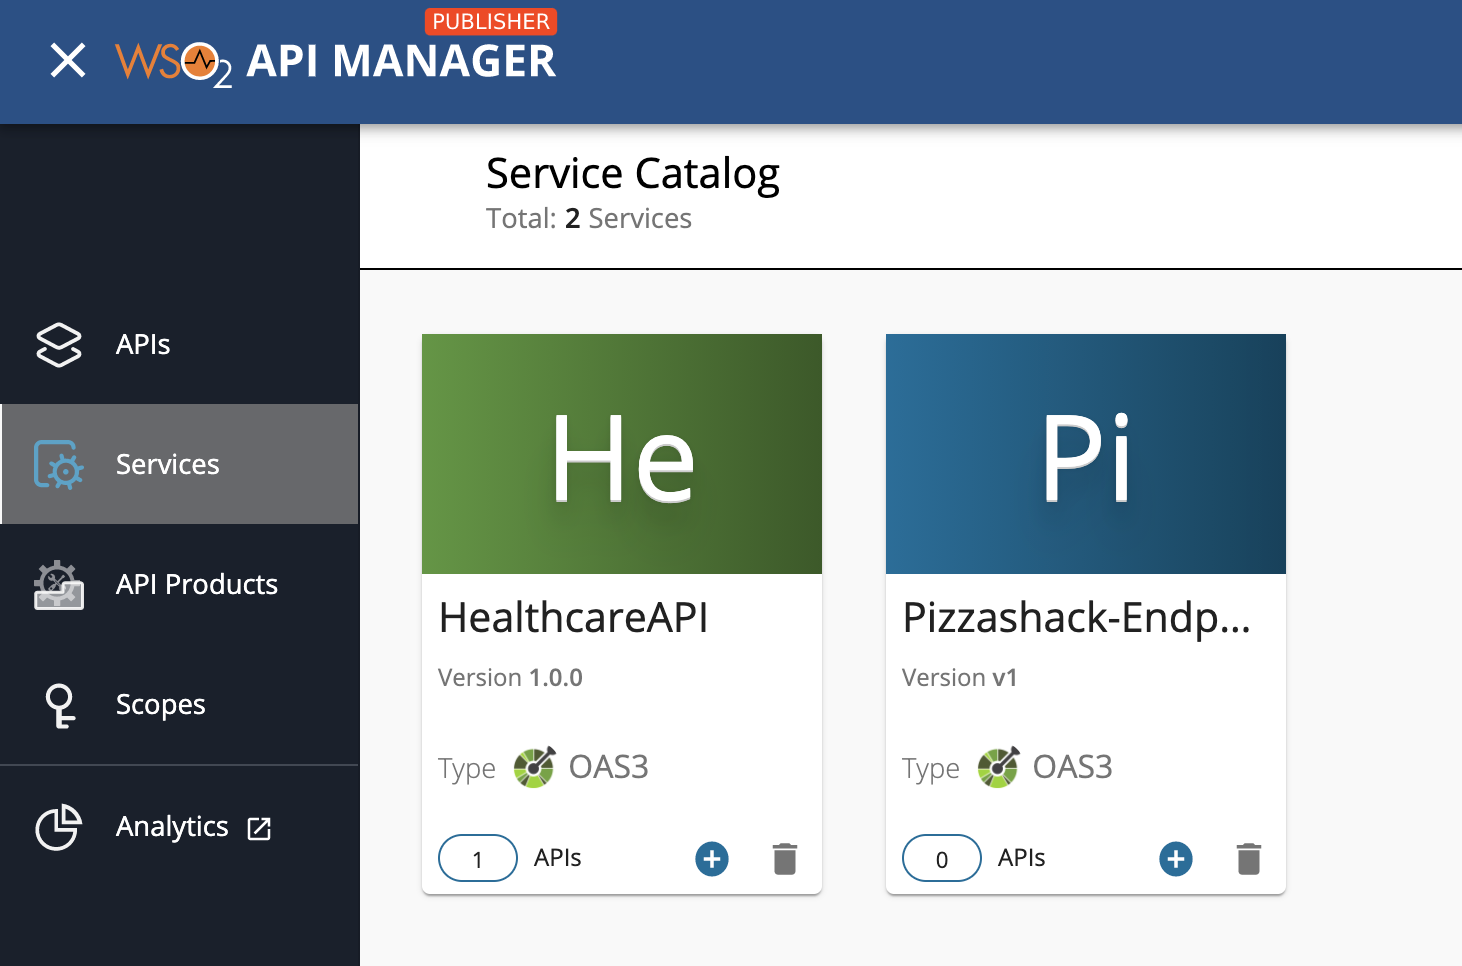
-
Click Services.
The services, which include the
SweetProdAppservice, appear. -
Click on the respective service (
SweetProdApp) to view details of the managed service.
Step 7 - Create an API
Follow the instructions below to create an API from the deployed managed service via the WSO2 API Manager Publisher.
-
Click Create API in the Service Catalog page, which is in the Publisher.
-
Enter all the Streaming API details.
Field Value Name SweetProdApp Context /SweetProdApp Version 1.0.0 -
Click Create API.
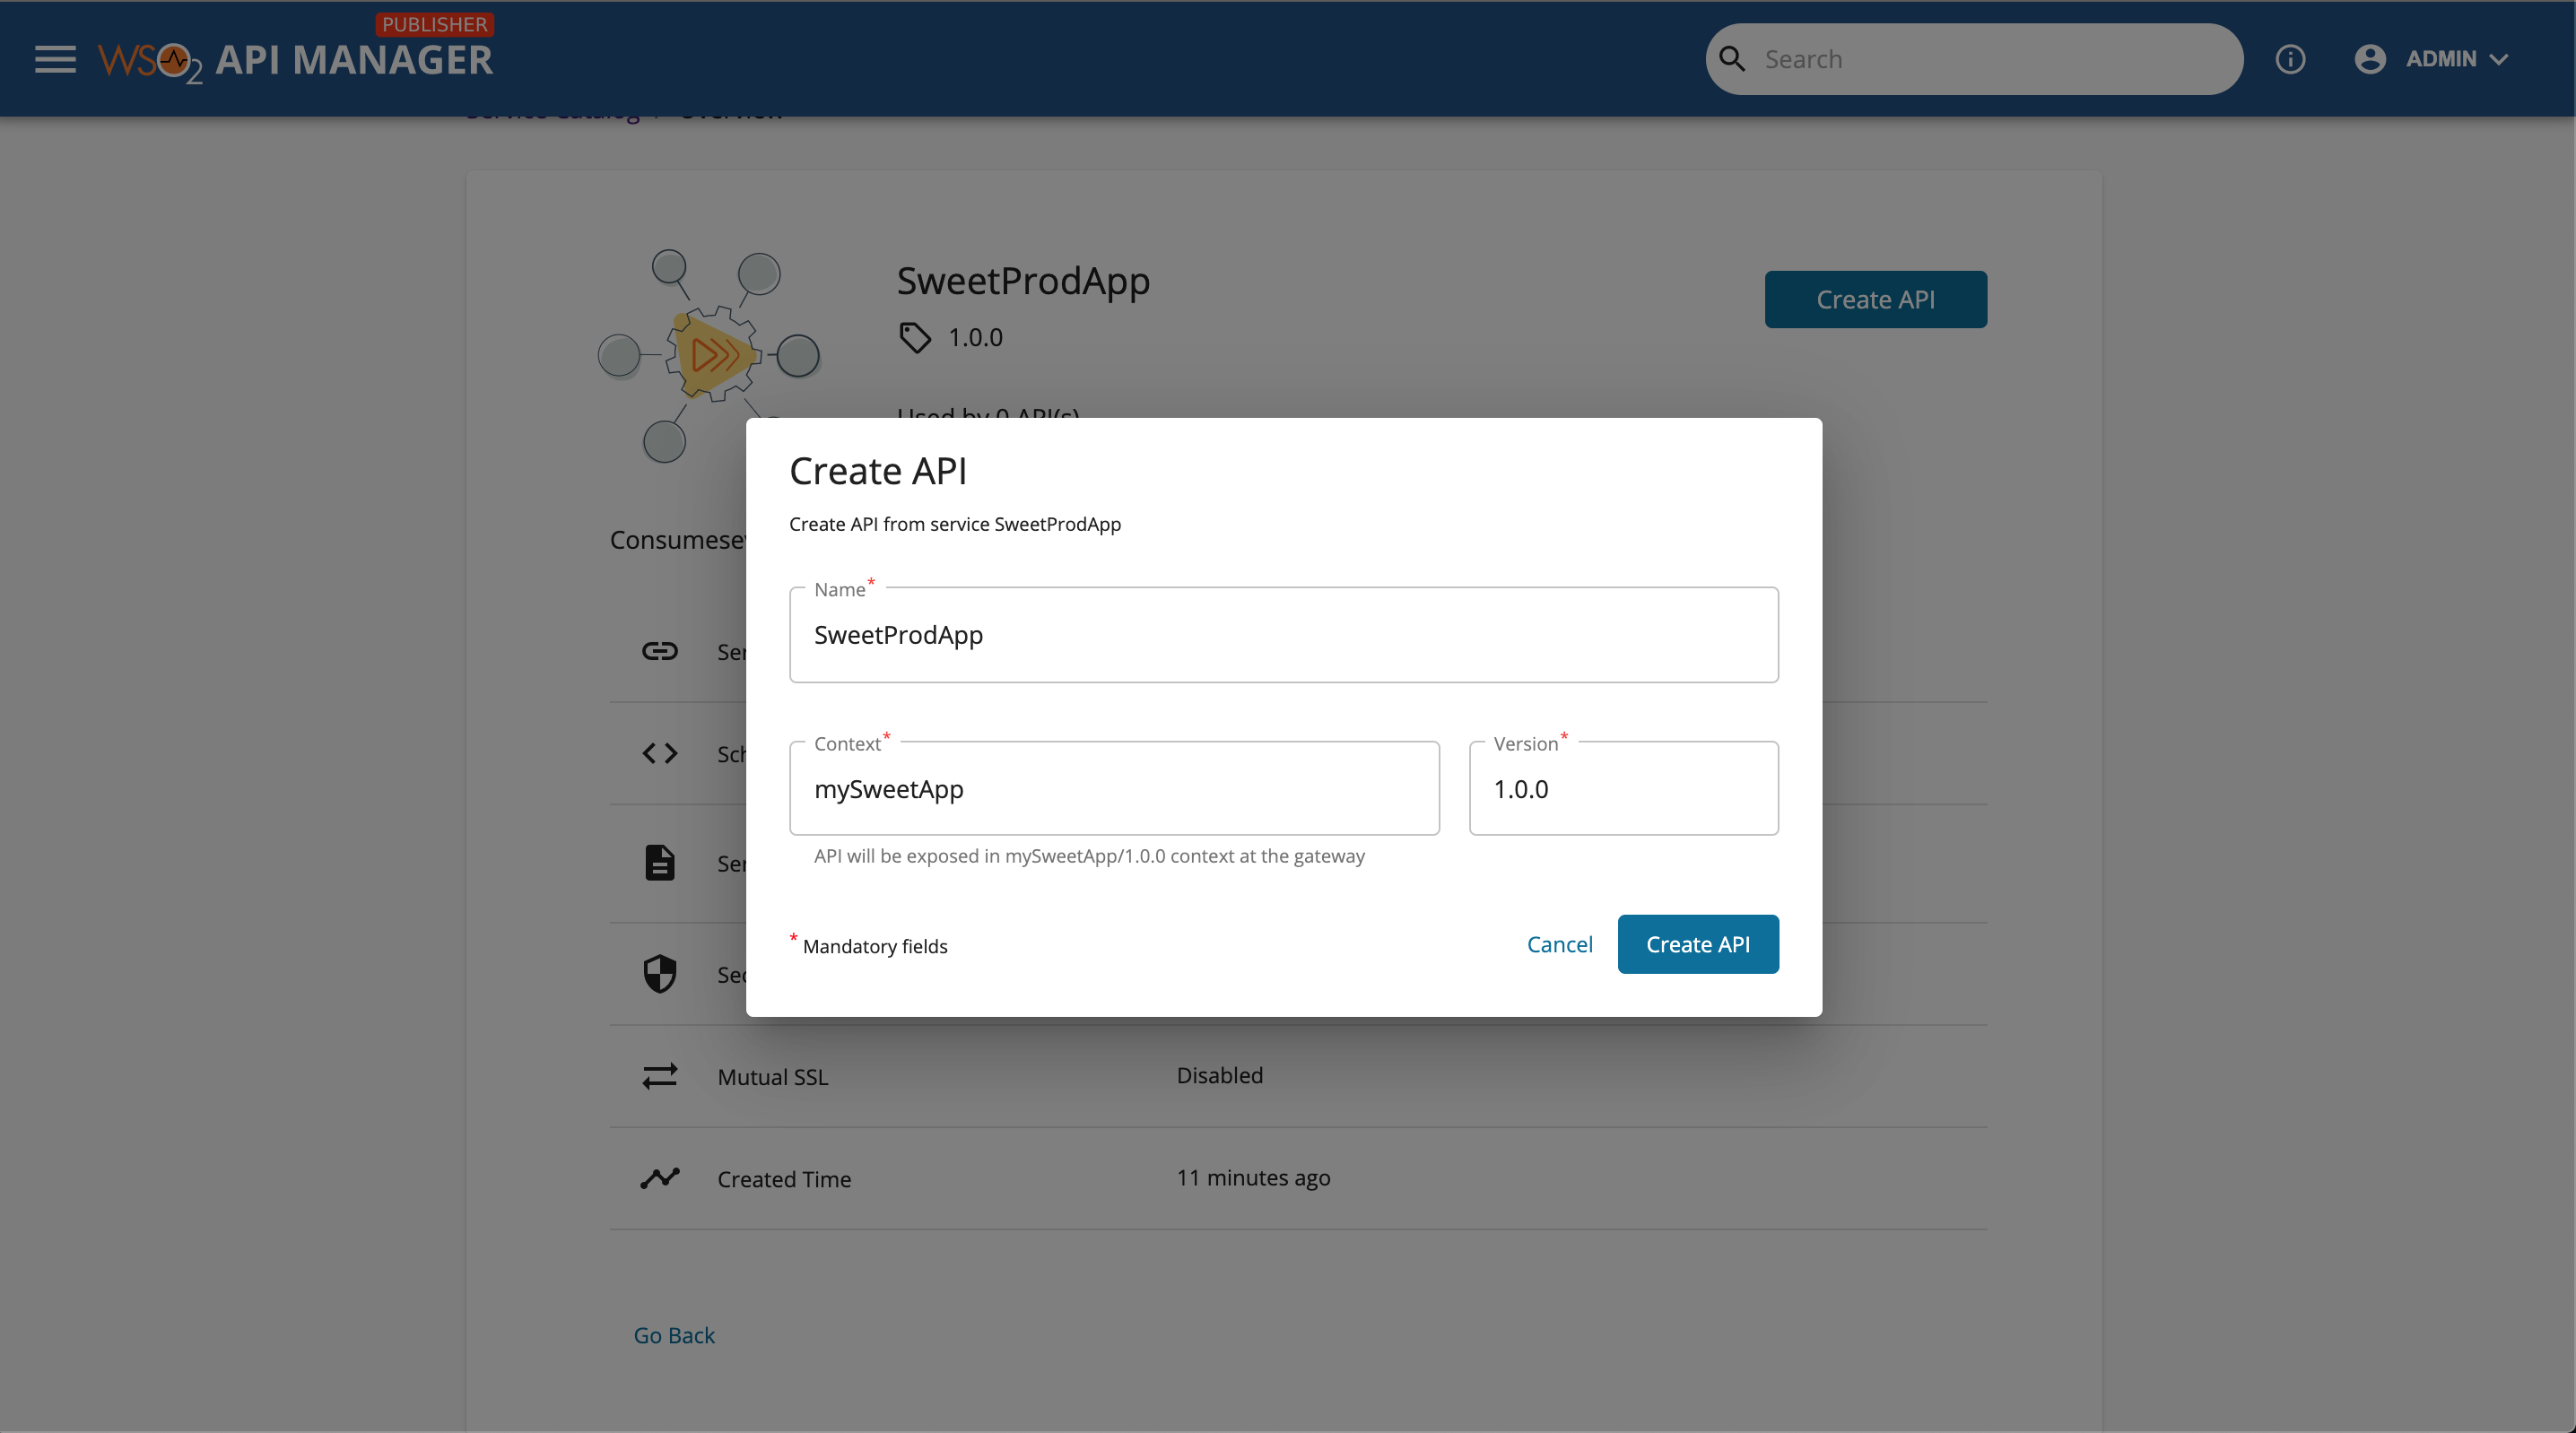
The API overview page appears.
Step 8 - Publish the API
Follow the instructions below to publish the API via the WSO2 API Manager Publisher.
-
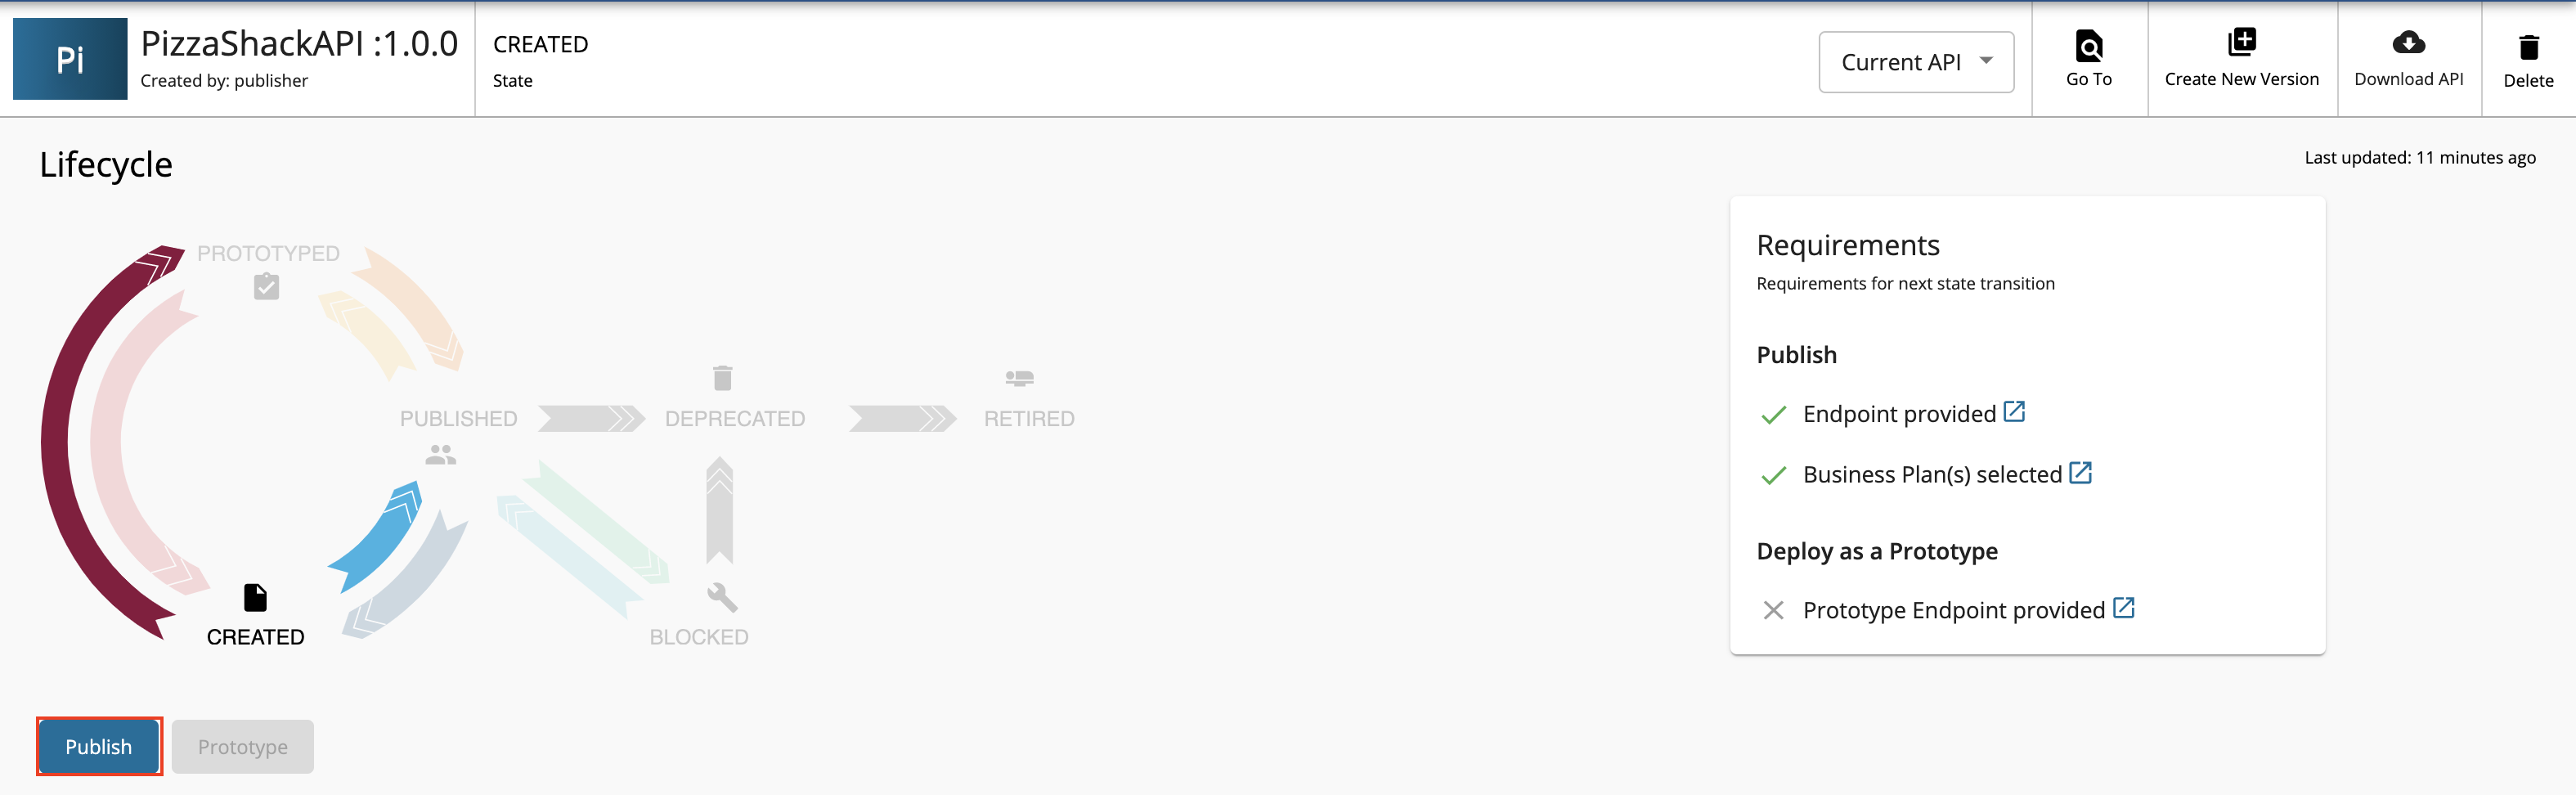
Click Lifecycle to navigate to the API lifecycle.
-
Click Publish to publish the API to the API Developer Portal.
If the API is published successfully, the lifecycle state will shift to PUBLISHED.
Step 9 - Invoke the published API
-
View the published API.
Navigate to the Developer Portal.
https://<hostname>:9448/devportalFor testing purposes, you can use
https://localhost:9448/devportalandadminas the username and password.The API that you published is visible in the API listing page.
-
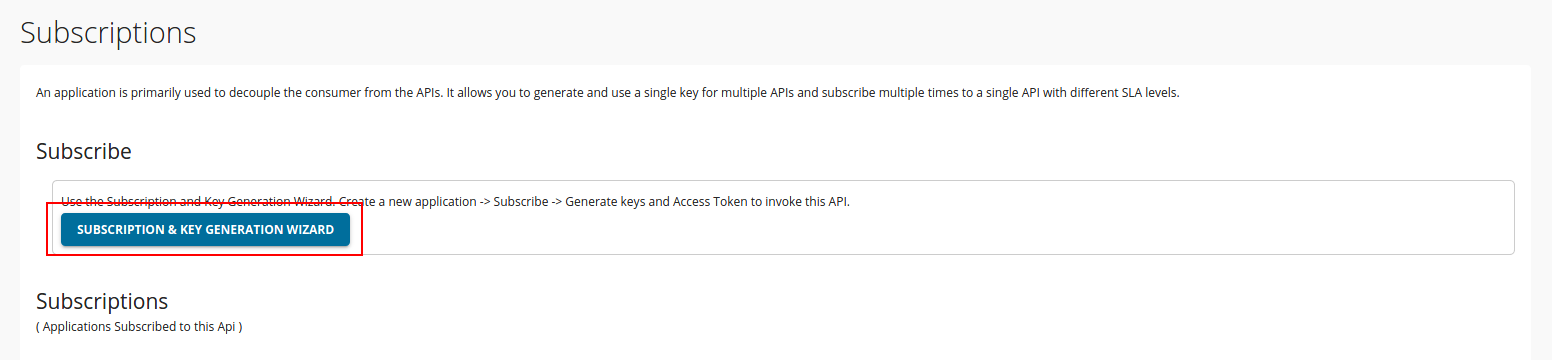
Subscribe to the API.
-
Click Subscriptions and thereafter click SUBSCRIPTION & KEY GENERATION WIZARD.
-
Navigate through the SUBSCRIPTION & KEY GENERATION WIZARD.
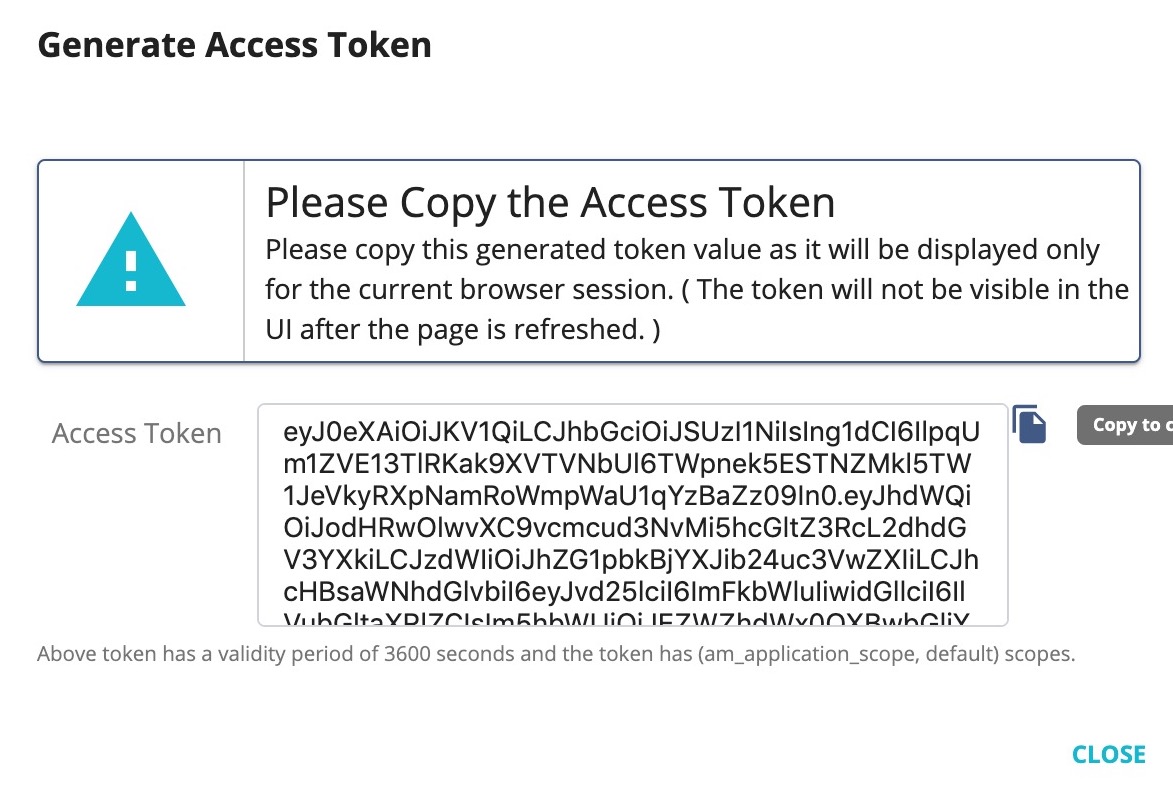
This wizard takes you through the steps of creating a new application, subscribing, generating keys, and generating an access token to invoke the API.
-
Copy the authorization token that appears in here.
-
-
Try out the operations.
-
Install wscat client.
npm install -g wscat -
Invoke the API by using an authorization header by executing the following command.
wscat -c ws://localhost:9104/sweetProdApp/1.0.0 -H "Authorization: Bearer [accesstoken]"wscat -n -c wss://localhost:8104/sweetProdApp/1.0.0 -H "Authorization: Bearer [accesstoken]"Note
There are clients (especially browsers) that do not allow to add headers. In such cases, you can send the access token for the API invocation as a query parameter named
access_tokenby using the command below:wscat -c "ws://localhost:9104/sweetProdApp/1.0.0?access_token=[accesstoken]"wscat -n -c "wss://localhost:8104/sweetProdApp/1.0.0?access_token=[accesstoken]"
-
Step 10 - Pass the streaming event to the broker
Let's execute the following Kafka client producer sample to pass the streaming event to Kafka.
-
If needed please copy
org.wso2.carbon.si.metrics.core_jar from<SI_HOME>/wso2/lib/pluginsto<SI_HOME>/samples/sample-clients/lib/before running the kafka-producer client. -
Open a terminal and navigate to
<SI_HOME>/samples/sample-clients/kafka-producerfile. -
Receive XML events via Kafka.
Execute the following Apache Ant command.
ant -Dtype=xml -DtopicName=kafka_sample_topicInfo
In addition, you can also limit the number of events as follows:
ant -Dtype=xml -DnoOfEventsToSend=5 -DtopicName=kafka_sample_topic
Step 11 - Results evaluation
As SI server is already running as explained in above steps, when the Kafka client sends the events they will be consumed by the source in the SI server and pushed to the WebSocket server. As the WS client command listens to these events, the following types of events will be printed in the terminal that the WS client was run.

Now, you have successfully created and published the API that corresponds to the WebSocket service in the Services. In addition, you have subscribed to it, obtained an access token for testing, and tested the API with the access token generated with the Kafka client which sends streaming events.
Top