Scenario 14 - External Key Manager Support
This is a tutorial that is part of a series and can be used as a standalone tutorial on how to configure a Key Manager. For more details on the scenario and general prerequisites, please see the scenario overview page.
Time to Complete : 5 minutes
User story
RailCo has users in their internal identity management system. They do not want to have duplicate user information in two systems. RailCo wants to use this IDP to generate access tokens to consume their APIs without having to import their users to the GOGO train API platform.
WSO2 API Manager comes with out-of-the-box external key manager connectors to various Identity providers such as Okta, Auth0, Keycloak, etc. Additionally, it has provided interfaces to write custom Key Manager implementation to plug any external third-party Key Manager solution.
For this scenario, we assume Railco has Keycloak IDP as their internal identity provider. Following are the steps to configure Keycloak IdP as the external Key Manager for RailCo.

Step 1: Set up Keycloak
Detailed steps on how to configure Keycloak can be found in WSO2 Documentation. Additionally, you could refer to the screencast done on this in here. Following are the simplified steps for this setup.
- Download Keycloak Server from https://www.keycloak.org/downloads. At the time of writing this tutorial, keycloak 12.0.4 was used for this.
- Extract it to your local setup and navigate to
<keycloak>/binand run./standalone.shto start the server. - Go To
http://localhost:8080/. If this is the first time, create an initial admin user from the form given in this page. -
Run the following command. Replace admin username and password. This will run a script on keycloak to generate application on keycloak.
docker run -e USER=<admin_username> -e PASSWORD=<admin_password> chamilaadhi/keycloak-apim-script:1.0.0
If execution is successful, you will be given a client Id and client secret to use with WSO2 API Manager
=====================================================

client id    :  apim-client
client secret:  221f10b7-d169-45e0-851e-e1b017052162

=====================================================
Note
The script used in this Docker container to create the credentials can be found in the /resource/setup-keycloak.sh file.
Step 2: Configure the connection to Keycloak
Now let's configure the connection between API-M and Keycloak.
- Log on to Admin Portal https://localhost:9443/admin/ using RailCo admin user. Use
[email protected]andadminas the password. - Go to Key Managers and select Add Keymanagers
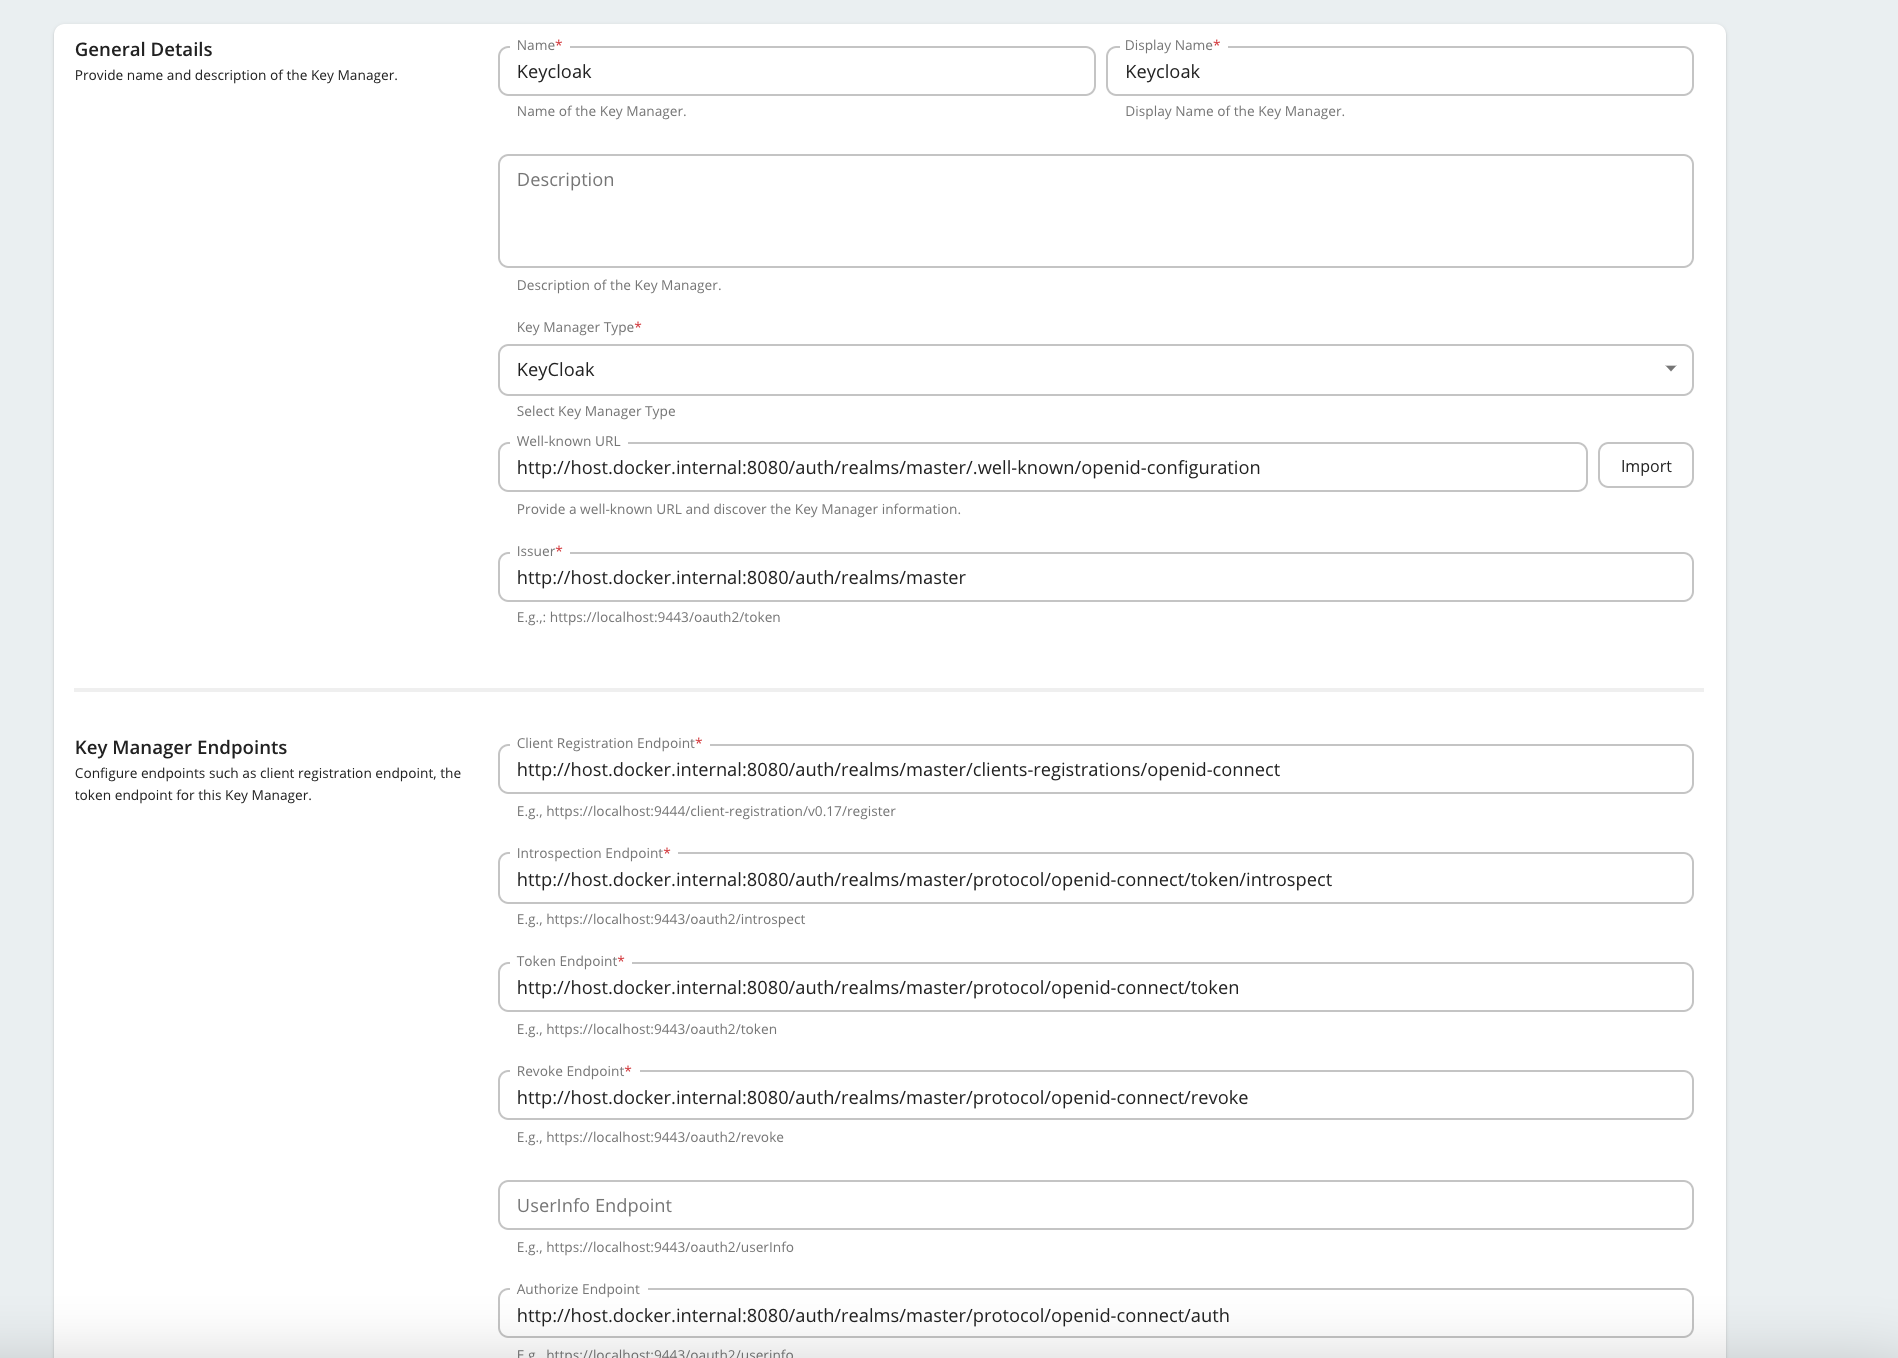
- Provide a suitable name and display name.
- Select Key Manager Type as Keycloak from the dropdown menu.
- Use
http://host.docker.internal:8080/auth/realms/master/.well-known/openid-configurationas the Well-known URL field and click Import. This will populate the other required fields. - Set
http://host.docker.internal:8080/auth/realms/master/protocol/openid-connect/revokeas Revoke Endpoint if this field is empty. -
Under the Connector Configurations section, provide the client id and secret we got from executing the script.
Now the Key Manager is configured.
Step 3: Invoke the API
Let’s invoke an API using a token generated from Keycloak.
- Log on to Railco tenant domain’s Developer Portal https://localhost:9443/devportal/ using [email protected] and password user123.
- Go to the Applications page and select KeyCloakAPP. This application is already subscribed to the RailCoTrainAPI.
-
Select Production Keys → OAuth2 Tokens . You will see a tab for Keycloak
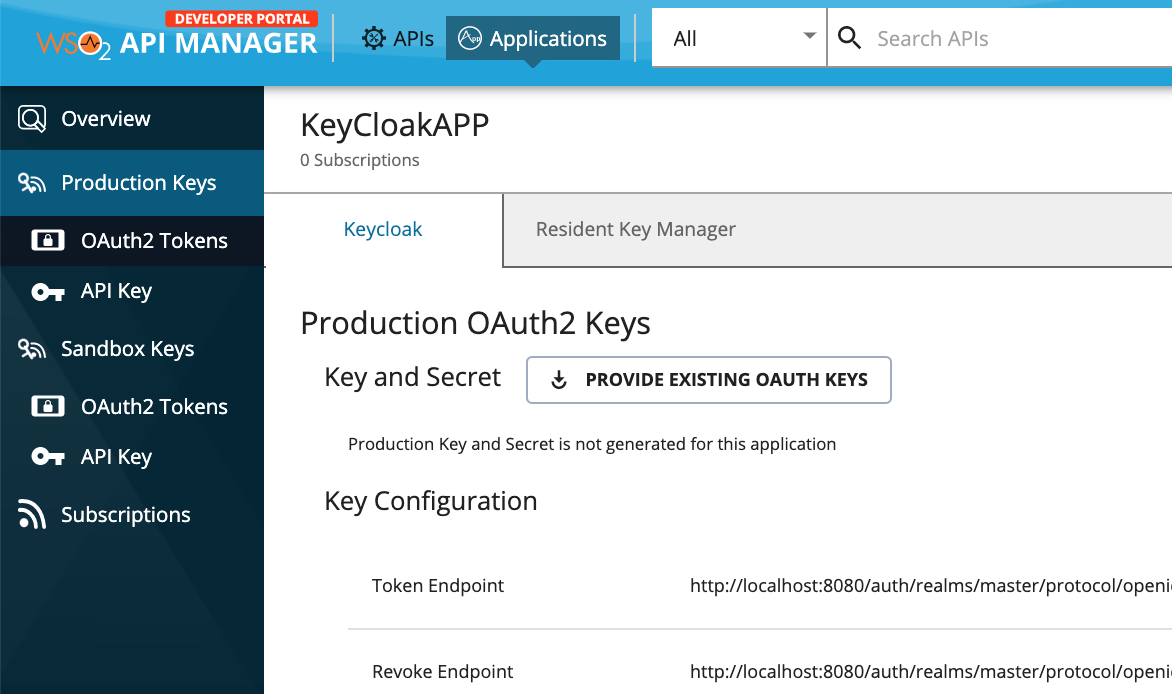
-
Click Generate Keys to generate a token. (Default values would be enough to generate an access token for this scenario)
- Invoke API using this token.
What's next
Look through other available tutorials and look through our documentation for topics of interest.
Top