Understanding the New Configuration Model
Overview
The new configuration model, which is based on the TOML format, was introduced in WSO2 API Manager 3.0.0 and is available from there onwards. In older versions of WSO2 API Manager, you had to modify different configuration files based on the components corresponding to the specific feature they were configuring.
However, with the new WSO2 configuration model, all configuration files have been merged to make the configuration process easier. Therefore, the <API-M_HOME>/repository/conf/deployment.toml file is the single source used to configure and tune the various features in WSO2 API Manager.
For more information on the configuration parameters that can be used in the deployment.toml file, see the Configuration Catalog.
The following section explains the mapping between WSO2 API Manager's old configuration files and the new deployment.toml file.
Identifying configuration parameters
Let's see how you can identify the new configuration parameters that you need to add in the deployment.toml file for any configuration. Understanding the concept behind the new configuration model will be really helpful when migrating from old API-M versions to the new APIM 3.x versions.
.j2 template files
In the <APIM_HOME>/repository/resources/conf/templates/repository/conf directory there are files that are exactly in the same structure as the files in the <APIM_HOME>/repository/conf directory.
Each configuration file that is inside the <APIM_HOME>/repository/conf directory has a .j2 template file. These .j2 files contain the parameterizations.
Example:
Let's assume that you want to change the ServerURL value inside the APIKeyValidator section of the api-manager.xml file.
<APIKeyValidator>
<!-- Server URL of the API key manager --><ServerURL>https://localhost:${mgt.transport.https.port}${carbon.context}services/</ServerURL>
<!-- Admin username for API key manager. --><Username>${admin.username}</Username>
<!-- Admin password for API key manager. --><Password>${admin.password}</Password>
<KeyValidationHandlerClassName>org.wso2.carbon.apimgt.keymgt.handlers.DefaultKeyValidationHandler</KeyValidationHandlerClassName>
<DefaultKeyManagerType>default</DefaultKeyManagerType>
<EnableKeyManagerConfigurationRetriever>true</EnableKeyManagerConfigurationRetriever>
<EnableProvisionedAppValidation>true</EnableProvisionedAppValidation>
</APIKeyValidator>
Let's check the respective .j2 file that is in the <APIM_HOME>/repository/resources/conf/templates/repository/conf/api-manager.xml.j2 file.
<APIKeyValidator>
<!-- Server URL of the API key manager -->
<ServerURL>{{apim.key_manager.service_url}}</ServerURL>
<!-- Admin username for API key manager. -->
<Username>{{apim.key_manager.username}}</Username>
<!-- Admin password for API key manager. -->
<Password>{{apim.key_manager.password}}</Password>
<KeyValidationHandlerClassName>{{apim.key_manager.key_validation_handler_impl}}</KeyValidationHandlerClassName>
<DefaultKeyManagerType>{{apim.key_manager.type}}</DefaultKeyManagerType>
 {% if apim.jwt.expiry_time is defined %}
<JWTExpiryTime>{{apim.jwt.expiry_time}}</JWTExpiryTime>
{% endif %}
<EnableKeyManagerConfigurationRetriever>{{apim.key_manager.enable_retriever}}</EnableKeyManagerConfigurationRetriever>
{% if apim.key_manager.enable_provisioned_app_validation is defined %}
<EnableProvisionedAppValidation>{{apim.key_manager.enable_provisioned_app_validation}}</EnableProvisionedAppValidation>
{% endif %}
</APIKeyValidator>
You can see that the parameter for setting up the value for the ServerURL in the APIKeyValidator is apim.key_manager.service_url. Therefore, the configuration for the deployment.toml file will be as follows:
[apim.key_manager]
service_url = "https://my_keymanager.com:${mgt.transport.https.port}/services/"
default.json file
The default.json file contains the default values for all the parameters that are defined inside the .j2 files.
You need to add values in the deployment.toml file only if you need to override the default values, which are defined in the default.json file. Otherwise, you do not need to add a configuration block inside the deployment.toml file.
This default.json file, which is in the <APIM_HOME>/repository/resources/conf/default.json directory, has all the parameters and default values for it.
Example:
Let’s assume that you want to enable the Gateway Token Cache. The relevant configuration can be found in the api-manager.xml file inside <CacheConfigurations>.
<CacheConfigurations>
<!-- Enable/Disable token caching at the Gateway-->
<EnableGatewayTokenCache>{{apim.cache.gateway_token.enable}}</EnableGatewayTokenCache>
.......
</CacheConfigurations>
Let's check the default.json file and look for the default value set for apim.cache.gateway_token.enable
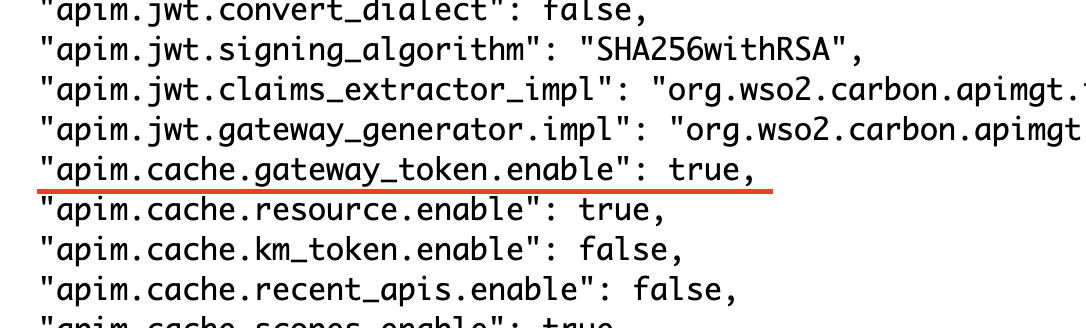
It is set to true, which means, by default, the Gateway token cache is enabled.
Therefore, you do not need to add any configuration in the deployment.toml file.
Repetitive configurations
The following are some important points that you need to keep in mind.
Arrays
If you look at the .j2 template files, you may notice in some places, there are for loops. Those for loops are there to add multiple/repetitive configurations.
Example:
Let’s assume that you have more than one Gateway in your environment, and you need to add the required configuration inside the deployment.toml.
In the old configuration file, it is just a matter of adding multiple <APIGateway> sections. But in the deployment.toml file, you have to add it as arrays/groups.
Let’s first look at the APIGateway section in the api-manager.xml.j2 file.
<APIGateway>
........
{% for environment_name in apim.gateway.environment%}
<Environment type="{{environment_name.type}}" api-console="{{environment_name.display_in_api_console}}" isDefault="{{environment_name.show_as_token_endpoint_url}}">
<Name>{{environment_name.name}}</Name>
.........
</APIGateway>
In the above section, you can see that there is a for loop to iterate through each section named apim.gateway.environment. Therefore when you configure this in the deployment.toml file you need to add this as grouped sections as shown below:
[[apim.gateway.environment]]
name = "Internal Gateway"
type = "hybrid"
display_in_api_console = true
......
[[apim.gateway.environment]]
name = "External Gateway"
type = "hybrid"
display_in_api_console = true
......
KeyValue pairs
If you look at the .j2 template files, you may notice that in some places there is another set of for loops for adding key-value pairs. Most of the time, this is there for adding multiple properties.
Example
Let’s assume that you need to set the properties in the HTTP transport sender configuration in the axis2_client.xml file. The following is how the configuration for the HTTP transport sender appears in the axis2_client.xml.j2 file.
<transportSender name="https"
class="org.apache.axis2.transport.http.CommonsHTTPTransportSender">{% for name,value in transport.client.https.properties.items()%}<parameter name="{{name}}">{{value}}</parameter>
{% endfor %}
</transportSender>
In above section you can see that there is a for loop to iterate through transport.client.https.properties.
First let’s look at the default.json file to see what are the default properties getting added to this transport sender.
"transport.client.http.properties.PROTOCOL": "HTTP/1.1",
"transport.client.http.properties.Transfer-Encoding": "chunked",
"transport.client.http.properties.SO_TIMEOUT": "60000",
"transport.client.http.properties.CONNECTION_TIMEOUT": "60000",
Let’s assume that you need to increase the timeout values, which means you have to override these values via the deployment.toml file. In this case you need to add those values as key value pairs.
[transport.client.https.properties]
SO_TIMEOUT = 120000
CONNECTION_TIMEOUT = 120000
How it works
During server startup, the WSO2 API Manager will assign the values inside the default.json file to its respective parameters inside the multiple configuration files (api-manager.xml, carbon.xml, user-mgt.xml, registry.xml, pass-through.properties, axis2.xml etc.)
If you have defined any values in the deployment.toml file for any of the parameters that are defined in the .j2 template files, then the server will assign the value that is defined in the deployment.toml file instead of the default value, which is in the default.json file.
Summary
- From APIM 3.x onwards, there is only one configuration file to modify, which is the
deployment.tomlfile. - It is not recommended to modify the
.xmlfiles directly. - You do not have to add a configuration to the
deployment.tomlfile unless you want to modify the server’s default value. - Default values for all the configurations can be found in the
default.jsonfile. - You can always find the required parameter name to add in the
deployment.tomlfile by looking at the respective.j2template file of that configuration file.