Publishing Integrations to the API Manager
A REST API artifact you create from WSO2 Integration Studio is exposed to consumers when you run it on the Micro Integrator runtime. If you want to control and manage this API, and also expose it to an API marketplace where it becomes discoverable to a wider community of consumers, you need to publish this REST API to the API management layer (API-M runtime) of the product.
Follow the steps given below to publish REST APIs from the Micro Integrator to the API-M runtime.
Related Tutorials
To try out an end-to-end use case where an integration service is created and used as a managed API, see tutorials: Exposing an Integration Service as a Managed API and Exposing an Integration SOAP Service as a Managed API.
Prerequisites
Develop a REST API artifact using WSO2 Integration Studio. This is your integration service with the mediation logic that will run on the Micro Integrator.
Tip
For instructions on creating a new integration service, use the following documentation:
Step 1 - Update the service metadata
When you create a REST API artifact from WSO2 Integration Studio, a resources folder with metadata files is created as shown below. This metadata is used by the API management runtime to generate the API proxy for the service.
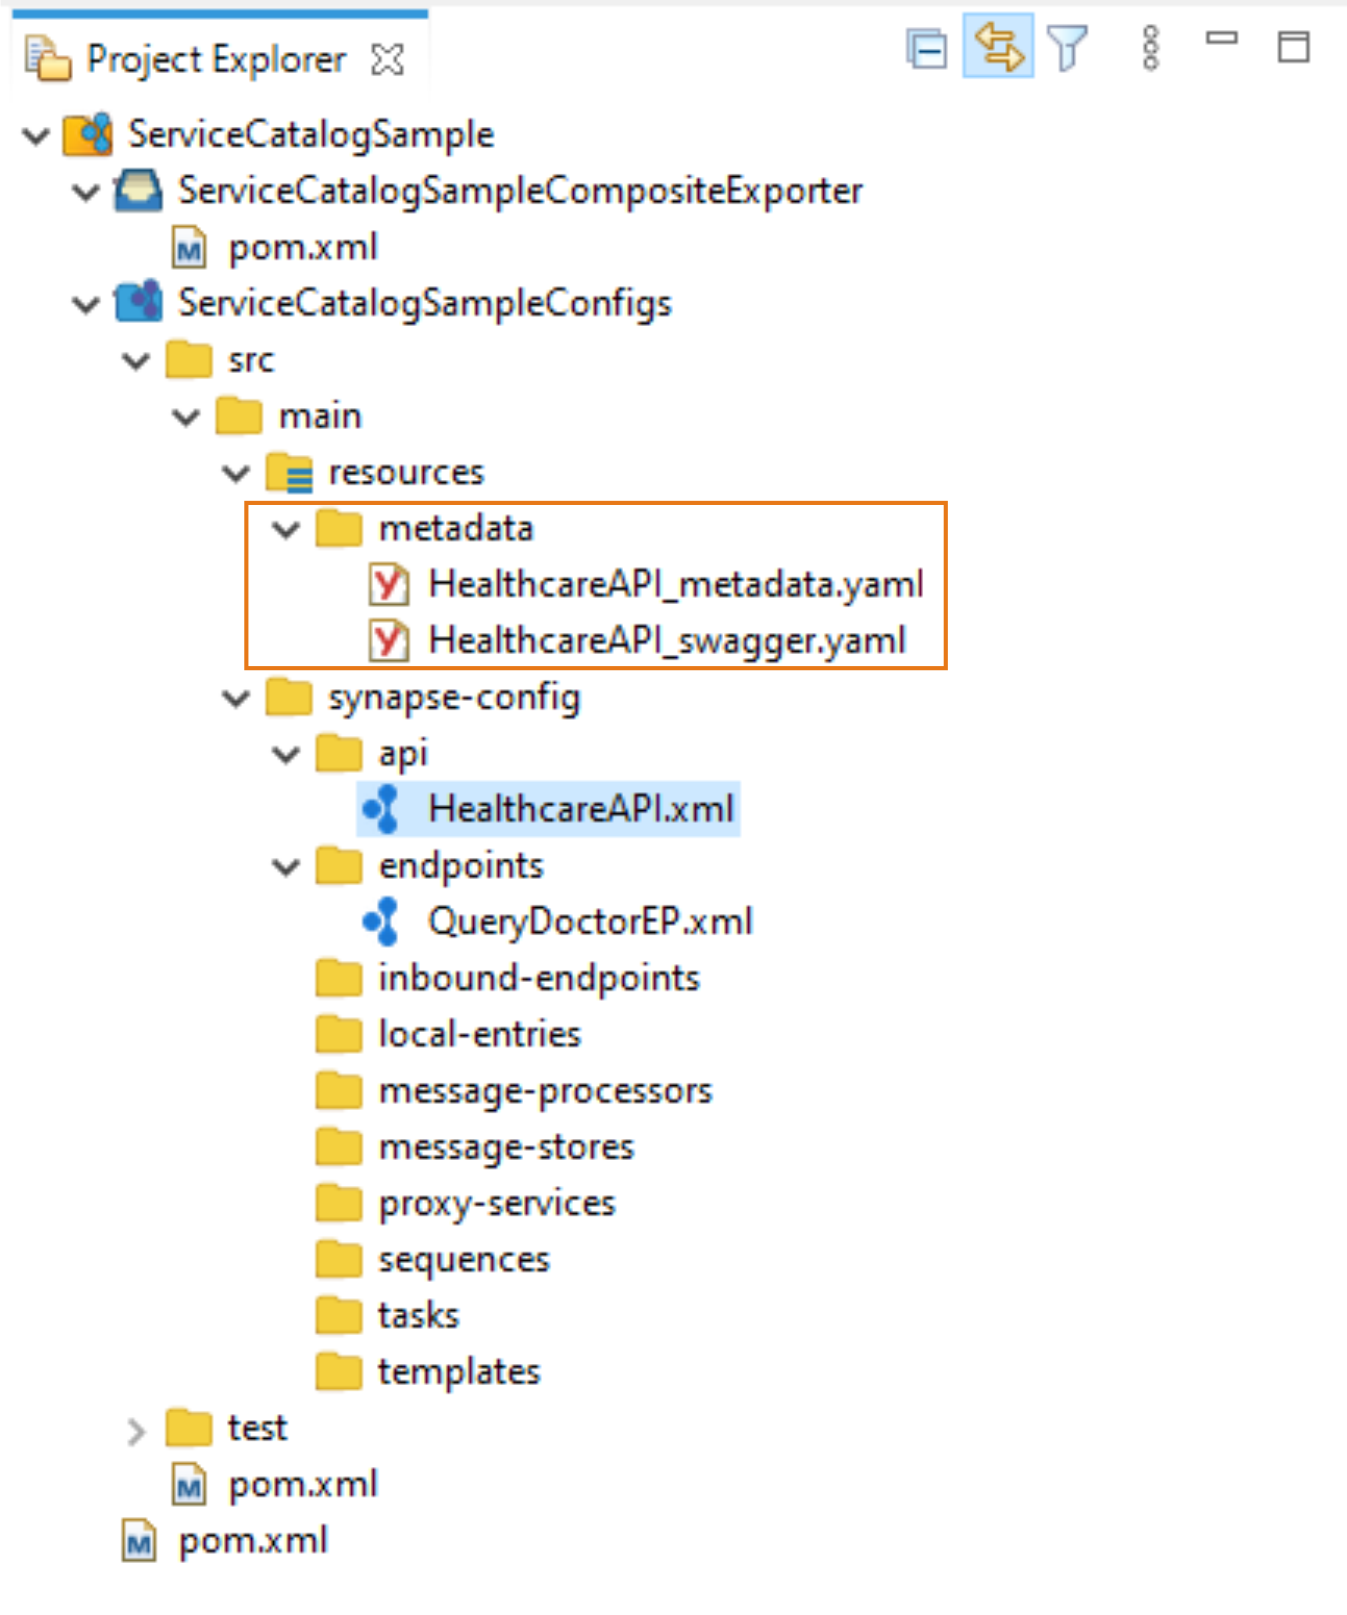
Update the metadata for your service as explained below.
| Parameter | Description |
|---|---|
| description | Explain the purpose of the API. |
| serviceUrl |
This is the URL of the API when it gets deployed in the Micro Integrator. You (as the integration developer) may not know this URL during development. Therefore, you can parameterize the URL to be resolved later using environment variables. By default, the {MI_HOST} and {MI_PORT} values are parameterized with placeholders.
You can configure the serviceUrl in the following ways:
|
Tip
See the Service Catalog API documentation for more information on the metadata in the YAML file.
Step 2 - Configure the Micro Integrator server
The Micro Integrator contains a client for publishing integrations to the API-M runtime. To enable this client, update the following in the deployment.toml file of your Micro Integrator.
[[service_catalog]]
apim_host = "https://localhost:9443"
enable = true
username = "admin"
password = "admin"
See the descriptions of the service catalog parameters.
Step 3 - Start the servers
Once you have created the integration service and deployed it in the Micro Integrator, you only need to start the two servers (API-M server and the Micro Integrator server).
Note that the API-M server should be started before the Micro Integrator. The client in the Micro Integrator publishes the integration services to the API-M layer during server startup.
What's Next?
Once the servers are started and the services are published, you can access the service from the API-M layer, and then proceed to Create, Deploy, and Publish the API as follows:
- Create and API using the integration service.
- Deploy the API in the API Gateway.
- Publish the API to the Developer Portal.