Create and Publish a WebSocket API
This tutorial will guide you to implement a WebSocket based chat application using the WSO2 API Manager. Follow the instructions in this tutorial to design and publish API via a WebSocket backend, and thereafter invoke the WebSocket API using the wscat WebSocket client.
This will demonstrate a simple command line based chat room which has two channels: rooms, and notifications.
Note
When you create a WebSocket Streaming API it's exposed via both ws and wss protocols. By default, the ws transport uses port 9099, and the wss transport uses port 8099.
Step 1 - Design a WebSocket API
-
Sign in to the Publisher.
https://<hostname>:9443/publisherFor testing purposes, you can use
https://localhost:9443/publisherandadminas the username and password. -
Click Create API, go to Streaming API, and click WebSocket API.
Note
The Create button will only appear for a user who has the
creatorrole permission.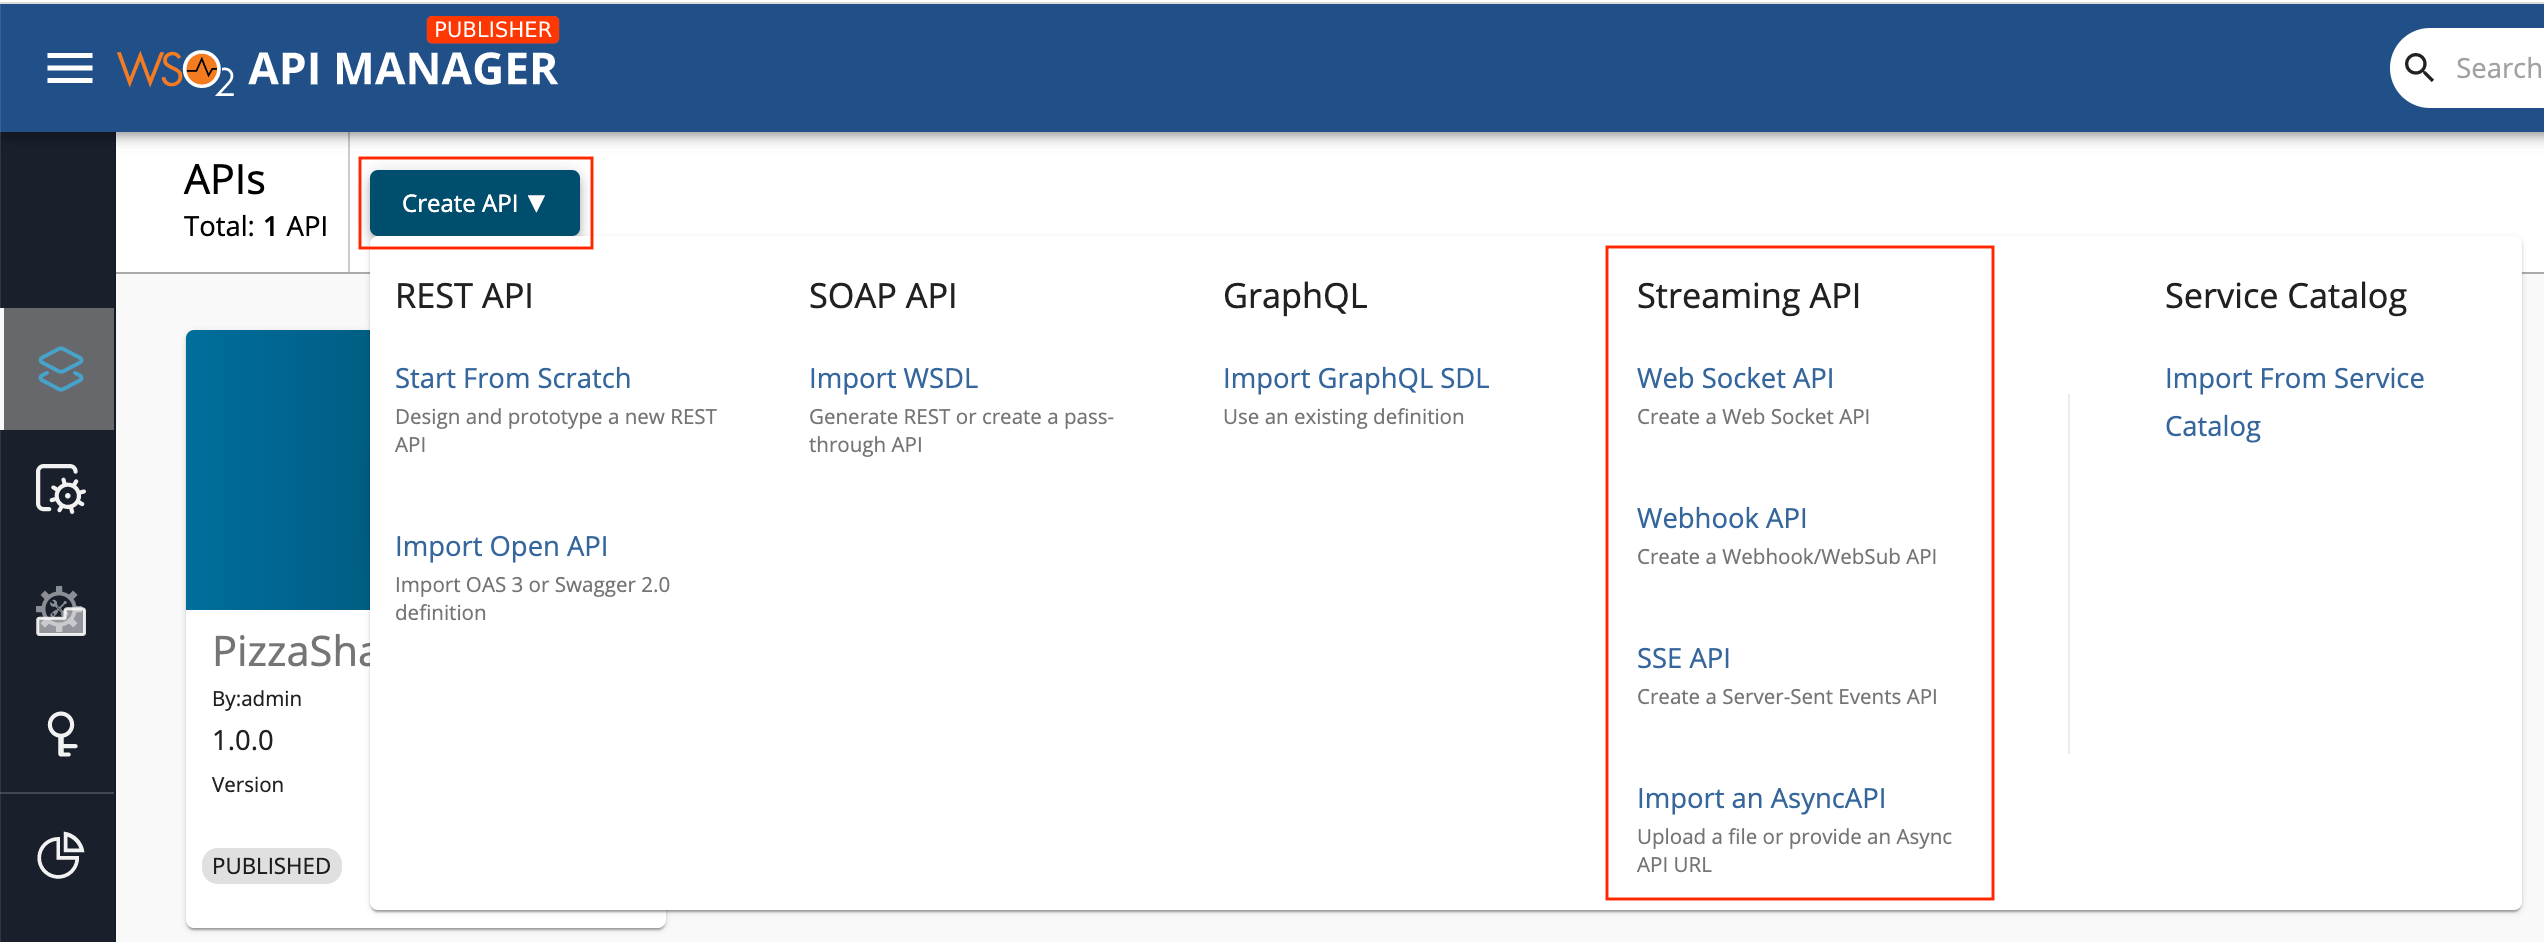
-
Enter the details of the new WebSocket API.
Field Sample value Name Chats Context /chats Version 1.0.0 Protocol WebSocket Endpoint ws://localhost:8080 Note
- When you create a WebSocket Streaming API it's exposed via both ws and wss protocols. By default, ws transport uses port 9099, and wss transport uses port 8099.
For non-secured WebSockets enter the protocol as
ws://in the endpoint, or for secured WebSockets enter the protocol aswss://
-
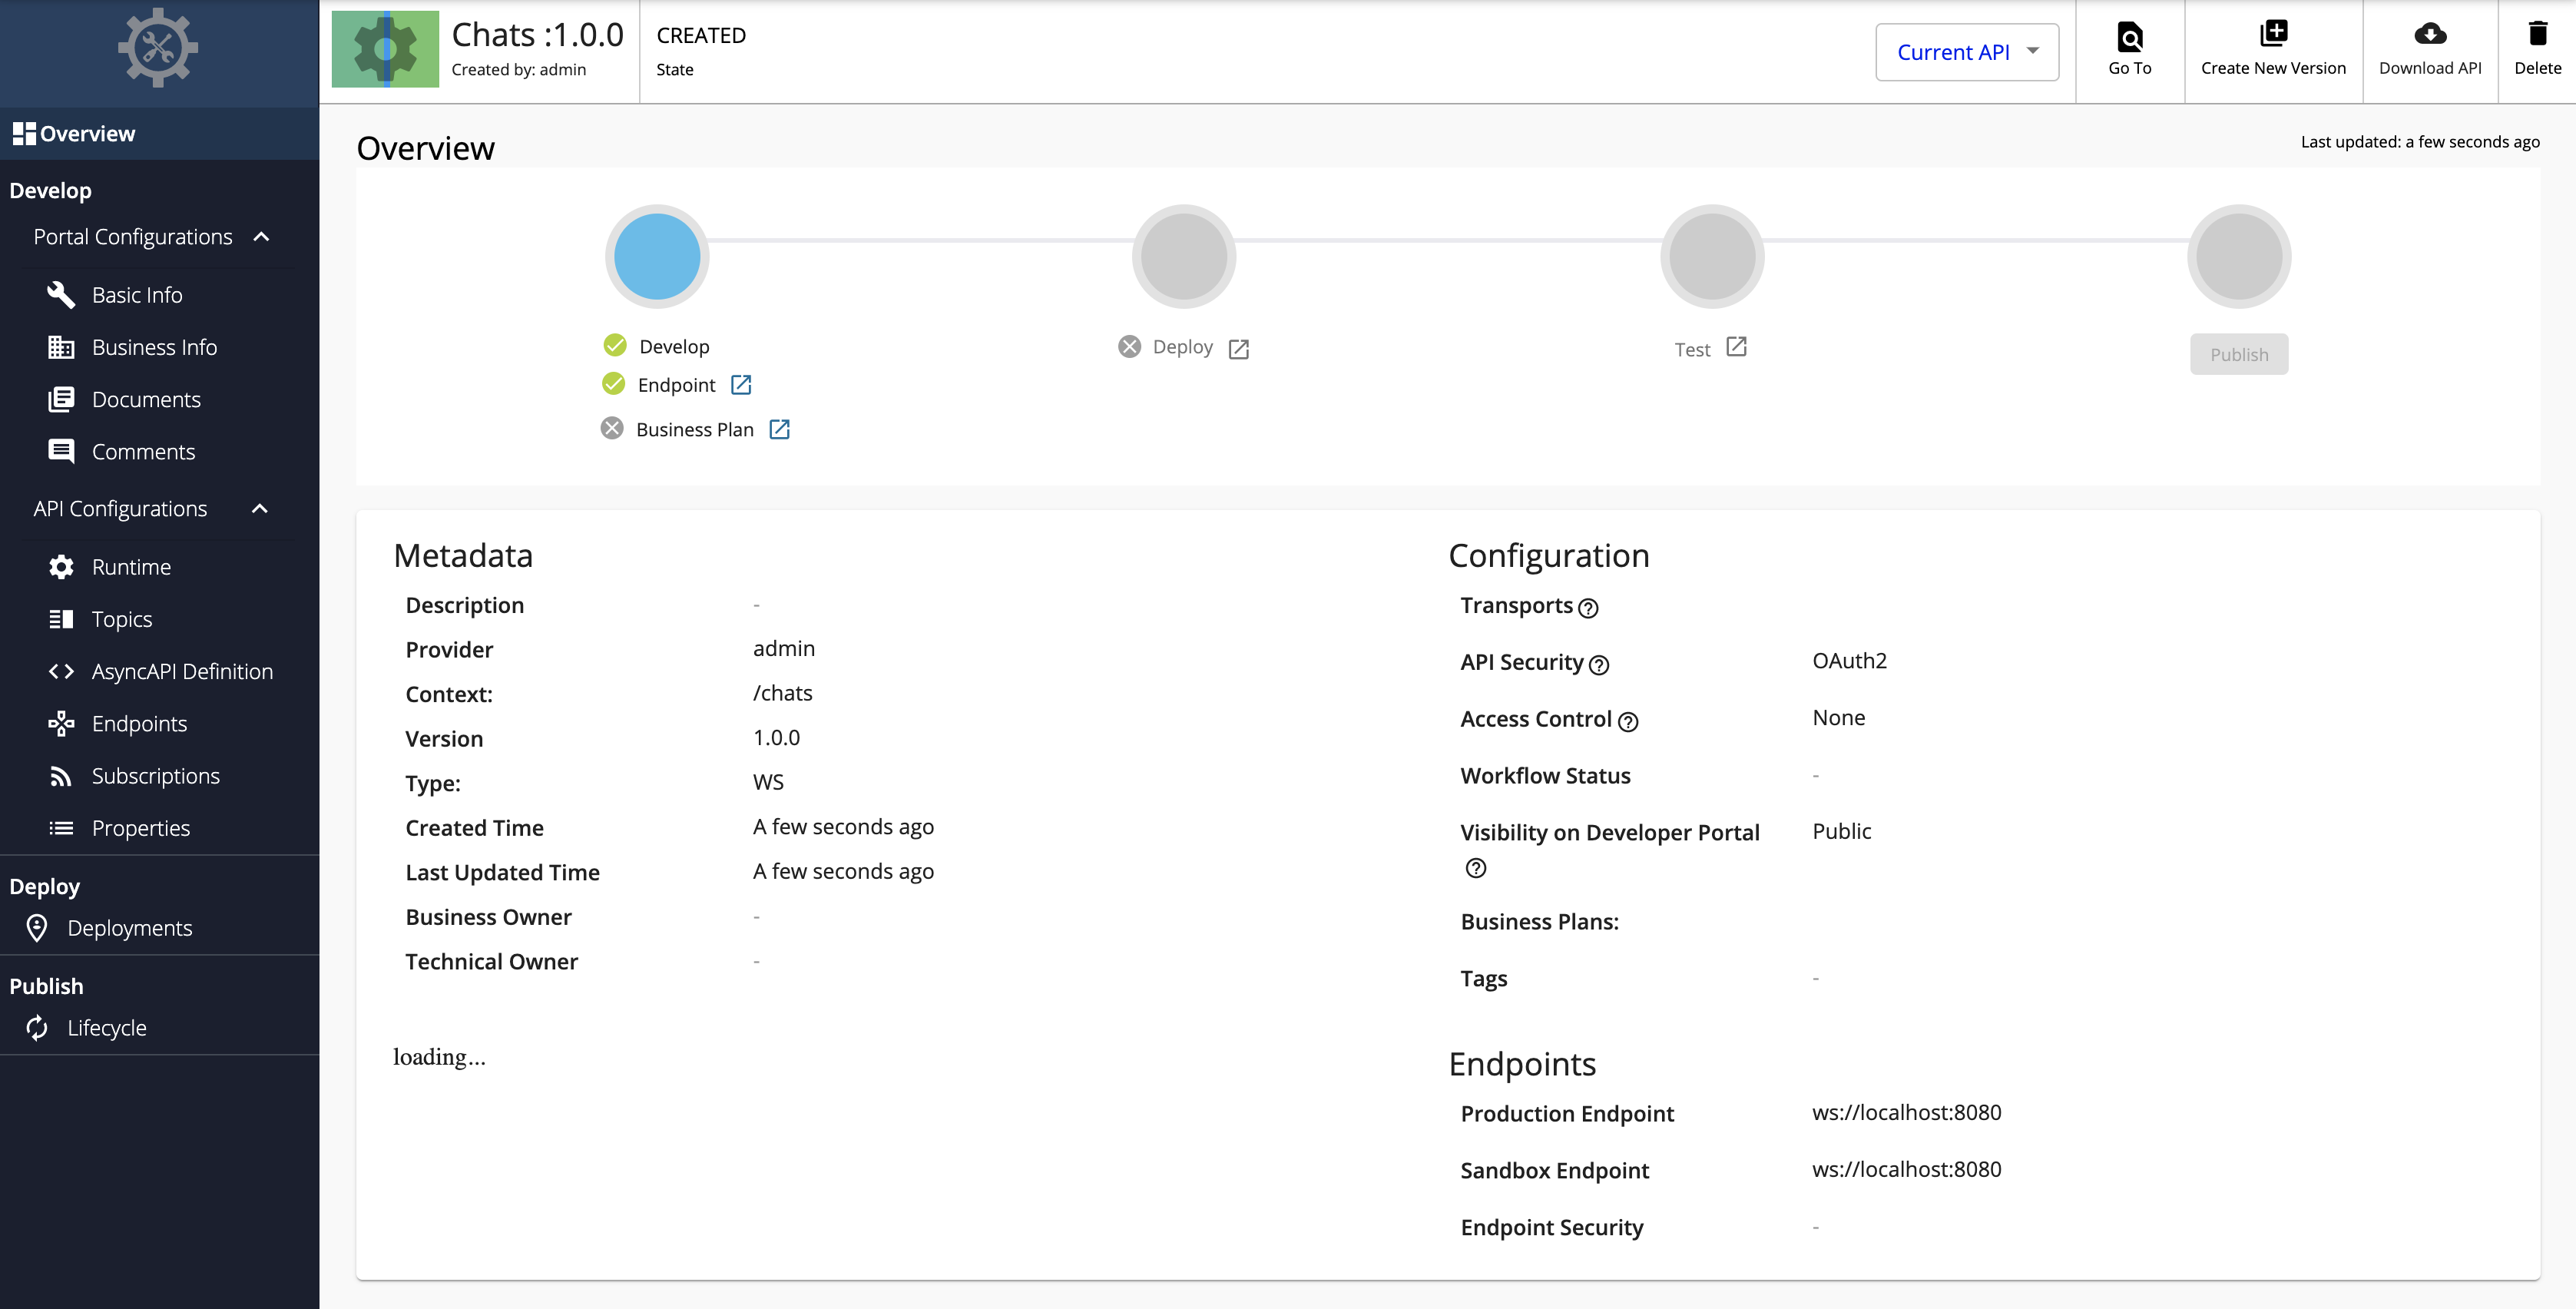
Click CREATE.
The overview page of the created WebSocket API appears.
-
Add topics to the WebSocket API.
-
Click Topics and navigate to the Topics page.
-
Delete the existing default topic, which has the name
/*. -
Add the following topics one by one.
Select pub and sub as the Types, enter the Topic Name, and click + to add each topic.
- /notifications
- /rooms/{roomID}

-
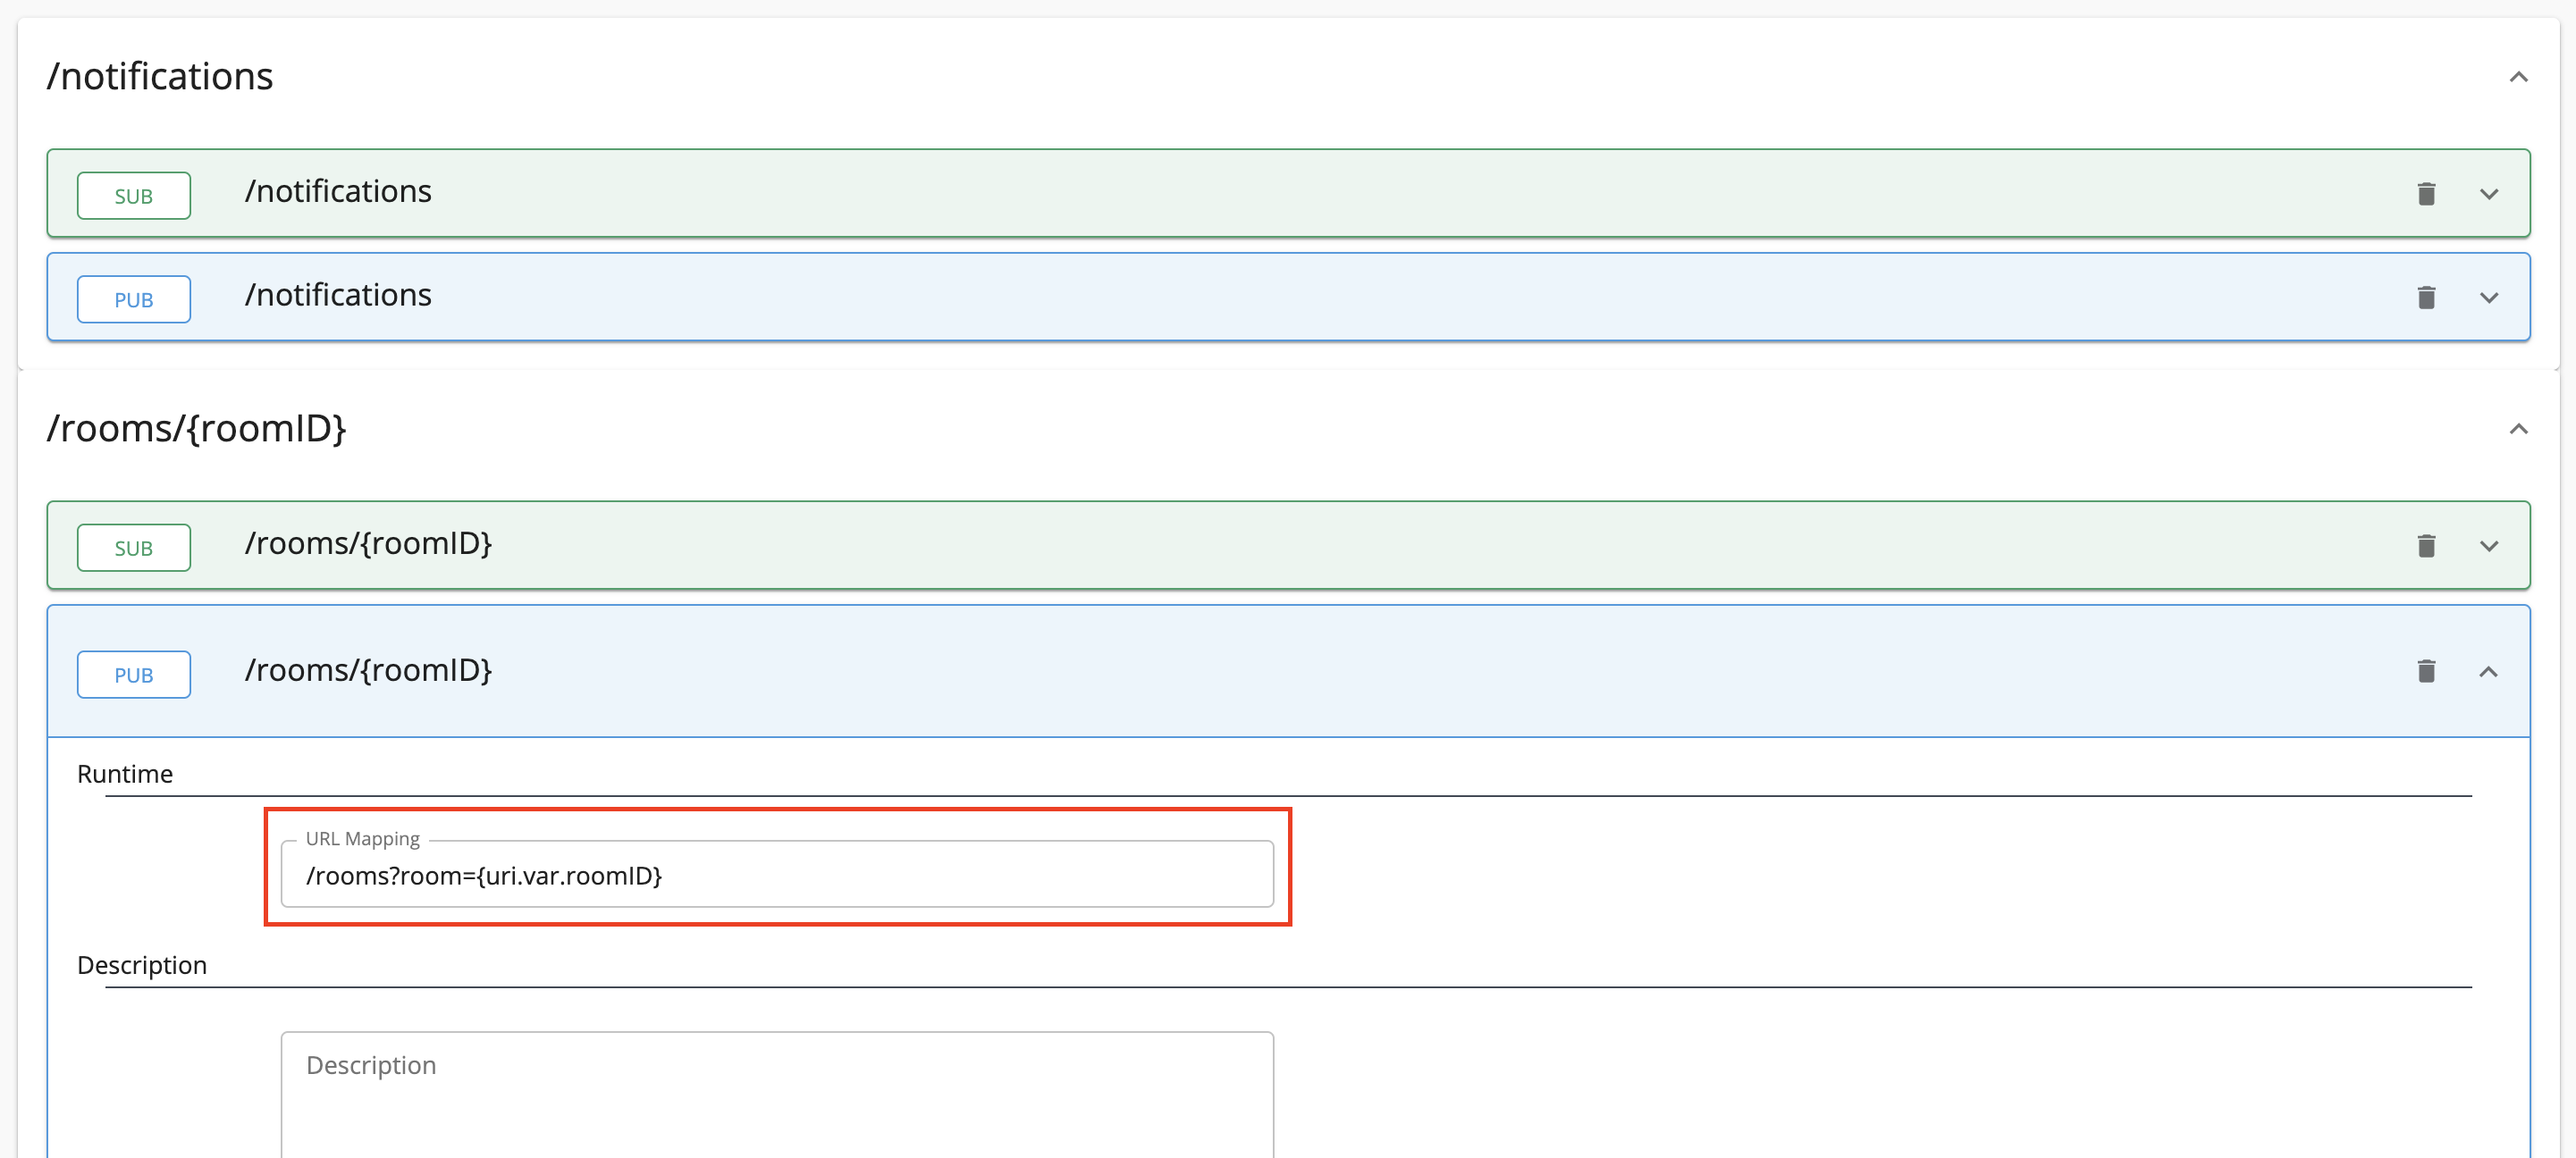
Expand each topic, provide URL Mappings as follows, and click Save.
Topic URL Mapping /notifications /notifications /rooms/{roomID} /rooms?room={uri.var.roomID} URL Mapping provided for a topic will be appended to the WebSocket endpoint URL, which was provided when creating the API, and the traffic via the topic will be sent to & received from the resulting URL.
-
-
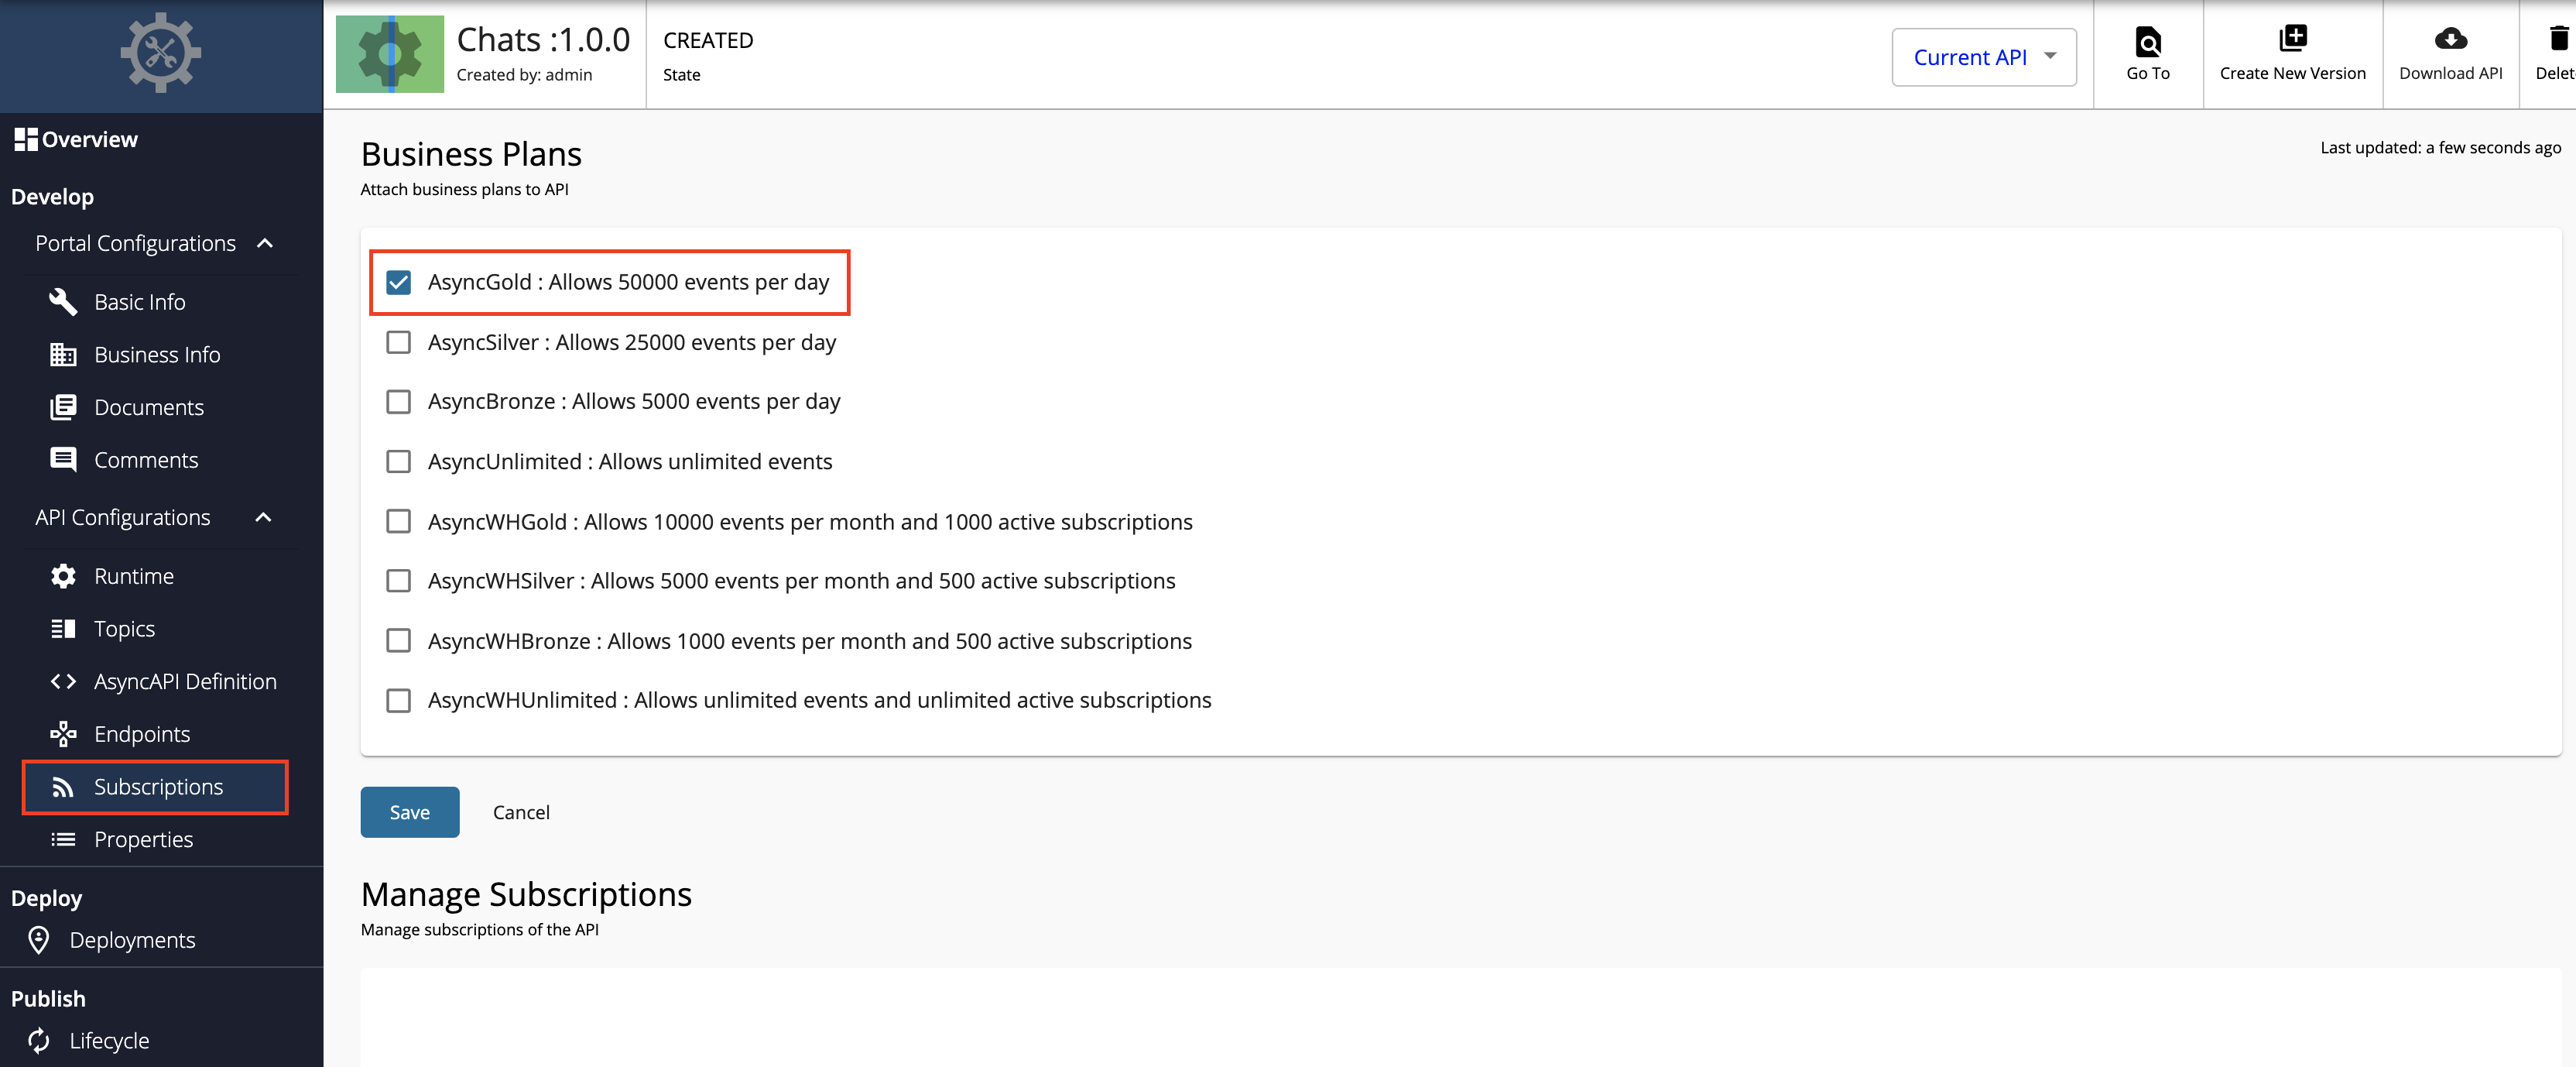
Attach business plans to your WebSocket API.
-
Click Subscriptions and navigate to the Business Plans page.
-
Select AsyncGold and click on Save.
-
Now, you have created and configured the WebSocket API successfully.
Step 2 - Publish the WebSocket API
-
Click Lifecycle to navigate to the API lifecycle, and click Publish to publish the API to the API Developer Portal.
-
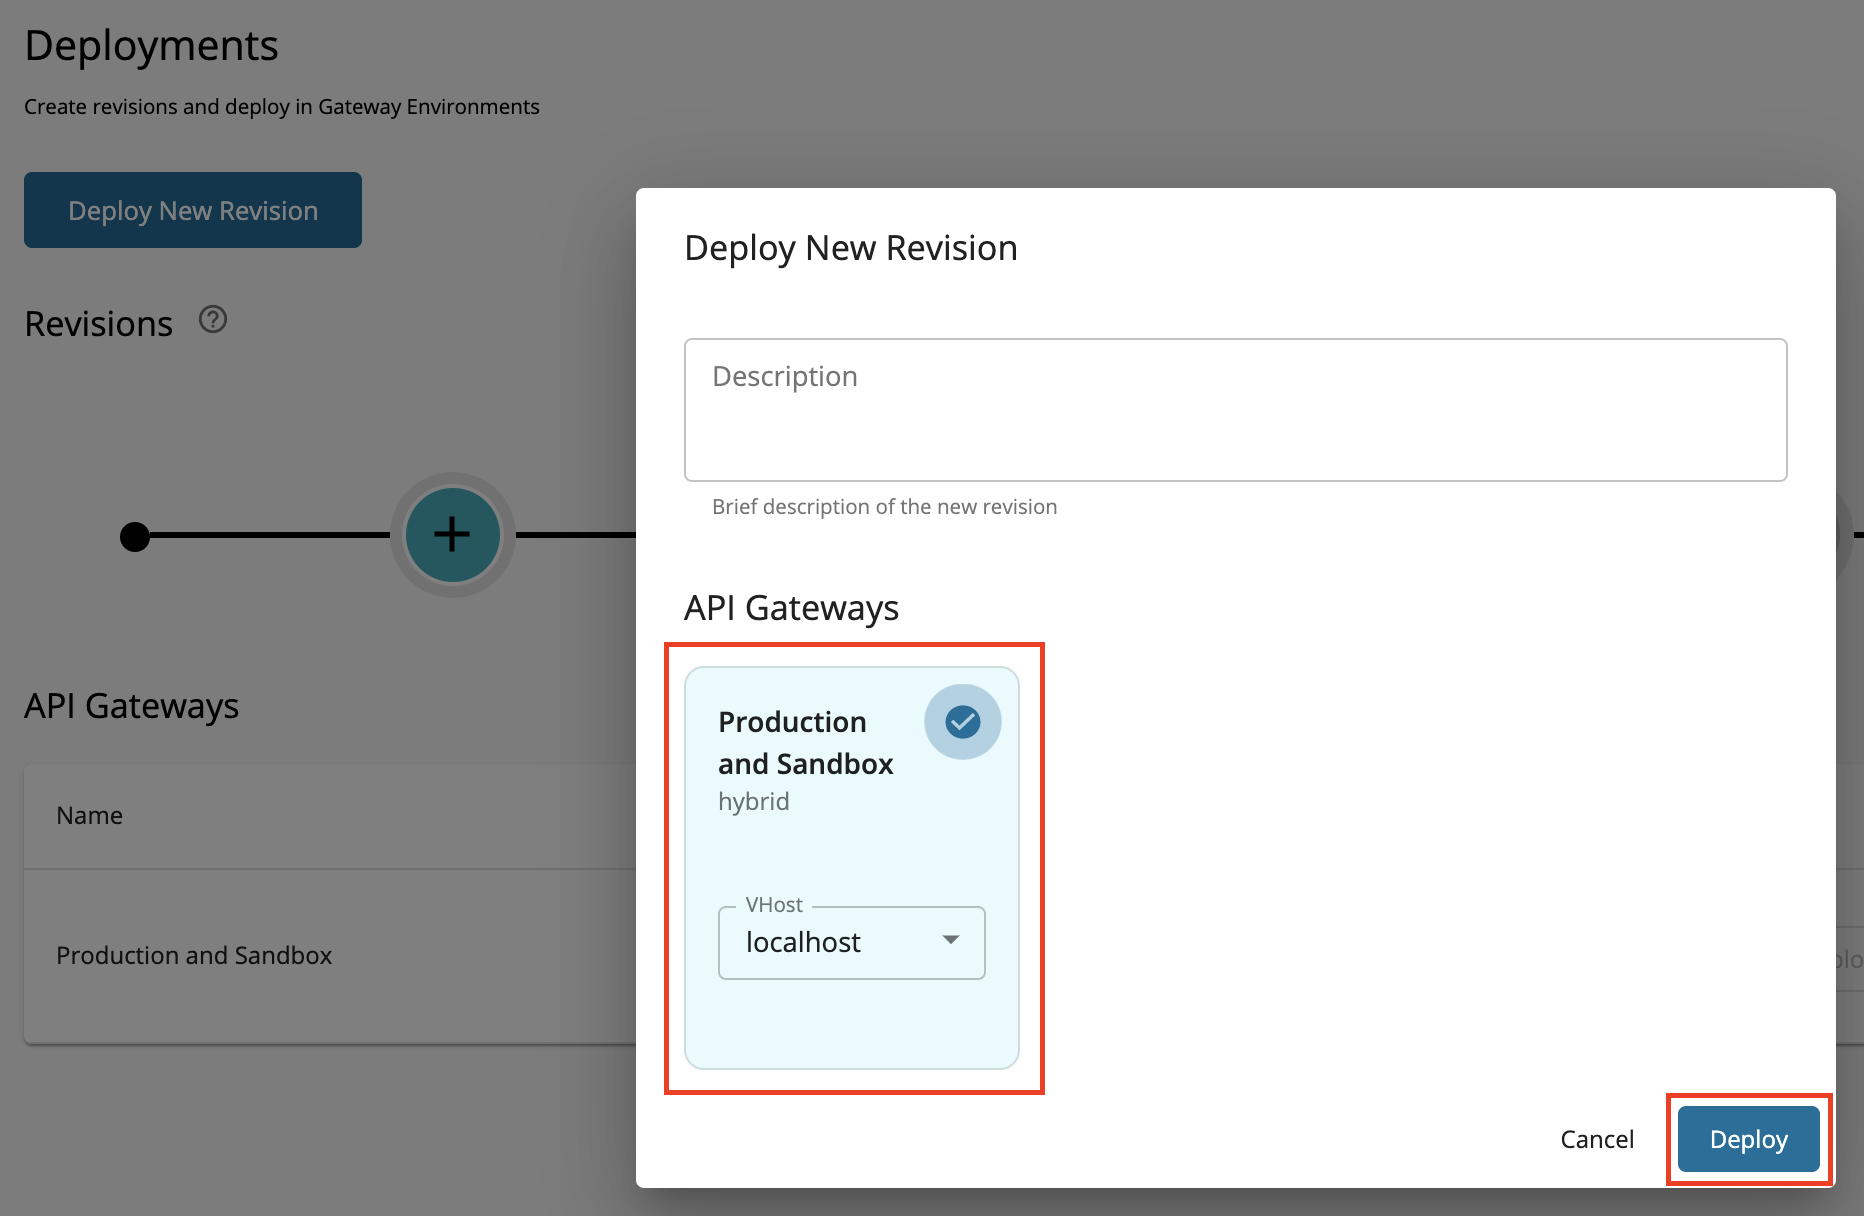
Click Deployments to navigate to the Deployments page and click Deploy New Revision.
-
Select Production and Sandbox, choose localhost as the VHost, and click on Deploy.
Step 3 - Start the WebSocket Server
-
Download the sample WebSocket server from WSO2 APIM Samples - GitHub repository.
-
Go to the
streaming-api-backends/websocket-backenddirectory, and install the required dependencies.npm install -
Start the server.
npm start
Step 4 - Invoke the WebSocket API
-
Sign in to the Developer Portal.
https://<hostname>:9443/devportalFor testing purposes, you can use
https://localhost:9443/devportalandadminas the username and password. -
Click on the WebSocket API.
The API overview appears.
-
Subscribe to the API.
-
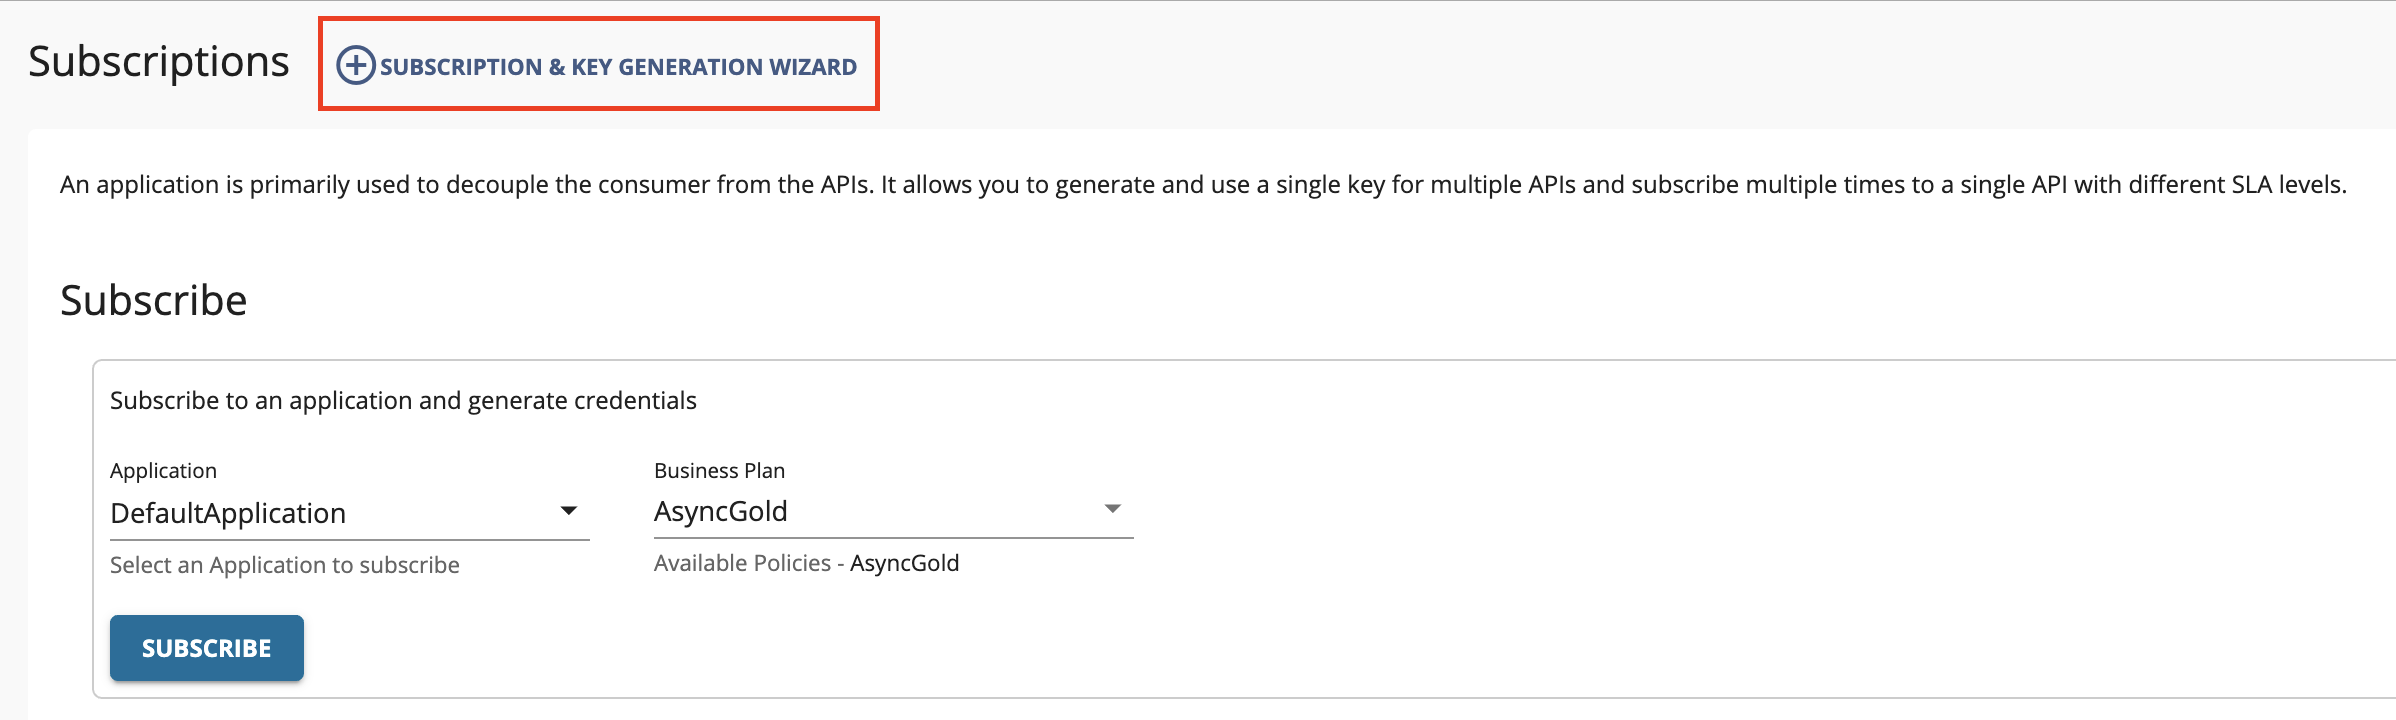
Click Subscriptions to go to the Subscriptions page and click Subscription & Key Generation Wizard.
This wizard takes you through the steps of creating a new application, subscribing, generating keys, and generating an access token to invoke the API.
Note
You can use any application (e.g., JWT or OAuth) to subscribe to the API.
-
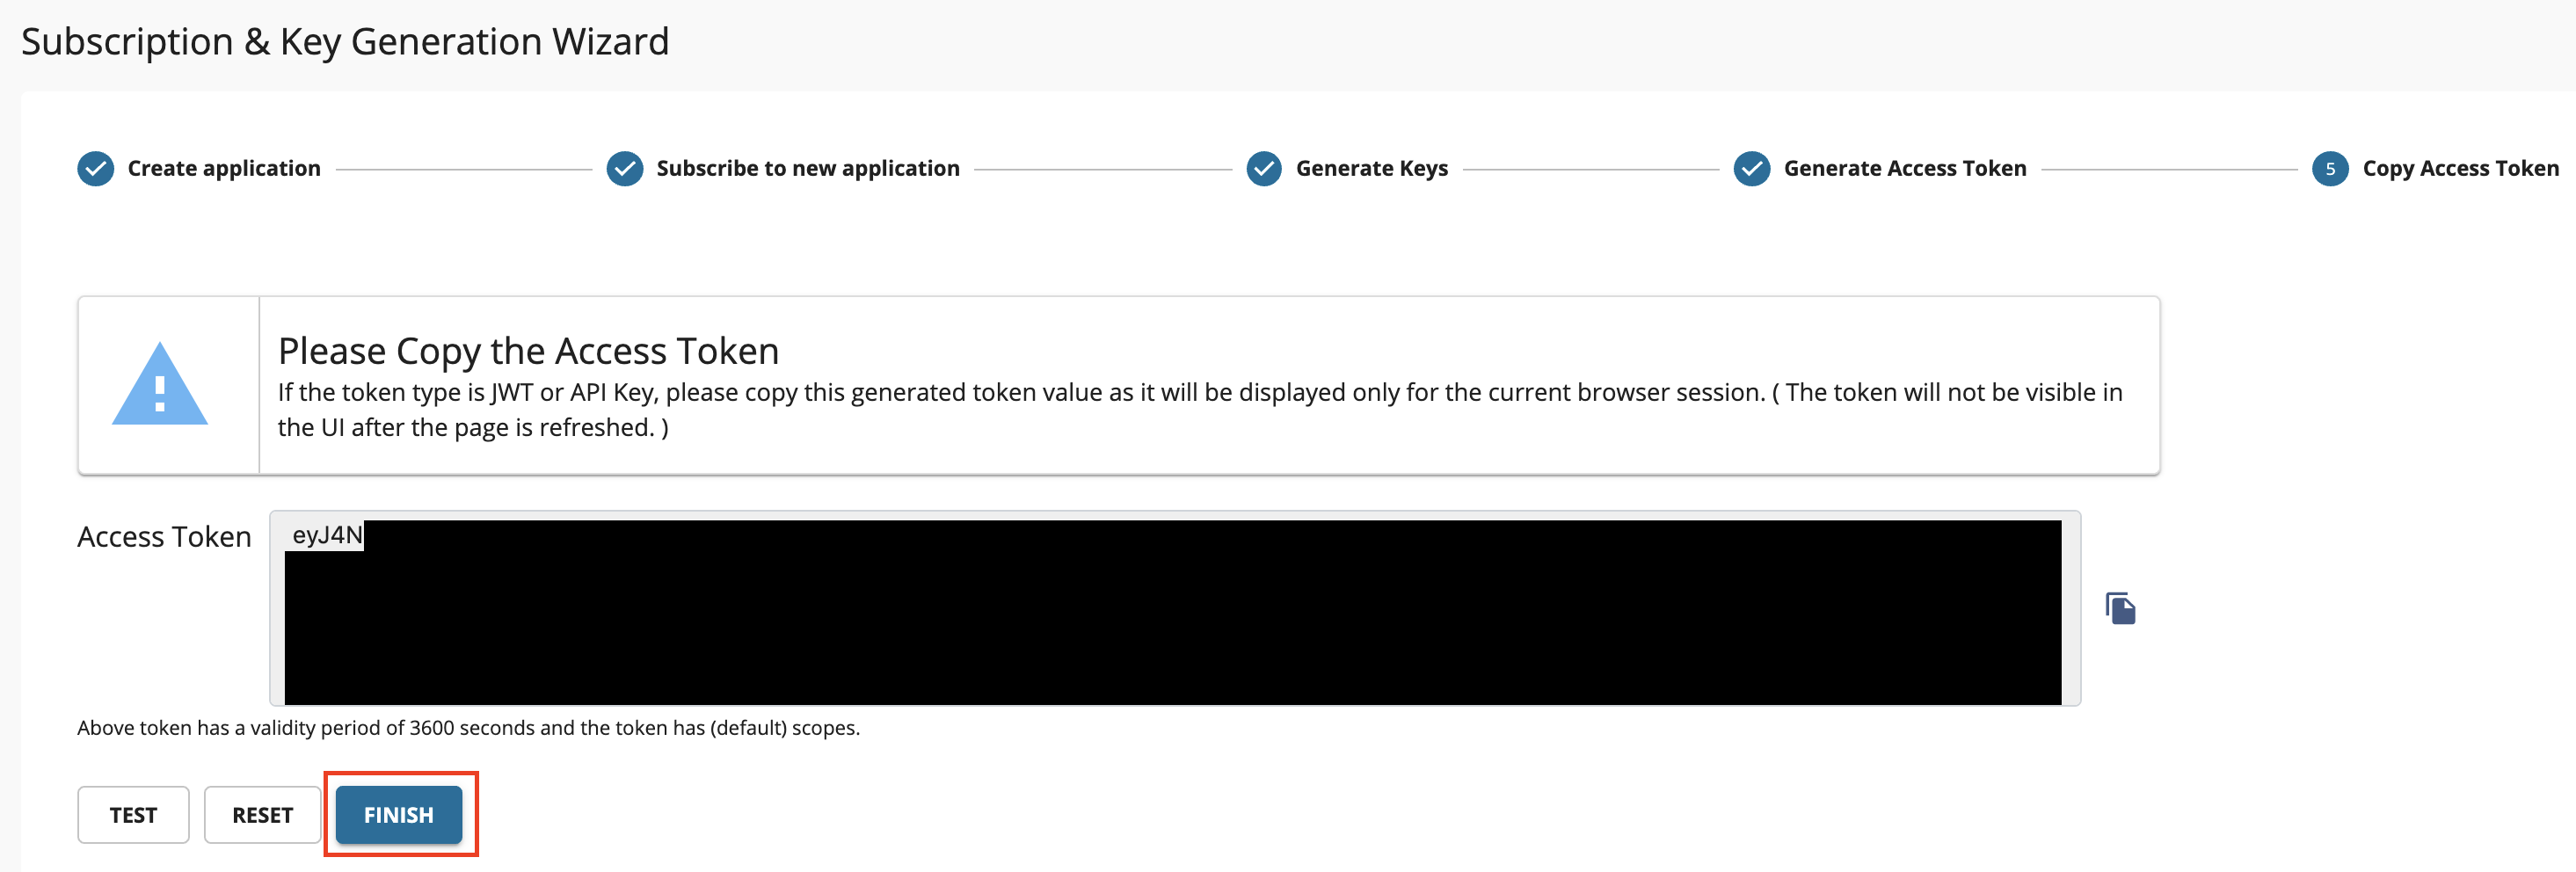
Copy the authorization token that appears, and click Finish.
-
-
Try out the operations.
-
Install wscat client.
npm install -g wscat -
Invoke the API's
/notificationstopic with an authorization header by executing the following command.wscat -c ws://localhost:9099/chats/1.0.0/notifications -H "Authorization: Bearer [accesstoken]"wscat -n -c wss://localhost:8099/chats/1.0.0/notifications -H "Authorization: Bearer [accesstoken]"When the connection is successful, the WebSocket server will send:
Subscribed to notifications! -
In a separate terminal, invoke the API's
/rooms/{roomID}topic with an authorization header by executing the following command.wscat -c ws://localhost:9099/chats/1.0.0/rooms/room1 -H "Authorization: Bearer [accesstoken]"wscat -n -c wss://localhost:8099/chats/1.0.0/rooms/room1 -H "Authorization: Bearer [accesstoken]"When the connection is successful, the WebSocket server will send:
This denotes that the first user has connected toYou joined room1!room1.Additionally, the following message will be shown in the terminal where you invoked the
/notificationstopic. This denotes the notification for the above event.Someone joined room1! -
In another terminal, invoke the API's
/rooms/{roomID}topic again. This denotes the second user, who will be connecting toroom1.wscat -c ws://localhost:9099/chats/1.0.0/rooms/room1 -H "Authorization: Bearer [accesstoken]"wscat -n -c wss://localhost:8099/chats/1.0.0/rooms/room1 -H "Authorization: Bearer [accesstoken]"You will receive the message:
You joined room1!in this terminal, along with the corresponding notification in thenotificationsterminal.As there are two users connected to
room1, both of them can send and receive chats viaroom1. Try sending messages from both of these terminals back and forth.Note
There are clients (especially browsers) that do not allow you to add headers to the WebSocket handshake. In such cases, you can send the access token for the WebSocket API invocation as a query parameter named
access_tokenby using the command below:wscat -c "ws://localhost:9099/chats/1.0.0/notifications?access_token=[accesstoken]"wscat -n -c "wss://localhost:8099/chats/1.0.0/notifications?access_token=[accesstoken]"Note
BasicAuthandAPI Keydo not work for the security of WebSocket APIs.
-
You have successfully created and published your first WebSocket API, subscribed to it, obtained an access token for testing, and tested your API with the access token.
Troubleshooting
If you require more detailed logs in the WebSocket API flow in order to troubleshoot and debug an error in your scenario, see Troubleshooting WebSocket APIs.
Top