Connecting to IBM WebSphere MQ
The WSO2 JMS transport can be configured with IBM® WebSphere® MQ. The following topics cover the configuration steps.
Info
The configuration steps below are for a Windows environment.
Prerequisites
- Download and install WSO2 Micro Integrator.
- WebSphere MQ is installed and the latest fix pack applied (see the IBM documentation. The fix pack can be obtained from http://www-01.ibm.com/software/integration/wmq). These instructions are tested on IBM WebSphere MQ version 8.0.0.4.
Creating queue manager, queue and channel in IBM WebSphere MQ
- Start IBM WebSphere MQ Explorer as an administrator. If you are not running on an administrator account, right-click the IBM WebSphere MQ icon/menu item and then click Run as Administrator.
- Right-click on Queue Managers, move the cursor to New, and then click Queue Manager to open the Create Queue Manager wizard. Enter ESBQManager as the queue manager name. Make sure you select make this the default queue manager check box. Leave the default values unchanged in the other fields. Click Next to move to the next page.
- Click Next in the page for entering data and log values without changing any default values.
-
In the page for entering configuration options, select the following. Then click Next.
Field Name Value Start queue manager after it has been created check box If this is selected, the queue manager will start running immediately after it is created. Automatic field If this is selected, the queue manager is automatically started when the machine starts up. -
Configure the following in the page for entering listener options.
Field Name Value Create listener configured for TCP/IP check box Select this check box to create the listener. Listen on port number field Enter the number of the port where you want to set the listener. In this example, the port number will be 1414. -
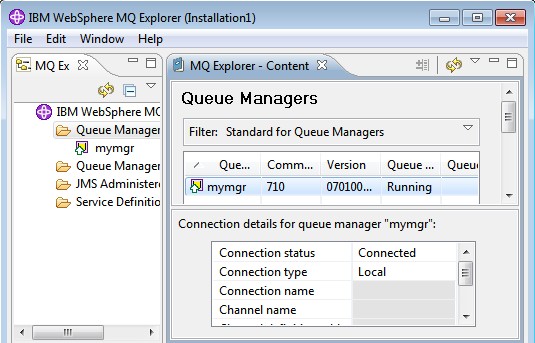
Click Next and then click Finish to save the configuration. The queue manager will be created as shown below.
- Expand the navigation tree of the ESBQManager queue manager in the navigation tree. Right-click Queues, move the cursor to New, and then click Local Queue to open the Create a Local Queue wizard. Enter the local queue name as
LocalQueue1and complete running the wizard. Leave the default values of all other fields unchanged, and click Finish to save the local queue. - Right-click Channels , move the cursor to New , and then click Server-connection Channel to open the Create a Server-connection Channel wizard. Enter myChannel as the channel name and click Next. Make sure that the value for the Transmission Protocol is TCP . Leave the default values unchanged for the rest of the fields, and click Finish to save the channel.
Generating the .bindings file
- Create a directory in which the
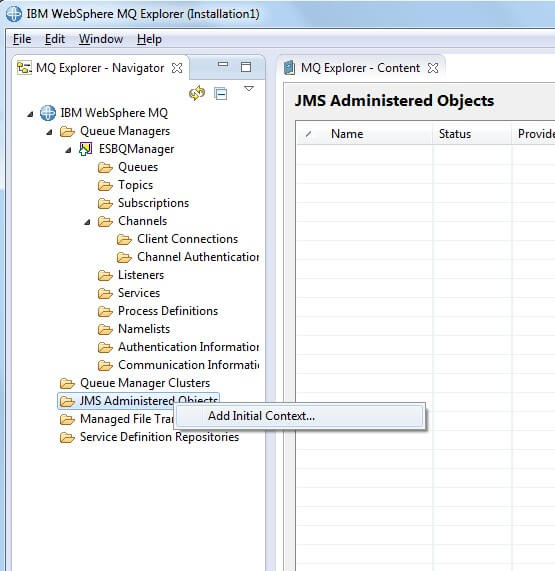
.bindingsfile can be saved in any location of your computer. In this example, a directory namedjndidirectorywill be created in theGfolder. - Go to IBM WebSphere MQ, and right-click on JMS Administered
Objects , and then click Add Initial Context .
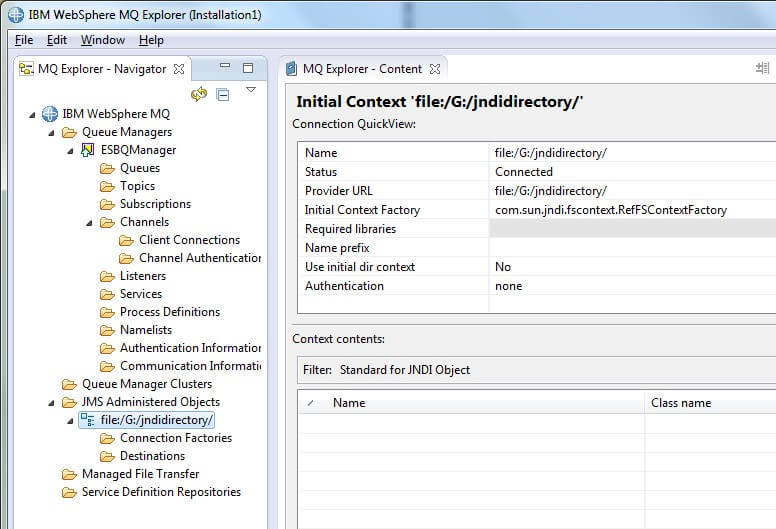
- Select the File system option in the Connection Details
wizard. Enter
file:G/jndidirectoryin the Context nickname field. Leave the default values unchanged for other fields and complete running the wizard. The new file initial context will be displayed in the left navigator under JMS Administered Objects as shown below.
- Click the file initial context (named
file:G/jndidirectoryin this example) in the navigator to expand it. Right-click on Connection Factories, move the cursor to New, and then click Connection Factory. Enter the name of the connection factory asMyQueueConnectionFactory. SelectQueue Connection Factoryas the connection factory type. SelectMQClientas the transport. Leave the default values unchanged for other fields and complete running the wizard. - Right-click on the newly connected connection factory in the left
navigator, and the click Properties . Click Connection .
Then browse and select
ESBQManagerfor the Base queue manager field. You can change the host and port name for the connection factory if required. No changes will be made in this example since default values are used. Leave the default values unchanged for other fields and click OK . - Right-click Destination under JMS Administered Objects in
the left navigator. Move the cursor to New and then click
Destination to open the New Destination wizard. In order to
map the destination to the local queue you created in step 7 of the
Creating queue manager, queue and channel in IBM WebSphere
MQ section, enter the same
queue name (
LocalQueue1in this example) in the Name field. SelectQueuefor the Type field. SelectESBQManageras the queue manager andLocalQueue1as the queue in the wizard. Leave the default values unchanged for other fields and complete running the wizard.
The .bindings file will be created in the location you specified (
file:G/jndidirectory in this example) after you carry
out the above steps.
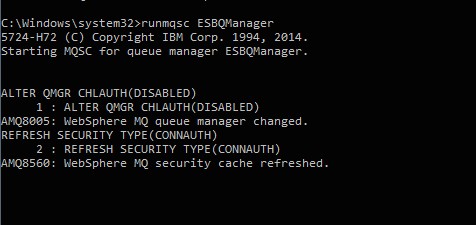
In order to connect to the queue, you need to configure channel authentication. Run the following two commands to disable channel authentication for the ease of use. Alternatively, you can configure the authentication for the MQ server.
Info
Note that you have to run the command prompt as a admin user and run these commands.
runmqsc ESBQManagerALTER QMGR CHLAUTH(DISABLED)REFRESH SECURITY TYPE(CONNAUTH)The following will be displayed in the command prompt.
Configuring the Micro Integrator
Info
- If you use the default configuration of the IBM MQ queue manager, you need to provide username and password client authentication. The username and password that you need to provide here is the username and password that you provide to log on to your operating system.
- If you need to enable MQCSP authentication mode to connect to IBM MQ (without using admin user name and password),
start the server (runtime) with the following system property:
bash -Dcom.ibm.mq.cfg.jmqi.useMQCSPauthentication=Y - The
vender.class.loader.enabledparameter in the above configuration should be added only when you use IBM Websphere MQ as the JMS broker. - WSO2 uses some external class loader mechanisms for some external
products such as QPID and AMQP due to the limitation of serializing
the JMSObject message. However, it is not required to use this
mechanism for IBM Websphere MQ. By adding the
vender.class.loader.enabledparameter, you can skip the external class loader for IBM Websphere MQ. - This property can also be included in a proxy service, REST API, message store, JMS receiver or the Synapse configuration depending on the use case.
-
If you are using Windows Operating Systems (e.g., Windows 10) , mention the
.bindingsfile location starting withfile:///format, in the deployment.toml file.parameter.provider_url = "file:///G:/jndidirectory"
-
Add the following configurations to enable the two JMS listeners.
[[transport.jms.listener]] name = "myQueueConnectionFactory1" parameter.initial_naming_factory = "com.sun.jndi.fscontext.RefFSContextFactory" parameter.provider_url = "file:/G:/jndidirectory" parameter.connection_factory_name = "MyQueueConnectionFactory" parameter.connection_factory_type = "queue" parameter.username = "username" parameter.password = "password" [[transport.jms.listener]] name = "default" parameter.initial_naming_factory = "com.sun.jndi.fscontext.RefFSContextFactory" parameter.provider_url = "file:/G:/jndidirectory" parameter.connection_factory_name = "MyQueueConnectionFactory" parameter.connection_factory_type = "queue" parameter.username = "username" parameter.password = "password" -
Add the following configurations to enable the two JMS senders.
[[transport.jms.sender]]
name = "myQueueConnectionFactory1"
parameter.initial_naming_factory = "com.sun.jndi.fscontext.RefFSContextFactory"
parameter.provider_url = "file:/G:/jndidirectory"
parameter.connection_factory_name = "MyQueueConnectionFactory"
parameter.connection_factory_type = "queue"
parameter.username = "username"
parameter.password = "password"

[[transport.jms.sender]]
name = "default"
parameter.initial_naming_factory = "com.sun.jndi.fscontext.RefFSContextFactory"
parameter.provider_url = "file:/G:/jndidirectory"
parameter.connection_factory_name = "MyQueueConnectionFactory"
parameter.connection_factory_type = "queue"
parameter.username = "username"
parameter.password = "password"
Copying IBM WebSphere MQ libraries
Follow the instructions below to build and install IBM WebSphere MQ client JAR files to WSO2 Micro Integrator.
Info
These instructions are tested on IBM WebSphere MQ version 8.0.0.4. However, you can follow them for other versions appropriately.
-
Create a new directory named
wmq-client, and then create another new directory namedlibinside it. -
Copy the following JAR files from the
<IBM_MQ_HOME>/java/lib/directory (where<IBM_MQ_HOME>refers to the IBM WebSphere MQ installation directory) to thewmq-client/lib/directory.Info
If you are using IBM MQ docker container, you can find these libraries in inside the
/opt/mqm/java/libdirectory. You can usedocker cpcommand to copy jar files from the docker container.Note
If you are using IBM MQ 8 with Mutual SSL enabled, you need to download the wmq-client-8.0.0.zip file and follow the instructions in the readme.txt file.
com.ibm.mq.allclient.jarfscontext.jarjms.jarproviderutil.jar
-
Create a
POM.xmlfile inside the wmq-client/directory and add all the required dependencies as shown in the example below.Tip
You need to change the values of the
<version>and<systemPath>properties accordingly.<?xml version="1.0"?> <project xmlns="http://maven.apache.org/POM/4.0.0" xmlns:xsi="http://www.w3.org/2001/XMLSchema-instance" xsi:schemaLocation="http://maven.apache.org/POM/4.0.0 http://maven.apache.org/xsd/maven-4.0.0.xsd"> <modelVersion>4.0.0</modelVersion> <groupId>wmq-client</groupId> <artifactId>wmq-client</artifactId> <version>8.0.0.4</version> <packaging>bundle</packaging> <dependencies> <dependency> <groupId>com.ibm</groupId> <artifactId>fscontext</artifactId> <version>8.0.0.4</version> <scope>system</scope> <systemPath>${basedir}/lib/fscontext.jar</systemPath> </dependency> <dependency> <groupId>com.ibm</groupId> <artifactId>providerutil</artifactId> <version>8.0.0.4</version> <scope>system</scope> <systemPath>${basedir}/lib/providerutil.jar</systemPath> </dependency> <dependency> <groupId>com.ibm</groupId> <artifactId>allclient</artifactId> <version>8.0.0.4</version> <scope>system</scope> <systemPath>${basedir}/lib/com.ibm.mq.allclient.jar</systemPath> </dependency> <dependency> <groupId>javax.jms</groupId> <artifactId>jms</artifactId> <version>1.1</version> <scope>system</scope> <systemPath>${basedir}/lib/jms.jar</systemPath> </dependency> </dependencies> <build> <plugins> <plugin> <groupId>org.apache.felix</groupId> <artifactId>maven-bundle-plugin</artifactId> <version>2.3.4</version> <extensions>true</extensions> <configuration> <instructions> <Bundle-SymbolicName>${project.artifactId}</Bundle-SymbolicName> <Bundle-Name>${project.artifactId}</Bundle-Name> <Export-Package>*;-split-package:=merge-first</Export-Package> <Private-Package/> <Import-Package/> <Embed-Dependency>*;scope=system;inline=true</Embed-Dependency> <DynamicImport-Package>*</DynamicImport-Package> </instructions> </configuration> </plugin> </plugins> </build> </project> -
Navigate to the wmq
-clientdirectory using your Command Line Interface (CLI), and execute the following command, to build the project:mvn clean install - Stop the WSO2 Micro Integrator, if it is already running.
- Remove any existing IBM MQ client JAR files from the
MI_HOME/dropinsdirectory and theMI_HOME/libdirectory. - Copy the
<wmq-client>/target/wmq-client-8.0.0.4.jarfile to theMI_HOME/dropinsdirectory. - Download the
jta.jarfile from the maven repository, and copy it to theMI_HOME/libdirectory. -
Regenerate the
.bindingsfile with theProvider Version : 8property (if you already generated one before), and replace the existing.bindingsfile (if you have one) with the new.bindingsfile you generated. -
Start the WSO2 Micro Integrator server.
Deploying JMS listener proxy service
In this section, the following simple proxy service is deployed to listen to the LocalQueue1 queue. When a message is published in this queue, the proxy service would pull the message out of the queue and log it.
<proxy xmlns="http://ws.apache.org/ns/synapse"
name="MyJMSProxy"
transports="jms"
startOnLoad="true"
trace="disable">
<description/>
<target>
<inSequence>
<log level="full"/>
<drop/>
</inSequence>
</target>
<parameter name="transport.jms.Destination">LocalQueue1</parameter>
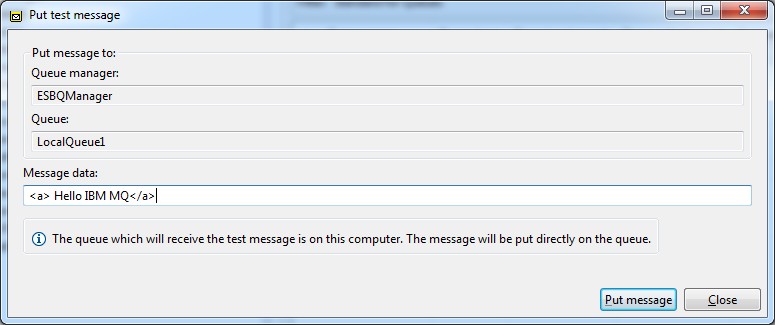
</proxy>Testing the proxy service
Open IBM WebSphere MQ and publish a message to LocalQueue1.