SAML Extension Grant
Flow
SAML 2.0 is an XML-based protocol. It uses security tokens containing assertions to pass information about an end-user between a SAML authority and a SAML consumer. A SAML authority is an identity provider (IdP) and a SAML consumer is a service provider (SP).
Enterprise applications that have SAML2 based SSO infrastructures sometimes need to consume OAuth-protected resources through APIs. However, these apps prefer to use the existing trust relationship with the IdP, even if the OAuth authorization server is entirely different from the IdP. The API Manager leverages this trust relationship by exchanging the SAML2.0 token to an OAuth token with the authorization server. It acts as the OAuth authorization server.
Info
When SAML bearer token is used, the roles of the user can be retrieved from either the user store or the SAML assertion. When checkRolesFromSamlAssertion system property is set to true, the roles will be checked from the SAML assertion, not the user store. Refer the steps below to set this property:
- Set the property
-DcheckRolesFromSamlAssertion=truein the<API-M_HOME>/bin/api-manager.(sh|bat)file. - Restart the server.
The diagram below depicts the above with WSO2 Identity Server as the IdP.
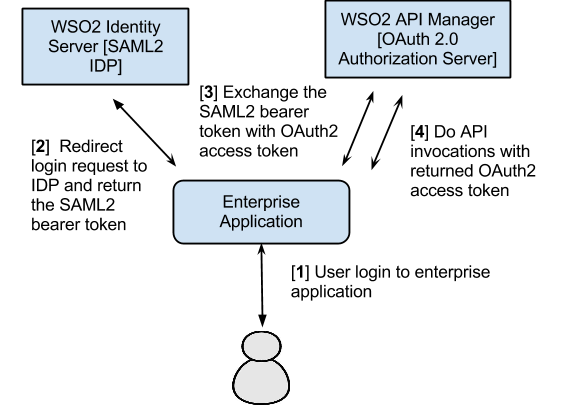
The steps of the above diagram are explained below:
Step [1] : User initiates a login call to an enterprise application
Step [2] :
- As the application is a SAML SP, it redirects the user to the SAML2.0 IdP to log in.
- The user provides credentials at the IdP and is redirected back to the SP with a SAML2.0 token signed by the IdP.
- The SP verifies the token and logs the user to the application.
- The SAML 2.0 token is stored in the user's session by the SP.
Step [3] :
- The enterprise application (SP) wants to access an OAuth2 protected API resource through WSO2 API Manager.
- The application makes a request to the API Manager to exchange the SAML2 bearer token for an OAuth2.0 access token.
- The API Manager validates the assertion and returns the access token.
Step [4] : User does API invocations through the API Manager by setting it as an Authorization header with the returned OAuth2 access token.
A sequence diagram explaining the above flow would be as follows:

Configuring the token exchange
Note
Before you begin, make sure you have the following:
- A valid user account in the API Developer Portal.
- A valid consumer key and consumer secret. Initially, these keys must be generated in the API Developer Portal clicking the Generate Keys button on the Production Keys tab of the application.
- A running API Gateway instance.
- If the Key Manager is on a different server than the API Gateway, change the server URL (host and ports) of the Key Manager as mentioned below, in the
<API-M_HOME>/repository/conf/deployment.tomlfile.[apim.key_manager] configuration.ServerURL = "<key-manager-server-url>" - A valid SAML2 assertion. For instructions on how to configure WSO2 API Manager with SAML2, see Configuring API Manager for SSO
In this example, WSO2 Identity Server 5.7.0 is used as the IdP to get a SAML token and the API Manager is used as the OAuth server.
-
Sign in to the API Manager's management console (`https://localhost:9443/carbon') using admin/admin credentials.
Note
If you are using a tenant to create the Identity Provider, use the credentials of tenant admin to log into the API Manager's Management Console.
-
Click Main > Identity Providers > Add.
-
Provide the following values to configure the IdP:
-
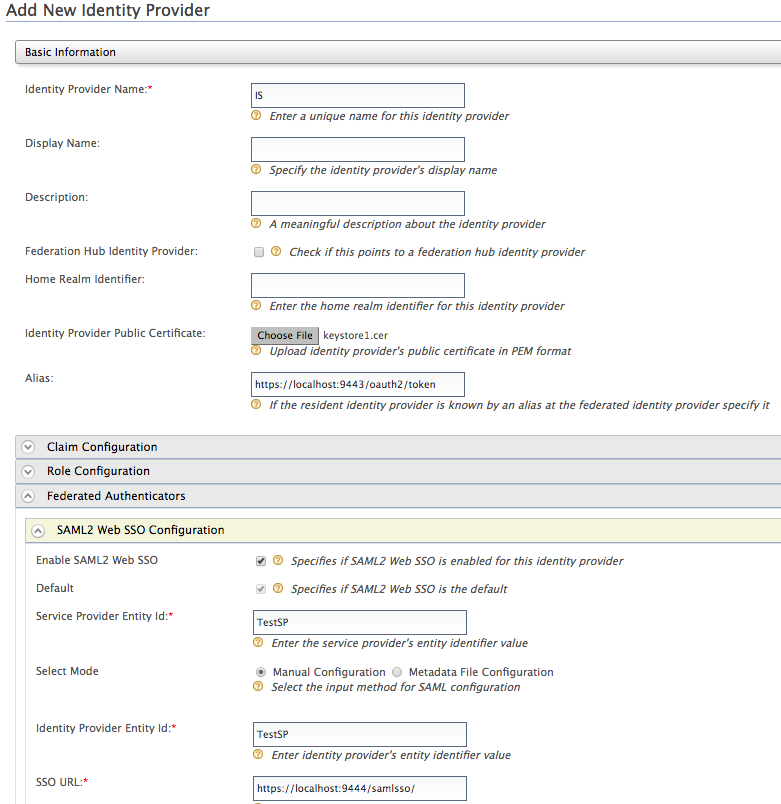
Under Basic Information
- Identity Provider Name : Enter a unique name for the IdP.
-
Identity Provider Public Certificate : The certificate used to sign the SAML assertion. Export the public certificate of WSO2 IS and import it here. For more information, see Exporting the public certificate in the WSO2 Identity Server documentation.
Alternatively, you can create a self-signed certificate and then export it as a
.cerfile using the following commands:keytool -genkey -alias wookie -keyalg RSA -keystore wookieKeystore.jks -keysize 4096 keytool -v -export -file keystore1.cer -keystore wookiekeystore.jks -alias wookie -
Alias : Give the name of the alias if the Identity Provider identifies this token endpoint by an alias. e.g.,
https://localhost:9443/oauth2/token.
-
Under Federated Authenticators > SAML2 Web SSO Configuration
-
Enable SAML2 Web SSO : true
-
Identity Provider Entity Id : The SAML2 issuer name specified when generating the assertion token, which contains the unique identifier of the IdP. You give this name when configuring the SP.
-
Service Provider Entity Id : Issuer name given when configuring the SP.
-
SSO URL : Enter the IDP's SAML2 Web SSO URL value. E.g.,
https://localhost:9444/samlsso/if you have offset the default port, which is 9443.Note
If you are in tenant mode, append the tenant domain to the SSO URL as a query parameter as below.
https://localhost:9443/samlsso?tenantDomain=<tenantDomain>
-
Next, let's register a service provider.
-
-
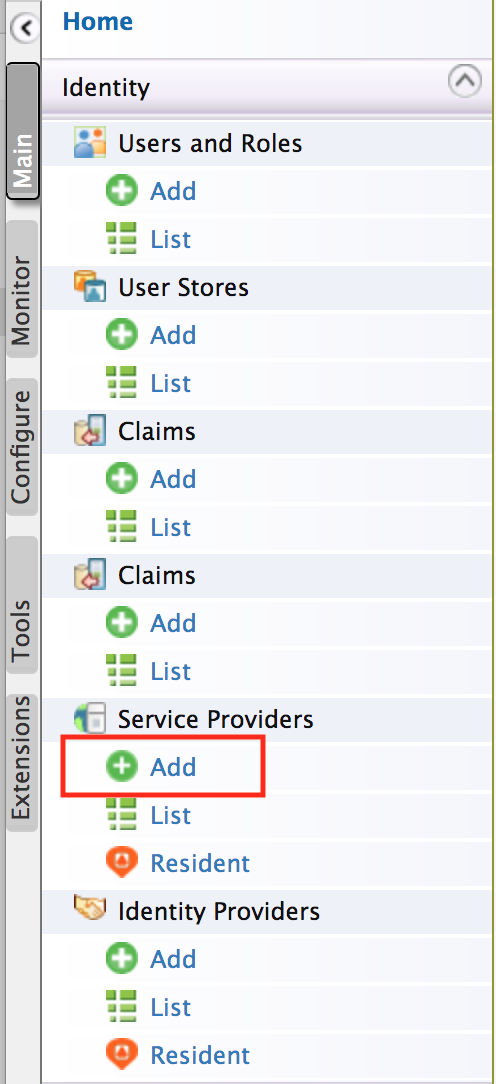
Sign in to the management console of the Identity Server and click Main > Service Providers > Add.
-
Choose to edit the service provider that you just registered and click **Inbound Authentication Configuration > SAML2 Web SSO Configuration
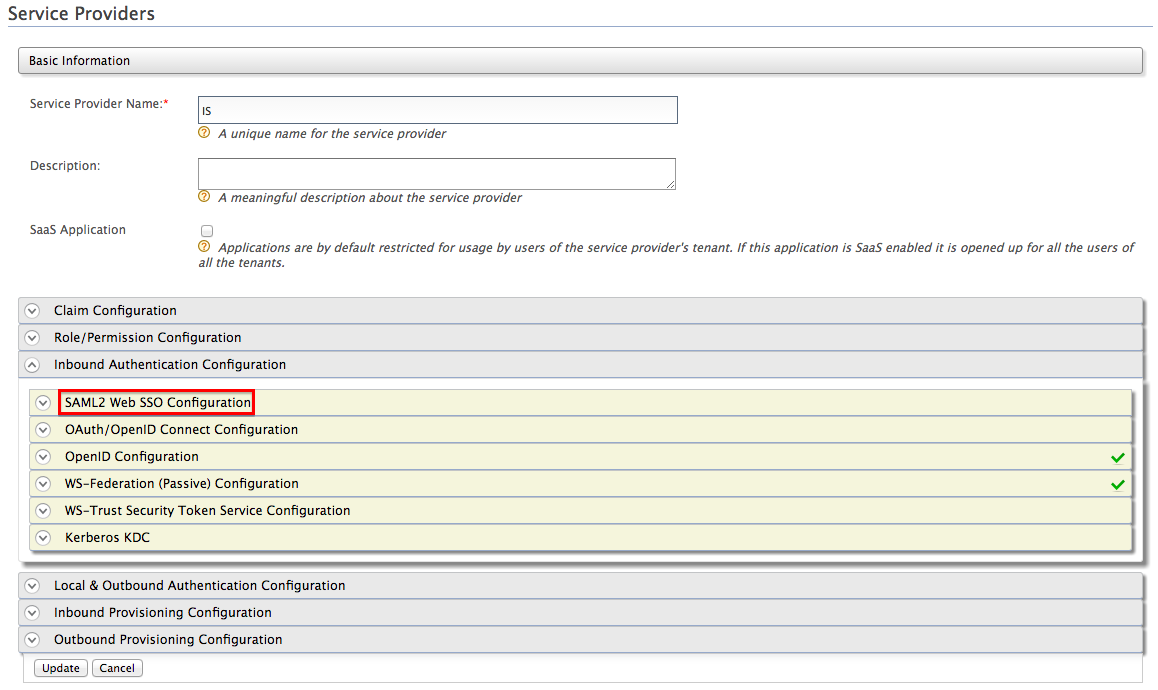
-
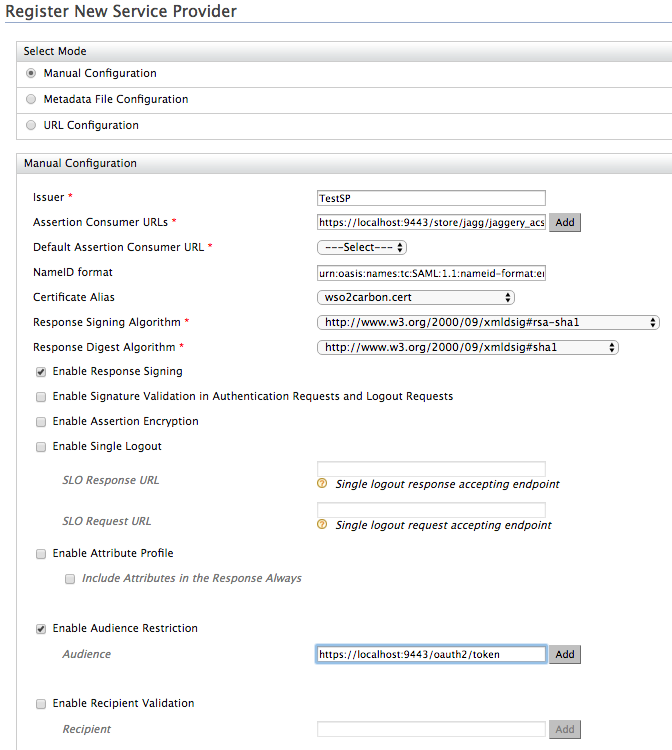
Provide the following values to configure the SP and click Update :
- Issuer : Give any name
- Assertion Consumer URL : The URL to which the IDP sends the SAML response. For example:
https://<application-host-name>/<redirection-path> - Enable Response Signing : true
- Enable Audience Restriction : true
- Audience : URL of the token API.
For example:
https://localhost:9443/oauth2/token
Let's see how to get a signed SAML2 token (encoded assertion value) when authenticating against a SAML2 IDP. With the authentication request, you pass attributes such as the SAML2 issuer name, token endpoint and the restricted audience. In this guide, we use a command-line client program developed by WSO2 to create the 64-bit, URL-encoded SAML assertion.
Invoking the Token API to generate tokens
Follow the steps below to invoke the token API to generate access tokens from SAML2 assertions.
-
Combine the consumer key and consumer secret keys as
consumer-key:consumer-secret. Encode the combined string using base64. Here's an example consumer key and secret combination:wU62DjlyDBnq87GlBwplfqvmAbAa:ksdSdoefDDP7wpaElfqvmjDue.Let's create a SAML2 assertion using the same command-line client that you used in the previous section.
-
Download the command-line tool from here and extract the ZIP file.
-
Go to the extracted folder using the command line and execute the following command. We assume that both the client and the API Gateway run on the same server. Therefore, the Token API URL is
https://localhost:9443/oauth2/tokenjava -jar SAML2AssertionCreator.jar <Identity_Provider_Entity_Id> <saml-subject> <saml-recipient> <saml-audience> <Identity_Provider_JKS_file> <Identity_Provider_JKS_password> <Identity_Provider_certificate_alias> <Identity_Provider_private_key_password>java -jar SAML2AssertionCreator.jar TestSP admin https://localhost:9443/oauth2/token https://localhost:9443/oauth2/token <APIM-Home>/repository/resources/security/wso2carbon.jks wso2carbon wso2carbon wso2carbonThe arguments are as follows:
Identity_Provider_Entity_Id(issuer)This is the value of the saml:Issuer, which is a unique identifier of the identity provider.saml-subjectThis is the value of the name ID, which is found in the saml:Subject->saml:NameIdsaml-recipientThis is the value of the subject confirmation data recipient, which is found in the saml:Subject->saml:SubjectConfirmation->saml:SubjectConfirmationData.Recipientsaml-audienceThis is the value that is added to the saml:AudienceRestrictionelement of the token. This argument can take multiple values separated by commas. Each value is added as asaml:Audienceelement withinsaml:AudienceRestrictionIdentity_Provider_JKS_filePointer to the Java Key Store (JKS) file to be used for credentials. Identity_Provider_JKS_passwordThe JKS password. Identity_Provider_certificate_aliasThe alias of the public certificate. Identity_Provider_private_key_passwordThe password of the private key that is used for signing. This command returns a SAML2 assertion XML string and a base64-URL encoded assertion XML string. You now have a SAML2 assertion.
-
Access the Token API using a REST client such as cURL. For example, the following cURL command generates an access token and a refresh token. You can use the refresh token at the time a token is renewed.
curl -k -d "grant_type=urn:ietf:params:oauth:grant-type:saml2-bearer&assertion=<base64-URL_encoded_assertion>&scope=PRODUCTION" -H "Authorization: Basic <base64_encoded_consumer-key:consumer_secret>" -H "Content-Type: application/x-www-form-urlencoded" https://localhost:9443/oauth2/token
Tip
If you want to disable the SAML Extension grant type in the APIM instance, add the following entry to the deployment.toml file in the <APIM_HOME>/repository/conf/ folder.
[oauth.grant_type.saml_bearer]
enable = false