JWT Grant
The JSON Web Token (JWT) Bearer Grant is simply a JSON string containing claim values that will be evaluated and validated by the JWT Grant Handlers at the Authorization Server end before issuing an access token.
WSO2 API Manager (WSO2 API-M), as an OAuth 2.0 Authorization Server with its key manager features, can accept JWT Assertions from OAuth 2.0 clients as means of resource owner authentication and authorization. Additionally, it can exchange the JWT access token with the OAuth 2.0 access tokens in order to access protected resources on behalf of the resource owner.
Note
Before you begin, execute the following script in the relevant database. This is done to include a missing column that is required when working with JWT.
ALTER TABLE CM_SP_PURPOSE_PII_CAT_ASSOC ADD IS_CONSENTED BOOLEAN DEFAULT TRUEConfiguring the JWT grant
Step 1 - Obtain a JWT from an external Identity Provider
You can use any identity provider to obtain a JWT. As an example, this step will discuss how to obtain a JWT from WSO2 Identity Server (WSO2 IS).
-
Download and install the latest WSO2 IS.
If you downloaded the archive, extract it.
<IS_HOME>refers to the root folder of the extracted WSO2 IS. -
Start WSO2 IS with a port offset.
portOffsetis required only if you are running both API-M and IS in the same JVM.sh wso2server.sh -DportOffset=1 -
Sign in to the WSO2 IS Management Console (
https://<IS_Server_Host>:9444/carbon). -
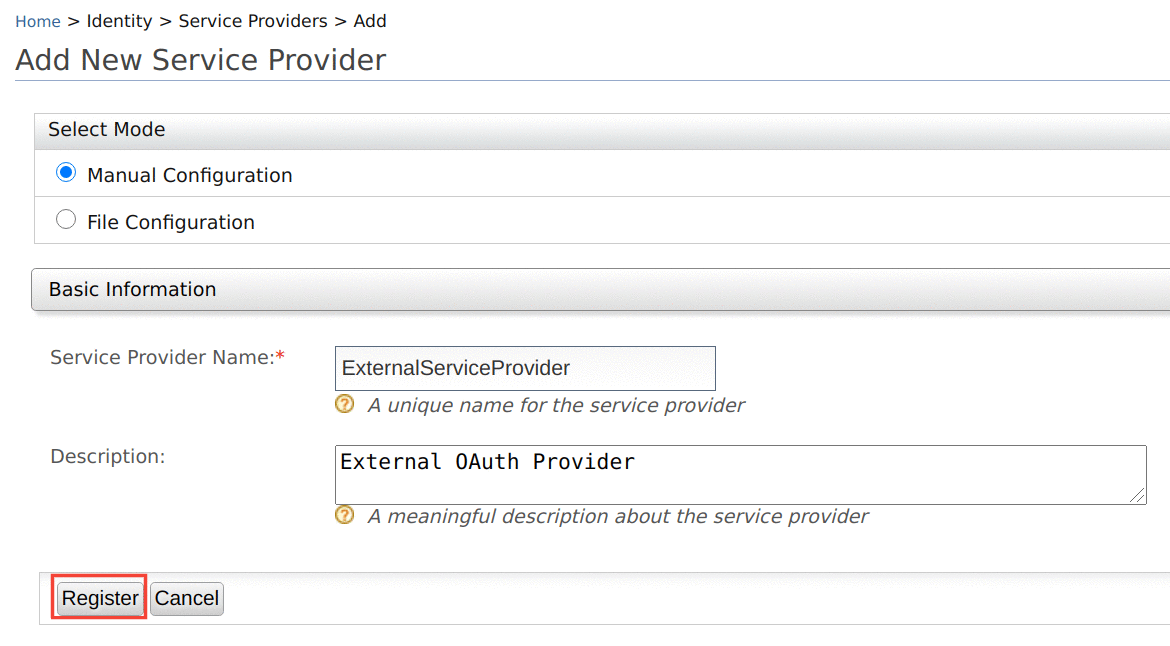
Click Main → Service Providers → Add.

-
Enter the name of the service provider and click Register.
-
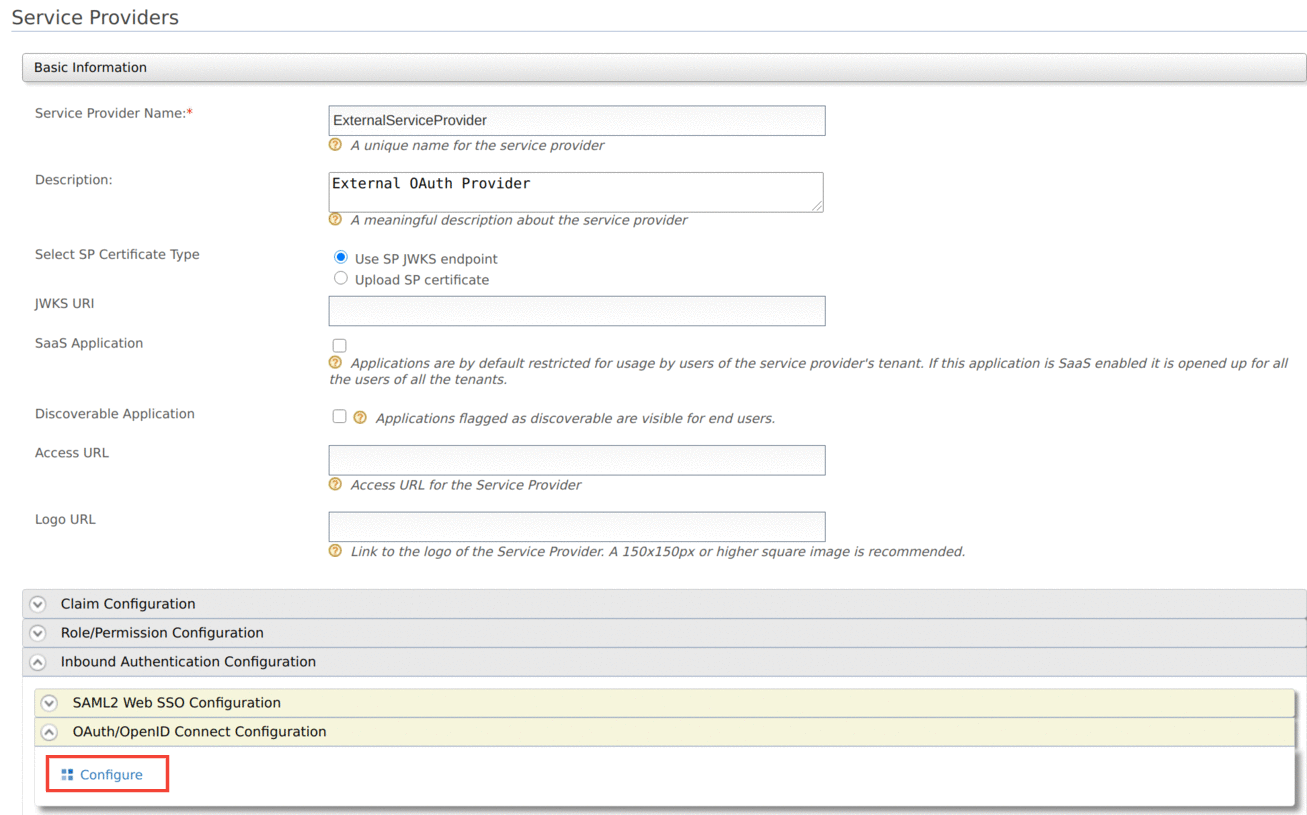
Click Inbound Authentication Configuration → OAuth/OpenID Connect Configuration → Configure to add a new OAuth2 client.
-
Provide a Callback URL and set the Token Issuer as
JWT, then click Add.If you do not have a Callback URL, you can clear the Code and Implicit authorization grant types and add the OAuth2 client.

Now you have successfully created an OAuth2 client and generated a consumer key and consumer secret for it.

Now you have configured a service provider in WSO2 IS that can be used later to obtain a JWT. In the next step, let's register an identity provider and create a service provider in WSO2 API-M.
Step 2 - Configure an Identity Provider and a Service Provider in WSO2 API-M
-
Make sure WSO2 API-M is up and running.
-
Sign in to the WSO2 API-M Management Console (
https://<API-M_Server_Host>:9443/carbon) -
Navigate to the Identity Providers section in the Main -> Identity section and click Add.
-
Provide the following values to configure the Identity Provider.
- Identity Provider Name : Enter the issuer name as the identity provider name. This is used to generate the JWT assertion. The issuer of a JWT generated by WSO2 IS is by default
https://localhost:9444/oauth2/token. -
Identity Provider Public Certificate : Choose the radio button named Upload IDP certificate so that the field named Identity Provider Public Certificate will be enabled. This is the certificate which will be used to sign the JWT assertion.
Info
The Identity Provider Public Certificate is the public certificate that belongs to the identity provider. It is necessary to update this certificate to authenticate the response from the identity provider.
This can be any certificate. As you have used WSO2 IS as the identity provider here, follow the instructions below to create the identity provider certificate using the
wso2carbon.jks file.- Open your command line interface, navigate to the
<IS_HOME>/repository/resources/security/directory and run the following command.
keytool -export -alias wso2carbon -file wso2.crt -keystore wso2carbon.jks -storepass wso2carbon- After you run this command, the certificate will be exported as
wso2.crtin the same folder. You can upload it by clicking Choose File in Identity Provider section in the Management Console.
For more information on how public keys work and how to sign these keys by a certification authority, see About Asymmetric Cryptography.
- Open your command line interface, navigate to the
-
Alias : Enter the audience (
audvalue) of the JWTs issued by the identity provider (WSO2 IS).
Tip
When testing, you can find the values such as issuer name (
iss) and audience (aud) by decoding the JWT obtained in Step 1 using a JWT decoder such as https://jwt.io. For more information, see JWT Bearer Grant.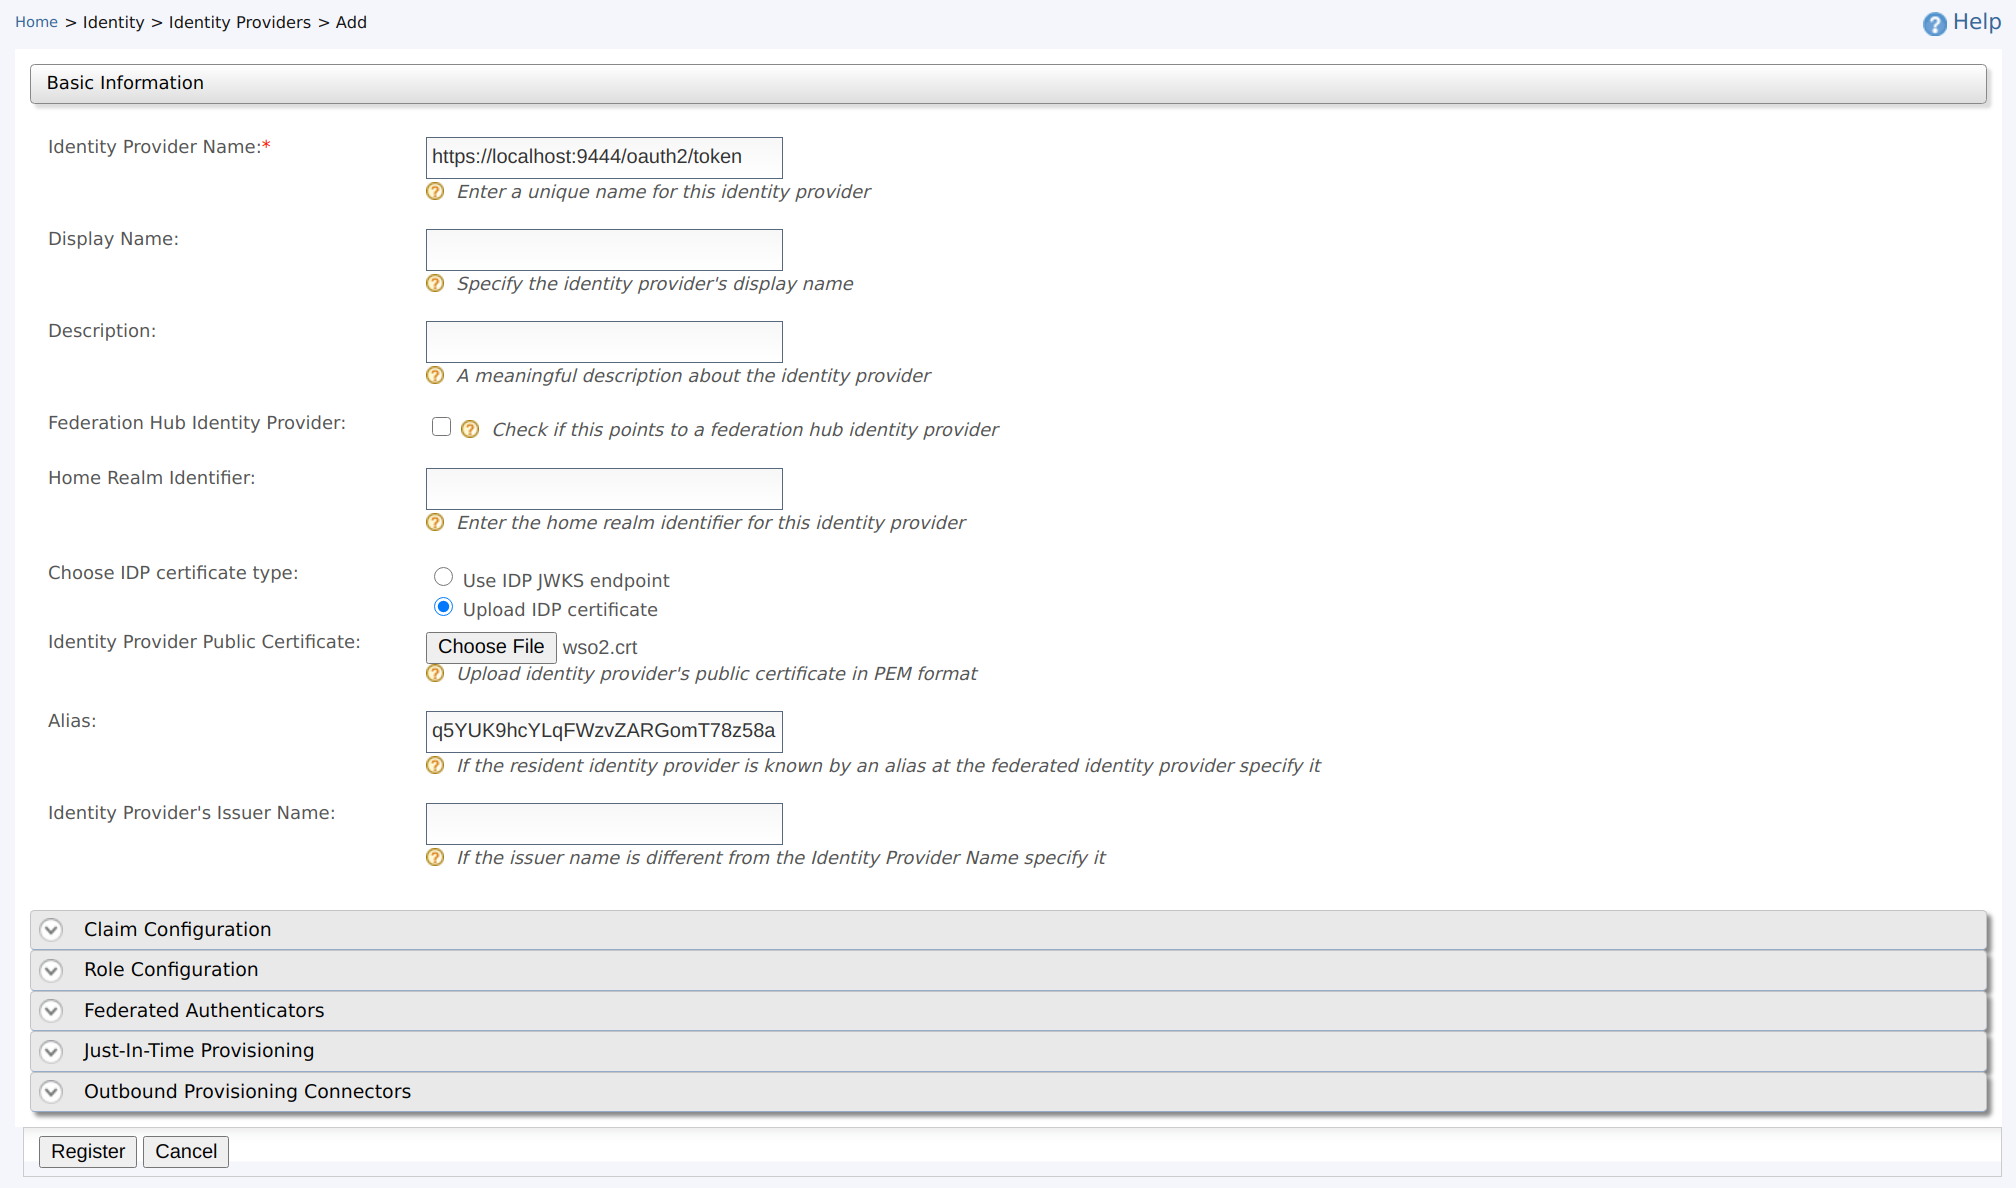
- Identity Provider Name : Enter the issuer name as the identity provider name. This is used to generate the JWT assertion. The issuer of a JWT generated by WSO2 IS is by default
-
Click Register to complete the registration of the identity provider.
-
Navigate to the Service Providers section in the Main -> Identity section and click Add.
-
Fill in the Service Provider Name and provide a brief Description of the service provider. See Adding a Service Provider for more information.
-
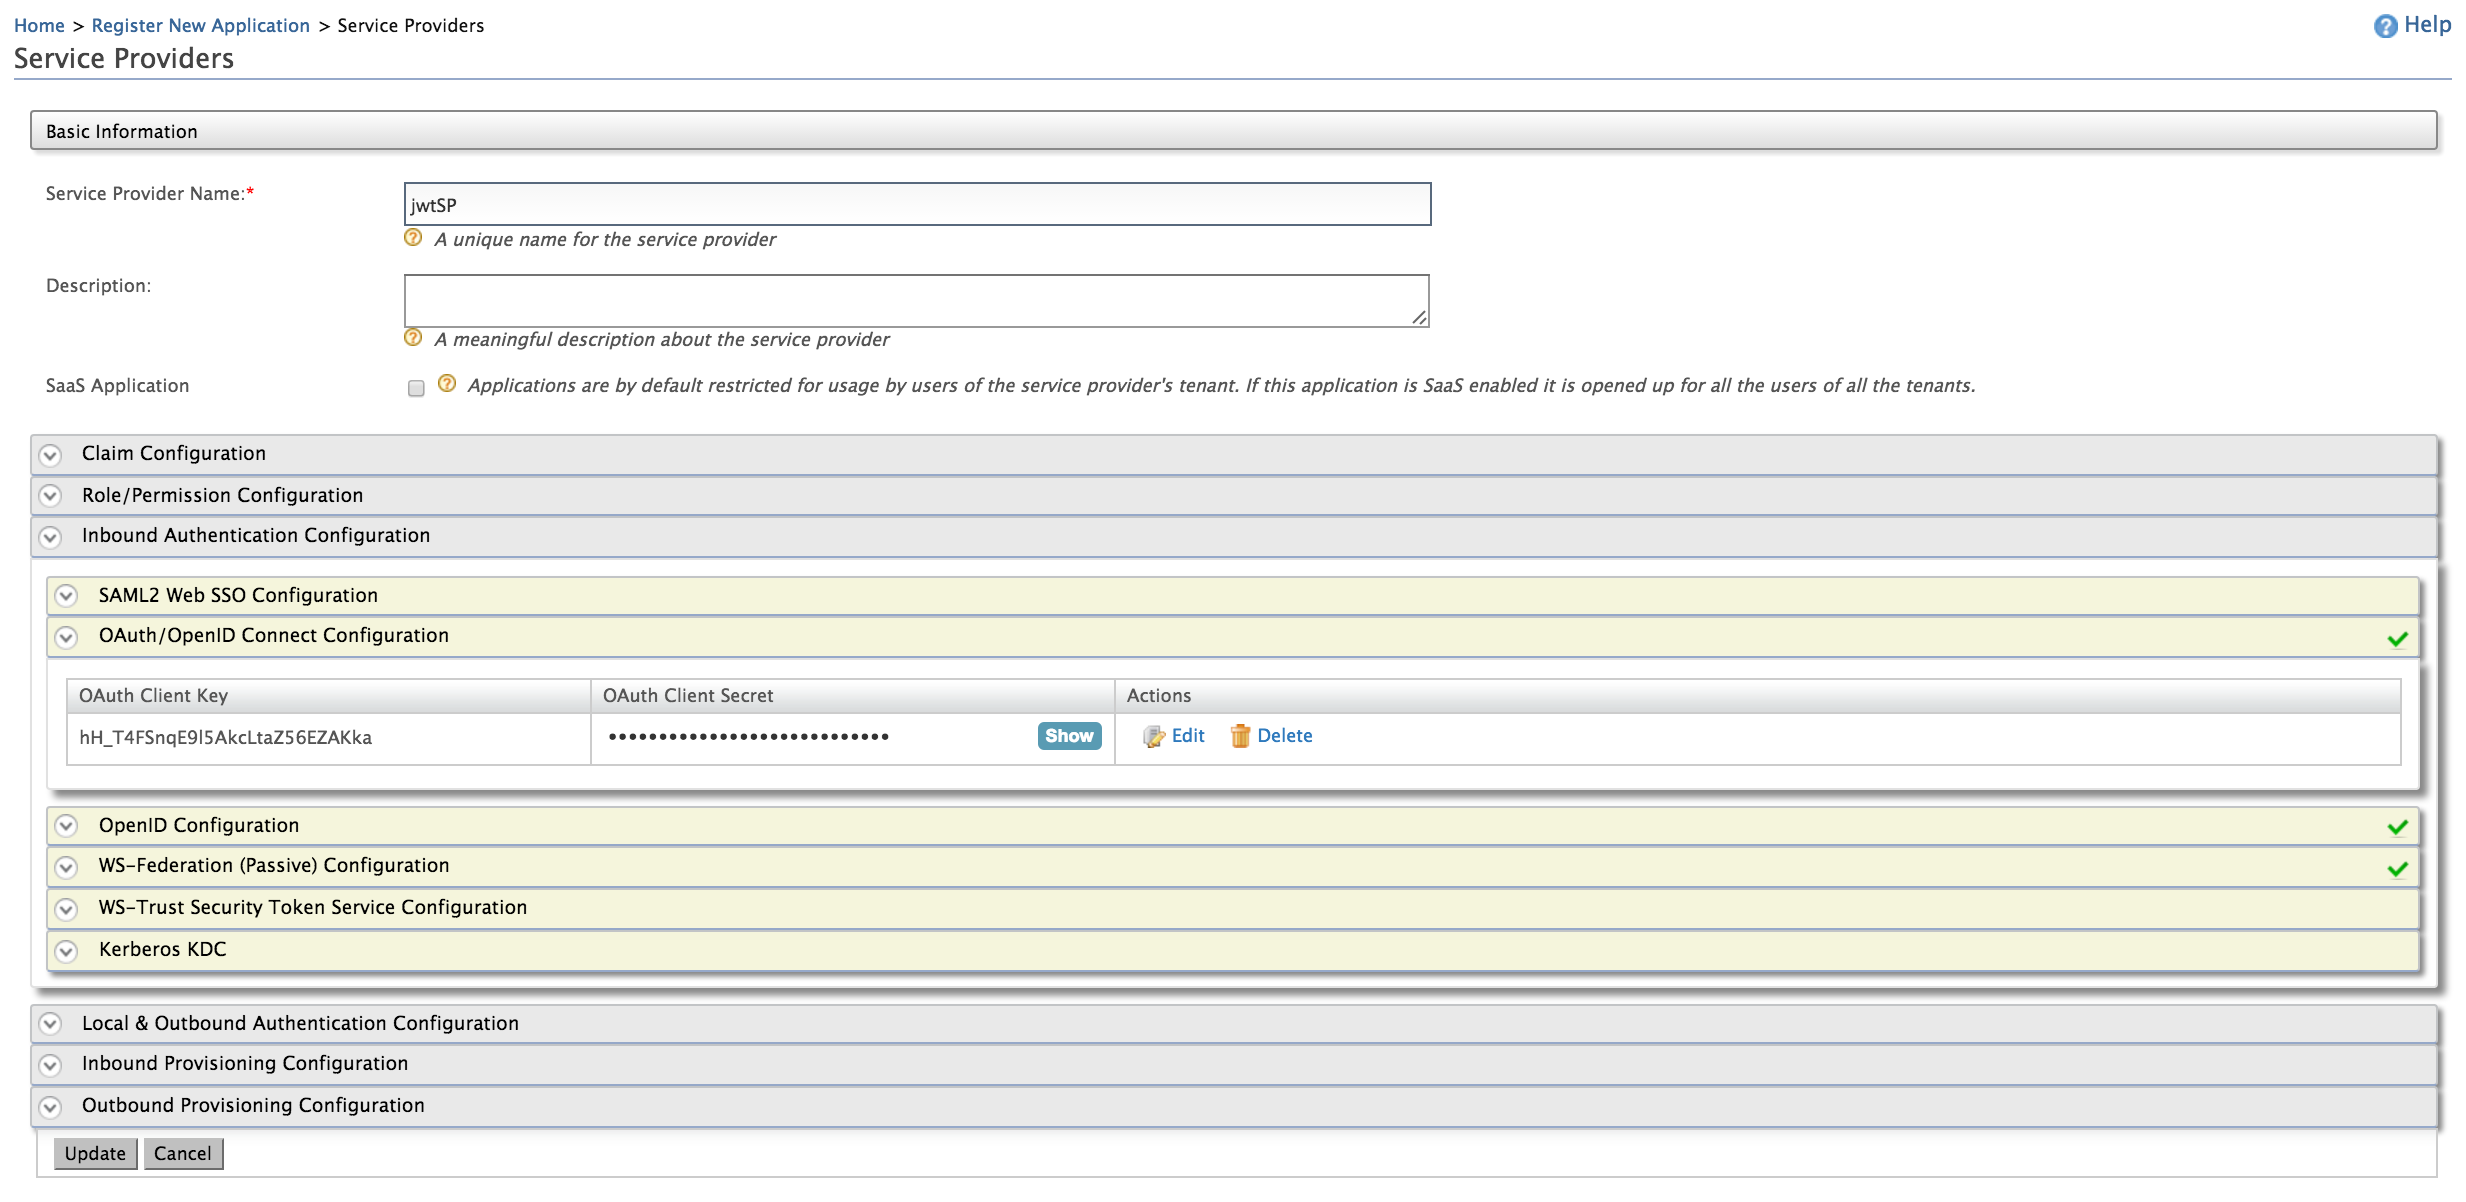
Expand the OAuth/OpenID Connect Configuration under Inbound Authentication Configuration and click Configure.
-
Enter a Callback URL. For example, use
http://localhost:8080/playgroundand click Add.The OAuth Client Key and OAuth Client Secret will now be visible.
Now you have a registered identity provider and as well as a service provider with an OAuth Client Key and an OAuth Client Secret. In the next section, you can test the JWT grant with the configured setup.
Using the JWT grant
-
Obtain a JWT from the service provider.
Use the following sample cURL command to obtain a JWT from the service provider inside WSO2 IS that we configured in Step 1. Note that, you can use any
grant_typewhen sending the request. For more information, see OAuth2 Grant Types.curl -k -d "grant_type=<grant_type_of_your_choice>" -H "Authorization: Basic <Base64-encoded-client_key:client_secret>" -H "Content-Type: application/x-www-form-urlencoded" https://<IS_Server_Host>:9444/oauth2/tokencurl -k -d "grant_type=password&username=admin&password=admin" -H "Authorization: Basic cEJ6dUlaaEdwaGZRbWRjVVgwbG5lRmlpdXh3YTo0U0pnV19qTU56aGpIU284OGJuZVhtTnFNMjRh" -H "Content-Type: application/x-www-form-urlencoded" https://localhost:9444/oauth2/tokenSample Response
{"access_token":"eyJ4NXQiOiJNell4TW1Ga09HWXdNV0kwWldObU5EY3hOR1l3WW1NNFpUQTNNV0kyTkRBelpHUXpOR00wWkdSbE5qSmtPREZrWkRSaU9URmtNV0ZoTXpVMlpHVmxOZyIsImtpZCI6Ik16WXhNbUZrT0dZd01XSTBaV05tTkRjeE5HWXdZbU00WlRBM01XSTJOREF6WkdRek5HTTBaR1JsTmpKa09ERmtaRFJpT1RGa01XRmhNelUyWkdWbE5nX1JTMjU2IiwiYWxnIjoiUlMyNTYifQ.eyJzdWIiOiJhZG1pbiIsImF1dCI6IkFQUExJQ0FUSU9OX1VTRVIiLCJhdWQiOiJxNVlVSzloY1lMcUZXenZaQVJHb21UNzh6NThhIiwibmJmIjoxNjEzMTMwNTAxLCJhenAiOiJxNVlVSzloY1lMcUZXenZaQVJHb21UNzh6NThhIiwiaXNzIjoiaHR0cHM6XC9cL2xvY2FsaG9zdDo5NDQ0XC9vYXV0aDJcL3Rva2VuIiwiZXhwIjoxNjEzMTM0MTAxLCJpYXQiOjE2MTMxMzA1MDEsImp0aSI6IjdmZDc0NGQ5LWJlYTMtNDJiNS1hY2RjLWVmMDU0NGRjMmZhZiJ9.mBh0FB8kPKwkqP8rV78YXaSqmv_j-7kSKlylOfH8i1M3g8JvEQRx5gsxwMNidOr28DIL9hNv7Ebz6j6tqu-HUXtB_QgQGbF1QRALtBcYaV1-O8V_TAs02P7KYx_jfZv2HCVEE-s-jW2vBAMa24ZwgI0uCk4QHsev1chLd85FZdwbzqe0E0lt5hfB0Y5kLnZmzQFdBxkrv9eTppO5Z2WLyKFt9j2oI2a2eqa_NOYr7pwLyuzg-QL4Xz3SdfC3SMHPjAmaksJfcOS-SuswQ_edPN02fXVR0SKGCVIS-86u-9D4xgFvf_jtIg2Xd2LNNHY6BPBj1l9Nk_rfesnllx04ZA","refresh_token":"b6549344-c5ba-3103-8f93-475aa5416759","token_type":"Bearer","expires_in":3600} -
Execute the following cURL command to retrieve the access token from WSO2 API-M for the generated JWT in the previous step.
curl -X POST -u <clientid>:<clientsecret> -k -d 'grant_type=urn:ietf:params:oauth:grant-type:jwt-bearer&assertion=<JWT>' -H 'Content-Type: application/x-www-form-urlencoded' https://localhost:<HTTPS-port>/oauth2/tokencurl -X POST -u 4WCCBckEpMMM5oFmC59EEtJXpzEa:_htM8KV73STHfzBO4TGbnC9iSswa -k -d 'grant_type=urn:ietf:params:oauth:grant-type:jwt-bearer&assertion=eyJ4NXQiOiJNell4TW1Ga09HWXdNV0kwWldObU5EY3hOR1l3WW1NNFpUQTNNV0kyTkRBelpHUXpOR00wWkdSbE5qSmtPREZrWkRSaU9URmtNV0ZoTXpVMlpHVmxOZyIsImtpZCI6Ik16WXhNbUZrT0dZd01XSTBaV05tTkRjeE5HWXdZbU00WlRBM01XSTJOREF6WkdRek5HTTBaR1JsTmpKa09ERmtaRFJpT1RGa01XRmhNelUyWkdWbE5nX1JTMjU2IiwiYWxnIjoiUlMyNTYifQ.eyJzdWIiOiJhZG1pbiIsImF1dCI6IkFQUExJQ0FUSU9OX1VTRVIiLCJhdWQiOiJxNVlVSzloY1lMcUZXenZaQVJHb21UNzh6NThhIiwibmJmIjoxNjEzMTMwNTAxLCJhenAiOiJxNVlVSzloY1lMcUZXenZaQVJHb21UNzh6NThhIiwiaXNzIjoiaHR0cHM6XC9cL2xvY2FsaG9zdDo5NDQ0XC9vYXV0aDJcL3Rva2VuIiwiZXhwIjoxNjEzMTM0MTAxLCJpYXQiOjE2MTMxMzA1MDEsImp0aSI6IjdmZDc0NGQ5LWJlYTMtNDJiNS1hY2RjLWVmMDU0NGRjMmZhZiJ9.mBh0FB8kPKwkqP8rV78YXaSqmv_j-7kSKlylOfH8i1M3g8JvEQRx5gsxwMNidOr28DIL9hNv7Ebz6j6tqu-HUXtB_QgQGbF1QRALtBcYaV1-O8V_TAs02P7KYx_jfZv2HCVEE-s-jW2vBAMa24ZwgI0uCk4QHsev1chLd85FZdwbzqe0E0lt5hfB0Y5kLnZmzQFdBxkrv9eTppO5Z2WLyKFt9j2oI2a2eqa_NOYr7pwLyuzg-QL4Xz3SdfC3SMHPjAmaksJfcOS-SuswQ_edPN02fXVR0SKGCVIS-86u-9D4xgFvf_jtIg2Xd2LNNHY6BPBj1l9Nk_rfesnllx04ZA' -H 'Content-Type: application/x-www-form-urlencoded' https://localhost:9443/oauth2/tokenNote
- The -u flag should specify the “
<Client Id>:<Client Secret>” value.
You can use the OAuth Client Key and an OAuth Client Secret that we obtained at the end of Step 2 here).
- The assertion parameter value (
<JWT>) is the signed base64 encoded JWT.
You can use the JWT that we obtained at the end of Step 1 here). The value of the assertion parameter MUST contain a single JWT. For more information on assertion, see JWT Bearer Grant.
Info
If you have configured the service provider and identity provider in a tenant, you have to add the tenant domain as a query parameter to the access token endpoint.
If the tenant domain is
wso2.com, the access token endpoint will be as follows:Access Token Endpoint: https://localhost:9443/oauth2/token?tenantDomain=wso2.comYou would now have received the response from the token endpoint of WSO2 API-M. The response would contain the access token, refresh token, expiry time, scope and token type.
Sample response
{"access_token":"650547f8-1dd3-3586-bbd0-57d01e097afe","refresh_token":"d65152ee-64bf-3d2f-853b-eb54b9baac63","scope":"default","token_type":"Bearer","expires_in":3600} - The -u flag should specify the “
JWT Bearer Grant
The JWT contains three parts that are separated by dots ".":
- header
- payload
- signature
The header identifies the algorithm used to generate the signature. For example, see the following code block.
Sample header
{
    "alg":"RS256"
}
The payload contains the claims mentioned below:
iss (issuer) |
The JWT must contain an iss (issuer) claim that contains a unique identifier that identifies the identity provider that issued the JWT. |
sub (subject) |
The JWT must contain a sub (subject) claim that identifies the entity that the identity provider or the entity that issued the JWT vouches for. |
aud (audience) |
The JWT must contain an aud |
exp (expiration time) |
The JWT must contain an exp |
nbf (not before) |
The JWT may contain a nbf |
iat (issued at) |
The JWT may contain an iat |
jti (JSON web token ID) |
The JWT may contain jti |
| Other custom claims | The JWT may contain claims other than the above mentioned ones. This is the extension point of the JWT specification. |
For example, see the following code block.
Sample payload
{
    "sub":"admin",
    "aud":[
        "https://localhost:9443/oauth2/token"
    ],
    "nbf":1507546100,
    "iss":"jwtIDP",
    "exp":1507606100,
    "iat":1507546100,
    "jti":"Token56756"
}
The signature is calculated by base64 URL encoding the header and payload and concatenating them with a period as a separator and signing it:
Signature = sign(encodeBase64(header) + '.' + encodeBase64(payload))The signature must then be base64 URL encoded. JWT assertion can be generated by concatenating these three encoded values with a separator dot ".".
assertion = encodeBase64(header) + '.' + encodeBase64(payload) + '.' + encodeBase64(signature)The result is as follows:
Sample assertion
eyJhbGciOiJSUzI1NiJ9.eyJzdWIiOiJhZG1pbiIsImF1ZCI6WyJodHRwczpcL1wvbG9jYWxob3N0Ojk0NDNcL29hdXRoMlwvdG9rZW4iXSwibmJmIjoxNTA3NTQ2MTAwLCJpc3MiOiJqd3RJRFAiLCJleHAiOjE1MDc2MDYxMDAsImlhdCI6MTUwNzU0NjEwMCwianRpIjoiVG9rZW41Njc1NiJ9.iGMhjibB0W2QFQlM27gnHp6z47Eybv8cAHk2o2i-xqo2S4uJ_1VppFI4CCJXTj4qzV9vmkJ5HKNAayiTa6wOMXGL4XnwYwpOAoKXvboznlEDNRpw3htW34nLvyUu6PjHbdvAPVjh8kPRwf7esRr2p-luecGvC21mjWdhyGzM4hETip
If you want to disable the JWT Bearer grant type in the APIM instance, add the following entry to the deployment.toml file in the <APIM_HOME>/repository/conf/ folder.
[oauth.grant_type.jwt_bearer]
enable = false