Changing the Default Mediation Flow of API Requests
The API Gateway has a default mediation flow for the API invocation requests that it receives. There are three main mediation flows as in, out, and fault. You can extend these default mediation flows to do additional custom mediation for the messages in the API Gateway. This can be done by a policy provided as a Synapse mediation sequence. You create a custom mediation policy either manually or by using a tool such as the WSO2 Integration Studio and then engage it per API or globally to all APIs of a specific tenant.
Warning
The following mediators are not usable within custom sequences because they are not supported by the API Gateway.
Callmediator in non-blocking modeSendmediator
Warning
When using the Loopback mediator, it is mandatory to set the following property before defining the Loopback
mediator in the custom mediator sequence in the following manner.
<property name="api.ut.backendRequestTime" expression="get-property('SYSTEM_TIME')"/>Creating Per-API Mediation Policies
Creating and uploading manually in the API Publisher
You can create a per API mediation sequence manually and upload it from the API Publisher itself. Thereby, this allows you to add a customized mediation policy to your API.
The following is a manually created sample custom mediation policy. This custom sequence adds a trace log which gets printed when you invoke any of the APIs deployed in the API Gateway.
Example
<sequence xmlns="http://ws.apache.org/ns/synapse" name="custom_policy">
  <log level="custom">
    <property name="TRACE" value="API Mediation Policy"/>
  </log>
</sequence>
Follow the instructions below to upload the above sequence as a custom mediation policy in the Request message flow:
- Copy the above mediation sequence into a XML file.
- Log in to the API Publisher Portal.
- Create a REST API by following the instructions in Create a REST API.
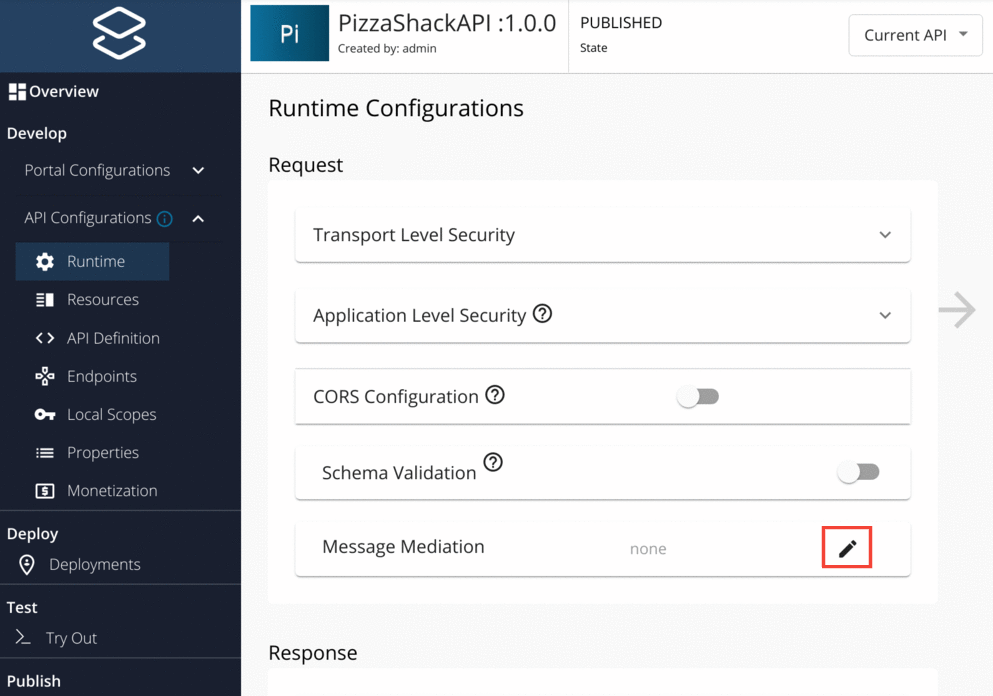
- Go to the created API and navigate to API Configurations → Runtime.
-
Click the Edit button
 in the Message Mediation section.
 Note
You can do this for Request, Response and/or Fault message flows.
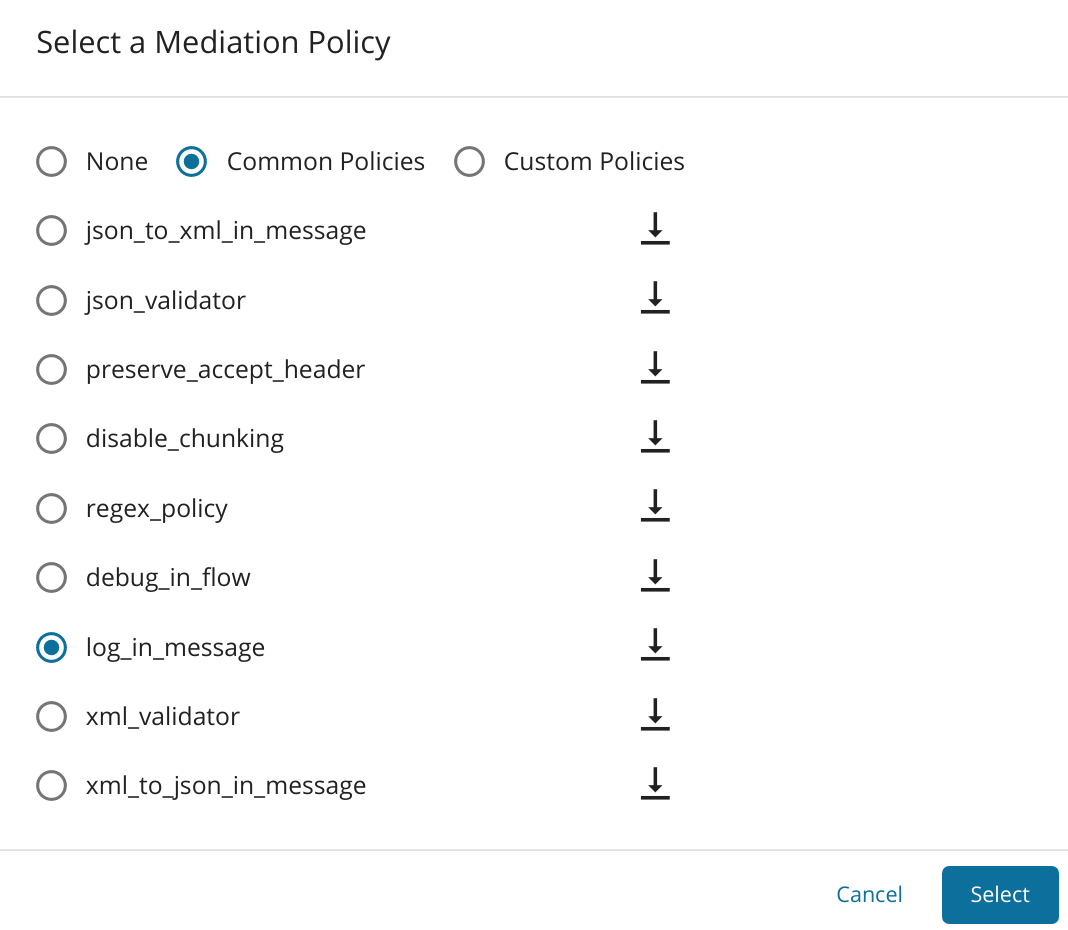
-
In the Select a Mediation Policy popup, select the Custom Policies radio button and upload the above-created mediation as an XML file.

-
Once the file is uploaded, save the API.
-
If the API is in the
PUBLISHEDstate, go to the Lifecycle tab, clickREDPLOYto re-publish the API. -
Navigate to the Developer Portal (
https://<hostname>:9443/devportal), subscribe and obtain a token to invoke the published API.Tip
Follow the instructions in here to invoke the API using the integrated API console.
-
When you invoke the API using a valid subscription, you can see the following trace log in the
wso2carbonserver logs.[2021-12-19 13:55:11,887] INFO - LogMediator TRACE = API Mediation Policy
Attaching Common Policies
There is a set of default common policies that are predefined and stored in the registry, which you can upload from the Publisher UI as well.
Editing a Mediation Policy
Follow the instructions below to edit an already attached mediation policy:
-
Click the edit button
in the Message Mediation section. -
Click the download icon next to the selected mediation policy, as shown below.
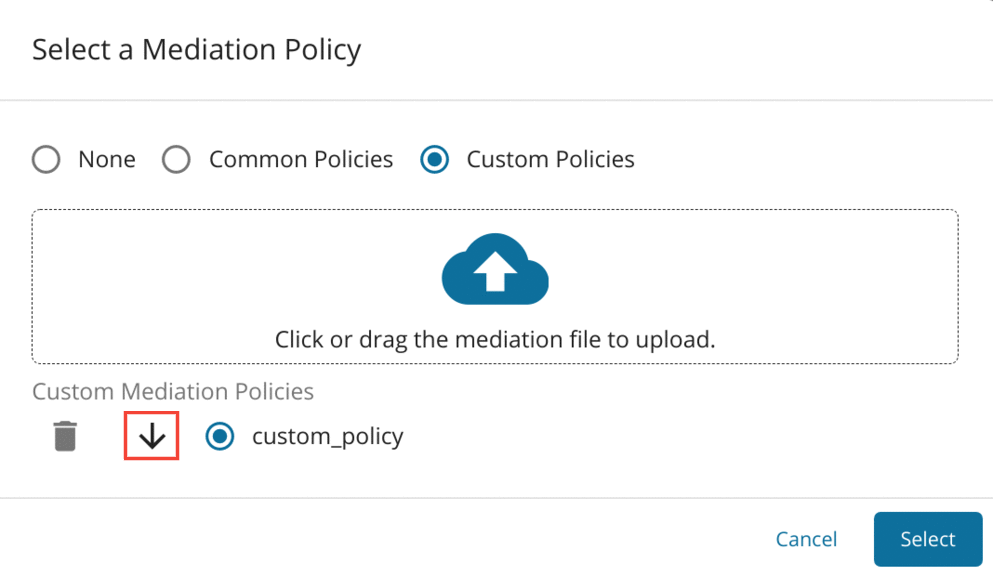
-
Edit the downloaded mediation XML file and re-upload it as a Custom Policy.
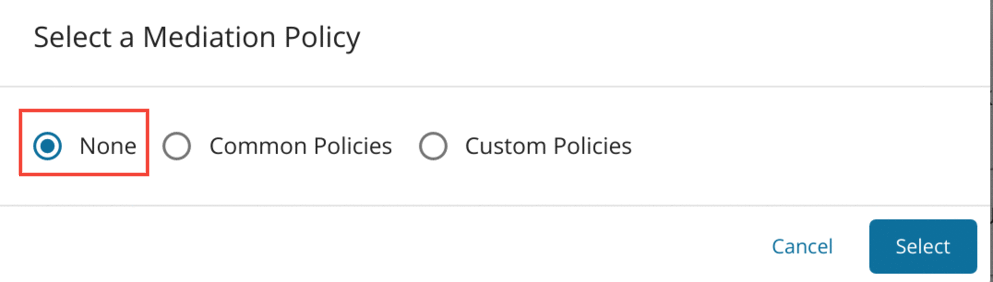
Follow the instructions below to disengage any mediation policy that is already engaged:
-
Go to the Edit option in the Message Mediation section.
Note
You can do this for Request, Response and/or Fault message flows.
-
Select None as the mediation policy and save the API.
Creating manually and saving in the file system
Alternatively, you can name the mediation XML file in the pattern <API_NAME>:v<VERSION>--<DIRECTION> and save it directly in the following location:
- In a single-tenant mode, save the XML file in the
<API-M_HOME>/repository/deployment/server/synapse-configs/default/sequencesdirectory. - In a multi-tenant mode, save the XML file in the tenant's Synapse sequence folder.
For example, if the tenant ID is 1, then save it in the<API-M_HOME>/repository/tenants/1/synapse-configs/default/sequencesfolder.
In the naming pattern, the <DIRECTION> can be In or Out.
- When it is
In, the extension is triggered on the in-flow (request path). - When it is
Out, the extension is triggered on the out-flow (response path).
To change the default fault sequence, you can carry out one of the following actions, and thereafter, engage it to APIs through the API Publisher.
- Modify the default fault sequence.
- Write a custom fault sequence.
Tip
If you have a distributed setup, make the changes in the Gateway node.
An example Synapse configuration of a per-API extension sequence created for the API admin--TwitterSearch version 1.0.0 is given below.
Example
<sequence xmlns="http://ws.apache.org/ns/synapse" name="admin--TwitterSearch:v1.0.0--In">
  <log level="custom">
    <property name="TRACE" value="API Mediation Extension"/>
  </log>
</sequence>
You can copy this content into an XML file (e.g., twittersearch_ext.xml) and save it in the <API-M_HOME>/repository/deployment/server/synapse-configs/default/sequences directory.
The above sequence prints a log message in the wso2carbon logs whenever the TwitterSearch API is invoked.
Creating and uploading using WSO2 Integration Studio
You can design the custom mediation policy using the tooling support provided by WSO2 Integration Studio and directly upload it to the registry in WSO2 API Manager. For more information, see Creating and Uploading using WSO2 Integration Studio.
Creating Global Extensions
You can also engage mediation extension sequences to all APIs of a specific tenant at once. To do that, simply create the XML with the naming pattern WSO2AM--Ext--<DIRECTION> and save it in the <API-M_HOME>/repository/deployment/server/synapse-configs/default/sequences directory.
An example synapse configuration of a global extension sequence is given below:
Example
<sequence xmlns="http://ws.apache.org/ns/synapse" name="WSO2AM--Ext--In">
  <log level="custom">
    <property name="TRACE" value="API Mediation Extension"/>
  </log>
</sequence>
This custom Sequence adds a trace log that gets printed when you invoke any of the APIs deployed in the Gateway.
You can copy this content into an XML file (e.g., global_ext.xml) and save it in the <API-M_HOME>/repository/deployment/server/synapse-configs/default/sequences directory.
Tip
If you have a distributed setup, make the changes in the Gateway node.
Sample Message Mediation Policies
The following are some sample mediation policies which you can upload as per API or global policies based on your requirement.
- Adding Dynamic Endpoints
- Removing Specific Request Headers From Response
- Passing a Custom Authorization Token to the Backend
- URL Mapping
- Disabling Message Chunking
- Transforming API Message Payload
- Adding a Non-Blocking Send Operation
- Adding a Class Mediator