Create and Publish a WebSocket API
Follow the instructions in this tutorial to design and publish API with a WebSocket backend, and thereafter invoke it using the wscat WebSocket client.
Note
For more information on WebSocket APIs, see Create a WebSocket API.
Step 1 - Design a WebSocket API
-
Sign in to the API Publisher.
https://<hostname>:9443/publisherExample:
https://localhost:9443/publisherLet's use
adminas your username and password to sign in. -
Click CREATE API and then click Design a New WebSocket API.
Note
The CREATE button will only appear for a user who has the
creatorrole permission.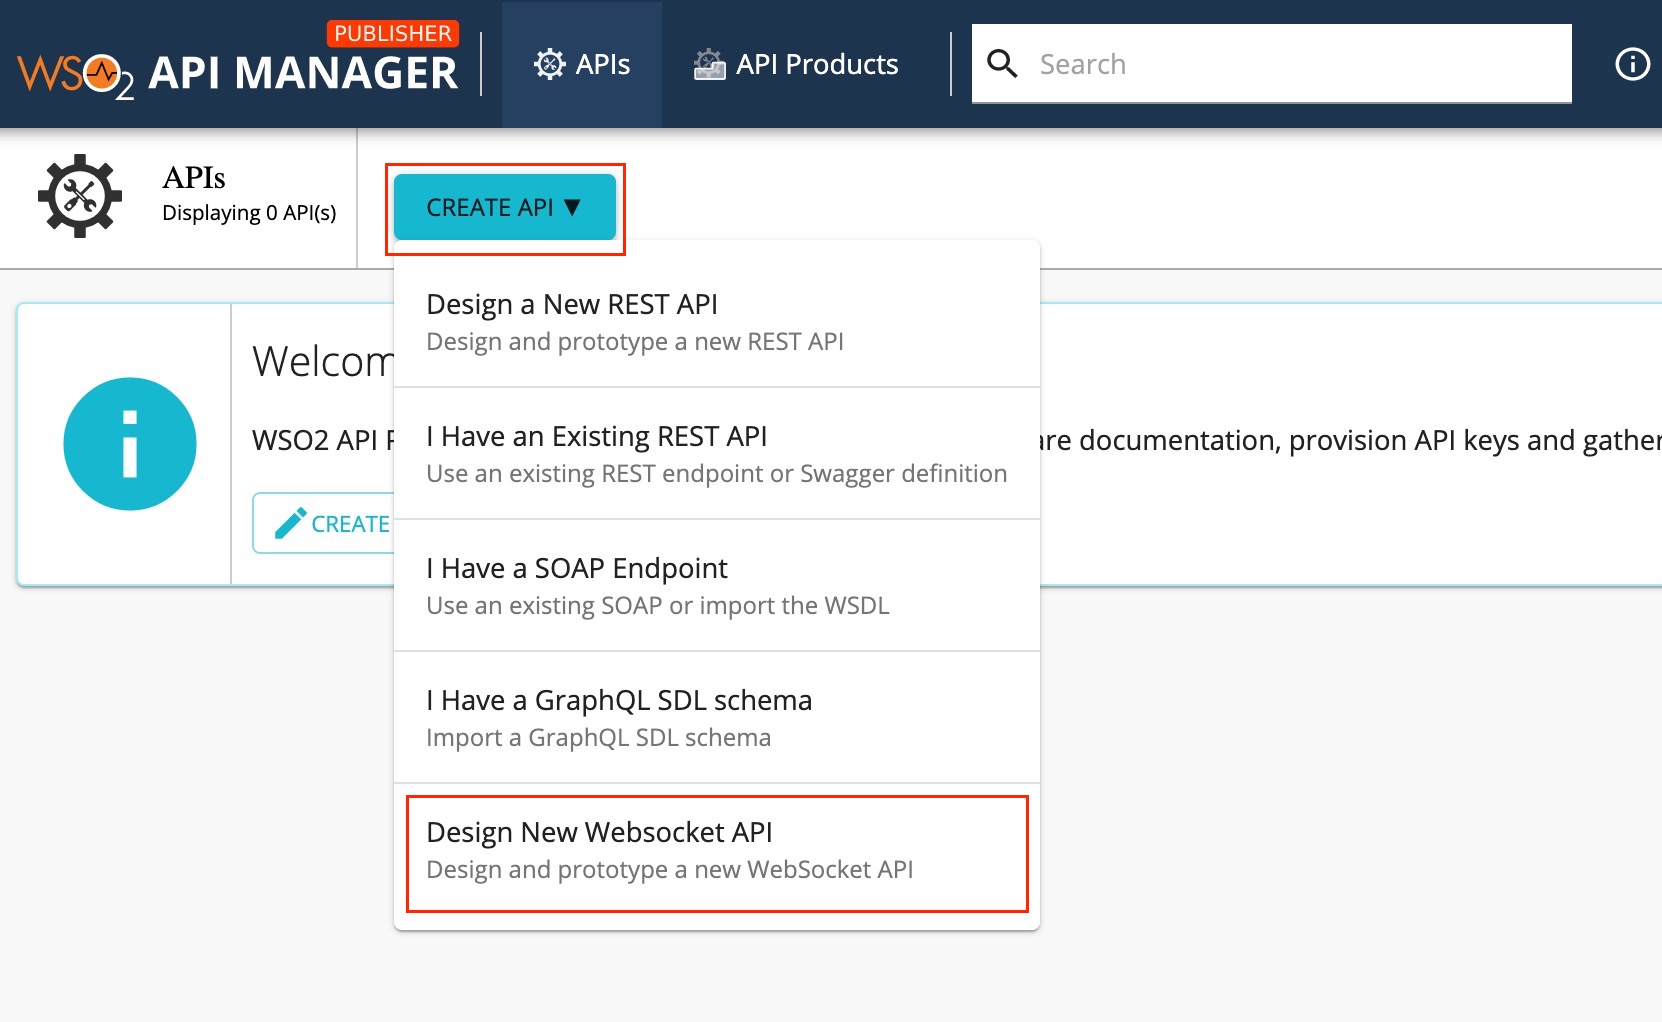
-
Enter the details of the new WebSocket API.
Field Sample value Name ifelseWebSocket Context /ifelse Version 1.0.0 Endpoint Use one of the following endpoints.
- ws://ws.ifelse.io:80
- wss://ws.ifelse.io:443
Business Plan Unlimited 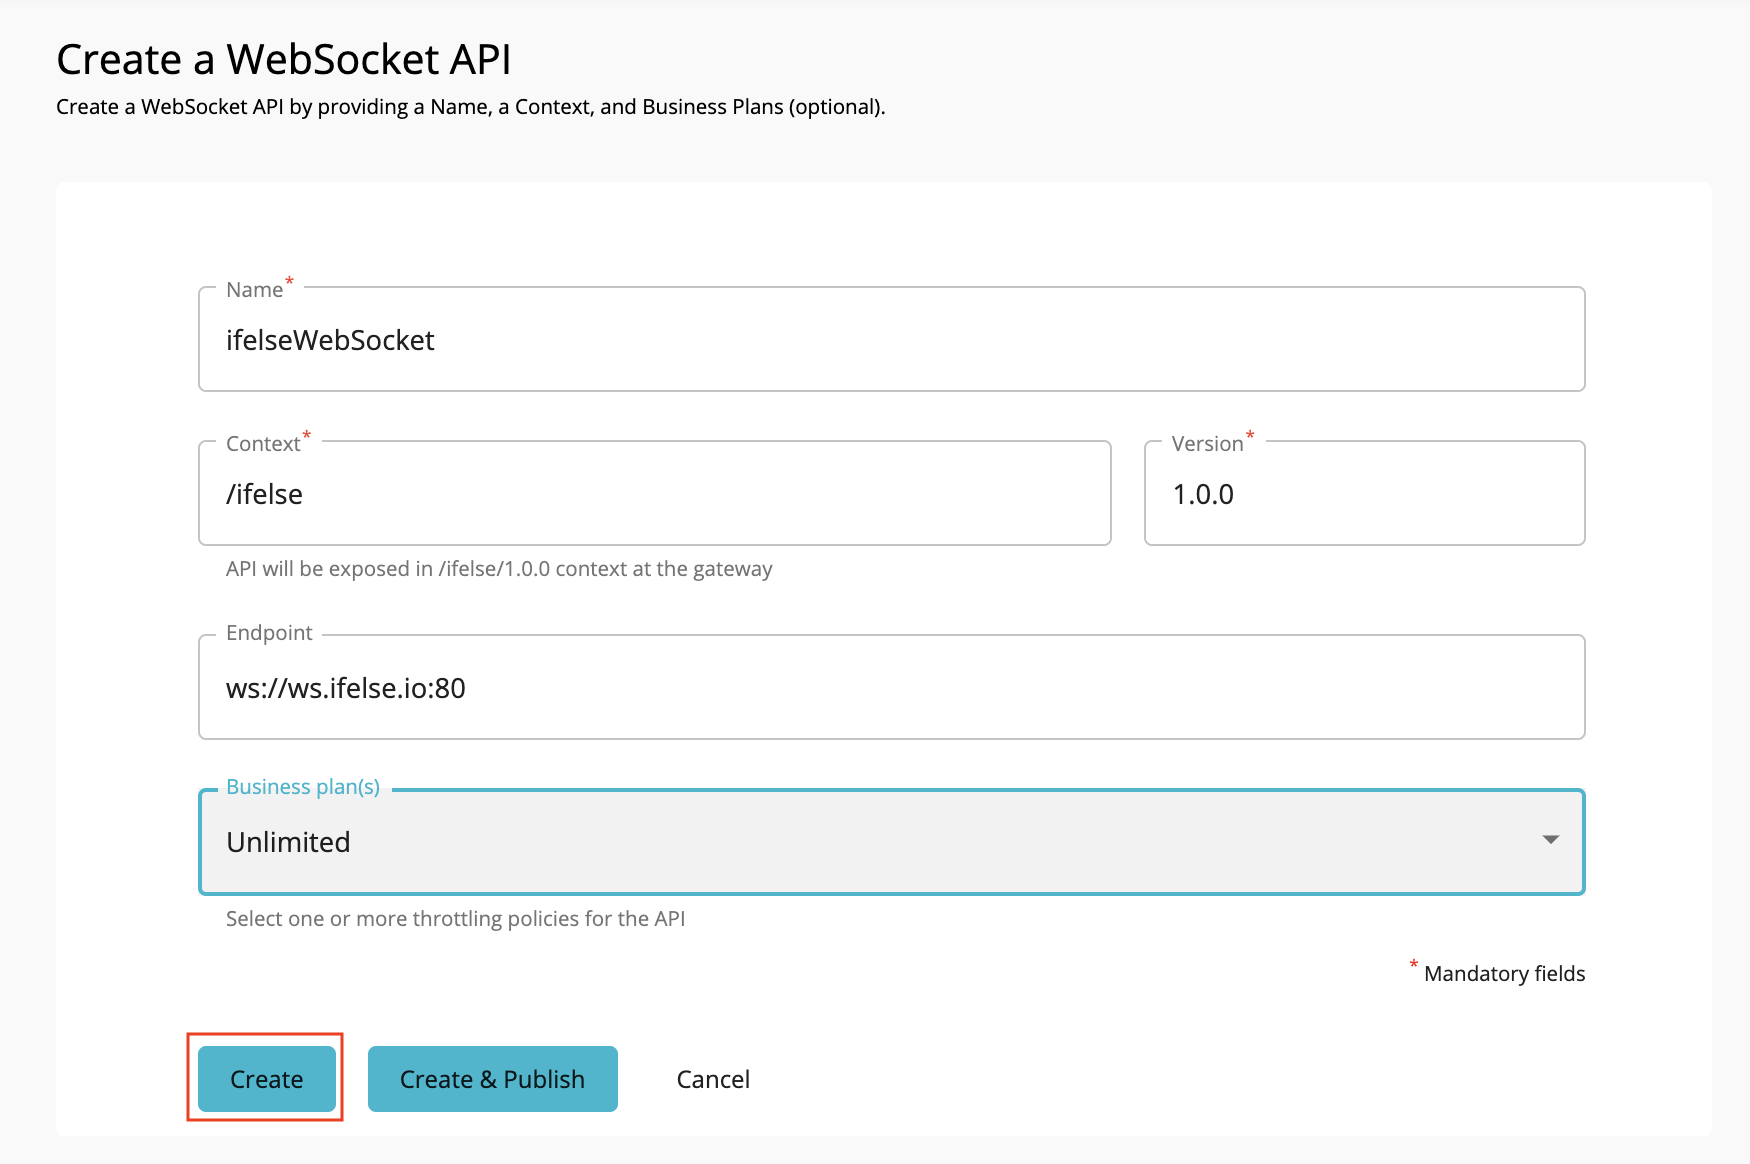
Note
The CREATE & PUBLISH option will appear only if the optional fields Endpoint and Business plan(s) are provided by a user who has
publisherpermission. You need to add a Name, Context, Version, and a valid Endpoint (For non-secured WebSockets enter the protocol asws://or for secured WebSockets enter the protocol aswss://) to create the API. -
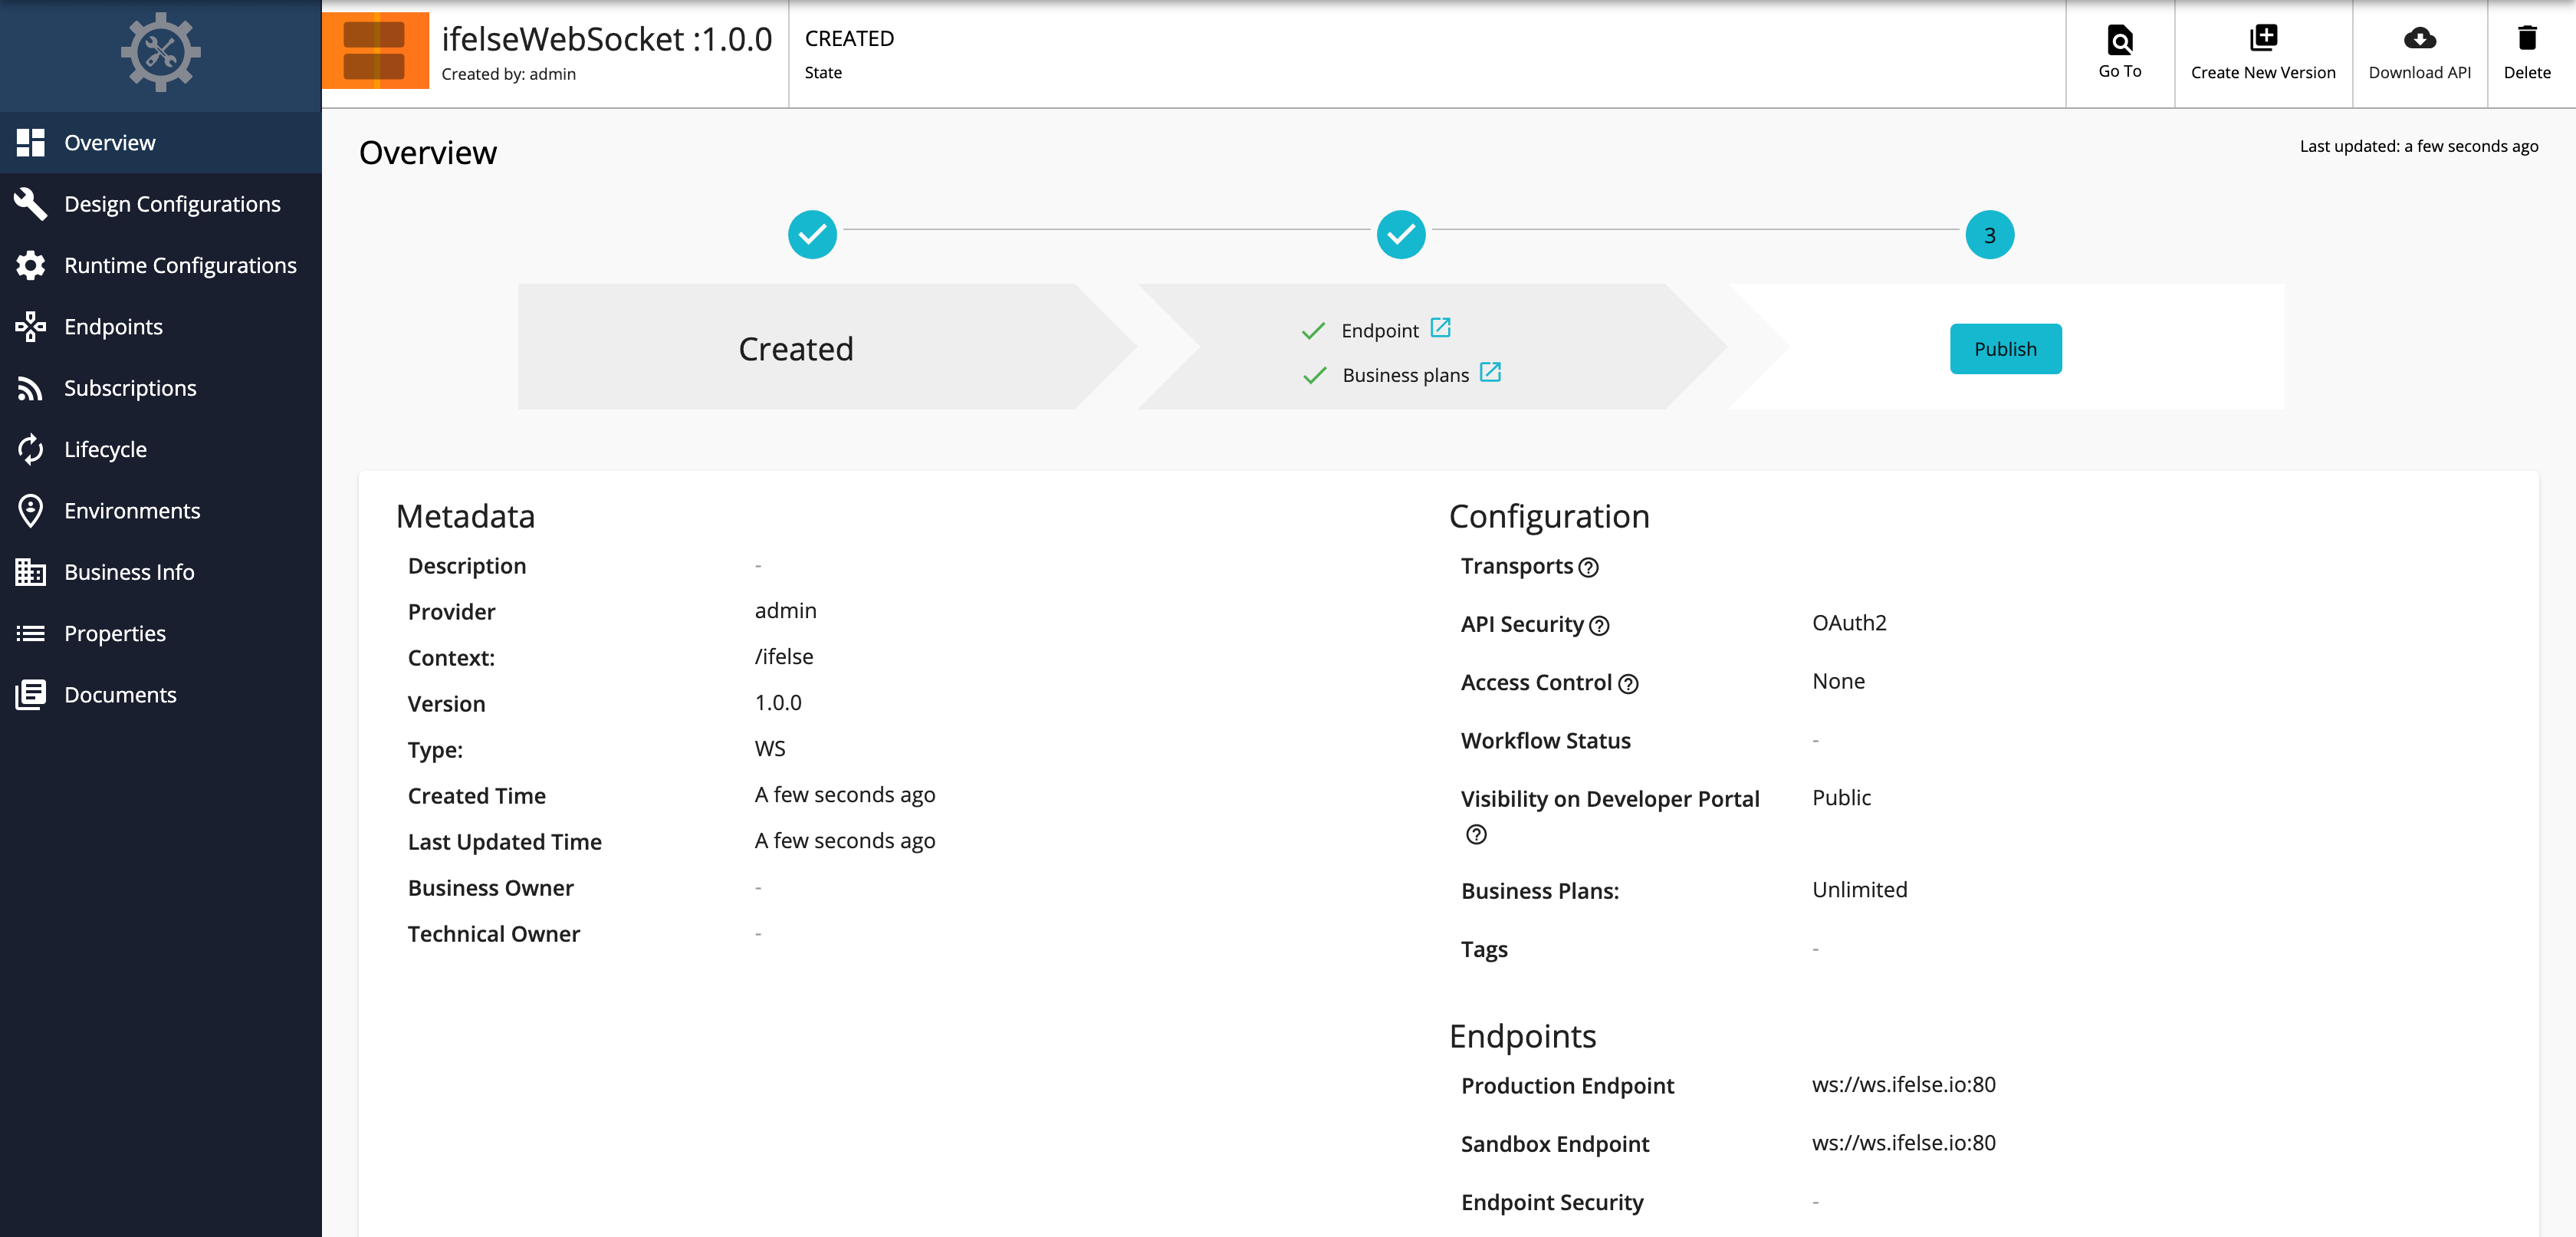
Click CREATE.
The overview page of the created WebSocket API appears.
-
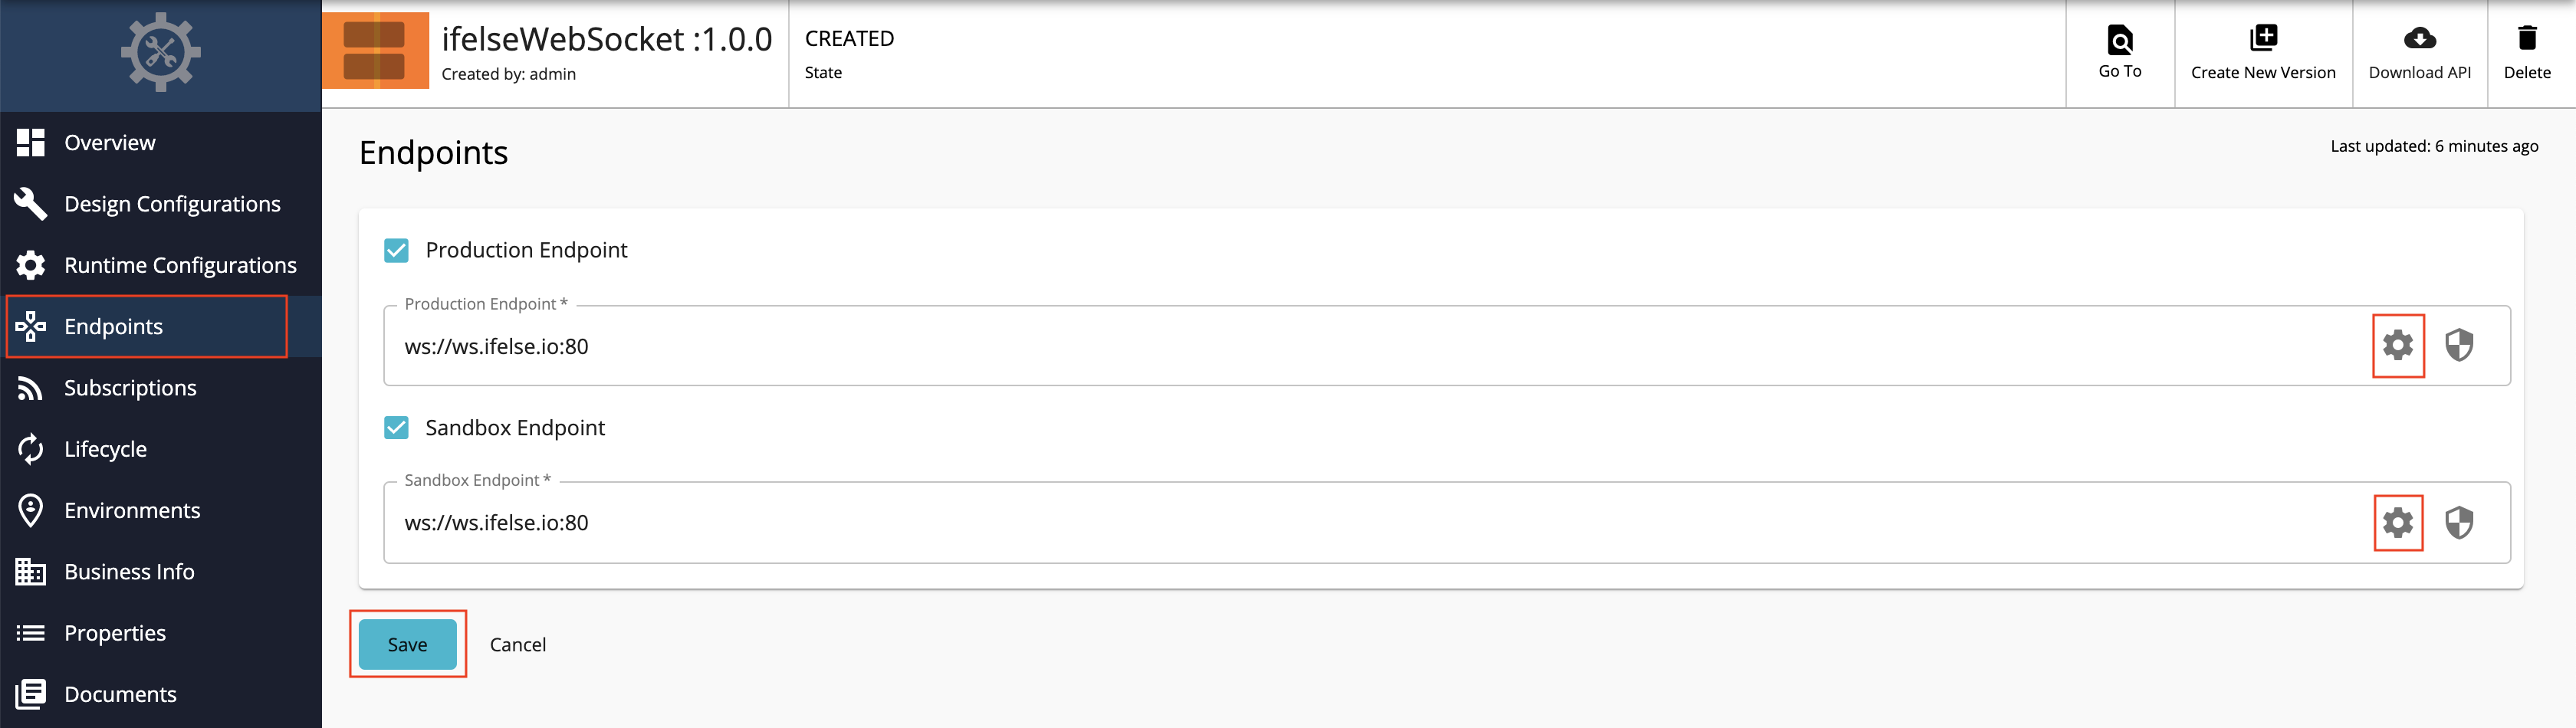
Optionally, enter the endpoint configurations.
-
Click Endpoint.
-
Click the Endpoint Advanced Configurations link as shown below and update the endpoint related configurations as required.
For more information, see the following sections on endpoint related configurations.
-
Now, you have created and configured the WebSocket API successfully.
Step 2 - Publish the WebSocket API
Click LIFECYCLE to navigate to the API lifecycle and click PUBLISH to publish the API to the API Developer Portal.
Step 3 - Invoke a WebSocket API
-
Sign in to the Develepor Portal.
https://<hostname>:9443/devportalExample:
https://localhost:9443/devportal -
Click on the WebSocket API.
The API overview appears.
-
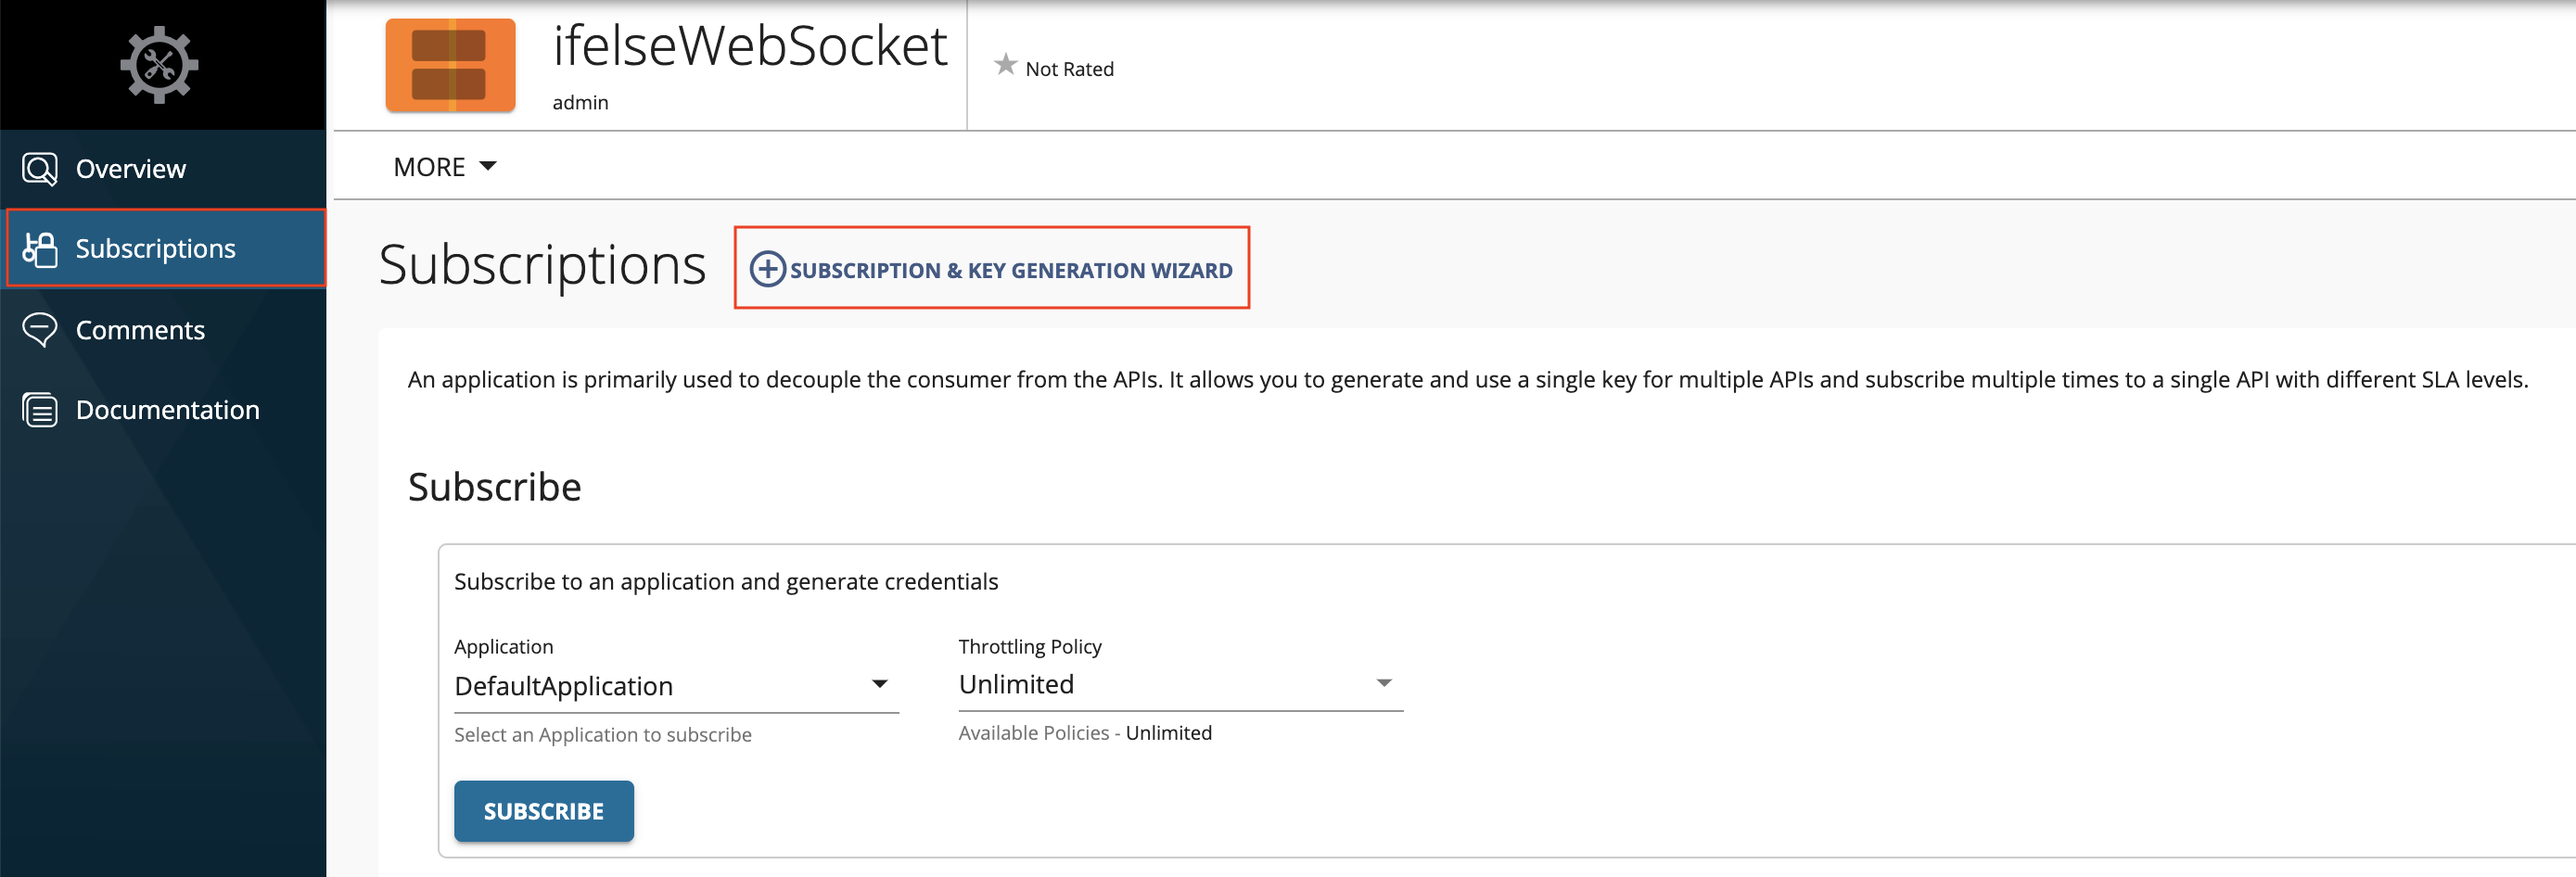
Subscribe to the API.
-
Click SUBSCRIPTION & KEY GENERATION WIZARD.
This wizard takes you through the steps of creating a new application, subscribing, generating keys, and generating an access token to invoke the API.
Note
You can use any application (e.g., JWT or OAuth) to subscribe to the API.
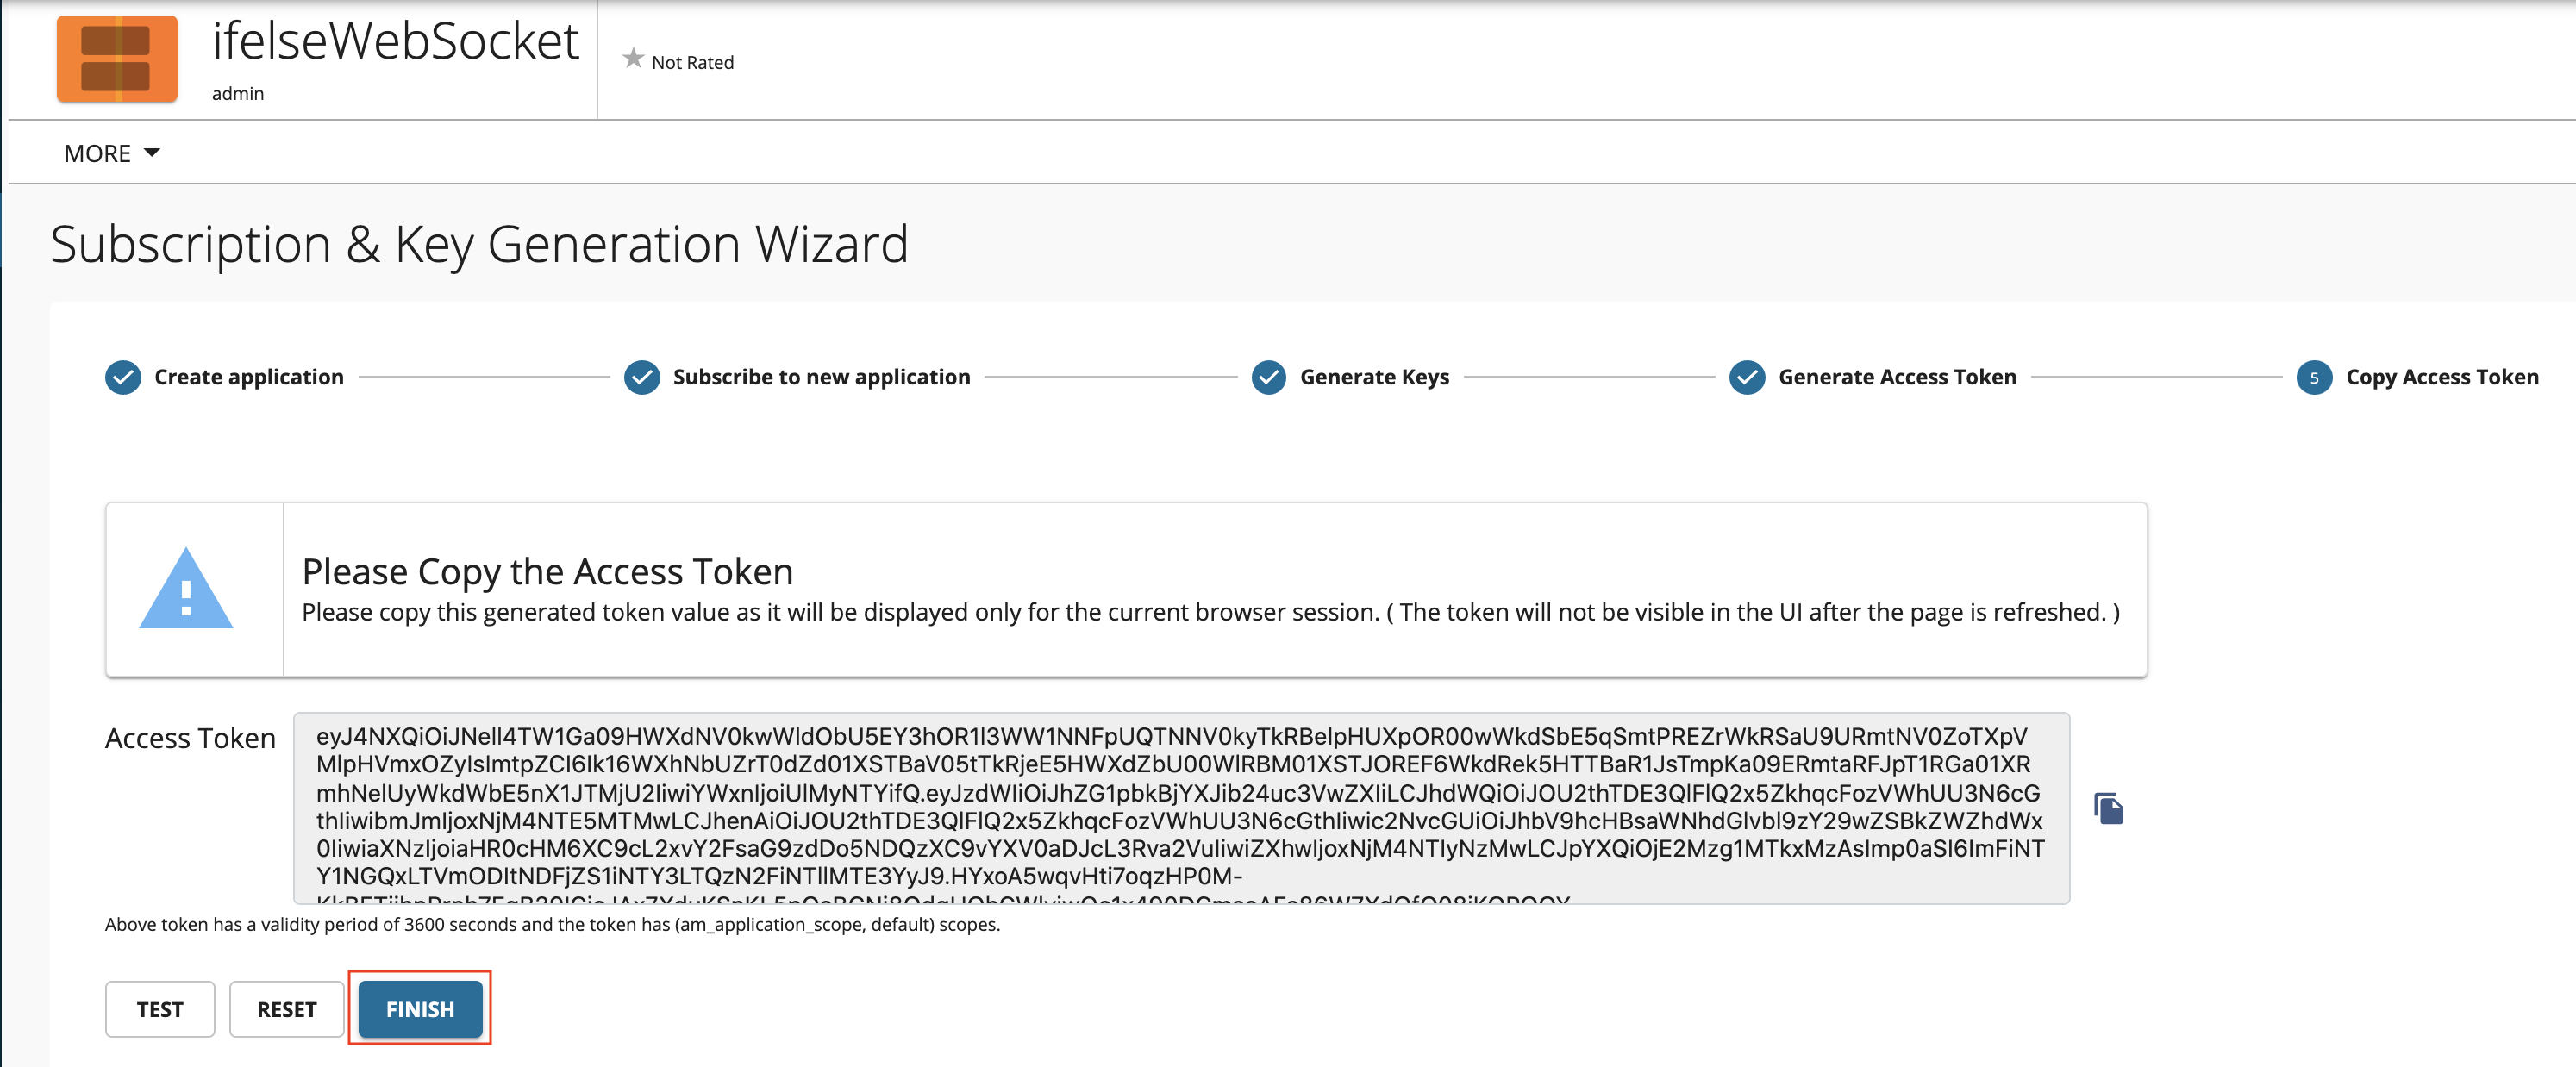
-
Copy the authorization token that appears.
-
-
Try out the operations.
-
Install wscat client.
npm install -g wscat -
Invoke the API by using an authorization header by executing the following command.
wscat -c ws://localhost:9099/ifelse/1.0.0 -H "Authorization: Bearer [accesstoken]"wscat -n -c wss://localhost:8099/ifelse/1.0.0 -H "Authorization: Bearer [accesstoken]"Note
There are clients (especially browsers) that do not allow to add headers to the WebSocket handshake. In such cases, you can send the access token for the WebSocket API invocation as a query parameter named
access_tokenby using the command below:wscat -c "ws://localhost:9099/ifelse/1.0.0?access_token=[accesstoken]"wscat -n -c "wss://localhost:8099/ifelse/1.0.0?access_token=[accesstoken]"Note
BasicAuth and API Key do not work for the security of WebSocket APIs.
You have successfully created and published your first WebSocket API, subscribed to it, obtained an access token for testing, and tested your API with the access token.
Top
-